This is a read-only archive of the old Madabout Kitcars forum. New posts and replies are no longer possible, but every thread is still here to browse and read.
And I think all of these are still available as well as some spare bushes and trunions, if your interested ill have a sort at the weekend and pm you a list
Mac
And I think all of these are still available as well as some spare bushes and trunions, if your interested ill have a sort at the weekend and pm you a list
Mac
Not sure if you meant to post a link here but it's not visible.
Are the brake drums standard spitfire or the larger GT6 drums? I am thinking of changing over to the GT6 front and rear brakes to match the engine, but this may not be required due to the reduction in weight so more thought required on this one.
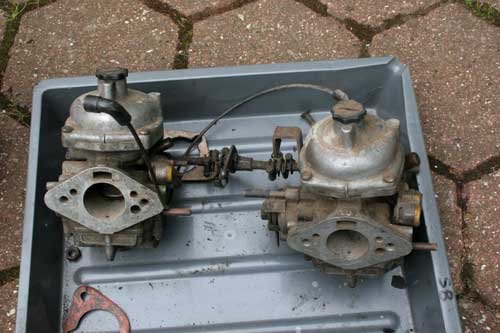
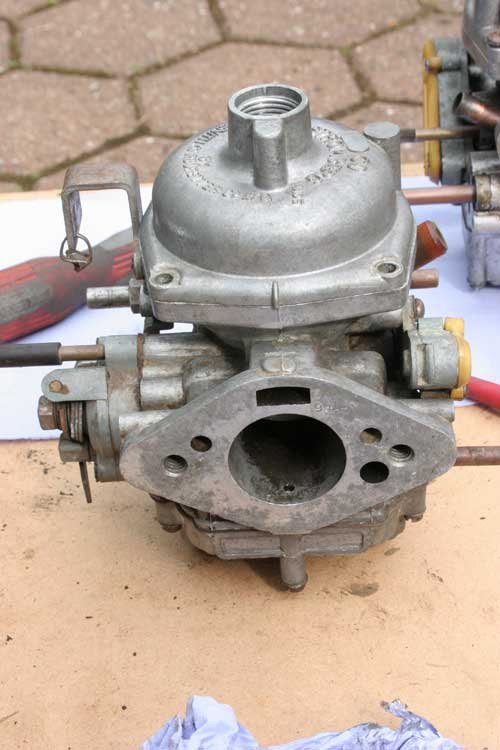
Stripped the stromberg 150 carbs down today ready to fit an overhaul kit which i need to order, the problem is the small id tag is missing and there's no numbers stamped on the carb body so will speak to the guys at Zenith Carbs tomorrow. Found a build up of lacquer and seized float valves, butter fly shafts are worn also a missing gauze filter on one of the float valves plus rounded/missing screws, me thinks a butcher has been at work.
The carbs before i gave them a clean with petrol and the cleaned carbs.
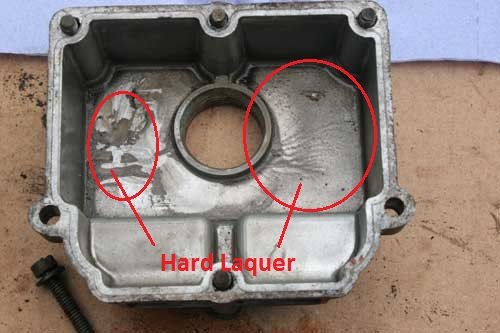
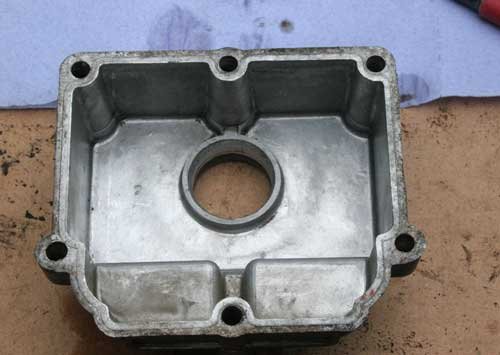
View into the float chamber were the petrol goes, you can see hard lacquer on the left image and after a quick clean with carburetor cleaner, its wonderful stuff.
Attachment “IMG_4337.jpg” from the original forum could not be reliably recovered.
All the parts off one carb stripped and cleaned ready to re-assemble with new butter fly shafts and gaskets etc.
Attachment “IMG_4338.jpg” from the original forum could not be reliably recovered.
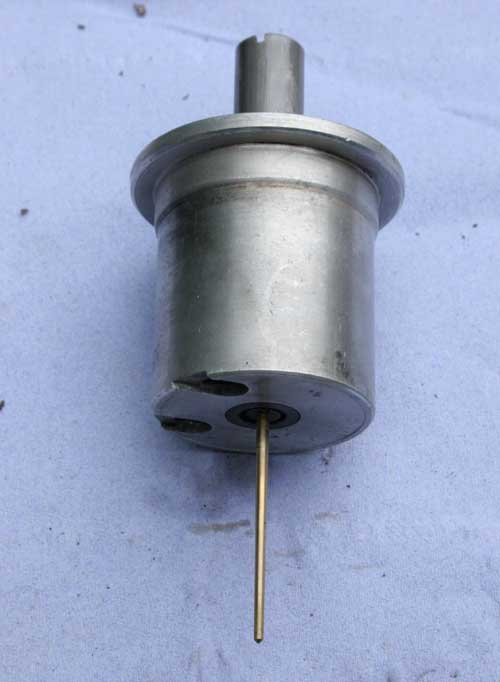
Photo of the air valve and needle which has a large build up of lacquer, a couple of squirts of carb cleaner and its gone. I did notice that one carb was worse with carbon buildup, it just happens to be the one with the missing screws and float valve filter.
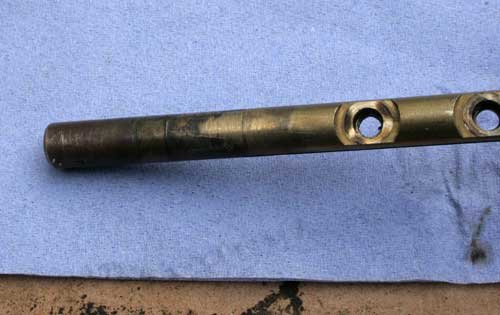
Wear on the butter fly spindle were it rotates on the bush in the body which are part of an overhaul kit along with new spindles.
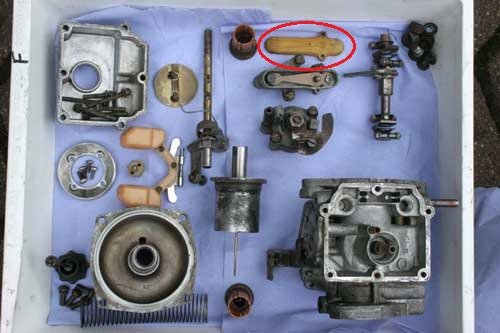
The compensating valve plastic cover is distorted on both my carbs and i don't seem to be able to source replacement. Is anybody running an engine with distorted cover and does it affect the performance etc.
Attachment “IMG_43245.jpg” from the original forum could not be reliably recovered.
The cover is circled red in the left hand image, its a yellow colour plastic which does not sit squarely on the ally valve body when screwed down. If you look closely at the right hand image you can see the plastic cover sitting off the ally face, the carb in the back ground also shows the compensating valve cover not sitting flat.
To buy the correct overhaul kit you need to determine the correct type/model of carb is it a 150 CD or CDSE, this info is stamped on the metal tag attached to the carb top but alas my carbs are missing this vital piece of info so i have done a little research and found a good description between a CD and CDSE at https://groups.yahoo.com/neo/groups/triumph-gt6-enthusiast/conversations/topics/7790
This guy says the CD carb does not have the "By pass valve - Throttle" item 15 on the diagram, if the By pass valve is fitted then its a CDSE carb also the "Valve Assy - Starting" is fitted to 1 CD carb and both carbs on the CDSE twin carb set up.
Hi Swifty ,you can get the spares from Gower and Lee ,also Burlen fuel Systems ,I have used both recently for my 175 cd's , both places are very helpful.
Hi Swifty ,you can get the spares from Gower and Lee ,also Burlen fuel Systems ,I have used both recently for my 175 cd's , both places are very helpful.
Thanks slickshod, i spoke to Andrew Turner of Turner Carbs today who was also very helpful in confirming the spec of carbs i have plus his rebuild kit is the cheapest i can find for the genuine article, so will be placing an order with him.
Also for reference after talking to Andrew the plastic compensating valve cover does not have to seal tightly against the body but he did say you can buy new ones for about £6 each.
Today the chassis arrived back after being shot blasted and etch primed along with the suspension parts etc. The overall condition is excellent with no holes or repair work being done in the past so i am very pleased with how it has turned out.
Attachment “IMG_4347.jpg” from the original forum could not be reliably recovered.
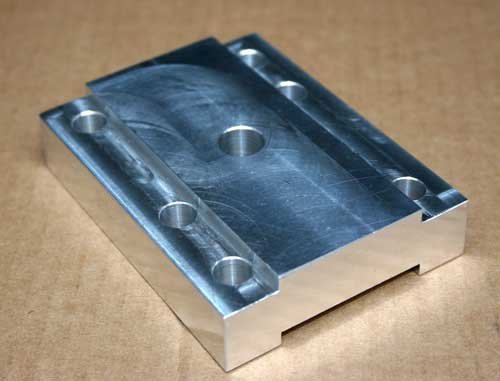
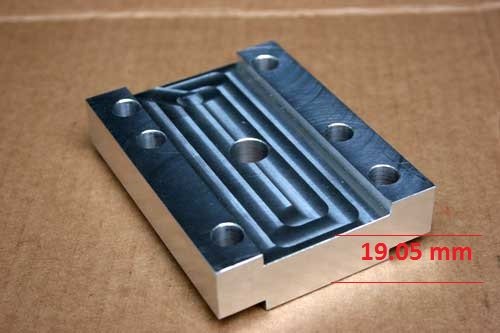
Also today made a spacer block to go between the rear leaf spring and diff, this will lower the back end and straighten the wheels up (less negative camber) plus if the front end is lowered the block helps to balance the car's level.
Here's a couple of pictures of the block which is machined out of ally.
Machined to a height of 19.05mm or 3/4 inch, i can always reduce this height if the car is to low.
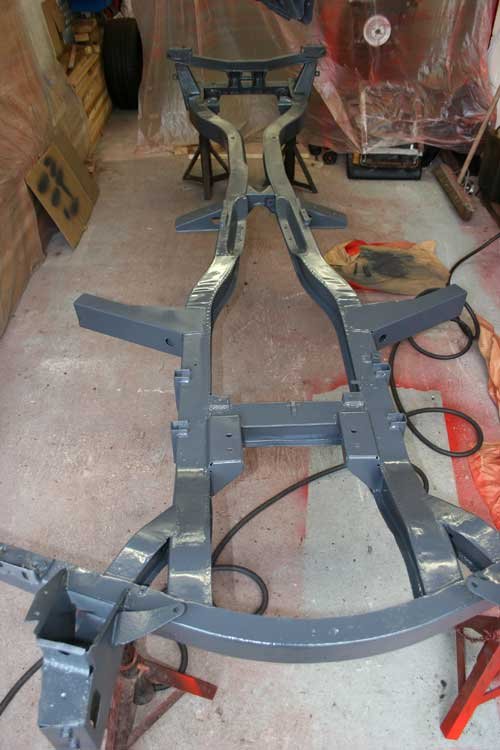
Today i finally got the chassis sprayed along with all the suspension parts, the new compressor just managed to keep up so i may have to have a re-think before i spray the body.
Attachment could not be found in the archived database.
Photo of the chassis in etch primer.
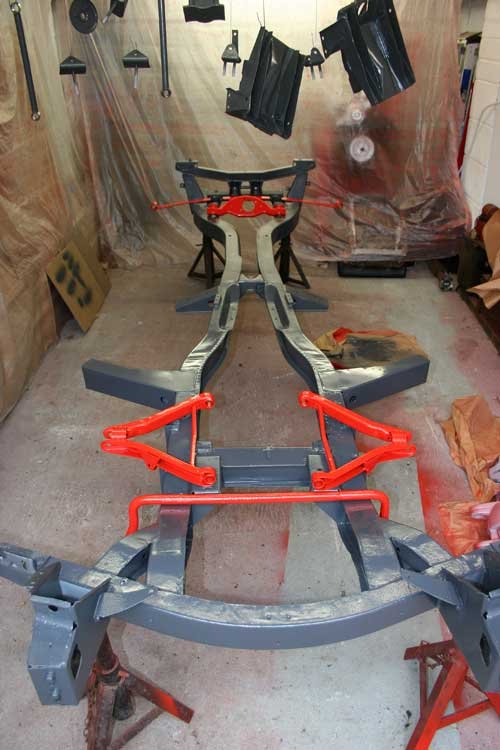
Chassis sprayed in graphite grey and some parts of the suspension have been sprayed in Rosso red, should be a good combination i think. Now i have to work out what's required to re assemble the suspension, brakes and drive train.
Paint on the chassis now dry but i think i will give the whole chassis another coat.
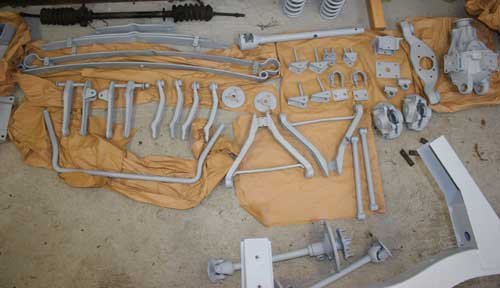
Some of the suspension parts laid on top of the chassis to see how the colours look.
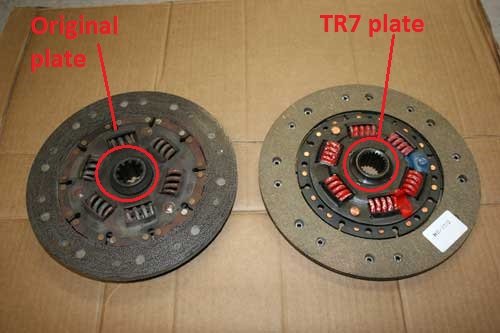
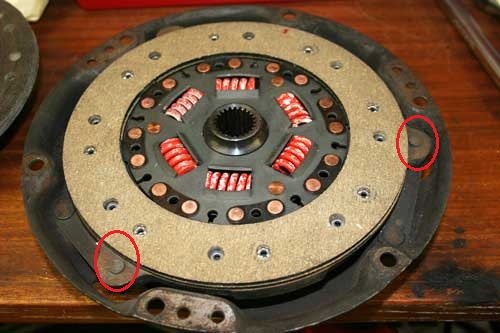
My latest flee bay purchase arrived today, a clutch friction plate for a TR7. The original friction plate is 203mm dia with 10 splines where as the TR7 is 216mm dia with 23 splines which fits the type 9 gearbox perfect and just fits the pressure plate with a few millimeters to spare before it catches the riverts.
You can see the difference in the splines of the original against the TR7 friction plate.
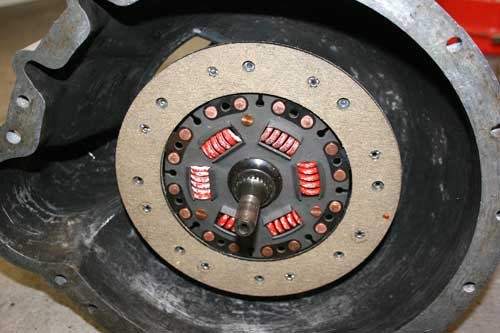
The left hand image shows just how close the edge of the plate is in relation to the pressure plate rivet tops. Friction plate in position on the type 9 gearbox input shaft splines.