MadaboutKitcars

This is a read-only archive of the old Madabout Kitcars forum. New posts and replies are no longer possible, but every thread is still here to browse and read.

#47 Spyder

14 Oct 2013, 7:38am
Good to see somebody else cutting and making things better. It gives encouragement. That original back really did have an interesting shape.

I like the front vents.
14 Oct 2013, 4:17pm
Michiel - Great job on the back of the car, it looks miles better. :cool:
20 Oct 2013, 9:01am
This is about the way I mount the body to the frame and chassis. I went a different way with this. If I'm correct, the general idea is to box the interior with plywood and bonding paste. I'm sure that treated plywood and the bonding paste could give a strong result and it is a fast and relatively easy way of achieving results. But I saw some disadvantages in that and that is why I tried an alternative.

Firstly I made a hole in the back off the body that would be my boot lit. After that I got acces to the frame underneath from above. Because I have a lenghtened tail, I have a longer frame that reaches the end of the outriggers at the back of the car. This Picture shows the extra frame length I'm speaking of.
[IMG][/IMG]

I placed the body on the chassis and frame and outlined it just the way I want it. Basically by choosing the right hight bewteen the rear wheels and the top of the wheel arch. (difficult to choose because how much would it still drop with extra weight, usage and time?). I took suitable size blocks and layed them on top of the rear wheels supporting the body. Then I prepared the frame by using tape.
[IMG][/IMG]

After this, I used woven glass mat to pack the frame tubes creating a contra shape. The woven mats are stronger the standard glass fibre mat and keep the fibres together after using resin.
[IMG][/IMG]

After curing, I cut the edges back. With carton I made some moulds that I duplicated to glass fibre pieces I had no use for anymore.
[IMG][/IMG]

After cutting them out, I glued them in. Using a bonding paste (based on strong Epoxy) with chopped glass fibres.
[IMG][/IMG]

In the end I could remove the body again. Turn it on it's back and take the time and effort to laminate this structure until it was very strong. The box shape makes it very stable and rigid.
[IMG][/IMG]

[IMG][/IMG]

The box section at the rear carries most of the weight, but offcourse isn't enought. I made stainless sills at the sides of the frame/chassis.
[IMG][/IMG]

With the body in place, I used the same technic. Using woven glass fibre mats to laminate a GRP lip that lies on top of the sills and is attached to the inside of the body. Some thread ends make it possible to mount a stainless strip on top of it, making a sandwich construction, fixing the lip firm.
[IMG][/IMG]
[IMG][/IMG]

It all works. I will add extra support under the dash, side of bulkhead and the back of the interior by glueing in some profiles which will be bolted to the frame/bulkhead. When I make the doors, I will add a upper sill aswell. That way I creat an other box like shape at the side sides.

Michiel
20 Oct 2013, 10:05am
Very good job !
20 Oct 2013, 2:35pm
that's looking great there fella. I love the changes you are making and the improvements to what was an unfortunate rear body shape. I do feel a bit for gary sometimes when I read these comments , I popped into see him several times during the development of these cars and he is very much an ideas man with some hands on ability. when it came to the fiberglass side of the business he very much relyed on hired help and outside assistance. he didn't always get the help he had hoped for. not knocking anyone directly , just as the head honcho it always seems to be his fault even when stuff wasn't always.i know he was always frustrated by the lack of money in the pot to improve the kit above the starter level it had begun as. reading the ribble threads now it certainly looks like time and money is now being invested into what is at the days end , a fantastic kit.
20 Oct 2013, 3:49pm
O dear,

By no means it is my intention to critisize Gary or Mike or others. The changes I make are my own choice. Just like the concept intended to be. I bought the body kit for a very low price and you can't expect it to be perfect. I really love the concept of a 50's racer. Inspired, instead of a replica. For me, that is worth gold. Combined with the usage of the body replacement strategy. We have to thank Gary for that.
The good thing is that it is affordable for many. And everyone has a choice to go for either Overspraying or Overengineering :wink:
On the way I decided to achieve a more high quality result. That means you have to change some to get there. That's true. It is my impression that there are more builders that go for a quality build. There are lots of examples on this forum today!
It is good that Ribble has made improvements and I think they should ask more money so that they can survive.
I really respect the fast builds as well. Somehow these cars look good anyway.

Michiel
20 Oct 2013, 5:57pm
I can't believe that i've only just stumbled across this thread!

I've just read it from the start and you're doing a really good job there matey and I'm loving some of the changes you're making and the way you're approaching everything. I'm intrigued to see how this pans out.

Keep up the good work, i'm getting all nostalgic!

Dave
21 Oct 2013, 6:36pm
Well thank you for the compliments. I try to keep it up. I enjoy the proces very much and that is what it is all about isn't it?

Michiel
21 Oct 2013, 7:09pm
Michel , whats the finished colour gonna be ?
21 Oct 2013, 8:03pm
Shadow,
What colour? I have changed my thoughts about it every day the past two years. I really like the old metalics from the late 40's, early 50's. For example the Triumph Roadster. It came in (gun metal) grey, brown and green colours. Metalic paintings with relatively big metal particals. I like those.

Michiel
22 Oct 2013, 11:01am
Yes Towed,

Silver is indeed one of these colours that appeal to me and seemed to be used in the period the cars are related with!
The patina you gave it, is also very nice. Not too shiny, butt a little bit dull (not to confuse with boring, but with shinyness only!), wich suits the car and period so nicely.

Michiel
22 Oct 2013, 12:13pm
christinedmc wrote:
Yes Towed,

Silver is indeed one of these colours that appeal to me and seemed to be used in the period the cars are related with!
The patina you gave it, is also very nice. Not too shiny, butt a little bit dull (not to confuse with boring, but with shinyness only!), wich suits the car and period so nicely.

Michiel


Thanks Michiel, it took a lot of skill and specialist knowledge built up over years of practice to get the paint finish like it is. Oh no, hang on, it was just a happy accident. :whoo:
30 Nov 2013, 6:57pm
Here I'am again with finally some progress to report. I have been busy getting all things sorted for the doors and the interior structure. Beside the doors I was planning, I have noticed that there is little room for shoulder and arm at the door side. I'm about 12 feet 60 and a fatty on top of that, so figure.
The tub is quite narrow. I figured that it needn't to be, because the upside of the "doors" has a substantial horizontal surface. So the tub could be widened at least 7 cm's at both sides.
I had to change my plans and went for the "superleggera" approach. Here are some pictures to explain.

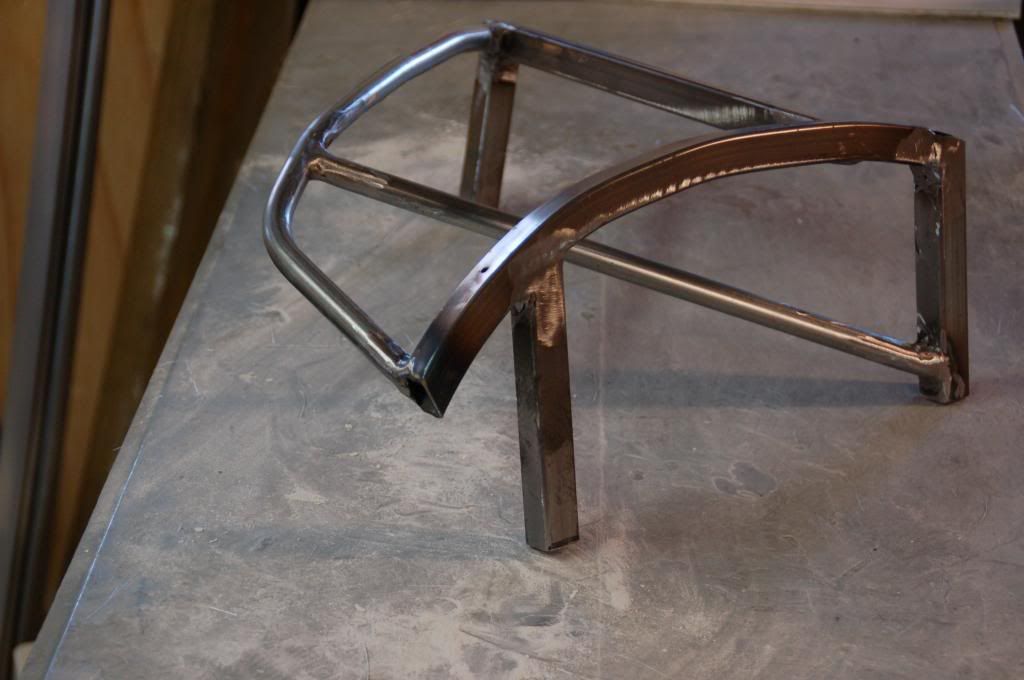
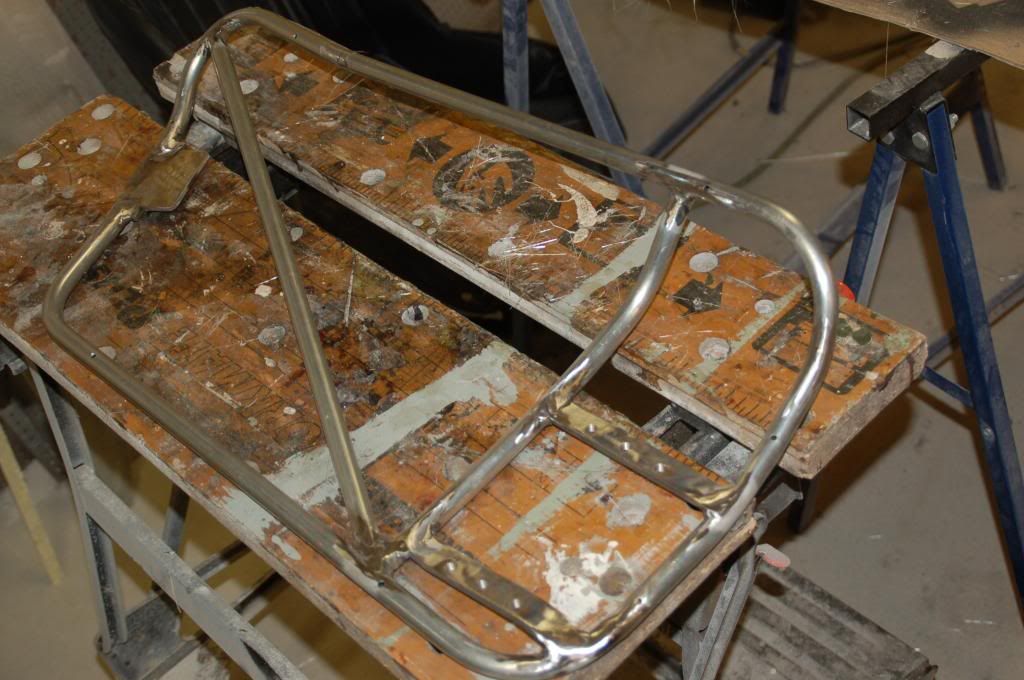
This is a subframe I made for the right side
[IMG][/IMG]

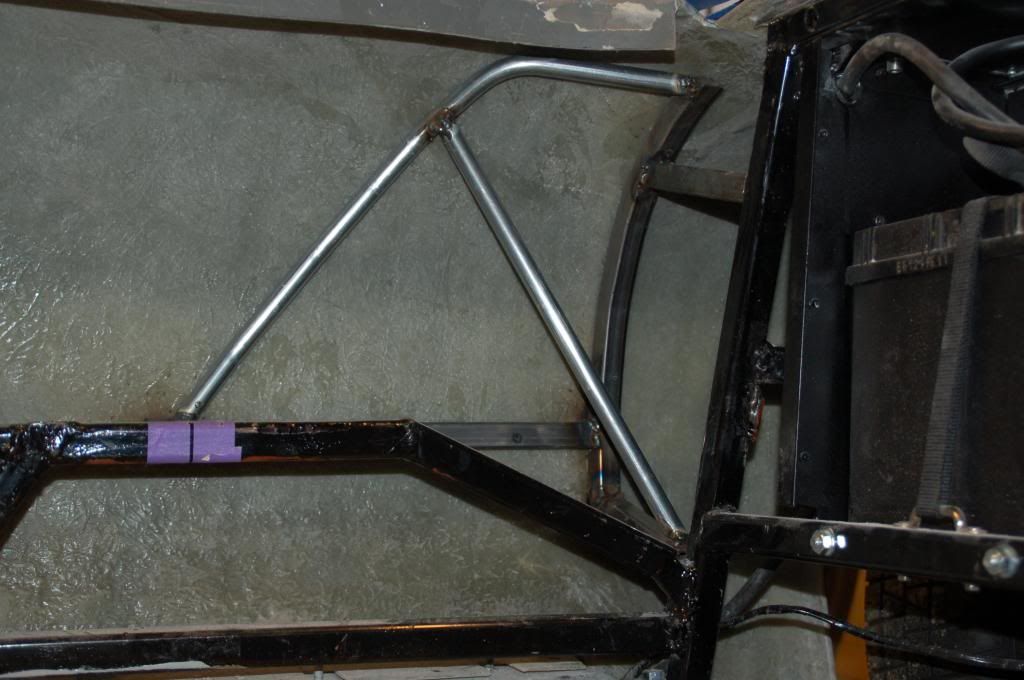
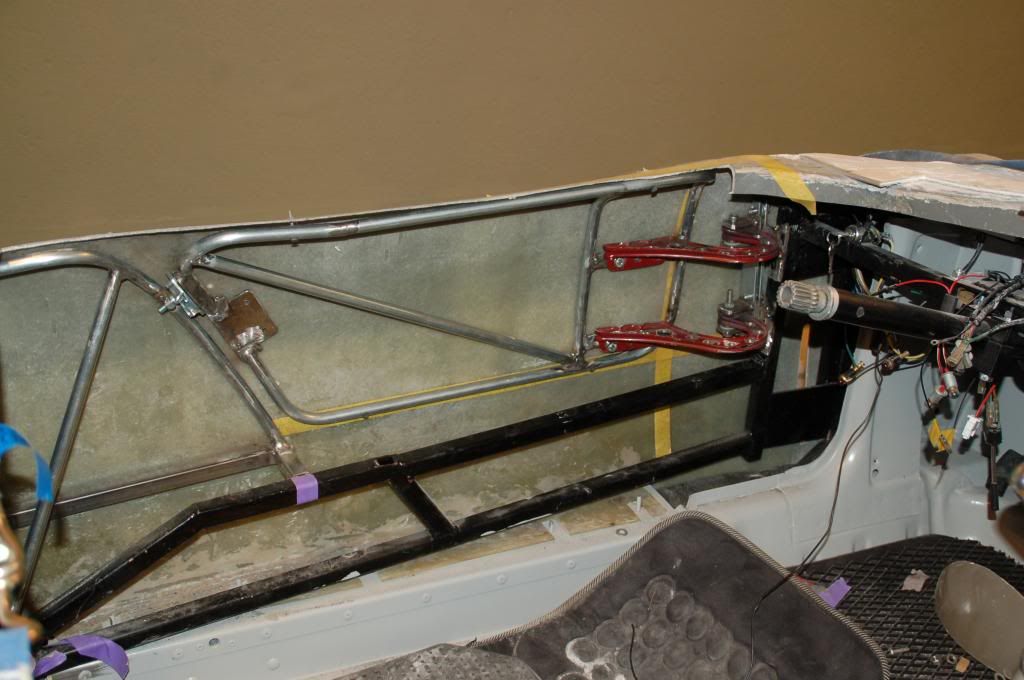
This is the subframe in place
[IMG][/IMG]

This is making the framework for the doors
[IMG][/IMG]

Building doorframe and subframe at the inside of the body (I haven't cut the doors yet)
[IMG][/IMG]

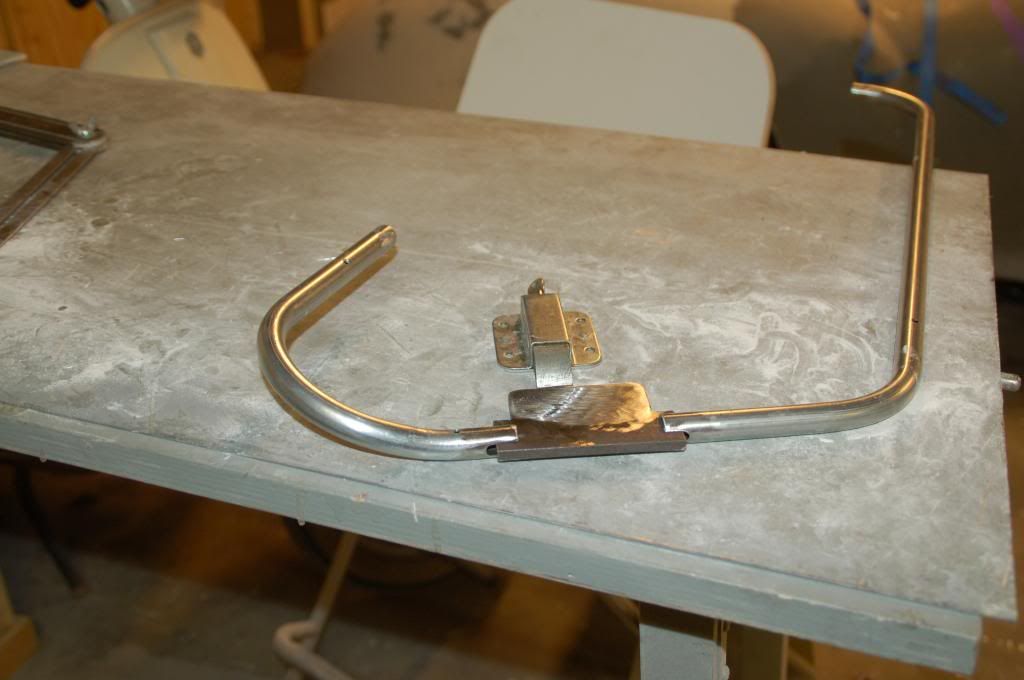
This is a door frame almost finished. The foto doesn't show all the curves of the tubing following the body lines properly. It was a llot of work getting t=it done
[IMG][/IMG]

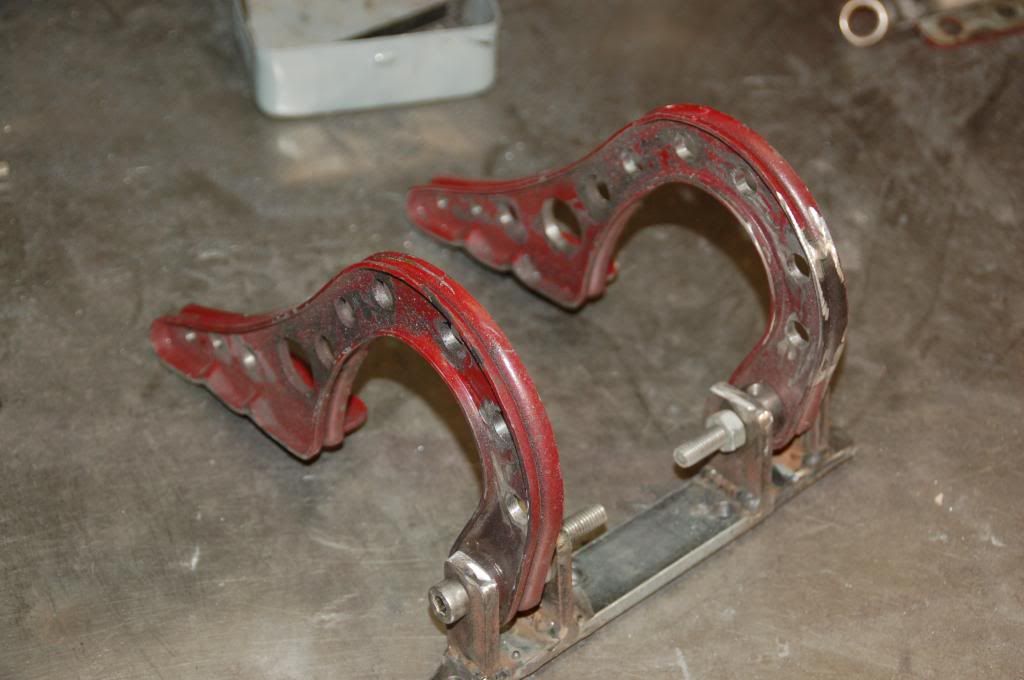
This is a picture of the door hinge mechanism. I used Spitfire boot hinges. The foto doesn;t show the bracket with the studs that supports this part. This part is welded to the frame. This way I can adjust the hinges by adding spacers between the stud bracket ant the hinges.
[IMG][/IMG]

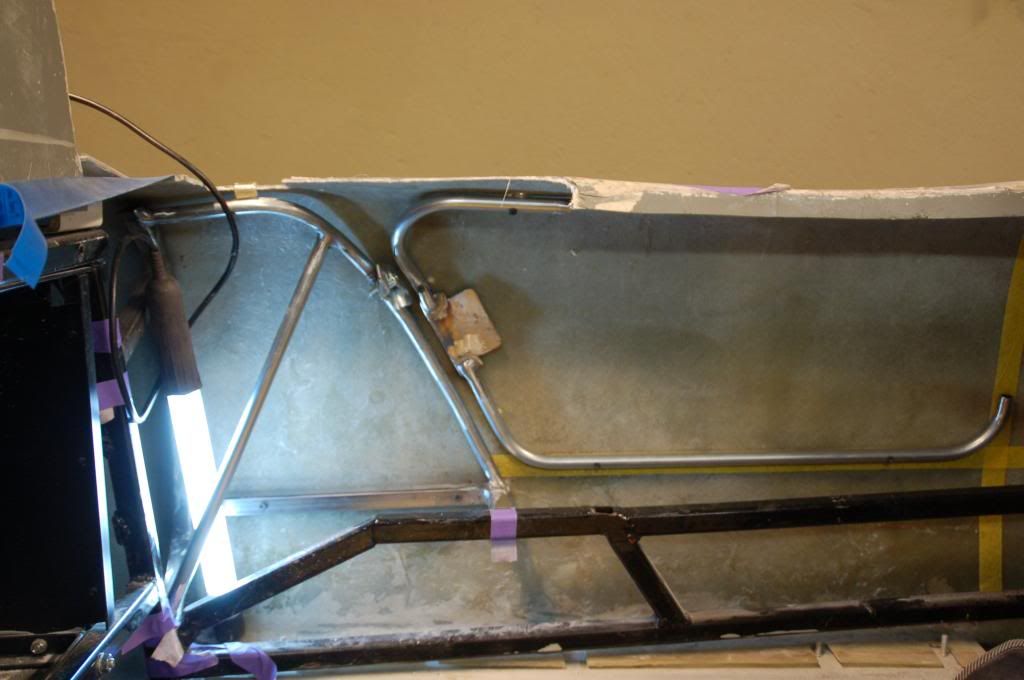
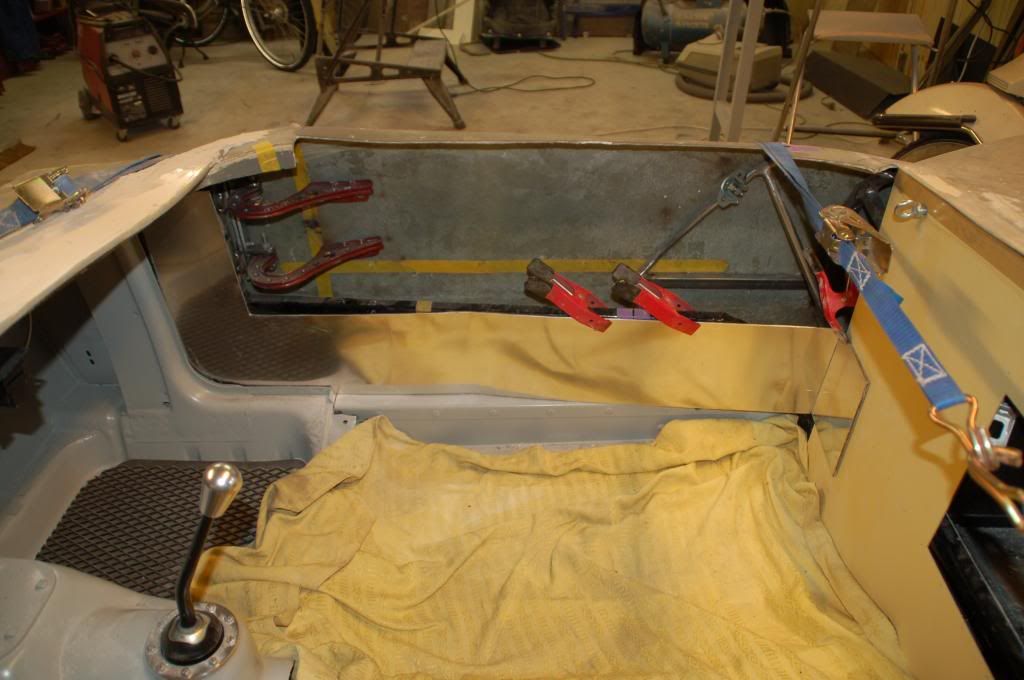
This picture shows the complete assembly.
[IMG][/IMG]

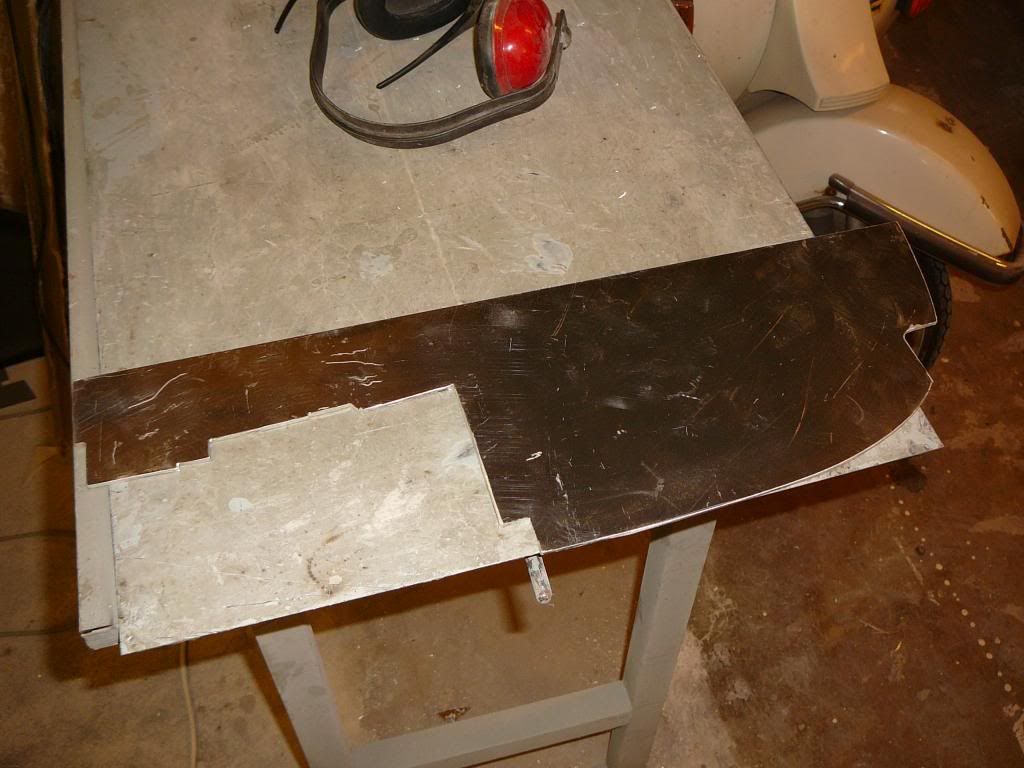
After that, It's a lot of panneling. This one for the inner side of the sills (3 mm aluminium).
[IMG][/IMG]

These plates for the panel behind the seats.
[IMG][/IMG]

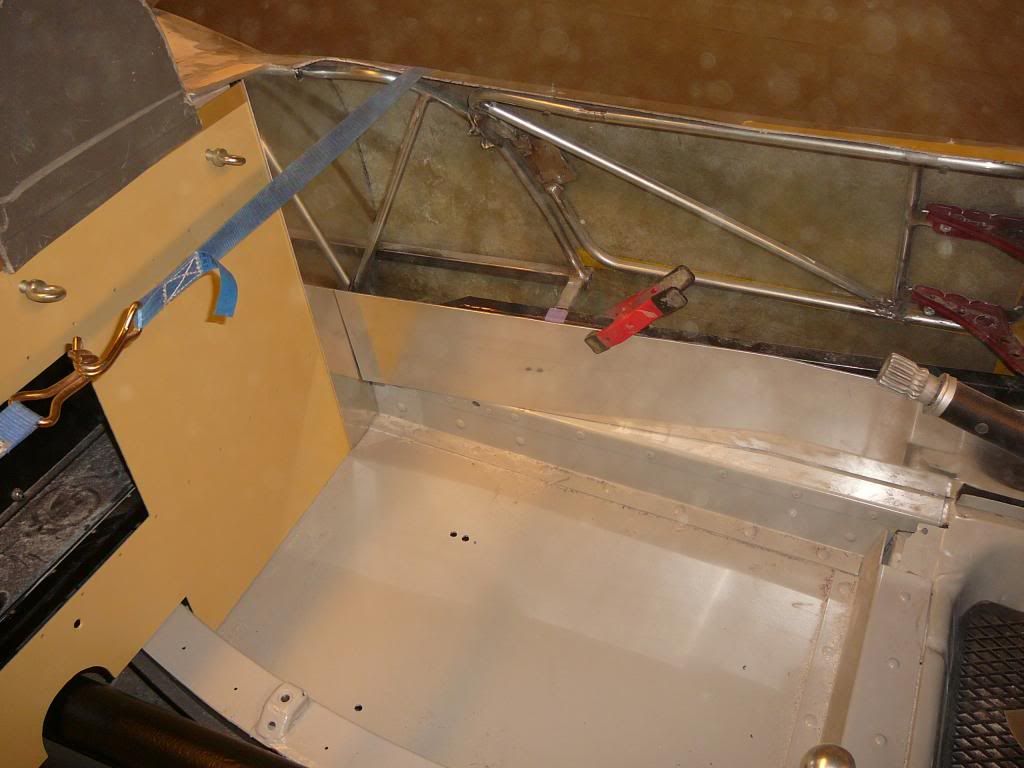
Which will bring it to this
[IMG][/IMG]

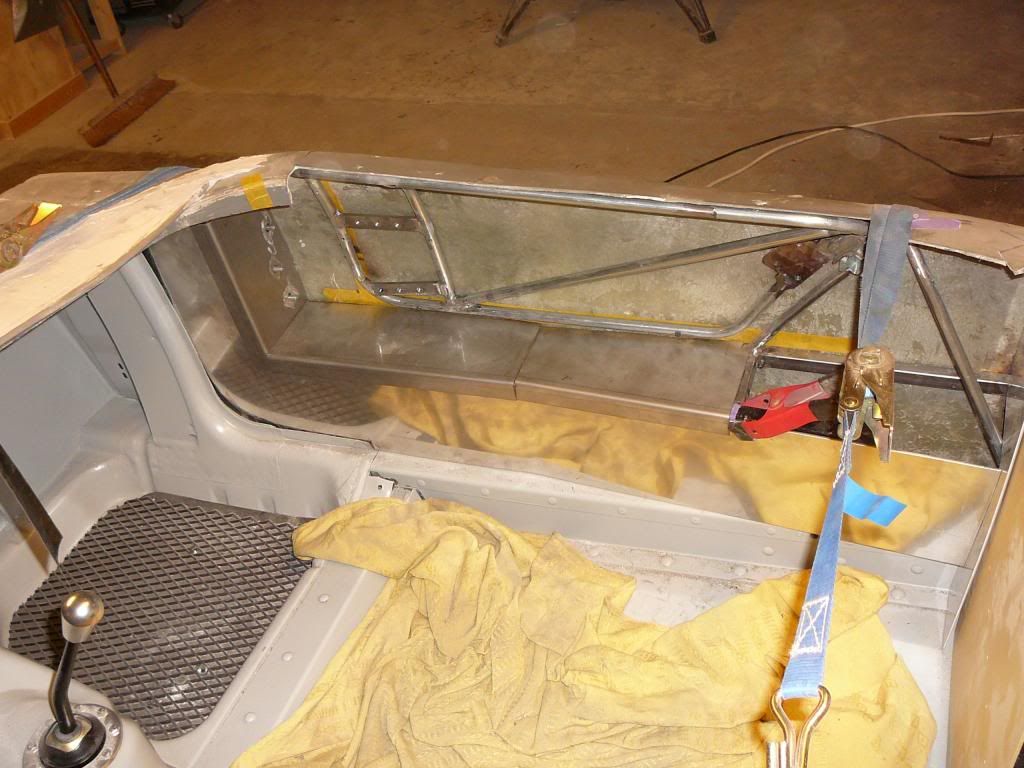
Which will lead to this (2 mm Stainless)
[IMG][/IMG]

And this is right where I'm today. I have to proceed with the last two panels that are in the subframes. I have to get some stainless panels welded to each other and have the aluminium panels coated first.
I have to get the body off and apply an extra layer of glassfibre because the body is very thin at the place (0,5 mm gelcoat and 0,5 mm grp). Then I have to smoothen the inside with filler before applying the paint. Ah well, never a dull moment with a Sammio I would say.

Michiel
30 Nov 2013, 7:14pm
Michael,
Great fabrication work, read this with interest as I'm hoping to attack my doors in the not too distant future. I had already settled on 3mm Ali for my interior so its good to see someone else using the same.
Keep up the good work
Mac
30 Nov 2013, 8:15pm
Love the internal door structure, it's just the way I'd have tackled it if I'd gone for doors myself.

Keep up the good work and you'll be on the road in no time. :)
1 Dec 2013, 4:40pm
christinedmc wrote:
Here I'am again with finally some progress to report. I have been busy getting all things sorted for the doors and the interior structure. Beside the doors I was planning, I have noticed that there is little room for shoulder and arm at the door side. I'm about 12 feet 60 and a fatty on top of that, so figure.
The tub is quite narrow. I figured that it needn't to be, because the upside of the "doors" has a substantial horizontal surface. So the tub could be widened at least 7 cm's at both sides.
I had to change my plans and went for the "superleggera" approach. Here are some pictures to explain.

This is a subframe I made for the right side
[IMG][/IMG]

This is the subframe in place
[IMG][/IMG]

This is making the framework for the doors
[IMG][/IMG]

Building doorframe and subframe at the inside of the body (I haven't cut the doors yet)
[IMG][/IMG]

This is a door frame almost finished. The foto doesn't show all the curves of the tubing following the body lines properly. It was a llot of work getting t=it done
[IMG][/IMG]

This is a picture of the door hinge mechanism. I used Spitfire boot hinges. The foto doesn;t show the bracket with the studs that supports this part. This part is welded to the frame. This way I can adjust the hinges by adding spacers between the stud bracket ant the hinges.
[IMG][/IMG]

This picture shows the complete assembly.
[IMG][/IMG]

After that, It's a lot of panneling. This one for the inner side of the sills (3 mm aluminium).
[IMG][/IMG]

These plates for the panel behind the seats.
[IMG][/IMG]

Which will bring it to this
[IMG][/IMG]

Which will lead to this (2 mm Stainless)
[IMG][/IMG]

And this is right where I'm today. I have to proceed with the last two panels that are in the subframes. I have to get some stainless panels welded to each other and have the aluminium panels coated first.
I have to get the body off and apply an extra layer of glassfibre because the body is very thin at the place (0,5 mm gelcoat and 0,5 mm grp). Then I have to smoothen the inside with filler before applying the paint. Ah well, never a dull moment with a Sammio I would say.

Michiel


Hey Michiel,

Looks great,especially the stainless panels!
Looks like a big man can stand on it....,very nice.
Was the second doorframe easier or just another size?

Gr.Rob
1 Dec 2013, 5:52pm
Michiel - That is a seriously impressive solution to getting doors that will work. :cool:

Good luck with the rest of it, Paul. :)
1 Dec 2013, 7:49pm
Thank you guys,

I hope to get all the new ellements to the coater this week. Some work left to the body before I lift it again to finalise the inside and get the work underneath finished.

Regards,

Michiel
1 Dec 2013, 8:29pm
love the door framework. they should be the mutts when sorted.
this is shaping up to be a very nice car indead. well done my son.
2 Dec 2013, 9:17pm
Very nice Michiel ... very nice indeed :nod: Keep up the excellant work.
Mine is the standard Syder but who knows .... I could adapt and put in some doors.
All the best
Slarti
4 Dec 2013, 1:47pm
Hi you all,

I'm reworking the tub and dash. Standard, the edge of the body that falls into the tub and dash, need some work by the builder. Mostly this work will be integrated when interior panels are brought into place (often plywood). And the edge in front of the tub would often be covered by some kind of dashpanel.

In my case, I do it differently. As you may know, my aim is a complete illusion. I want rounded edges, like they had in the past, when aluminium sheet was used that was folded around metal tubes.

For the dash and binnacle I want a somewhat sharper curve that resembles folded aluminium sheet.

It is still work in progess, but I wanted to share this appoach and hear from you what your thoughts are.

This is where I started with. A plumber made me a zinc piece with a nice round curve. I made a mould out of it and then made 4 copies of the zinc shape with glasfibre.
[IMG][/IMG]

This is the backside, where I have glued the curved piece in. I use a special epoxy paste that is very strong.
[IMG][/IMG]

The corners are the most difficult. I use a lot of epoxy making a solid base shape. I have to sand it back then and finalise with polyester filler. And I have widened the tub giving me more shoulder room.
[IMG][/IMG]

This is my approach for the dash. I put in a horizontal panel, placing the dash somewhat more into the cabin and make room for the binnacle, which I made in a stainless bowl from IKEA (don't tell the wife:biggrin1: )
[IMG][/IMG]

I sanded the inside of the binnacle to get the same thickness as the upside of the dash. I curved the edge and applied a layer of epoxy over it, making it rock hard. I still have to sand it tough.
[IMG][/IMG]

Michiel
4 Dec 2013, 2:12pm
Your right we are nearly at the same stage! hopefully I will get my body on today to measure up for the Ali body supports im making.

Mac
4 Dec 2013, 3:34pm
Some great ideas, must pop down to IKEA with my guages...