MadaboutKitcars

This is a read-only archive of the old Madabout Kitcars forum. New posts and replies are no longer possible, but every thread is still here to browse and read.

Royale Sabre - Take two!

8 Dec 2012, 2:54pm
seanick wrote:
After being in our (unheated) workshop all day I too can only managea couple of hours on the car in the eve before I have had enough!

Cor, working all day in unheated workshop, that must be tough!
8 Dec 2012, 7:56pm
Its not to bad, just keeeeeep moving! Plus I've had 25 yrs of practice!
Have you considered buying a small compressor? With what you have spent on Hammerite you could have bought one, a cheap spray gun, 10 quids worth of paint and still been better off!
Oh yes, nice balls!
9 Dec 2012, 4:38pm
seanick wrote:

Have you considered buying a small compressor? With what you have spent on Hammerite you could have bought one, a cheap spray gun, 10 quids worth of paint and still been better off!

I don't have any mains electricity down at the lock-up.
I do have a small generator but a died a few years back and I've not spent any time fixing it as the noise used to drive me mad.
You're probably right but the spray cans are just so convenient.

...peter
12 Dec 2012, 9:00pm
peterux wrote:
Another fine example!!
The interior on this one does look very nice and the high level brake light looks like it's made for the car.
I've added the pictures to my scrap book of ideas :smile:

That one is stunning! Perfect panel fit and finish, good detail, wheels perfect. In fact my only dislike is the modern style of seats, and that high level brake light. Mind you I could live with them!!:wink:

The other red one has a long way to go to catch up, especially as its slush drive.
13 Dec 2012, 1:41pm
cabrioman wrote:
Peter

Have you seen this one with some jaguar style mods...

http://www.ebay.co.uk/itm/271088737561?ssPageName=STRK:MEWAX:IT&_trksid=p3984.m1423.l2649

John


Hi John and Nick,

yes, I've seen this car advertised on ebay and the ROC website.
In fact, it is one of three cars I considered when buying my car. I'm not sure I like the 'jaguar' like modifications, but others no doubt will like the style. It wasn't painted when I was looking into it and it will still need IVA and registration as far as I know. As far as I can remember, the current owner is not the original builder and I don't know how long it has been 'in-build'. I think the risk of buying a 'nearly finished' kitcar is you don't always know the full history and what has been done or not done during refurbishment. Also, rubber seals in brake cylinders and shocks, etc can deteriorate without any use and dry up or go hard, which is why I'm treating mine as a complete build albeit with the 'donor' parts already in place.


...peter
13 Dec 2012, 9:26pm
OK, enough about other cars, here's my week 16 build update.....

I nipped down to the lock-up this morning and removed the final few pieces of the rear suspension. An hour later and I was left with this pile of bits...


Rear suspension by marlinpeter, on Flickr

They're loaded up in the back of my car at the moment waiting to be cleaned down and repainted.

This is a big milestone as, apart from a few measly brake lines, that completes the dismantling of the car; so everything now on is building!! :smile:

Which leaves the rest of the chassis free to be de-rusted and repainted.


Rear chassis by marlinpeter, on Flickr

I've cleaned up the tag on the diff final drive unit.....


Diff. tag by marlinpeter, on Flickr

This tells me that I have a non-LSD 7.5" diff built on 28th April 1992 with a 3.91 ratio. This is a little on the high side but might be OK with 15" wheels and some high profile tyres that suit this style of car.

:smile:.......peter
16 Dec 2012, 5:39pm
Hi Peter
I've been following this build .................... very well done and informative.
I'm a complete novice when it comes to building a kit car; It's been a "dream" of mine for some years and 2013 will be a decisive year for me in that regard.
I am very interested in the Royale Sabre but I am also looking at the idea of an MX5 transformation.
We'll have to see how things develop.
However, my question is in regard to what you use to "clean up" the chassis and other parts as I have never done this before?
Also, although I am OK about Hammerite I notice that they have a variety of options including a waxoyl product designed for protecting a chassis and general underbody. Is that what you have been using?
17 Dec 2012, 4:49pm
Alanlionheart wrote:
Hi Peter
.....However, my question is in regard to what you use to "clean up" the chassis and other parts as I have never done this before?
Also, although I am OK about Hammerite I notice that they have a variety of options including a waxoyl product designed for protecting a chassis and general underbody. Is that what you have been using?


Hi Alan,
welcome to the world of kitcars!!
How to 'clean up' donor parts, well that's a long subject worthy of it's own thread but I'll briefly describe what I do....
If it's really oily and greasy the most effective and fast cleaner is just neat petrol. Not very environmentally friendly or safe but it is the most effective. (I think garages use a paraffin based parts cleaner.)

If the item is just dirty and not too oily I use Bilt Hamber 'Surfex HD' which works very well.
For de-rusting I use Hammerite 'Rust remover gel' (thanks Robin!) but if it's small enough to immerse the part I use Bilt Hamber 'Deox-C'. I just mix up a bucket full and pop them in overnight and they come out the next day with no rust. You must clean them with Surfex HD first or it doesn't work so well. I call it my magic potion!!

On my chassis it was just a case of lots of elbow grease. Basically a variety of wire brushes in an electric drill and lots of emery paper on a rubber sanding block.
For degreasing before painting and for cleaning small parts like bearings, engine parts, CV joints, etc, I use Brake Cleaner.
There are lots of exotic anti-corrosion paint coverings available but most are very expensive. For this build I'm just sticking to black Hammerite Satin. It will probably last longer than me!!

Finally, if you are a complete novice then I can recommend you start buying a couple of the kitcar mags as they have lots of articles and reviews of the various preparation methods, etc.

Good luck.....


....peter
20 Dec 2012, 11:16am
Week 17 update......

As the festive preparations start, car building has slowed down but here's a small update and hopefully useful for any other Sierra based kitcar builders.

The Sierra suspension rear cross-member, or beam, is mounted to the chassis with too very large rubber bushes that are nearly 4" in diameter.
You can see them here at the top of the picture...


Rear suspension by marlinpeter, on Flickr

The Haynes manual doesn't cover how to replace these bushes and a trawl of internet forums suggested that these are notoriously difficult to remove with suggestions ranging from drilling them out to burning them out with oxy acetylene torches!!

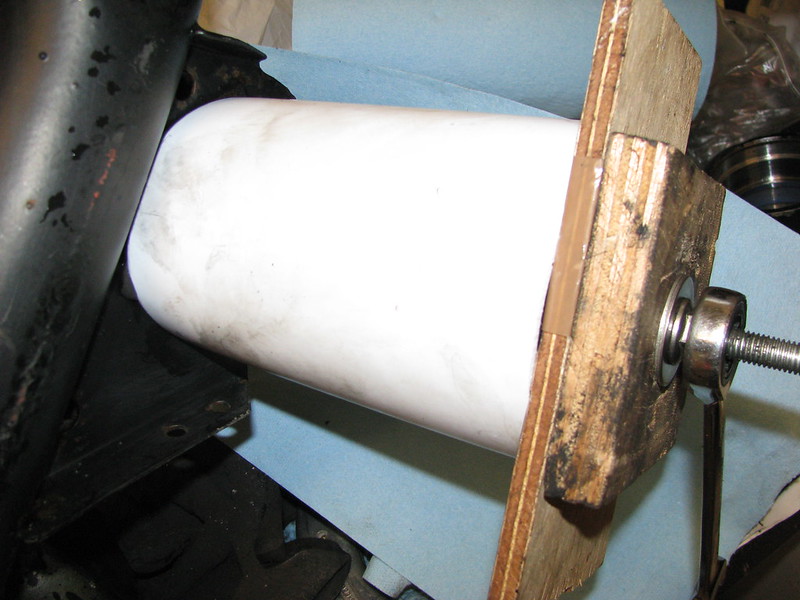
Now normally I remove rubber bushes with a large socket, a length of threaded studding and some nuts and washers. Obviously I don't have a 4" socket but I did have a length of 4" ventilation pipe left over which is just the right size.


Cross-member bush removal by marlinpeter, on Flickr

An old crush tube and a nut on the other side.....


Cross-member bush removal by marlinpeter, on Flickr

Just wind up the nuts and the bush just popped out without any effort.

Note: new Internet folklore = these bushes are really easy to remove!! :lol:

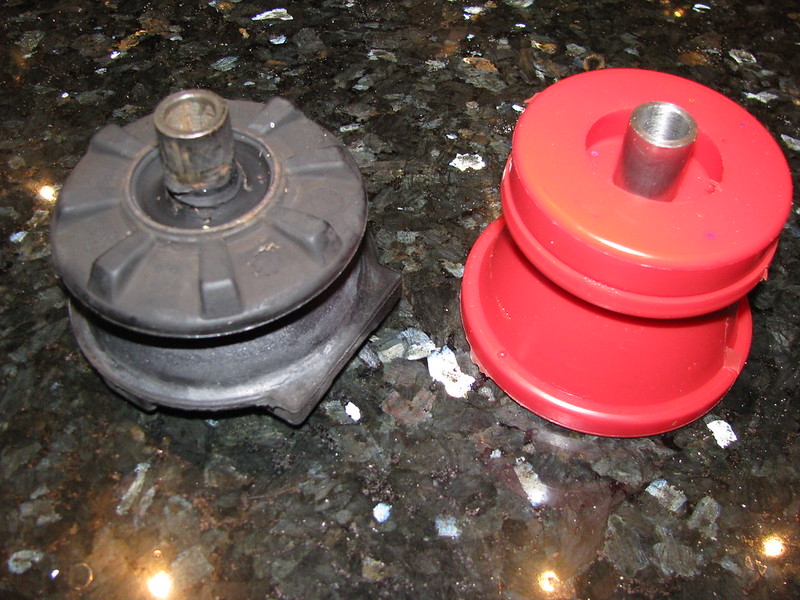
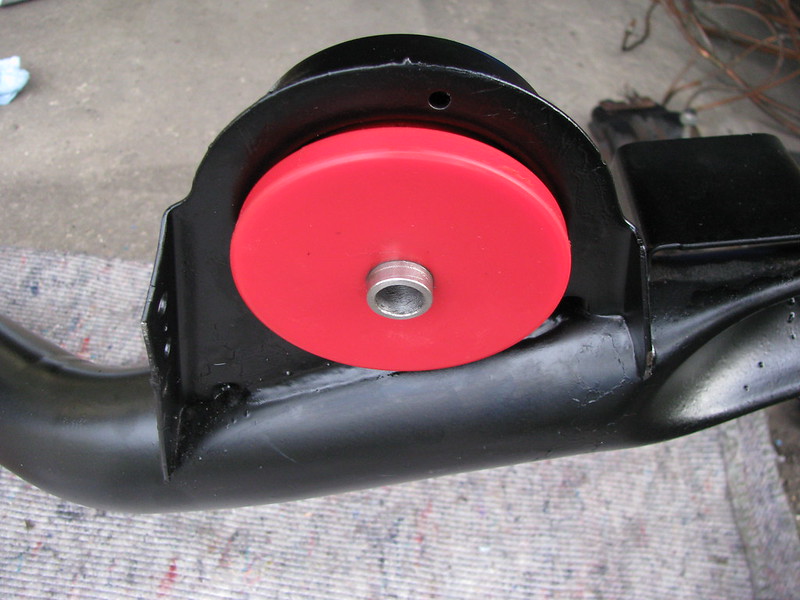
Here's a picture of one of the old bushes and a new poly bush version.


Rear Crossmember bushes by marlinpeter, on Flickr

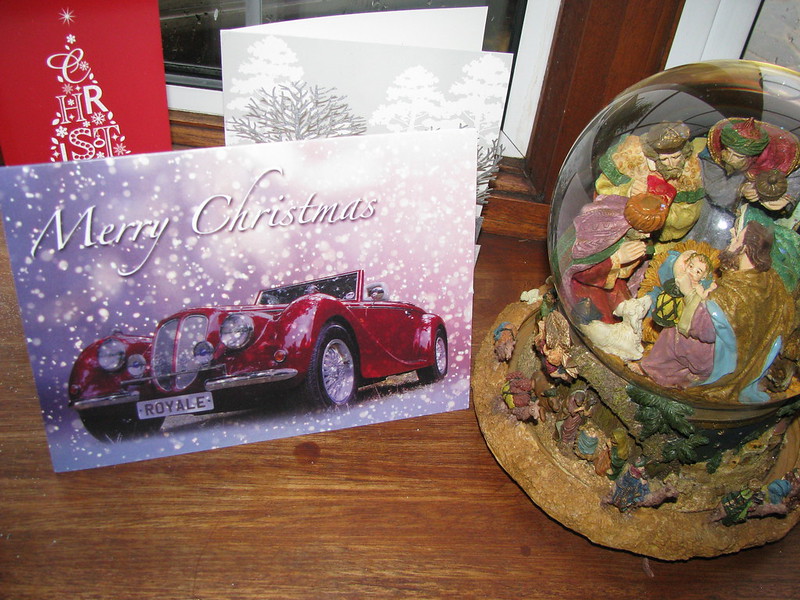
So as this is my last update before the festivities begin, I'd like to wish everyone a Happy Christmas and and a productive kitcar building and driving in 2013!


Christmas 2012 by marlinpeter, on Flickr

The Christmas card is courtesy of the Royale Owners Club - nice one!

:smile:.....peter
22 Dec 2012, 8:45pm
Nicely popped Peter.
Merry Christmas!:party:
22 Dec 2012, 10:34pm
From your report so far, Peter, the Sabre looks like a well made kit and the finished car should be a pleasure to own. I have always thought it has really good lines.

Hopefully, I will be able to get back into the garage one of these days but at the moment I am fully occupied taking care of her indoors.

To all readers of this super forum, Happy Christmas and good building in 2013.
23 Dec 2012, 10:41am
seanick wrote:
Nicely popped Peter.
Merry Christmas!:party:

Sorton wrote:

To all readers of this super forum, Happy Christmas and good building in 2013.


Thanks guys, have a nice Christmas!
30 Dec 2012, 4:17pm
Week 18 update.........

I managed a couple of hours down at the lock up today between showers and while Pauline was off to the 'sales' :wink:

Before Christmas I managed to clean up and repaint the rear beam.
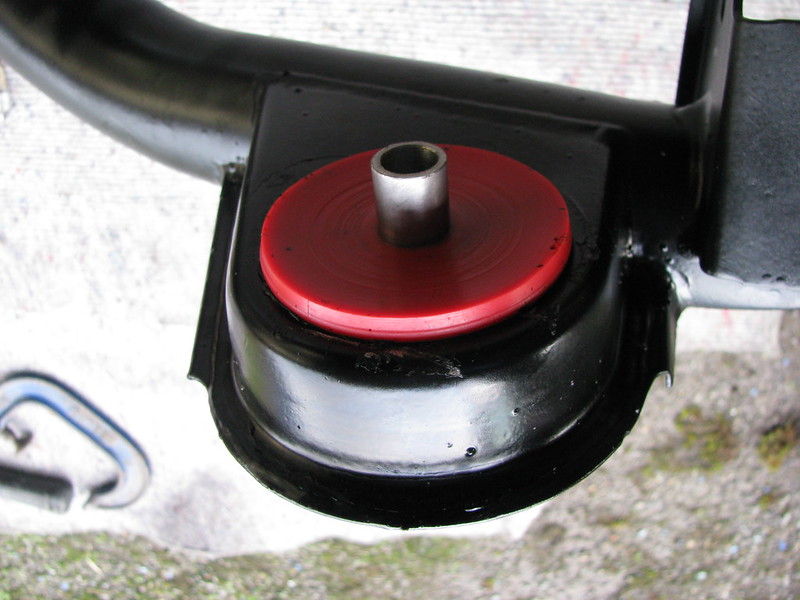
Replacing the rear beam bushes with the new poly bushes was a bit more of a challenge than getting the old rubber ones out, but this arrangement finally forced the bush into place. (The nuts you can see are just acting as spacers to allow the top edge of the bush to pop into place.)


Rear beam - bush replacement by marlinpeter, on Flickr


Rear beam - bush replacement by marlinpeter, on Flickr


Rear beam - bush replacement by marlinpeter, on Flickr

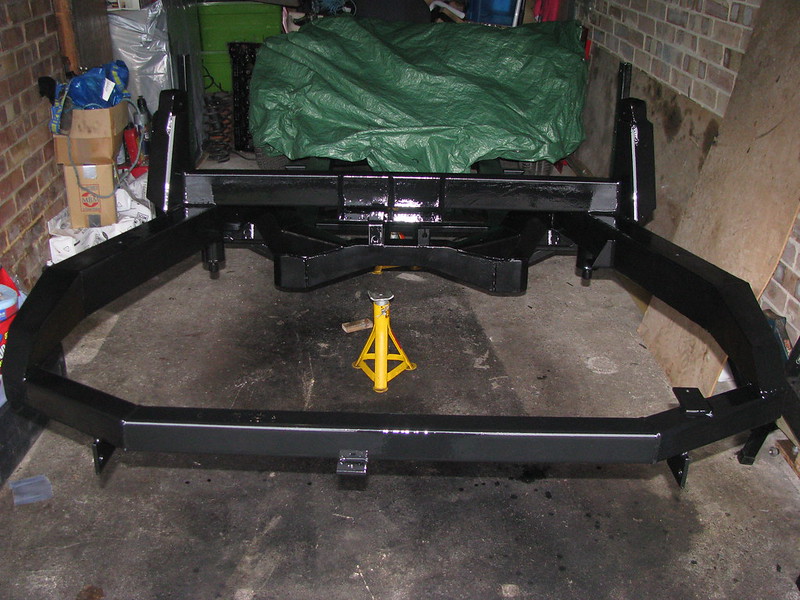
I've started to paint the rear end of the chassis. This is the second coat and is still wet.


Chassis - rear end repainting by marlinpeter, on Flickr


So that's the last update this year.....

:wave: .....peter
16 Jan 2013, 5:02pm
Week 20 update.....

well to be honest, I don't have a lot to show for the last couple of weeks due to a combination of the weather and 'domestic things' taking up my spare time.
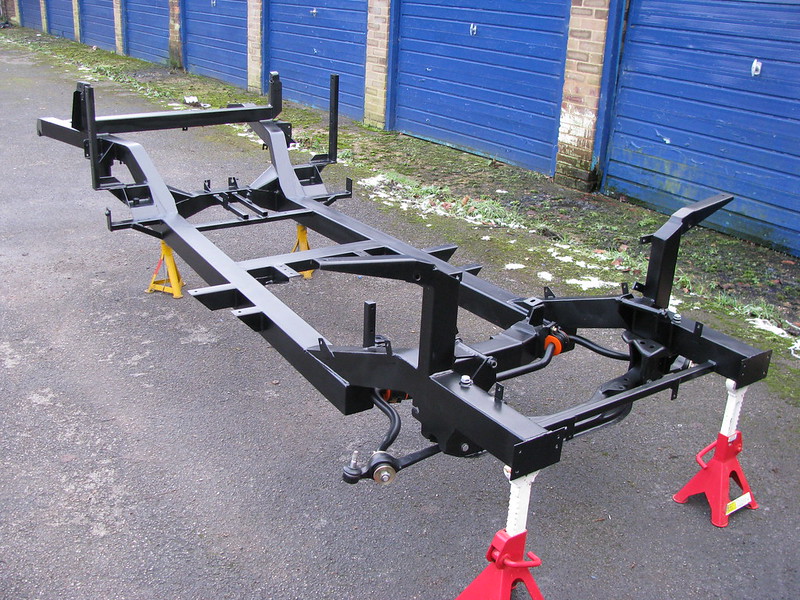
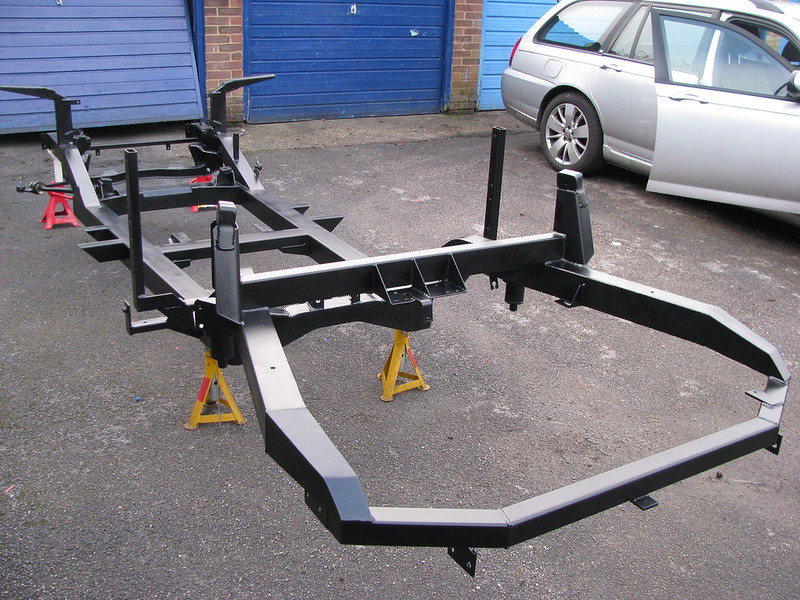
But I have reached a significant milestone.... I've finished painting the chassis and the build can now begin:whoo:


Chassis - painted! by marlinpeter, on Flickr


Chassis - painted! by marlinpeter, on Flickr


:smile:.......peter
17 Jan 2013, 9:02am
Will you be keeping the same body colour?
17 Jan 2013, 3:24pm
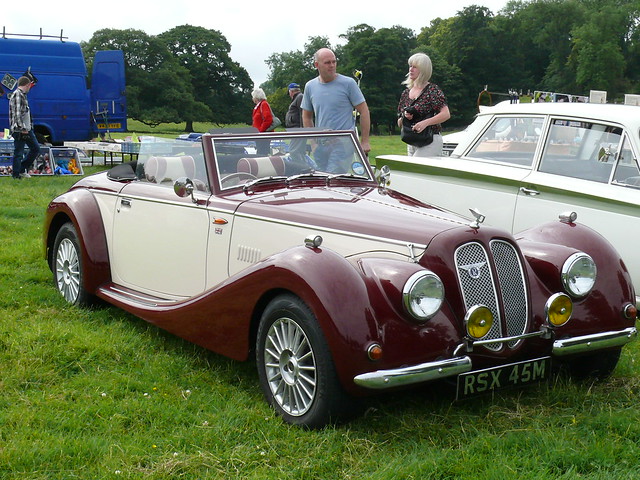
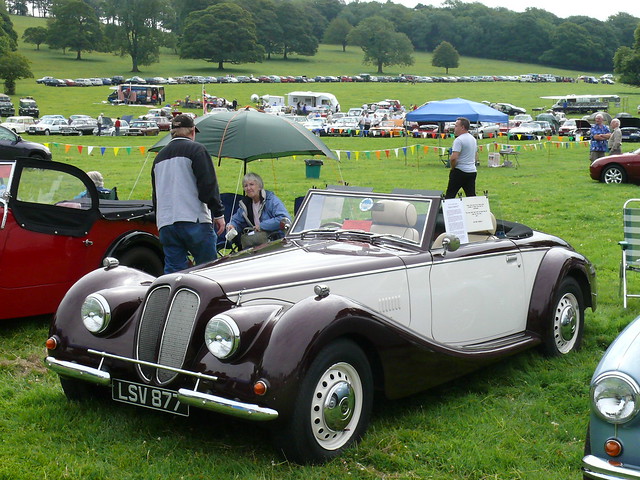
So, will it be one of these above? Or have you come up with a different combination?
17 Jan 2013, 3:39pm
peterux wrote:
Probably not as my Marlin Sportster is almost the same colour.
I quite like the 'two-tones' but really that decision is a long way off :smile:


Royale Sabre kit-car by Albert S. Bite, on Flickr


Vintage Car - Royale Sabre [RSX 45M] 110710 Leighton Hall by maljoe, on Flickr


Vintage Car - Royale Sabre [LSV 877] 110710 Leighton Hall by maljoe, on Flickr


I really like wire wheels on period cars - I think the blue one looks lovely, - but I do get the steel wheels too, as they are just as appropriate.
Wires are just so damn expensive - and several people have told me they are high maintenanace: not a good combination - high price and lots of after care!
17 Jan 2013, 4:46pm
I agree, the alloys don't do anything for it.
18 Jan 2013, 1:58pm
garyh wrote:
So, will it be one of these above? Or have you come up with a different combination?


It'll be on steel wheels or or maybe wires, but the colour options are still wide open.
I hope to see some finished cars at shows this year before making up my mind.
23 Jan 2013, 4:56pm
Week 21 update......

After finishing the painting last week meant that I could get back to spannering and start bolting bits back together.:smile:

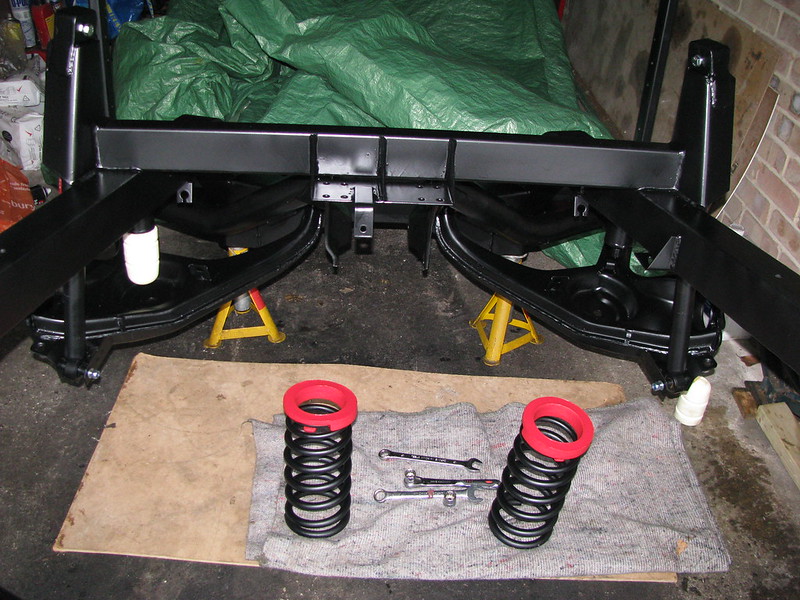
First up was refitting the rear beam followed by the two trailing arms and (temporarily) the shock absorbers.


Rear beam and trailing arms by marlinpeter, on Flickr

The rear bump stops are as rare as 'hens teeth'.

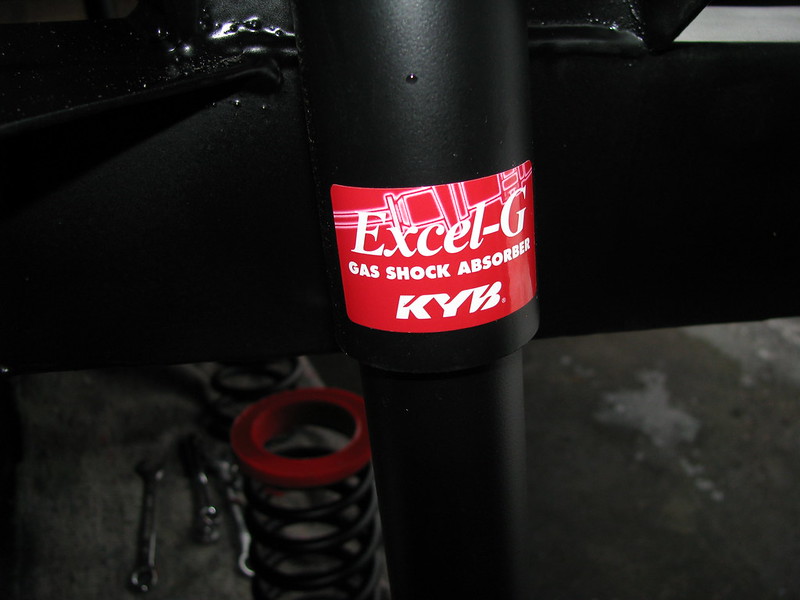
Unfortunately, the shocks that came with the kit were for a Granada and the wrong length for the Sabre, so I decided to try these Japanese KYB shock absorbers.


Shock absorbers by marlinpeter, on Flickr

After a trial fit of the rear beam, it became clear that I needed the top part of the bush.


Rear beam poly bush by marlinpeter, on Flickr


Rear beam poly bush by marlinpeter, on Flickr

View from below. The smaller bolts are 7/16 inch UNF but I have no idea why.

Rear hubs have been refurbished with new bearings and grease seals.


Rear hubs fitted by marlinpeter, on Flickr


I've fitted the differential/final drive but the bad news was that the Floflex mount didn't fit so I've put the Ford part back.


Final Drive fitted by marlinpeter, on Flickr

Next up will be the rear springs, half shafts and then a quick go round with the torque wrench before putting the rear wheels back on.


:smile:........peter