MadaboutKitcars

This is a read-only archive of the old Madabout Kitcars forum. New posts and replies are no longer possible, but every thread is still here to browse and read.

Another Cordite Is Born ...

25 Jul 2012, 8:26pm
Managed a few hours after work on Tuesday...

Body Shell - Part 3:
I needed to remove the throttle cable before I could remove the pedal.
This was a simple "push and unhook the cable" job, a bit like on a bicycle.
Then there were just two bolts in the bulkhead to remove and that was it.
Note: This pedal does not have a rubber cover on it as standard.
( Which explains why I was not able to find anyone selling one! :rolleyes: )


Then it was time to remove the petrol tank, starting with 2 clips on the filler hose.
Again, I hadn't realised the petrol cap was a simple "push on" design.
It pretty much came away in my hands as I started to look at what was holding it in.
There was two more clips on a hose connecting the fuel hard line pipes.
Then 5 bolts to undo and a bit of wiggling about and out she popped.
I assume there should be a breather hose given the molten mess held on by a clip. :mmph:
Either way, I put caps on the pipe ends and sealed everything up for now.
I need a bigger jerry can to decant the remaining petrol out of the tank.
( I have no idea how long its been in there, so I'll refill with fresh petrol later on )
Not sure yet whether I can re-route and reuse the existing hard line for the Cordite.


The heater was next (and I'll be starting a separate thread on whether to keep it).
Two pipes from the engine block needed to be disconnected, held by jubilee clips.
I opted for another low tech solution to seal one end, cling film & a rubber band.
There were 4 bolts in the bulkhead to remove and that was that.
I guessing the foam "seals" are not a standard Triumph part. :wink:


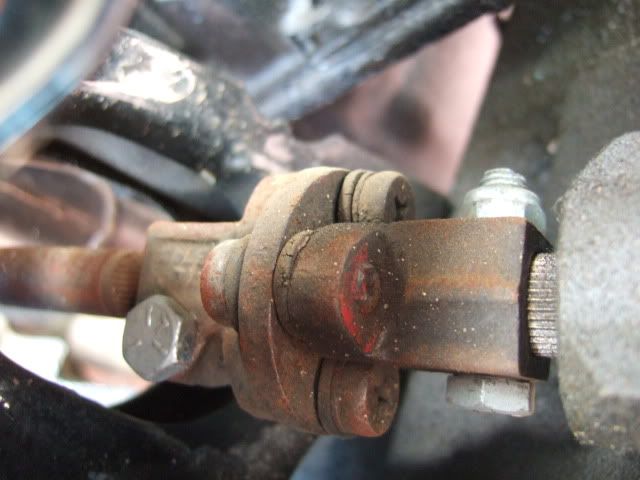
Removed the main part of the steering column held in by 3 sets of brackets.


Next Steps:
- Remove the rest of the steering column
- Block the wheels & then remove the hand brake
- Undo all the bolts and see if the body will lift off! :shock:

Cheers, Paul. :)

PS
My next post will be photos of the body shell for potential buyers.

25 Jul 2012, 8:37pm
What makes you think the heater seals aren't OEM parts?
26 Jul 2012, 7:58am
They look like the rarer Boxter replacement seals to me!
:bolt:
26 Jul 2012, 8:10am
On the heater, was the central hole chewed to correct shape!
26 Jul 2012, 7:55pm
Gentlemen - I know British Leyland's quality control was bad, but surely not this bad!

:icon_twisted:
26 Jul 2012, 7:56pm
I am sending a link to this post to my potential body shell buyers.
So it is purely for their benefit and my normal build diary will return shortly.

Body Shell For Sale

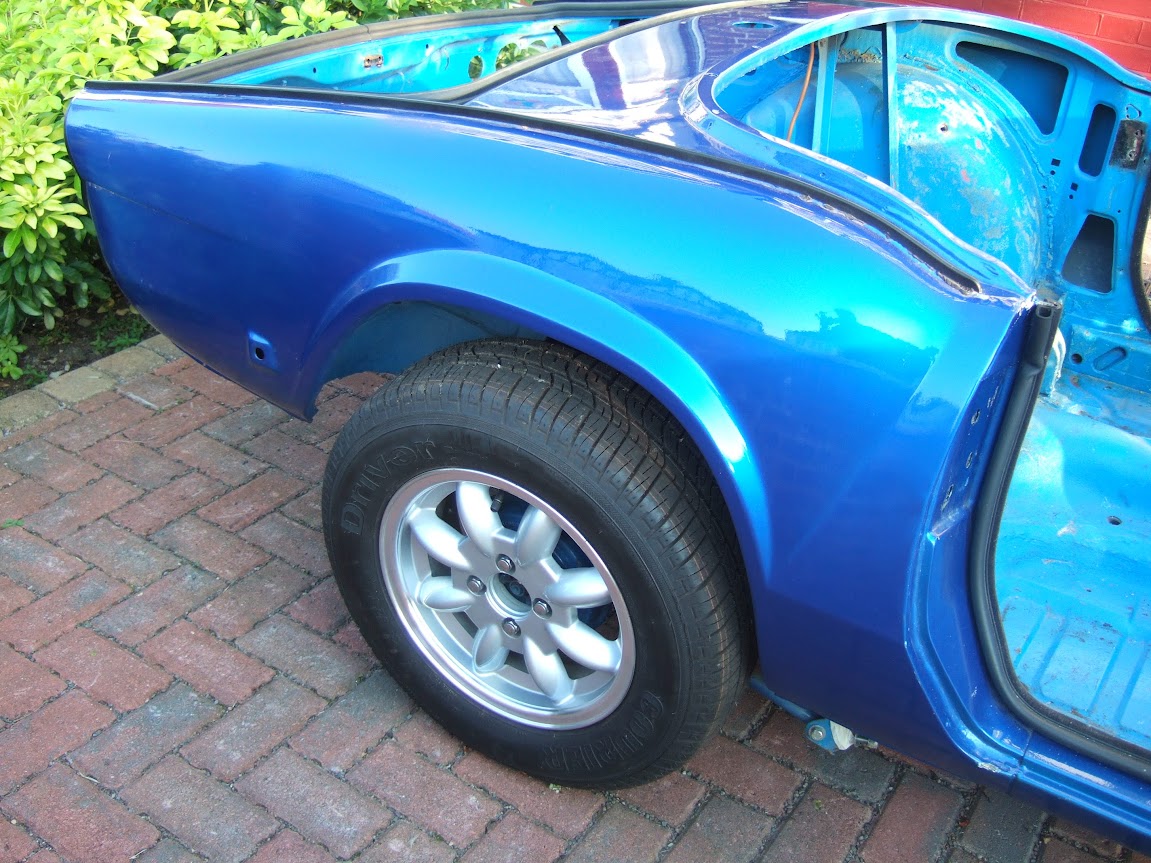
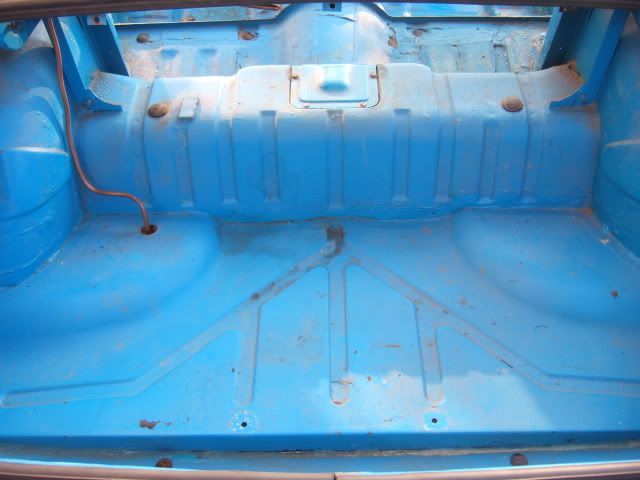
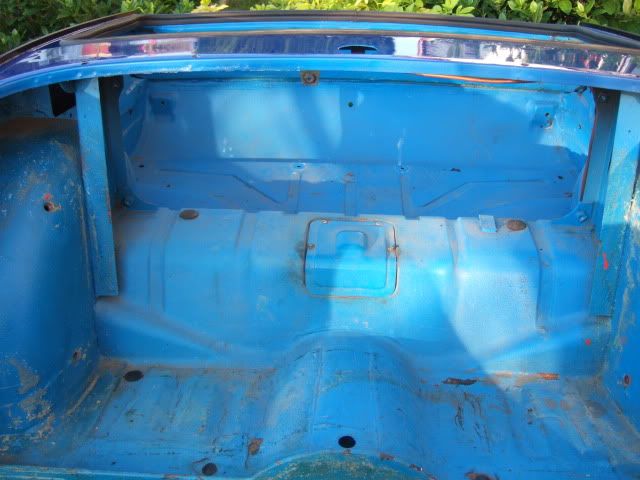
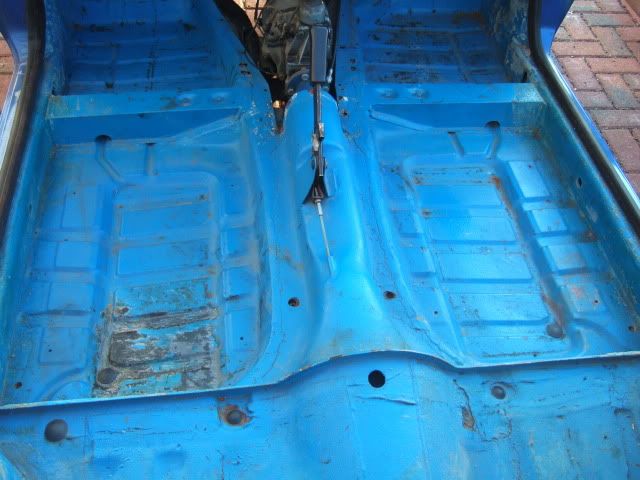
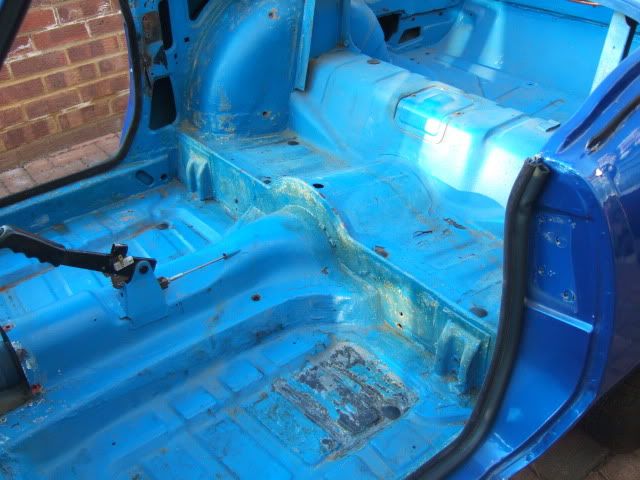
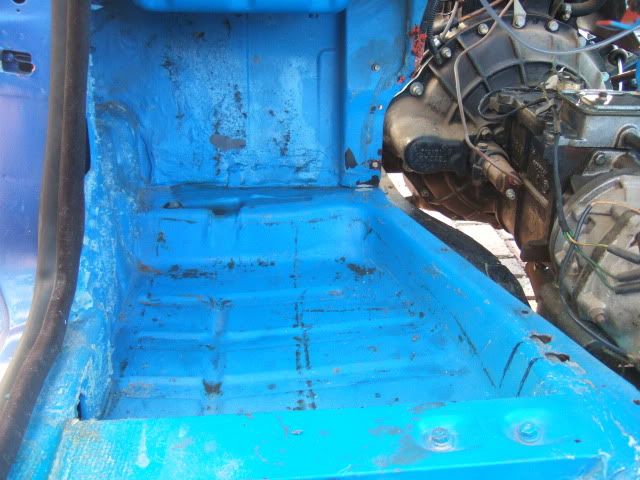
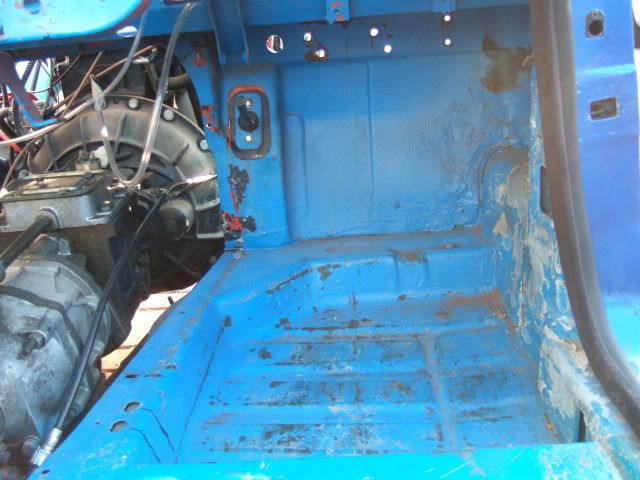
On the whole, the body shell is very solid with a number of new panels in place.
The previous owner supplied invoices for floors, wings, etc. & these can be viewed.

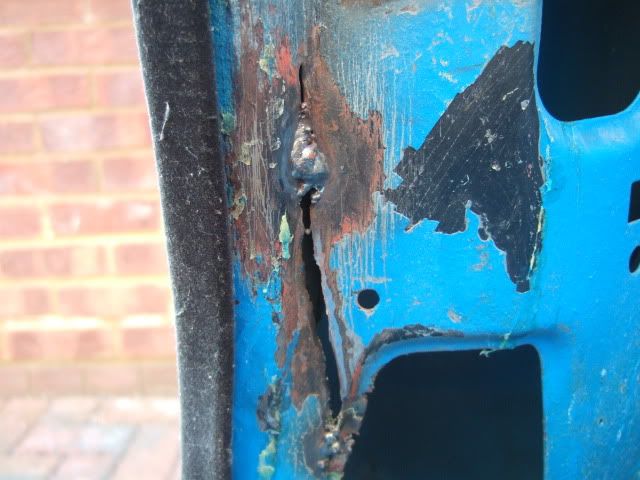
Below are the problem areas that I am aware of (also highlighted in the photos):
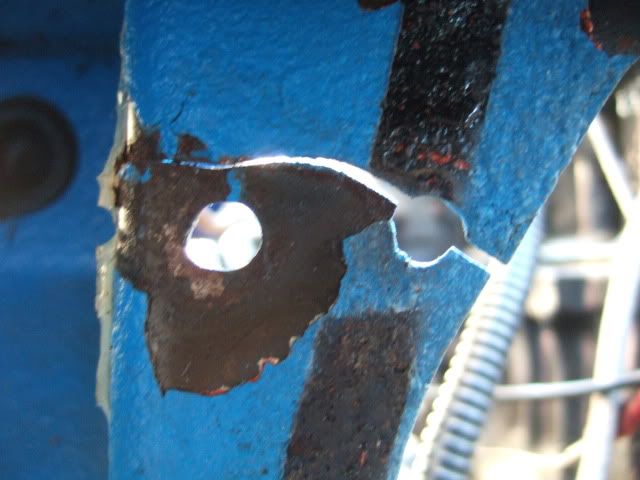
- There is a slit in the body work behind the driver's door frame.
- There are several small cracks in the bulkhead where the gearbox cover attaches.
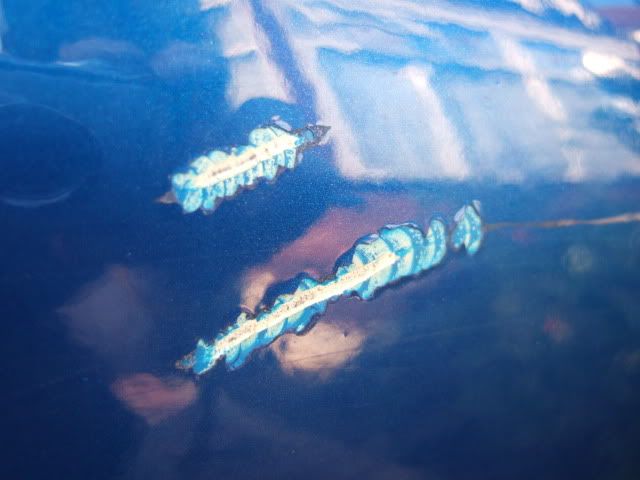
- The passenger side rear panel picked up two scratches at my local garage.
( They were only supposed to be working on the engine & rolling chassis! )
- There are also areas with flaking paint, excessive carpet glue residue, etc.

Items that will be staying with the bodyshell:
- Working windscreen wiper mechanism, but no wipers.
- New screen washer system.
- Driver's side heater vent nossle (can't remove without dismantling wiper mech.).
- Rubber seals for bonnet, doors & bood lid.
- Black trim strips at rear of body shell.

Items in photos, but due to be removed & therefore not part of sale:
- Master cylinders for brake & clutch.
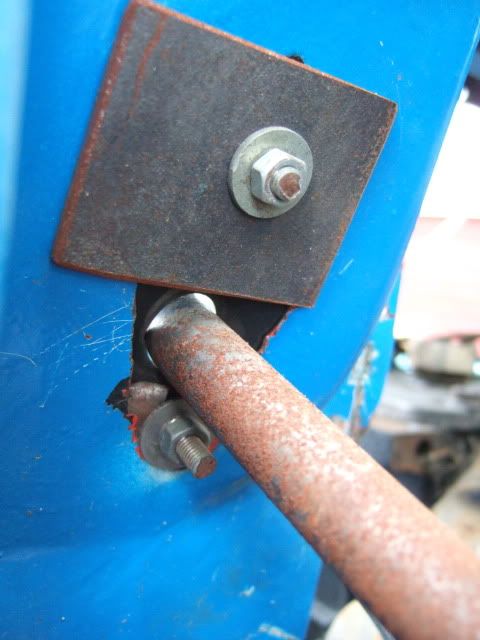
- Lower steering column & surrounding bulkhead location plate.
- Hand brake lever.

Please Note:
I have removed the VIN plate as I need to attach it to my new fibreglass body.
However, it is available for inspection & to confirm it matches my V5C document.


28 Jul 2012, 3:13pm
This run of dry weather has been just what I needed to keep this project moving forward...

Body Shell - Part 4:
I used an assortment of bricks to 'chock' all four wheels in place before removing the hand brake.
I've also made a note of size, shape & location of the mounting bracket before removing the lever.
As I haven't got as far as working out how to refit either this, or an alternative, hand brake yet.
I did remember to release the hand brake before disconnecting one "C" clip & one split pin.
I've left the cable in place for now until the body shell is removed.


I just had the lower part of the steering column and the bulk head locating cover left.
The cover had an extra brace to support the bulk head.
I also needed to remind myself of the angle of the "flat" section of the column.
I could only get access to the very bottom of the column, so I removed it from there.
But before I did, I took measurements to ensure I knew where to cut the Cordite bulk head.
You will notice a recurring theme of my fear of not being able to put things back together. :rolleyes:


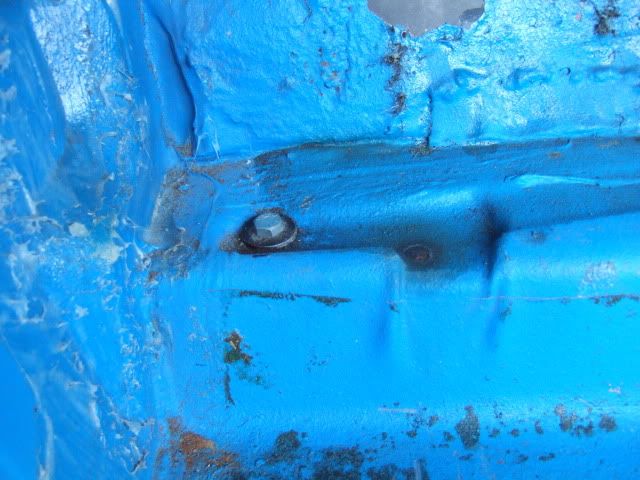
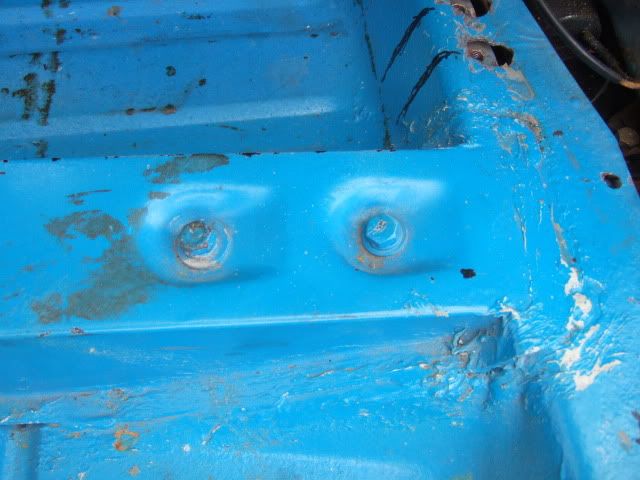
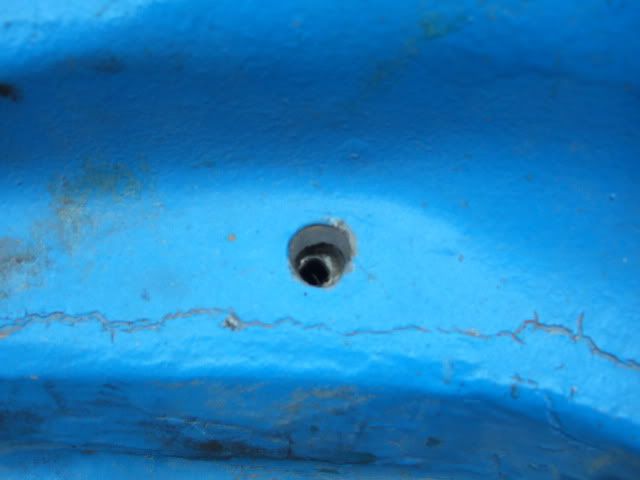
Then it was finally time to remove the 12 bolts that held the body shell in place. :shock:
These were located as follows:
- 2 in the engine bay in front of the bulk head
- 2 in the front foot wells just the other side of the bulk head
- 2 x 2 on either side of the main cockpit area
- 2 holding the seat beat brackets in place (already removed earlier on)
- 2 in the rear cockpit


I gave the body shell a gentle lift and everything is clear and ready to take away.
Which means the final part of the 'destruction' phase of my Cordite build is complete. :cool:
Due to my complete lack of storage I will leave it where it is until sold.

EDIT:
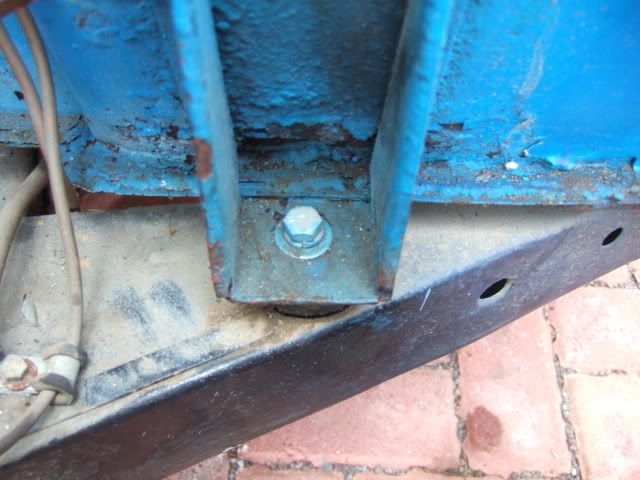
I actually forgot about removing a final bolt under the body shell.
This held part of the hand brake mechanism in place.
Please see my next post for details.

I'd started a thread about the pros & cons of fitting a heater here.
I feel better about the idea of not having one now as it makes things much easier.
So I have simply reconnected one of the existing heater hoses across in a loop.
I followed the better to need to cut more off than need to add some back on approach. :wink:
I noticed the heater value was full of "stuff" which I hope isn't anywhere else in the system.


Next Steps:
- Hopefully get the body shell sold ASAP.
- Work out what needs to be done to fit the rear spring lowering block.
( Based on DonnySoutherner experience this is done before fitting the frame. )
- Give the chassis a good clean (it was stored in a barn) & touch up its paint.
- Then I can start to think about fitting the internal frame work.

But there are a few family events to do before that.

So until next time, take care, Paul. :)
28 Jul 2012, 3:30pm
Good progress Paul, won't be long before your Cordite starts to take shape. Best of luck selling your bodyshell. :)
28 Jul 2012, 5:06pm
Looking like good progress there Donny. Be sure to disconnect the handshake compensator from the underside of the shell too. How do I know? ......
29 Jul 2012, 1:56pm
Numbered..... measured..... I'm not sure you "get" this whole Sammio thing yet matey? Plus there's been hardly any talk of hitting things with a big hammer, most odd!

;)
30 Jul 2012, 5:20pm
Mr T - Thanks for all your encouragement. :)

AndyP57 wrote:
Looking like good progress there Donny. Be sure to disconnect the handshake compensator from the underside of the shell too. How do I know? ......


[SIZE="4"][COLOR="Red"]D'Oh![/COLOR][/SIZE]

Andy - Thanks for the top tip, although is "Donny" the Northern equivalent of "Mate". :wink:

Which leads me to...

Body Shell - Part 4 and a bit: :rolleyes:
Yes, clearly I had not done everything required to remove the body shell last time.
And to make matters worse, the final thing to remove was obviously the hardest to reach.
It was time to jack the car up again and take my chances with a sloping drive & axle stands. :shock:
Thankfully just needed to flatten a locating collar and undo one bolt and that was it.


DaveCymru - It gets worse than just some masking tape on bolts...
Obviously there is a note book and sandwich bags involved too! :wink:


However, if it makes you feel better, I have these standing by for the frame fitting...


:icon_twisted:

Cheers, Paul. :)
5 Aug 2012, 6:31pm
Holding Pattern:
This has been a week for the family, rather than Cordite building and that is OK.
We managed to get tickets for Olympic badminton & tennis on Mon. & Tues. :cool:
So just a couple of build related things to report...

Body Shell:
2 of my 4 potential buyers have bought other body shells due to my rain delays. :icon_sad:
But one has offered to contact someone else on my behalf which was nice of him.
I will not be able to list it on Ebay until after our family holiday which is a further delay.
And I need the body shell out of the way before I can really start the build.

Engine Cooling Solutions:
I picked up some good tips on my 'Car Heater - Pros & Cons' thread here.
So I will probably connect my heater hoses to a Renault Megane type header tank.
I had also been thinking about using an alternative Honda radiator like Mister Towed.
But I have since found a Spitfire 'performance' radiator which is a straight swap.

However, I can't finalise these choices until I understand how the bonnet fits.
I know Spyder builders need to lower their radiators, but I don't know about Cordites.
So I needed to do a quick test fit...

Bonnet Hinges:
My wife helped me get the bonnet from the garden, through the house, to the drive.
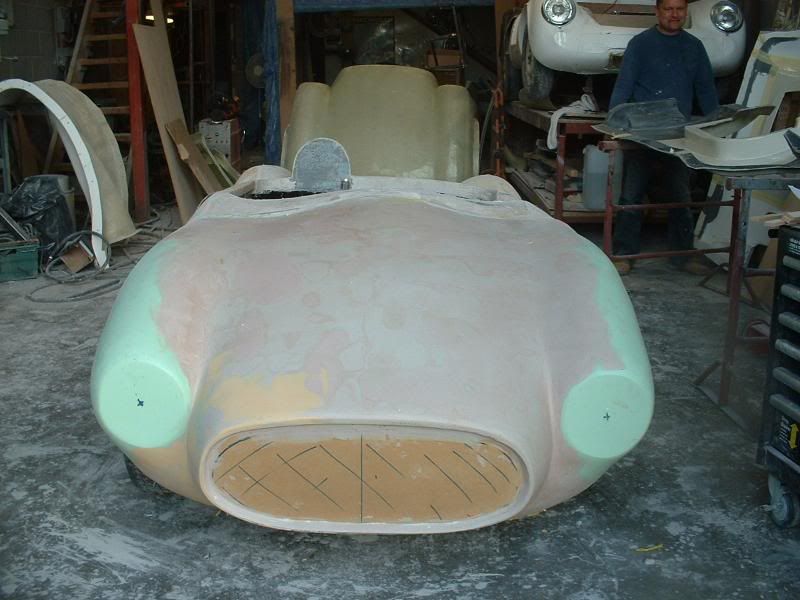
One of my optional extras was to have bonnet hinges fabricated and bonded in place.


But I have just come across my first real Sammio building "challenge".
- The hinges are set around 74cm apart
- The outsides of the front chassis rails are approx. 76cm apart
- The insides of these rails are approx. 63cm apart
So my initial thoughts on how this is supposed to bolt on doesn't seem to work.

These front rails must be close to the grill for the wheels to fit in the bonnet's arches.
But if the passenger side hinge is close to the rail, the driver's side hits the rail.
Not easy to see in the following photos...


The only good news is that I checked before ordering a new radiator.
Does any one have any ideas, or better still, some photos with measurements?

Next Steps:
We have a family holiday coming up which will obviously take priority.
Then I hope to find some blocks of time to really kick start the build process.

Cheers, Paul. :)
5 Aug 2012, 6:46pm
To me it looks like you need to get the rebody inspection out of the way without the bonnet fitted, then cut the front bumper hangers off, fabricate some bonnet brackets and weld them to the front of the chassis where the bumper hangers were.
6 Aug 2012, 6:47am
Mr T - Cheers, I knew bits "fell off" the Herald after inspection.
But I wasn't aware that things might need to fall off the Spitfire too.

May be I was misreading this post (I've added the red highlight)...

lancelot link wrote:
...


We had to deviate from the photoshop rendition a little , she has more of a pout due to the [COLOR="Red"]front crossmember issues[/COLOR] on a Spitfire chassis...


Unfortunately I've only seen Cordite pictures with the bonnet closed.

I know Gary & Andy are busy, so I'm trying not to hassle them if I can avoid it.

Cheers, Paul. :)
6 Aug 2012, 8:14am
Hi Paul, Not too busy to do what I can to help...
Although, like you, I haven't any photos of this part of the Cordite and have yet to get to the bonnet hinges on the Demonstrator, It so happens that I have what appears to be the remains of the chassis that was used under Gary's demo that was at Stoneleigh. I've taken a couple of photos to show what he did for hinging and hope this helps (both of us). As you can see, it looks like the original brackets do come off and new hinge points welded to the front crossmember. (Full marks Mr T :biggrin: )


6 Aug 2012, 9:24am
Ahh, yes. That's pretty much how I'd pictured it using my 'fitters eye'. ;)

It's worth mentioning that it's important to get the DVLA rebody inspection done before cutting the bits off the front cross-member to avoid the dreaded IVA though. :eusa_naughty:

It's nice to see a cordite progressing and don't forget that you're paving the way so it's up to you how you do things. That's one of the nice things about building a Sammio - nobody can say "that's wrong" (Micha et al excepted of course) because there is no right and wrong, just how you think your car should be. :bounce:
6 Aug 2012, 5:20pm
Andy - Thanks for that photo, you are a star. :cool:

I really thought I was being very thick not being able to work it out. :rolleyes:

So the project plan must have body inspection before bonnet fitting.

I don't suppose you know if the radiator needs to be lowered?

For now I will put the final decision about engine cooling on hold.

Mr T - So bits of Spitfire fall off after all. :wink:

I fully agree with the sharing of all building experience for the greater good.

I know there are many on here who can work it out for themselves.

But I hope to show that even a ham fisted amateur like me can build one of these.
( With quite a bit of help from this forum )

Thanks, Paul. :)
7 Aug 2012, 5:33am
tip on the radiator front: if the one from the spitfire fouls the bonnet and can't be moved to a position to avoid that, you can always swap it for one from a GT6: because of the longer 6 cyl engine, the radiator is narrower and drops down between the chassis rails to give more clearance!

Baz from Brussels
9 Aug 2012, 8:22am
This is just another post to highlight my remaining parts for sale to potential buyers.
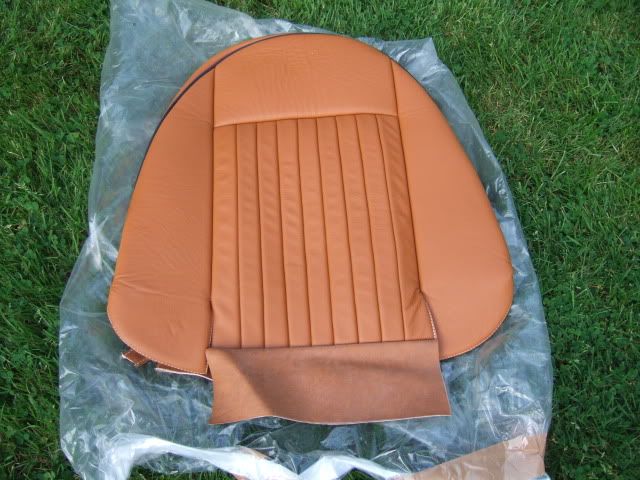
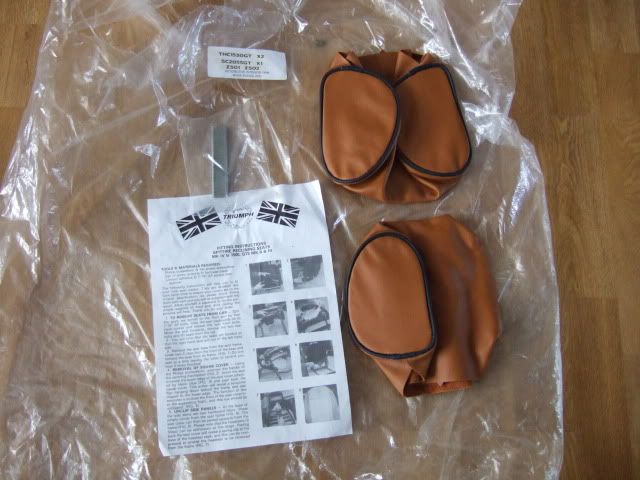
Leather Seat Covers - Brand new, never been fitted, RRP @ Rimmer Bros. = £630.
Unfortunately the photos do not do these covers justice, they are first class.


Wiper Switch - Was working fine before I removed it.
But I did notice the circular clip at the back of the lever was missing.


Door Sill Covers - Etched with Triumph & Spitfire logos, brand new, still with protective film on.


Heater and various associated parts - Appeared to be working before I removed it.
Previous owner fitted their own hand made / chewed foam seal.
Note: One dash board nossle has been left with the body shell.


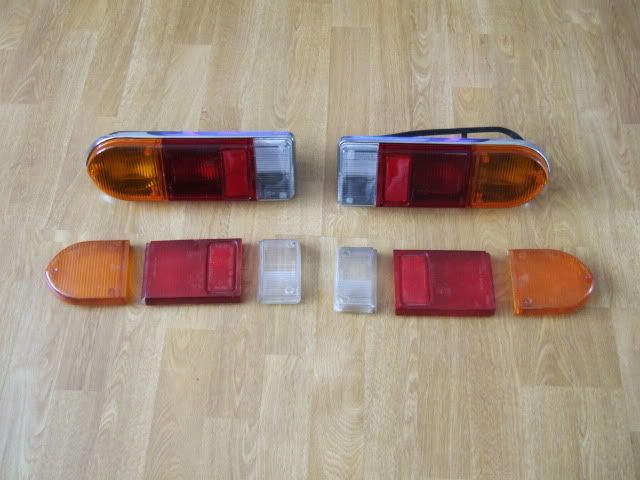
Rear Lights & Spare Lenses - Original assembly, but new lenses & gaskets fitted.
Whilst there are bulbs in all the lights, I wasn't able to test them all due to unfinished wiring.


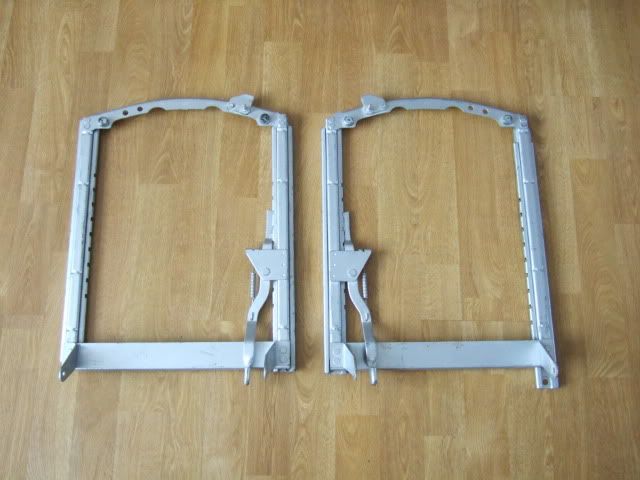
Seat Rails - Look like original items which have been given a lick of paint.
This paint is already bubbling in places, so probably needs to be re-done / touched up.


Sealed headlights - 2 x original units, with main & low beam working on both.


Steering Wheel - Original item.


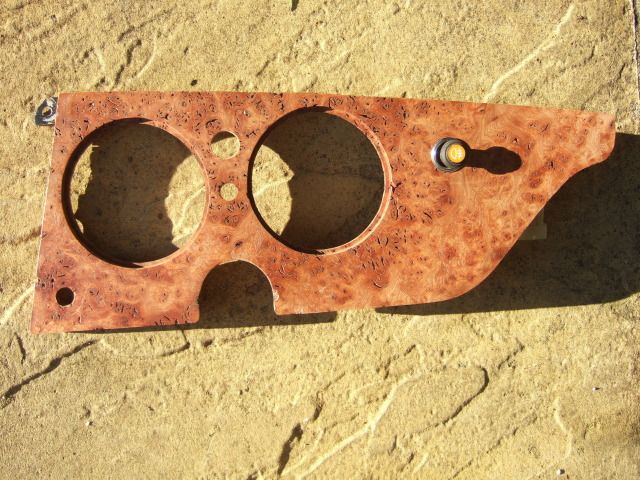
Dash Board - The previous owner said this was a hand made "one off" to original dimensions.
All the dials and switches fitted fine before I removed them.
Includes fog light switch, plus hand brake & seat belt warning light covers.


Various pieces of plastic trim.


My normal Cordite building thread continues on the post below this...
9 Aug 2012, 8:22am
Basic Project Plan:
The photo Andyp57 posted above has provided a clear sequence of events for Cordite Construction.
The re-body inspection must be completed at a much earlier stage than I originally expected.
I will be able to do some basic alignment work with the bonnet when the body is being fitted.
But the bonnet itself can not be fitted until after the inspection due to extra chassis brackets.

I have been building a "To Do" list on a spreadsheet (high tech pen & paper :wink:) since I started.
But since I've seen that photo I've tried to convert all my thoughts into a proper project plan (of sorts).
I still have lots of questions & unknowns, plus I need to buy construction materials as well.
But before I knew it, my workload to re-body inspection list had stretched to 5 pages of A4!! :shock:

Given the unreliable weather, this isn't a traditional project plan with any dates in it. :rolleyes:
I can't even allocate expected man hours to each task as I have no idea how long some things will take.
So far, some jobs have been miles easier than I expected, but I've also tripped up on "simple" jobs.

However, I get to learn from DonnySoutherner & I'm sure Andy's own build will be super quick.
So if I can follow their lead & keep working through my own list, I should get my Cordite on the road.

Selling my remaining Spitfire parts:
You can see the post above is more photos and descriptions of what I have left to sell.
This allows me to provide an easy link for potential buyers to look at.
If they don't want them, I will put them on Ebay when I get back from our family holiday.
Although I'd offer a good price as a job lot with the body shell for a quick sale of that.

"Inspire a generation"
Whilst this phrase is from the Olympics and about sport, it reminds me of a favourite quote.
Again, not strictly about Sammio building, but I think is counters some recent forum posts...

"It is not the critic who counts: not the man who points out how the strong man stumbles
or where the doer of deeds could have done better. The credit belongs to the man who is
actually in the arena, whose face is marred by dust and sweat and blood, who strives
valiantly, who errs and comes up short again and again, because there is no effort
without error or shortcoming, but who knows the great enthusiasms, the great devotions,
who spends himself for a worthy cause; who, at best, knows, in the end, the triumph
of high achievement, and who, at the worst, if he fails, at least he fails while daring
greatly, so that is place shall never be with those cold and timid souls who knew neither
victory nor defeat."


All my original ideas about how long this project would take have gone out the window.
Not so much in hours taken, as it hasn't taken many hours to get this far.
But more the availability of my time and it lining up with dry weather.
Hence it has taken me months to spend a few days (in total) on the car.

However, I remain inspired by the "can do" attitude of the majority of this forum.
And I look forward to driving my Cordite with a gold medal winning sense of pride. :cool:

Until next time, cheers, Paul. :)

Replies:
Alpha - Thanks Baz, that is another good option to bear in mind.
20 Aug 2012, 7:23pm
Quick Catch Up:
Nothing much to report as I've been away on a holiday with my family near Thetford Forest.
I did pack my wiring loom & a few tools into the back of the car along with the rest of our luggage. :icon_twisted:
But we had so much to do while away that I didn't get a chance to open the box,let alone work on it.
It also looks like I will need to put my body shell on Ebay after all, which will cause further delays.

However, I now fully accept that I need a far more philosophical approach to my project plan.
I bought a decent donor to avoid the need for a nut & bolt restoration of the rolling chassis.
But as I said last time, my "To Do" list is already 5 pages of A4 just to get as far as the re-body inspection!
So I will simply keep chipping away at the workload whenever I get the chance & see what happens.

Hopefully I will have some more progress and photos to post next time.

Until then, take care, Paul. :)

PS
Just taken some photos to post a message on Andy's Cordite Demonstrator thread.
I am sure all the work he does before the September show will be a big help to me. :cool:
21 Aug 2012, 7:23am
The key thing is not to lose heart. I've been chipping away at little jobs on mine now for over a year and it still isn't finished. I never actually wrote a 'to do' list, just went out each day I had some time and got on with something I felt like tackling. Although I'm really looking forward to having the finished car to drive whenever I want, I think I'm going to miss the challenge of actually building the thing. For me, this project has been more about exercising my creativity, dusting off old skills and learning new ones than ending up with a potentially valuable car. So, crack on with what you feel like doing when you feel like doing it and enjoy the journey! :becky:

Oh, and if you happen to visit Thetford Forest again do drop in for a cuppa - I'm less than twenty miles away, although this last couple of weeks I've been away myself in Menorca :)
25 Aug 2012, 4:59pm
Ebay Update:
My Spitfire body shell is finally on Ebay with the auction due to end on Tuesday, 28th August.
I'll then give the buyer first choice on the last few parts I have before they go on Ebay too.
My my main concern is to get the body shell out of the way so I can get at the rolling chassis.

Wiring Loom - Part 1
I want to be able to restart my engine ASAP, so I'm keen to sort out the wiring early in the build.
The decision to build my Cordite without a heater makes more of the original loom redundant.
So I updated my wiring diagram & adding a dotted line to ensure a connect remained in place.


I laid the loom out in the dining room and started to cross check it back to the diagram.


This allowed me to add extra labels where some wires were not connected in my donor.
I was also able to trace the two "random" unattached wires to the oil warning light! :shock:
The previous owner has fitted some sort of pressure gauge in the engine bay.
So I need to do a bit of research to see if he removed all the original connections.

Then it was simply a case of carefully cutting and unwrapping the tape around the wires.
Then working my way slowly around the loom removing everything I didn't need.
I only made two mistakes (I blame the thunder, lightening & torrential rain outside :rolleyes: ).
But the are an easy fix to correct and will be reconnected in Part 2 (see below).
Based on this photo, it doesn't look like I have much to show for many hours work...


So maybe this is a better way of highlighting what I managed to remove...


There is still a lot of work to do with the loom, but that can wait until "Part 2".
I need to fit connections to my new lights & the loom to ensure everything will join up.
But first I'll run the loom in the car to check which wires need shortening / lengthening.
Earthing to the frame instead of the original steel body locations will be part of that.
When all that is sorted out I will then wrap up the wires to tidy it all up.

Next Steps:
If I get half a chance to do some more Hammerite painting outside tomorrow I'll take it.

Until next time, take care, Paul. :)

Replies:
Mister Towed - Thanks & I'll take you up on the cuppa offer one day.
This is why your build thread is a joy to follow as you just keep chipping away at it.
I know it has taken a long time, but you'll soon be driving a Sammio Spyder. :cool:
( No pressure! :icon_twisted: )
27 Aug 2012, 4:33pm
Wiring Loom - Part 1 and a bit
Woke up in the middle of Saturday night as my mind was clearly still thinking about wiring. :rolleyes:
It dawned on me that one of my "mistakes" from earlier that day was not wrong after all.
I'd cut a wire convinced I didn't need it & only then did I notice one end heading into the bulk head loom.
I was horrified to see the words "gear box" on the other end of the matching wire & panic set in.
I thought I'd cut the over drive connection and stopped before I did any more damage.

However, I should have actually marked the wires as "gearbox reversing light switch"!
So I was doing the right thing all along and can remove some more wiring from the loom.
But I'll pick that up along with all the other stuff I need to do in "Part 2".

Stop! ...

Hammerite Time! ...


There were some bits of the internal framework that still needed to be painted & other bits touched up.
Some dry weather on Sunday let me paint that & some of my other donor parts that will be re-used.


Parts of the frame look like they have been painted by a child and that's because they were!
But I'd rather keep the runs and blobs and have a family painted frame than a beautiful finish. :cool:

Mind you, even with a dodgy finish, things do look better with a fresh coat of paint.


I'd put a second coat on this morning, but shortly afterwards the rain came (again!).
So we have a large temporary garden ornament until I can move it all out of the way.


Body Shell Update:
Just over a day to go, no bids yet, but 34 watchers.
I also had 2 messages about a "Buy it now price", but no offers there either.
Hopefully this will be one of those sales that takes off in the last few minutes.

I took quick rubbing of the petrol filler cap hole while it was still here.
This is purely as a double check when it comes to drilling a hole in my Cordite body.


Cordite Bulk Head:
As I was painting both the frame and the tops of my pedals I thought I'd compare them.
- The brake pedal lines up with the six holes provided.
- The clutch pedal needs six holes, only 5 are pre-drilled and they do not line up.
- The gas pedal had two holes in the top of the Spitfire bulk head, but only one here.


Now I remembered that DonnySoutherner had some issues with his pedals.
But a quick revisit to his build thread has just highlighted another "challenge".

He posted this photo...


And then Andy posted this message...

AndyP57 wrote:
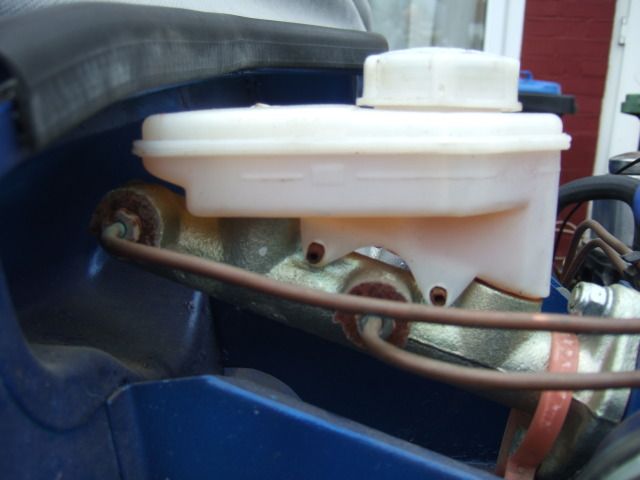
Now looking enviously at your Master Cylinder layout... Beware buying a late 1500 donor as it comes with a tandem brake system as a default. Just as well we don't have to IVA as I'm going to have to downgrade the system to a single cylinder to get it to fit :(


I couldn't remember what I had, but a quick look revealed...


Insert rude word of your choice as I didn't think I needed to touch my brakes at all.
( As they have already "passed" the MOT inspection my local garage gave them. )

But in the wise words of Mister Towed... "The key thing is not to lose heart."
There is not much I can do at the moment until the frame and body are in place.
At that point I'll have a better idea of what my options might be.
Perhaps I can simply fit a 'Wembley Scoop' to clear the master cylinder. :wink:

Also looking at Simon's photo again, it is clear his gas pedal is mounted using one bolt on top.
Plus there are another two bolts to go through the front of the fibreglass bulkhead.

Until next time, take care, Paul. :)
27 Aug 2012, 10:31pm
Gas pedal only mounted by the two bulkhead bolts. One on top is the frame mounting bolt as fitted by Gary. A bit surplus to requirements really as there are 12 bolts going thru for pedals anyway.

My clutch mounting had a hole missing and didn't line up either. Some filing required.