MadaboutKitcars

This is a read-only archive of the old Madabout Kitcars forum. New posts and replies are no longer possible, but every thread is still here to browse and read.

New Cordite Build, with a twist....

24 Nov 2014, 7:32pm
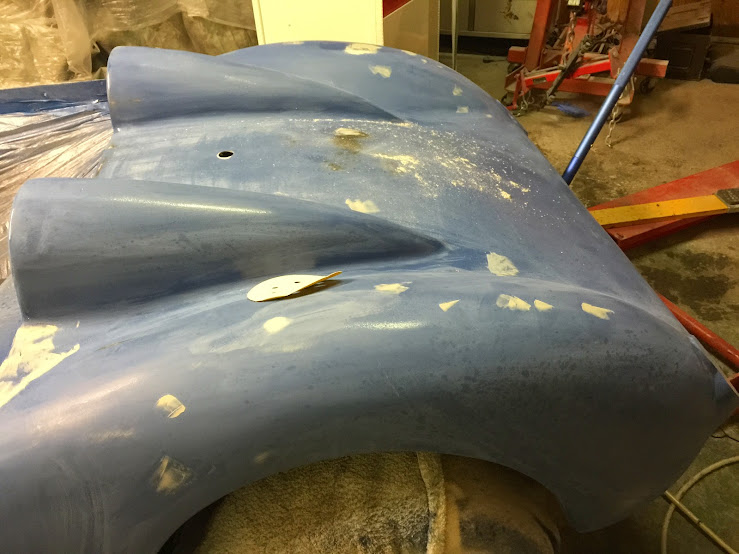
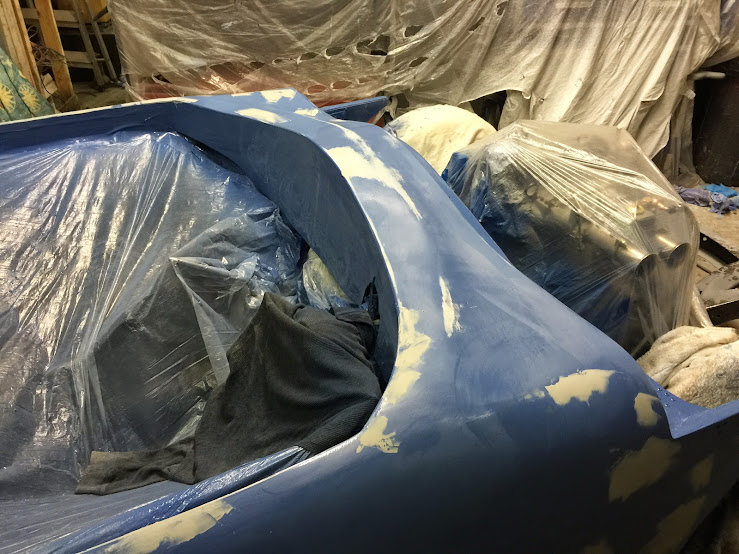
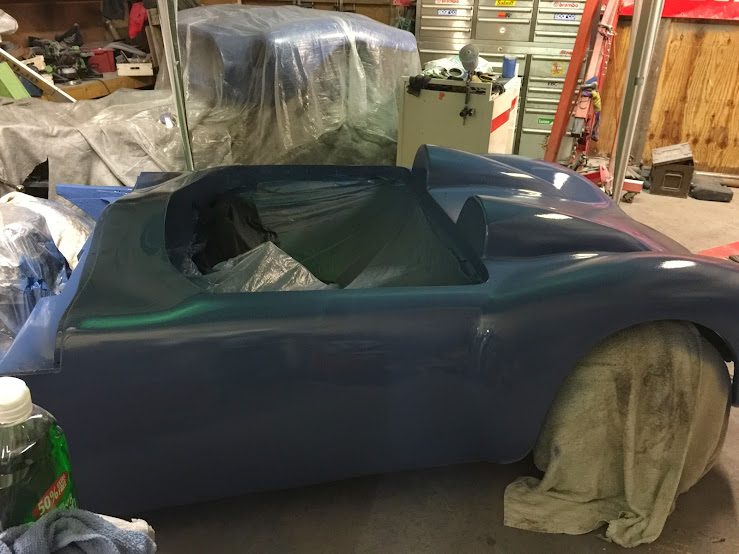
Apologies in advance for the crappy pics. 1st coat is on the tub! I can see a couple of areas that need attention before going to coat 2 but will leave that until tomorrow night so the paint has time to go off properly as its very cold here at the moment.


TTFN
Mac
24 Nov 2014, 7:42pm
Fast work Mac it doesn't take you long and it looks great one colour and all.

Is that the legs of a gazebo i can see in the pictures, make shift spray booth?
24 Nov 2014, 7:44pm
Looking good. I like that nice, smooth upper bulkhead, it's one area I wish I'd put more effort into. Looking forward to seeing it all reassembled after spraying now. :)
24 Nov 2014, 9:06pm
Swifty: I had forgotten that I had already etched, spray filled and flatted the tub ( senior moment) so it just needed a good clean and a scuff over to clean off any overspray, plus my mate Dave turned up to lend a hand for a couple of hours which made a big difference. It is a gazebo but it's not a spray booth it's just to keep the crud falling from the roof onto the paint. The workshop is circa WWII so not exactly modern or super clean.

Towed: thanks for the comment, ITS amazing what a difference having it all in one colour makes! I like the smooth bulkhead, it will be much prettier once I start hanging shiny stuff off it :-)

TTFN
Mac
25 Nov 2014, 11:29am
Mac - All the effort you put into sorting out your body shell really paid off, as is looks really good in colour. :cool:

Good luck, Paul. :)
25 Nov 2014, 6:05pm
So I think there may be a pattern forming here..... 1st dose of paint reveals lots of small defects.
Not really a problem as I am not a professional body man and it has always been my least favourite part of being a petrol head, so it has not come as a big surprise. What has been a pleasant surprise is that none of the defects that showed up in both the bonnet or the tub needed anything more than a scrape of stopper.


TTFN
Mac
25 Nov 2014, 6:48pm
So an hours or so cleaning etc and coat 2 is down


TTFN
Mac
25 Nov 2014, 6:49pm
Going to leave it at that for tonight as wifey has forgotten who I am and I want to let this coat go of before laying down coats 3 and 4 hopefully tomorrow.

TTFN
Mac
30 Nov 2014, 4:48pm
Well the extra coats didn't happen as I found loads of moisture blisters, a consequence of water in the air lines caused, I think, by recent cold temps followed by me turning the oil fired heater up high, end result, condensation in the air lines. So plan B.
After purging the air system and fitting an extra water trap to the spray gun I laid down 2 good thick coats to the bulkhead area. Very orange peely but I'm not bothered as:
A. Hopefully the amount of shiny stuff will draw the eye.
B: I would rather have some thick paint coverage in the bulkhead area to help resisting stone chips etc.

So now I can concentrate on getting the engine bay finished and then just mask it off at the seal area to paint the car when the mood takes me. Hopefully this will also accelerate getting an MOT! Oh and its a major moral booster fitting stuff up!

Brake master cylinders and brake fluid reservoirs fitted


Note that I am now changing the description of the paint finish in the engine bay from orange peel to "stonechip" after seeing this pic!


5mm Ali cross member fitted for the bottom of the radiator, note that to fit the Civic racing rad I had to ermmmmm clearance the returns of the chassis rail.


The clearancing can be seen clearer here, it involved a couple of slits to the flange and then some gentle persuasion with a specialist clearancing tool (Hammer)


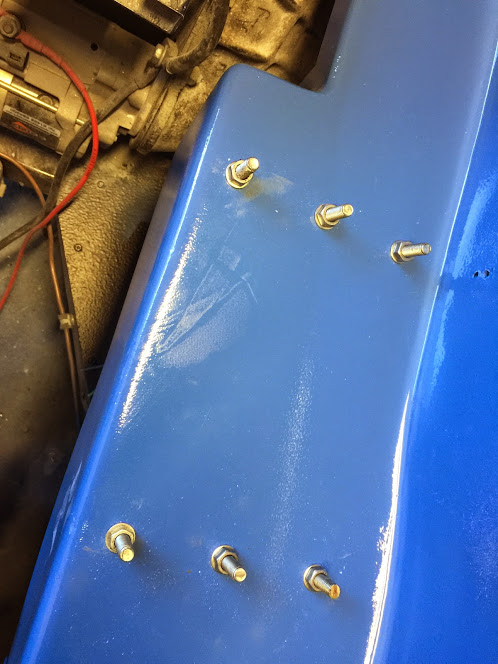
Someone who shall remain nameless (Dave) doesn't know the difference between touch dry and lean on it with your bare hands dry as can be seen by the paw print here! Luckily its under the battery so meh...

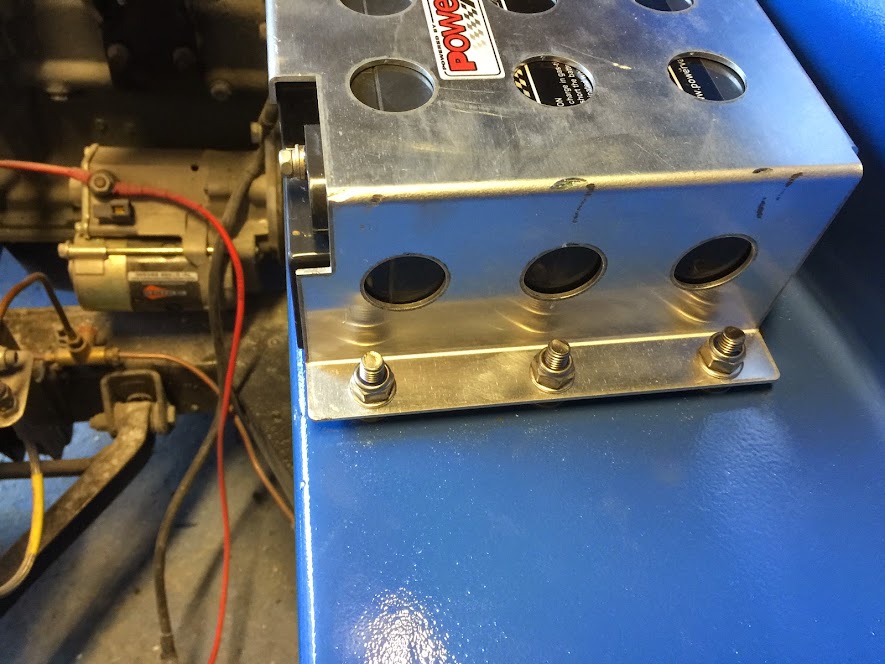
Didn't want the hassle of removing nuts and bolts to change the battery so have fitted the bolts from underneath with stainless washers and plain nuts and some super Loctite.


Obviously this now means that the battery holder will sit too high so just space the battery up using some rubber sheet.


6 stainless nylocks later and the battery is permanently fitted but can be removed in about 2 minutes without having to gain access to the underneath of the scuttle.


Also painted the radiator cross member and started fitting the first of 2 fake milspec bulkhead connectors for the front wiring.

More tomorrow

TTFN

Mac
30 Nov 2014, 7:37pm
Mac Now starts the exciting bits fitting all the shinny stuff, its a shame about the water contamination but it's something that can be fixed, good luck.

I've started to cut out the ally sheet for the floor and the more i look at the pedal positions the more i am thinking of fitting something similar to the floor mounted pedals you have opted for, did you opt for these due to the limited leg room/pedal push movement in relation to the steering wheel?

Great work by the way and the battery box looks the business.
30 Nov 2014, 7:44pm
Swifty,
I went for the floor mounted pedals for a few reasons
A. It allowed me to chop back the drivers side bulkhead an inch as my tyre and wheel combo was too close for comfort
B. I wanted a smooth look to the bullhead
C. I had doubts about clearances between the master cylinders and the back of the bulkhead.
D. I have always had floor mounted pedals in my "built" cars and like the action.
E. Using twin master cylinders and a balance bar will allow me to dial in the front to rear brake balance.

I went for a set from a new ebay supplier and although they were "ok" if I were to have the decision to remake would go with a set from Optimal Balance Products (OBP) whose products I have used from the early days. The only reason I didn't go with an OBP set this time was that I thought I was going to have to cut and shut them, turns out I didnt.
HTH

Mac
1 Dec 2014, 9:02am
Mac - Paint and shiny things. :cool:

It must be a good sign if you are starting to think about an MOT.

Good luck, Paul. :)
1 Dec 2014, 1:27pm
First fake mil spec connector done, this ones for lighting, the second one will be for engine related connections.


And a shot of the painted radiator cross member


TTFN
Mac
1 Dec 2014, 3:27pm
Nice touch, will be duly copied on my next project. :)
1 Dec 2014, 4:04pm
Thanks Towed, you can pick them up from [url]www.triggerwheels.com[/url] for about £10 depending on how many pins you want.

TTFN
Mac
2 Dec 2014, 8:29pm
not much to see today as I forgot to take pics! did just get this one as I was locking up.


The number plate lamps were found in my recent workshop clearance haul, genuine chrome Lucas and brand new :-) I have one left that I may use on the dash for a map light?

The good news is I have just about finished the steering. Pics tomorrow. Other good news is that the last of my required brake parts have also arrived so with a bit of luck and a fair wind I just may have it steering and braking by this time tomorrow....

TTFN
Mac
3 Dec 2014, 11:30am
Couple of extra shots of the number plate lights:


Just starting on the final piece of the steering setup so pics in a bit.

TTFN
Mac
3 Dec 2014, 11:46am
Nice work Mac, its a smashing colour!

Like you say, it takes a coat of shiny paint to hallmark the missed bits!

And, like Towed, I am also looking forward to seeing all the shiny bits on it too.
3 Dec 2014, 12:25pm
Viatron wrote:
Thanks Towed, you can pick them up from [url]www.triggerwheels.com[/url] for about £10 depending on how many pins you want.

TTFN
Mac


Interesting web site, Mac. I've read the spots off it now, but I'm still struggling to understand why you can't just buy a damaged Ford Puma/MGF/Maserati V8 and swap the whole engine complete with its original ECU/injectors/management system. into a project car and have it fire up and produce its advertised 123/143/475bhp on first press of the starter.

Can anyone enlighten me?
3 Dec 2014, 1:21pm
Mac - I like the back of your car's "uncluttered" look. :cool:
3 Dec 2014, 1:25pm
Towed, you didn't need to read the whole site!! up all night with nothing to do?

The actual fake mil spec connectors are here:
http://trigger-wheels.com/store/contents/en-uk/d10.html#p179

As to the aftermarket vs oe ecu debate well some people want more out of the engine than the standard ecu will allow, some ecu's are a pain in the arse to transplant without all the additional security and comfort module, and in my case im running a non standard fuelling setup with a hotter cam , slightly bigger valves and slightly higher compression, to get a dizzy to handle that lot could probably be done but it will be much easier using the Nodiz I have fitted as it can be pretty much infinitely adjusted timing wise. Oh and if your really bored on shift tonight [url]www.nodiz.co.uk[/url] :-)

TTFN
Mac
3 Dec 2014, 7:22pm
Thanks Mac, not at work at the mo but will be up half the night (again) with toothache so will be glad of something to read. :(
3 Dec 2014, 7:44pm
Today was a bit like the Curates egg, good in parts....

Cracked on with the steering only to find that when I had welded on the spline to the end of the shortened steering shaft the heat had tweaked it a bit and it was running about 1mm out of true, doesn't sound much but it was very noticeable in that the bearing kept binding up. Nothing for it but to fix it. Cut the old spline off , luckily I had a spare. to make sure it was as true as possible I cam up with this:
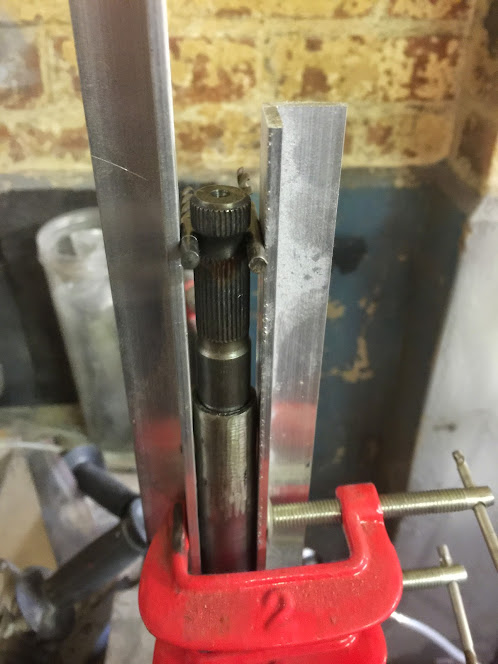

the ali angle is about 4mm thick so good and hefty, also checked it with a steel ruler and it was dead straight. Just kept trying drill bits until I found a matching pair that just slid in nicely, tacked it, repeated at 90 degrees tacked again. Then welded it in opposing spots until I had gone all the way round. Will pick up some 3mm roll pins in the am as with all steering stuff I like to have a a mechanical fastening as well as a weld, not that I don't trust my welding but better safe than sorry.

Taking a step backwards to before this hiccup in events I made the bearing carrier for the front bulkhead. I needed the bearing to actually be 10mm away from the bulhead for everything to go to plan so a quick visit last night on the way home to a mate who run an Ali and Stainless fabrication business bagged me a piece of Ali 5mm plate from the scrap bin for the sum total of a kind word!

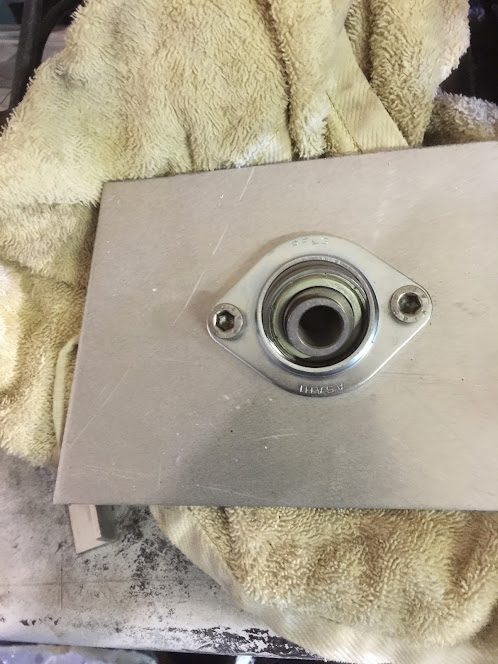


With steering shaft now straight and the bearing mount finished I got it all in and am pleased to report that I now have steering!
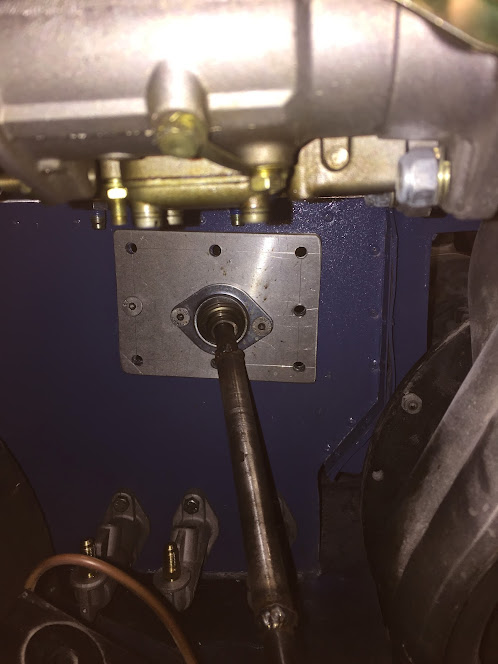

The welding at the top of the shaft is a bit ropey but now all the lengths are set ill take it all apart in the morning anyway to fit the roll pins and will grind it back and re-weld, at the same time ill countersink the holes in the bearing carrier.

Got home and some good stuff has arrived, the last of the bulkhead fitted items:
Good heavy electro polished stainless mesh for the grill from here not cheap at about £75 a sheet delivered but I needed a full sheet to do it in one piece. I'm probably going to have some good sized offcuts if anyone is interested?
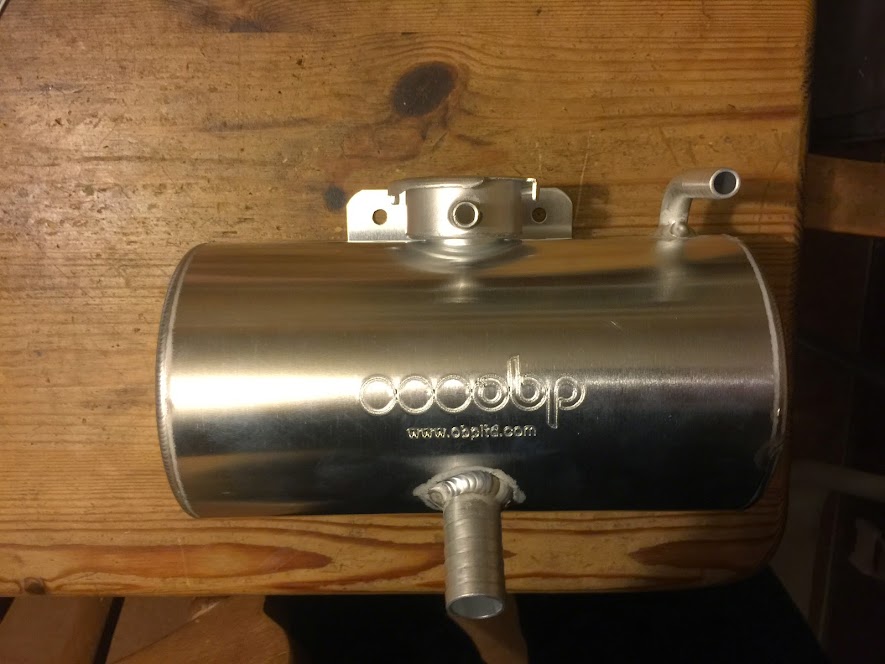
Also my new header tank, decided the vertical one just didn't quite fit as I wanted so have swapped to the horizontal model which will fill the centre of the bulkhead nicely.


Also the filter regulator for the fuel system. I'm absolutely sure that I already have one but after turning the unit upside down 3 times I couldn't find it and cant wait until it turns up so there may be a bargain to be had when the original makes an appearance!


To be honest I have run Webers before without a filter regulator using just an inline plastic filter (as long as your using a carb specific pump) but couldn't find anywhere to put a plastic filter and it just didn't seem right and the filter king looks period correct, or that's how I sold myself the idea anyway!
So brakes tomorrow!

TTFN
Mac
4 Dec 2014, 8:31am
Just realized I forgot to post a pic of the mesh:

4 Dec 2014, 8:49am
That looks like the same mesh I've got for my side vents, it's very nice. Although i wish I'd waited until i heard you mention "offcuts"! :)

I'm glad you got your steering sorted as i was dreading welding mine so i went with a slightly different approach and this reminds me that i need to post some pics of that at some point :)

keep up the good work :)