MadaboutKitcars

This is a read-only archive of the old Madabout Kitcars forum. New posts and replies are no longer possible, but every thread is still here to browse and read.

Another Cordite Is Born ...

17 Dec 2013, 4:34pm
Visible Progress...
After a weather wash out yesterday, I made an early start today.
Thankfully mixing and applying filler doesn't disturb the peace.

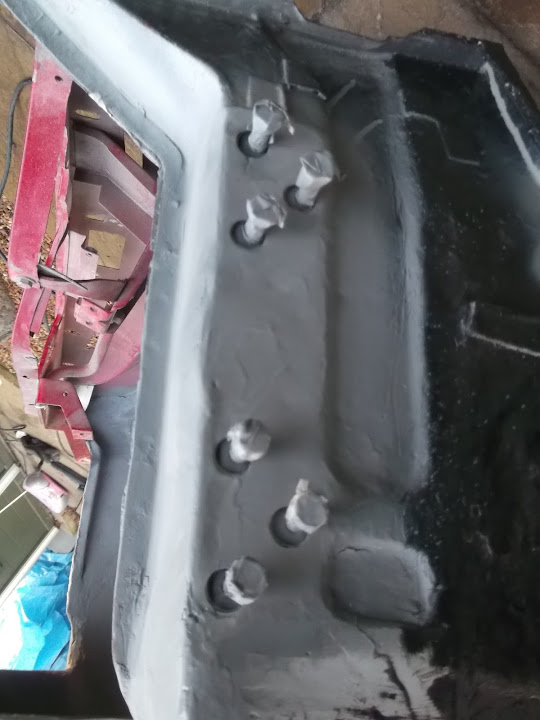
I put some tape around the threads of the Spitfire door hinge bolts & screwed them in.


This allowed me to apply filler without clogging up the mounting plate threads.


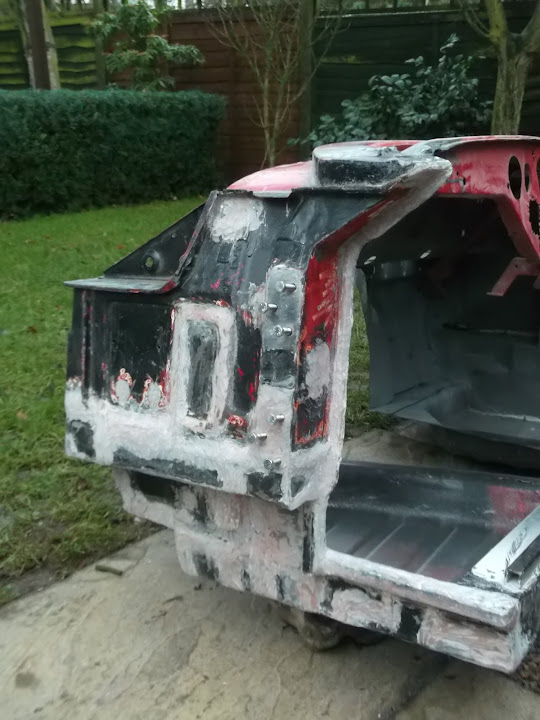
Eventually all the required areas on the outside of the bulkhead were covered in filler.


I even managed to make a start on the inside of the bulkhead, but there is still more to do there.


However, given the weather forecast, I wanted to get some primer on the outside surfaces ASAP.
So after creating yet another mini snow storm of filler dust the outside edges were roughly sanded and cleaned up.


Again, the bolts went back into the mounting plate with some tape wrapped around them.


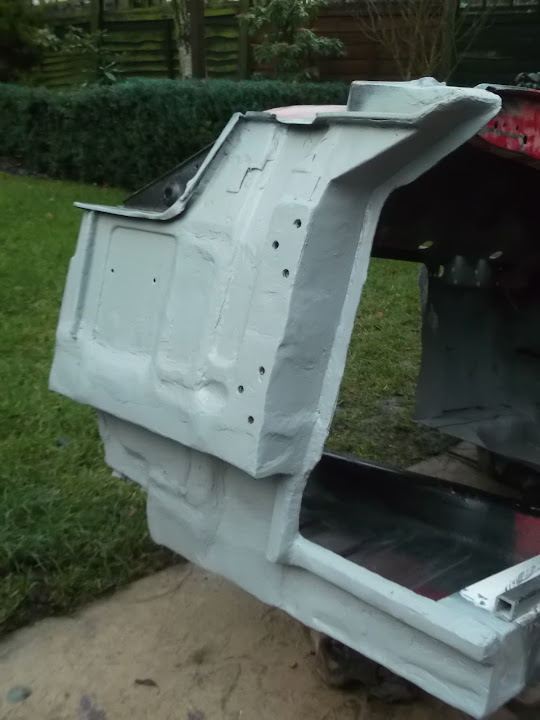
After a coat of etch primer, this is what the passenger side looks like now.


It was always going to be a bit bumpy in places, but as I am brushing the paint on over the top it isn't really a problem.

But there is certainly something about seeing it all in one colour that gives you a real boost. :cool:

Until next time, take care, Paul. :)
17 Dec 2013, 4:49pm
It's all looking good and solid - like a 50 year-old race car that has been into the hay bales a few times in its life - perfect.
17 Dec 2013, 5:58pm
Excellent progress Paul, that's a prime candidate for the bed liner I used on the inside of mine, chuck it on a trailer and bring it up and ill shoot a couple of coats, got a litre left over :-)
18 Dec 2013, 9:14am
Looking very good Paul,
With the bulkhead out of the way you will soon be filling all orifices with the white dust (No, Not like Nigella :biggrin:)
I can vouch for the truck bed liner, whether sprayed or brushed, it's great stuff and it seems Mythbusters agree too! http://www.youtube.com/watch?v=3JOXrpCLCJg
18 Dec 2013, 4:02pm
Oxford - Cheers, I think the whole battered race car look will work well for me. :icon_wink:
Mind you, I think my 2nd hand body shell may have hit a few things in its time.
Given the rust it might have even have spend a little time at the bottom of a lake too. :rolleyes:

Is there any progress to report on your own build? How is the framework going?

Mac - Thanks for the offer, unfortunately I don't have a trailer. :icon_sad:
Although there is still quite a bit of work to do before I need to give it a final protective coat.

Andy - Cheers, I really hope that when the bulkhead is finished I can get back to building the car.

- - - - - - - - - - - - - - - - - - - - - - - - - - - - - - -

More Filler...
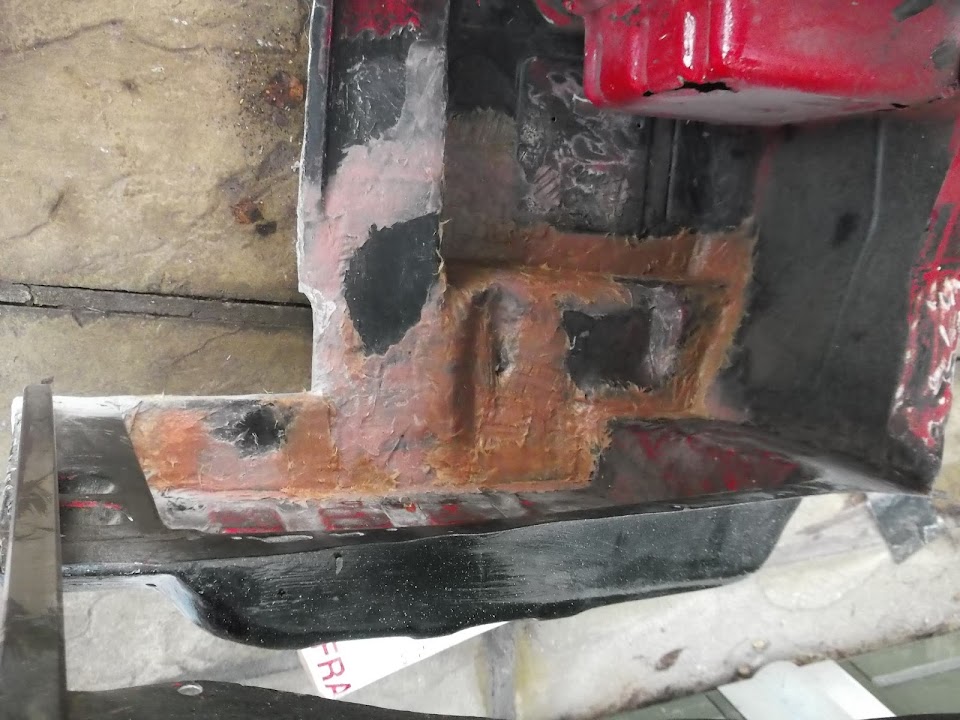
I managed to finish off applying the filler to the inside of the bulkhead.
In addition to covering up my welding, I added extra to help me get a better interior shape.


With rain forecast and the wind already picking up, I decided to call it a day and catch up with other domestic chores.
Once the filler is completely set I can start the sanding and hopefully get a coat of etch primer over the top too.
At this point I hope it will be easier to see the final contours, as some of the photos inside the bulkhead aren't great.

Some initial dashboard thoughts...
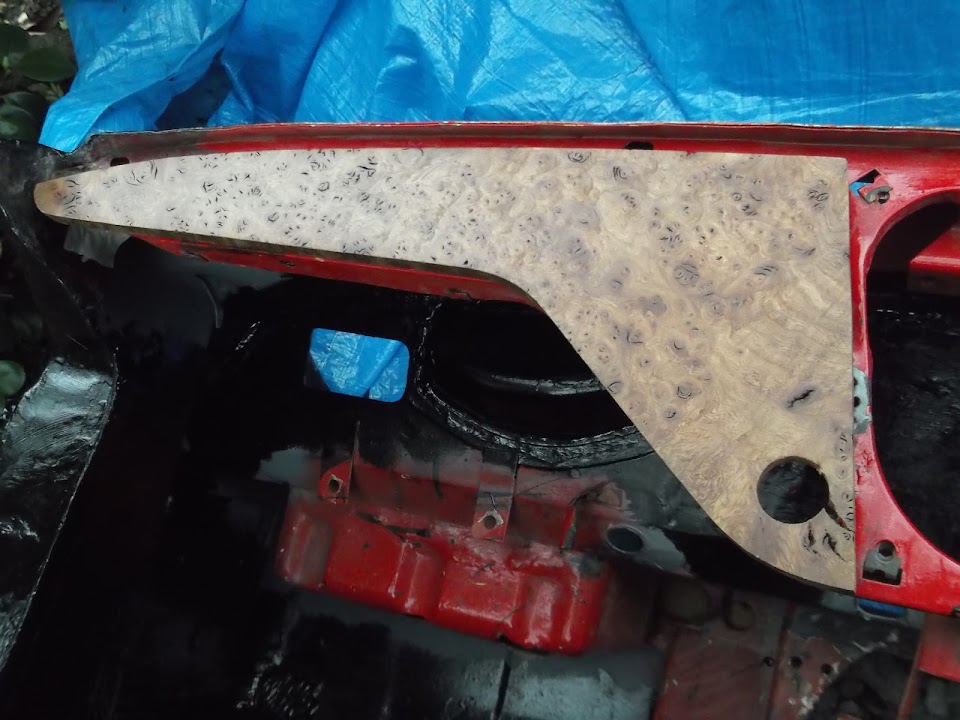
Just before I pulled the tarpaulin over the bulkhead, I quickly test fitted the left hand dash board panel again.


Unfortunately the area where one of the original mounting brackets is meant to be secured has been hacked away. :rolleyes:


So I will add repairing this area to my long list of things to do.

Which actually lead me to a bit of beard scratching about strengthening the whole of the dash area in general.

I don't need the windscreen de-misting slits in the top of dash and closing them in would help reduce the current flex.
I could then make a repair panel with a 90 degree bend to tie in the face of the dash with the top of the dash.

But, one step at a time and I will spend some more time chewing this over another day.

Cheers, Paul. :)
19 Dec 2013, 5:04pm
Close, but no cigar...
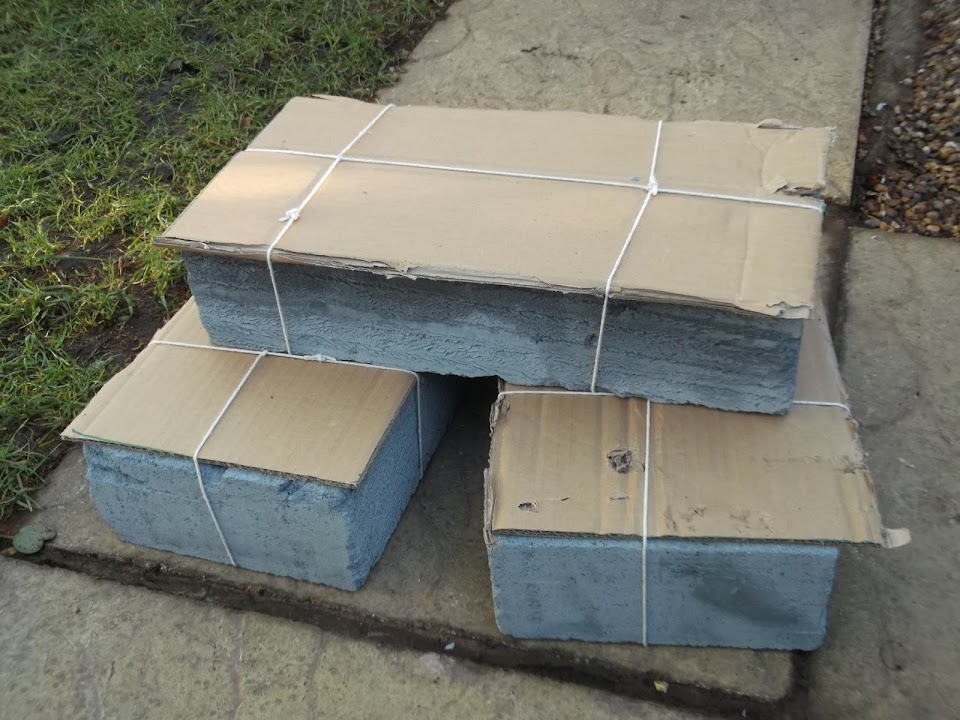
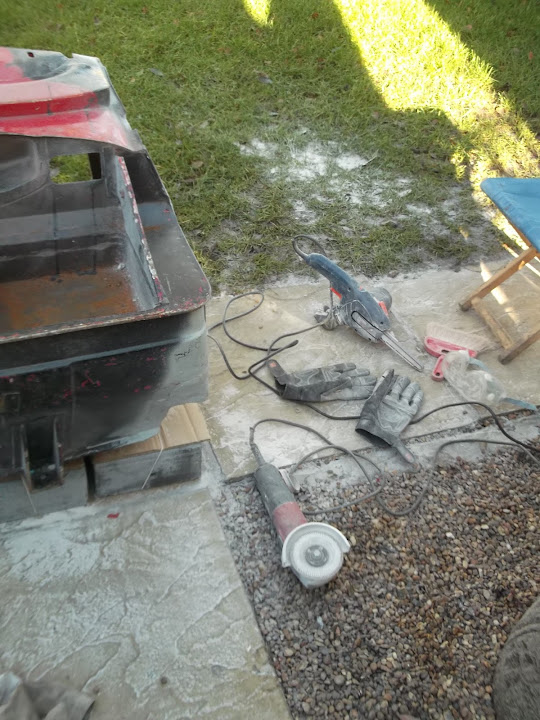
I started the day "padding" some breeze blocks...


These should allow me to work on the bulkhead without scraping the paint, like so...


After making another big mess on my lawn, the filler inside the bulkhead was ready to go.


I may have to re-turf a whole section of the grass at this end of the garden due to working on the bulkhead. :rolleyes:

Still at least I had some basic contours inside the bulkhead...


Unfortunately, I've run out of etch primer & my next batch is still in the post. :icon_sad:
So I just gave any bare metal a final coat of Kurust for now.


I could have nipped out to Halfords to get some, but I just had too many other things to do.

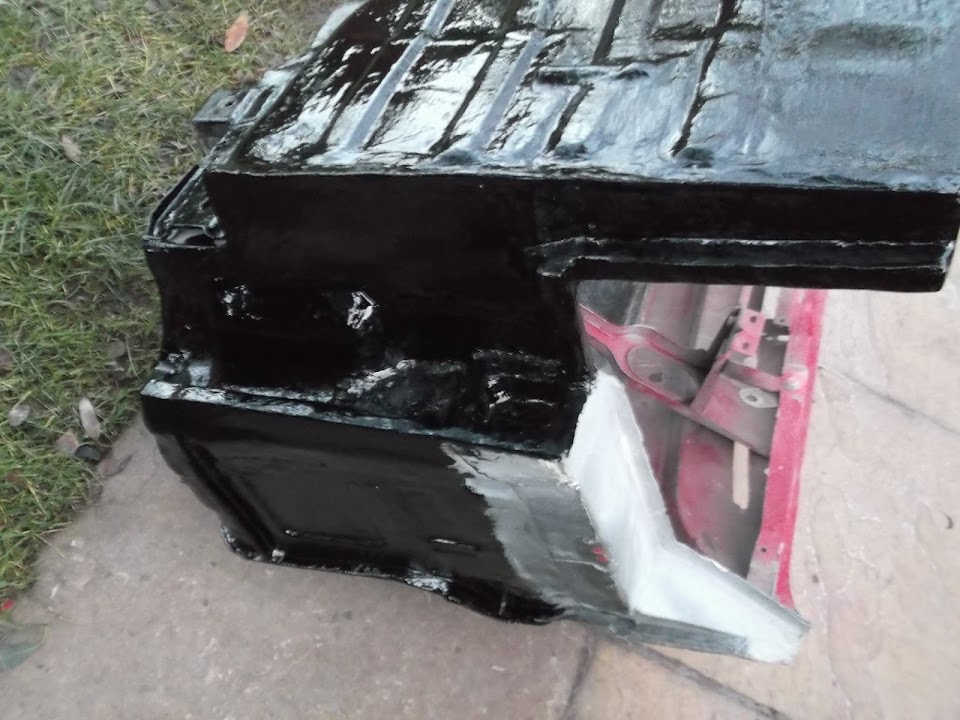
However, as it was such a nice day, I couldn't resist putting a first coat of black on the outside of the bulkhead.


I'm leaving a section of the driver's side for now until I've welded up the door hinge mounting plates.

After getting a few domestic chores under my belt, the sides were dry enough for me to flip the bulkhead over & paint some more...


I know there is still quite a bit of work to do on the bulkhead, but the black paint does make such a big difference. :cool:

Until next time, take care, Paul. :)

P.S.
Winter Solstice
Thankfully in just a few days time, the days will start getting brighter again. :cool:

Whilst I am a long way from Stonehenge, the Wembley arch does the same job.
Only at this time of the year does the sun move across the sky & dip under the arch.
( Well it does, when you look out of my bedroom window. )

8.20am this morning...

20 Dec 2013, 3:25pm
Watching Paint Dry...
I cleaned up the area around the Spitfire door hinge mounting plates on the driver's side.
Initially I was planning to weld them solid, but the metal is in much better condition than the passenger side.
So I decided to save myself a job and just gave the area a coat of etch primer (which arrived today).


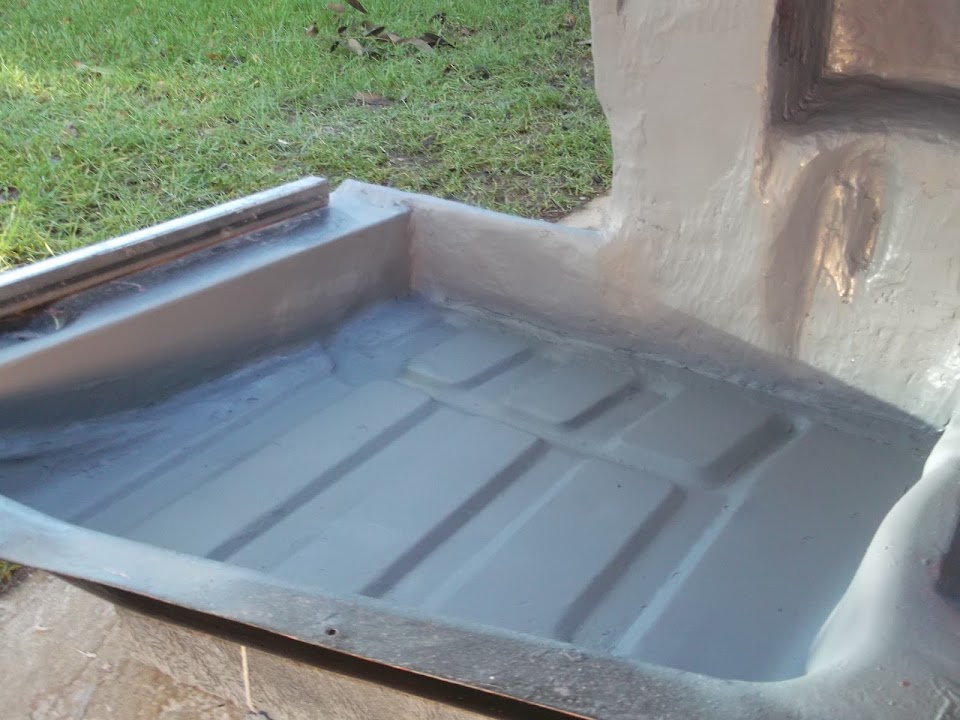
But the main thing I wanted to use the primer on was the inside of the passenger bulkhead area.


Whilst it is clearly a very "lumpy" finish, it is certainly in a much better condition now than when I started...


Now I just need to wait 24 hours before I start putting the seam sealer stuff on & then a first coat of black paint.

Although, given the weather forecast, it may be a few days before it is dry enough to start painting. :rolleyes:
Which may mean that it will be done after Christmas.
As I will need to down tool & pack everything away in the run up to the big day itself.

Cheers, Paul. :)
20 Dec 2013, 4:10pm
i paul
all i can say is epic...............try the spray on seam sealer, you need a different gun but well worth it ,the finish will be great.
good luck ikon merry christmas...........i have just got my miglia, so scrapped my herald baulkhead.................i had a smmio body aswell but deciec not to build it went with the miglia,
ikon
20 Dec 2013, 4:44pm
Paul you make me laugh!
My lawn is the same! Don't worry, by the time you come to re-turf it,
it will have repaired itself!
Pity our rusty cars don't have the same talent!
21 Dec 2013, 5:34pm
Ikon246 - Cheers Clive and a Merry Christmas to you too.
I'm looking forward to seeing a few active Miglia build threads in 2014. :cool:

Scottie - Well I'll be very happy if this section of lawn repairs itself. :icon_wink:


See below for the answer to the stopping for Christmas question on your build thread...

- - - - - - - - - - - - - - - - - - - - - - - - - - - - - - -

Christmas Countdown...
Today was supposed to be the penultimate day of working on the car before Christmas.
I spend the morning running around doing some traditional last minute Christmas chores in the rain.
The weather forecast promised it would dry up in the afternoon, so my plan was to get some paint on then.

Once the rain had stopped for a bit, I took my chance I headed out.
I had just taken the tarpaulin off and got the paint & seam sealer out when it started raining again. :rant:

So I used my time to tidy up the Summer House, which was on my Christmas chores list anyway.
As I've been storing some of the Christmas Day "provisions" there too (drink, crackers, etc.).
Everything is now tucked away nicely, with just the paint to hand if I get a chance tomorrow.


One thing I did when I was tidying up was take a photo of my metal working tools.
I've always hoped that this build thread would encourage other novices to "give it a go".
Especially as none of the current kits will be half as much work as this one. :rolleyes:

Not only is working with metal new to me, this is all I've used to make all my repair panels.


So if I can do this sort of work, anyone can.

Until tomorrow, when I will be closing down for Christmas, take care, Paul. :)

PS
I forgot to mention that I was planning to take my mate's welder in to be repaired.
So I thought I'd just remind myself what wasn't working so I could explain it to the shop.
But when I tested it briefly, it was back working properly again. :cool:
I will give it a proper test after Christmas and then I can give it back & keep my new one.
However, I will clean up the metal case, treat the rust and put some new paint on it first.
22 Dec 2013, 1:52pm
Winding Down...
The weather forecast suggested that this morning would be the only dry spell of the day, so I took a chance.
I brushed some seam sealer along the "factory" joins that I had previously cleaned up, treated & primed.

This is in the centre of the dash board where the old heater used to be (photos taken over a number of days).


Sorry, just noticed today's photo is "upside down" compared to the previous two. :rolleyes:

Plus several other seams on both the driver and passenger sides of the bulkhead.


If I have understood things correctly, the fibre glass filler will do the same job as the sealer where it covers seams/joins on the inside.
Then when I put a final coat of tetroseal / bed liner / etc. over the outside surfaces I will have the water tight finish I need.

As always, please correct me if I have got this wrong.

But for now, I switched to putting some black paint on, avoiding the areas where the seam sealer was drying.
Thankfully by the time I'd finished painting those areas, the seam sealer was ready to be painted over too.

I just needed to use a Stanley knife to help me carefully remove the masking tape.


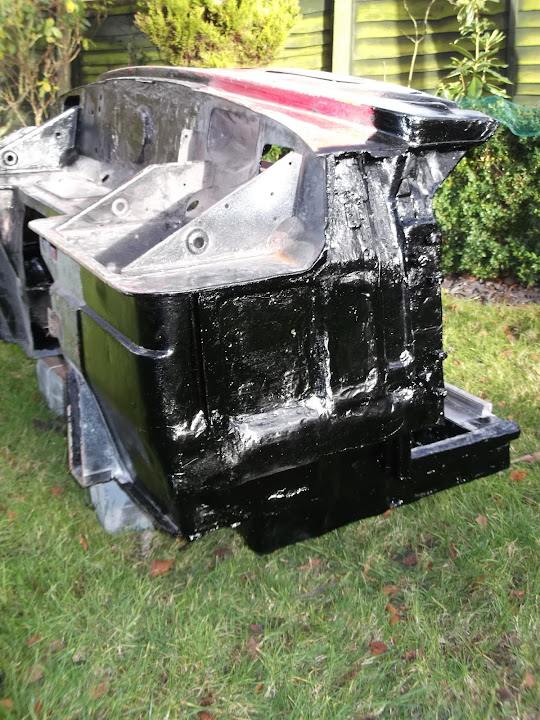
So after the final bit of painting, I can now proudly present the bulkhead as it looks today...

Driver's Side:


Passenger Side:


Overall:


I know I have been working on this bulkhead for almost two months now, but I'm happy to have finally reached this stage. :cool:

There is still a bit of work to do, but it will be on a much smaller scale compared to the previous epic repairs.
However, all that can wait a few days as I'm off in a few minutes to pull the tarpaulin over the bulkhead.
Then after a quick final tidy up, that is me done with the car and into full family Christmas mode.

[COLOR="Red"][SIZE="3"]Merry Christmas![/SIZE][/COLOR]
I'd like to thank everyone who has taken the time to reply to this build thread during the year.
All your feedback, suggestions, encouragement, etc. really helps me to keep plugging away at this project.

Take care, Paul. :)
22 Dec 2013, 2:49pm
Well at least with the back broken you can relax over christmas in the knowledge that the worst is over! Well done for keeping with it, its this kind of project that usually ends up on eBay as an abandoned project, your perseverance does you credit. Have a good one.
2 Jan 2014, 3:49pm
Mac - Cheers, I do take pride in what I have achieved so far.
But deep down, I know I still have a lot of work to do to get this finished.

- - - - - - - - - - - - - - - - - - - - - - - - - - - - - - -

[COLOR="Blue"][SIZE="3"]Happy New Year![/SIZE][/COLOR]

Unfortunately, I haven't been able to line up my free time with the limited dry weather available.
So no real progress has been made since before Christmas.

I did bring the box containing the micro heater & associated parts into the house the other day.
This allowed me to start measuring how much space I will need for all the ducting, etc.

My initial plan was to tuck everything behind the dash, but that might be a little too tight.
I checked back on Mr T's build and he has his vents below the dash, either side of his radio.

So I will do some proper mocking up next time I get to play outside.
As sorting out the dash / heater are the next things on my "To Do" list.

Until then, take care, Paul. :)

PS
I am conscious there is nothing interesting to read on my build thread.
So here are some links to some other inspiring build threads:

A rusty 1937 Zephyr brought back to life with some serious metal working skills.
( I also love the fact the builder's wife helps and can do lead repair work!! )
http://www.jalopyjournal.com/forum/showthread.php?t=720735

When a 1948 Chevy pick up body is joined to a Mazda rolling chassis:
( An amazing bit of skill, but the limited budget makes it stunning. )
http://www.rodsnsods.co.uk/forum/garage/48-chevy-pickup-marries-mazda-b2200-45080

A chopped & lowered 1949 Mercury, as mean as they come:
http://www.rodsnsods.co.uk/forum/garage/49-mercury-build-pics-8642

I'd never never of a "Tot Rod" until I saw this:
http://www.rodsnsods.co.uk/forum/garage/junior-tot-rod-model-coupe-22931

Amazing finish on a car painted outside a section at a time:
( Although I will not be copying his choice of interior! )
http://www.rodsnsods.co.uk/forum/showroom/my-49-chevy-101721
2 Jan 2014, 3:56pm
Cheers for the links Paul, just what i needed for some light reading whilst enjoying my after dinner coffee at the Colombo Cricket Club Cafe :-)
2 Jan 2014, 5:11pm
The Zephyr build is amazing. Nothing is beyond saving. If you don't have time to look through the whole thread, just got to Page 1 and then Page 20. Not a single new panel purchased - all fabrication. Inspiring.....and it took just over a year.
2 Jan 2014, 7:34pm
Bulkhead


Your bulkhead looks amazing Paul, well done! Two months, you shame me!
I was peed off after two days!

Happy New Year to you, as someone once said " If you have a Merry Christmas, it is sometimes difficult to have a prosperous new year" :-)
4 Jan 2014, 9:34pm
Mac - Hope you enjoyed those build threads.
I guess the cricket club isn't being battered by the wind, rain, hail, thunder & lightening. :icon_wink:

Oxford - Glad you liked the Zephyr build, I do like seeing craftsmen at work.
So obviously I'm keen to see how you are getting on with your build.

Scottie - Following on from the comment I made on your thread...
I am really pleased with how well the bulkhead has turned out, given my lack of experience.
But it does seem like a lot of time and effort for something that is not really kit building, if you know what I mean.

- - - - - - - - - - - - - - - - - - - - - - - - - - - - - - -

Still nothing to see here...
I am just going to have to wait for the weather to improve before I can get back to working on the bulkhead.
The garden is absolutely water logged at the moment, the worst I've seen it.
Not sure these photos actually do it justice, but you get the idea.


I've had another think about the heater controls.
This was a quick mock up using the original heater control "slot".


However, I am not leaning towards putting these two dials below the original dash.
This photo is from the dismantling of my original donor and the space is where the radio would have been.


This would give me more space behind the dash and allow me to have the vents either side of the switches.
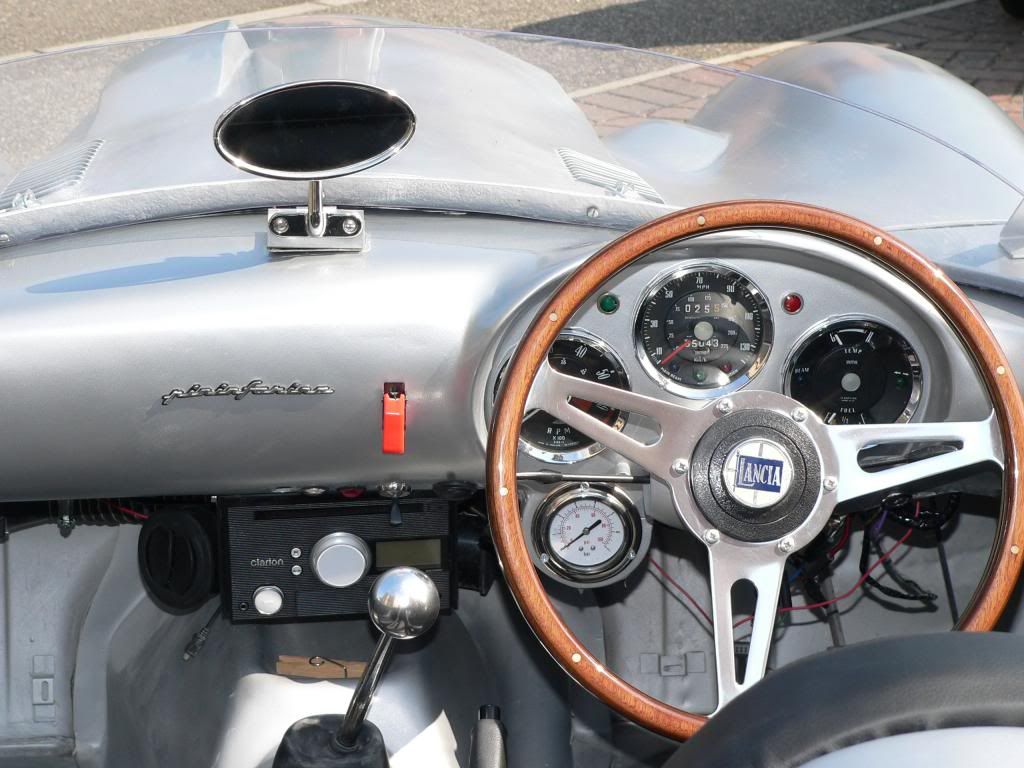
So looking at Mr T's car, my dials would be where his radio is.


But I will have a much better idea when I can mock this up properly.

Until next time, take care, Paul. :)
4 Jan 2014, 9:43pm
I will get round to tidying up the wires under the dash, I will, I will...
4 Jan 2014, 10:06pm
Who are you trying to fool Towed! If it came to a toss up whether to tidy up the wires or go for a drive?????
9 Jan 2014, 5:28pm
Mr T - How hard can it be to wrap some black tape around those wires? :rolleyes:

:icon_wink:

Scottie - OK, fair point, we'll let Mr T off the wiring until his garage is snowed in.
Which at this rate will be any day now. :D

- - - - - - - - - - - - - - - - - - - - - - - - - - - - - - -

Reflective Mood...
This long run of wet weather has prevented me from getting outside to continue work on the bulkhead.
However, it has given me a bit too much time to think about all the work I still have to do on this build.
I also made the mistake of re-reading Mac's guide to the work required to "fix" the original Coridte bodyshell.
So I am going to ignore the bodywork completely for now and just worry about my "moon rover" plans.
As there is more than enough work required to get myself to that position as it is.

But the tragic news that Simon (DonnySoutherner) posted yesterday has put all this into context for me.
Building this kit is just a hobby for me, it is certainly not a matter of life and death.
I've always meant what I said on here about my family coming first.
I dread to thing how my life would be if I was in Simon's position, I am truely gutted for him.

This has confirmed to me that I need to completely forget about the time this build will take to finish.
There will be times when I can get a lot of work done and others when I can't touch it for ages.
If this means it takes another 2 years to finish, so what, this will simply reflect my true priorities.
( Plus the fact I was dumb enough to attempt this without a garage. :rolleyes: )

So let's see if I get a chance to work on the dash/heater at the weekend.

Take care, Paul.
9 Jan 2014, 9:53pm
weather

Thanks for your kind words on my thread Paul.

With things like the dials, I am driven by I suppose, a mixture of poverty and outrage. Outrage that companies want hundreds and hundreds of pounds (that I cannot afford) to complete a task that I can perform myself for nothing, and end up with (virually) the same thing.

I mean, if I wanted an XKSS lighting set, the asking price is £1000.

I used the Spitfire headlights, and modded Moggie rear lights for less than a decent meal would cost.

The weather is getting us all down I'm sure, but it cannot last, everything goes in cycles, and dry periods will return, your grass will grow back too!

My build tent has faired very well considering what the weather has thrown at it.

I made it myself from scrap piping. It all strips down and packs flat as well.

You should get a pair of cheap gazebo's, weld them together and buy a tarp like I did, then really anchor them down well with lots of cordage.
Then you will have a dry area to perform in

Good luck with your build when you get stuck in again.

Scottie
11 Jan 2014, 5:00pm
Scottie - Cheers mate.
My wife doesn't want the "circus tent" I've already got to become a semi-permanent feature.
Thankfully I will be able to put it up in the back garden when I start the fibre glassing work.
I will have to cut the body shell into two parts to accommodate the Spitfire bulkhead.
At which point I will be able to carry the body shell through the house (it's too big "whole".)
This will allow me to sort out the boot, 2nd hump, cockpit & 101 other "fixes" in the gazebo.
Just leaving the final re-joining of the body shell to be done on the front drive.
Although I may be able to go through my neighbours' gardens to get to the street.
Which means I would be able to do all the fibre glass work in the back garden.

- - - - - - - - - - - - - - - - - - - - - - - - - - - - - - -

Micro Heater Mock Up...
I finally got a chance to do some work outside today, so I started playing around to see how the heater might work.

First job was to look at the option of putting the switches below the dash, a much better idea.
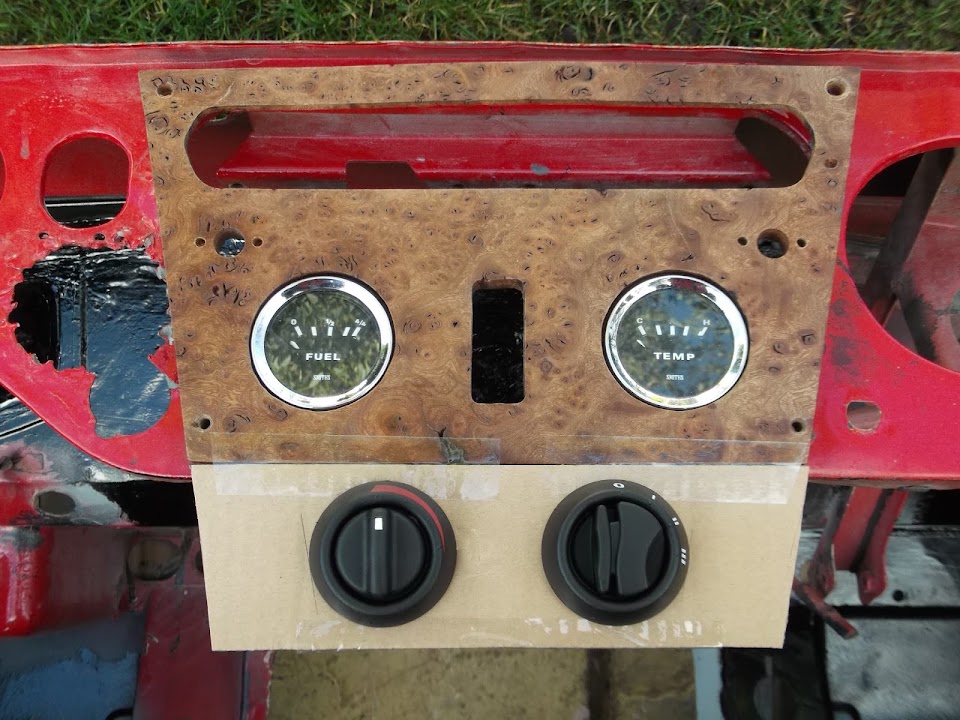


The cardboard would be replaced by metal, which I would paint black to reduce the visual impact.

There is plenty of room below the switches for the gear box cover.


Especially as this cover can not sit flush due to the cross brace I welded on.
Also, there is plenty of room for the gear stick despite what this photo may suggest.


I will be modifying that brace when I come to repairing the bulkhead edges that the cover sits on.
I will also be painting the cover black after I have repaired the small cracks / slips in it.

Quick Question

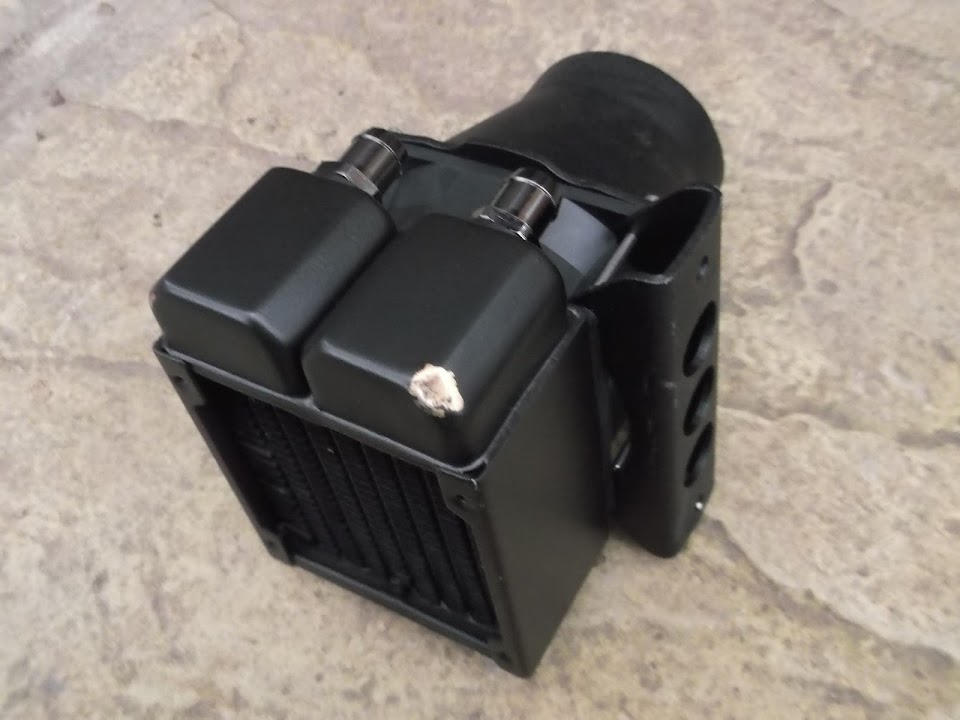
I have this bulkhead connector that also adapts the engine hoses to the heater hoses.


I assume this adaptor should sit higher than the heater hoses to avoid air locks.
Something like this...


Is this the best way to run the heater hoses?

Then I started on the passenger side to see where the heater vent might go.
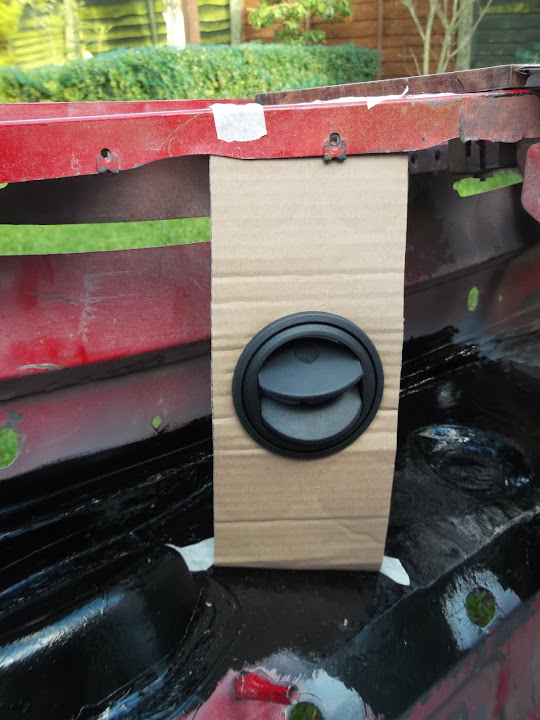


By putting a large section of metal in for the vent, I will also be cross bracing the dash itself.

The vent didn't look too bad from this side, but it was a bit close to the heater on the other side.
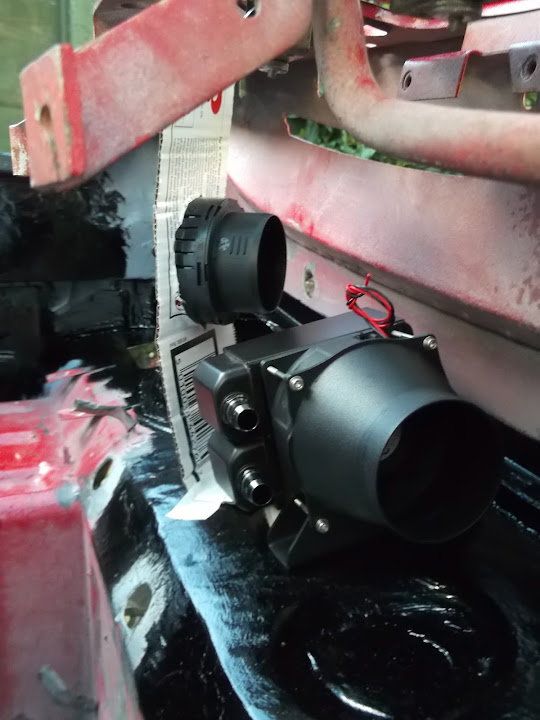


So "Take 2" just moved the vent a bit like so.


Which gives much better clearance for the ducting behind.
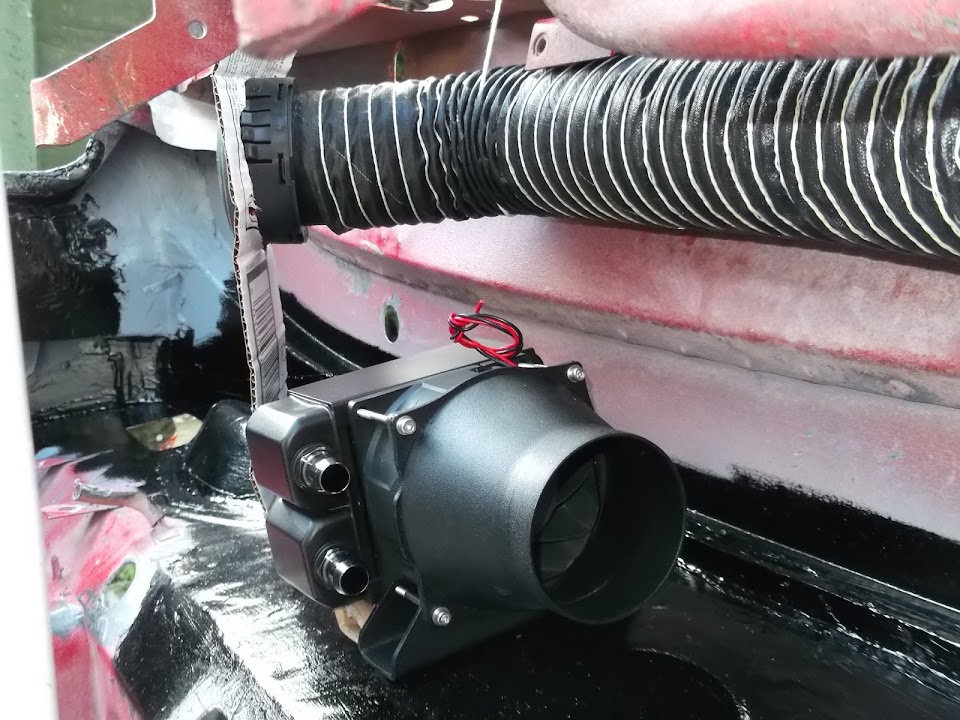


If you ignore the bends in the cardboard, the panel would be flush with the dash.


Initially I was hoping to fit the vent on the driver's side in a similar position.
But after a bit of fiddling around, it was clear there was not a simple way of doing this.
As I didn't want the ducting to get in the way of the speedo, or steering column.

So I switched my attention to the far right hand side to see if that would work.

Thankfully the ducting would fit behind the steering column support.
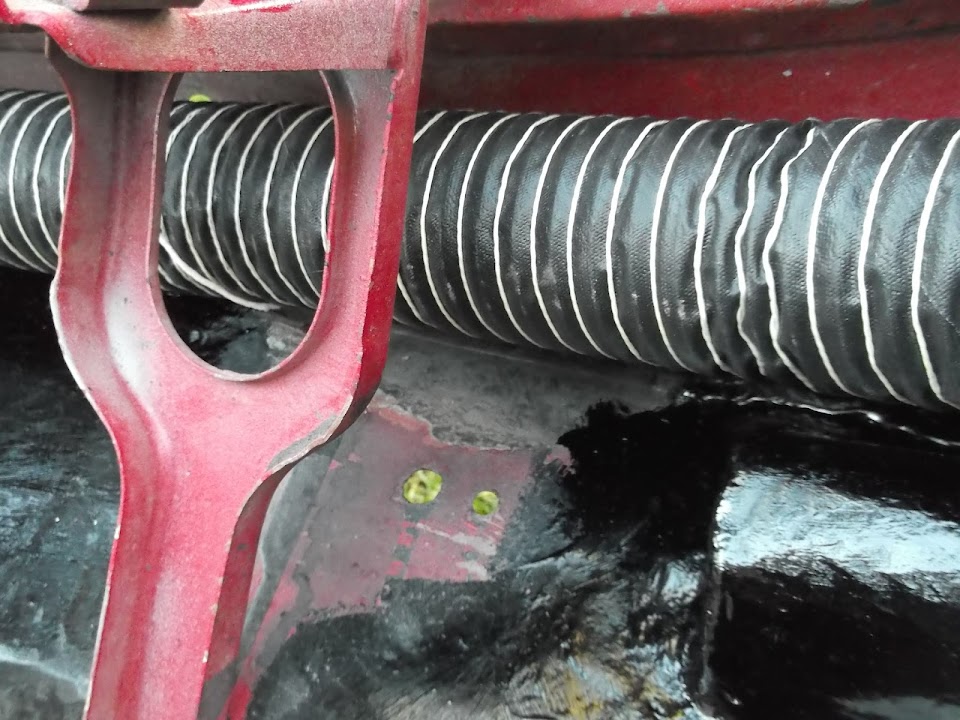


There was also still room for the choke & heater cables to go through the bulkhead.

This was my first attempt at fitting a panel for the vent.


The only problem with this location was I might not have enough ducting.
As I need to fit this "Y" connector to join the two vents to the heater.


Yes, I should have ordered a bit more, but I thought one metre was more than enough.

Anyway, I tried another position just in case (obviously a metal panel wouldn't look as crumpled as the card).


This might be a marginally better position to get heat onto my feet.

The driver's side panel would also "disappear" when the dash was in place.
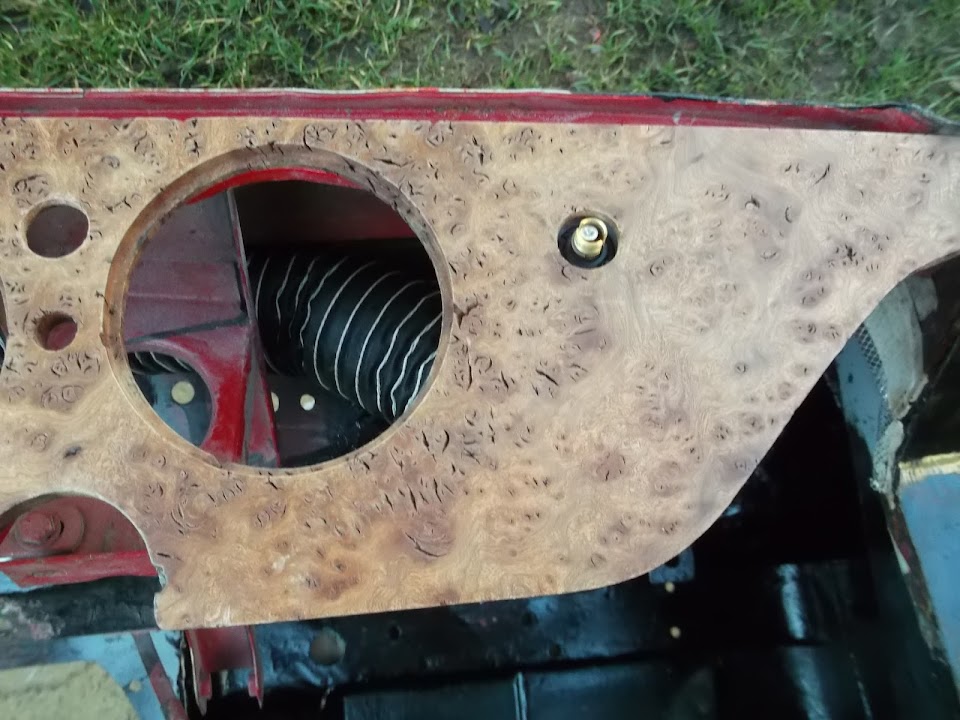


Note: There is still enough room for the rev. counter to fit in above the ducting in this position.

This small change, means there would be more than enough ducting for the job.


Although it was dry, it was actually quite nippy out, so that was it for the day.

Also I'd be happy to hear any feedback on this mock up work before I start welding.

Talking of welding, there has been one change to my working clothes this year...


As I final got fed up with welding splatter burning through my trainers and burning my feet / toes. :rolleyes:

Until next time, take care, Paul.
11 Jan 2014, 7:16pm
Nice work Paul.

I have not thought that far ahead heater and duct wise, but I have cut so much metal out of my dash top that I will have put some sort of bracing back like you to give it support!
12 Jan 2014, 10:27am
I fitted one of these at the highest point in the return hose from the heater back to the block -

http://www.ebay.co.uk/itm/New-in-stock-Caterham-Westfield-kit-car-Bleed-Tee-Coolant-valve-/301063074033?pt=UK_CarsParts_Vehicles_CarParts_SM&hash=item4618c1f0f1

It acts as a point to bleed air out of the heater system, but also allows the heater to be back filled with coolant after filling the whole cooling system, making it much easier to get the heater working in the first place.

Nice work Paul, keep it up :)
12 Jan 2014, 4:02pm
Scottie - I figured it would be easier to do this work while the bulkhead is still "free".
Plus I want to know what are the last few "factory" holes I don't need so I can weld them up.

Mister Towed - I knew you had fitted some sort of bleed value, so I've got two of these...


Looks like your one is a better design.

Does my proposed location of the heater pipes in relation to bulkhead connection look OK to you?

- - - - - - - - - - - - - - - - - - - - - - - - - - - - - - -

After a family pub lunch earlier, I managed to get a bit of time outside on the car.

Micro Heater Dent...
Top Tip - If you are going to mock up your brand new micro heater, tape it to the bulkhead.
That way it wont drop on the ground and get a dent! :icon_evil:


More Mock Up Work
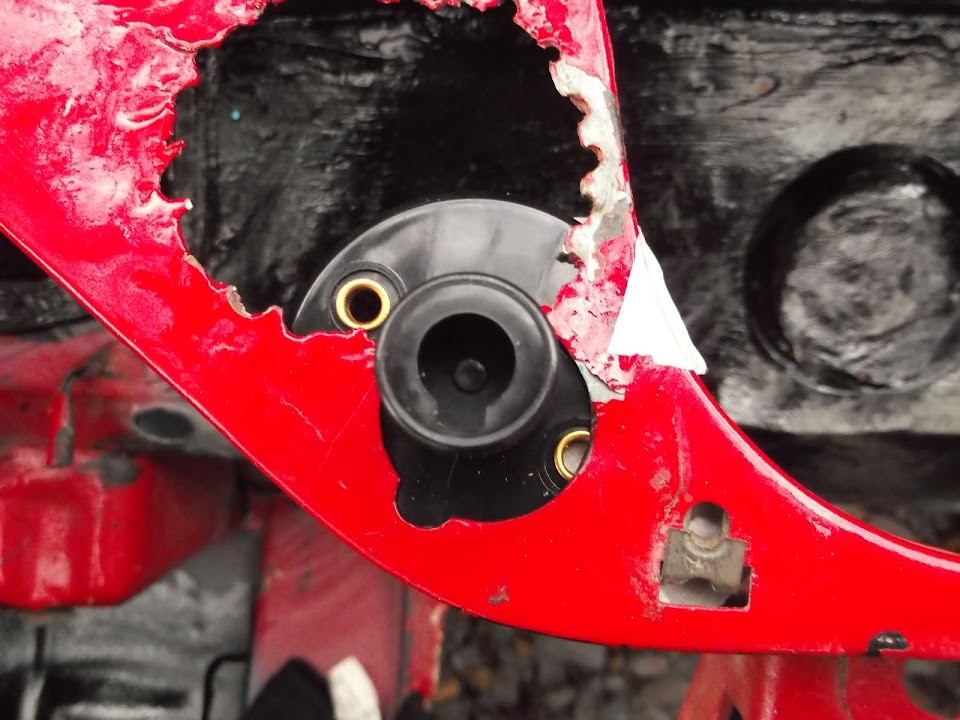
I want to fit this battery kill switch somewhere...


There is an obvious hole in the left hand dash panel where the cigarette lighter used to be.


I have previously mentioned what a mess the metal work is behind this panel.


But on first glance, the switch is a good fit.


Obviously I would need to do some repair work before I could bolt it in place.


My initial thoughts are to secure the switch to the metal work (once repaired).
Then take a bit off the back of the dash panel so it sits flush over the fixings.

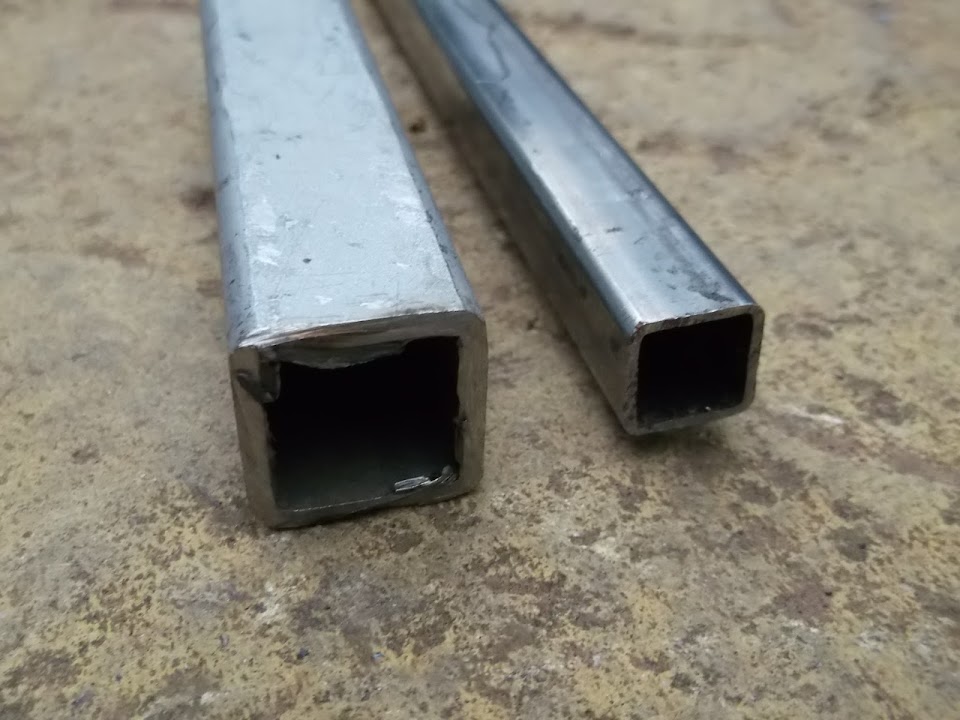
I'd previously bough some half inch box section to brace the dash to the bulkhead.
Here it is next to a section of 25mm box that I've been using for all my other work.


Not only was is cold outside, it felt like it was going to rain.
So I picked a quick job that was easy to pack up in a hurry.

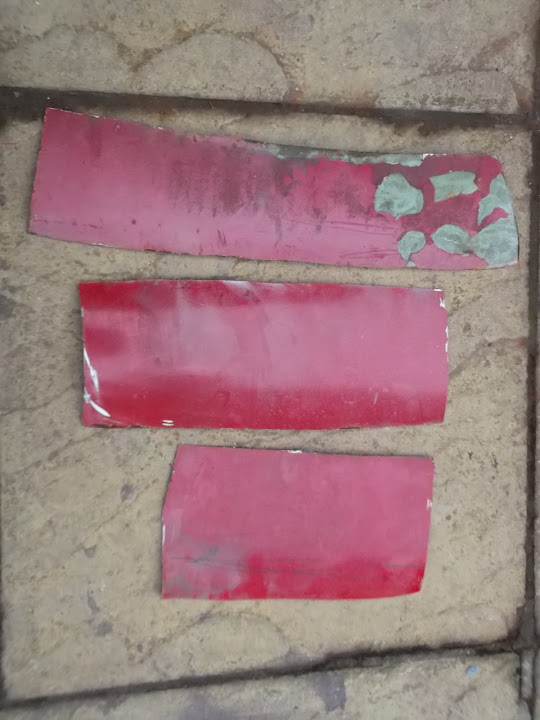
I cut three panels from my recycling pile for the vent mounting & dash repairs.


But when I started to clean then up, two had repair panels under the filler.


Once they were removed I could finish the initial cleaning before calling it a day as the rain started.


Until next time, take care, Paul. :)