This is a read-only archive of the old Madabout Kitcars forum. New posts and replies are no longer possible, but every thread is still here to browse and read.
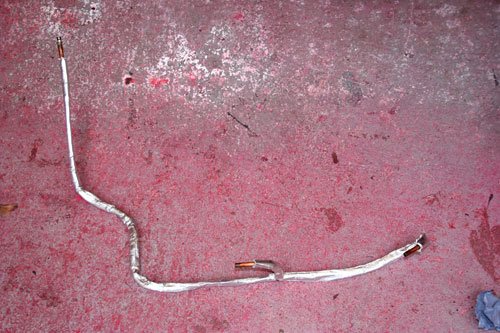
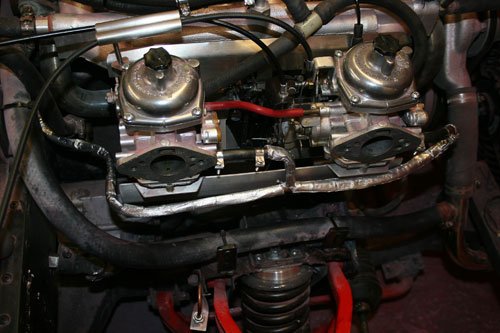
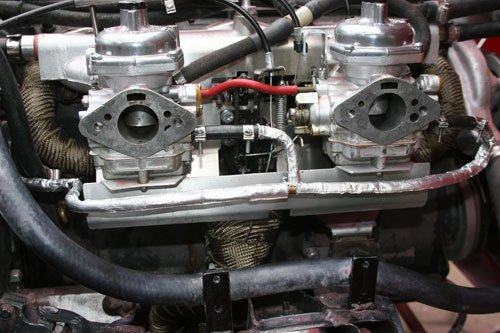
Thanks Phil, Ive ordered 100ft x 2 inch exhaust wrap and 1 mtr of reflective heat shield sleeve to cover the copper pipe at the rear of the block, hopefully this will sort the problem.
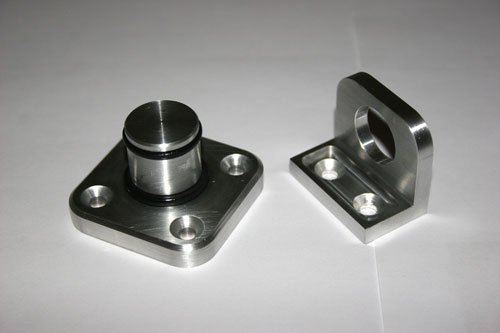
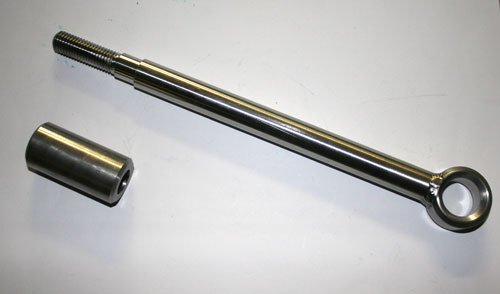
Made two bracket's to hold the tow eye made many months back, will more than likely mount it in the boot but may see if there is somewhere in the cockpit area as it looks too good to be hidden out of the way.
Attachment “IMG_6588.jpg” from the original forum could not be reliably recovered.
Made from ally with a couple of o rings to cushion and hold the eye in place.
Thanks Phil, Ive ordered 100ft x 2 inch exhaust wrap and 1 mtr of reflective heat shield sleeve to cover the copper pipe at the rear of the block, hopefully this will sort the problem.
Made two bracket's to hold the tow eye made many months back, will more than likely mount it in the boot but may see if there is somewhere in the cockpit area as it looks too good to be hidden out of the way.
Attachment “IMG_6588.jpg” from the original forum could not be reliably recovered.
Made from ally with a couple of o rings to cushion and hold the eye in place.
Are looking for a good mount as it is just a little too good to hide away.
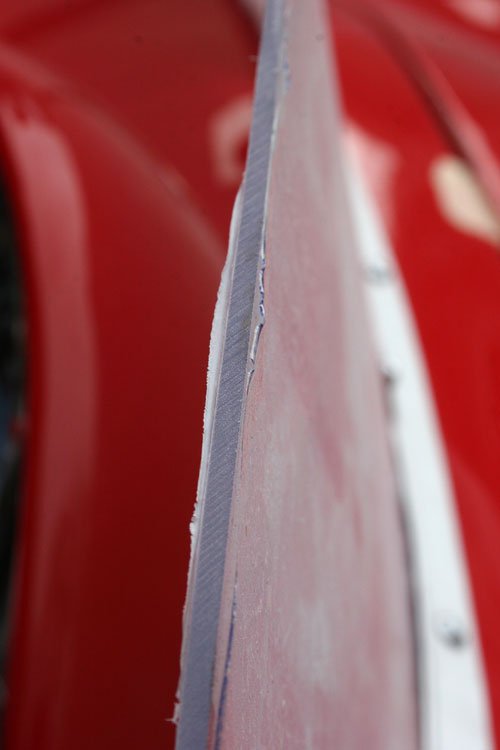
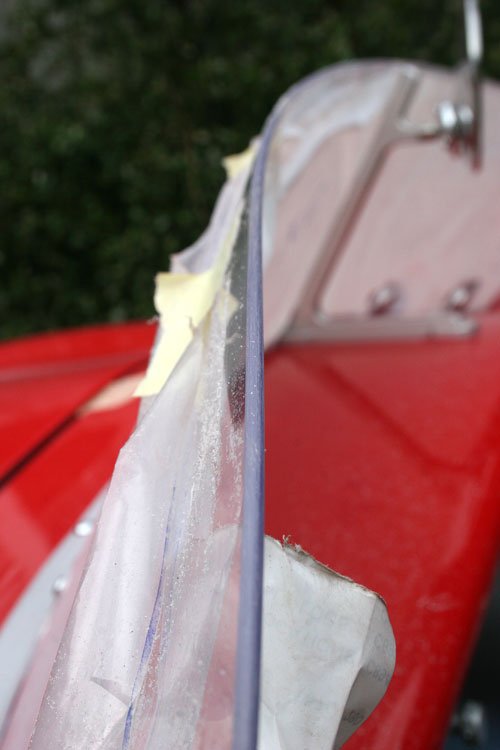
Starting to get to the bottom of the To Do List, today i made progress with the undressed top edge of the perspex screen.
Used a fine flat file to radius the edge then finished with 1500 grit wet and dry.
Attachment “IMG_6602.jpg” from the original forum could not be reliably recovered.
Not to bad of a finish just have to be extra careful the front or rear surface is not rubbed other wise you end up with a badly marked screen, might look for a acrylic polish to finish off which also may come in handy for any future scratches.
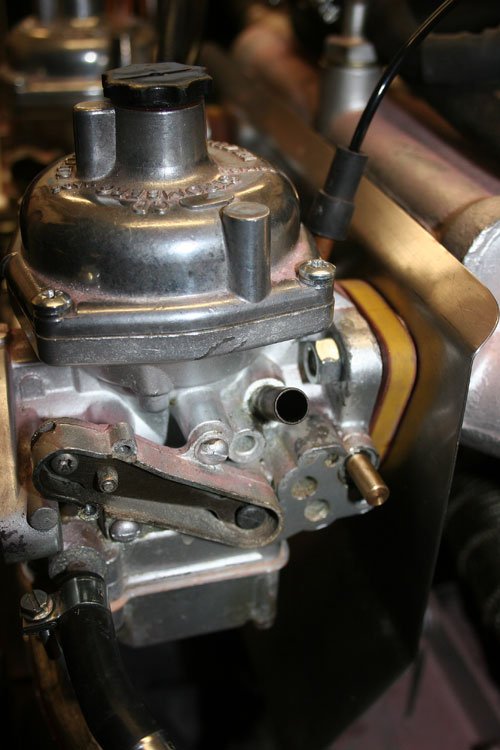
After letting the engine warm up the front carb decided to flood yet again so it was off with the fuel bowl, float needle valve removed and blown through, i must of getting some debris in the fuel line, reassembled and all was ok.again.
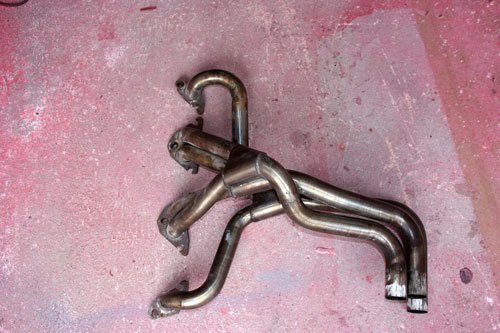
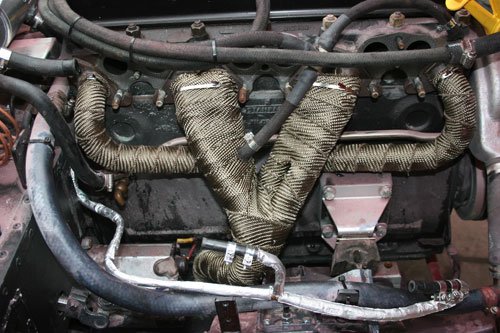
This was a partial result in that the engine did not refuse to start this time but took about 6 turns to start so partial result. Tomorrow i'll start to strip the inlet manifold off then the exhaust manifold to cover in exhaust wrap.
The Londoner in me says keep the shiny tow eye out of view in case a "magpie" takes it.
I live well away from London but i did have reservations about things on view but my intentions are to always use the tonneau cover when car left unattended that is if i can find a reasonable priced cover.
Jones Not sure just yet if ill take the spyder or travel in luxury.
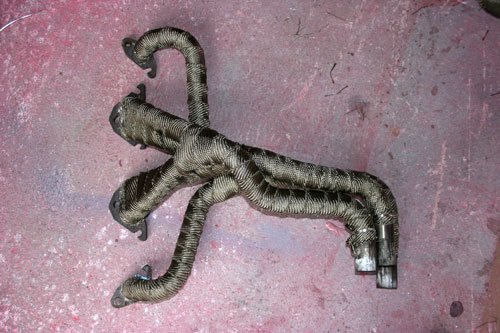
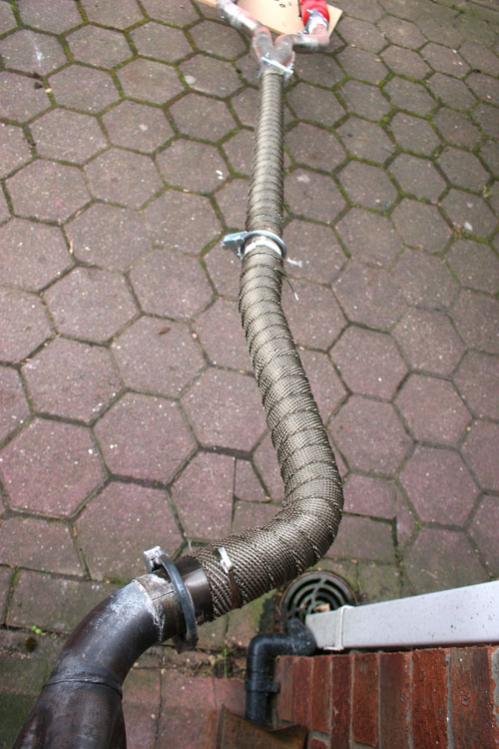
Today fitted the exhaust wrap which was fairly easy to do apart from removing the manifold.
Also wrapped the exhaust pipe back to the rear of the car to add some heat protection.
All parts refitted. Ran the engine until the fans kicked in twice to make sure there was enough heat and switched engine off with crossed fingers, waited a couple of mins and guess what the engine refused to start plus the left hand carb started to flood or at least that's what i thought, pulled the fuel line off and the petrol squirted out as if it was under a high pressure refitted fuel hose and engine started.
My next thought is to move the fuel line to run along the bulk head shelf taking it away from the rear of the block, so have ordered a couple of meters of fuel line and a t piece to pipe in temporary and see what that does plus im going to fit a fuel pressure gauge to see what the new mechanical pump is putting out.
One thing has come out of the wrap and that's the engine bay is a lot quieter but the noise out of the rear is deeper so i have achieve something plus the engine bay is cooler, you can even touch the exhaust manifold with out melting your skin.
I've always been in two minds about exhaust wrap and it's benefits, so I'll be really interested to see how you get on with it fitted and the effects it has
davecymru The only thing i think i will be able to judge is weather or not the wrap keeps the cockpit cool, regards increase in power if any i don't have a reference to compare with as the car has never been driven on the road.
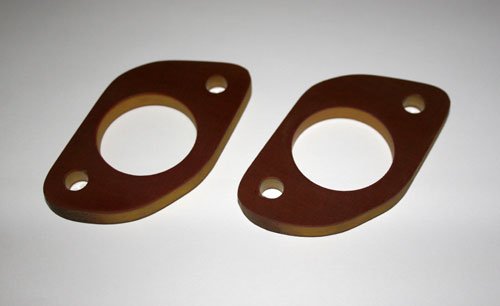
While i am waiting for the extra fuel line etc to arrive Ive been thinking about the none start when hot problem and Ive just realized i missed something out in the rebuild of the engine. There's a heat insulator between each carb and inlet manifold, i seem to remember removing them when i stripped the engine down but some how Ive lost them so after searching online to buy a couple Ive found they are no longer unavailable so decided to make a couple out of Tufnol myself.
There pretty easy to make, first make a cardboard template of the carb mount face transfer this onto the Tufnol, rough cut the outline with a band saw, drill the two mount holes and bolt the two together then with a hole saw drill the large center hole and finish off the outer profile with a belt sander leaving them bolted together so as they end up the same. All done and as those little fury animals say SIMPLE'S......
My intentions are to leave them off until i see if the re-routed fuel line works then fit the Tufnol insulators.
deggsy The wrap has definitely cooled the exhaust manifold as you can now touch the pipes when hot without melting your skin so i would say it has done what it is supposed to do.
A questions for you guys, are any of you running a GT6 engine with unleaded petrol containing ethanol in either 5% (E5) mix or 10% (E10) mix OR do you stick with the Super Unleaded products as most of these are ethanol free E0 (at the moment) from the main oil companies apart from Shell who refuse to comment on weather or not their super unleaded is ethanol free so the general consensus is it's a least a 5% ethanol mix.
This is just a though in respect to the none start when hot problem i am having at the moment possibly linked to the way ethanol behaves in a hot combustion engine, i have a couple of gallon in the tank bought from Sainsbury's in the standard unleaded fuel mix so will assume it contains ethanol but will check the next time i call at the petrol station. My next purchase will be a super unleaded mix to see how that fairs but in the meantime any info would be appreciated.
I'm running a Vitesse mk1 motor on a mk2 cam. It's supposed to have been rebuilt with an unleaded head at some stage in its life, but having taken the head off and found it crusted up with sooty crud I doubt that. Even so, it runs fine on bog standard Tesco unleaded - the mixture's a bit rich but that's worn out Strombergs for you. I also ran it with methanol injection for the first six thousand miles and only took it off because the air box I made was restricting the airflow so much it cancelled out any increase in power.
Overall, the Triumph six is a pretty simple old lump - mine even ran with the cam installed 180 degrees out - so I'd say there must be a relatively simple problem somewhere in the system. Hopefully a bit of trial and error will find it and it'll be a simple fix when you do. Good luck!
Oh, just a thought, I ran a modified '67 Beetle back in the 90's and had a similar problem with it cutting out or not starting when hot. It turned out to be a faulty (new) Bosch coil.
Cheers Mr T, I've had the head converted to run on unleaded while it was stripped down so all should be ok there.
I don't know if you noticed but i have mentioned on here on a number of occasions about the carbs flooding but after thinking about it it looks to be more of a fuel vapor issue, the reason i say this is that after the hot engine is switched off fuel comes out of the overflow port on the flange where the air filter bolts to so in theory the fuel pump has stopped so no more fuel being pumped through to the carbs but the fuel spurts out of the overflow in fits and starts if that makes sense which leads me to believe the ethanol in the fuel is vaporizing and causing the spurts in fuel i.e. higher pressures.
If the fuel supply pipe is pulled off releasing the pressure slightly then refitted the fuel no longer comes out of the overflow port for a minute or so but then start to spurt out slightly this time but with less vigor.
So with this in mind i hope the re routed fuel line prevents the fuel pressure building up causing the carbs to over flow plus i intend to make a inline fitting so that i can attach a fuel pressure gauge in at various point's of the fuel supply pipe to hopefully help diagnose the problem. Well that's what i hope.
A quick phonecall to Mark at Southern Triumph Services here in Bournemouth might not be a bad idea ...hes a decent guy who is always happy to help and is regarded nationally as somewhat of an anorak on these Beasts ...Hes often the 'quoted professional' in many magazine articles etc..
Are you using a mechanical or electric fuel pump? it's a lot easier to isolate the fuel lines from the heat source if you use an electric one. On my A352 I have the fuel pump in the boot.
lancelot link and deggsy Thanks for the info guys.
Success at last.
Re-routed the fuel line temporarily away from the rear of the block by feeding it across the bulk head, the engine now starts when hot so very pleased with that one.
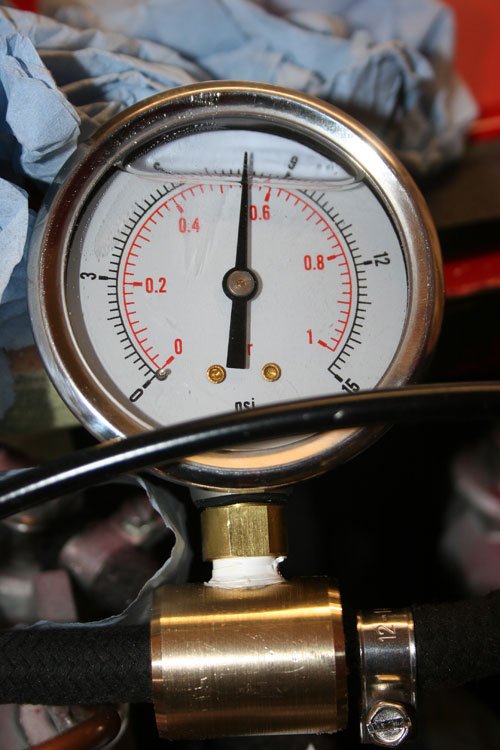
I also piped in a fuel pressure gauge to see what pressure the mechanical pump was putting out and to my surprise it's pumping at 8psi which is way above the recommended 2.5 psi/o.17 bar when running stromberg's so tomorrow I'll hard pipe the fuel line back in and re connect the filter king to see if the regulator drops the pressure to 2.5 psi.
Photo of pressure gauge with pump running.
With the starting problem sorted i am very close to booking the MOT once a couple more jobs are completed.
great news ..i use a fuel pressure regulator can adjust from .5 to 6psi i have it set at 3psi for my motor bike carbs on new engine.. but always used mechanical pump at 8 psi for stroms with no prob good news well done
Cheer's Phil for the photo, interesting to hear you ran with 8 psi with no problems on stroms.
I've already got a filter king mounted to the bulk head so i am going to give that a try with its built in regulator.
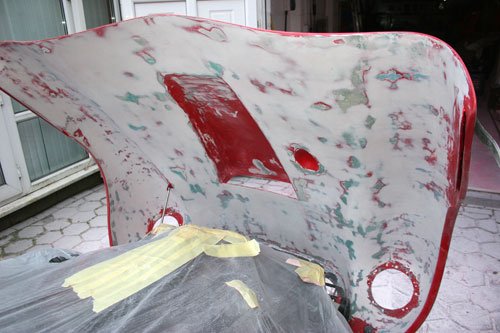
Something that has been bothering me for a while was the under side of the bonnet which looked out of place with the rest of the paint work so today with the weather being good i decided to sand the rough spots out then skimming over with filler, the whole job has ended up being a full 8hrs on the job.
Ready to paint hopefully tomorrow if the weathers good.
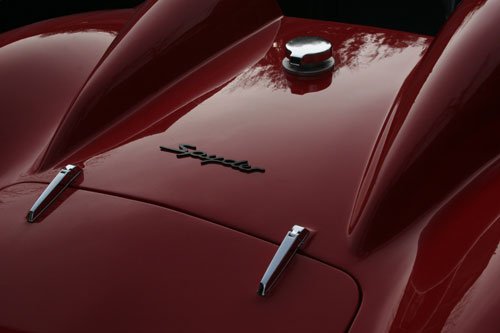
Fitted the spyder badge to the back panel today before i started sanding the bonnet. Fitting the badge was pretty simple, i masked the area off first with masking tape then worked around the center of the car before drilling the holes for the stainless pins in the back of the badge, i put small blobs of black grease on each pin then pushed the badge down onto the masking tape which left small dot prints on the masking tape where each hole had to be drilled.
The pins were fitted to the badge to give it something to glue to the body, i wasn't confident enough to just glue the badge directly to the body.
Swifty I am a big fan of your car, nice shots too of the exterior the badge looks great there. You're not going to get much mileage on it, for everyone stopping you to admire it! Great work