This is a read-only archive of the old Madabout Kitcars forum. New posts and replies are no longer possible, but every thread is still here to browse and read.
Today was a day trying to clear up the many small jobs Ive been putting off for a while, wiring the many dash lamps etc, also did a small adjustment to the wheel tracking at the rear.
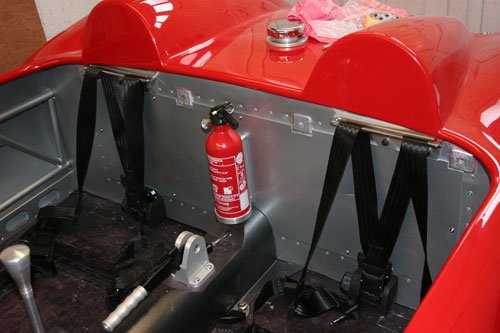
Seat belts finally fitted and working so i was able to fit the back panel before bolting the seats in place that is after the floor has been cleaned.
I think that if i was to build one of these again then i would angle the back panel backwards from the floor up over to give slightly more room behind the seats at the top.
Been having a few issues with the carbs, if the engine was stopped once hot then restarted with slightly pressing the throttle the carb's flooded, more so the front one. I removed both float bowls to check that there was no debris in the float needle valves then turned my attention to the Filter King with fuel pressure regulator which i backed off slightly, all seems to be fine now just need to make sure enough fuel is getting to the carbs at full speed.
I did take it around the local estate for a quick spin and boy does it sound great, can't wait to get it on the open road. Its funny how the sound of a crackling exhaust make's a petrol heads day. Roll on the summer......
Attachment “IMG_43245.jpg” from the original forum could not be reliably recovered.
Picture showing the hole the fuel pours out of when flooding, this port vent's from the float chamber that allows excess fuel to pass through into the air filter housing.
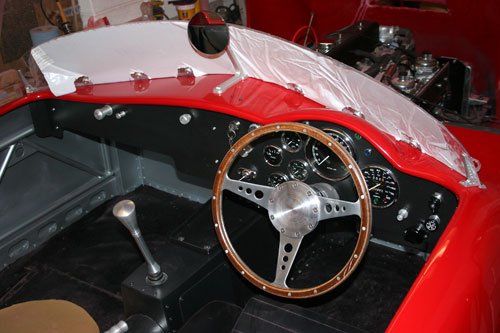
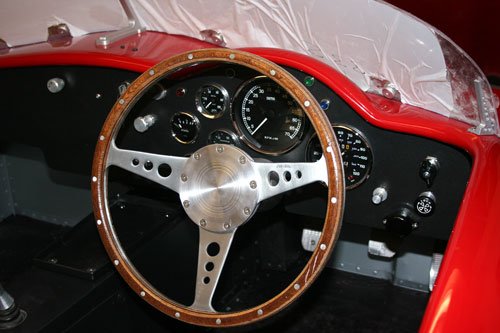
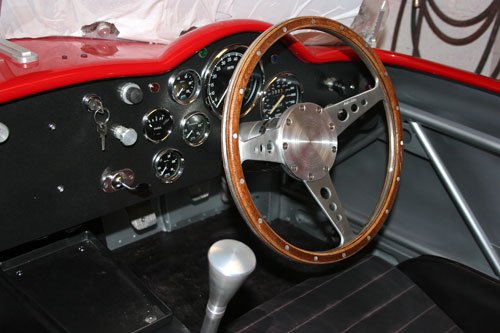
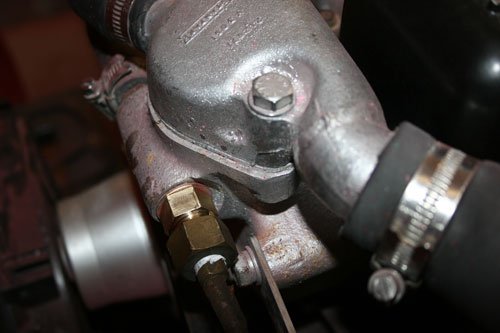
One more major step completed with the build, the dash is finally complete with all clocks etc working. I had been waiting for a water temp gauge with a degree scale to come on flebay at a reasonable price which it did last week so after turning a brass adapter to suit the thermostat housing and the capillary tube nut the dash was complete.
I've also ran a bead of clear silicone on the under side of the screen ally trim to prevent water traveling under the screen and into the cockpit, although if it pours down while on the road the seal between the screen and car will the least of my worries.
I had intended to use the warning lamps built into the original speedo for high beam, alternator charge and indicator but decided to use individual Lucas warning lamps instead.
All in all I'm pretty pleased at how its turned out.
Next the seats are to be fitted then its off to the MOT station which i am trying to put off so as not to be able to use the car until the salt grit has washed off the roads.
Nice to see you back online Scottie, i had been wondering as you have not posted on your thread for some time, hopefully you will have some new posts soon.
The local roads have been covered in salt so even though i am VERY VERY tempted to have the MOT done the car will be staying in the garage for some time plus it's allowing me to finish off the small jobs.
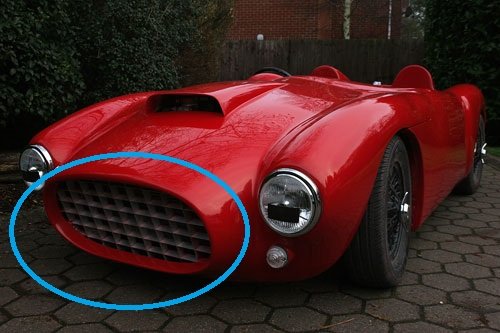
Ive decided to have a go at fabricating an ally trim to fit around the inside lip of the bonnet, never tried this before so it will be a massive learning curve, made two wooden slapper tools from pine, ive gone for pine rather than a hard wood as pine is softer so hopefully will be easier to work the soft ally without creating too many dents.
The image shows the front lip circled in blue that will hopefully have an ally trim fitted. The 250 swb on tributes site has something similar fitted as standard and it finishes the look off.
The problem i can see is the ally has to be formed around opposing curves so stretching/work hardening will be an issue, ive already annealed the ally but will more than likely have to anneal it a few times during the fabrication.
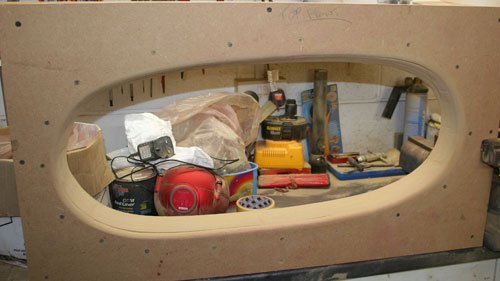
Decided to make a mold of the lip profile from mdf, two pieces of 25mm thick should do the trick.
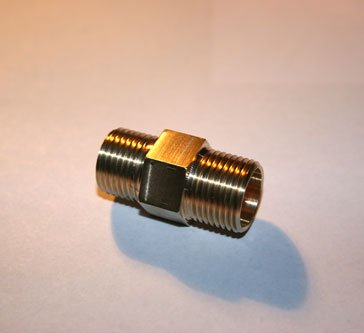
Here's a photo of the brass adapter made for the mechanical water temperature gauge sensor.
If any body needs to make one the thread size's are 3/8 BSP x 13mm long capillary tube nut side and 5/8 18 UNF x 10mm long for thermostat housing side. The hole through the adapter is 11.5mm dia with a 8mm deep 13.5 od counter bore at the capillary tube side, this allow the capillary tube bulb to seat correctly in the brass adapter, the hex is 18mm AF. I used stock size 25mm round brass bar then milled the flats on a dividing head with the threads etc done in the lathe.
Well that's it for now see you all soon and i will post pictures of the ally nose trim when it's hopefully finished, fingers crossed that is.
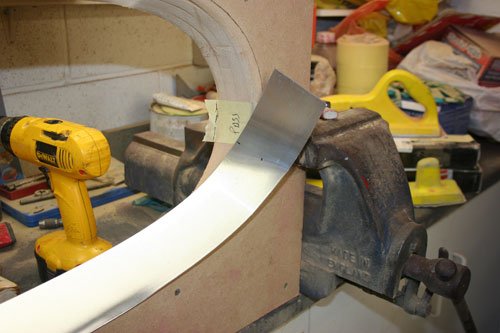
Today i started to try and and make the ally nose trim, first a former was made from 24mm mdf joining four piece together to make the required thickness.
Replicated the bonnet oval as close as i could with a radius edge matching the bonnet.
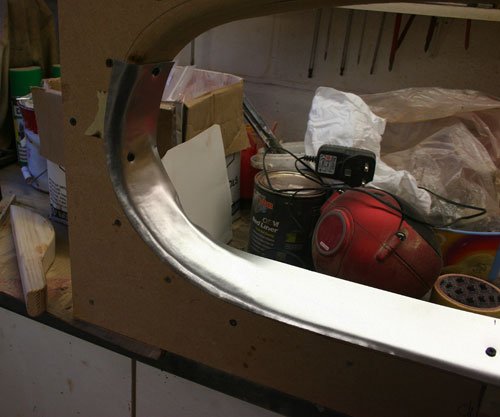
Screwed the trim center point to the former which left the ends of the ally curved to the front.
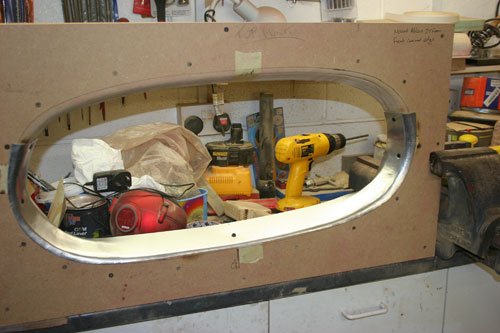
After heating the ally a number of times then working it around the former the ends were pulled back in line with the back edge of the former, my intentions are to trim the back edge once the front edge is worked to the correct curve. The ally stretches fairly easy if its kept hot and worked with a radius slapper tool.
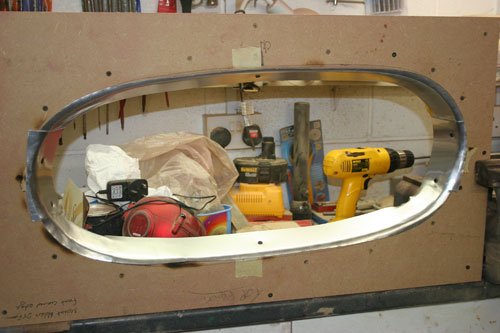
Worked one half around the former then flipped over and did the same to the other half. The joining ends will be trimmed to length once the trim has been formed and still thinking on how i can finish the two joins, might have to machine a thin cover strip.
Still not convinced it will look ok but at the minute i think a brushed surface finish will be required to flatten the slapper tool marks left in the ally.
I had been looking at i say ding dong but after emailing them on a number of occasions with no replies i feel reluctant to spend money with them, why do companies have an email contact then ignore enquiries, their site however is easy to use but i need a couple of things made thats not shown on their web site.
Just pickup the phone and call them..........a bit of obsolete these days,i know,but i never use email to contact companies because you always have to wait someone reads it and then give you the wrong answer so you email again and again...............
René
Been posting on other sites and the general consensus is that stainless manifolds don't like to be wrap up so i may drop that one, contacted a few suppliers to see what their thoughts are.
What i am trying to prevent is fuel vapor lock, if the engine is hot it wont start i have to wait 10-15 mins then it starts. A heat shield is already fitted between the carbs and exhaust, one problem area is i re-routed the fuel line around the back of the block which is both close to the hot block and cylinder 6 exhaust manifold pipe so this may be a possible vapor lock point plus it is after the pump which is new but would lack enough pressure to overcome fuel vapor lock so i am thinking may be try pipe insulation if this doesn't work then a electric fuel pump with a return line to keep the fuel moving and use the petrol in the tank as the heat sink.
Judging by the amount of posts on the net the triumph gt6 engine is prone to this especially with modern fuels with ethanol, thanks very much EU.
If anybody has had fuel vapor lock and come up with a solution then i will be interested to hear what the solution is.
have a look at my old posts [pics] to see my fuel/ex set up the rap was £60 i do not get heat prob can put my hand on it after 15 mile s in summer car still run great hope you sort it
I used cheap heat wrap from ebay and covered from the downpipe back (I was going to do the manifold but it just looked too fiddly so I never bothered).
This was to keep the exhaust heat from soaking into the cockpit rather than to prevent vapour locks in the fuel and it does that admirably.
I haven't suffered any serious vapour lock issues - on one of my trips to Goodwood Revival I got stuck in very heavy traffic on a hot day on the outskirts of Brighton on the way back to the hotel on the Friday evening, and with the engine temperature alarmingly high the motor cut out then took about 30 seconds of cranking before it (thankfully) fired again - but that's the only time and I don't even have those stainless carb shields that a lot of Triumph Sixes seem to run.
Have you checked that your new fuel pump is fitted correctly and pushing enough fuel through? Just a thought.
Phil Is the manifold stainless i cant tell from the picture.
Mr T If you dont have a heat sheild fitted and have not experienced fuel vapour issues then it looks like my problem is pointing to the re routed fuel line around the back of the block, small bore fuel line close to exhaust manifold equals fuel vapour lock.
yes s/steel manifold i too have ex/pipe done like towed my mate has a gt6 thats gets very hot ...me barry had no probs ...thermo tec garantee 70% very big in usa oval racing have you run the car far to see what its like ....get fuel line away for motor 1st good luck look at my pics page 22