MadaboutKitcars

This is a read-only archive of the old Madabout Kitcars forum. New posts and replies are no longer possible, but every thread is still here to browse and read.

Another Cordite Is Born ...

19 Nov 2013, 6:28pm
Epic Bulkhead Repairs - Part 1:
As I said yesterday I wanted all the repair panels ready before I cut the last bit of rot out.
So first job of the day was to work out the shape of the final panel in cardboard & mark out the shape.


After cutting & cleaning it looked like this.


Then after hitting it with my hammer a bit, it looked like this.


After cleaning up the area & marking up two reference points it was time to take a deep breath & cut... :pray:


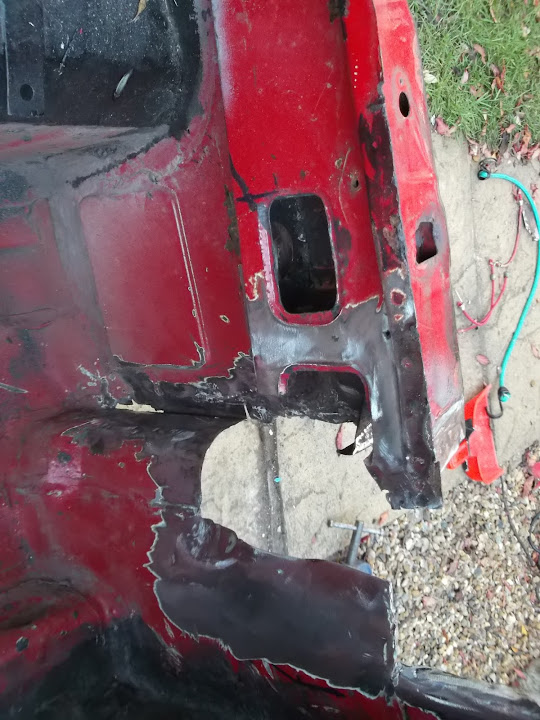
Then it was time to start fixing the bloody great hole I'd left in the bulkhead.
I clamped the external support structure in place, making sure my reference points were the same distance as before.


Then I welded the left "arm" of this box section to the bulkhead both top & bottom.
Then what remained of the edges of the bulkhead were hammered over the box section.
This gives you the idea, even though it is not the final position of the lip.


This allowed me to weld one section of this edge to the box section.
( I'll come back to do the edge on the left of this photo another day. )


I welded the bulkhead to the box section where ever the edges met.


Sorry this next photo is so blurred, but hopefully you can still see a few more welds in place.


I was even able to weld the support bracket inside the pillar to the flat plate on the box section.
( I did finish off welding the right hand side of this bracket after the photo was taken. )


At this point, the bulkhead was already more solid than it was before and I've still got more welding to do.
So I am now confident that by the time I weld in the rest of the panels it will be good to go.

Talking of the repair panels, this is roughly where my pillar extension will go.


Note:
There is an area on the top right of the panel which will be hammered over to meet the box section.

The final panel will fit in like this.


There will be a bit of shaping required at the right hand side of the panel to blend in with the shape of the bulkhead.

For once I made my life easier by not trying to replicate the original Spitfire shape exactly.
As long as it is all joined together, the final shape makes no difference what so ever.
Having said that, the shape should not stand out to the untrained eye once it is painted.

Until next time, take care Paul. :)
19 Nov 2013, 7:33pm
Smack on Paul, great stuff!
20 Nov 2013, 5:48pm
Scottie - Cheers and I see you have spotted your typo.
I was about to ask if "Smack on Tony" was the modern equivalent of "Rock on Tommy"?
:icon_wink:

- - - - - - - - - - - - - - - - - - - - - - - - - - - - - - -

Epic Bulkhead Repairs - Part 2:
Well after the hailstones finally stopped I had a chance to start welding my panels into place.
First up was the pillar section, which required me to crawl inside the bulkhead to weld all edges. :rolleyes:


This is the view from the outside looking in, showing one of this panel's "lips" wrapped around the box section.


Next I welded about 2/3rds of the other panel into place.


This is because I need to cut & shape this end of the panel to merge it with the curves of the bulkhead.
( Something similar to the curve in the recess panel I made. )


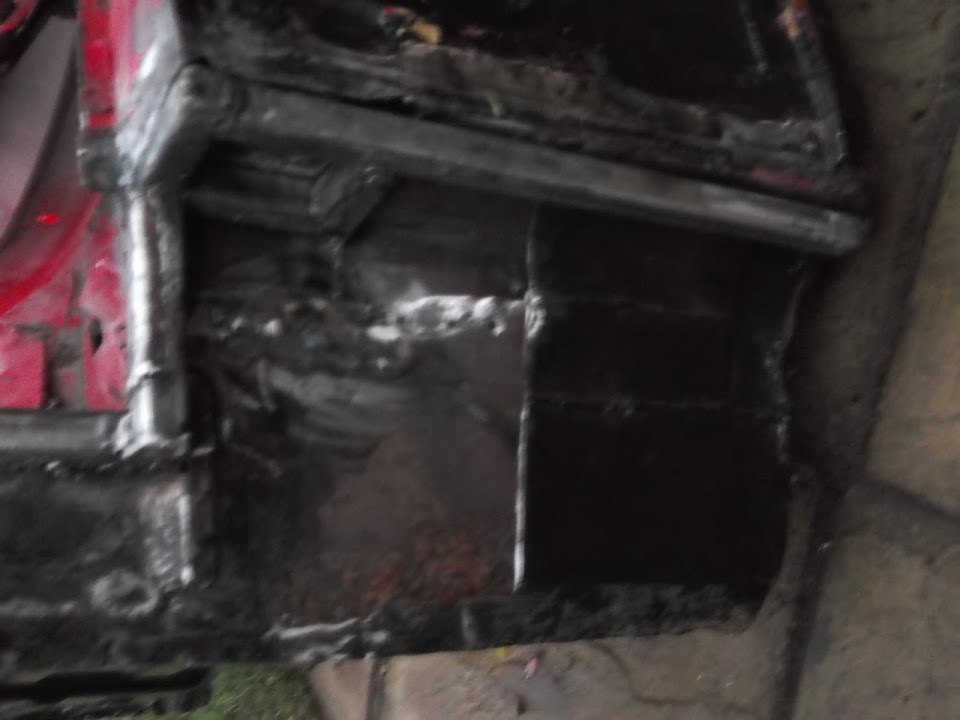
Not easy to see in this blurred photo, but there is currently a "void" between the old & new metal.


Depending on how the shaping goes, I may simply add a patch to the outside.
But fixing that will have to wait for another day, as darkness also brought back the rain.

One thing I will say is that I can't believe the difference this has made to the bulkhead.
It feels significantly stronger than before, so I'm really happy that this approach has worked. :cool:

Obviously it is over engineered, but I have never attempted anything like this before.

Cheers, Paul. :)
20 Nov 2013, 6:58pm
Paul! The shear volume of work you churn out is amazing, it really is.
You make me feel like a real skiver, 'cos I know I could do more!
21 Nov 2013, 5:56pm
Scottie - This is the most "spare" time I've had to work on my car as I'm currently "between jobs".
It is just a shame that this isn't June, or July when I'd have more daylight and better weather. :rolleyes:
Unfortunately, I will have to head back into the working world again shortly & my progress will slow down.
Which is why I'd really like to finish repairing this bulkhead ASAP.

- - - - - - - - - - - - - - - - - - - - - - - - - - - - - - -

Epic Bulkhead Repairs - Part 3:
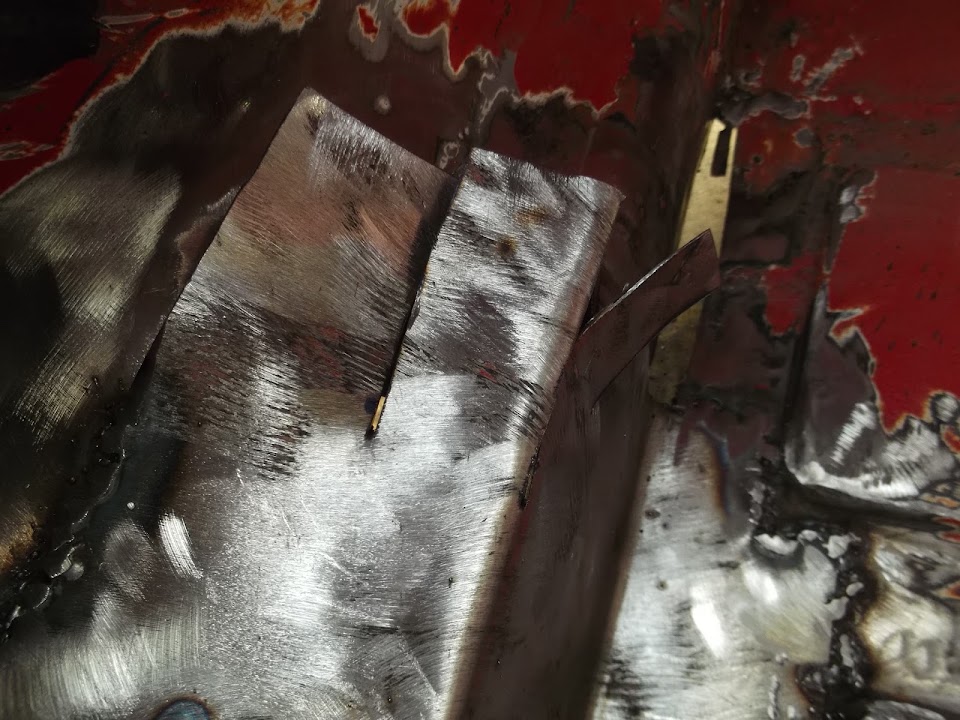
I made a few cuts in the end of the panel that I didn't fully weld in yesterday.


Then I hammered each of the tabs into place & welded them up.
This what it looked like after the first two tabs were done.


When all four were done it looked like this from the inside.


This gives me the basic shape to smoother in filler.

And this is what it looked like from the outside.


I still need to decide just how I will put a second skin of metal over this section.

Next job was to seal up the holes above the "top" supporting arm.
( I'd already cut the rot out by this stage. )


I cut out a different section of an old Spitfire panel to cover this.


As this allowed me to continue around the corner like so...


Note: It was a much better fit when clamped into place.

I started the welding on the bottom / box section edge.


I then hammered the panel along the top edge to match the bodywork and welded that too.


There is still a bit of work to do to get a tidy finish on the front corner.


This is the view of the repair from the inside.


The final job for the day was to slap on some Kurust.


I know I haven't finished work on the outside panel yet.
However, as this is where the bulkhead lives overnight, so I am a bit worried about the weather.


Until next time, take care. Paul. :)
21 Nov 2013, 6:18pm
Paul, this looks like the worst condition Spitfire bodytub that anyone has ever attempted to bring back to life! Good on you for sticking into it and just getting it done! Wow...

But wouldn't it have been simpler to get hold of one that didn't have quite so many holes?

Baz from Brussels
21 Nov 2013, 7:17pm
That's just what I thought Baz, but I can identify with Paul here, it's the CHALLENGE!!!
I have sometimes spent 4 days welding and making a panel when they are available and cheap, but its always more rewarding to
to do a "PAUL" and repair the impossible, right Paul?
22 Nov 2013, 4:47pm
Baz - There is a great expression in Ireland that goes something like this...
If you wanted to go there, you shouldn't be starting from here. :icon_wink:

When I started this project I had no idea of the problems the original Cordite had.
With hindsight I'd be on the road by now if I'd just chopped my original donor in two!
I could have simply left the bulkhead in place and just removed the windscreen.
I wouldn't need to disconnect the dashboard, steering, pedals, electrics, etc.
So apart from when I refitted the petrol tank it would still be able to run and drive.

This bulkhead was effectively "free" as I bought the body shell for just the rear arches.
But you are right, one with a lot less holes would have been miles easier to work with.
Plus I'm finding that this bulkhead has a number of bad repairs which are not helping either.

Scottie - Another expression I like is Necessity is the mother of invention.
Given the fact that I am an accountant by trade, this repair work is beyond my imagination.
But I am simply following the trail blazed by Mister Towed who gave everything a go.

The scary thing is when I now look back at the state of the chassis on MrT's Herald.
I can't believe how much stronger the driver's side of the bulkhead is after my repair work.
So Mr T is right to say he donor car was a potential death trap before he got it.

- - - - - - - - - - - - - - - - - - - - - - - - - - - - - - -

Weather Watch:
The wind today made welding outside pretty tricky.
But its main effect was to made me very cold indeed. :icon_sad:
Still, looking on the bright side, it wasn't raining so some progress was made...

I removed the remains of the original seam sealer near my repair panels.


Then I applied filler over the area to smooth out the welding.


As it was so cold I added some extra hardener just to be on the safe side.
It looks like this will do the trick, as the filler seems to have gone off much quicker than before.

Then I made some repair patches to cover some of the remaining "factory" holes in the repaired pillar.
I have put anti-rust treatment & weldable primer on the inside of the pillar as I've been going along.
Plus I will spray more waxoyl inside it before attempting to seal it off at the the top of the pillar.
My thinking is to seal up the whole pillar to help the water & therefore the rust out.

[COLOR="Red"]Anyone care to confirm whether, or not, this is a good idea?[/COLOR]

I don't want to accidently create a perfect breeding ground for rust to develop from the inside. :rolleyes:
Whilst I haven't sealed the whole pillar yet, I have started welding patches in & treating the surface.


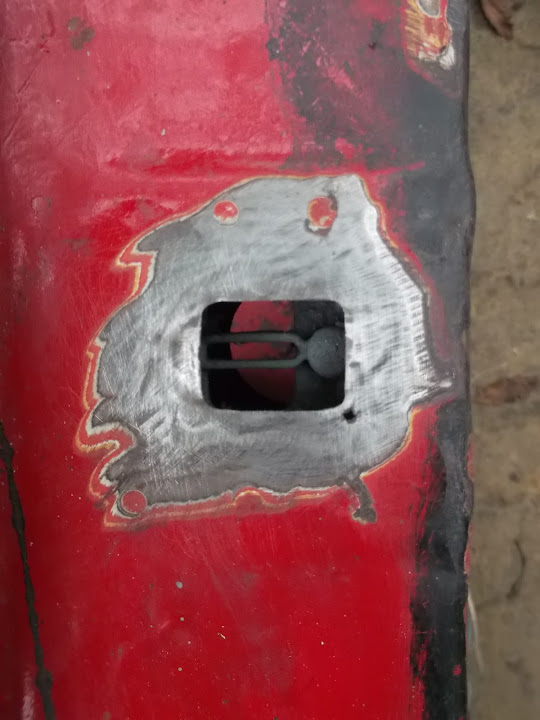
The final bit of welding for the day was to seal up the holes for mounting the bonnet catch.


Then it was time for the final round of filler for the day.

I covered the inside of the floor repair panel work from a while back.


Plus the top edge of this bulkhead repair panel.


Note:
As I had a bit of filler left over I simply covered the bonnet catch repair while I was there.

Until next time, take care, Paul. :)
22 Nov 2013, 4:56pm
Paul, don't use waxoyl anywhere near your welding until the welding is finished or you will end up with a fire!
If you want to waxoyl it do it after by drilling some holes then fill them with plastic bungs after application.

PS actually managed to get some done on mine today check later tonight for an update :-)
23 Nov 2013, 5:50pm
Mac - Cheers.
I did start a small Waxoyl fire welding somewhere else a while back. :rolleyes:

- - - - - - - - - - - - - - - - - - - - - - - - - - - - - - -

Close, but no cigar...
I really wanted to get all the areas I covered in filler yesterday sanded down & painted in primer today.
But it was not to be despite generating my own snow storm of white filler dust as I smoothed it out.
But there were a couple of areas that I wanted to add a little bit of extra filler to.

So I was only able to get primer on the outside edge and driver's floor.


Sorry the picture is blurred, but can see the two areas that I "topped up".


I also welded up two more of the pillar's factory holes.


It was a real pain getting inside the bulkhead to access this area.

I also put some filler over the patches I welded in yesterday.


As before, there was a bit of filler left over that went on the holes I welded up today.

Whilst trying to work out how to finish off the outside of these repairs...


It became clear that the bottom edge needs to be removed as it is rusted through in places.
Along with the previous repair patch to the bottom right of the photo.
( Which is hiding some rust on the panel below it. )

But I will worry about that another day.

Cheers, Paul. :)
24 Nov 2013, 6:54pm
Small Odds & Ends:
Luckily I was able to see properly this morning after a comedy injury last night. :rolleyes:
I'm pretty good at wearing gloves, masks, ear plugs, safety glasses etc. when working on the car.
But yesterday I somehow managed to wash some crap from my head/face straight into my eyes whilst in the shower.
Nothing I did would shift it and I had to sit on my hands to stop rubbing my eyes & making it worst.
Thankfully mother nature's eye self cleaning mechanism kicked in over night while I slept.

Only had a little time available today, so roughly sanded down all the filler that went on yesterday.
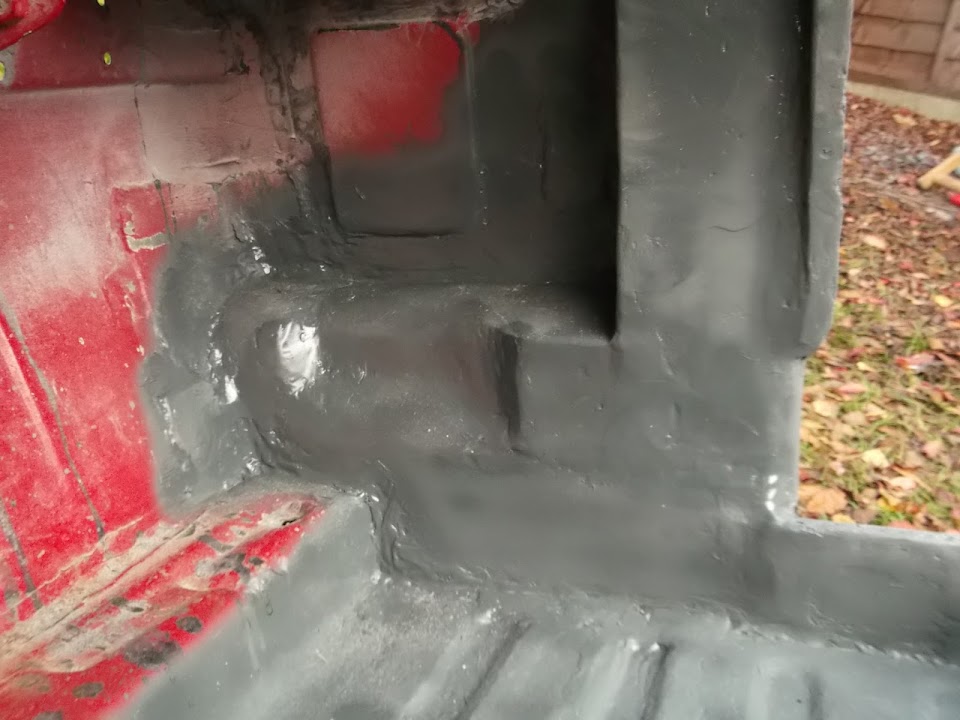
And with a coat of primer over the top I am really pleased with the way it all looks now. :cool:

Before:


During:


After:


Next I am going to remove the remaining seam sealer / surface rust in this side of the bulkhead.
Then I can get the whole of the driver's side in primer and then give it a coat of black paint.

I also need to decide what I will do about joining the bulkhead to the Cordite frame.
I've left the original mounting points for the door hinges untouched up until now.


As I know the Spyder builds use these to mount the frame to the bulkhead.
( This is Mister Towed's car. )


However, the rear Cordite frame framework will not reach this far forward.
It ends at the vertical angle iron you can see just at the front edge of the door opening here.


So I need to build a "join" between the two sections, which raises a couple of questions.

- Would it be OK to weld the "floating" attachment plates to the side of the bulkhead?
( I will be making the bracket to fit, so there would be no need for any adjustment. )

- Would it be OK to cut a bit off the top of that vertical frame rail?
( At the moment the frame prevents access to where the lower door hinges would mount?

Shopping News:
I have just ordered the same micro heater & associated bits that Mr T fitted.
This will allow me to make all the bulkhead alterations required to fit it at this time.
Which will be a lot easier than waiting until the bulkhead it fitting to the chassis.
This work will also allow me to finalise how the dash is going to look / function too.

Finally, I'd like to share one of many build threads I read for inspiration.
I can only dream of doing this kind of "factory finish" standard of work.

http://www.rodsnsods.co.uk/forum/garage/anglia-van-into-pick-up-134874

Until next time, take care, Paul. :)
24 Nov 2013, 7:08pm
Hi Paul

With the amount of work you put into, it would be difficult to keep hold on the "body replacement strategy". It's more a new build!:eusa_clap:

Michiel
26 Nov 2013, 5:45pm
Michiel - Thanks. :cool:
One thing is for sure, I don't envy people who restore rusty wrecks to original spec.
Whilst I know all this bulkhead work is to get around problems with the kit I have learnt a lot.
It has also convinced me that I will be able to finish this build one day.
Although when that day will be is another story entirely!

- - - - - - - - - - - - - - - - - - - - - - - - - - - - - - -

Restricted Duties...
I am coming down with the traditional cough / head cold combination at the moment.
Which I am sure is connected to working outside on the bulkhead & getting a chill. :rolleyes:

So nothing done yesterday, and just a few odd jobs today.
But every job done is another small step towards the finish line...

I removed what was left of the old seam sealer.


Is this stuff really such a good idea?
As it seems to be a breeding ground for rust. :icon_evil:

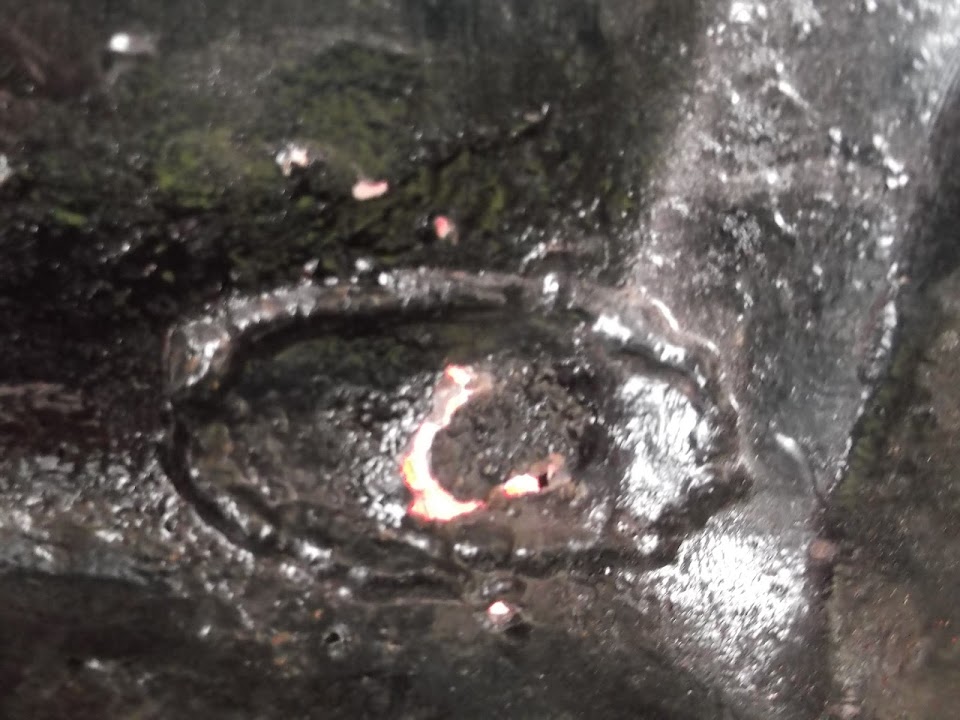
Removing it exposed another hole in one corner of the bulkhead.


Notes:
I just put some note paper behind the hole to make it easier to see in the photo.
Also I had made the hole worse by cleaning it up ready for welding a repair patch.

Eventually I cleaned up the worst of it and applied some Kurust.


Thankfully that had dried before close of play, so I just had time to get a quick coat of primer on the area.


Another little job was putting a temporary seal over the top of the repaired "A" pillar.


As I was finding that all the debris from cleaning the other areas was going down the inside.

I got some modelling mesh which needs to be cut and shaped for my first attempt at fibreglassing.


Hopefully I can get a nice curve covering the end of the windscreen supports & the top of the pillar.

I found another area on the driver's side that needs some welding.
There is a split around these holes in the edge of the bulkhead that the gearbox cover mounts to.


After I have fixed the passenger side of the bulkhead I will have a better look at the fitting of that cover.

I also cut away a large chuck of a previous repair patch as it was covering rust.


I just had enough time to get some Kurust on it before calling it a night.


The only other thing I did today was to dig out my original donor car's dash board.


When all the parts for the micro heater arrive I want to have a good think about how it will all fit together.
I need to add some new switches, remove some old stuff & move somethings around a bit.
Whatever I end up doing I want to make sure that the dash will be removable for ease of fitting/wiring.

Finally AndyP57 send me some brackets to use on the chassis for the bonnet hinge.


I only need two, but figured it would be a good idea to practise welding on a spare one.

Until next time, take care, Paul. :)
27 Nov 2013, 4:59pm
Just Resting
Funny how working outside in the cold when you are not feeling well actually makes you feel worse.
Who knew? :rolleyes:

So after a little bit of tinkering yesterday, I stayed indoors today.
Still, a nice man in a van delivered parcels from T7 Design & Car Builder Solutions. :cool:

So here is everything I could possibly need to install a micro heater in my car...


Well, when I say everything, there are still a few nuts & bolts required to secure some of these things.

When I have finished all my rust repairs on the bulkhead I will work out where all this lot is going to go.
I want to add some bracing to stiffen up the dash as the original Spitfire had an extra support column.
This connected the dash to the chassis (through the bulkhead floor) and was where the radio lived.
My current vague plan is to build "something" to mount the heater vents & to support the ducting.

This work will also tie in with my other vague plan for the dash board area itself.
I know I want the dash to be removable to make fitting everything behind it easier.
But I also need to rearrange, remove and add things to the existing dash layout too.

The only other car related thing I did today was speak to VOSA & the DVLA.
I had a number of questions, but not many answers, so it looks like I still need to send an email.
Hopefully the email will give me the definitive response to the Spitfire bonnet brackets.
As long as the officials agree they are not part of the chassis, I can safely remove them.
( This was the view of Tribute & Mr T on Scottie's A352 build "next door". )

If I feel up to it, I will try to weld up the final repairs on the driver's side of the bulkhead tomorrow.

Cheers, Paul. :)
27 Nov 2013, 7:29pm
Paul, is that an after market dash? It looks like walnut? Difficult to tell with the light reflection.
27 Nov 2013, 7:35pm
Paul, nothing like unpacking new shiny stuff, especially if your a bit under the weather. I went for the bare minimum with mine as im not planning to have any dash vents as
1. I couldn't find any that looked period enough
2. I have gone for a bigger heater and am hoping that having it running will fill the under dash are and foot wells with hot air which will then spill into the cockpit area.
Hope you feel better soon
Mac

PS thanks for the PM, yes I was aware but thanks for the heads up anyway.
28 Nov 2013, 7:47pm
Scottie - The previous owner said that a carpenter mate of his made the dash as a one off.
However, it is a bit ropey in places, so I am prepared to "cut & shunt" it about to form the backbone of a new dash.
Whilst the plan is vague, basically when everything is in the right position, I'll put a uniform surface over the top of the dash.
So in theory, all the dials & switches will sit it their original mountings, but you won't see the relocating "joins".

Mac - As always, I wasn't very clear about my plans for the dash vents. :rolleyes:
The heater vents will not be mounted into the dash board itself, but behind/underneath it "somehow".
Hopefully they will point at the front foot wells to heat the car in the way you described.

In this photo you can see the bracket below the dash that was originally connected vertically to the chassis.


Again, the vague plan is to use this in someway to link the front of the dash horizontally to the back of the bulkhead.
If I could bend the whole thing backwards 90 degrees, then it would largely disappear from view at the front.
Then, with a bit of luck, those two brackets currently pointed downwards could be used to help hold the vents in place.

Admittedly, the heater control & fan speed switches will stick out as modern fittings.
But I hope it will look like I've added a modern heater to an old racing car I found in a barn.
Certainly my "rough & ready" approach to finishing the bulkhead is in keeping with a barn find! :icon_wink:

- - - - - - - - - - - - - - - - - - - - - - - - - - - - - - -

Minor Tinkering...
I'm still under the weather, so only spend a very short time outside working on the car.

I needed to fill this hole.


So I cut out & cleaned up two repair panels.


Then welded them in.


Then I covered the area in Kurust.


This is the view from inside that corner and the hole will disappear when the filler get applied.


Rather than just patch a small hole, I made the repair panel oversize to add strength to the corner.

I've removed quite a bit of rot and some dodgy repair panels from this bottom corner.


So I have run some welds along various edges to hold it all together.


Another liberal coating of Kurust.


Now all I need to do is cover this mess in filler.

Initially I was thinking of making some sort of sill panel to cover this whole area.
But then I remembered that the fibre glass body will cover it completely.
I just need to make sure I join/seal the bodywork to the bulkhead properly.

Moon Rover Plans:
I know there will be a shed load of bodywork / fibre glassing to do once the current metal work repairs are completed.
Previously, others have suggested getting the body bonded on before worrying about restarting the engine.
However, I think getting the car to a stage where I could start and drive it again would be a big real motivator.

So my current plan is to build a working "moon rover" as seen here, driven by AndyP57.


Mind you, I'm still a long way from getting to this stage at the moment.
So I'll worry about the finer details another day.

Until next time, take care, Paul. :)
28 Nov 2013, 9:22pm
Paul,

It seems a shame to cover such a nice dash, but I'm not looking at it from your end!

I think your plan to start the engine first is a good one. When I stripped my Spit, ( although all the dials and dash are off) the car remained, and still is, drivable.
Like you say, its mainly a mind thing, but it is practical at the same time.
I found it so useful to be able to move the car about, go for it!
29 Nov 2013, 5:16pm
Scottie - The only way I think I could save any of the dash is by making the changes I need very obvious.
E.g. Put the new heater controls on a metal backing plate & bolt the whole lot over the top of the wood.
Again, this might give the impression of modern alterations to an older car, I'll certainly have a think.

I love the way that the Tribute approach to the A352 build allows the Spitfire to be kept as a runner. :cool:
Unfortunately, when the A352 was first put together for the Exeter show I was already knee deep in this build.

- - - - - - - - - - - - - - - - - - - - - - - - - - - - - - -

Still Just Tinkering...
Today's very brief venture outside allowed me to weld the final end cap to my external support structure.


I also put some filler on yesterday's bulkhead corner "hole" repair.

- Above


- Front


- Inside


As darkness fell it was time to pack up, as the cold is certainly not helping me to recover.
But at least I made a start on applying the filler on the outside of the bulkhead.


I also took the advice of Tribute "next door" and ordered some Fibral.
It is certainly cheaper than P40 and so far the squeezy tube is easy to use too.


The only other thing I managed to do was cut & shape the mesh to help seal off the A Pillar.
It will cover both the top of the pillar and the bottom of the windscreen support sections.


Hopefully one of these days I will get the chance to fibre glass this mesh into place.

Until next time, take care, Paul. :)
30 Nov 2013, 2:47pm
Flying Visit...
I've been very busy today, unfortunately on domestic chores, not car work.
Still, I did managed to get two quick jobs done...

Added some more filler to the outside of the bulkhead.
I know it looks a complete mess, but that is all the welding / panel joins covered.


I also roughly sanded down the filler on the outside of the corner repair & got some primer on it.


By the time I've brushed on some black paint, this will look just as "good" as the rest of the bulkhead. :rolleyes:

Anyway, I'm supposed to be doing something else, so got to go, Paul. :)
30 Nov 2013, 6:34pm
Getting there Paul, is that all the welding done now? Put your grip tape in the post this evening first class so start looking out for it in January! :-)
Mac
1 Dec 2013, 5:49pm
Mac - Unfortunately, I've only finished the welding on the driver's side of the bulkhead.
I still need to do the passenger side (see below) & the inside edges where the gearbox tunnel fits.

Thanks again for sending the grip tape, I am looking forward to fitting parts back on the bulkhead.

- - - - - - - - - - - - - - - - - - - - - - - - - - - - - - -

Slow Progress:
My wife went to visit her sister and took our girls with her, so I headed outside to see what I could do.
It was too early on a Sunday morning to start the angle grinder up, so I started looking at the passenger side of the bulkhead.


The good news is that this is in much better shape than the driver's side was.
But there is still a lot of work to do, including a number of rust holes to sort out.


Plus repairs to the "A" Pillar, that thankfully will not be as hard to do as the other side was.


I decided the "screwdriver of truth" could be used without disturbing the neighbours.
As always, some of the rusty areas are a little bigger than they first appear.
Plus the old seam sealer continues to breed rust in places.


Note: Sorting out the badly repaired battery box is also on the "to do" list.

When I could get the grinder & belt sander working I roughly cleaned up the filler on the driver's side.
Once I'd brushed away all the filler dust, it became clear that I had missed filling a couple of spots.
( I blame working in the dark, under the influence of cough mixture. :rolleyes: )

So I simply masked these two areas off & then put a coat of primer over the top of the rest.
( You can see the bits I missed, the box section at the back and a little area at the side. )


This is how the front edge of the repair panel I'd previously welded into place now looks.


Then I put some filler over the two sections I missed.


I then switched back to the passenger side and cleaned up some more of the inside.


I am going to start the repairs from the inside of the bulkhead this time.
So I cut up and cleaned up the first three repair panels that I cover some of the "factory" holes.


I also gave the "inside" faces a coat of weldable primer.


I also coated the inside of the "A" Pillar with anti-rust treatment.


But I ran out of time to start welding, hopefully I'll get a chance to do that tomorrow.

Cheers, Paul. :)
2 Dec 2013, 5:59pm
Monday - Part 1
This was one of those days were all your good intentions go out of the window.
I did manage to get a few of my planned jobs done, but the build had its own ideas.

The following is not in chronological order, but hopefully it is easier to follow this way.

Driver's Side:
I roughly sanded down the two areas of filler I put on yesterday and put some primer on.


I also remembered to finish off the inside of the front corner repair I did the other day.
( Note that is dust/rubbish sitting on top of the grey paint in places, not more rust. )


Passenger Side:
I set about welding panels over the factory holes in the bulkhead I no longer need.

"A" Pillar


"A" Pillar


Side Wall


So far, so good...

I'd prepared a panel for this hole yesterday.
Although I was planning to trim the "holey" bottom right corner out before I welded it into palce.


However, the more I looked at that bottom section, the more suspicious I got about the state of the metal.
Even though I knew I was making more work for myself, I knew I wanted to do a proper repair job.
So I started to cut & peel away the whole bottom section...


Which revealed the way that rust had developed & eaten away the driver's side.


The area to the right of this was also pretty rotten.


Although this seems to be linked to a previous repair when you look from the outside.
( Sorry the photo isn't great. )


My approach of starting from the inside and working out was beginning to back fire a bit.
I couldn't cut all the rot out as there would be nothing left to hold the bulkhead in position.
So I decide to make a repair panel in two parts and get the first part in before final cutting.

Although I started with my previous repair panel, which was now too big.


After cutting it back a bit, it was welded in.


And this is what the "A" Pillar was looking like now.


Then after welding in the first part of my repair panel it looked like this.


As before, just this small section of metal really made a difference in the stiffness of the bulkhead.
So next time I will start cutting out the rot and putting more repair panels in.

I'll be back in a minute with Part 2...
2 Dec 2013, 6:00pm
Monday - Part 2
The other area when it all went wrong were these two holes used for the original bonnet catch.


I knew there were a few pin holes to sort out, but wasn't too worried.
However, after a complete nightmare of blowing holes everywhere I had to admit defeat.
The area on the left side of this photo was just too thin to weld properly.
( Well for me anyway. :rolleyes: )


By this point I was getting pretty fed up with rust damage so I took some drastic action.
I cut the whole mess out and cleaned up the area ready for a much bigger repair panel.


By now it was also getting dark & as I am still not 100%, it was time to call it a day.
So I simply tacked the repair panel into place and will hopefully finish it off tomorrow.


These bulkhead repairs have certainly been more extensive than I was expecting.
But I am determined not to take short cuts that that would only "look good".
Whilst I know my filler work is rough, it is all over solid metal, so I am happy.

Seam Sealer Question:
Obviously I have been digging the old stuff out and fixing all the mess underneath it.
What are people's views on the correct sequence for using the new stuff I have bought?

So far, I have repaired & applied anti-rust treatment to the old metal seams.
Then I have then put a coat of primer over the top of that.

Does the new seam sealer go on next, with the black paint over the top of that?
Or do you put the first layer of paint on, then the sealer, then more paint?

Any "answers on a postcard to the usual address" would be most welcome.

Cheers, Paul. :)
2 Dec 2013, 6:12pm
Hey Paul,

Keep it up, you're getting there eventually. Normally these sealers can be painted, which suggest that you use it first. In my case the metal was all ready prepped and had a primer. And I think this is the best way. First use treatment and primer (which can penetrate all the little gaps and holes. Then the sealant and on top of that a top coat of paint.

Not sure though, but it looks like a logical method.

Michiel