This is a read-only archive of the old Madabout Kitcars forum. New posts and replies are no longer possible, but every thread is still here to browse and read.
Thanks guys. When you are ate the bare chassis stage and it's p*ssing with rain outside, photos like this keep me going. Seeing two together is very nice indeed. Very, very 1950s. They look terrific.
Well done, chaps. And thanks Mr T for sharing.
No problem. By the end of September I'm hoping that we'll have three of these lined up outside the gates of Sandringham for a 'gentlemen, start your engines' photo. Mine should be first away from the pits though as I've fitted electronic ignition and it starts first time every time while Phil's takes a fair bit of churning before it'll fire...
So, lazy day today after I had a bit of a hectic shift last night, but I have tackled the dog's dangly bits at full mast fuel filler. Just cutting another 3/4" off the hose has made quite a difference -
I also took five minutes to plonk the bonnet on to see if I was going to have any fouling issues. It's a little awkward with the ends of the front cross member still in place as that restricts how far back you can push the bonnet until they 'fall off.'
The question was answered when I started depressing the bonnet above the engine to see if there was any resistance and it cracked directly over the engine to radiator top hose connection (circled).
Oh well, I'm not too worried about the crack as I'll just cut a hole there for clearance and then decide whether to put a scoop or a blister over the top.
Should be a bit more positive progress on Sunday and Monday if all goes to plan...
As far as your fuel filler is going it looks a lot better with the shorter pipe, but it still looks like it could do with "something". Perhaps along the lines of what i did with a metal flange/collar around it and may also help to hold it in place? just an idea.
As far as your fuel filler is going it looks a lot better with the shorter pipe, but it still looks like it could do with "something". Perhaps along the lines of what i did with a metal flange/collar around it and may also help to hold it in place? just an idea.
Yes, I've been experimenting with a polished alloy steering wheel top ring to embelish the fuel filler but it's a bit too big. Might have to fabricate something in alloy...
I've just trial fitted my wind deflector to check the seating position - not a great photo I'm afraid, but I'm very happy with the driving position: raise head to look over the screen, lower chin(s?) to look through it. eep:
At least it's shown me that I can get into the car in less than ten seconds as that's the longest delay on my camera!
I'm like a dog with two tails now it's starting to look like a car. I can't help constantly popping out to the garage and just sitting in it... These cars look fantastic, really while to me Cobras look a bit, well,
Connected up the vacuum hose for the brake servo this morning. I've replaced the standard vacuum connector on the manifold with a new one fitted with a non-return valve from Rimmers. Simple job, undo the old, tighten down the new. I've ordered a cone filter to go on the engine breather outlet to replace the rather clumsy standard Triumph set up. The servo gives a 1.9:1 boost, and I've fitted it so my Spyder has the same pedal feel as you get in a modern car. This will prevent the OMG moment you get when you need to stop in an old car, gently depress the middle pedal and fck all happens.
Got the rear panels prepared today. They're now all out of the car and soaking in wood preservative as the outsides will be exposed to the elements and I don't want them to rot, especially if I'm going to be buried in it one day. Should be bonding them in tomorrow once they're dry.
Current plan is to fibreglass over the panels once they're in, then sand them down smooth so I can have a bare painted finish to the sides. I'll probably carpet the rear bulkhead though, mainly to hide the luggage compartment door.
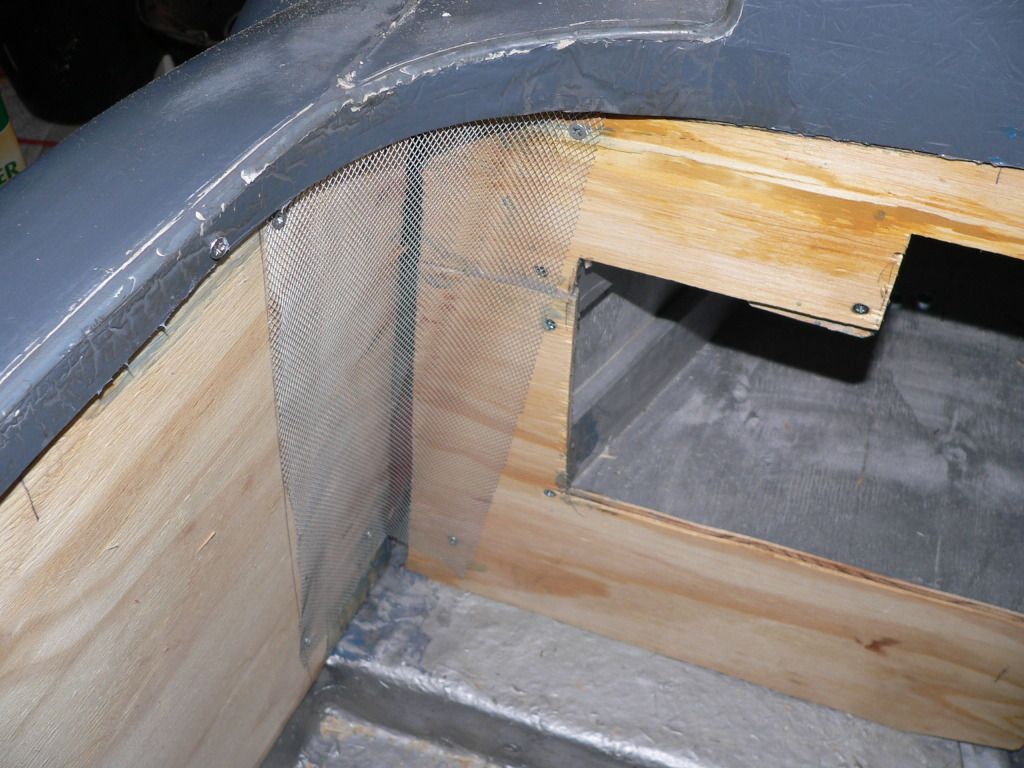
The inner panelling is now bonded in place and I've tacked in some stainless mesh to help form the curved corners. Once the bonding paste has set tomorrow I'll be fibreglassing over the whole lot.
I also trial fitted the driver's seat to make sure there's enough clearance to the side panel, which there is.
I had to cut the side panels in two down the centre line in order to get them up inside the return at the top of the bodyshell without breaking it, but it turns out to have been a masterstroke as it's allowed the panels to naturally sit at a slight angle to one another, pushing them further outboard than if they were straight. This has freed up extra space in the cockpit making it a very comfortable place to be.
Looking good! I think that you'll be pleasantly surprised as how comfortable it actually is driving a Spyder, as I was lovely and comfortable for the 1hr 40min drive from mine down to Poole for the 1st Sammio Gathering!
Plan for the day - line the interior with chopped strand matting, stapling it along the top edges to hold it in place. Then lift it up to apply resin beneath, slap a coat of resin on top, forcing it in with a roller and stand back to admire the high quality finish.
SO FAR SO GOOD -
EASY PEASY -
BUGGER.
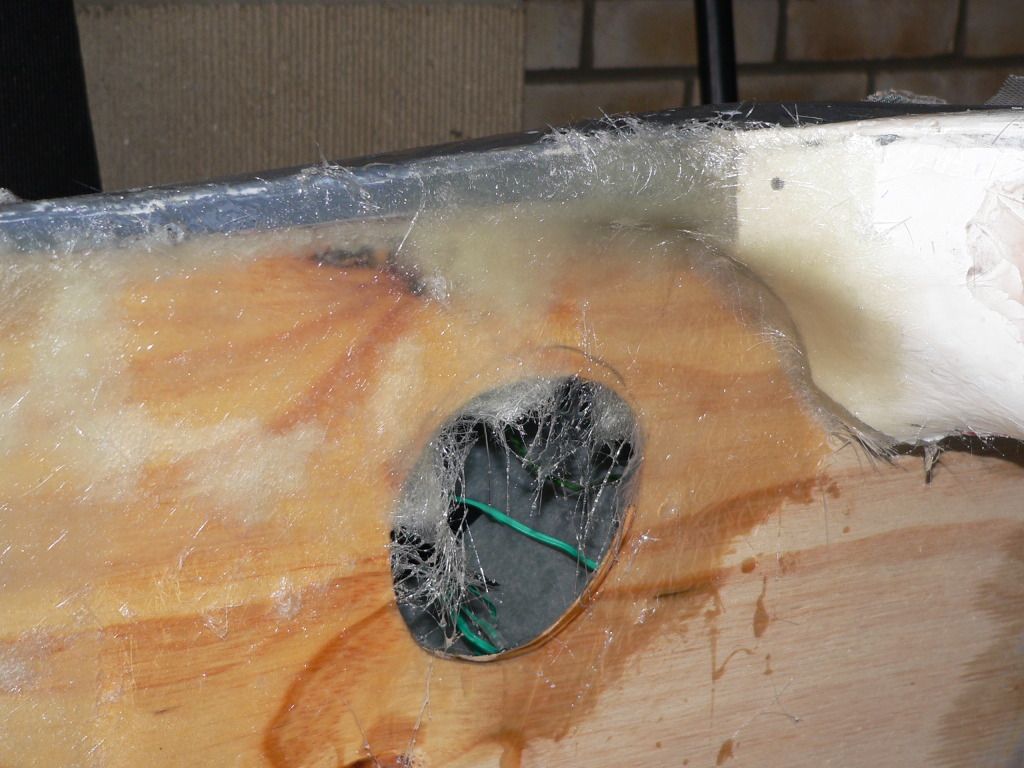
The reality is, once you start adding the resin the glass mat starts to sag and droop and I quickly started looking like Tutankhamun after a bad day at the embalmers. If I hadn't pulled most of it out and thrown it in a sorry looking heap behind the car I'd have been forever cocooned in resin and mat inside my Spyder like an insect trapped in amber.
After a bit of a rethink on the fibreglass front I decided that doing it a little at a time is a better idea for the novice 'glasser. I have at least managed to blend the 550 dash into the sides today though.
The aim of acheiving a nice, smooth finish ready to paint looks like it's probably beyond me so I'll just do the best job I can and get some side panels made up by a professional trimmer to finish the job.
Sometimes fate just takes over and decides the direction your project will go in
Just filling in the V627/1 form to re register my Vitesse as a Spyder.
Can anyone tell me if I need to fill in the mileage, and if so, do I use the mileage off the Vitesse speedo that came with the donor, the GT6 speedo that I'm going to fit or the Herald speedo I bought but won't be using because it'll say I'm going 60 when I'm actually doing 78?
And where it says Colour: do I put in the original colour or the colour it's going to be?
Apart from that it looks surprisingly straightforward.


 eep:
eep: 
 while to me Cobras look a bit, well,






 tube [sammio spyder]