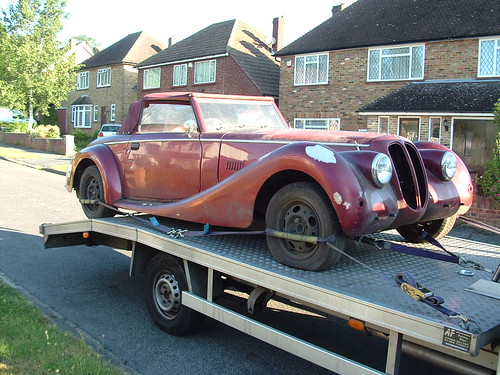
This is a read-only archive of the old Madabout Kitcars forum. New posts and replies are no longer possible, but every thread is still here to browse and read.
Thanks, Mick, Kon, Dpaz and Patrick for you words of encouragement
----------------------------------------------------------------------------
A quick update of progress of trimming out the interior of the last couple of weeks.
So the next step was to cover the rear panel that sits behind the seats. (For anyone not familiar with the sabre, the hood drops down behind this panel when in the fold down position.)
Having stripped of all the old trimming, I started by covering the top rail of the back panel with some navy vinyl which was glued on the front and stapled on the back. The back was also covered in sound absorbing foam.
After a lot of faffing about getting the seat belt mounting holes aligned with the chassis I could finally fit the rear panels in place. Before the final fitting I covered the rear body tub bulkhead in sound absorbing foam.
A couple more panels on the drivers side to make/trim/fit and then I can move on to fitting the seat belts and the drivers door.
Due to the width of my garage I need to move my car across the garage by about 12 inches.
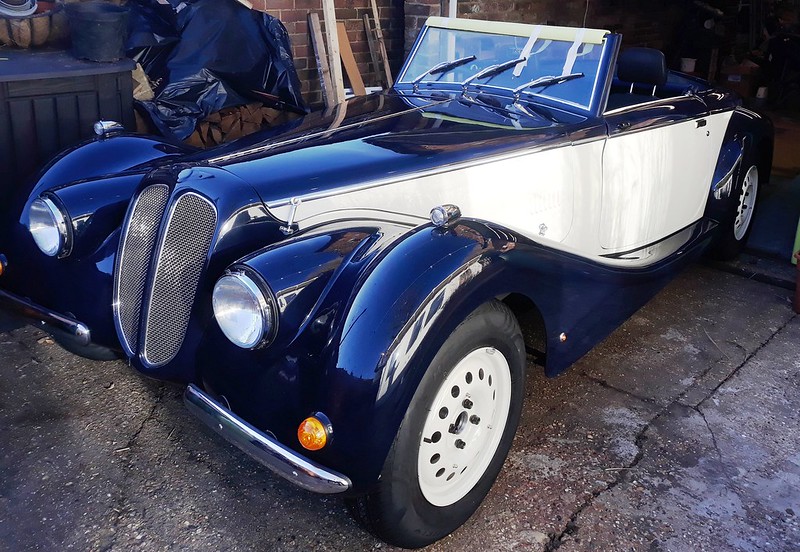
So as mentioned above I had to move the car across the garage by about 12" to give me space to fit the drivers door and I decided to retrieve the boot lid from the loft above while the car was out.. It was a nice sunny day so a good excuse to take another picture. It looks almost finished but of course at this stage it still had no driver's door or boot lid.
The first job before fitting the driver's door was to add some protection to the wall of my garage so I don't damage the door when I open it. I used a cheap yoga mat off ebay.
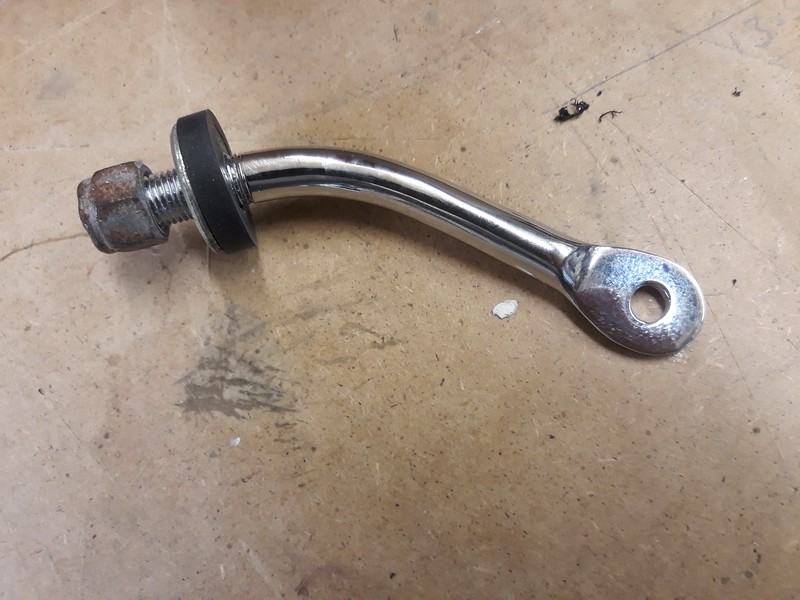
I then fitted the driver's door which looks exactly like the passenger door so no photo's. But I didn't photo the door stay before so.....
The door stay on the Sabre is a simple device that passes through a hole in the hinge plate to stop the door opening too far. The original plating had rusted on mine so I had them chrome plated.
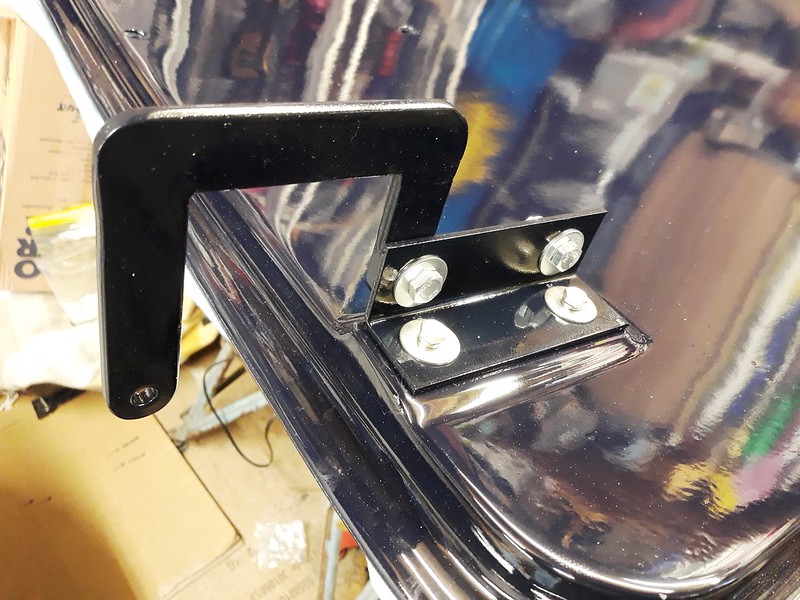
I then moved on to fitting the boot lid. I prepared the boot lid by first cleaning off some old masking tape and then giving it a good polish. I trial fitted the hinges to make sure everything lined up. The boot lid is very well engineered, being a double skinned GRP structure with metal plates bonded inside to take the bolts of the hinges and boot stay.
The Sabre boot lid catch is taken from a VW beetle engine cover and I picked up a new catch at the Donnington kitcar show many years ago. The original builder made a bit of a pigs ear out of cutting the hole but you don't notice it once the boot lid is fitted.
My son popped in on Saturday so I roped him in to help me fit the boot lid. I spent over an hour lining it up as the hinges are adjustable. Boot seal is not fitted yet nor the catch striker pin. I expect to have do some more adjustment once the seal is fitted.
Thanks, Dpaz, it's a great looking car and hats off to John Barlow for his automotive design skills.
--------------------------------------------------------------------
I have aborted an attempt to install some seatbelts from a company called 'Universal Seatbelts' in Billericay, Essex. After many hours of trying to figure out how to fit them I came to the conclusion that they had been assembled incorrectly with the buckle and lower mounting point stitched in the wrong way round. I managed to reverse the buckle by folding the belt over and pulling it through the buckle but the lower mounting point is cranked so it's not possible to reverse the mounting. They are correctly 'e' marked but I suspect they are Chinese copies from a low quality factory. Having realised they were obviously assembled incorrectly I completely lost faith in them in case the internal mechanism might be wrong.
I then bought a set of Securon belts and they fitted without any issue at all. They have a definite feel of quality in the smoothness of the belt material and are highly recommended.
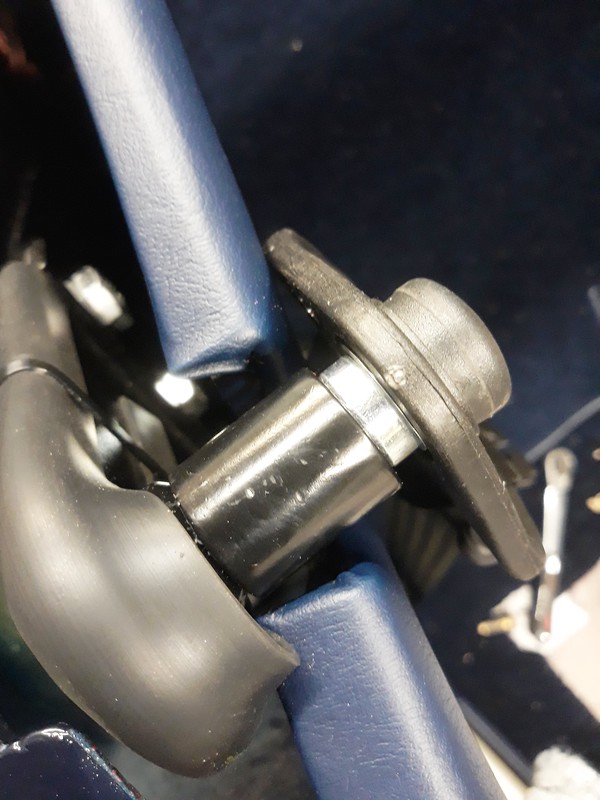
But first I had to make some spacers to clear the bodywork and rear quarter trim panels. Seatbelts by Sabrebuilder, on Flickr
I used a 25mm diameter steel bar which I cut to length before drilling the holes.
I had to purchase some longer 7/16" UNF bolts so here's a picture of the bolt head for the IVA inspector.
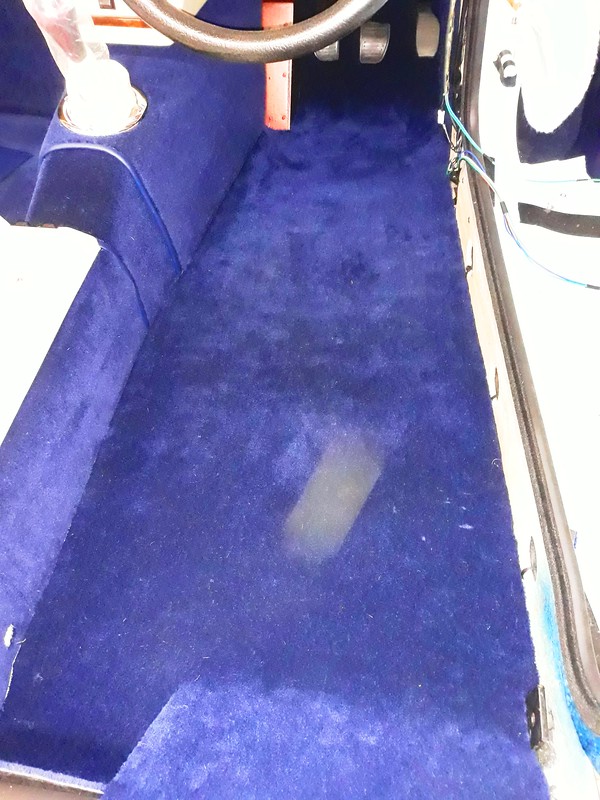
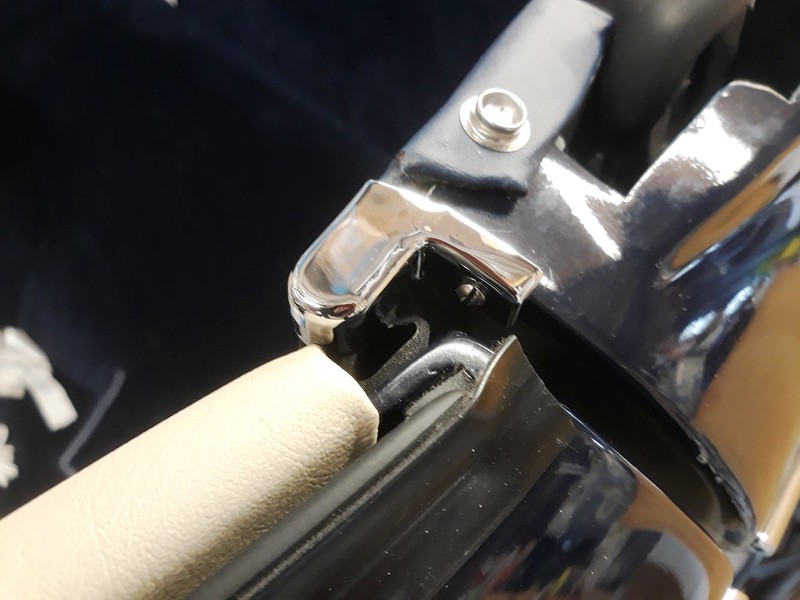
I've now finished the carpeting inside the car and trimmed the drivers door card. These strange looking pieces are the 'A' pillar covers, shown here before I covered them in cream vinyl.
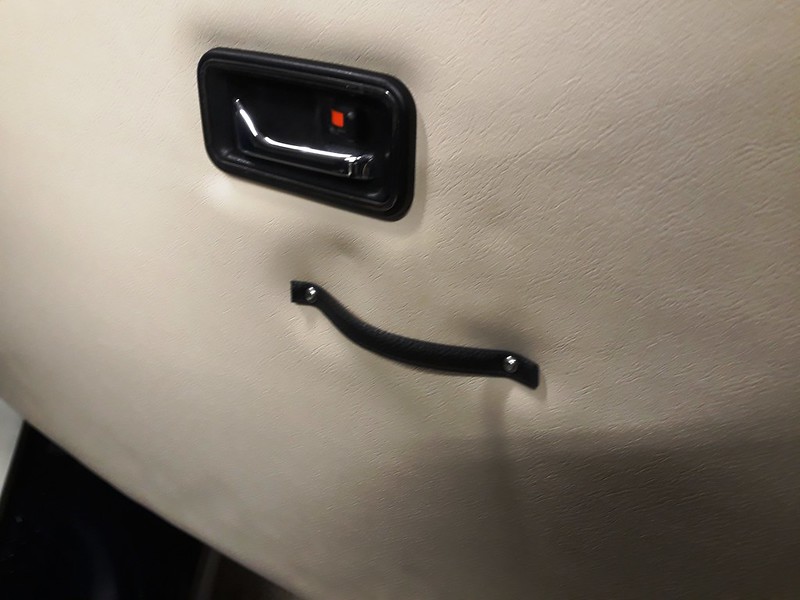
The chrome door pulls have hinges that do not meet the IVA 2.5mm radius rule so I made these temporary door pulls. Made from the strap from a charity shop handbag.
I shall now be taking a short pause from car building for a couple of weeks to do some essential diy and then I'll be back in the garage working my way through my final list of tasks before applying for my IVA test.
More updates to follow in a few weeks................
Just when I thought I was close to applying for my IVA I had a thought that I should check if the IVA manual had been up issued. So I checked on the government website and sure enough a new version was issued on the 20 March 2023!
So I downloaded a copy and checked the Release Notes for Version 15.0.
There are 15 changes identified and most of them are very minor. So I went through each change and identified the impact on my Royale Sabre.
There are 12 changes that have no impact or are not applicable to my vehicle.
2 changes (Section 12 and section 16) now have an exemption from the 2.5mm radius rule for movable windows. They now only have to be 'blunted' which is good news as I won't have to disable the electric windows at my test.
(Mike on this forum, had this as a failure point at his IVA on his Marlin Cabrio) It's nice to see some common sense being applied.
The only other change is to the tolerance of the Speedometer. Previously, Speedo's were allowed to over-read the true speed by up to10% plus 6.25mph.
The new requirement is a tolerance of up to10% plus 2.5mph. Providing my ETB electronic speed is working and set correctly, then this shouldn't be a problem.
As I said, this analysis is for the Royale Sabre so if you are building something else you should check the changes as they may affect your particular kit car.
Not bad value if it has all the bits (kit bits) with it but even more work to do than the other one. I'd be very tempted but just haven't got the room (TVR in the garage)
BTW, like the idea with the yoga mat. I need to do the same.
Not bad value if it has all the bits (kit bits) with it but even more work to do than the other one. I'd be very tempted but just haven't got the room.
I've been following this thread for a couple of years, and I must commend you on attention to detail!
I bought my Sabre last year, already finished, with a few little jobs to do. Unfortunately, I have NO IDEA how to post a photo on here, now(Luddite!)
Not much to report on due to other commitments but I am slowly working my way through a list of things to do before applying for my IVA test.
One of the things on the list was to set up the speedo with the correct calibration setting based on my new wheels and tyres, etc. After setting the speedo, I raised the rear of the car on axle stands so I could run through the gears and see if the speedo works which it did fine.
But, when I first started the engine it made a dreadful noise and ran very roughly. I think one of the hydraulic lifters had drained (or stuck?) and took a while to work properly. It cleared after about 5 minutes but the episode reminded me it was probably time to change the engine oil.
I also figured it would not be a bad idea to flush the old oil so I bought a can of Wynns engine flush to clear out any crud. Following the instructions, I added the can of liquid to the engine oil and allowed the engine to idle for 20 minutes.
Then whilst still hot I drained the old oil which came out black showing the flushing agent had worked.
With my new 15" wheels and 80 profile tyres there is now sufficient clearance under the car to slide my plastic oil draining 'can' underneath without the need to jack up the car. And the oil drain plug is in a convenient position so that it can be reached with an extra long extension bar on my 1/2" ratchet.
Oil change April 2023 by Sabrebuilder, on Flickr
(You can make out the sump and oil draining out in the centre of this picture. The black plastic oil draining can is on the ground beneath the chassis above.)
After leaving the old oil to drain over lunch, I changed the oil filter which is so easy on this engine and I was pleased to find the new Bosch filter came with all the necessary seals and 'o' rings. I refiitted the sump plug with a new seal and refilled with Millers Oil. I chose this oil as it meets BMW spec and is a reasonable price.
Whilst running my engine to test the speedo all the air in the header tank 'disappeared'.
After some head scratching I realised the air had not leaked out but it had all accumulated in the top of the radiator.
I then realised I had made a school boy error when I moved the header tank vent hose from the top of the radiator connection to the cooling fan-switch adaptor in the top radiator hose. I had overlooked the fact that the adapter was set in a hose that was about 4" lower than the top of the radiator.
I've now re-configured the top hose so that the fan switch adapter is now level with the top of the radiator so there should be no chance of air being trapped in the top of the radiator. It's a bit of a Heath Robinson design and I hope to create something more elegant one day.
First test went well but only time will tell if it is okay.
I've been a bit quite on here as I've been preparing for the Sabre's IVA test.
Whilst preparing for the IVA (which had its own share of issues) I found the time to line the boot. I used matching carpet and plywood covered in carpet.
The jack and wheel brace is a requirement for the IVA and of course is useful to change a wheel and is fixed to the bulkhead with a couple of wing nuts. i plan to make a cover at some stage.
The IVA requires you arrive with a full tank of petrol so a trip to the local petrol station was required to fill the tank. All 17 gallons!!
That wasn't deliberate but the forum seems to have a sense of humour
----------------------------------------------------------------------------
Well it didn
seems to apostrophise causing problems........
I will try again.........
---------------------------------------------------------------------------
Well it didn’t pass and he couldn’t test the brakes as their rollers were broken!
Because of the rollers issue he couldn’t do an ‘official’ test but agreed to check the car over.
I will have to go back for the brake test and check the corrections below.
So firstly the good news....
VIN plate and stamping passed (I was bit worried as my chassis stamping wasn’t very good)
Engine emissions passed with flying colours (even though tested to the BMW spec!)
No 'sharp' edges (he didn't even get his measuring tools out)
All lights, wipers, demister, horn etc okay
All interior controls and steering passed
Seat belt mounting height passed! (so my upright mods worked)
All nylocks okay
Speedo accuracy passed okay
Mirrors and self centering passed
Noise not even measured as it is ‘obviously quiet’.
And now the things I need to fix....
Excessive play between brake pedal pushrod and master cylinder (this developed during the drive to the IVA)
Front flexible brake lines too long and touching chassis on full lock (not previously seen when I checked?)
A grommet on the wires to the starter motor had popped out (probably whilst fitting carpet)
Screw missing from one 'p' clip (??) (I had fitted the nutsert but not the screw...doh!)
Heat shield required between exhaust pipe and a rubber fuel hose (reasonable request)
Heat shield required between silencer box and fuel tank (subjective opinion)
No grommets on the wires going to rear lights (even though they are covered in PVC sheathing and going through GRP)
Top of the front tyres foul on the wings under full lock and acceleration (I need to raise the suspension a bit or get thinner spacers)
So a bit disappointing not to pass first time but not a bad result.
i hope to go for a retest in a couple of weeks..........
Dear Peter, It is such a good news that you finally had the change to get the feel of the beautiful car you put so much effort into building it to what it is. It looks the part and it is lovely. Looking forward to the little modifications to be done and get it through the IVA test.
Thanks Paul and Amir for your encouraging comments. I've been building this car for nearly eleven years so another couple of weeks is a drop in the ocean.
Yesterday, with all the issues in my head, I forgot to mention the fantastic experience of driving my Sabre.
My journey yesterday morning started at 6.30am and the 40 minute drive to the test station was really exhilarating and enjoyable with the early morning light and the birds singing in the trees.
The ride is smooth and easy to drive with so much power from the engine. I think my tyres were pumped up a bit high (to help pass the self-centering test) as the steering was a little twitchy and very sensitive to the smallest movement. I had her up to about 50mph but found cruising at 45mph more enjoyable much to the frustration of some of the early morning commuters .
You don’t notice the slightly offset steering wheel and being quite low down in the car there is not much wind buffeting. I drove there with the windows down and up on the way back, as the weather had deteriorated. With the windows up you get a lot more wind on the back of your head.
This car was number seven off the production line and left the factory in July 1994 and now has been driven!! It only took 29 years.
It must have been quite a shock for the poor thing.
I made a start today on the issues so shouldn't be too long.....
Good news, my car has passed its IVA test today!!!
Fairly uneventful apart from my route to the DVSA site was blocked by the police attending a car and trailer that had taken a bend too fast and tipped over. This meant I had to take a detour up a single track road which was a bit exciting.
Different tester this time who started by checking off the list of corrections without much comment and then ran the brake test. Front brakes passed okay but the rears were marginal at 58% versus the requirement of 60%. This would have been a fail except the tester suggested I changed the Axle Design Weight from 1500kg to 1400kg to which I agreed and it passed. It was just a technicality as the rear brakes are still bedding in and would likely reach the 60% quite soon.
After that he went off and wrote out the certificate and I headed home before the rain came.
Registration documents sent off today, so we'll have to see how long the DVLA take.


 Rear Panel by Sabrebuilder, on Flickr
 Rear panel by Sabrebuilder, on Flickr
 Carpet by Sabrebuilder, on Flickr
 Rear panels by Sabrebuilder, on Flickr
 Door seal finishers by Sabrebuilder, on Flickr
 Door seal finishers by Sabrebuilder, on Flickr
 Moving by Sabrebuilder, on Flickr
 Door protection by Sabrebuilder, on Flickr
 Door stay by Sabrebuilder, on Flickr
 Door stay by Sabrebuilder, on Flickr
 Boot lid preparation by Sabrebuilder, on Flickr
 Boot lid catch by Sabrebuilder, on Flickr
 Boot lid preparation by Sabrebuilder, on Flickr
 Boot lid fitted by Sabrebuilder, on Flickr
 Seatbelts by Sabrebuilder, on Flickr
 Seatbelts by Sabrebuilder, on Flickr
 Seatbelts by Sabrebuilder, on Flickr
 Seatbelts by Sabrebuilder, on Flickr
 'A' Pillar trims by Sabrebuilder, on Flickr
 IVA door pulls by Sabrebuilder, on Flickr
 IVA radius check tool by Sabrebuilder, on Flickr

 Oil change April 2023 by Sabrebuilder, on Flickr
 Oil change April 2023 by Sabrebuilder, on Flickr
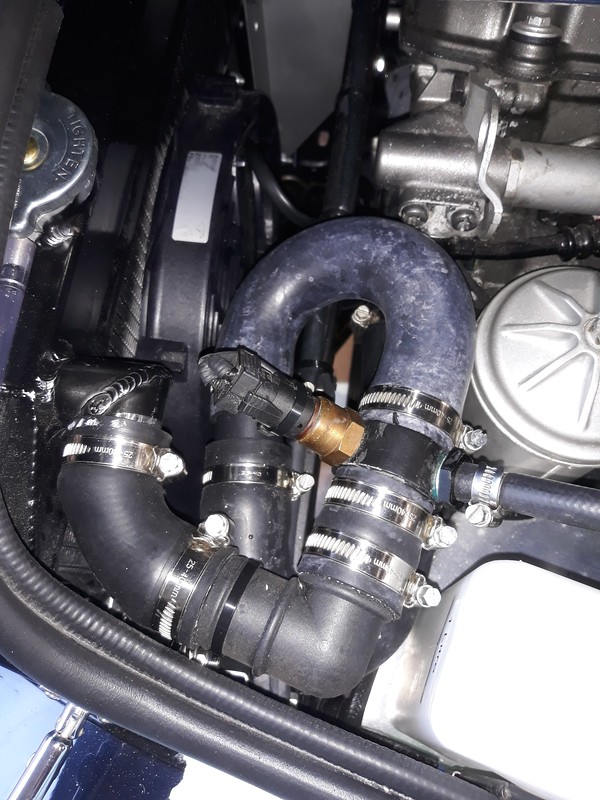 Cooling system - Mk 3 by Sabrebuilder, on Flickr
 Boot lining by Sabrebuilder, on Flickr
 IVA preparation by Sabrebuilder, on Flickr
 IVA preparation by Sabrebuilder, on Flickr
 IVA day by Sabrebuilder, on Flickr
 IVA day by Sabrebuilder, on Flickr
 IVA day by Sabrebuilder, on Flickr

 IVA Passed by Sabrebuilder, on Flickr
 IVA Passed by Sabrebuilder, on Flickr