This is a read-only archive of the old Madabout Kitcars forum. New posts and replies are no longer possible, but every thread is still here to browse and read.
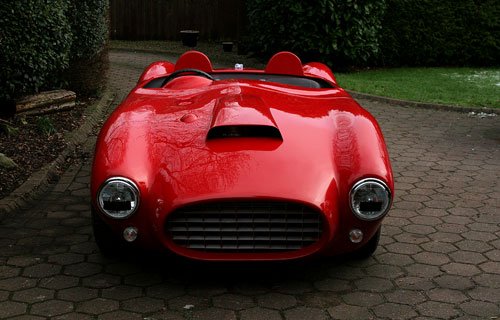
Paul Having the grill fixed to the nose did not cause me any issue, the lip around the inner nose was filled and flattened before the grill fitting so no issues with painting i did have to mask the area off and to be honest if i was to do it again i would design the grill to be detachable in case of future repairs etc.
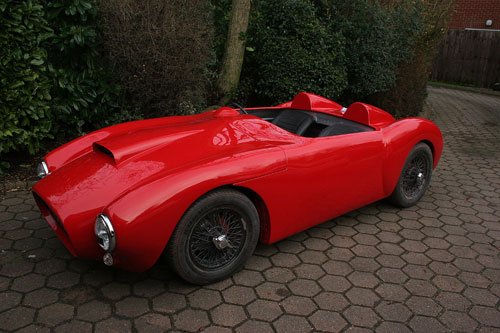
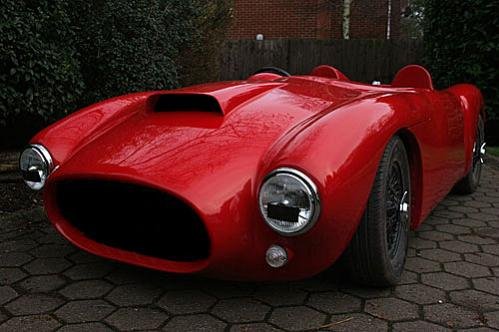
Started to added the parts back onto the car but not sure if I will leave the wire wheels black or go for silver, I had though about spraying some of the ally parts fitted to the outside satin black to match the wheels but will wait and see.
Attachment “IMG_6314.jpg” from the original forum could not be reliably recovered.
Attachment “IMG_6313.jpg” from the original forum could not be reliably recovered.
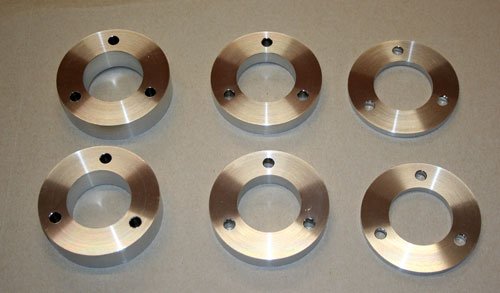
I'm still not totally happy with the way the drivers side front wheel arch is in relation to the tyre so are going to make a couple of spacer discs to lift the front end by 10mm and see if that helps.
Very nice job - those black rims looks fabulous.. I noticed you also went with the flat hood which give you more access from the side. I also like the rear light arrangement a lot, well done
I agree with all so far. The red with the black wheels is a very good look. I would keep them that colour. And don't feel it is necessary to change any of the bright-work to match.
Thanks for the reply guy's, when it comes from a group of guys who have been through or in the process of a build it means a lot, cheers.
When i mentioned about may be spraying some of the ally parts satin black i had in mind just the screen base mount, one of the reasons was that i am finding it difficult to get the parts anodized plain silver and i know that if they are left untreated then i will be for ever polishing them to keep the surface finish, especially the screen base mount due to its position on the car. I did go down the route of maybe DIY anodizing but the cost of a power supply out ways the justification for a couple of parts so if anybody knows of a good source for the correct power supply let me know.
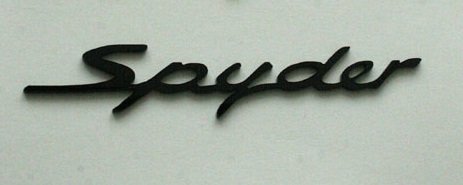
The other factor about spraying satin black is the name plate i made is black, so these couple of parts will tie in with the black wheels.
Attachment could not be found in the archived database.
This is the screen base mount i made from ally sheet and i think it will look well in satin black.
Name badge in black.
Attachment could not be found in the archived database.
Another area to possibly spray black is the grill, tried to show what it will look like in photoshop compared to the ally on the right image. The scoop grill has already been powder coated black.
Any way it's food for thought and Ive still got the interior to finish putting back together, see you all soon and roll on summer.
just one thing swifty ...they would not have been black in period... i think that what make's a car look like an older car, then a kit trying to look old with modern colours and parts .......it all down to builder' but my view is try to make it as period as poss and for me just black wheels its a great looking car you should be proud.......
The period look is what i have tried to achieve and i do agree that the ally parts would look period if left bare sort of speak especially the screen base mount which i have copied from cars in the mid fifties but i would prefer to anodize all the ally parts that are on the outside to stop them looking scruffy but then again i supose that could be seen as patina which may go towards the illusion, decisions decisions.
I think anodyzing was around from the 1920s but may not have been particularly widespread. Given what you have already achieved, have you thought of experimenting yourself -
The period look is what i have tried to achieve and i do agree that the ally parts would look period if left bare sort of speak especially the screen base mount which i have copied from cars in the mid fifties but i would prefer to anodize all the ally parts that are on the outside to stop them looking scruffy but then again i supose that could be seen as patina which may go towards the illusion, decisions decisions.
I wonder if ally was anodised in the fifties.
what ever way you go ..its one of the best yet..... love it..... love to see it out with me barry and towed now that be a day ....
I think anodyzing was around from the 1920s but may not have been particularly widespread. Given what you have already achieved, have you thought of experimenting yourself -
I did it with some scooter parts many years ago and it worked. And, yes, you achieve the colour you require using Dylon!
Oxford I did a little research some months ago on this subject which looks to be relatively easy but the problem i have is the length of the screen base which will require boiling in water for 30mins to seal it off and i don't have a pan big enough to do this, the smaller parts will not be a problem. The anodizing tank i thought could be made out of a plastic christmas wrapping paper storage box the type you see for sale in poundland etc.
I had thought that it would be simply a case of going to go to a local company but so far nobody is willing to tackle the job for what ever reasons.
Back to the drawing board on this one.
what ever way you go ..its one of the best yet..... love it..... love to see it out with me barry and towed now that be a day ....
Phil Would love to be able to do that but i live many miles away from you three guys, but who knows if the car performs then i may trust it to do a long journey.
I have been looking around for advice on setting up and tuning the suspension and come across this site http://auskellian.com/paul/links_files/performance_enhancements.htm which offers easy to understand information along with good reference pictures. There's also a drawing for the rear leaf spring lowering block for anybody wanting to make their own along with links to other sites that offer after market none standard suspension parts.
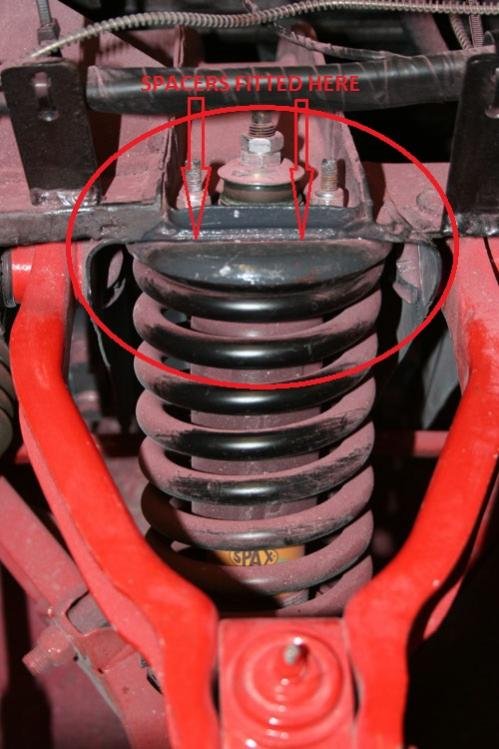
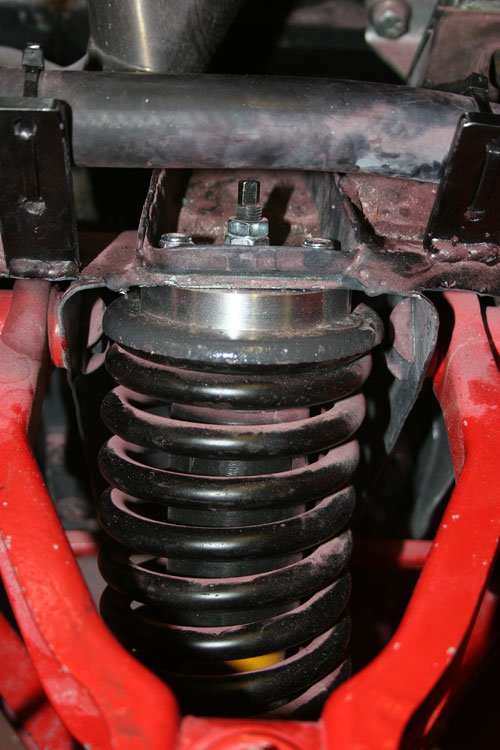
Recently made a selection of spacer rings 16mm/10mm/5mm thick which i am going to trial fit between the front suspension spring top cup and the chassis suspension arm, the reason is to try and lift the body slightly up to give more wheel clearance as the drivers side sits down slightly plus Ive read the spitfire suspension setup is better if the front is slightly higher than the rear, the different thicknesses is to find the one that works. Another area i need to check is the front ARB to make sure it's not twisted and causing the drivers side to sit lower, i have read that it's very unlikely that you find a ARB that is not slightly twisted and a solution is to fit adjustable ARB drop links to compensate, check this site out for what i mean http://www.wolfitt.com/wolfitt_products_1.htm#Anti%20roll%20bar%20drop%20links%20-%20rod%20end%20conversion they look very easy to make, be sure the rod end bearings are adequate enough.
Well that's it for now see you soon and i will post pictures of the front suspension mods when complete.
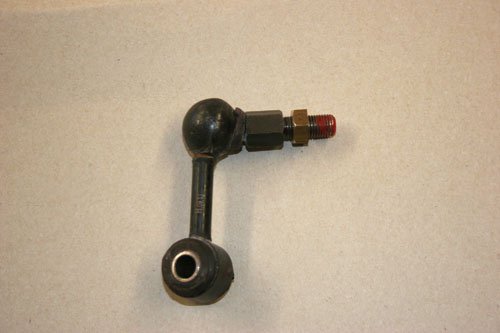
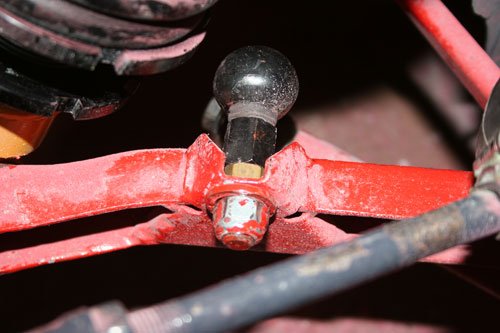
Today was a result, ive manage to lift the front end of the body by 20mm. First i dropped the drop link arms off the ARB to amke sure it was not twisted and all was well, i dd notice the top ball joint on each drop link arm was flexed to its max the steel cup was hard against the ball shaft, decide to make a couple of spacers to alleviate this problem which they did.
First image shows the 7mm brass spacer and second shows the spacer in place. This simple fix allowed the car to sit slightly more level then before.
Next i removed both front shock units and fitted the ally spacers made earlier, i used the 12mm thick spacers so that when the car was dropped and moved about to settle the suspension the front was lifted by 20mm. The problem i had was with full lock applied with the car moving the tyres were rubbing slightly on the top of the fixed part of the front arch.
Ally spacer fitted to the top of the suspension unit on top of the spring cup.
Tomorrow i hope to start fitting the dash, gearbox tunnel etc.
Hey Swifty, ref spraying your car parts satin black.
When I finished my windscreen surround, I had all sorts of problems with it as I wanted it chromed, (like some of them are)
That was impossible to do as I found out, so in the end I simply sprayed it silver, with a rattle can. The effect was really good surprisingly.
The last time I drove it out for a day, someone asked me if the screen surround was made from alloy, which was a real compliment since it was just steel sprayed silver, so you may want to consider doing the same.
Cheers Scottie i may end up doing that, there's one last local company to try before i give up on the anodizing.
A question regards seat belts, i am looking to fit a 4 point harness and have come across a 4 point harness made specifically for the caterham, has anybody used these or what alternative is there due to the short length required.
Also looking for a self adhesive number plate with silver border but so far not had any luck with a couple of online companies, any suggestions.
A long time back or at least it seems that way i fitted a type 9 gearbox to a straight six, i wanted a mechanical driven speedo fitted so due to the tight space between the type 9 gearbox and the fabricated tunnel side has meant ive had to use a 90 degree gearbox on the speedo output as you need about a 150mm radius bend in a speedo drive cable to prevent premature cable wear.
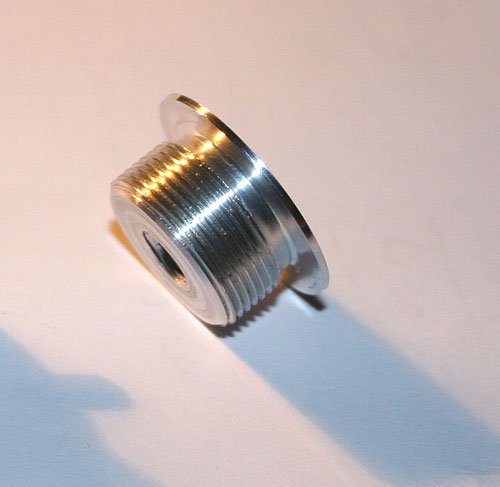
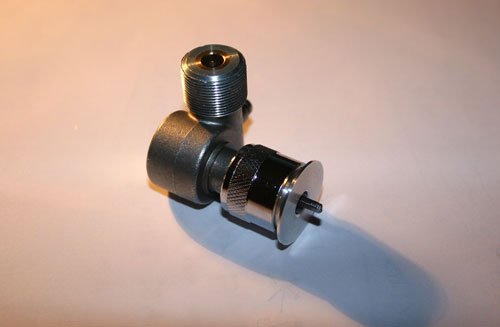
I did find an off the shelf speedo 90 degree gearbox but at £110 i thought was just to expensive so after a little further searching i came a cross a gearbox for a triumph stag and other triumph models of that era for £40 the only problem was the square drive shaft is 3.1mm AF while the type 9 is 2.6mm AF plus the mount is different so ive machined the square shaft down to 2.6mm AF and turned an adapter to suit the gearbox and type 9 speedo drive output.
Adapter made from aluminum, the thread is a none standard thread of 26 tpi, 55 degree thread angle with a .996 pitch on a 17.9mm diameter which Ive not found listed in any data books.
Attachment “IMG_6347.jpg” from the original forum could not be reliably recovered.
Speedo drive 90 degree gearbox with adapter.
Adapter fitted to gearbox, this small gearbox is held in the type 9 with a circlip so hopefully this weekend i will have that tied up, just need to work out the speedo cable length and either buy one off the shelf or have one made by speedy cables.
Today had some good news regards the anodizing of the ally parts, a local company has said they can do the lot for £80 which is very reasonable for the quantity of parts.
Attachment “IMG_6351.jpg” from the original forum could not be reliably recovered.