MadaboutKitcars

This is a read-only archive of the old Madabout Kitcars forum. New posts and replies are no longer possible, but every thread is still here to browse and read.

New Cordite Build, with a twist....

16 Jul 2014, 3:09pm
bodys are all over the place ....like in some of you bit and bobs on car think it s going to look a1 ...keep up good work mac.
16 Jul 2014, 3:38pm
Cheers Phil, high praise from a founder builder!
Mac
17 Jul 2014, 5:09pm
Hi Viatron did you get a chance to see if there is a complete navigator shell next door?

I see you have R Tech welders, is one of them a tig by any chance and if so is it any good?
17 Jul 2014, 5:46pm
I'm not up again until tomorrow afternoon mate or if not then I'll be up all day Saturday, I'll have a look and let you know :-)
Both my Tig and Mig are R-Tech, there not Esab or Miller but for the price they are both excellent bits of kit and their service and warranty are very good. Keep an eye on their ebay shop as they often have xe display units going for a discount.
Mac
17 Jul 2014, 9:15pm
I did consider the R Tech tig welder a couple of years ago for my garage but decided at the time to buy a mig instead being put off by the cheap price.

I do use a Esab tig at work and can say they are excellent but they should as they cost a couple of grand and as they say you only get what you pay for.
19 Jul 2014, 4:37pm
Spent the day at the workshop today, first job though was non car related, bought a tatty old box off the bay of e to use as a Toy box as at the moment the poor little tots toy collection is housed in our front room in an old Laser Printer box!
10 minutes with the Da and some 240 grit had it ready and I then gave it 3 coats of epoxy primer that was way past its sell by so didn't want to use it on the car. It gave me a chance to break out the spray guns and get some practise in now that the priming of the car draws near, the primed article ready for top coat.


19 Jul 2014, 4:48pm
Anyway back onto car stuff.
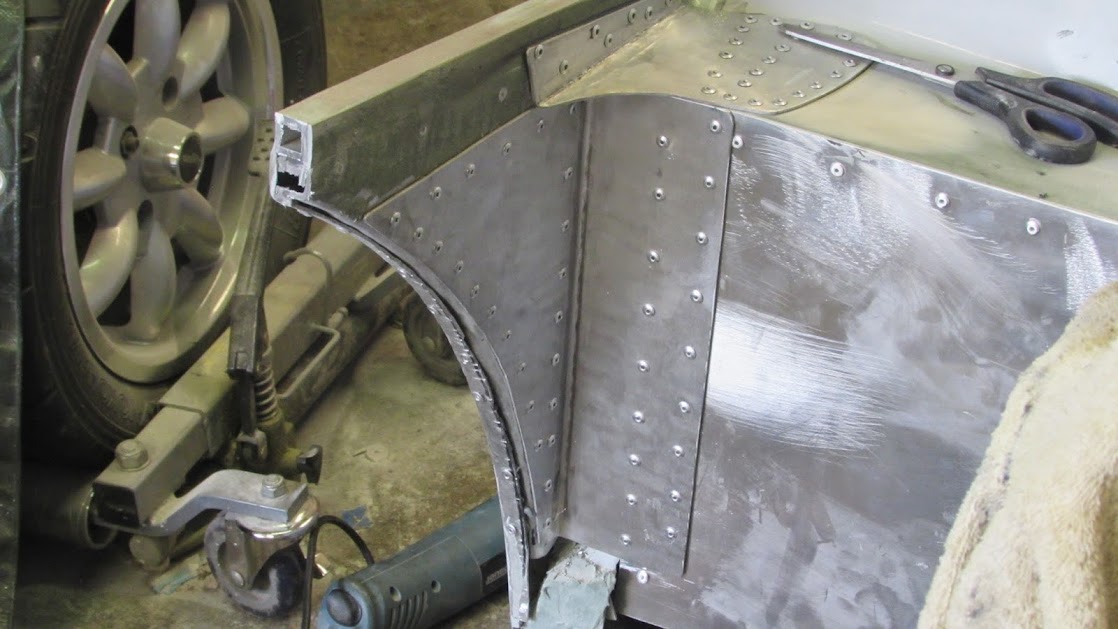
Got the closing / strengthening panels done on the drivers side:


Rivets rivets and more rivets:


The small gap left at the bottom got filled with fibreglass filler before I left for the day.

Next job was to make a start on the tubular frame that the bonnet will attach to. Started by making bolt on steel brackets:


Then drilled and bolted them to the front bumper chassis member.


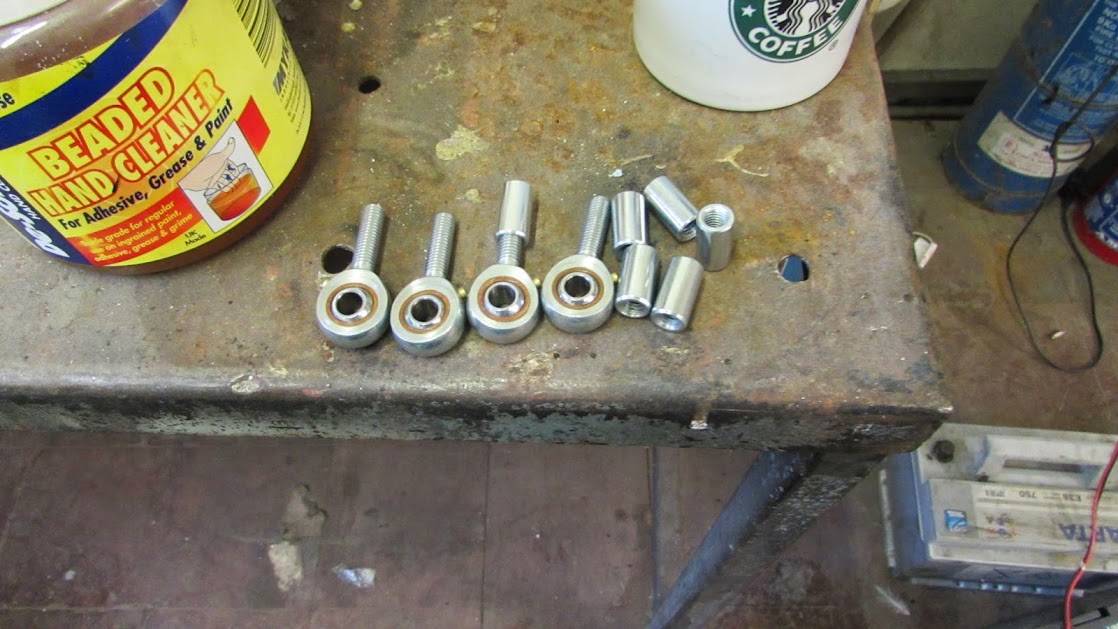
These are the M6 rod ends I will be using


2 will attach to the frame on the car and another pair will attach to a separate frame bonded to the inside of the bonnet. By screwing the rod ends in and out and using different sized spacers between them the whole bonnet can be moved backwards, forwards up down and side to side which will hopefully allow me the adjustment I need to get a good close fit along with a smooth opening and closing motion.

Unfortunately I ran out of time to start on the frame itself but at least next time I'm up I can get started straight away tacking tube to the brackets.

TTFN

Mac
19 Jul 2014, 6:16pm
Sounds like a great idea, looking forward to seeing it work.
19 Jul 2014, 8:07pm
garyh wrote:
Sounds like a great idea, looking forward to seeing it work.

+1

Mac - Is that a length of box section at the top of the body shell extension panel?

Either way, it all looks very solid. :cool:

Good luck, Paul. :)
22 Jul 2014, 10:19am
Got short spell in golems lair last night.
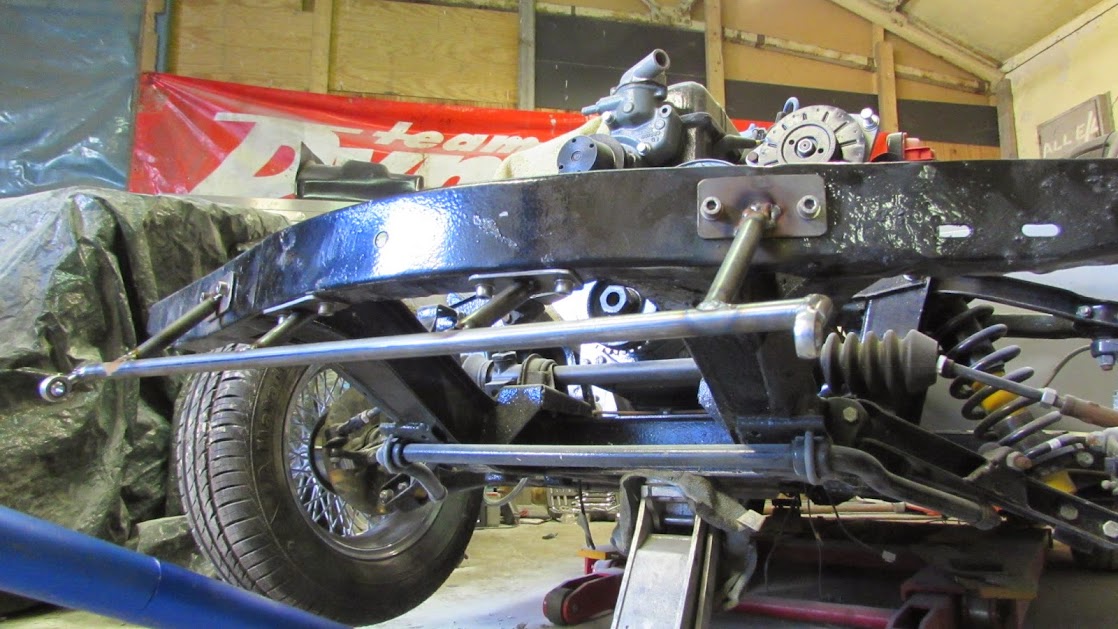
Wont bore you too much with the specifics but basically got the chassis side of the bonnet tilt mechanism done. not my best welding to be honest but as we like to say " it isn't going anywhere"! a good 23 coats of paint and you'll never know....


By using this method I have managed to bring the bonnet pivot point down as low as possible which should help.

TTFN
Mac
22 Jul 2014, 8:10pm
Mac - I thought about your bracket when I was strapping my bonnet into place for the night...

With the bracket "out front" you should have enough clearance for it to open without fouling the chassis. :cool:

But will you have to "extend" the back of the bonnet to reach the body shell?

Admittedly, I only have a quick glance, so I will have to have a proper look at this another day.

Really looking forward to seeing how this all works.

Good luck, Paul. :)
23 Jul 2014, 7:43pm
Viatron am i correct in thinking the wire wheels you have fitted are 14 inch MGB's with a hub converter from chic doug.

I assume the hub converter increased the wheel base on each axle, did this not create a problem with how the wheel's sits inside of the nav shell?
23 Jul 2014, 8:00pm
Yep spot on, they don't increase the width by as much as you would think so apart from the drivers side front arch the others have been ok and that one would have been a problem no matter what wheels were on it!
26 Jul 2014, 5:22pm
Another day in the sweat box today.
Decided to sort start sorting the bonnet. Set up the bonnet against the blast cabinet as there was a good even bit of floor there.


Then used my laser level, ensuring it was adjusted to be totally level using the built in bubble gauge.


I know there may well have been minor discrepancies using this method but it gave me a starting point.

Then measured from the nose to the laser projected line.
Drivers side 190mm


Passenger side 210mm


So the misalignment would appear to be somewhere in the order of 20mm, less than it looks to my eye but it turned out to be pretty accurate as you will see later.
At this point I had to decide whether to stretch the drivers side or chop the passenger side, the chop option won out for no other reason than I thought I would prefer the look.
Marked out a wedge cut going from 0 on the drivers to 20mm on the passenger side.
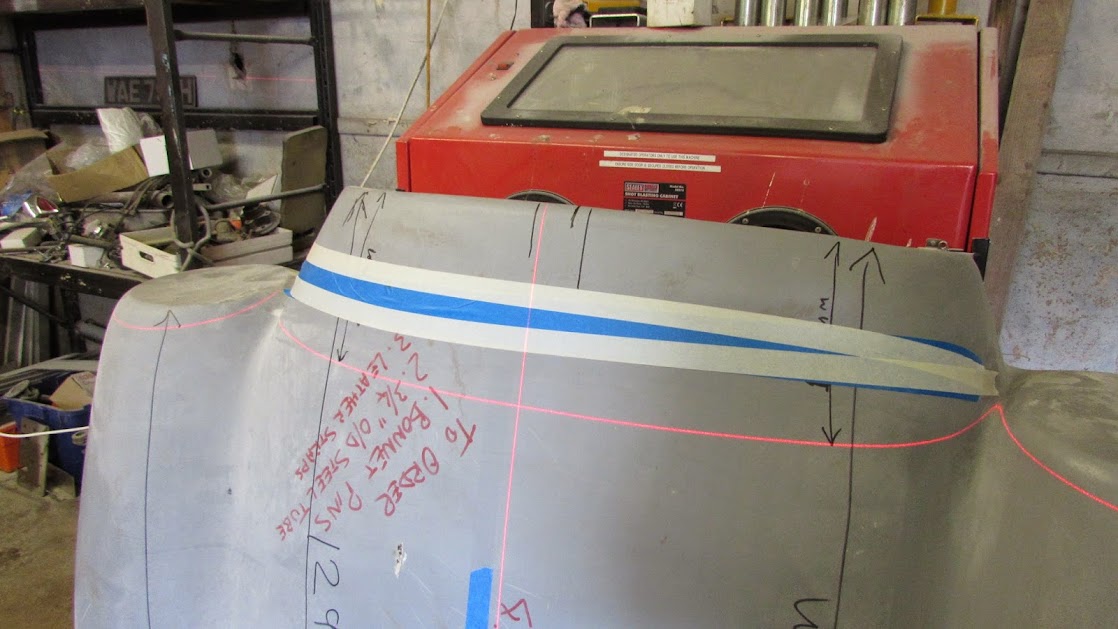
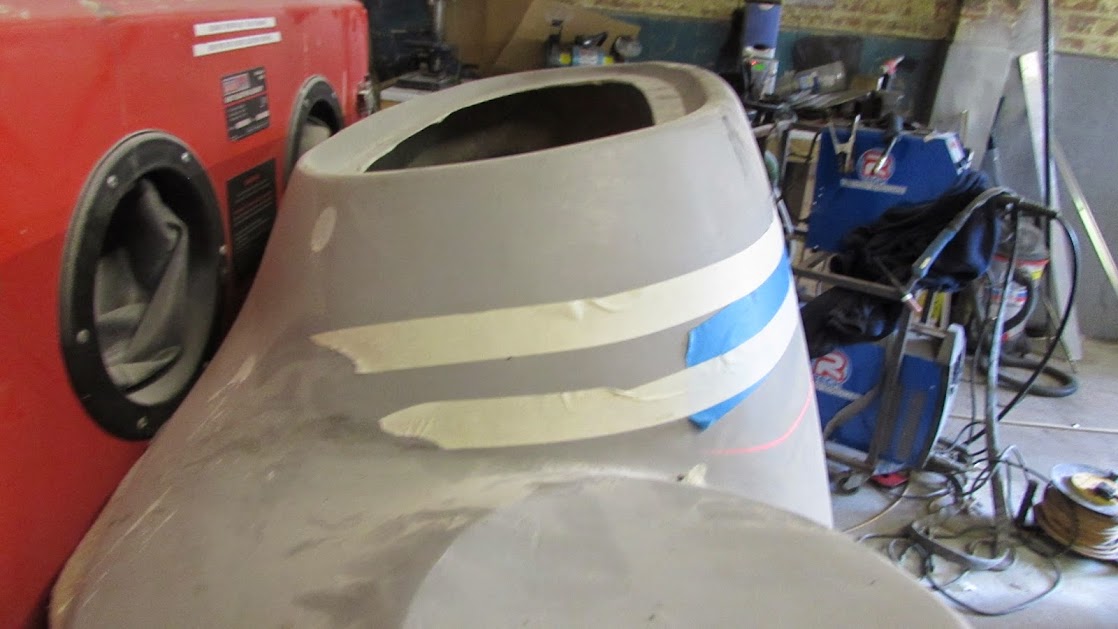


Cut this wedge and then repeated the operation on the underside. Result was:
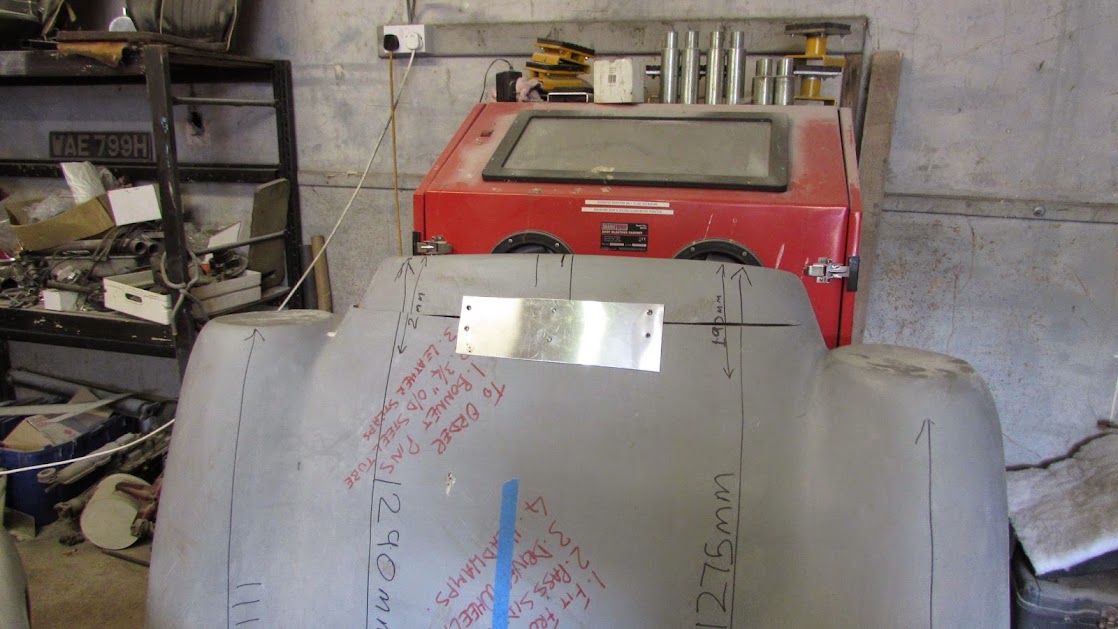


First issue to resolve was the misalignment you can see on the left of the nose. another quick chop followed by putting it all back together with ali sheet and screws.

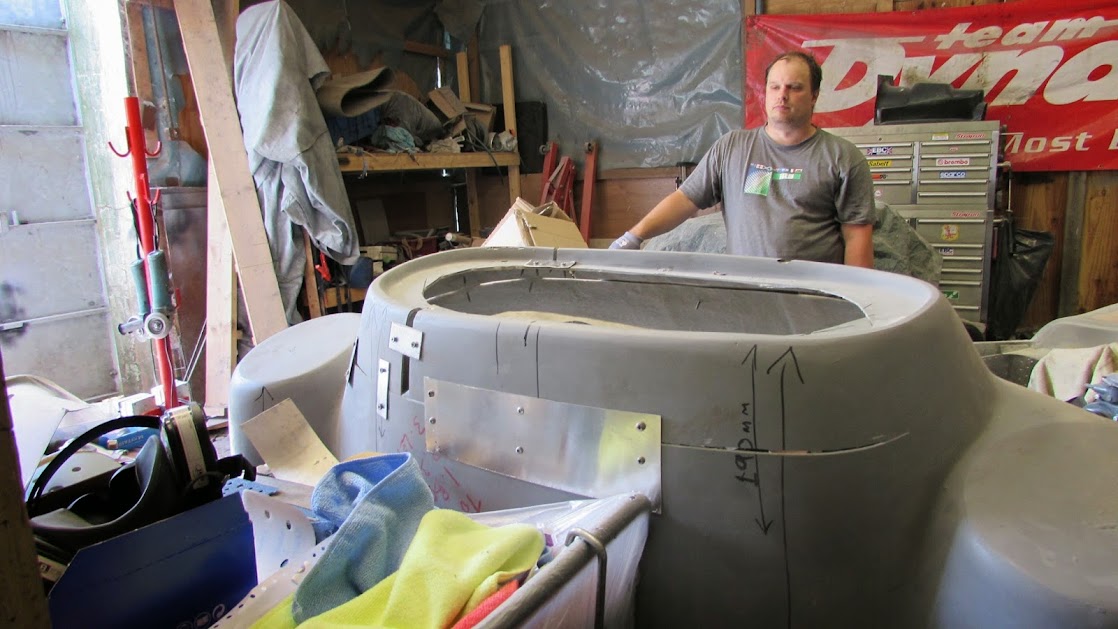


Happy with progress so far we moved on to making the start on the reinforcing frame that will be bonded into the nose.
Using 16mm 1.25mm wall steel tube we slit it every 10mm which allowed us to bend it quite easily.


bit of cutting and shutting later and it fitted ok into the recess in the nose.


Next job was to temporarily bolt it into place using 4 M6 set screws, you can just about see them in this pic.


And this shot shows the ends of the crews body side which are all pretty central which means the tubular frame is nicely seated.


At this stage the day went south and we tried to fit the bonnet to the car. My genius idea for my tilt frame didn't go to plan and it was immediately removed and remade, another test fit showed it still wasn't going to work and at this stage it was getting late so called it a day.
The up side is that by trying a couple of solutions that didn't pan out I have eventually arrived at a solution that I'm pretty sure will.

The worse news is that I'm back off down to the big smoke (London) Monday am and will be working every day for the next 12 :-( so no work on the car until a week next Saturday.

TTFN

Mac
26 Jul 2014, 6:40pm
Looking much less skewed now, keep up the good work!
26 Jul 2014, 8:39pm
Cheers T, I am happy that it was a job worth doing and am pretty happy the ways it's gone........so far! Now if I can just sort my hinge frame I'll be happy:smile:
27 Jul 2014, 6:03am
Mac - Great "nose job". :cool:

Amazing just how much work goes into making a 20mm adjustment! :eek:

Shame about the enforced break from the workshop, but my offer buying you a beer in London still stands.

Good luck, Paul. :)
27 Jul 2014, 8:08am
Paul,
Can't do a beer as I'm a non drinker (not through choice :-( ) but maybe a coffee one evening or I'm partial to a Virgin Mary! I'll give you a bell.
Mac
27 Jul 2014, 9:27am
Nice work Viatron making all these small adjustments now will make the car look great.

The laser is a good tool use and relatively cheap, i bought one a few years ago when i installed the kitchen to level the base and wall units very handy and may be used again.

Looking forward to see how you achieve the hinge bracket, i had thought along the lines of a cantilever bracket but will have to wait until the tub arrives to see the amount of clearance available.
31 Jul 2014, 8:57pm
Cheers Swifty.

Been thinking about the interior a fair bit lately and have a seat cover style in my mind. Its fairly simple (famous last words) but I think will look ok.
To this end I have more or less decided to have a go at making my own seats from scratch including doing the leather work. To this end meet my latest addition to the workshop!


Its a semi industrial machine that the seller has taken great pains to demonstrate will sew heavier fabrics including leather. He even did a video of it sewing 4 heavy layers with no issues so hopefully it should do the job. Sum total of £93 delivered fully serviced and a new motor and foot pedal to boot! Another leap into the unknown!
TTFN

Mac
1 Aug 2014, 7:49pm
Mac - I take it you have seen Scottie sew his own seats for his A352 / XKSS.

Good luck, Paul. :)
1 Aug 2014, 9:12pm
I hadn't but I'm off to have a look now!
5 Aug 2014, 6:28pm
Viatron wrote:

To this end I have more or less decided to have a go at making my own seats from scratch including doing the leather work. To this end meet my latest addition to the workshop!


Mac


Hi Mac, I'v got one of those things in my workshop! I have even downloaded the instructions.


It's oil cooled and every thing, one day I'll sit down and try it :ohwell:
5 Aug 2014, 8:16pm
I've one as well, it came from an underwear firm in Weatherfield. It was like brand new... i think the workers were always in the pub!