This is a read-only archive of the old Madabout Kitcars forum. New posts and replies are no longer possible, but every thread is still here to browse and read.
Mr T The look on the faces in the crowd say it all especially the older guy in red trousers and the young guy in shorts with sunglasses and black spiked hair.
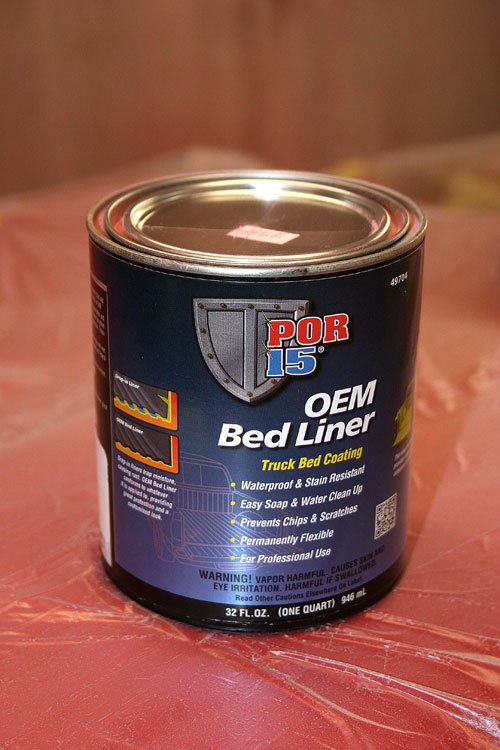
Anybody used POR 15, thinking of either a brush or roller application, spraying is out of the question as it not good for the lungs without an air fed mask. Basically i was looking for advice as to the finish you get with either a brush or roller and would it be better to pre-heat the surface first at this time of year.
Hi Swifty, I am keen to find out how this goes for you as I was thinking to use it for mine to including the boot.
With regards to heat, yes warm the metal it will prevent runs and help retain a texture if thats the look you are after. Just don't make it too warm as it will pull the paint as you roller it, if thats the route you choose.
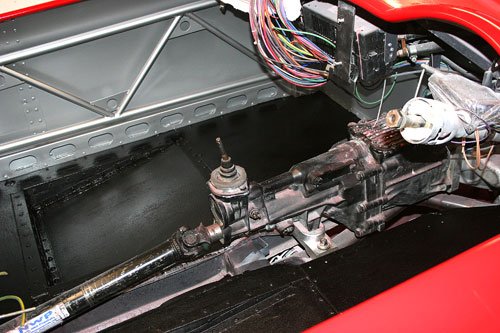
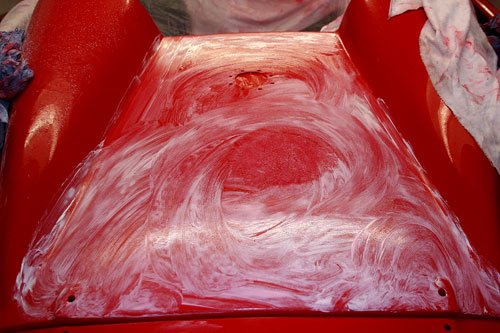
Yesterday the first coat or POR15 was painted on by brush then a second coat first thing this morning which has turned out ok.
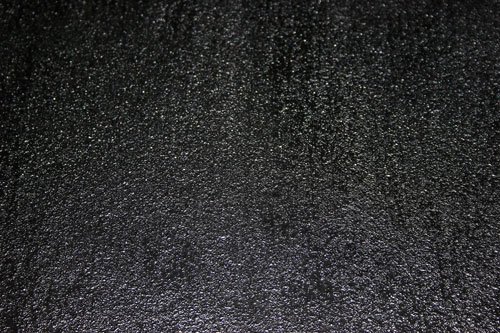
The surface finish is slightly rougher than anticipated but once the seats etc are in place it will look ok. It certainly looks to of sealed the whole floor area very well and has a rubber feel so hopefully no cracks or splits will appear in the future.
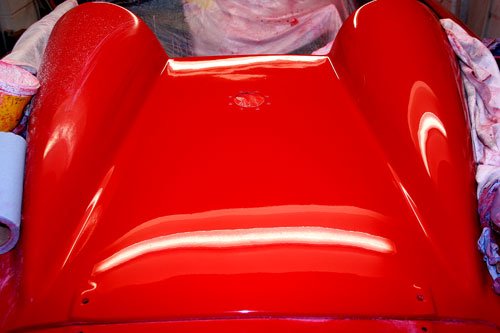
I've tried to shown the surface finish in the second image, when mixed in the tin it has small particles which gives it a rough texture. Thought I would mention this in case anybody else is thinking of using this paint.
MrT I would like to think it could be on the road today but alas other things are in the way. Been chipping away at the final flattening of the paint which is taking for ever so today i though i might try to polishing with the mop without flattening with 2000 grit wet and dry and see if the finish is any different and hopefully if not will save a lot of work.
Cheers Paul, once the interior is fitted if I think its no good I can always paint it silver.
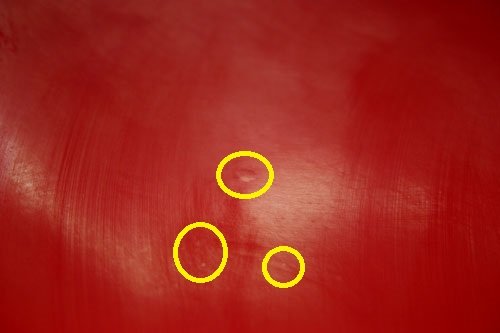
Been busy polishing the paint and tried a few different techniques to see if I could miss out a step or two but it looks like the best way is to first rub the paint down with 2000 grit wet and dry with plenty of water with a little liquid soap added for lubrication, then squeegee off to reveal any imperfections against the matt paint surface and concentrate on the areas requiring further rubbing down before mopping with G3 paste.
These are the imperfections that become visible after rubbing down with 2000 grit, not so visible prior to rubbing down.
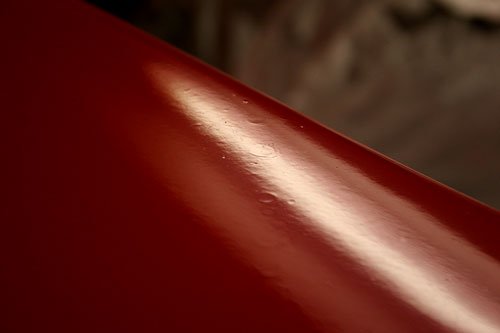
A close up image of the dashboard top rolled edge before any work done to the paint, ive tried to show the reflection of the light fitting as it's a good gauge as to how flat the paint surface is, which in this shot is not very flat, you can tell as the reflection is blurred with no sharp edges to the light fitting reflection.
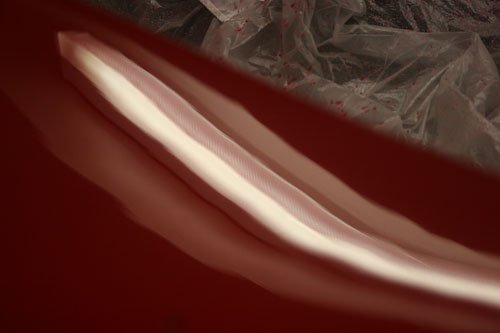
The same area on the dashboard top as the previous image after rubbing down with 2000 grit and polishing with a buffing sponge and G3 paste. The light fitting reflection is now sharp with definite sharp edges plus the colour becomes rich and deeper.
So far the bonnet and dash top have been polished which has taken about 10 hours just the rest of the car to do then I will go over the whole body again with a buffing sponge and G10 followed by a coating of wax. Now that I have worked out the best way to tackle this it should be a lot quicker.
Spent a couple of hours today rubbing down and polishing which hopefully will be complete by monday/tuesday next week.
Below is images of the steps taken to achieve a good finish.
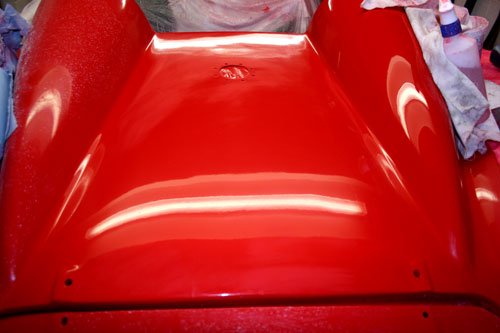
Painted surface before any flattening has been done. The hump on the right has been flattened and polish which shows in the finish.
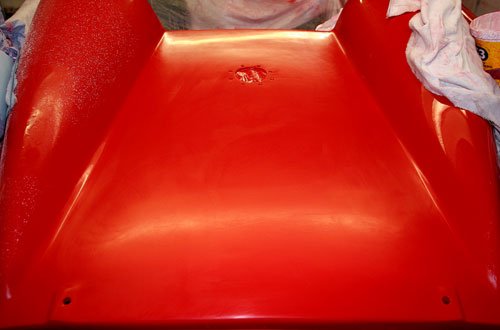
Painted surface flattened with 1500 grit and plenty of water. I've found that once the initial flattening is complete squeegee the water/paint residue off then shine a bright light on to the surface which reveals any further defects in the paint i.e. dust particles under the paint which have not been removed then go over the defects again with 1500 wet and dry, squeegee and re check.
G3 polishing compound applied with a mist of water.
Mop polished with G3 compound, again the use of a bright light shows any rough scratches which if present i mop over again with G3.
Once the whole body has been polished with G3 i will clean the whole surface again before mopping with G10 finishing compound to remove any fine scratches.
Paul Cheers, I thought a couple of images would help plus I know how the guys on here like a photo or two.
davecymru LOL......I've had that thought many times but I know if I was to Mot the car then the likely hood of finishing would be nil so onwards and upwards only problem now is after honing the polishing skills I am thinking of going back over the bonnet which I did first and it's just not as flat as the rear end has turned out but maybe ocd is taken over.
Mr T That's was an excellent price for a good job, it looks well made and fitted have you tested it in rain and did it keep the water out.
Hi Swifty, I'm very happy with the quality for the price. The Brockwell Brothers are old-school craftsmen: rather eccentric but very talented and provide terrific value for money.
My first year at Goodwood Revival (2013) I left my Spyder parked outside overnight with the full tonneau fitted in torrential rain and wind. Next morning I found that it had kept about 99% of the water out. Perhaps a teacup full had run down the rear bulkhead under the head fairing (the only bit of the tonneau that doesn't overlap the bodywork because of the design of the car), and about a pint of water had collected in a puddle on the passenger side of the tonneau, again due to the shape of the car, which I then managed to flop into the cockpit while removing the driver's side cover. If I'd swept that off first it wouldn't have been a problem.
It was then parked up all day at Goodwood in more normal intermittent light rain, and the cover kept all of that out of the cockpit.
Overall, the tonneau looks the part, helps to keep the driver warm when one-up in winter, provides security from prying eyes at night (if not prying fingers!) and keeps out most of the water when it's parked in the rain. I can thoroughly recommend having one made for your own car.
Oh, and despite leaving the car unattended outside various hotels/seaside resorts/etc., nobody's actually tried to steal anything from my car.
Thanks for the info Mr T, i am looking at a couple of local companies to see what they can do for me along with the cost, will post pictures once i have something made which will be more than likely after the mot is done to be able to drive the car to the upholstery company.
Finally today finished flattening and polishing the body which has come up treat. Then moved onto fitting the exhaust system permanently while i still had the car on axle stands and ran the engine to cure the exhaust paste. I thought i had made a video to upload to let you guys hear the twin cherry bomb exhaust's burble and crackle when lifting off the throttle but some how the video has not worked but i can say the sound was terrific, can't wait to get it out on the road and i will make a video in the meantime.
Looking for some more advice to do with protecting cellulose paint, Ive come across this company http://www.raceglaze.co.uk/race-glaze/race-glaze-wax-classic-british-car-wax/ who have a wax product specifically for cellulose paint but it's not cheap at £70 a tin so wondered if any one knows of a good alternative to keep the cellulose bright and flexible on the fiber glass body.
I use Autoglym super resin polish (I think it was on Phil J's advice). It really does the job and I've had no paint problems in two and a half years on the road.
That's the polish i use on my modern car and find it's good stuff, did a check on Autoglym's web site and they recommend Super Resin for cellulose so Super Resin it is.