This is a read-only archive of the old Madabout Kitcars forum. New posts and replies are no longer possible, but every thread is still here to browse and read.
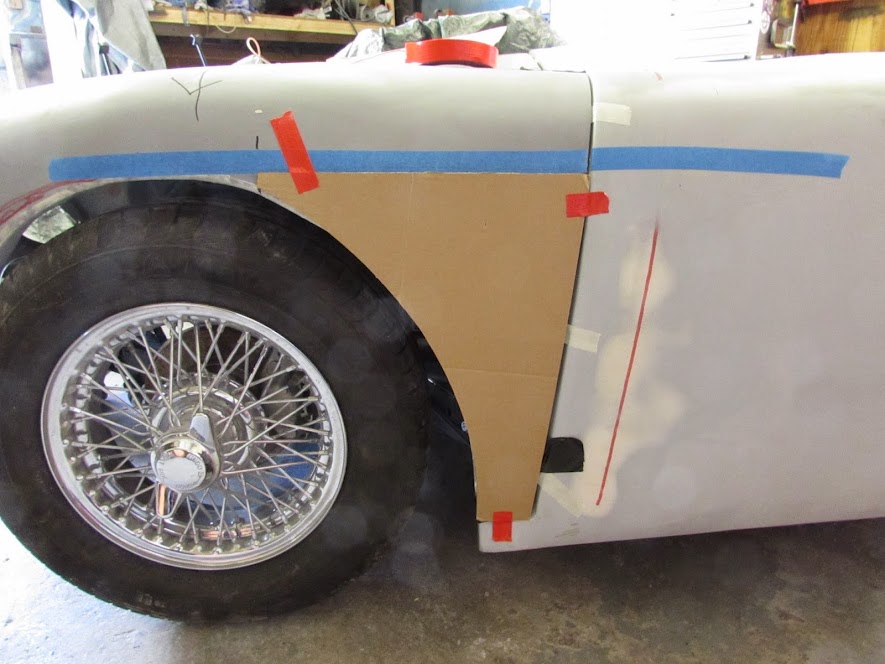
Not in the office/workshop right now (More on that later) but although the lack of symmetry has never been in doubt, I'm not so sure as to what is causing the wheels to be outside the bounds of the arches. The following photos show a Pilot with a Navigator bonnet and a Navigator with it's native bonnet from both sides and you can see the wheels are well within the arch boundary.
Note too that the Yellow car has an early Navigator bonnet which was laid up before the arches became 'rounder' and less like 50p coins.
Paul, the bonnet mould wasn't touched. Im still a bit mystified as to how Ribble HQ manage to get the wheels clearing. The only thing I can think of is that the choice of wheel comes into play but that still wouldn't account for the difference side to side. Confused but determined not to be beaten by a lump of inanimate fibreglass...
Hi Viatron I had not realized these kits are that far out in alignment, your cad system and laser have highlighted just how far they are out in relation to the wheels.
Am i correct in thinking you have had some input with the new Navigator buck, if so do you know if the issues you are having along with paul have been fixed?
Swifty,
I am more than a little "invested" as did a lot of work on the buck for the new Navigator body moulds. Have to say that its not my day job just an enthusiastic amateur so cannot claim that the new body moulds are 100% exactly right in all respects.
The Gen II Navigator bodies though, in my opinion, are at least usable and represent good value for money but be under no illusions that they are "paint ready" though. Andy and Ribble HQ seem to be making them work and maybe I'm just being a pick pickier because of my previous involvement.
That said if you want some bed time reading follow this link for a brief (ish) write up I did on the process that will show what perfection the current Navigator body is compared to the original that in no way was of saleable quality in my opinion, probably why the project was sold when it was......
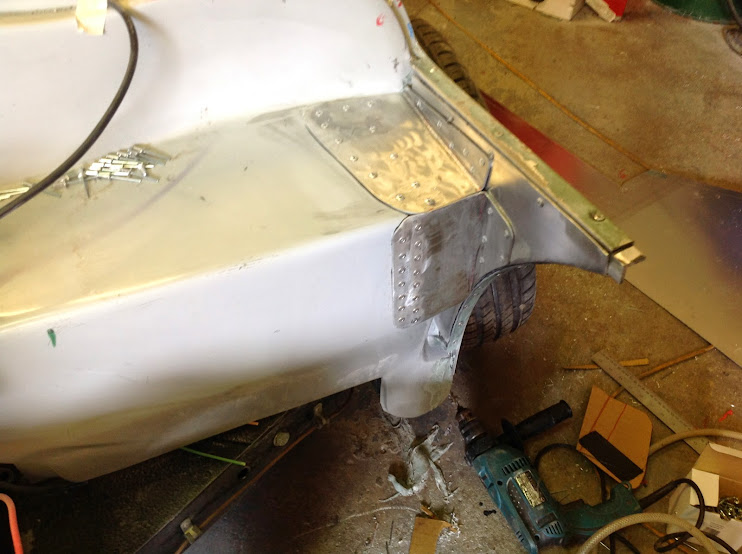
Quick visit to the lair this evening. Managed to fit my Ali panel and get the filler work about 80% there
Hopefully will get a few hours in tomorrow as well then all day Saturday so am hoping to make good progress. Target for tomorrow is to get what I have done today replicated on the drivers side and then move on to tackling the inside of the panels to make them very very rigid! watch this space.
It doesn't take you long to do the mods with the fiberglass, i like the way the bonnet trailing edges are made part of the main tub, less to catch your head on when the bonnet is hinged up.
How will the bond between the ally to fiberglass hold up when on the road with vibration etc?
Enjoying the build and it won't be long until it's on the road.
Swifty, they will hold up fine, they are fixed with a combination of fibreglass, PU adhesive and Qty 3 M8 countersunk bolts. In addition I plan to make another Ali closing panel for the rear which will be riveted to the tub, wheel arch and the top return to close the panel in totally at the back and add a lot of rigidity..
Mac
Mac - Great job on blending in the body shell "extension", you'd never know if wasn't there from the beginning.
Can I just ask what you used to get the shape of the wheel arch curve section of that panel?
Is it simply the tyre + x inches?
Cheers, Paul.
PS Swifty - Without wishing to hi-jack Mac's thread, I have both the original body shell & original bonnet.
Your Navigator body no longer has the issues that you can read about Mac tackling in the link above.
( I have a hard copy of that report which gives me nightmares every time I read it. )
Paul, KISS was applied, taped a piece of wire to a marker then to the floor and marked it roughly on the back by holding it against the existing arch and running a pen along. I then used the floor mounted "monster compass" to refine the curve, really it was just trial and error.
Up the workshop now so hopefully an update later, fingers crossed!
Quick update whilst I'm waiting for some fibreglass to go off and taking a small break as I'm drenched in sweat, its warm!
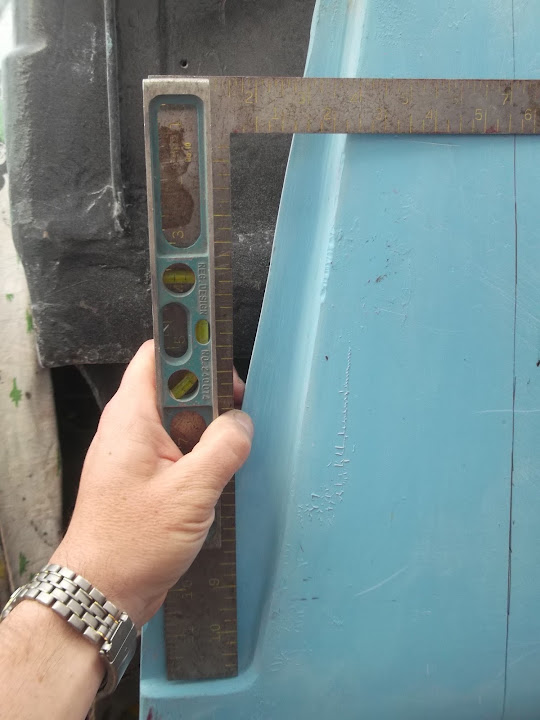
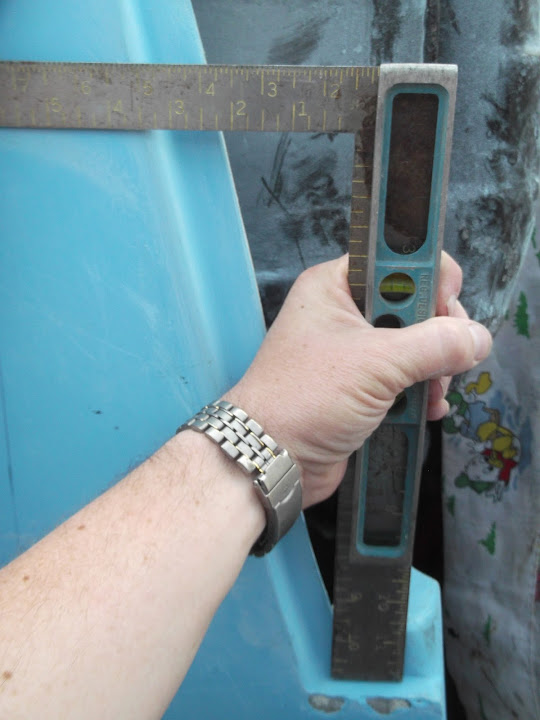
Started by taking some measurement off the passenger side wheel arch to body extension so I have a datum I can use when trying to get the drivers side to match.
As can be seen in this picture the magic numbers were 365mm and 355 mm
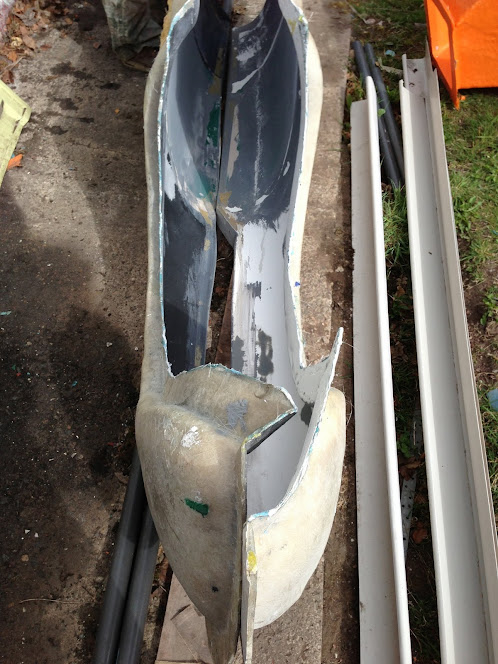
what this did highlight was that the outrigger moulding needed trimming back by approx. 20mm
Quick cut and its done, you can see the template on the floor in the background, I have extended the rear backwards at the top as Paul L was exactly spot on as the major difference was the lean back in the bulkhead notch side to side
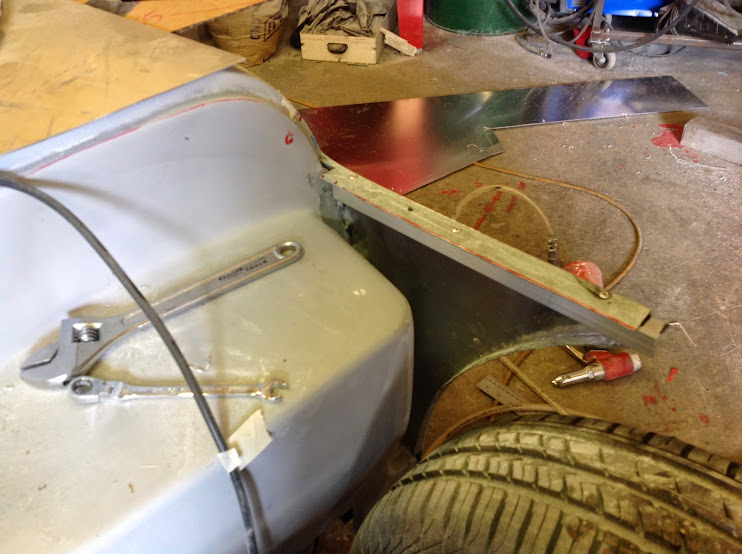
Then set too making a new Ali panel for the drivers side, same process as before.
Just waiting for my landlord to get back with some stainless countersunk set screws he's picking up from the nut and bolt supplier for me as he was going anyway. As on the passenger side the panel will be bolted and bonded with a combination of PU and fibreglass so it becomes an integral part of the tub. should have this done in the next hour or so and then will start on making the Ali closing panels for the inside of the extension. These are necessary to make them full rigid and also to fix their position in relation to the wheels I have a plan in my head but am making this up as I go along so no promises!
slight change of tack, thinking about it a bit more I really want the passenger side totally immoveable before I tackle the drivers side so I can take reasonably accurate measurements. So out with CAD V1.2
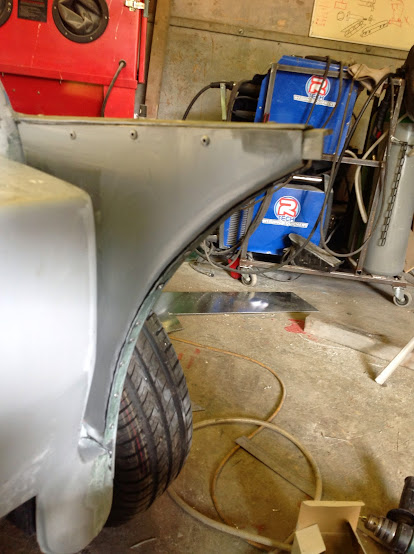
Forgot to take a pic of the finished closing panel but did decide I couldn't get a good enough bend on the top so have bonded and riveted a piece of 2mm thick angle to the top rail, this will give me a good vertical surface to rivet the closing panel to. In addition it gave me a good surface to trim the top flat of the extension panel to so it was a nice straight line and a consistent width.
Next I bonded and riveted the closing panel in place, started on the top then worked from the bottom of the arch working my way up dressing the outer panel as I went to get a good close join, that said the air riveter can pull panels together that are a good few mm away as long as your using a long enough rivet. End result is:
Very pleased with it so far as it gives a nice finished look to what was just an add on to the body. Now going to concentrate on joining the inner panel to the firewall which should make it totally rigid. Right quick coffee then back to it.
Probably (depending on how knackered I am after doing this update) the last update for today.
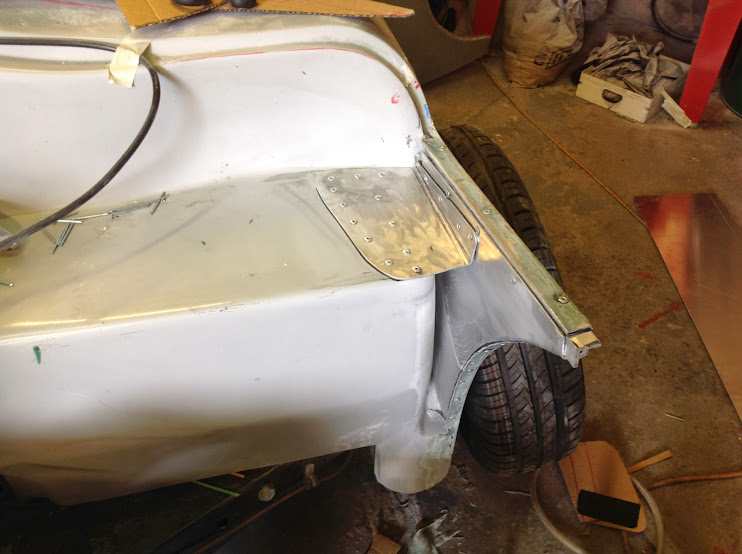
Would have liked to have made the rear of the front wing to body joining panel in one piece but I don't have the luxury of a folder so all bending is done in a relatively small vice using block of wood angle iron etc so the risk of scrapping a panl part way through is high. with this in mind I decided to split the panel into 3 pieces and rather than try and hide the fact they exist make a feature of them. As you can see from my interior I like the rivet look, good job really!
With more CAD the results so far are:
With this panel in place the position of the front wing rear is now cast in stone, no going back now!
Will fill the slight gap you can see in the top left of this pic before I go tonight.
This panel was actually harder than the first as it actually has 2 bends in it the one that isn't obvious is just to the right of the vertical lines of the rivets, it was necessary to make sure I have 100% panel to panel contact for bonding and riveting.
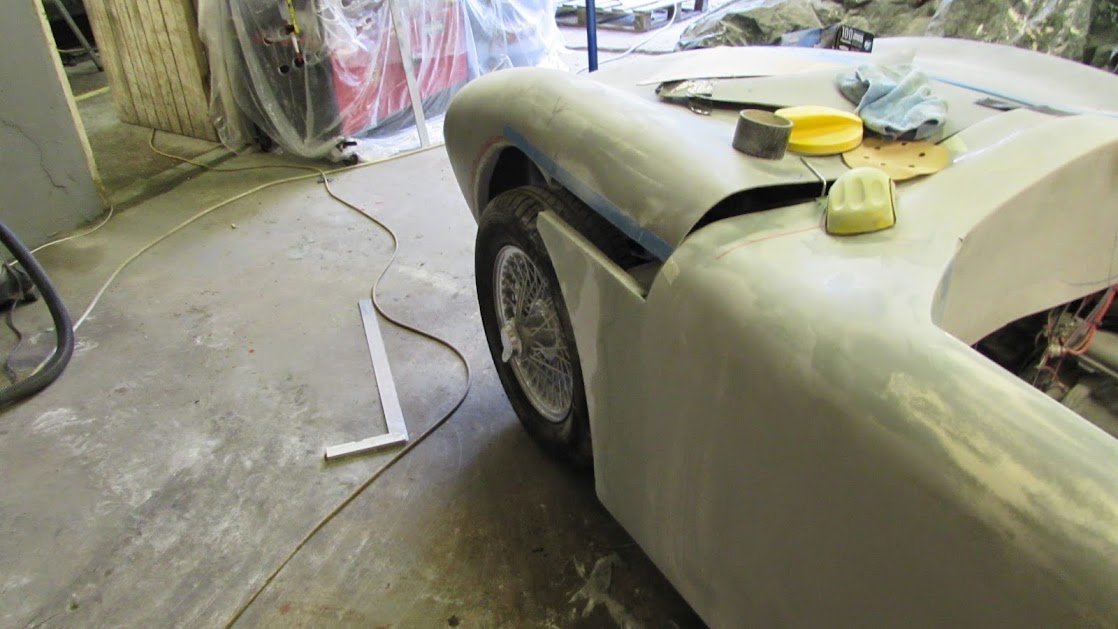
Well its a been a couple of days with no updates but that's because I've been busy. Duplicating the front winglet I did on the passenger side has been a trial to says the least, remade the panel twice and spend yonks making up an alignment tool to try and get both sides as similar dimensionally as possible. Today finally saw the back of it done though. They are not millimetre identical but close enough and at least the rear of the front drivers side wing now covers the wheel.
The filler work looks much worse than it is as I had just wiped it down with thinners which tends to make it look very patchy.
Better shot here of how it actually looks after giving the thinners 5 minutes to flash off:
The angle makes it look its pointing skywards but its not.
Still a couple of hours of final fibreglass filling and profiling then a quick finish skim but hopefully will have it looking done by this time tomorrow if I manage to get a few hours in tomorrow night.
Comparison side to side, bit more of a dip on the passenger side but I think I'm going to leave it as is:
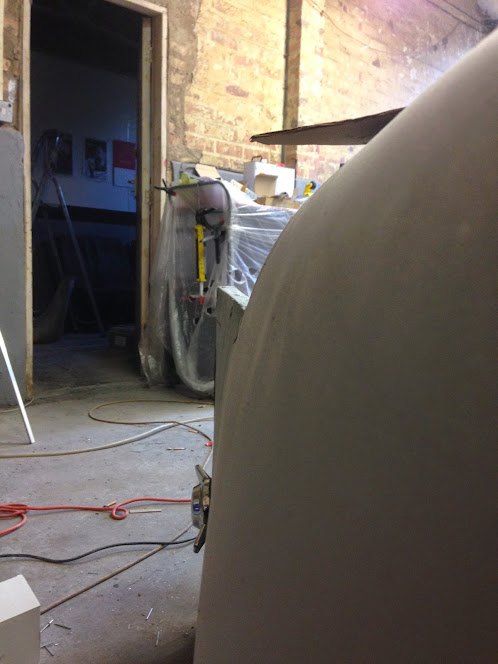
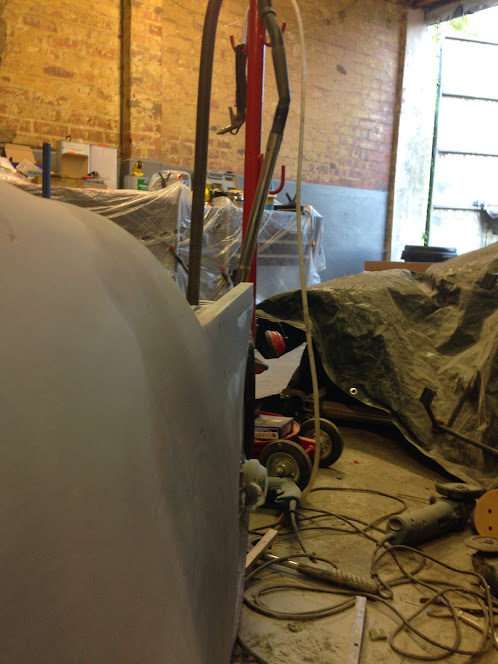
Overall I was very happy, then just before I left I looked behind the car.....
just highlights how out of whack the nose is, that said I have just had a peek at a couple of Miglia threads and all the Sammio faults are present there as well !
If you think the newer Ribble Navigator body still has a few....eccentricities then check out this thread on the new Miglia offering, looks ;like someone took the mould before realising the issue with one side being out of alignment with the other! http://www.madabout-kitcars.com/forum/showthread.php?t=4806
It's weird all this talk of rear end issues as i know i had bonnet alignment problems on my Sammio, but i can't remember any rear end alignment problems?
I may have to have a delve through my photo archives at some point now as you've piqued my interest
Hey Mac,
You're right in that i built a Spyder, but i didn't think the rear ends were greatly different? I just thought that the main body tub differed at the front?
Although obviously the mods to that could have thrown the back out..
I'm still going to have a nosy through my pics tho as it'll be interesting comparing those to my Miglia kit when it turns up.
Although, as with my Sammio, i fully accept what I'm getting for the price I'm paying and I'm willing to 'fettle' as required
It beggars belief that the simple acid test of putting the two halves together was not done at the beginning and to be that far out is crazy regardless of the final kit cost.
Your build is coming along nicely viatron and I look forward to working on my tub when it arrives which should be very soon.
ill see it before you as Ribbles laminator is my next door neighbour up the man cave, ill keep any eye out for it :-)
As for the Sammio moulds well as I have said before I'm not surprised they were sold off when they were as it would only have been a matter of time until a lynch mob arrived in Poole!
Shame Mike didn't think to do any basic measuring when he used them as the basis for his Miglia offering!



 )
)

 but the bonnet which is the only bit that is giving me a major headache is Gen I