This is a read-only archive of the old Madabout Kitcars forum. New posts and replies are no longer possible, but every thread is still here to browse and read.
towed, i think if you replaced your oil, to a matching smiths clock like your rev&speedo, and maybe add an amp meter and water meter next to it you get great look. i love the dash pod and clocks looks like a "healey dash"
Thanks Mulberry, glad you like the dash. I'm trying for a simple, uncluttered look so will be sticking with the three gauges as they are. I'm only fitting an oil pressure gauge on the advice of a friend, and had planned to have it directly ahead of the driver in the standard Sammio dash (see Clarkson's observation above). I may source a smaller one to go under the speedo in its own little panel though as I'm really not too taken with it in the middle of the dash. I'm also thinking of adding a couple of switches/push buttons to fill the voids diagonally above the speedo and rev counter.
great job towed - it looks really authentic
another detail to confuse any unsuspecting onlooker
Cheers Roadster, glad you approve. And yes, I want it to look convincingly like a racing car built by a major manufacturer.
I've just had a play with the gauges and I think the final job will have the rev counter and speedo upright (I'll have to clearance the frame for the speedo) and a smiths oil pressure gauge to the right of the main pod as it curves round to the 'door' panel. Now, off to ebay to get a suitable gauge...
Thanks for the positive comments guys. One thing I'd always felt could be improved on the Spyder was the dash. The basic panel supplied is plain and simple, which I usually like, but the dashboard is one of the major user interfaces on a car - along with the steering wheel, gearbox and pedals, it's the bit you actually interact with the most. I always wanted mine to feel really special when you get behind the wheel and the 550 dash just adds something as far as I'm concerned.
By the way Gary, once it's finished I wouldn't be averse to having a mould taken off it to be put into production. For the right price...
Done staring at it for the night now. It's no good, I'm going to have to modify the frame to allow the three main gauges to be raised an inch or so in the pod. If I don't do that I just won't be happy with it.
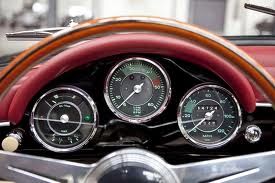
Dash and pod will match the rest of the car, which is going to be silver. I won't be putting a padded 'eyebrow' over the instrument cluster as the 550 dash isn't quite the same shape as the 356 pictured above, and it wouldn't really work. Upholstery will be dark red.
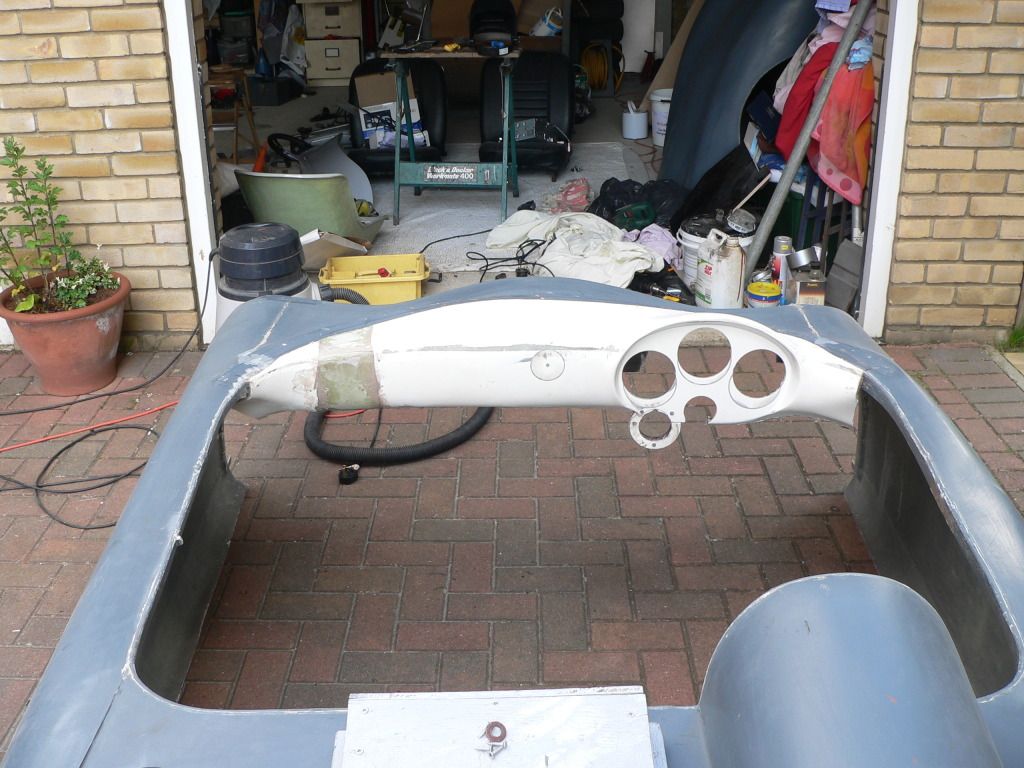
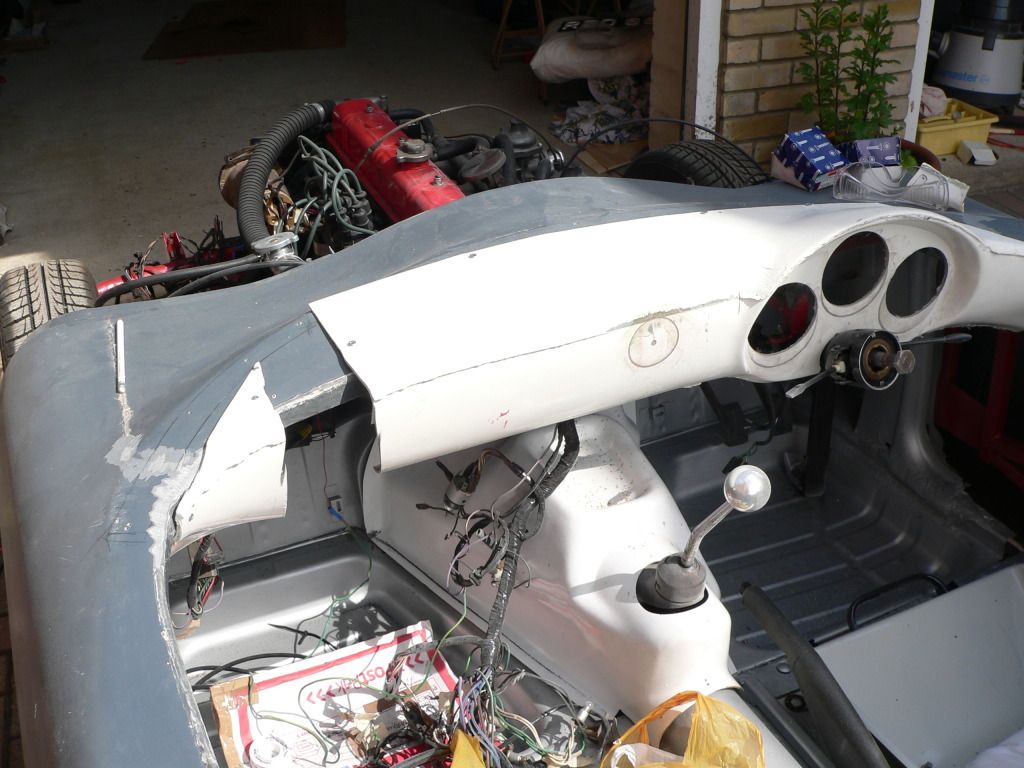
Some progress on the dash this morning. After cutting the passenger side end down to pretty much match the driver's side I was left with a gap this big -
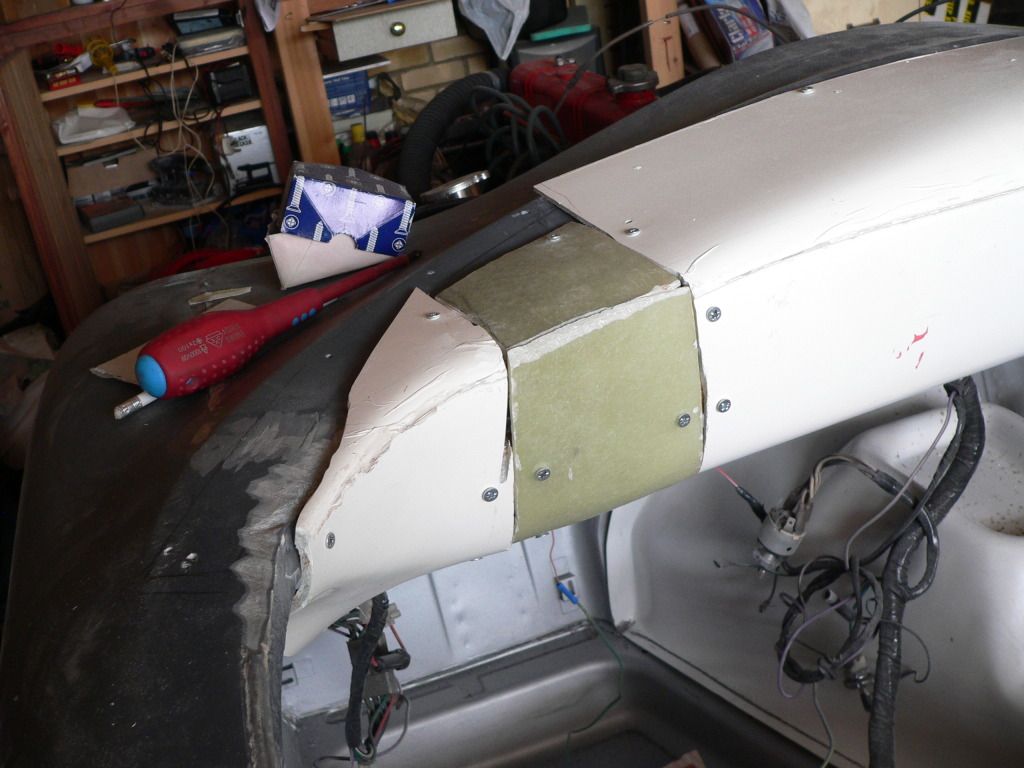
After a bit of chin rubbing it occurred to me that the ends of the original Spyder dash panel appeared to have a similar curve to the face of the 550 dash. After the Spyder dash gave up a suitable chunk it fitted almost perfectly -
Out of interest, you can see where I'd marked out where I'd planned to put the gauges on the original dash. It wouldn't have looked right though as they'd have all been too low and I'd have had to modify the frame anyway.
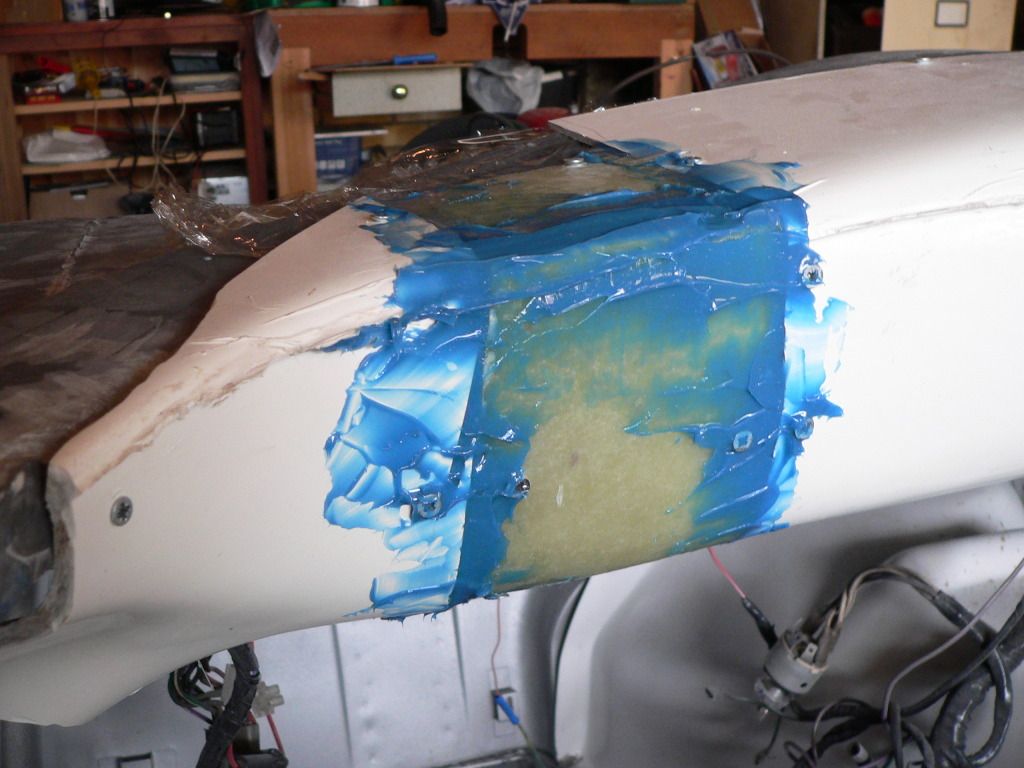
It's now all bonded in with this stuff which really is like fibreglass welding (so long as you put the catalyst in ) -
I'll leave that to set off overnight now and I should have a nice, one piece dash in the morning. ray2:
Is it a bugger to sand? I like seeing how you do all this bonding stuff, very educational. I think Gary and Mike should do an instructional video on how to fill or make bits.
Is it a bugger to sand? I like seeing how you do all this bonding stuff, very educational. I think Gary and Mike should do an instructional video on how to fill or make bits.
I'll let you know about the sanding in a day or two. So far, I've only used the bonding paste to reattach the discs I cut out of the gauge pod when I decided to move them up an inch. I used quite a bit of catalyst and it set in about four hours. I was then able to cut the holes in their new positions without the old discs dropping out and I can't physically snap the newly cut discs through the old cut lines now matter how much force I use. If nothing else, the bonding paste is bloody good glue.
I have to say I'm really enjoying modifying my dashboard and the general level of 'hands on-ness' necessary to build a Sammio. I wonder how many Caterham builders would be prepared to take an angle grinder to their bodyshell?
I have to say I'm really enjoying modifying my dashboard and the general level of 'hands on-ness' necessary to build a Sammio. I wonder how many Caterham builders would be prepared to take an angle grinder to their bodyshell?
I know exactly what you mean. Just reading about your dash I was getting jealous and remembering how much I enjoyed these parts of the build.
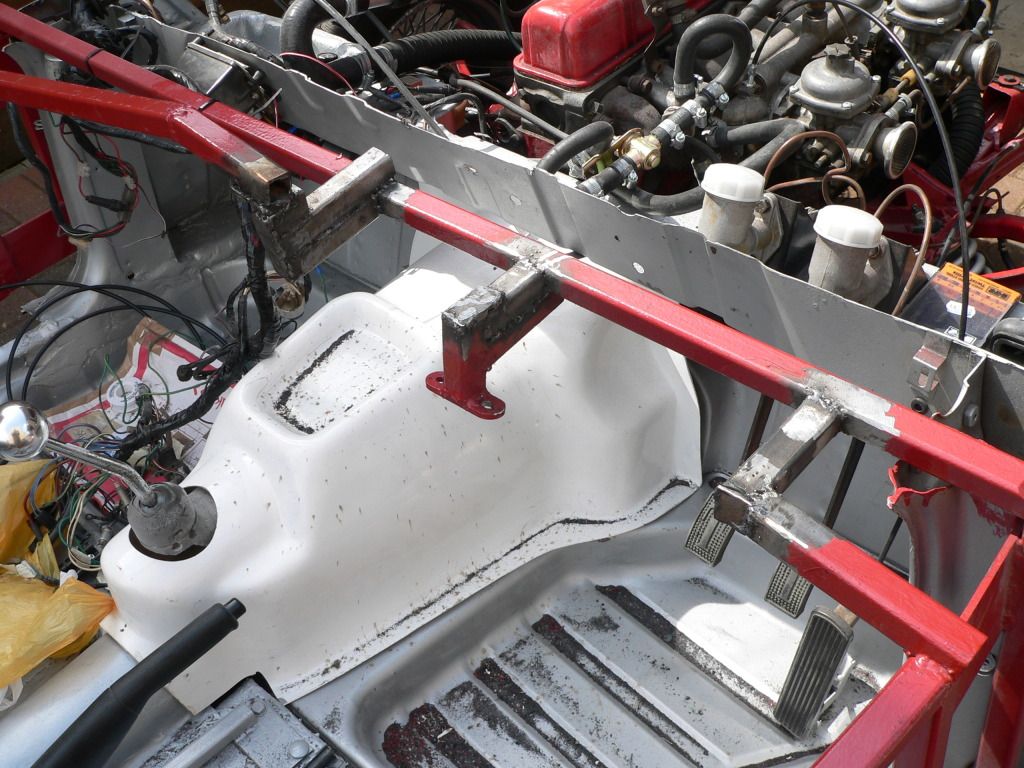
Not much I could do to the dash while the bonding paste sets on the passenger side so I decided to make up some brackets to mount the wireless.
I thought long and hard about whether to fit such a modern device in my car, but the reality is that I'm planning to go touring in it so I'd like some music while I cross continents, and I'll also be wanting something to do while I wait at the roadside for the RAC to show up...
I looked at a few options - original Blaupunkt radios rewired for connection to an mp3 player and American 'RetroSound' units that are designed to look really old for example. I didn't like any of them though and they were all too expensive for what they were. I eventually found a Clarion model that's so modern it actually looks rather retro, if that makes sense -
I can already hear the sharp intakes of breath from the Sammio traditionalists, but I rather like it, so it's staying.
I'm not sure what i think of this unusual mod.
.
.
.
.
.
Now i wonder when my Raspberry Pi will be turning up so i can figure out how to hide it and the touch screen in mine
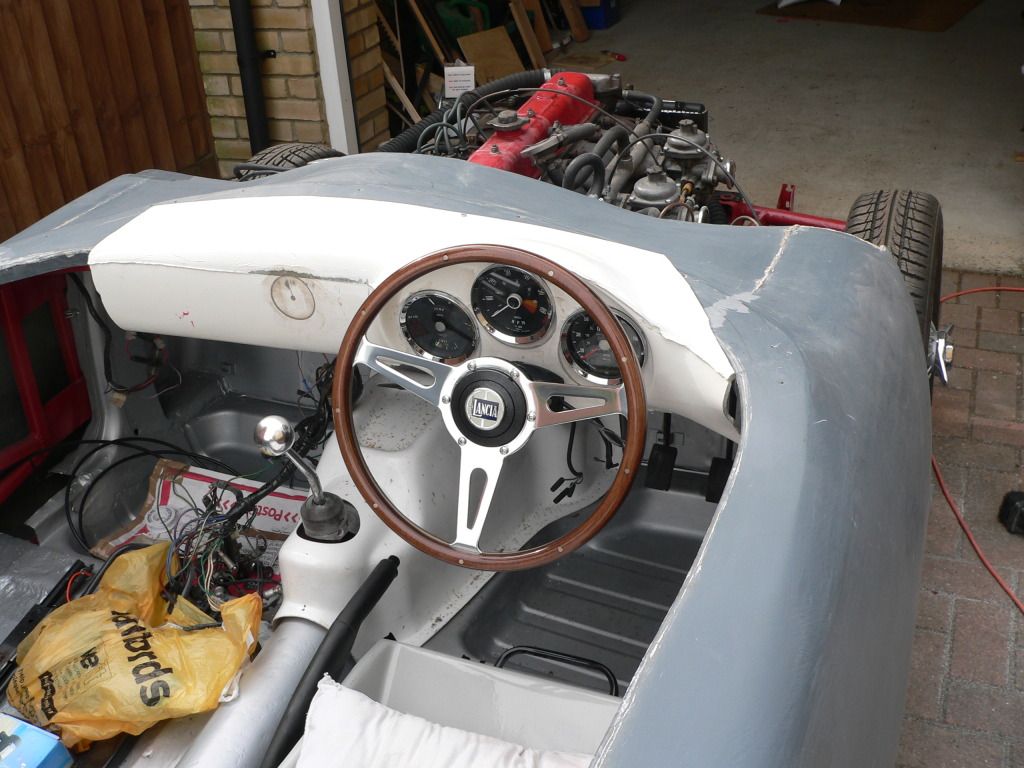
The Porsche 550 dash is now bonded in. It just needs blending in with filler to smooth it into the screen frame and into the 'door' panels.
I've also finished off my seat belt mounts. I've welded the brackets for the female connectors to mount on to the seat runners and decided to go with brackets welded to the frame for the bottom mounts. This was because when I trial fitted the bottom mounts to the other end of the brackets fitted to the seat runners, the belt kept snagging under the seat. It would have quickly frayed them and been a problem, hence moving them to the frame.
I spent the rest of the morning making up a template for a luggage bay liner. I had planned just to use a bit of rubber mat for the floor of the bay, but once I got started I couldn't stop and now the whole bay will be carpet lined.
At least that'll stop my Louis Vuitton baggage getting scratched...
That dash is looking really nice! I especially like the way that the ends curve under, that'll look "well posh" when finished.
One suggestion i would make based on my driving experiences so far is to use bonding paste as much as you can to stop things moving about when driving and to just use very thin layers of filler on top in order to give things a bit more strength to try and resist cracking.
I only mention this as I am getting a growing list of minor cracks and marks that i'll be addressing with a respray after i rebuild the engine over the winter.
"luggage bay"! just cram it all behind your seats!





 ) -
) - 
 ray2:
ray2: