MadaboutKitcars

This is a read-only archive of the old Madabout Kitcars forum. New posts and replies are no longer possible, but every thread is still here to browse and read.

Another Cordite Is Born ...

17 Sep 2013, 3:02pm
Car Cover Repairs:
I'd repaired my car cover once before after a windy night & the wind struck again.
It pulled away the tape I had on both sides holding the cover together.
It also put a new rip in the same area.

So this time, I thought I'd try to do a better job on the repair. :rolleyes:

I started by putting some new tape on the underside of the cover as before.
But this time I used a needle & thread to cross stitch either side of the split.
I used big stitches so that the tape will hold in place (in theory).
I also had to do small sections at a time working from the edges back to the middle.


This took over two hours due to a break when the heavens opened on top of me.
( I was outside as the sky was dark & I could keep most of the car covered while I worked. )
At least it was a chance to adjust to the somewhat colder working temperatures outside.

I had to wait until the top side had dried out overnight before I could add some tape.


Cheers, Paul. :)
17 Sep 2013, 4:51pm
if I ever have surgery, I know who to call for stitching me up!
17 Sep 2013, 4:59pm
Nice bit of invisible mending on the cover there Paul.

As you've raised the subject, I thought I'd share my experience of using a similar cover at Goodwood last weekend.

As you may be aware, I had King's Lynn trimmers Brockwell Brothers make me a zip up the middle tonneau cover, but as I'd never left my car out in the rain before I was worried that it wouldn't be completely watertight, so I also bought a silver indoor/outdoor waterproof breathable cover off ebay for about a tenner.

First day at the hotel and rain was forecast overnight, so I fitted the car cover over the top of the tonneau. In the morning I found that the rain had either gone through or underneath the cover and had pooled in the tonneau on the passenger side.

I removed the outer cover and sponged the 1/2" deep puddle off the tonneau before removing it. I was expecting the interior to be soaked but not a drop of water had got into the cockpit.

The second night, heavy rain and high winds were forecast, and I was worried that the outer cover would blow away, so I decided to leave it off and hope for the best. In the morning there was a puddle on the tonneau, but once again the interior was completely dry!

I can't praise Brockwell brothers' work highly enough. They are traditional craftsmen who do top quality work at a very reasonable price. My tonneau is mohair, cost £140 all in and took them half a day to make and fit. Bargain.


They can be found at Milton House, 44a Tennyson Avenue, King's Lynn, Norfolk, PE30 2QJ tel.01553 764582.
24 Sep 2013, 4:31pm
Replies:
christinedmc - Lets hope you never need surgery! :icon_wink:

Mr T - Thanks for the really helpful feedback on your tonneau cover.
Do they put the fittings on the car for you too?

- - - - - - - - - - - - - - - - - - - - - - - - - - - - - - -

Well I finally managed to get some time on the car today...

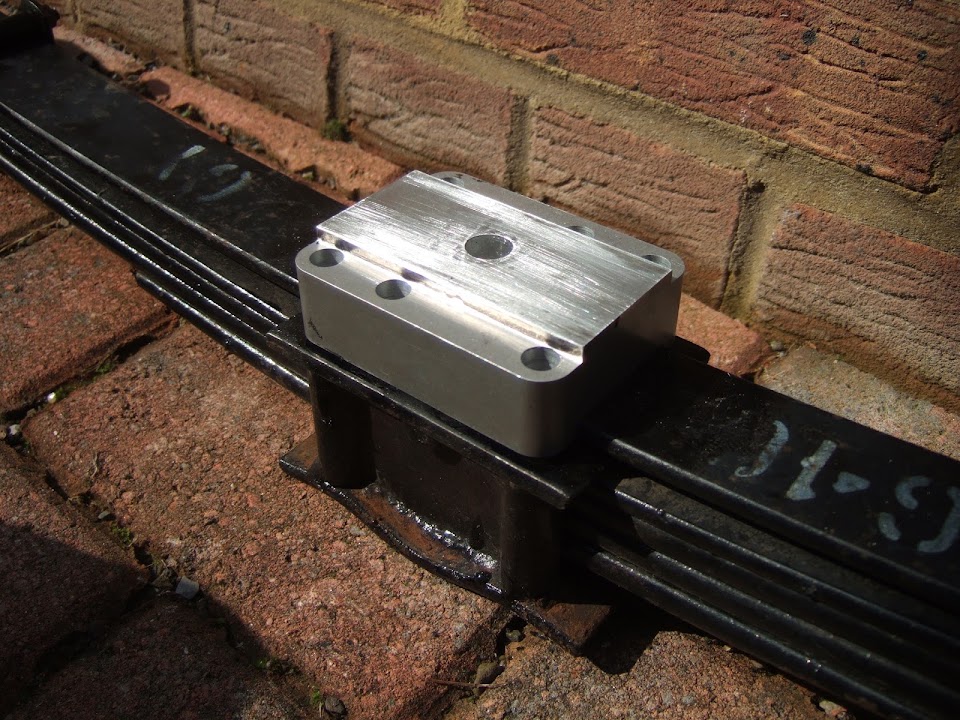
Rear Suspension Lowering Block - Part 1:
Seeing Mister Towed remove his rear spring the other day inspired me.
The lowering block was one of the first things I bought for the project.
But when AndyP57 built his first Cordite/Nagivator without one I wasn't sure.
However, after various test fittings, it is clear that the block is a good idea.

So here is before...


Unfortunately the rear framework is still in my rear garden after the welding/painting.
So the body shell has nothing to hold it off the tyres...


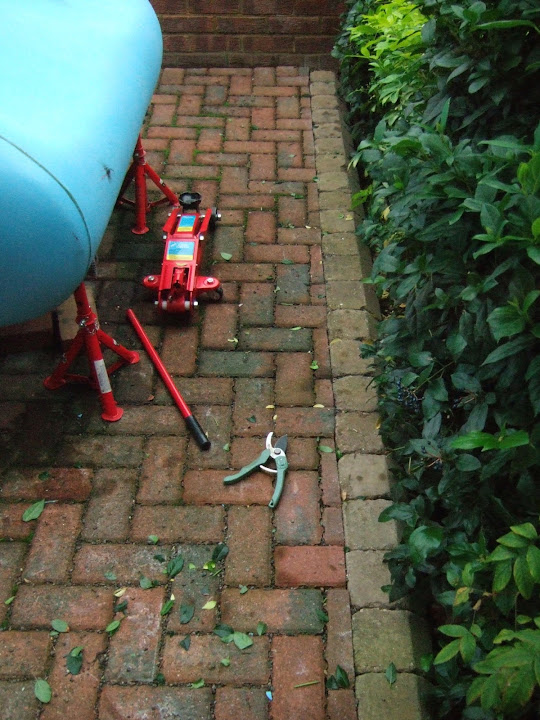
So I put a couple of axle stands under the back of the body work...


And this gave me enough clearance over the tyres to carry on...


The big advantage of this was I could leave the rest of the car covered...
( It was foggy when I started and I just don't trust the weather! )


However, when I wheeled my trolley jack into position I didn't have much room...


After spending some time with the pruning shears, it looked like this...


With the chassis supported on another pair of axle stands I could remove the wheels...


The jack was then used to support the hubs so I could remove the bolts...


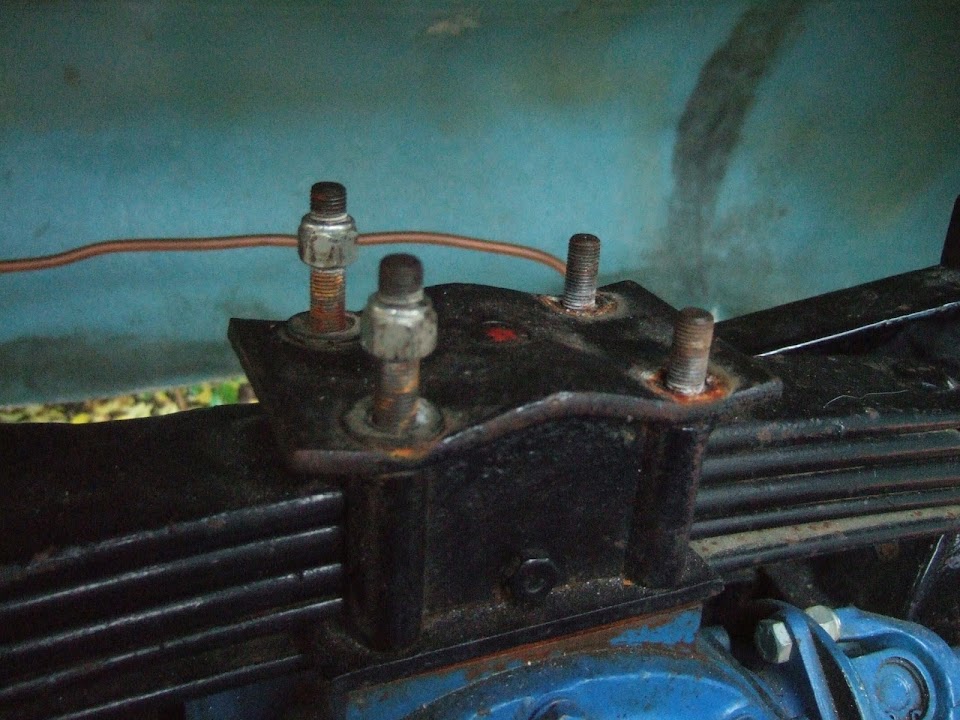
Then it was time to remove the nuts and studs from the differential.
Two nuts came out with no problem and two took the studs with them...


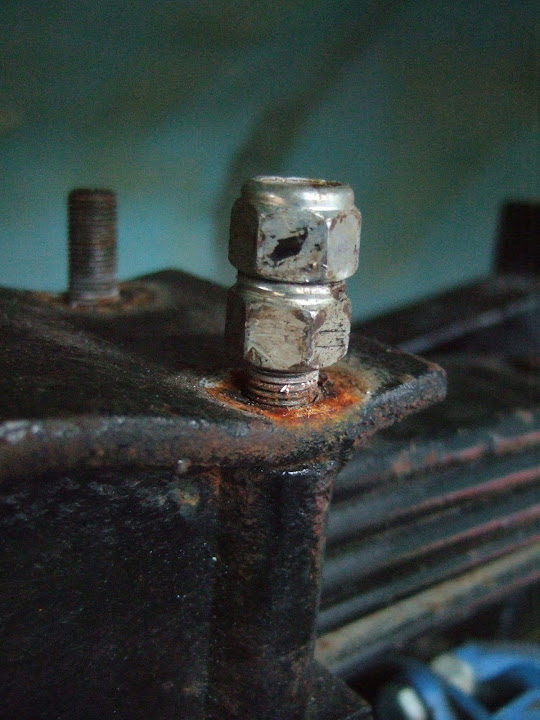
I half remembered the two nuts trick to remove the remaining studs.
( But forgot to use normal nuts, not the original nyloc ones. :rolleyes: )


But to my amazement, that was it and before I knew it the rear spring was out...


There was some surface rust on the top of the Diff...


This seems like a good excuse to get my tin of blue Hammerite paint out.
But first I had to tidy everything from the drive into the porch...


Then I could then lock the porch door and go look for the paint at the end of the garden.
But no matter where I looked I couldn't find the very small tin I bought a while back. :frusty:
Having wasted more that enough time on the search, I decided to use black paint instead.
This surface will never be seen and I will touch up the blue paint another day.
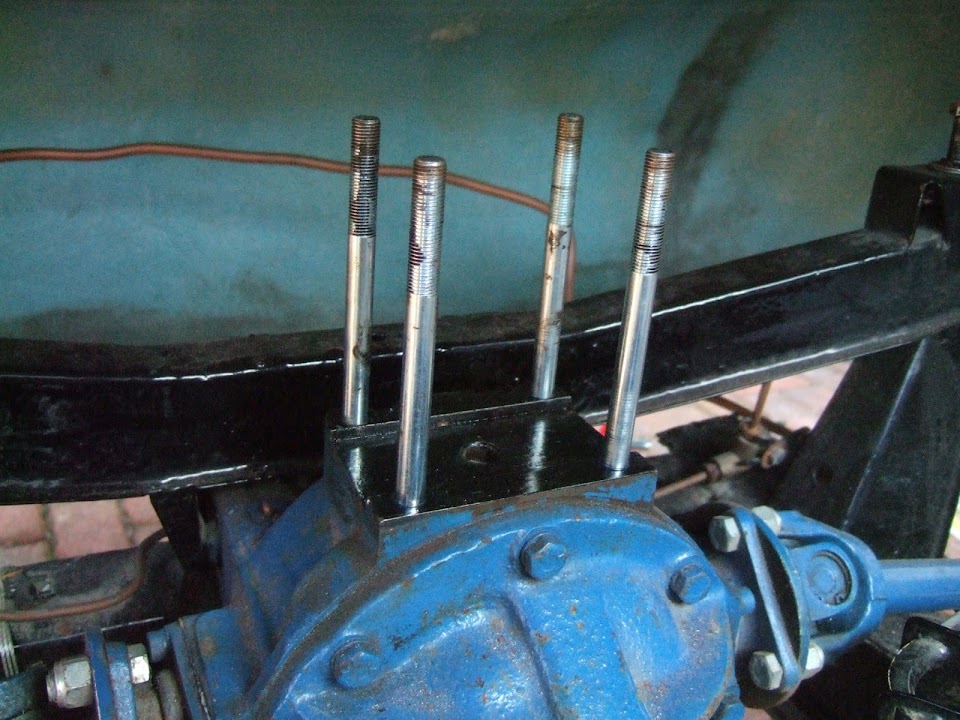
I did manage to find a couple of "normal" nuts that I could use to fit the new longer studs.

It didn't take long to clear up the diff. and get a coat of paint on it.


Back in a minute with the next part as I am including too many photos...
24 Sep 2013, 4:34pm
Rear Suspension Lowering Block - Part 2:

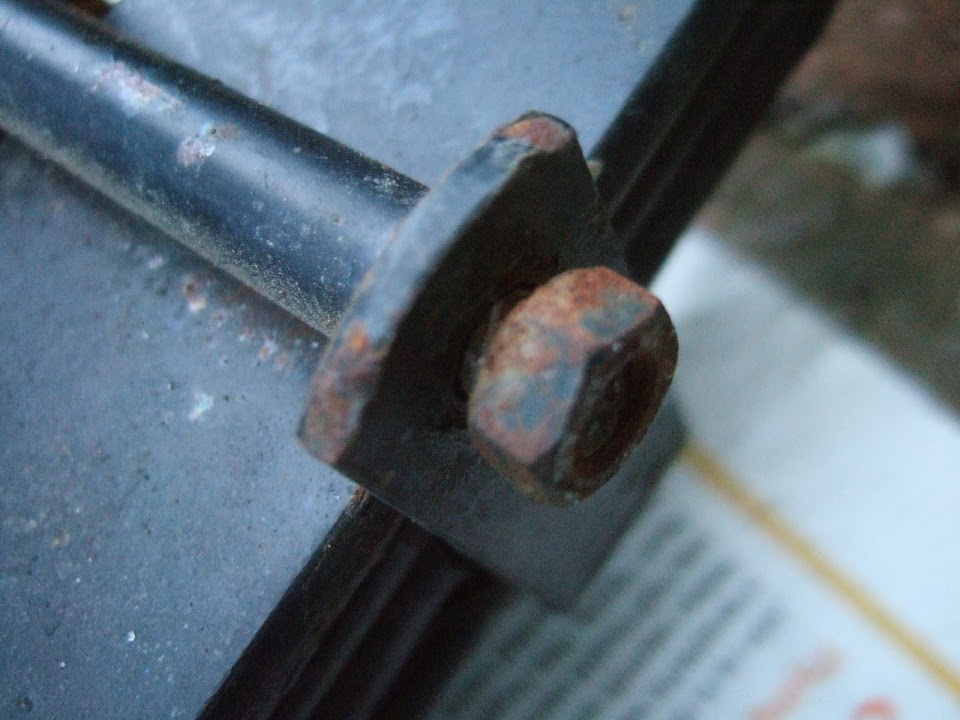
Another small job required was the nuts & bolts on the two inner spring clips.


These were not tight and had rusted into their current positions.
This needed nothing more that a soak in WD40 and they could be done up.

Before:


After:


I put the new longer studs in by hand just to help locate the lowering block...


These worked as a good guide and the block went in with no problems...


Unfortunately, the same could not be said for the rear spring which would not play ball. :icon_sad:
Turns out that the locating pin on the spring would not fit into the hole in the block.
The locating pin itself then came out which at least made it easier to see the problem...


After a bit of work with an assortment of metal files, the pin finally fitted the hole...


It took a little bit of fiddling to get the retaining nut inside the spring back into position...


I put some Loctite on the pin's threads and tightened it back up...


I then fitted the block to the spring just to be sure it was all OK...


Then I put some Loctite on the new studs and using the two nuts trick I tightened them up.


Then it was simply a case of putting the spring and block back on & tightening up new nyloc nuts.


I really thought getting the hubs bolts back in place would be a tricky job.
But it was too easy for words and I could even push one bolt in by hand. :cool:
( As everything lined up without the need to support it separately. )

Then it was back on with the wheels and lower the car back to the ground...


Obviously until i have the frame work back in place it is hard to see the difference.
But for a job that I was really dreading, it turned out not too difficult after all.

Until next time, take care, Paul. :)
24 Sep 2013, 6:07pm
I'm jealous Paul, haven't seen the workshop in weeks but am back this weekend so am hoping to make some progress myself, nice choice on wheels BTW. Keep up the good work and remember that every job done one less to do!

Mac
25 Sep 2013, 7:36am
Nice work Paul.

Brockwells did everything. I left the car with them first thing and it was ready for collection early afternoon with the tonneau and all fixtures fitted to the car. They did a great job and it's made the car completely weatherproof when it's parked outside. The materials are top quality with workmanship to match and I can't recommend them highly enough :)
25 Sep 2013, 6:52pm
In order to regain some momentum on my build I need to grab time when I can.

Chipping Away...
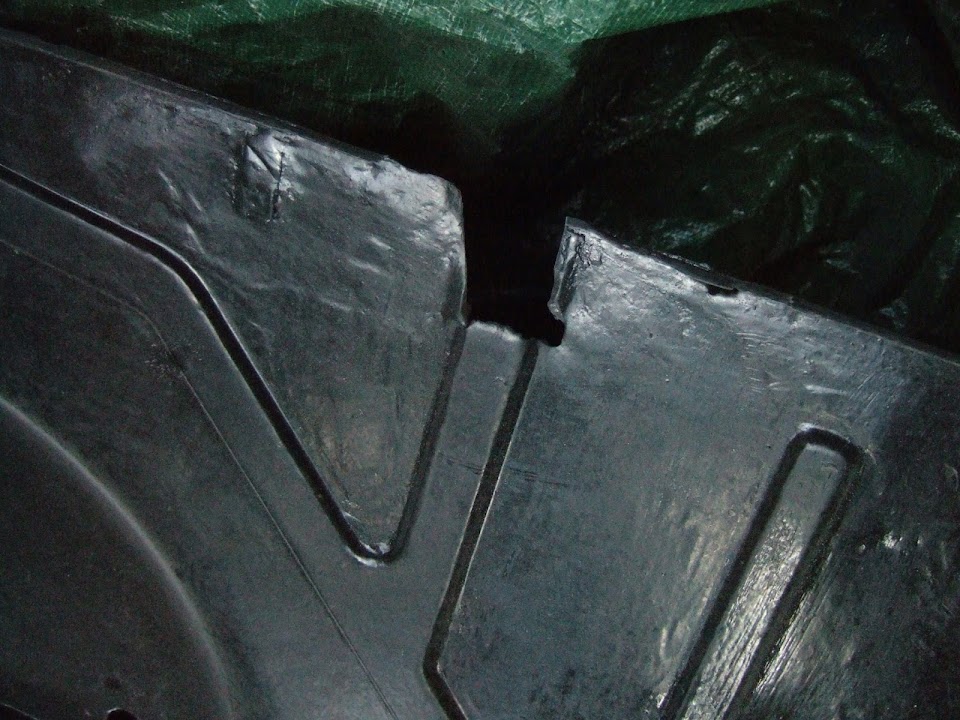
Previously I had posted this photo of the boot floor of my Spitfire rear arches...


I want to use this repair to test some welding options before I start on the bulkhead.

So I made an oversize cardboard template and found a suitable section of old Spitfire bodywork...


( The reasons for the green "dots" will hopefully become clear when I do the repair. )

This piece is ideal as it already has an edge I can use...


Note:
I might end up cutting this edge off the entire boot floor, but I'll worry about that another day.

It didn't take the angle grinder long to cut the shape I needed out...


Or to remove the paint from both sides...


Hopefully I will get a chance to clean up the boot area around the repair and start welding in the next few days.

Cheers, Paul. :)

Replies:
Mac - Cheers and as you can see above I am trying to do any job I can squeeze in.
The fact my donor car had new wheels & tyres was another reason I ended up buying it in the first place.
I've seen a couple of finished Sammio Spyders with these wheels and they do look nice.
( Although I must admit that wire wheels do look better. )

Mr T - Thanks again.
25 Sep 2013, 7:04pm
Trying your hand at plug welding then im guessing?
26 Sep 2013, 3:38pm
Mac - You know me and technical terms. :rolleyes:
But if "plug welding" is how to describe what I did below, then yes.

- - - - - - - - - - - - - - - - - - - - - - - - - - - - - - -

Boot Floor Repair:
The twin silencers on my donor car were mounted where the hole in my boot was.
As weight would be hanging down, I didn't want to risk a "fill in the hole" type repair.
So the piece I made yesterday was intended to overlap the hole from above.
That way the weight of the silencer would be properly supported.

In order to test what I hoped to do it was time to tidy up my scrap "workings".


The plan was to weld into the drilled holes from above to see if that would make a good join.
I clamped the two sections together with the holes "sunny side" up.


Then welded into the holes, and for a change I actually had some nice welds...


They had even penetrated through to the other side of the second section of metal. :cool:


So I went back to the boot floor and drilled some holes & cleaned up the metal...


After a small bit of trimming and bending, the piece I cut out yesterday was good to go...


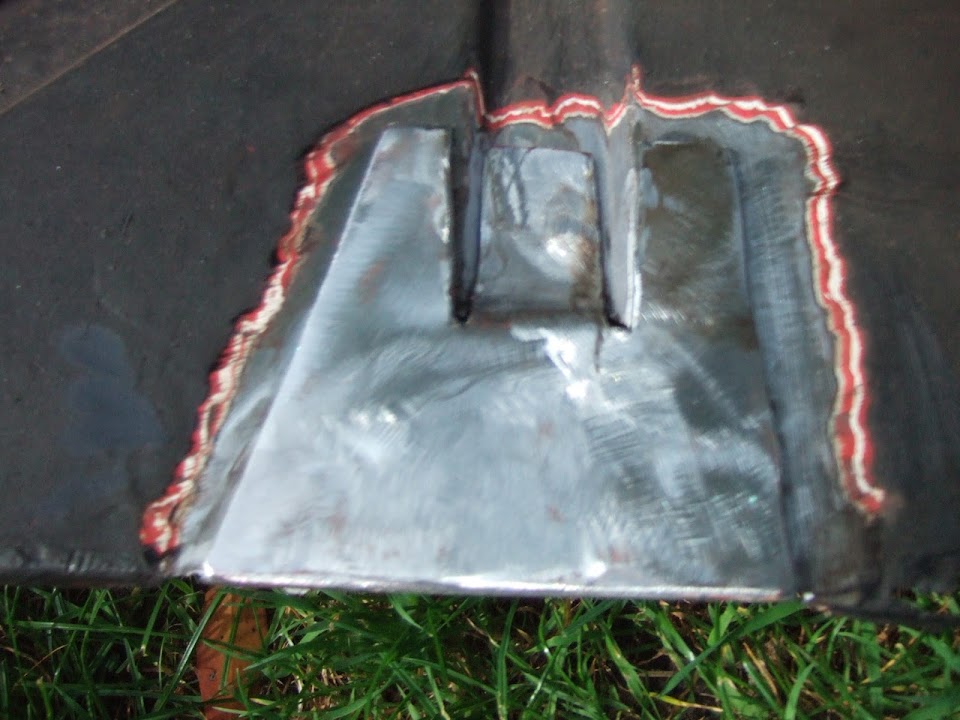
I then turned the rear arches upside down & clamped the repair piece in place...


After welding all the holes it looked like this...
( Excuse the poor photo, my old camera is still playing up. )


Although penetration through the other side wasn't consistent...


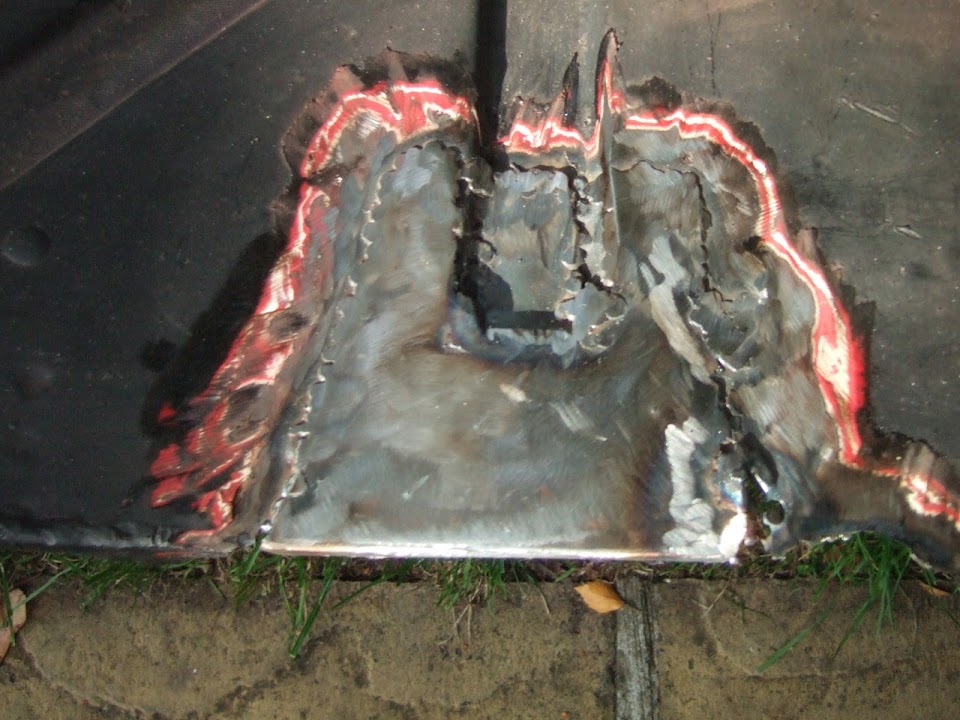
Then the arches were turned back over so I could weld the repair piece's edges to the boot floor.
Unfortunately I managed to blow a few holes in the metal while welding it in place.
I could weld some of the holes closed, but others I just made worse. :frusty:
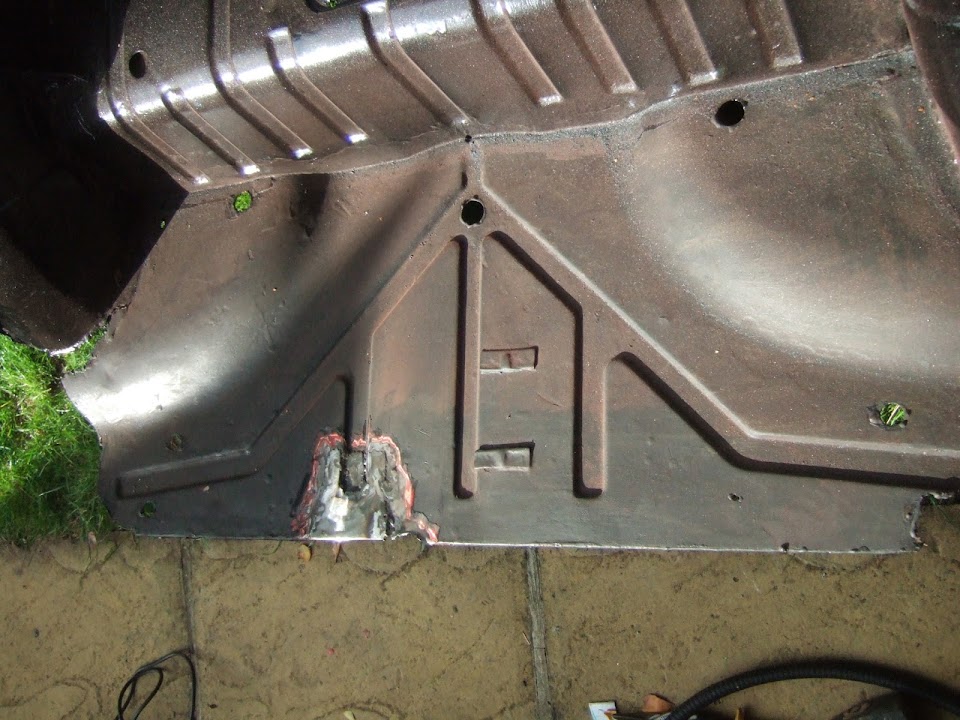
So I leave the missing section from the boot edge (bottom right of repair) for now.
Then this will be fixed when the whole floor in fibre glassed to the body shell.


This is what the boot floor looks like after the repair...


The final job was to apply some Kurust in preparation for painting tomorrow (weather permitting).


Whilst my welding is still a bit hit and miss, this repair is definitely not going anywhere.

Until next time, take care, Paul. :)
26 Sep 2013, 3:52pm
Beautiful welds. did you spiral out or just aim for the centre?
26 Sep 2013, 4:29pm
This man doesn't need a donor car. Just give him some sheet metal and a welding device!
27 Sep 2013, 3:26pm
Replies:
Gary H - I started at the centre & then made a small circle around it.

christinedmc - You are too kind Michiel, as I am still a long way from "real" fabrication work.

- - - - - - - - - - - - - - - - - - - - - - - - - - - - - - -

Tidying Up Boot Floor Repair:
I didn't want to risk blowing holes by welding the edge of the boot floor to the repair piece.
( Which is why I welded through the drilled holes, away from the edges, in the first place. )

Instead, I put a layer layer of body filler over the underside of the repair...
( Sorry photo is a bit blurred. )


While I was waiting for that to dry, I turned the wheel arched over and painted the top side.
I also put a second coat on the "cut outs" at the front of the arches I made to fit around the frame.


The repair was never going to be seamless, but at least the paint improves the look of it...


The good news was the top side was touch dry when I went to turn it over to sand down the filler.
The bad news is that painting outside in autumn on windy day has covered the fresh paint in leaves & "bits". :rolleyes:


Still, it is not a part of the car that needs a show finish, so I'll sort that out another day.
I couldn't get a decent photo to show the filler after I had tidied it up a bit...


It is slightly easier to see after I had painted the underside of the boot floor...


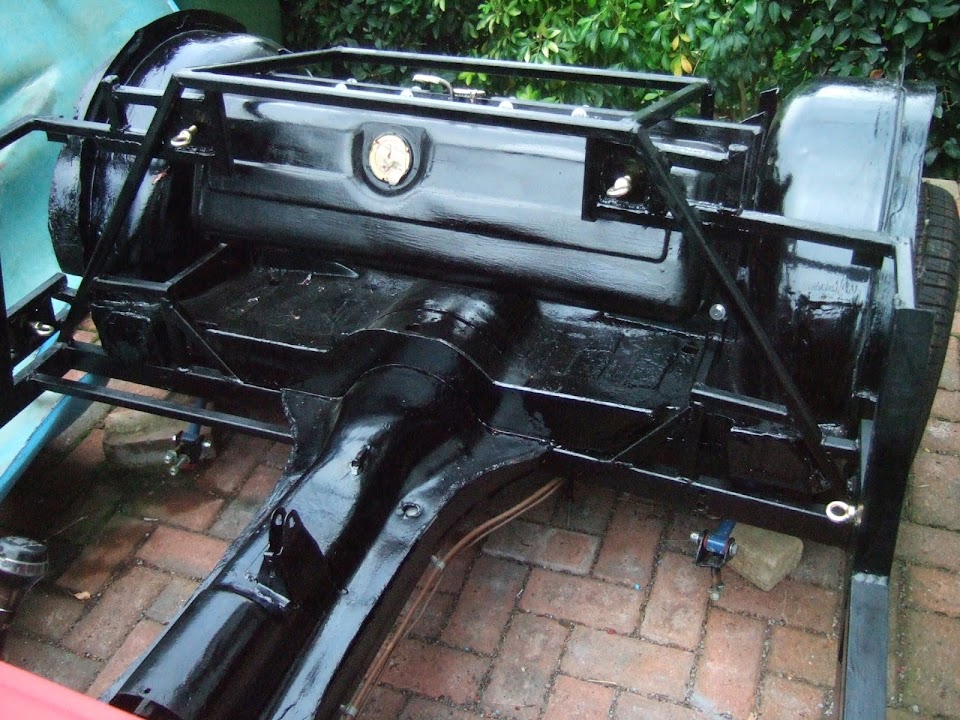
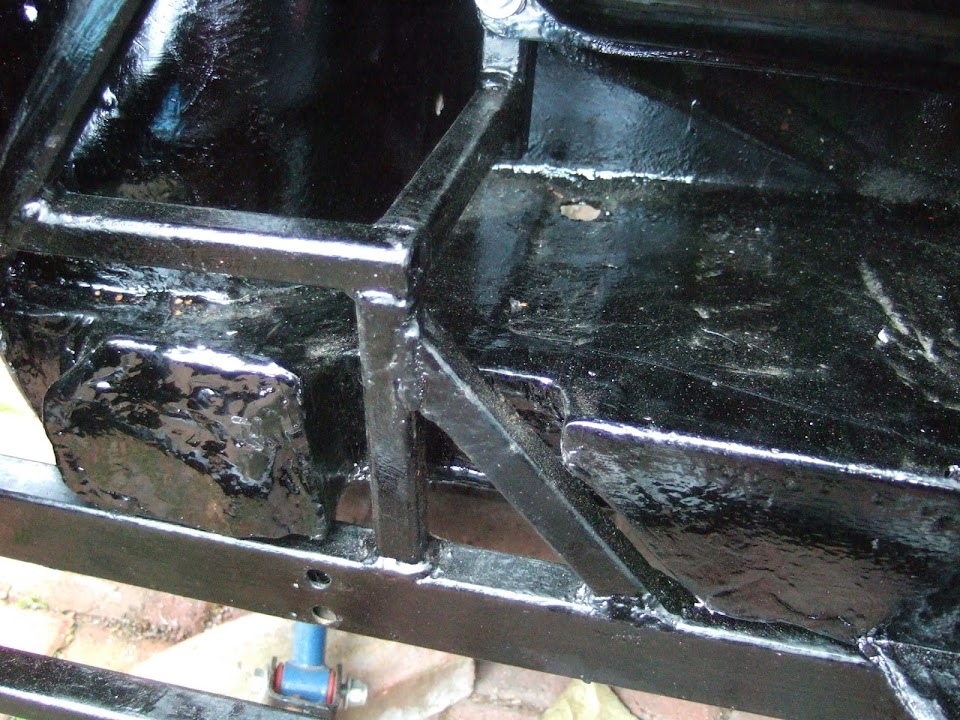
So now the rear wheel arches & rear frame work are ready to be test fitted to the chassis.
I am sure that I will need to modify the rear frame mounting points to fit.
( As they will need to align with the corresponding holes in the wheel arches. )
But the only way to find out will be to start the fitting process and see what happens.

Until then, take care, Paul. :)
27 Sep 2013, 6:30pm
Keep going Paul, looking forward to starting on my frame tomorrow.
Just a small point but for tidying up repairs such as the last one you may be better using P40 or equiv as normal body filler will absorb water if the paint get scratched, the P40 stuff is much more hard wearing and less hygroscopic ( big word of the week) :-)
28 Sep 2013, 6:21am
P40

Viatron wrote:
Keep going Paul, looking forward to starting on my frame tomorrow.
Just a small point but for tidying up repairs such as the last one you may be better using P40 or equiv as normal body filler will absorb water if the paint get scratched, the P40 stuff is much more hard wearing and less hygroscopic ( big word of the week) :-)


Only just introduced to P40 from the Trbute thread, what great gear for bridging holes in fibreglass, filling low spots and bonding, however quite expensive but wish I had found it earlier in our build.
3 Oct 2013, 12:58pm
Replies:
Viatron & Charman.Tech - Thanks for the tip chaps, please see below.

- - - - - - - - - - - - - - - - - - - - - - - - - - - - - - -

Holding Pattern:
Not had the chance to do much on the car recently.
But I did manage a little bit of shopping...

I got a tub of the P40 filler recommended above.
Plus a tin of seam sealer (something else recommended on here).


I also bought 6 x 150mm M10 bolts to join the frame to the chassis.
These are too long, but I will cut them to size when the time comes.


Also I am nut sure if I will be using all 6, or just 4.
I am also still not sure about welding in crush tubes vs. using spreader plates.
( I certainly know which is easier for me to do! )

I hope to test fit the frame & wheel arches at the weekend.
At that point I will make the final decisions about bolting everything into place.

Until then, take care, Paul. :)
7 Oct 2013, 5:34pm
Still Holding...
Didn't get a chance to test fit the frame & wheel arches at the weekend. :(
But with a bit of luck I will get the chance in the next few days.

I had planned to touch up the paint on the rolling chassis first.
Which meant I had to bite the bullet & find the blue Hammerite paint.

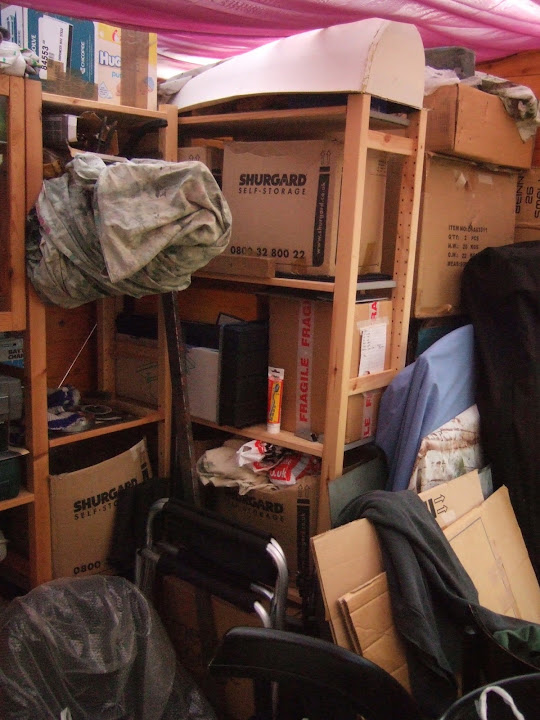
This in turn meant tackling the pile of boxes in the Summerhouse...


They had been pretty well labelled until I put the new shelves in.
Then it was such a rush to get it all put away that I just shoved things in. :rolleyes:

So I took the chance to re-pack & re-label each box I opened while I was there.
Obviously this meant it took me ages to work through the boxes.
Plus I was making an even bigger mess while I was organising things.

Eventually "Sod's Law" meant that it was in the very last box I had. :icon_evil:
( Bottom left row, unseen, behind the car seat in bubble wrap in the photo above. )


The other thing that I found while opening boxes was my broken tie down strap.
( The one I had used to pull the front framework into position ages ago. )

It was only the stitching that had given way...


So a few minutes with a needle and thread later, that was fixed...


These may come in handy when test fitting the framework.

Until then, take care, Paul. :)

PS
I also picked up a short length of steel tube that I might use when drilling the chassis.
However, it is only 1mm thick, so would that be up to the task of being a crush tube?
( Obviously, there is this the question of whether I'm up to the task of welding them! :icon_wink: )
8 Oct 2013, 4:51pm
Rear Cordite framework & Spitfire wheel arches - Part 1
Before i could test fit anything, I needed to move everything to the front drive.
This would have been much easier with two people, but there was just me.

I started here...
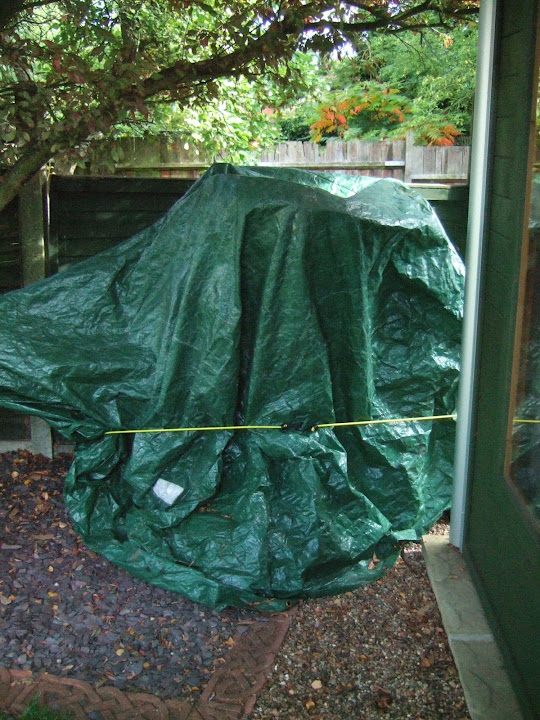


Removing the cover didn't take too much effort...


Carrying these the length of the garden was a bit harder (even one at a time)...


Then from the patio, it was into the kitchen...


Through the hallway...


Then out the front door and porch...


Before finishing here until I could get the body shell off...


Avoiding scraping the walls / doors inside was hard work!
( I was actually quite glad of the rest when I stopped to take the photos. )


Note:
I had a complete disaster removing the car cover. :icon_sad:
But I'll come back to that later on.

Next step was to fit just the arches to check against the lowering block.
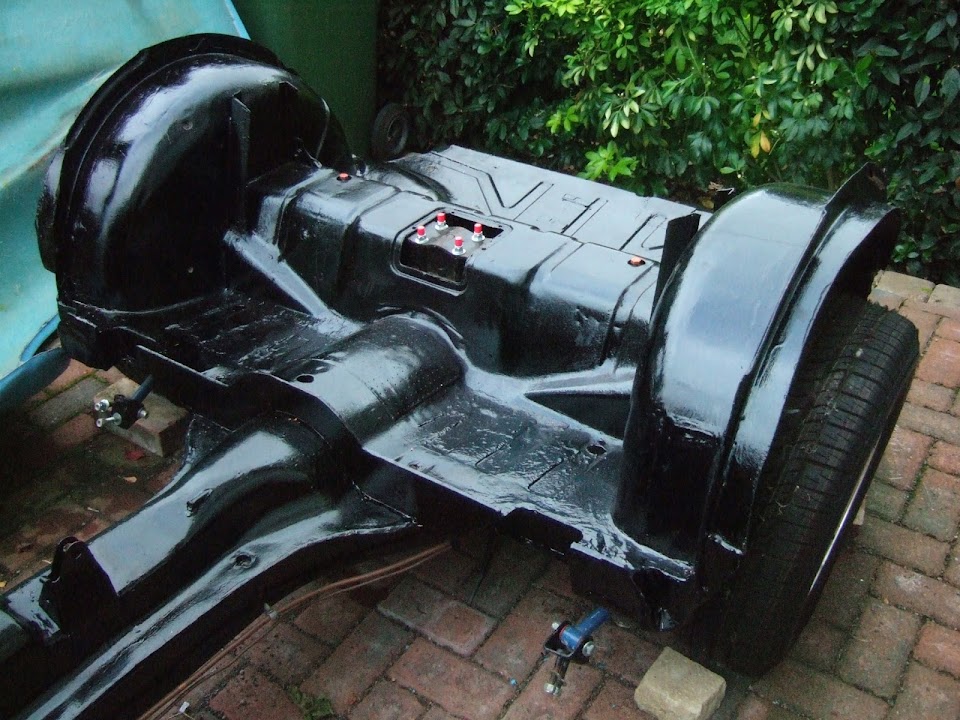


As expected, the studs extend beyond the line of the bodywork.


Which means I will need to modify the original cover plate to fit.


But I'll worry about that another day.

Next job was to slot these two sections together before fitting.
( I'd need some sort lifting gear to do this in situ. )


The good news is that they go together quite well.
The bad news is that they are now both heavy & awkward to fit.
But after yet more huffing & puffing there were in place.


Also as expected, the front of the hand brake panel was sticking up.


This is because the rear frame is deigned to sit on the chassis, not the arches.
Which means that the "feet" for the frame work need to be shortened.
( Which, in turn, would allow the arches to tilt forward to the right level. )


There is another small technical hitch with the frame "feet".
The chassis mounting points have some lateral play in them.
This allowed the Cordite framework to be bolted in place without adjustment.
However, the mounting points for the wheel arches are fixed.

There is only about one cm difference between the two...
( Not really visible in this photo, which was mainly a reminder for myself. )
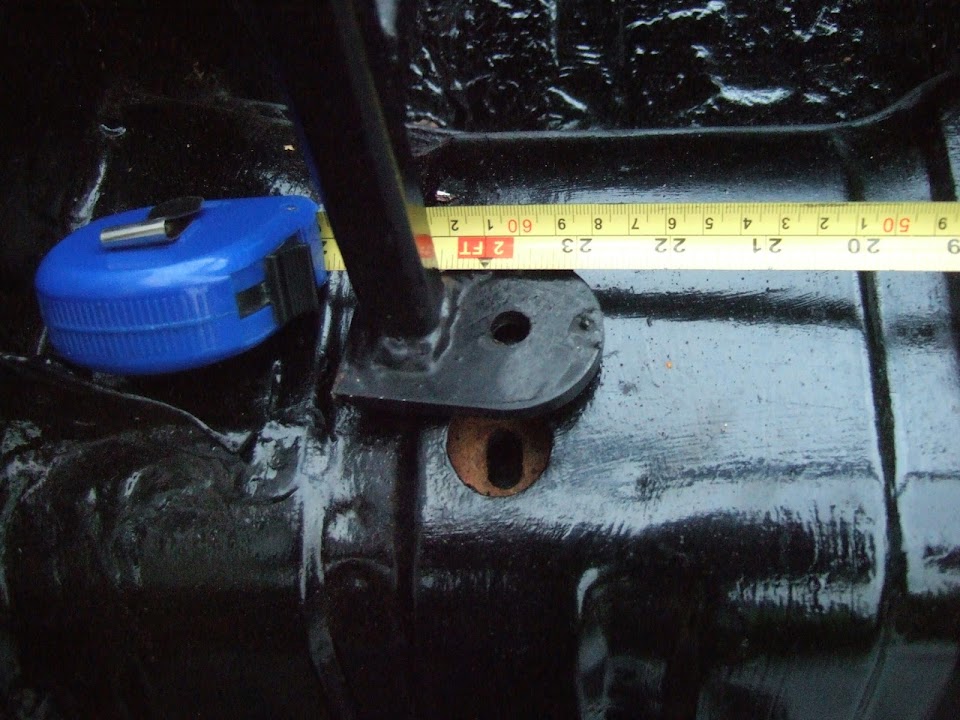


But that is still one cm too many. :icon_sad:

My plan was to cut off the feet to allow the arches to tilt.
When it comes time to weld them back on, they will be in the right position.

So out came the angle grinder & off came a section of frame/feet.
( I wanted to make sure I had plenty of box section left to work with. )


Back in a minute with "Part 2"...
8 Oct 2013, 4:52pm
Rear Cordite framework & Spitfire wheel arches - Part 2

This highlighted the next area to foul, which was one of the "ribs" on the arches.


No room to get a grinder / hack saw in there without removing every thing again.
Then I remembered my mate's metal "snips" & cut two slots above & below.
This allowed me to bend the metal out of the way for now.
( Sorry about the poor photo. )


In order to tilt the rear arches, I am fitting original Spitfire chassis mounts underneath.
( The metal wedges were originally used towards the front of the car, not the back. )


Raising the back effectively lifts the hand brake panel higher than the Cordite framework.
( Which needs to be under the panel to be bolted to the chassis. )

As you can see, a much better fit already, with a bit more work to do.


Note: I still need to fit the metal floor pans between the frame & the hand brake panel.

This gives to an idea of how the feet could be welded back into position.


I will add extra bracing in my traditional over-engineered problem solving way. :icon_wink:

This was the overall look after this first test fit.


The boxed in "cut outs" in the arches work well with the frame.


In order to tidy up for the day, I had to put the body back on.


Car Cover - RIP
It was a little harder to tidy up with the car cover as it had fallen apart. :icon_sad:
When I tried to remove it, it simply came away in strips and is now completely brittle.


Whilst it is only the bonnet area that is effected, it is completely beyond repair.


So I had to use the cover that way on the framework & arches instead.


This is only temporary until I can get a new cover delivered.
Especially as the green cover is meant to be protecting the garden furniture!

Next Steps:
Unfortunately, I need to remove everything from the chassis again.
I need to check the alignment of the frame work and drill holes to mount it.
Obviously I need to put the corresponding holes in the chassis too.
I also need to work out whether I am bolting the floors to the chassis.
( The alternative is to have a holes in the floor that sit over the mounting bolts. )
Only when the frame & floors are in their final positions will I weld the feet back on.
It is also clear, that this is all going to take a lot of time & multiple test fittings.

Until then, take care, Paul. :)
8 Oct 2013, 9:11pm
Hi Paul,

This is quite an endeavour. Whatch your steps, otherwise you end up with a uge crane lifting your car over the roof of your house just like a Dutch fellow builder!

It looks like great progess. Keep it up.

Michiel
9 Oct 2013, 5:51am
A good step forward Paul, apart from the rear mounts whats stopping you getting it permanently fixed?
10 Oct 2013, 3:52pm
Replies:
Michiel - Thankfully the car is being assembled on the "road side" of the house.
I would have needed a huge crane if I wanted to get the donor car into the back garden.
But given the choice, I'd still recommend building in a conventional garage! :wink:

Mac - Cheers, the plan is to get this rear section permanently mounted ASAP.
However, that does involve a number of other related tasks which I will tick off first.
E.g. I need to lower the fuel & brake hard lines along the chassis as the frame hits them.
I also need to finalise the flexible fuel line route from the tank to the existing hard line, etc.
So lots to do, but eventually I will be left with a the final version of the back half of the car.
Then I will be able to focus on the front bulkhead, which is another can of worms all together.

- - - - - - - - - - - - - - - - - - - - - - - - - - - - - - -

Shopping News:
I've ordered a cheap and cheerful car cover which should be here tomorrow. :pray:
This is because the fitted "Spitifire" cover can not be delivered for a couple of weeks.
Given the weather is a bit hit and miss, I need to be able to cover things quickly.
I will use both covers over the winter, which will hopefully protect the fitted one.

I also got a small retaining screw from Rimmer Bros. for the rear drum brake cover.
As I noticed that one was missing the other day when I was fitting the lowering block.
But I will wait until I have touched up the paint on the drum covers before using it.

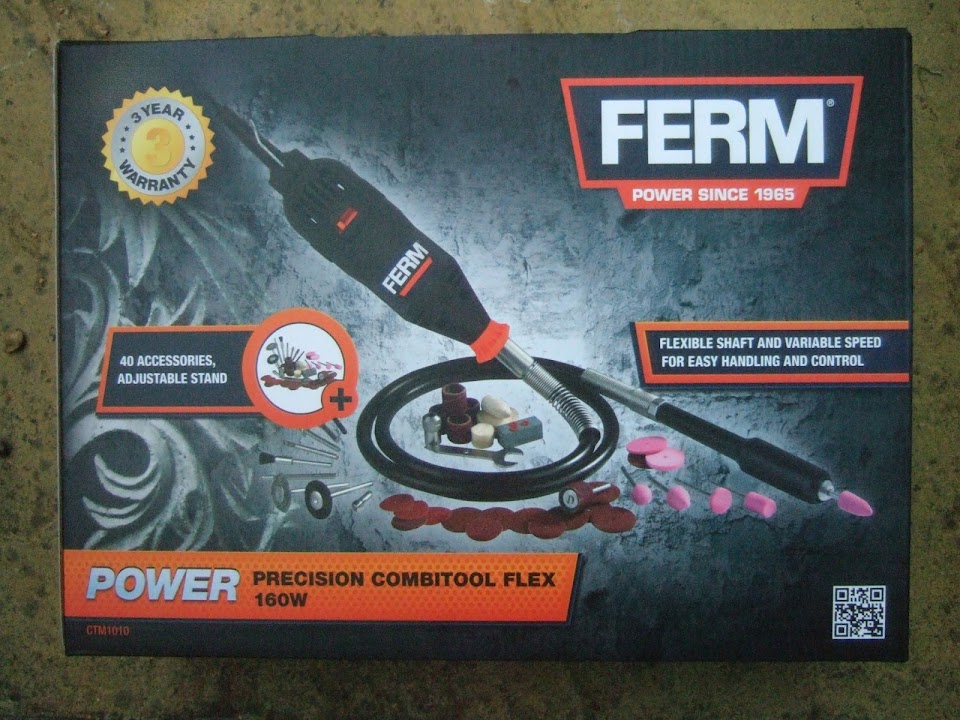
My final bit of shopping was for a cheap Dremmel type multi-tool "thingy"...


This should allow me to at least tidy up my welding on the bulkhead a bit.
Up until now, I've just left the welds that I couldn't reach with my grinder as they were.

Has anyone used one of these to dress welds?
If so, which one of the many accessories works best?

That's all for now, hopefully some work on the car to report next time.
First job is to double check the two sections line up with the seat belt mounting holes in the chassis.

Cheers, Paul. :)
10 Oct 2013, 5:02pm
Hi Paul,

I use the dremel all the time for various task. And I have learned that the Bosch Multi tool is the tool if you're into glass fibre. You can make terrific straight and precise cuts for example.
But I doubt that the dremel would dress welds. It lacks the power to do that. The little accessoires won't handle it. The angle grinder is the tool to accomplish that task.

Michiel
10 Oct 2013, 5:32pm
christinedmc wrote:

...I doubt that the dremel would dress welds. It lacks the power to do that. The little accessoires won't handle it. The angle grinder is the tool to accomplish that task.

Michiel


Agreed. I tried to clean up some inaccessible welds on my chassis with a dremel and the abrasive compound on the heads just disintegrated after a few seconds. :(

I ended up just cleaning up what I could get to with a hand file and painting over them with Hammerite. Out of sight, out of mind...
10 Oct 2013, 6:12pm
Paul L wrote:
Rear Cordite framework & Spitfire wheel arches - Part 2

This highlighted the next area to foul, which was one of the "ribs" on the arches.


No room to get a grinder / hack saw in there without removing every thing again.
Then I remembered my mate's metal "snips" & cut two slots above & below.
This allowed me to bend the metal out of the way for now.
( Sorry about the poor photo. )


In order to tilt the rear arches, I am fitting original Spitfire chassis mounts underneath.
( The metal wedges were originally used towards the front of the car, not the back. )


Raising the back effectively lifts the hand brake panel higher than the Cordite framework.
( Which needs to be under the panel to be bolted to the chassis. )

As you can see, a much better fit already, with a bit more work to do.


Note: I still need to fit the metal floor pans between the frame & the hand brake panel.

This gives to an idea of how the feet could be welded back into position.


I will add extra bracing in my traditional over-engineered problem solving way. :icon_wink:

This was the overall look after this first test fit.


The boxed in "cut outs" in the arches work well with the frame.


In order to tidy up for the day, I had to put the body back on.


Car Cover - RIP
It was a little harder to tidy up with the car cover as it had fallen apart. :icon_sad:
When I tried to remove it, it simply came away in strips and is now completely brittle.


Whilst it is only the bonnet area that is effected, it is completely beyond repair.


So I had to use the cover that way on the framework & arches instead.


This is only temporary until I can get a new cover delivered.
Especially as the green cover is meant to be protecting the garden furniture!

Next Steps:
Unfortunately, I need to remove everything from the chassis again.
I need to check the alignment of the frame work and drill holes to mount it.
Obviously I need to put the corresponding holes in the chassis too.
I also need to work out whether I am bolting the floors to the chassis.
( The alternative is to have a holes in the floor that sit over the mounting bolts. )
Only when the frame & floors are in their final positions will I weld the feet back on.
It is also clear, that this is all going to take a lot of time & multiple test fittings.

Until then, take care, Paul. :)


:popcorn: