MadaboutKitcars

This is a read-only archive of the old Madabout Kitcars forum. New posts and replies are no longer possible, but every thread is still here to browse and read.

Swifty's Navigator

12 Sep 2015, 8:27pm
Cheers Paul.

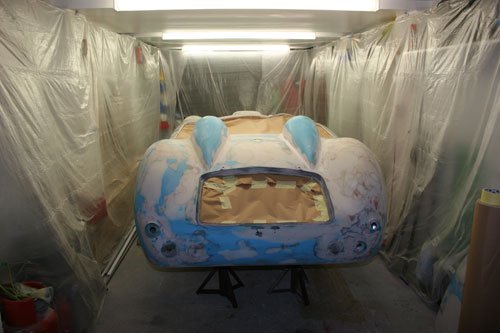
Finally started the pre paint prep by first hoovering out the garage and clearing all the accumulated rubbish, then putting up a make shift side curtain out of cheap poly dust sheets. The dust sheet is supported by a cord which passes around the top of the garage.


IMG_6018.jpg


I've lifted the car up on axles stands to aid spraying the sill area and removed the wheels so that the arches can also be sprayed.


Attachment “IMG_6014.jpg” from the original forum could not be reliably recovered.
Attachment “IMG_6015.jpg” from the original forum could not be reliably recovered.
IMG_6017.jpg


Masked off any areas that i don't want to spray just yet. I used the above method to mask off and also make sure the paint will cover the underside of the rolled cockpit edge. The masking tape is sticky side up.


First coat tomorrow will be a plastic primer, type used is this. Followed by Upol Reface a build primer.
Attachment “IMG_6016.jpg” from the original forum could not be reliably recovered.


Well that's it for now see you all soon.
12 Sep 2015, 9:43pm
Good luck Swifty all the best for tomorrow. I will be very interested in how well the plastic primer works in you opinion.
13 Sep 2015, 6:20am
Nice to see another Sammio getting ready for paint and nearing completion.

One thing worth mentioning, though: as I'd never sprayed anything, never mind a car before, I spoke to a number of expert sources prior to starting.

A number of those sources, including paint supplier Jawel, strongly recommended spraying a couple of coats of etch primer onto any fibreglass surface before following up with plastic or high build primers.

That's what I did and I've had no paint flaking issues in the two years and 6,000 miles it's been on the road.

Good luck and looking forward to seeing the painted article. :)
13 Sep 2015, 6:59am
Good Luck Swifty
Everyone says prep is the key and they are right.

Ive sprayed a number of cars now - all outside and I have been happy enough with the results.

As Mr T said I have used etch primer on some but to be honest tack cloths and panel wipe made the biggest difference to my finished job

What colour will the top coat be?
13 Sep 2015, 5:35pm
Hope the spraying went well.

I'm looking forward to seeing this in one colour.

Good luck, Paul. :)
13 Sep 2015, 6:52pm
Cheers Guys.

Mr T i had intended in using etch primer but after reading the technical sheet for the plastic primer it advised against this so applied the plastic primer straight onto the fiberglass/filler surface.

Jones I've never sprayed a car before so i can't really say if the plastic primer is a wise move, i was advised by a local spray shop to use this first as it is supposed to seal and bond the surface and hopefully prevent future flaking plus give a good key for the primer to stick to.


IMG_6020.jpg


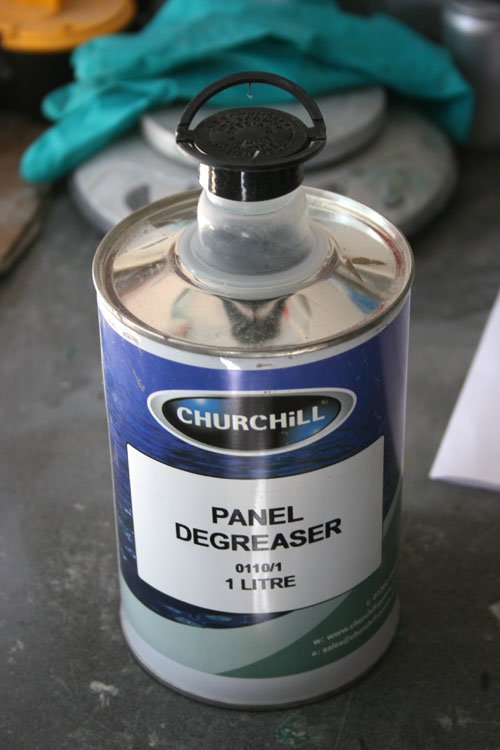
First the whole of the car was wiped down with panel de-greaser before any spraying commenced, i use two cloths one to apply the de-greaser and the other to wipe over dry. Then wiped the whole car again with a tack cloth but to be honest after seeing the finish of the plastic primer it was probably a wast of a tack cloth.


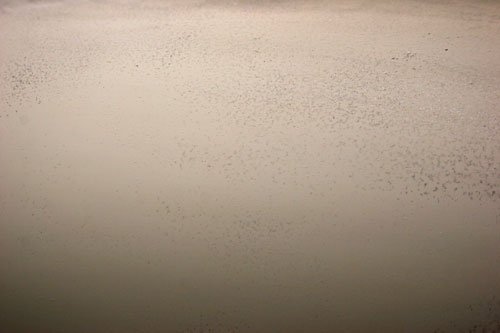
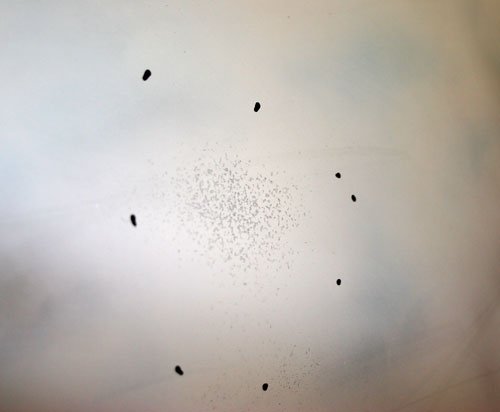
The plastic primer was then sprayed on using a 1.4 needle, it has the same viscosity as thinners with what looks like very small pieces of metallic flake mixed in.


Attachment “IMG_6021.jpg” from the original forum could not be reliably recovered.


Picture of the plastic primer applied, it gives a fairly rough satin metallic finish but the spray shop said not to flatten off as this would remove the primer.


Waited one hour then applied the high build primer with a 2.0mm needle, the viscosity of this is very thick to say the least but relatively easy to spray. I found that mixing 300ml at a time took about fiteen minutes to apply and the pot life is about 20 mins, each time i had to do a quick gun clean before mixing another batch, also another point is i removed the small filter fitted internally in the spray gun due to it blocking up the first time i used the high build primer.

IMG_6024.jpg
IMG_6019.jpg


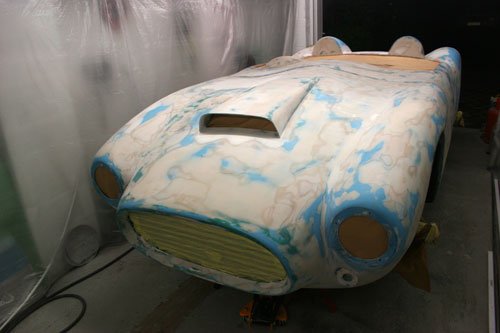
Did not get the whole car covered in high build primer as i ran out with a third still to do so will have to buy some more tomorrow, I've used 1 litre so far so think another 2 litres should finish off and allow for a second coat. The second image was a before shot for comparison.

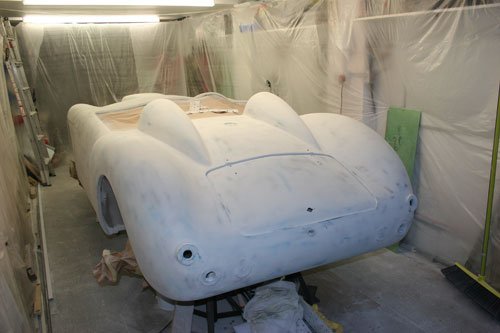
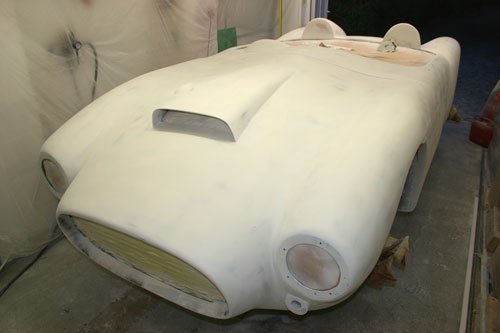
All in all its very satisfying to see the car in one colour and its looks more like a car now. Need to finish off the high build then wait a couple of days before dry sanding back any imperfections as there are a few small pin holes showing through the high build primer.


Well that's it for now see you all soon.
15 Sep 2015, 12:57pm
Very nice indeed. :cool:
17 Sep 2015, 7:35pm
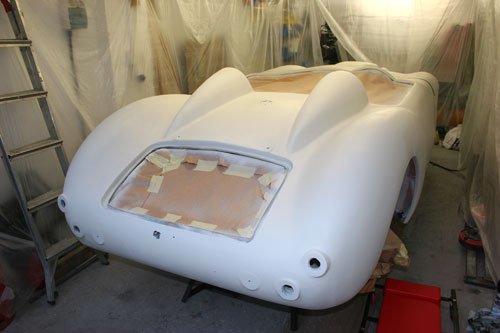
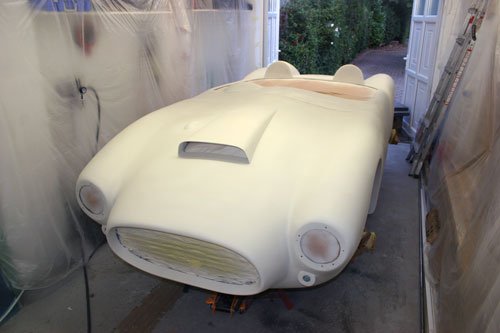
Finally finished spraying the car with high build primer so maybe this weekend I'll get a guide coat on and the whole of the body rubbed down again to see were the high and low spots are.

IMG_6037.jpg
IMG_6039.jpg


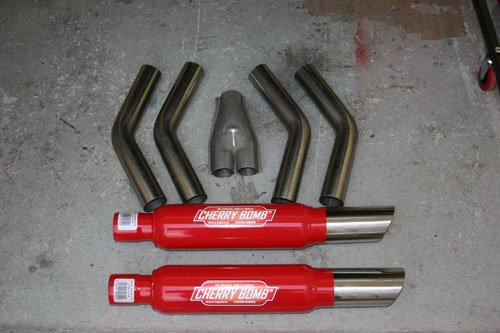
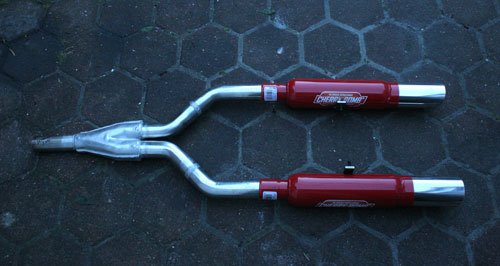
The new stainless exhaust parts have arrived, two cherry bombs, 1 into 2 fitting and some 45 degree bends.

IMG_6036.jpg


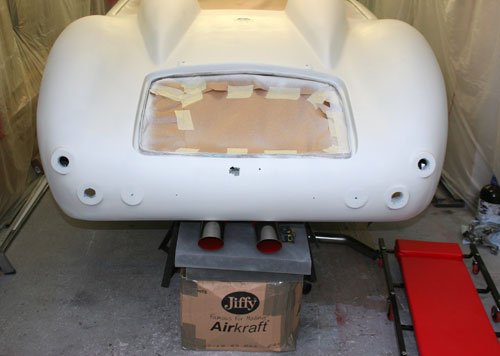
Not sure where the exhaust's look better, either center or to the outside.

IMG_6033.jpg
IMG_6035.jpg


Placed the cherry bombs roughly in place to see which looks better, once Ive decided then its a case of cutting fittings etc to size, tacking in place under the car and removing to tig weld all the new joints on the bench.


Well that's it for now see you all soon.
18 Sep 2015, 8:59am
Swifty - As far as the exhaust pipe layout goes...

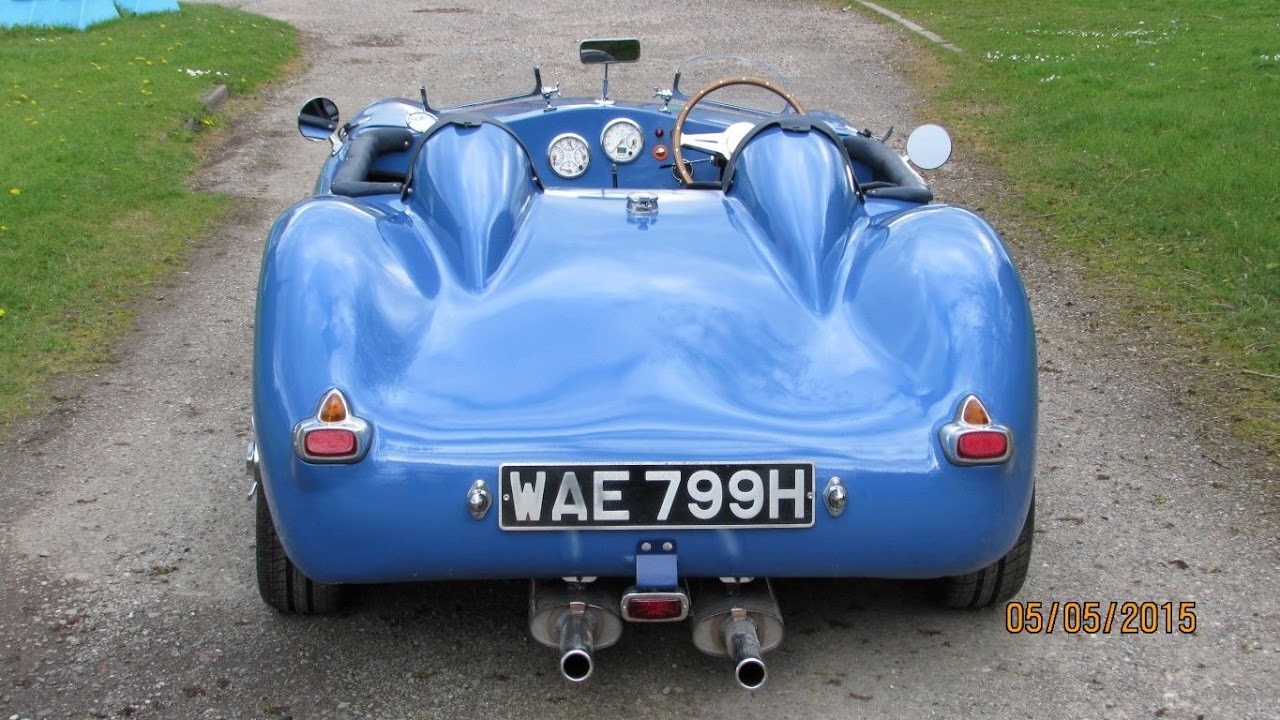
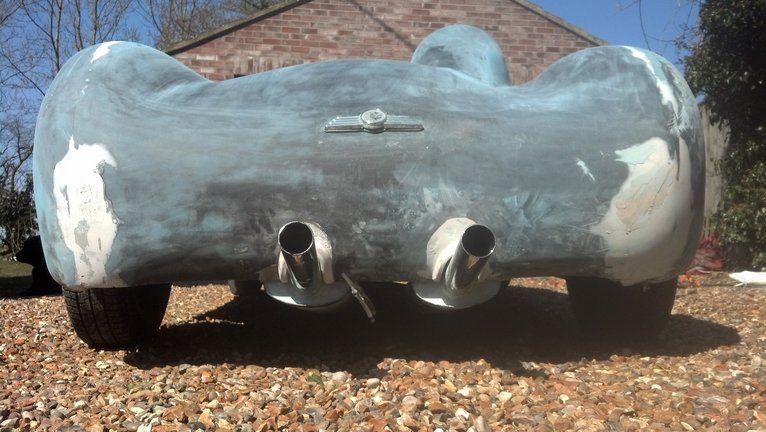
Central pipes are always a popular option with Sammio builders, as that is how the standard Triumph twin exhaust pipes are supplied.

Obviously that is what I am using, as did Mac.


Although his were hung pretty low, whereas most are "tucked up" in to the body work.

This is Psycho Pops' Sypder and again, I'm doing something similar on mine.

.

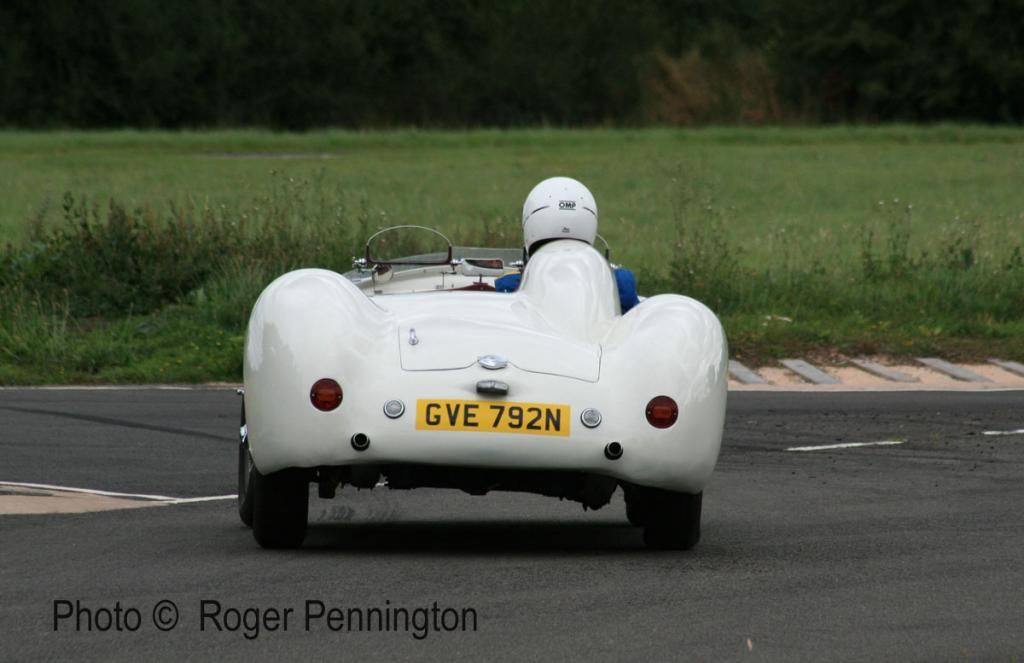
By chance, Micky1Mo posted this photo of his G-46 yesterday with a "wide" pipe set up.


Which I think is just how the original Scimitar pipes were laid out.


Overall, very few people have fabricated their own exhaust system.

When Mister Towed fitted his cherry bomb it was part of his side exit design.


Personally, I think your car is going to look great which ever option you pick. :cool:

Good luck, Paul. :)
18 Sep 2015, 4:24pm
Looking good Swifty, what was the final colour to be?
18 Sep 2015, 7:34pm
Paul Thanks for the pictures, they have been useful.

Scottie Cheers, final colour still on the shelf.

Cut and mocked up the exhaust this afternoon ready to be tig welded.

IMG_6055.jpg
IMG_6045.jpg


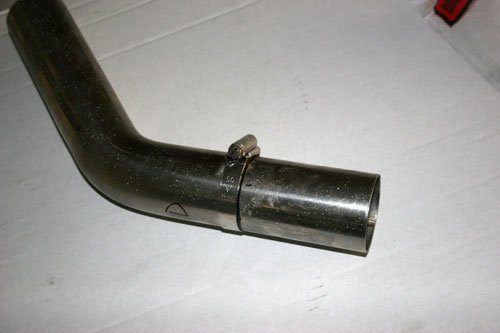
Parts assembled read for welding. A good trick to mark out the pipe to cut to a straight end is to tighten a jubilee clip around the pipe then draw a line around, you can also leave the jubilee clip on and use as a guide for the hacksaw. I used the jubilee clips to joint the 45 degree angle tube's together after cutting to size, if you are thinking of tig welding pipe then it's wise to have no more than .5mm gap between each pipe end when butted together.


IMG_6054.jpg


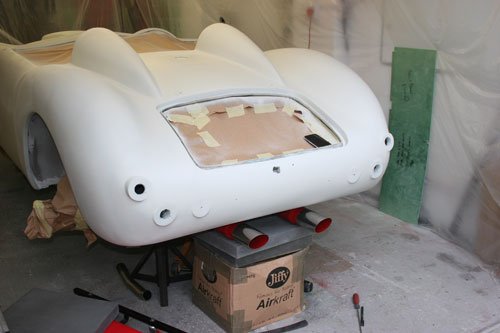
Pipes fitted in place, need to weld a couple of tags onto each silencer and also the boot floor to use a hanging brackets. I decide to go with the center mount which i felt is more of a sporty look and the twin pipes mounted to each side indicates a V engine.

IMG_6058.jpg
IMG_6062.jpg


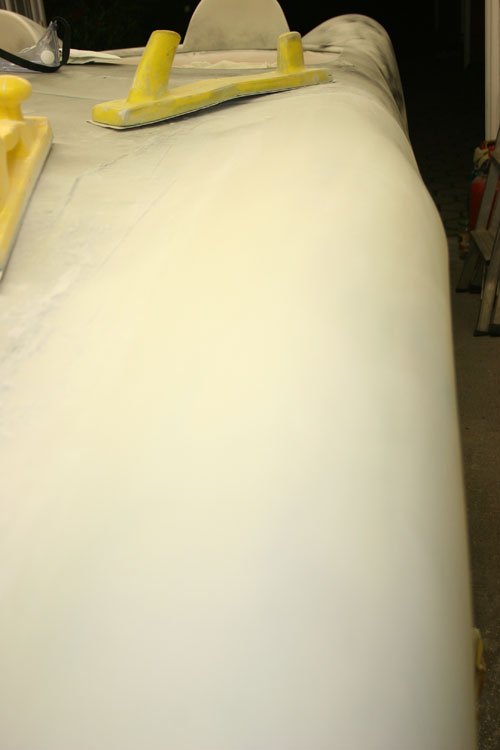
Guide coat applied and you can see some low spots in the first image after a slight rubbing down with 320 paper, to the eye before the high build was applied all looked ok but this has show otherwise. Second image shows a smooth flat wing top.


Well that's it for now and maybe i will have the whole car flattened off this weekend.
20 Sep 2015, 5:16am
Swifty - I hope you get the paint finish all your efforts in prepping the car deserve. :cool:

Although I am seriously dreading the effort required to get my car's bodywork into shape for paint. :rolleyes:

Good luck, Paul. :)
20 Sep 2015, 6:35am
Theres nothing like cherry bombs :) this should sound great
20 Sep 2015, 8:33pm
Paul The prep work is where the finished result is based on or so i am led to believe and i to hope that it will be worth it.

Roadster I did have a single stainless back box fitted which sounded throaty so i'm looking forward to hearing the cherry bombs.


Well after 12 hrs of rubbing down over the last two days i sickened myself and decided to do something else to relive the boredom.

The bonnet never close flat with the side of the car and after a number of ideas I've ended up fabricating a couple of plates from 3mm ally sheet.

IMG_6063.jpg
Attachment “IMG_6064.jpg” from the original forum could not be reliably recovered.


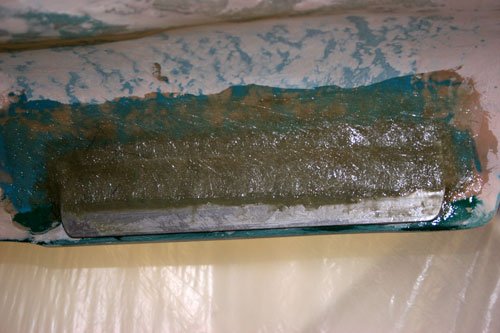
The plates were bent to suit the bonnet inside lines and holes were drilled to give it a key for the bonding paste. First the inner bonnet surface was rough up, then paste applied, then plates pushed onto the paste and held in place with the bonnet closed until dry.
Two layers of fiber glass put over the top and will rub down before applying some body filler to finish off.
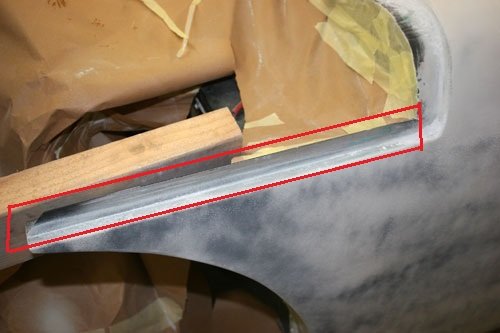
The body to plates have about a 3mm gap for the angle plate fitted to the bulk head/wing edge to locate into when the bonnet is closed.

IMG_6065.jpg


The ally angle line fitted to the bulkhead circled in red.


IMG_6067.jpg


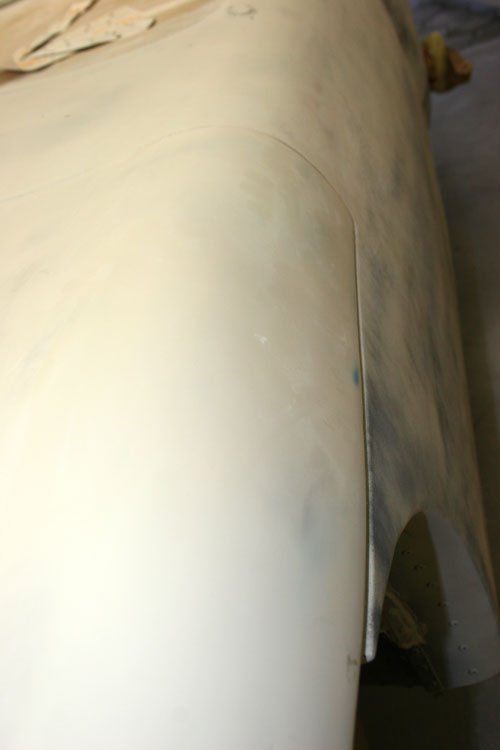
The edge of the bonnet is now flush with the body were as before it stood about 5mm proud. Two leather straps with buckles will hold the bonnet down securely.


Well that's it for now see you all soon.
21 Sep 2015, 2:02pm
I may well steal your approach to aligning the bonnet when the time comes. :cool:
21 Sep 2015, 4:24pm
Paul L wrote:
I may well steal your approach to aligning the bonnet when the time comes. :cool:


+1
21 Sep 2015, 8:47pm
Paul & Oxford Fill your boots guy's, you may even improve on the design, one concern i have is how the bonding between the fiberglass and ally plate will hold up over time.


Finished off the mods to the exhaust today.

Attachment “IMG_6068.jpg” from the original forum could not be reliably recovered.
IMG_6070.jpg


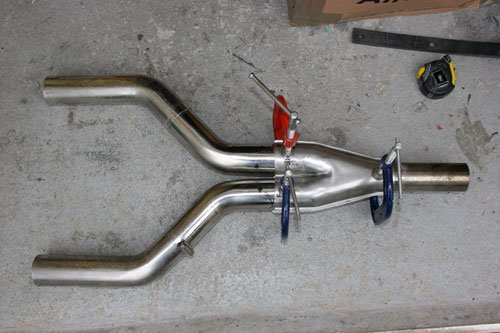
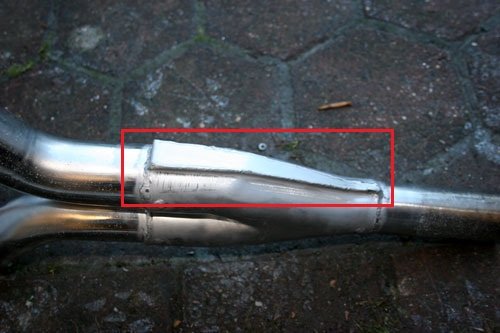
Tig welded all the joints, the pipes were held in place in the 1 into 2 section with stainless pop rivets (circled in red in first image) which were fused in once all the joint welding was complete. Also welded a couple of hanging brackets onto the cherry bombs.

Covered all the welds in pickling paste to clean all the crap off which makes the welds look a lot cleaner and shiny.


IMG_6071.jpg


The 1 into 2 came in two parts and really was for 1 3/4" pipe (the supplier only had these in stock so i took a chance) but as i was using 2" pipe i had to make and weld a couple of joining plates into the sides, the triangle shape section in the red border, the other option was to make reducer's to take the 2" down to 1 3/4", the plate was the easier option with the bonus of less obstruction to the exhaust gases. Thought i would mention this in case anybody else comes across the same problem.


Attachment “IMG_6072.jpg” from the original forum could not be reliably recovered.
Attachment “IMG_6073.jpg” from the original forum could not be reliably recovered.


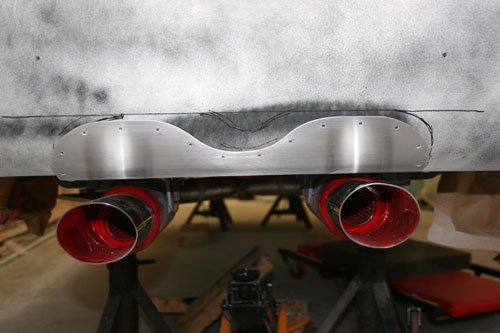
A couple of shots with the exhaust's in place which i am happy with, the mod has also kept the center pipe up inside the chassis rails and the tail pipes as close as is possible to the rear of the underside, may be tomorrow i will fabricate an ally plate to mount on the body above the exhaust tail pipes plus i am thinking of hanging the center pipe from a couple of rubber hangers because at the moment the exhaust has only two mount points, the manifold and cherry bomb hangers.


Well that's it for now see you all soon.
27 Sep 2015, 8:18pm
Its been ten days since the high build primer was put on and at last the whole body has been rubbed down reveling a few low points which will be flashed over again with more high build before i hope the final rub down before the under coat goes on.

A couple of pictures.

IMG_6075.jpg
IMG_6076.jpg


IMG_6077.jpg


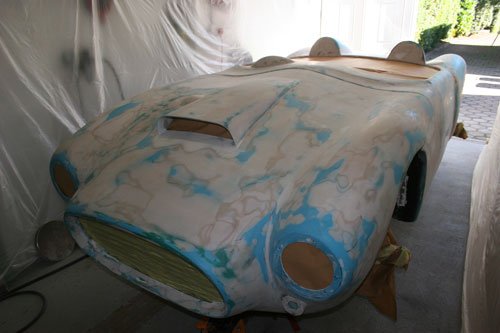
A low point in the body, the mottled look is the black guide coat in the low points, the blue gel coat is just starting to show through the high build so i had to stop so as not to break through the plastic primer coating.


IMG_6074.jpg


Ally trim made and tried for size.


Well that's it for now see you all soon.
28 Sep 2015, 8:20am
Love the exhaust Swifty!
It should sound marvelous. Keep up the good work.
28 Sep 2015, 6:26pm
I am sure your paint finish will reflect all the effort you have put in. :cool:
3 Oct 2015, 7:28pm
Cheers Scottie and Paul.

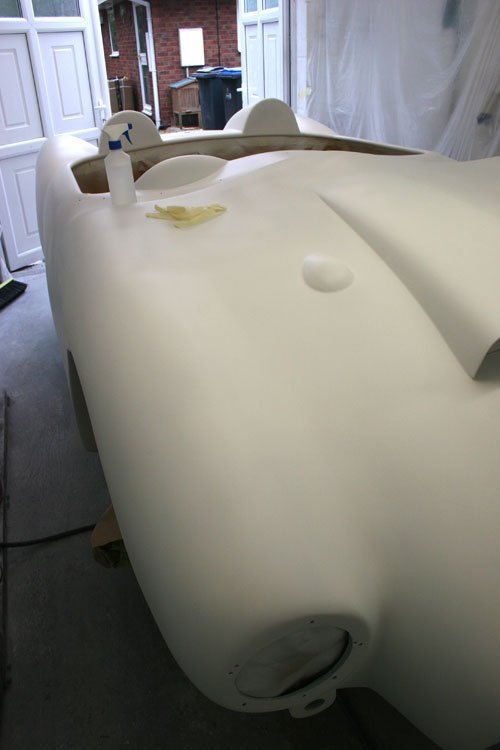
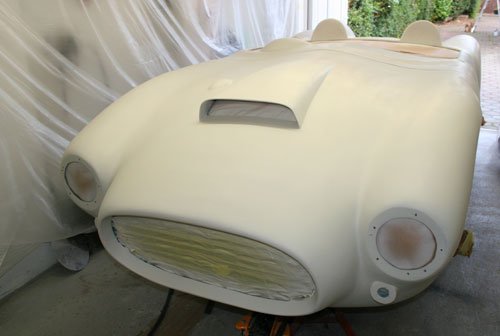
Well one step closer to putting the final colour on the body. Last night i put three coats of primer on ready to flatten off today which ive now completed some 7 hours later. The under coat was applied with a 1.8 needle in the spray gun with a ratio of 20% standard thinners.
The top coat will be thinned with high gloss thinners rather than standard thinners.

Wet flattened with 800 grit paper then cleaned down with clean water and a squeegee ready to rub over with a tack cloth and de-greaser tomorrow before starting to spray with the final colour.

IMG_6080.jpg


It looks good in one full colour rather than the blue and filler colour of the past months.


IMG_6082.jpg


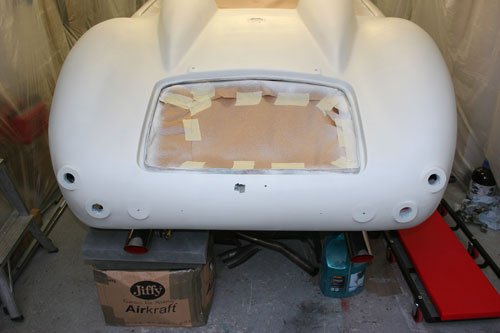
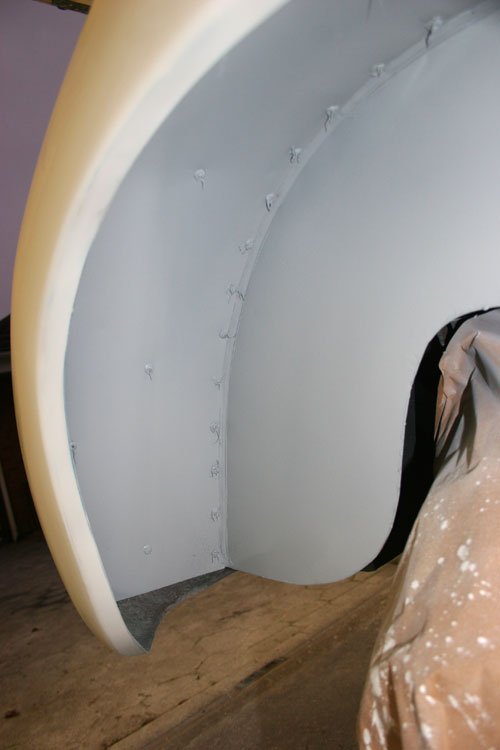
Sprayed inside the rear wheel arches and the boot area with grey etch primer ready for a quick coating of the body colour tomorrow to give a uniform look when on the road.


Well that's it for now see you all soon.
4 Oct 2015, 6:01am
Swifty - Your body shell looks extremely smoooooth. :cool:

Looking forward to seeing what top coat colour you have chosen.

Good luck, Paul. :)
4 Oct 2015, 6:51am
Paul L wrote:
Swifty - Your body shell looks extremely smoooooth. :cool:

Looking forward to seeing what top coat colour you have chosen.

Good luck, Paul. :)


+1

Looking very well prepared - lots of great cars on here I hope to see them out and about next year
4 Oct 2015, 7:18pm
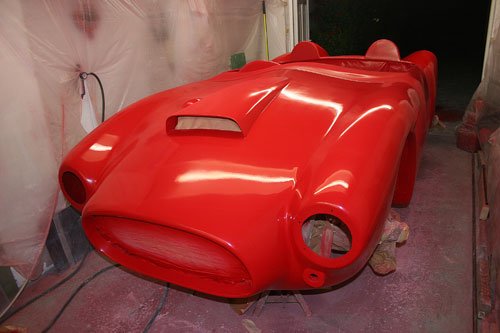
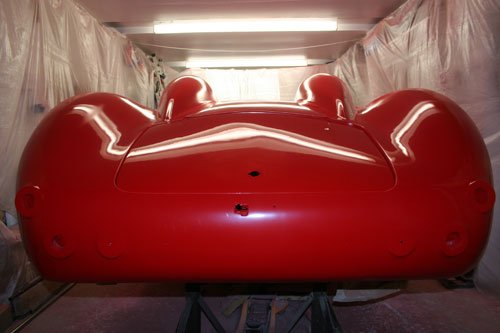
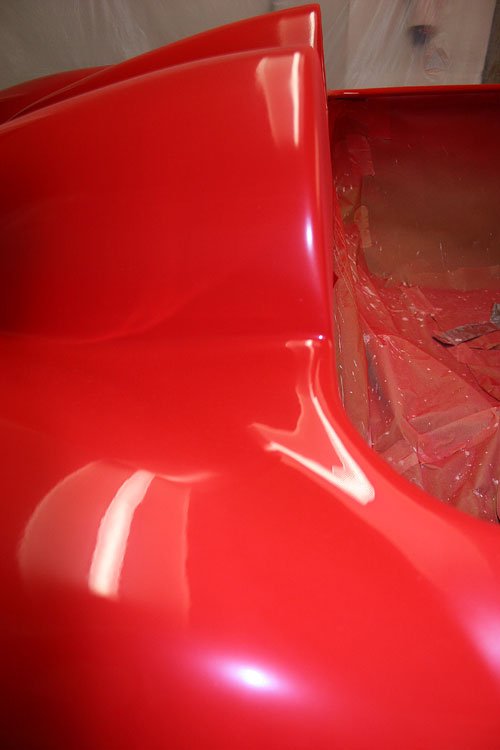
Later on today i started to spray the top coat which took several hours and six coats later which used 3 litres of paint at a 50/50 ratio with high gloss thinners.

A lit bit of advice is to buy a decent pair of paper overalls because i bought some very cheap ones and once i was finished it look like i had been in the sun too long with red tips in my hair which amused the kids no end.

All in all for a first time attempt at spraying a car it has turned out ok.


IMG_6217.jpg
IMG_6213.jpg


The second image is more like the true colour as the colour in the first image has come out lighter.


IMG_6222.jpg


The shine is not to bad and i believe that after the surface has been flattened off with 2000 wet and dry then another two coats of paint applied with a paint to thinners ratio of 25/75 then 10/90 it should end up up glossy. Then a quick buff mop with G3 followed by glaze and then wax for a good finish, i think i will wait and see how the next two coats go on i may be tempted to apply another three coats at 50/50 then flatten again before spraying the very diluted ratios.

Ive read some where that you should wait 4 weeks before flattening the top coat with wet and dry, does anybody know if this correct or too long. The reason given is to wait for the celly to sink.


IMG_6220.jpg
IMG_6221.jpg


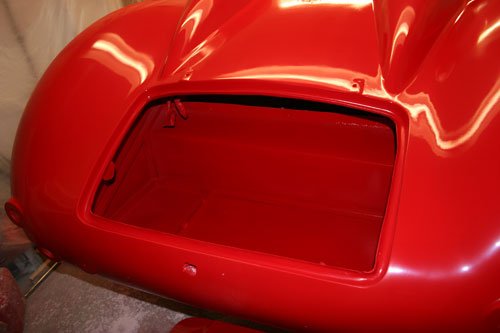
Sprayed inside the boot and rear arches which has added to the final finish.


Well that's it for today and see you all soon.
5 Oct 2015, 5:42am
Swifty - It certainly looks like you have achieved a very nice finish "straight from the gun". :cool:

I know very little about painting, but got the impression the real shine is achieved via the final sanding / polishing stage.

You will find a number of different approaches mentioned on this thread:

http://www.rodsnsods.co.uk/forum/tech-features/hand-painting-car-98714

Good luck, Paul. :)

PS
Apparently red cars are faster. :icon_wink: