MadaboutKitcars

This is a read-only archive of the old Madabout Kitcars forum. New posts and replies are no longer possible, but every thread is still here to browse and read.

Swifty's Navigator

28 Jun 2015, 5:23pm
Twin fans look good Swifty!
30 Jun 2015, 8:02pm
Scottie Cheers

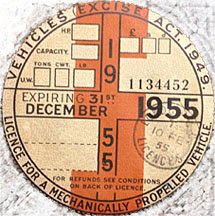
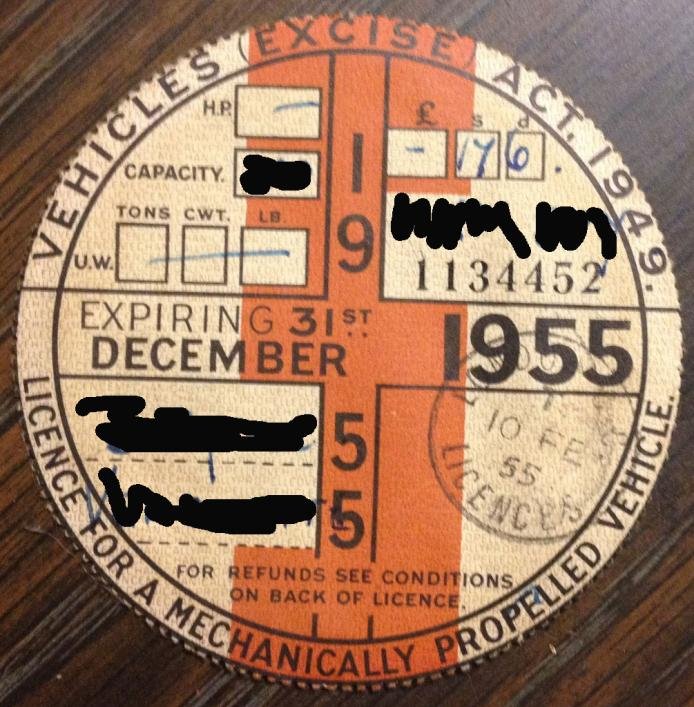
After reading scotties thread about a year related tax disc i decided to see what could be done in photoshop. Used this image found on the web.


large-1955-tax-disc.jpg


Then did a little work in photoshop removing hand written text etc and ended up with this, resized to print out at 75mm dia.


1955taxsharp copy.jpg


Well that's it for now see you all soon.
7 Jul 2015, 7:07am
Fantastic mechanical symphony from that Alfa 2600 motor. The little Abarth sounded pretty good too. Great find that video.
18 Jul 2015, 7:49pm
After leaving the build for a couple of weeks i though it was time to make a start again.

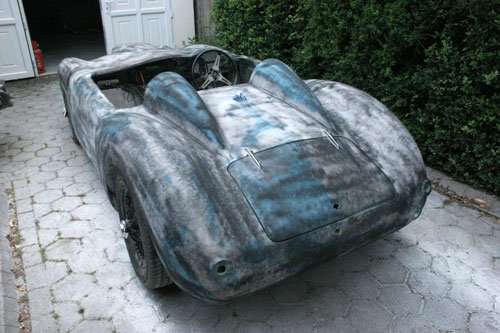
First all the ally parts have been removed ready to send off to be anodized, then spent most of today filling, rubbing down and filling again hopefully to end up with a good finish.

Attachment “IMG_5458.jpg” from the original forum could not be reliably recovered.
IMG_5459.jpg


Final guide coat applied which should be rubbed off tomorrow.

After talking to a local paint supplier he suggested i spray the car with a plastic bond coat before applying the undercoat to give a good key and seal the fiberglass surface.

Has anybody tried this with their build?
19 Jul 2015, 6:05am
yes i did that to mine and barrys ...going to look very nice
19 Jul 2015, 9:32am
Cheers Phil, did you by any chance use a spray filler for example Upol Reface, if so was the plastic bond applied before the reface?
19 Jul 2015, 9:58am
I would say it depends on what finish you have. I had a filler gelcoat with the Sammio (if that makes sense?) and I never had any problems.
I have a glossy white gelcoat with the Miglia and a few areas where I haven't used plastic primer I have had..... issues.
19 Jul 2015, 3:14pm
Swifty - Great news that you are at the guide coat stage. :cool:

I'd be interested to see what your final paint layers are.

As I was told to use etch primer over the gel coat/fibreglass/filler mess I call my bodywork.

Then a simple undercoat/primer layer, before the final top coat for mine.

Mind you, I'm using a brushed on "truck coat" paint. :rolleyes:

Good luck, Paul. :)
19 Jul 2015, 6:56pm
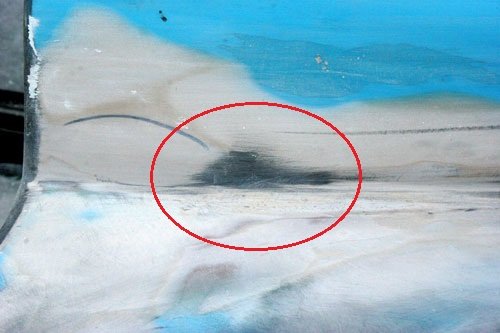
Spent all day sanding the guide coat off with 320 grit removing small indentations and scratches from the previous sanding bout, i can see why a respray cost a lot, it takes so much time to get a good flat surface.

IMG_5460.jpg


The area circled is a low point (the black is the guide coat) which was not so visible prior to the guide coat going on, thought i would share this with those of you that have never used a guide coat.


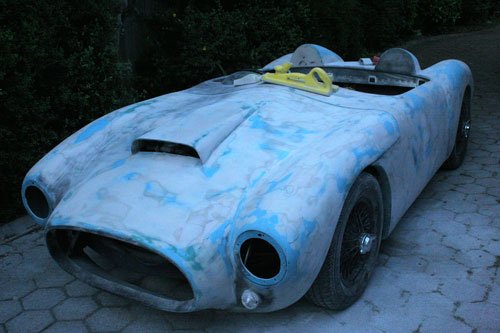
IMG_5461.jpg
Attachment could not be found in the archived database.


Just about there removing the guide coat. Surface is now smoooooooother and flat, there are a few small area's which need 1K filler putty applied, small pin holes etc once these are sorted the plastic bond coat will be applied followed by high build primer which mean's more sanding before the top coat's are applied, oh happy days but it does look better than with the guide coat. :eusa_wall

Well that's it for now see you all soon.
24 Jul 2015, 7:42pm
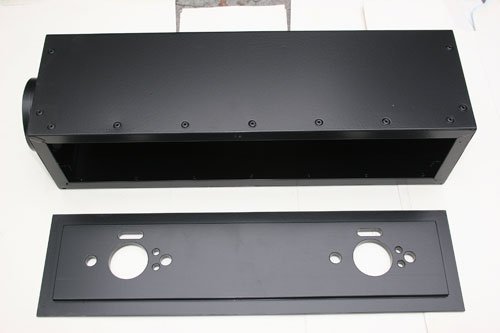
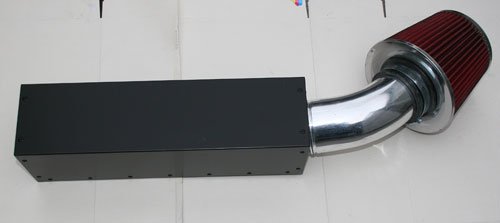
Been busy rubbing the body down over the last few days and today the air box has arrived back from the painters.


IMG_5463.jpg
IMG_5466.jpg


Black powder coat gives a lovely smooth finish. Air filter roughly in place for now, once the box is fastened to the carbs i'll be able to see the angle for the air filter/tube and make a permanent fix.

I'm thinking of using a latch type mechanism or leather straps to fasten the box to the back plate.

Also been busy machining a holder for the fire extinguisher out of ally, will post pictures when finished.


Well that's it for now see you all soon.
25 Jul 2015, 3:43pm
Nice. :cool:
25 Jul 2015, 8:10pm
Very nice, looks familiar too...

26 Jul 2015, 9:27am
Ah i new i had seen it some where before......

Mr T, guilty of taking your idea, easy to do and practical. Do you get much induction noise from the box?
13 Aug 2015, 8:07pm
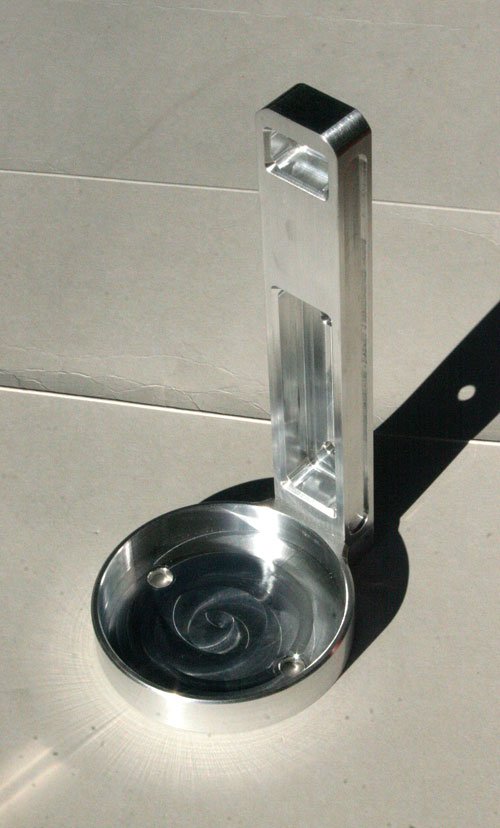
Finally finished the fire extinguisher holder. Machined from ally in two parts, the base with a separate upright leg. Also made a stainless ring pull as the original was naff plastic.

I am thinking of using an old leather belt to fasten the extinguisher in the ally holder but so far have not found one with a suitable buckle, have thought a satchel strap will have a period look.

IMG_5469.jpg
Attachment “IMG_5470.jpg” from the original forum could not be reliably recovered.


Still working on the body with filler etc but i am hoping to finally have the first coat of high build primer on this weekend, i've been looking out for one of those white garden circus tent thingies that Mr T and other have used. The tent will able me to spray the high build and standard primer out side in the fresh air.


Well that's it for now see you all soon.
14 Aug 2015, 3:39pm
Swifty - Where are you planning to mount the extinguisher?

Good luck with primer this weekend, I'm looking forward to seeing how that looks.

Cheers, Paul. :)

PS
You are welcome to borrow my small circus tent, but I'm hardly local.
14 Aug 2015, 8:22pm
Paul The idea is to mount the extinguisher between the seats vertically on the inspection cover i've made.

Thanks for the offer for the tent but the distance is just to great, thanks anyway Paul its greatly appreciated.

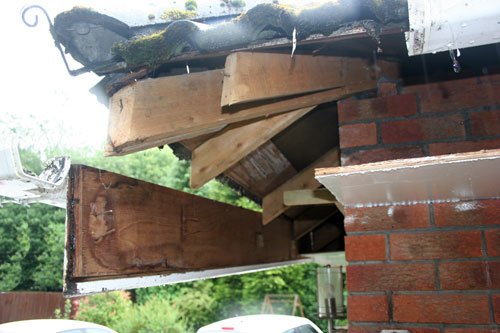
There's an Argos clearance shop near by which i had intended on paying a visit to today to see if they have any circus tents but due to a guy dropping off some bark chippings for the garden borders and then deciding on removing half the roof gutter when driving off with the his trailer in the upright position i've had other things to sort out, oh happy days.


IMG_5476.jpg
Attachment “IMG_5473.jpg” from the original forum could not be reliably recovered.


Well that's it for now see you all soon.
15 Aug 2015, 12:21pm
I didn't realise that WCA delivered bark chippings?

:icon_wink:
15 Aug 2015, 8:05pm
Paul May be its son of WCA.


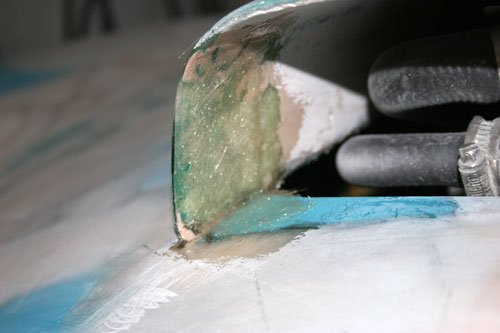
Thought i had finally finished the body prep later on today but while i was cleaning the body i spotted a slight flaw, the scoop was beginning to crack at the front where it was bonded to the bonnet. So only one thing to do grind back to a good surface and reinforce with fiber glass.

Attachment “IMG_5478.jpg” from the original forum could not be reliably recovered.
IMG_5479.jpg


Area circled in red reinforced now with two strips of fiber glass.


Regards body filler i have been using Upol Easy 1 but found it pulls a lot when spreading and has a few pin holes after sanding so today i payed a local body supply shop a visit and they recommended Upol Fly Weight. I can highly recommend this filler, it has a creamy consistency sticks well and does not pull when spreading, there's also no pin holes and its very easy to sand flat with a smooth finish, excellent product.

While on the subject of body work i used the following grades of sand paper to work on the body filler
80 grit to get a rough finish, removing all the high points.
180 grit to remove all the previous paper marks and feather the edges.
320 grit for the final finish before the under coat is applied.

All sanding is done with a flexi and fixed long boards with velcro pads.

Tomorrow i will probably be going to a classic car show about 40 miles away so may not have time to spray the under coat as i had intended.


Well that's it for now see you all soon
23 Aug 2015, 9:15pm
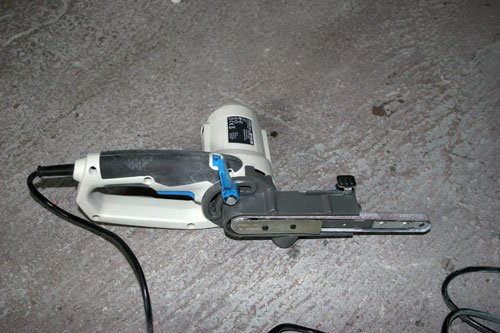
Today i added a new tool to my collection, a power file which already has made life easier with the car build, can highly recommend.

IMG_5480.jpg


Been looking at them for a while and decide to buy a cheap one from B&Q as i could not warrant an expensive brand.

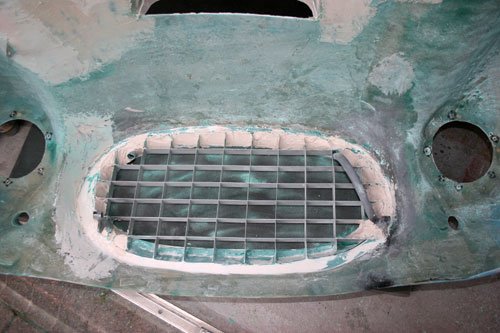
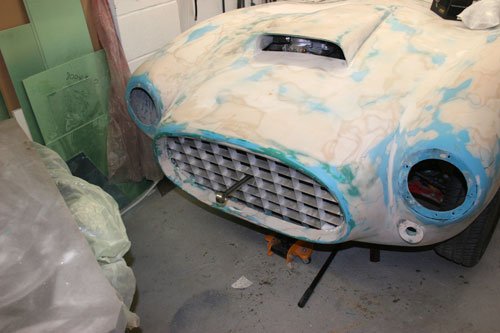
This weekend i bled the brakes and clutch with a pressurized bleed system, then finally finished the wiring under the bonnet. I then turned my attention to the front grill bonding it in place before the paint is applied.


IMG_5481.jpg
IMG_5482.jpg


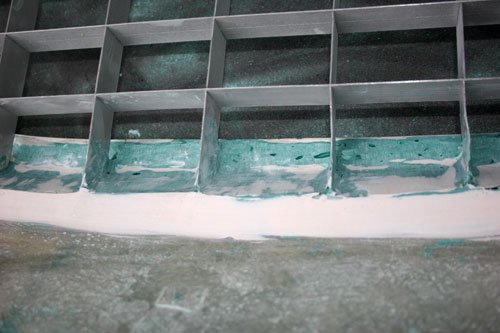
Bonded the grill to the bonnet around the inner outer edge with fiber filler first then roughly filed with new power file before smoothing off with body filler then going over again with the power file.
The second image shows the finish gained in an awkward place with the power file which made short work of what would of been a long task if i had to finished off by hand, need to go over again to remove any filler etc from the ally grill and clean up the rest of the grill.


Well that's it for now see you all soon.
24 Aug 2015, 9:38am
Swifty - Thanks for the Upol Fly Weight tip. :cool:

Whilst I've still got some body filler left, but I am sure I'll need more before I'm finished. :rolleyes:

It certainly looks like permanently bonding the grille in place is easier to do that making it a removable item.

I guess you just need to mask it all off when you start to paint the nose.

Good luck, Paul. :)
3 Sep 2015, 9:04pm
Over the last couple of days i've finished the coolant pipe work off and filled with water, had to modify a few of the stainless pipe fittings to accommodate the new ally rad etc by welding take off pipes.

The engine was started and ran up to temperature to check for coolant leaks and oil pressure with hot oil, all was ok until i noticed petrol dripping from the air intake on the front carb so engine off to find out what was causing the petrol to flood.

Removed the float bowl as i thought there may be a bit of crap in the bowl needle valve causing the petrol to flood, found nothing so then rechecked the float height which was correct 16-17mm height from carb body to highest point on plastic float when closed against the needle valve.

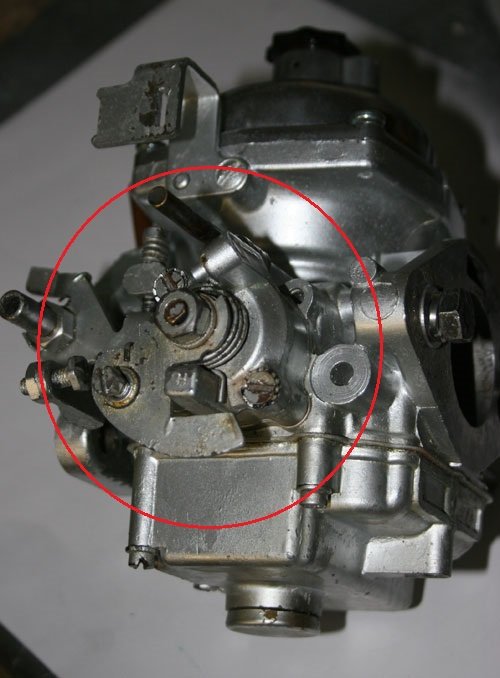
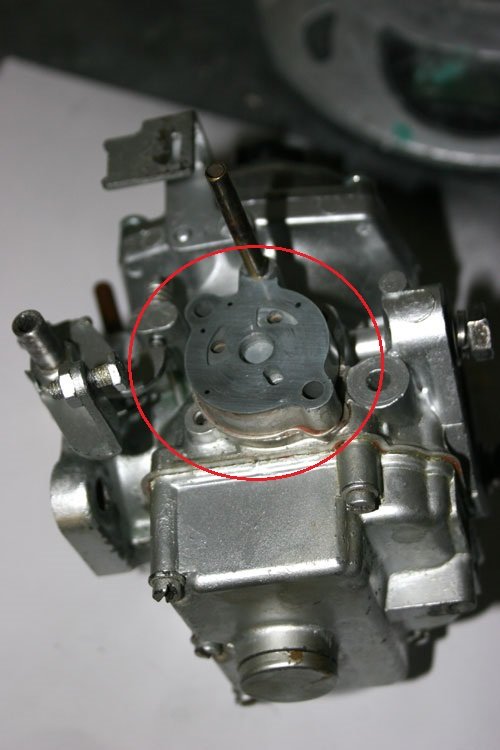
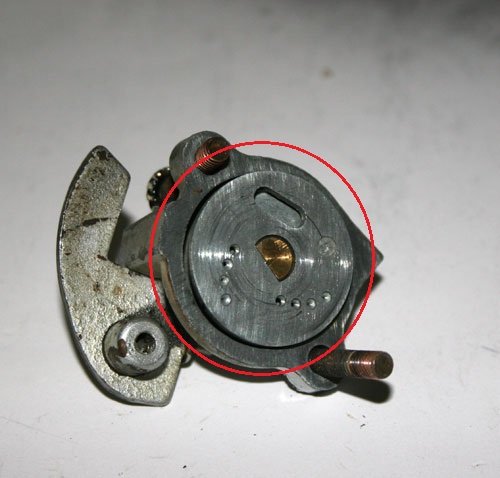
Reassembled the carb and ran the engine again but still the same, this time i noticed that the flooding did not occur until the choke was push fully in plus when i rocked the choke starter box brass spindle petrol could be seen leaking out from the choke starter box (only one carb has a choke stater box). Striped the starter box down and found a bit of corrosion so lapped the two matting surface back to a flat smooth finish.

IMG_5949.jpg


Choke starter box circled in red before removing.


IMG_5950.jpg
IMG_5951.jpg


The two face's circled in red lapped in on a flat surface with 800 grit then 1200 grit wet and dry, you can use a sheet of plate glass as a flat surface. When reassembling the starter box you can get the round disc shown in the left hand image 180 degrees out so make sure the slotted hole is at the bottom with the two sets of four holes at the top.

Reassembled and all was ok, no petrol leaking this time, result.


Just thought i would post this in case anybody else has the same problem. Well that's it for now see you all soon.
4 Sep 2015, 3:32pm
Swifty - Nice work fixing the carbs and congratulations on the engine start. :cool:
11 Sep 2015, 7:17pm
Over the last couple of weeks i've kept on thinking all the pre spray jobs are complete then i notice another and then another job needs doing and so on but i think i am nearly there now so may be and it is a big may be i may get the first couple of coats of under coat on this weekend.

Inside of the bonnet is now flat ready for paint but i don't know if i will paint the same colour as the body or cover in bed liner black.

Attachment “IMG_6002.jpg” from the original forum could not be reliably recovered.


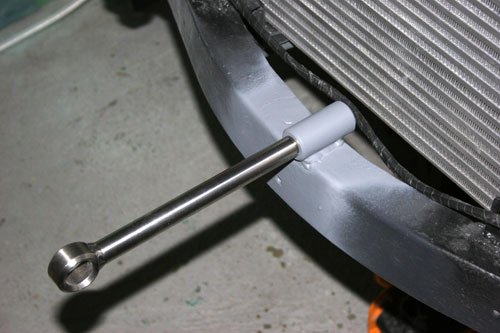
Also welded the removable tow eye i made some months ago. I also welded a steel box section between the front chassis U form to add strength for the tow eye, if i had welded it to the top plate only then it may of ripped it self off when towing.

IMG_6008.jpg
IMG_6009.jpg


Ordered the stainless steel exhaust fitting plus a couple of cherry bombs to complete the exhaust, at the minute it has a single back box which does not look as good as twin rear pipes.
Will post some picture's when i start to fabricate the exhaust section, will have to cut and tack on the car before tigging the exhaust up.


Well that's it for now see you all soon.
12 Sep 2015, 8:17am
Swifty - Smoothing out the inside of the bonnet must have been a big job! :eek:

Whist I've seen towing eyes on Phil & Barry's cars, I always through they were a nice period detail.

But as I look at your version, it is slowly dawning on me that they may be a practical requirement. :doh:

Good luck getting some paint on, Paul. :)