This is a read-only archive of the old Madabout Kitcars forum. New posts and replies are no longer possible, but every thread is still here to browse and read.
[IMG]http://[/IMG]All ready for driving back home.
I have now to fit the side windows and the mesh. Also need to sort the lights out as they don't seem to want to work properly on dip and main beam. Two wires to each on the original headlamp bulbs need 3 in total for the golf lamps.
i will look at it when my brain has had a rest
Fantastic work mate!! The spacers will make a huge difference to its looks as well. I'm so jealous at how quick this has come on and you've got a great finish on the paintwork. Out of interest, what did you use to get all the waxy stuff off the shell? I've been scraping bits off whenever I pass it but there's still pockets of the stuff I can't get my finger in to.
Hi Nick
the painter dealt with all that, he went all over with 180s on a DA and then started from there. I also started with a power file on all the joints, they are a great bit of kit
[IMG]http://[/IMG]All ready for driving back home.
I have now to fit the side windows and the mesh. Also need to sort the lights out as they don't seem to want to work properly on dip and main beam. Two wires to each on the original headlamp bulbs need 3 in total for the golf lamps.
i will look at it when my brain has had a rest
hi wozzy i had the same problem with the head lights just thinking back to how i sorted if you want i can give you the colour of the wires on to the h4 connectors if your struggling with it got my rad out at the moment started leaking on sunday luckily i was only a couple of miles from home new one arrives tomorrow quick build by the way its looking good "m sport" couldnt have done it faster lol all the best , mick .
Hi Nick
the painter dealt with all that, he went all over with 180s on a DA and then started from there. I also started with a power file on all the joints, they are a great bit of kit
[QUOTE=Drummajor;91461]180 grit paper on an electric sander, I guess . DA = "dual action" air sander it oscilates as opposed to a "orbital" sander that will leave loads of circular scratches
If you do it by hand get/make a flexible sanding sled*.
*basically a foam** block you wrap the sandpaper around. The flexible foam allows you to follow the curves of the body as opposed to a stiff bock that won't.
**I used lengths of foam pipe cladding as I was too cheap skate to buy the proper tools
hi wozzy i had the same problem with the head lights just thinking back to how i sorted if you want i can give you the colour of the wires on to the h4 connectors if your struggling with it got my rad out at the moment started leaking on sunday luckily i was only a couple of miles from home new one arrives tomorrow quick build by the way its looking good "m sport" couldnt have done it faster lol all the best , mick .
Hi Mick
that would be great if you don't mind, I have also decided not to use the side windows, i am adapting what is there to use the existing window. The door tops are quite loose when the door is shut, so i am going to chop them at the bottom where they come off the door. It will be quite good when they are finished as the frames will stay in place when the door is opened.
Just drove it home and the amount of people looking and nodding was great, it even had some workmen who were doing roadworks taking pics on their phones as i was sat at the traffic lights.
If you do it by hand get/make a flexible sanding sled*.
*basically a foam** block you wrap the sandpaper around. The flexible foam allows you to follow the curves of the body as opposed to a stiff bock that won't.
**I used lengths of foam pipe cladding as I was too cheap skate to buy the proper tools
are you going to black up the intakes and detail bits? makes a ton of difference to my eye. works in gloss and matte black.
I'm intrigued by your side window idea...
what white is it? FOrd Diamond white Version 1,2 or 3, or something else?
if you were wanting a front bib, B&Q does a natty little lawn/gravel edge roll for about £15. its basically a P profile, with the bead about 12mm, and the long bit about 10cm. looks good as it lowers the car quite a lot. works well esp if you are going to black up the bits n bobs. a roll is enough for 2 cars.
are you going to black up the intakes and detail bits? makes a ton of difference to my eye. works in gloss and matte black.
I'm intrigued by your side window idea...
what white is it? FOrd Diamond white Version 1,2 or 3, or something else?
if you were wanting a front bib, B&Q does a natty little lawn/gravel edge roll for about £15. its basically a P profile, with the bead about 12mm, and the long bit about 10cm. looks good as it lowers the car quite a lot. works well esp if you are going to black up the bits n bobs. a roll is enough for 2 cars.
Hi
I like the sound of that, i will have to take a look.
The colour is Ford Frozen white,
I have some black mesh for all of the intakes, even wrapping the intercooler in mesh, Can't do the whole top intake as the clam needs to pivot to the roof.
the rear of the doors are going to be black.
[IMG]http://[/IMG]had a couple of hours on the car today,managed to get a start on sorting the door issue out.
cut the door frame around the window and had a play about
[IMG]http://[/IMG]
It only needed to be a small cut as 2mm should be plenty at this stage
Also cut to the other side
[IMG]http://[/IMG]
Even managed to put the mirror back on.
This part is going to be sculptured so its a nice smooth curve when the door is open
[IMG]http://[/IMG]
once it's all blended in it should look pretty good
Door now opens fine
Any chance I could ask a favour? If you take off the top of the door frame again, would mind taking a photo of where the MR2 roof meets rs200 roof on the driver's side?
Love the idea, what will you do with the top corner where you can see the hardtop? Fill it?
Since it was a nice dry day yesterday, i though i would get the car out of the garage and start soldering some of the wires in.
Managed to get the side indicators done, and also got the fog lamps wired up.
Still not sure on the high beam yet, so will leave it until i make a final decision.
called it a day as it was very cold.
[IMG]http://[/IMG]
 http://[/IMG]All ready for driving back home.


 I've got a black and decker mouse somewhere. Would that be good enough for it or would I be better investing in something a bit more manly?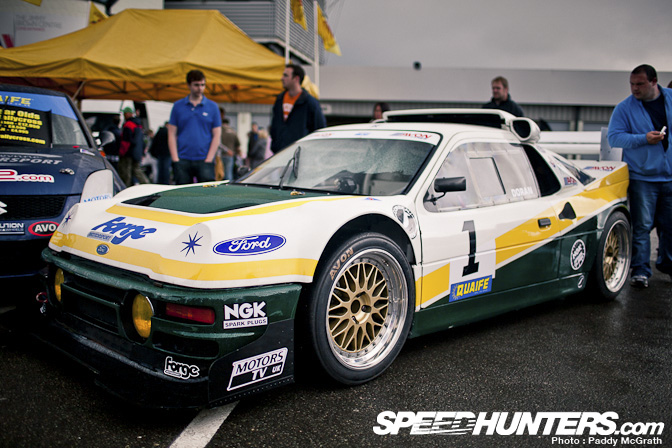
 eace:
eace:


