
MadaboutKitcars

This is a read-only archive of the old Madabout Kitcars forum. New posts and replies are no longer possible, but every thread is still here to browse and read.

Just another MX250 build! (Pic heavy!)

25 Apr 2016, 1:16pm
TynoPrime wrote:
Thanks Jones, I'm watching your thread eagerly waiting for updates! You're quite a fair way from me, I'm in South Woodham Ferrers in Essex, but maybe someday I'll take you up on that.


I'm glad you like the thread, I have to admit as of late my new business has started to take off a little so time is becoming sparse so when I do get to dabble I am in such a rush I forget to take any pictures.

If you are going to Stoneleigh, you drive past mine more or less - you can have brew on your way up. We are heading over on the Sunday by the looks of it as both days are forecast to rain.
25 Apr 2016, 5:45pm
if youre only doing one day, can i suggest go o the first day not second.

all the useful jumble bits have gone. the bargain discount bits have gone. the majority of owners have gone, and the tomato sauce bottles at the burger stands are all clogged up at the end so the sauce doesnt flow properly.
25 Apr 2016, 5:54pm
Not all Eunos have LSD, still gotta check....
Pull away from a T junction (so you are going hard left or right),
give it some welly, and if one wheel spins, (one tyre fire....)
you dont have an LSD.
25 Apr 2016, 6:15pm
Bit difficult to try as the cars surrounded by other bits of cars at tribute hq. Plus it doesn't have a bonnet or headlights/tailights. If their was an empty field nearby I could try it their.
8 Jun 2016, 9:31pm
Sorry for the lack of posting! It's been the build up to fashion week so work has been ridiculously busy. On the bright side, I've now moved house! Yay. Which means I had enough spare money to buy and start fitting the kitchen! Yay. But most importantly, enough to order my kit! YAY! Deposit paid just waiting for Chris to confirm delivery date.

On a side note in the background I've been working on my instrument cluster... After literally months of thinking and probably just hours of actual working I'm really happy with my results. I'll post a full post tomorrow I hope but for now here's a teaser...

9 Jun 2016, 8:52pm
Would I have seen you on the catwalk?
9 Jun 2016, 9:22pm
Just hope he wasn't modelling the "Budgie Smugglers":eek:
10 Jun 2016, 6:18pm
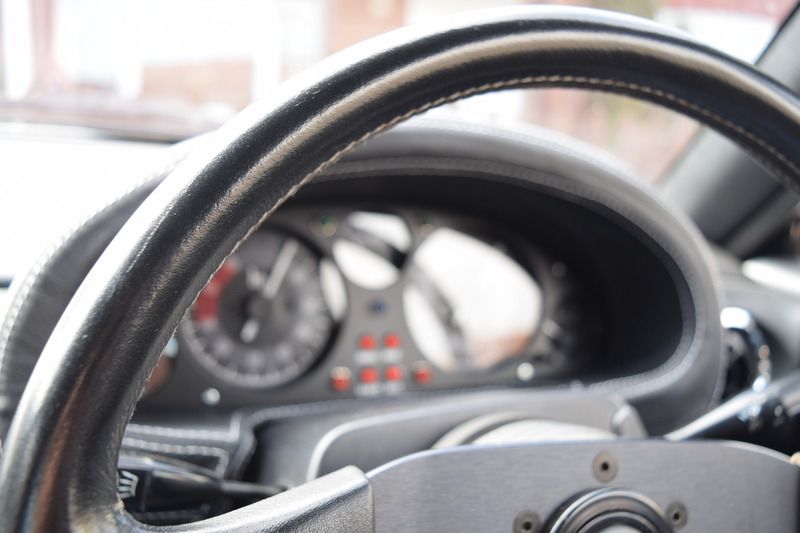
TynoPrime - Even with the soft focus, the reverse rev counter looks good. :cool:

Congratulations on the house move / kit order.

Good luck, Paul. :)
10 Jun 2016, 8:05pm
Looking forward to seeing your finished cluster.
Even the out of focus shot looks great
I made mine many years ago, made the mask out of aluminium, very fiddly to get the lenses in place for the warning lamps
I do miss the old girl :(

10 Jun 2016, 8:37pm
Interesting to see you had one of those Retro Caliber (?) stereos, Roadster. Any good? I've been looking at them for my Triumph. Thanks.
10 Jun 2016, 8:58pm
Triumph Special wrote:
Interesting to see you had one of those Retro Caliber (?) stereos, Roadster. Any good? I've been looking at them for my Triumph. Thanks.


It was good, but I didn't have anything over the top in speakers etc, I tried to keep it looking 60's
It fitted the dash style - some modern radios look out of place
14 Jun 2016, 8:24pm
garyh wrote:
Would I have seen you on the catwalk?


Nothing so glam I'm afriad! Im the construction manager for a set building company. Racked up 86 hours last week :bolt: atleast I'm paid by the hour!
14 Jun 2016, 9:58pm
Thanks Paul and Roadster.

So I always intended on making my own dials, so lets start there.

I did a lot of research as to the best way to make them, and after finding a good guide done by the guy that started RevLimiter I went to work.

So I've always liked RevLimiter guages, I think his designs are beautiful. However I had a few reasons to make my own. Firstly, they're expensive. I'm trying to do my build on a budget. Secondly, there was a change i wanted to make to the standard design, and that coats additionally! Thirdly, and most importantly, I love the idea of doing it all myself. There's just something about having made it yourself, even if all my ideas are borrowed from others :bolt:

So drawing up the dials took awhile, probably about 18 hours of drawing. The dials are made up of 3 layers. (although I actually ended up having to use 5) each of which are drawn up individually for each dial. The design is then printed.

Layer 1 is the "mask" layer. It's what you phisically see in everyday driving. It's printed on clear acetate.

Layer 2 is basically the "white/black out" layer. So everything you dont want showing up at night youmprint black, and leave everything else white. (I actually had to double up on layer 1 in the end, as the black turned grey when the backlighting came on).

Layer 3 is a "nighttime lighting colour" layer. I wanted everything amber, bar the redline, for that older look.

And finally Layer 4 was just a gradient layer. The test dial I did Was brighter in the middle, and darker towards the top and bottom. This layer helped to even it out.

I printed 5 sets of each, as I anticipated lots of mistakes in the gluing process.
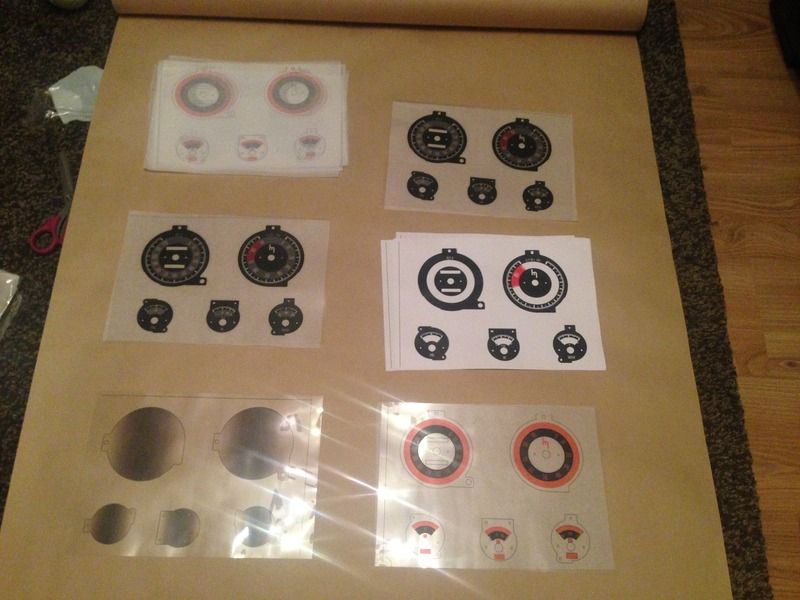


I then cut each into it's individual dials ready for gluing up.
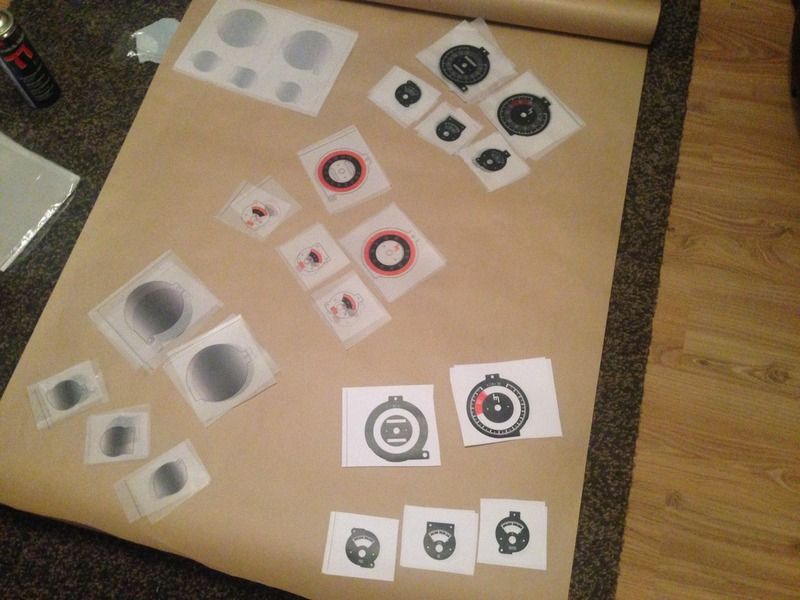


Then I began to glue them together. I found the easiest way was to use a clip at the top of the two, then align them up by holding them up to the light until everything seemed to merge perfectly. It was then a case of carefully lifting up and spraying a fine coat of spray adhesive inbetween, before pressing the two layers. Here are the first two layers glued together
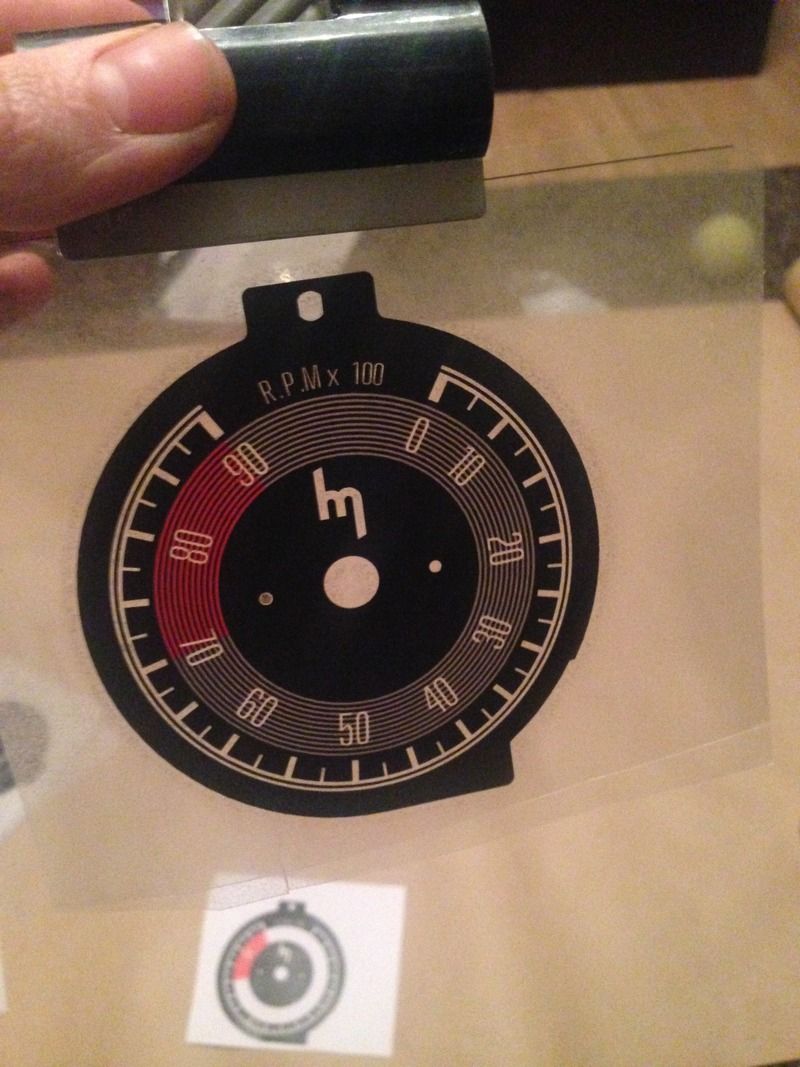


And once all layers are glued together
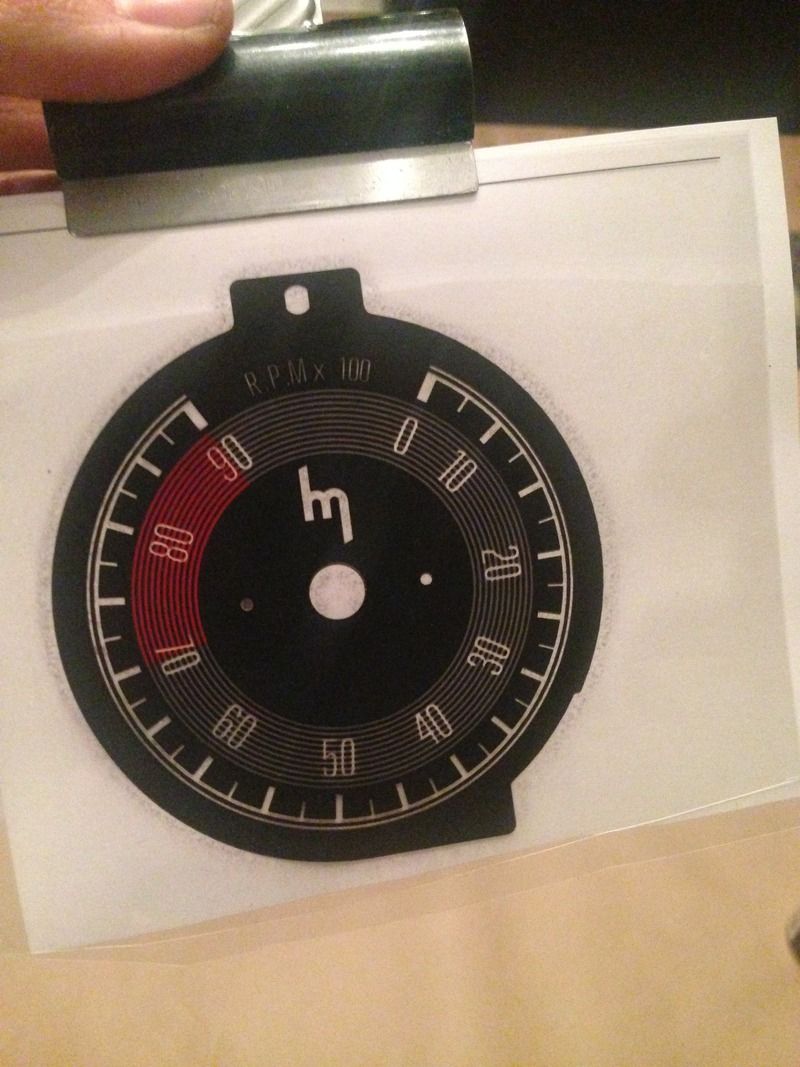


One down, 4 to go. Continue with the rest until they're all in the same position, then leave them to fully go off for a few hours before trimming. I trimmed them with a pair of Fiskars scissors, and a sharp stanley blade with a ruler for the cutouts. Take note: The ink is delicate! Fingerprints are visible and hard to remove, and when cutting the first dial I did the ruler scratched the dial. I ended up using a piece of tissue under the ruler.

Here was my original test dial put into place in the instrument cluster. I picked the Speedometer to try first as the needle for the speedo is "self balancing". I.E you just drop the needle on 0 and it's good to go, no stopper or anything needed.
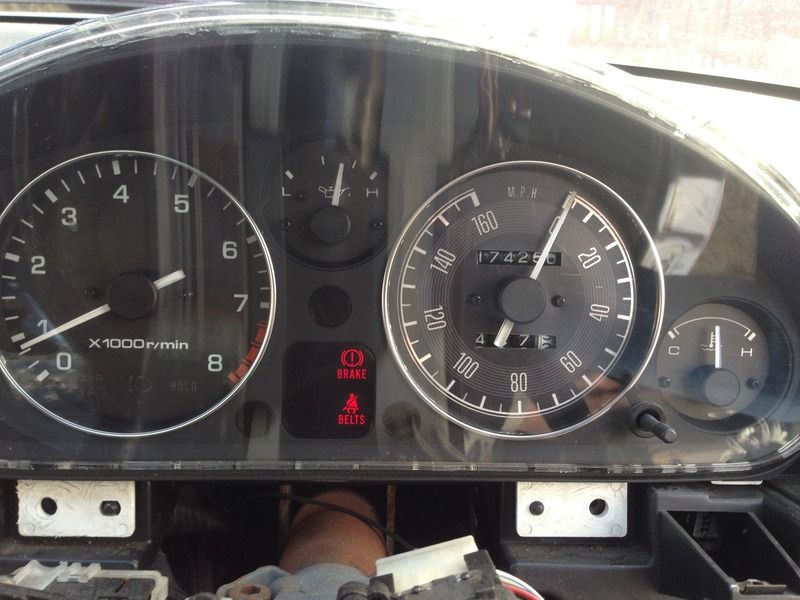


And many hours later, the finished guages in the cluster! You may notice the speedo numbers have changed position.... I actuslly bought a second instrument cluster from ebay to play around with so i could continue using the car in the meantime. I didn't notice that it was a different speedo design. So i scanned in all the images of each dial, drew to it and when I put it into my cluster the speedo lied, and said I was doing 50 when I was doing about 35!


And when lit up
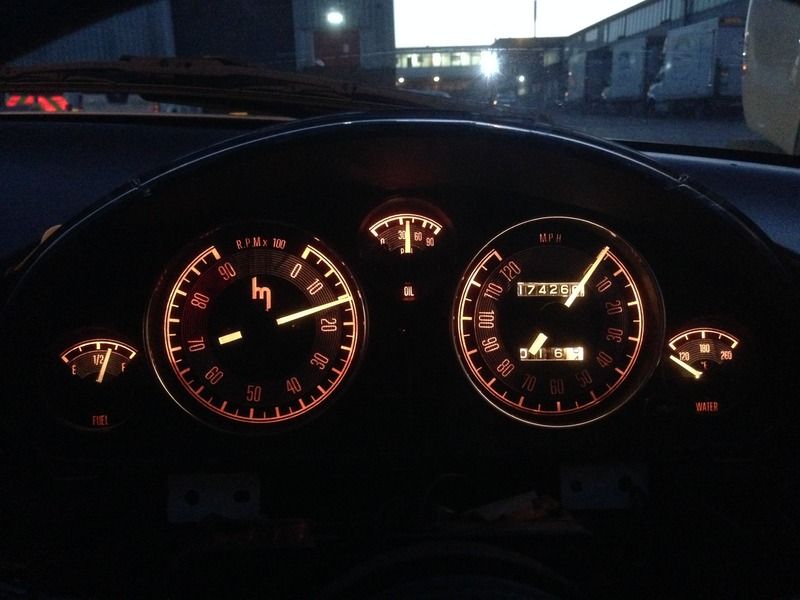


The photo actually isn't a very accurate image. The darkening in the top and bottom isn't so noticeable, and there is a large colour change between the amber and red which isn't really showing on the iphone camera!

I've had them in the car for a little while now, and I couldn't be happier. The only thing I would ammend is that RevLimiter suggests putting a layer of black behind the RED as it is otherwise 50% brighter than the amber, however with the black behknd the red is very dim. So eventually I will replace that dial with an ammended one.
14 Jun 2016, 10:09pm
Very impressive! How about using 2 layers of red to make the red darker?
14 Jun 2016, 10:49pm
They look great
What program did you use to draw them?
15 Jun 2016, 5:23am
Great work. Must be so satisfied with the results - I know I would be.

Dave
15 Jun 2016, 4:09pm
Thanks for the comments. Well just a single layer of red I think would be sufficient, but I put a layer of black behind to dull it down which was abit overboard.

A lot of people use illustrator to draw them up, personally I haven't had a lot of experience with it, so I chose to draw in AutoCad. I scanned in the original dials, then drew round them to insure the indices stayed in the same place.
23 Apr 2020, 6:33am
Well! It's been a while - but if isolation is good for one thing, it's getting back to all the forgotten projects!

It's been almost 4 years since I last touched this project, having moved house I had to concentrate on the entire house before I could justify starting the car again, and having 2 year old twins made it hard to give up time to the car.

Well, I now have all the time in the world! So the kit car is the main focus for the next few months (Making sure I have enough time with my now 6 year old twins and the wife of course!)
23 Apr 2020, 6:41am
So first things first - the car had been sitting for a few years in the garage - it was dry in there, but I didn't think the engine would be in the greatest shape having sat for so long. So I decided the first thing I would do is fix the car mechanically before putting the kit on it permanently - that way if anything was seriously wrong I could just get another donor car and move my interior across.

So over the past two weeks, I went from this;


To this;


This started with a full tear down of everything in the engine bay. So I began taking everything apart and bagging up the bolts...


I decided I would go only as far as the head for now, then decide if the bottom end needed rebuilding based on how it all cleaned up etc.

The car didn't ever blow smoke or anything, so I'm fairly confident the piston rings would be in good enough shape as long as they visually looked ok still.


23 Apr 2020, 6:48am
The head was in good shape, and the internals of the combustion chamber were covered in carbon, but no chips or dents and scoring anywhere in site, so I was confident it would be ok.

I decided to completely remove the AC system, as there was an awful lot of pipework, pumps and radiators involved which not only took up alot of room, it looked ugly and weighed a decent amount!

Having decided that everything looked like it would work out without a full rebuild, I started on the piston heads to get all the carbon off of them - and cleaned up the mating surface for the head gasket.

I didn't want to use anything mechanical on this, so decided the best thing I could use was a green scourer and lots of WD40. It took about 4 hours to get everything fully cleaned up, but it worked and there was no damage to anything which was the aim.

Before, and after;


23 Apr 2020, 7:30am
TYNO! Welcome back!

Great to see your build is back on! Very envious of that engine bay but serves as great motivation to get mine done. What paint did you use for the bay?
23 Apr 2020, 7:39am
Having looked around at the engine bay there was lots of spots of rust, especially under the brake master, where there had clearly been a brake fluid leak at some point and the DOT3 had eaten through the paint and started on the steel.

So I pulled everything else that was in the way, and got the engine ready for paint. Again, I didn't want to drop out the trans/engine so i went as far as I could to allow the space to paint the engine bay.


After cleaning back i then treated all rust with a rust converter before priming over it


23 Apr 2020, 7:53am
I then masked up the engine to ensure it wouldn't get covered in paint! And painted out the engine bay.

At work, I have access to a full spray booth, with a good turbine compressor with two large tanks, anti oil, anti water, good Sata projet spray guns, etc etc.

Well I'm not at work... I'm at home. I don't have any of that equipment nor do I have the room in my garage for a compressor - it's tight as it is!

So I had to improvise...

So I bought myself a little HVLP - It's basically a hoover in reverse to provide air - I got the "best one" I could on a budget - managed to get this one for £40 from CPC. It came with three tips, a 1.0, 2.0 and 2.5. It's a 1200w motor that produces 1100L/min of air, which is actually technically enough for a gravity gun... But again wanting to keep costs down I thought I'd try the gun it came with.


I tried it out with the 1.0 and it actually sprayed surprisingly well - shockingly well in fact. It did however let out a little too much paint, as even on the "lowest" setting of the trigger it opened the needle quite a bit. So I screwed a screw into the back adjustment nob - which means I can now go from no paint coming out at all, to as much as I need.


A little video of it spraying;

https://youtu.be/AQGxQRE0NMw
23 Apr 2020, 7:55am
So having decided my little £40 set up should work - I got to spraying! I used a 1k Gloss Black enamel chassis paint. In hindsight I wouldn't use this again, as it stayed soft for about a week and thus I've marked/damaged some small areas in the reassembly process - nothing too bad but a note!


23 Apr 2020, 8:04am
With the bay ready to go,it was time to start reassembly. The bottom end was ready to go, but the top end needed the same treatment. So I spent the next 6 hours with a soft wire brush attachment and lots of WD40 again and cleaned the top side of the combustion chamber and the valves.

This is how it looked before I started on them;


I wanted to do everything I could to avoid having to pull the valves out of the head, as I don't have the correct tools to remove the valave springs and didn't want to end up doing more damage than good. Again, with myself and my wife being furloughed and on 80% of our wages, I wanted to keep the spend down as much as possible.

After cleaning the valves themselves and the head, everything looked in fantastic shape - so the last thing I wanted to do was check if there were any leaks where the valves seat against the head. I watched a few videos and seemingly most people use WD40 or the like to check for leaks by filling up the cylinder and leaving it for a while.

I did the same, filling up one cylinder at a time and leaving it in there for an hour to check if anything was coming through into the intake or exhaust ports. Luckily, not a single drop came through so I was happy enough that i wouldn't need to pull the valves.


And after the several hours of cleaning, the top end looked like this;