MadaboutKitcars

This is a read-only archive of the old Madabout Kitcars forum. New posts and replies are no longer possible, but every thread is still here to browse and read.

Another little project!

20 Aug 2019, 8:50pm
Richard - Looks like your progress is started to gain some momentum. :cool:

So keep plugging away, as every job done is one less to do.

Good luck, Paul. :)

PS
The side indicator should work well and I like your cockpit mirror too.
20 Aug 2019, 11:00pm
[QUOTE=DerbyDreamer;101684]On a bit of a roll...


front end.jpg


Hi Richard,


Nice to see you are back on the build and on a roll. I'm not as far as you are, but I'm constantly thinking of ways to approach mounting of the body and find the best position to minimize the effects of symmetry (or a lack of it :eusa_angel:).


I was wondering if you have any photos of your front inner arches you've attached to the frame please? Are they flush with the top of the frame rails or did you raise the front of the body (closer to the radiator) above the frame at all?


Also, if you have any photo of the body position by radiator area (without bonnet), that would be great. Did you have such a difference in distance from the frame from one side to another, like in the photo below?


Attachment could not be found in the archived database.


The photo above shows my body just resting on the frame and follows the frame lines by the front and back bulkhead area. The inner (back) side of my dashboard panel is parallel and against the frame, which should provide a reference for forward/back position of the body, but there is obvious issue with the alignment at the front....

Any advice would help.


Thank you.

Cheers, Deni
21 Aug 2019, 4:27pm
DerbyDreamer & Deni – I hope the following helps.

Without wishing to drag up a big row from the past, the original Sammio Cordite bonnet…


Was used as the starting point for developing the Miglia Speedster bonnet.


This was a big improvement in the area between the driver’s side headlight & the bonnet opening.

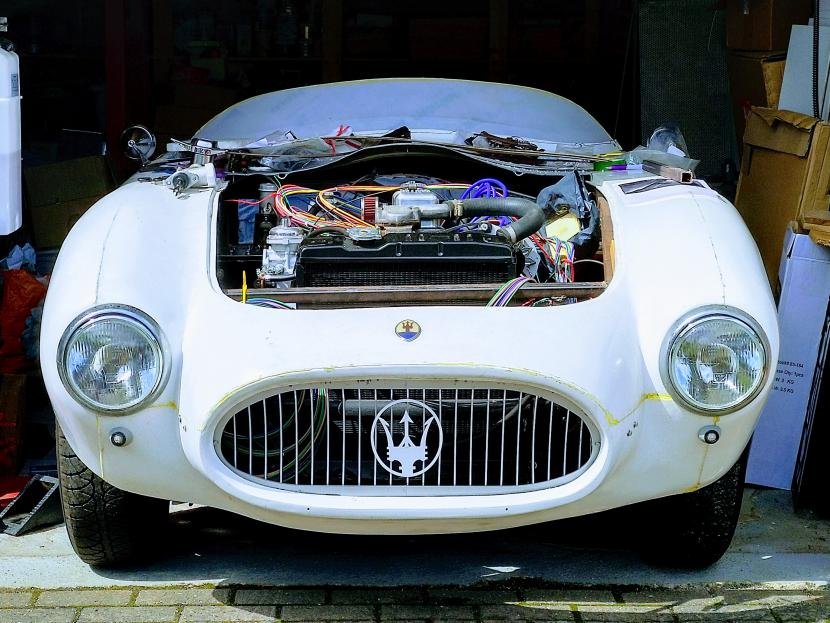
But the ‘wonky’ nose remained.

- - - - - - - - - - - - - - - - - - - - - - - - - - - - - - -

My top tip would be to just ignore the symmetry issues if you can.

Because, in the real world, no one else notices the same things that we see when building the cars.

I know there is an issue with the nose, so I can see it in this photo.
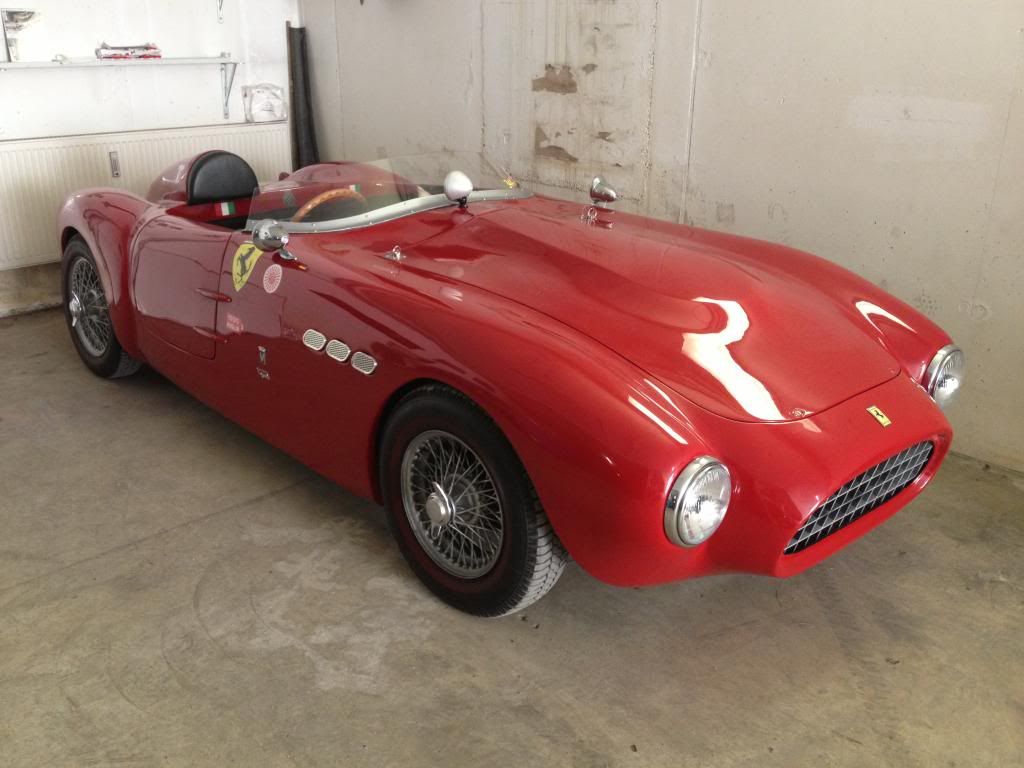


Thankfully, most people will simply see a great looking car and many will believe it is a Ferrari. :cool:

- - - - - - - - - - - - - - - - - - - - - - - - - - - - - - -

However, if you really want to straighten things out, the joy of fibreglass is you can do what you want.

Note: It is always a mistake to put a straight line anywhere near these cars. :icon_wink:


As this will always lead to more work, even if the cut and join is straight forward.


- - - - - - - - - - - - - - - - - - - - - - - - - - - - - - -

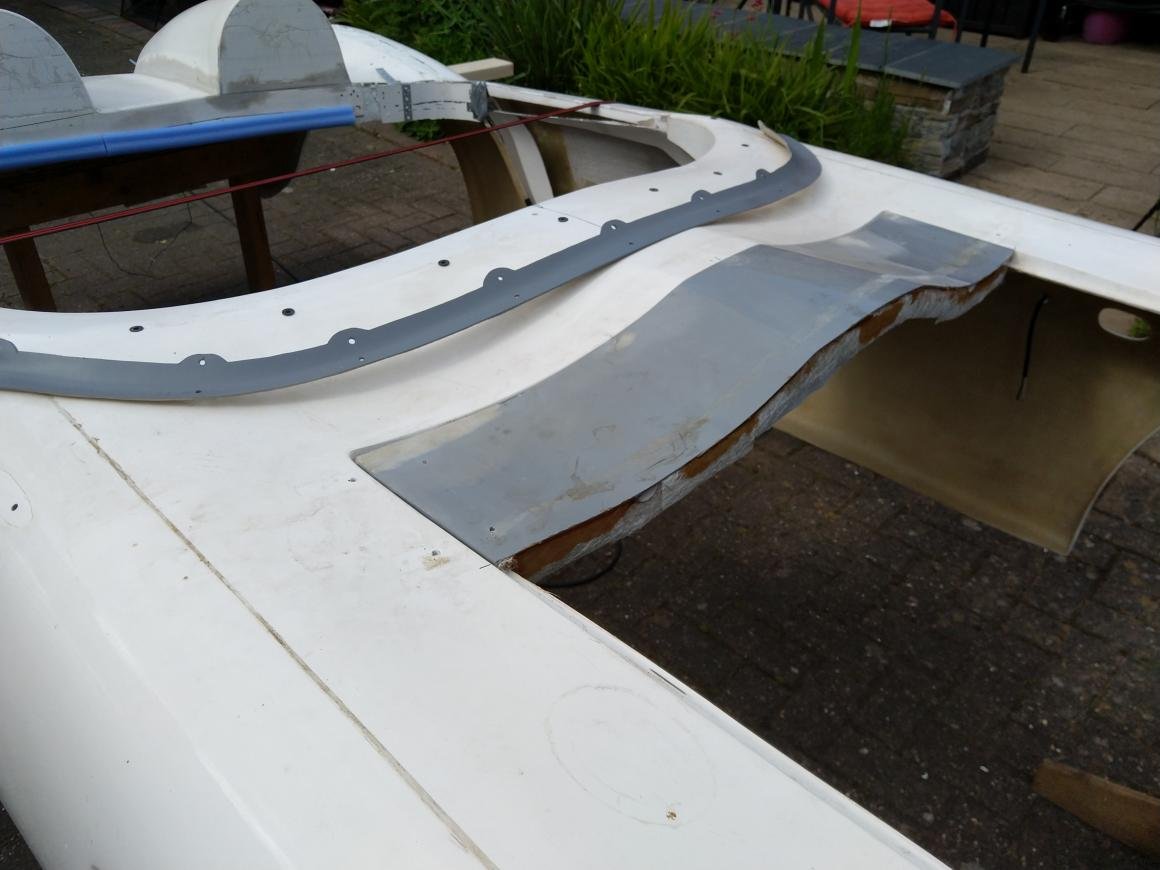
In the end, I spent a lot of hours butchering my bonnet and then piecing it back together again.
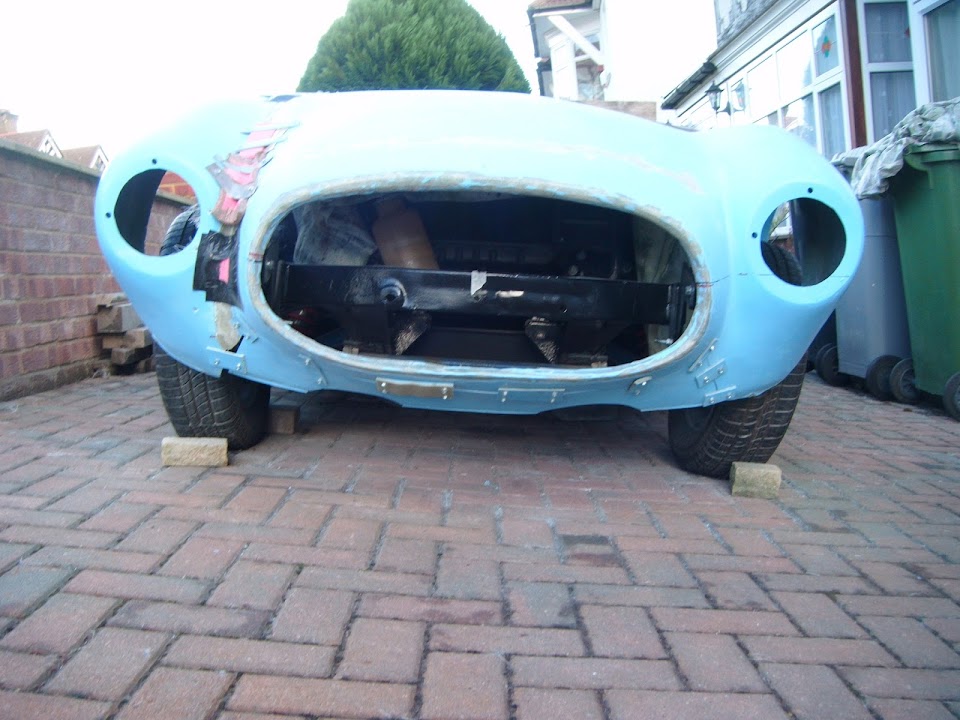


But, by the time you finish all the work, you can’t see the joins.


Please Note:
Despite throwing a HUGE number of hours at this, I still didn't achieve perfect symmetry. :rolleyes:

So the key thing to remember is that back in the ‘50s, these cars were built like this…


Not like this. :icon_twisted:


So if anyone does ask, just say the body shell for the car was hand built. :D

Good luck, Paul. :)
22 Aug 2019, 3:04pm
Thanks for the lip seal idea, Mr T - will have a measure up!

Deni, I will get hold of some more detailed photos for you.

Thanks for the 'grounding' Paul! It pays to remind ourselves where 'specials' started!!
22 Aug 2019, 4:07pm
Frame details for Deni

Deni,

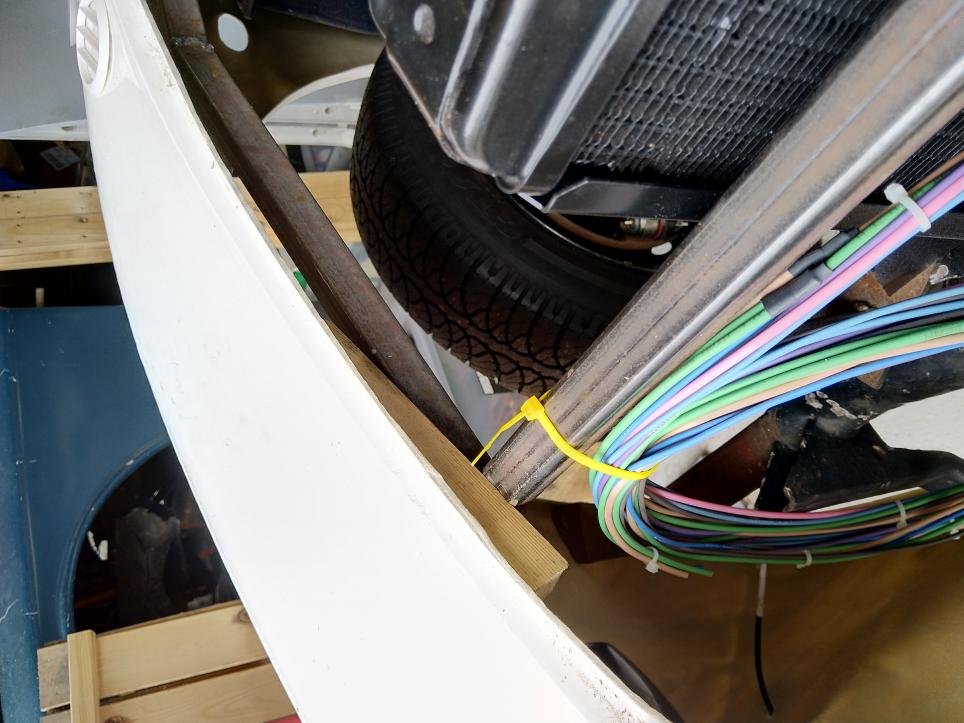
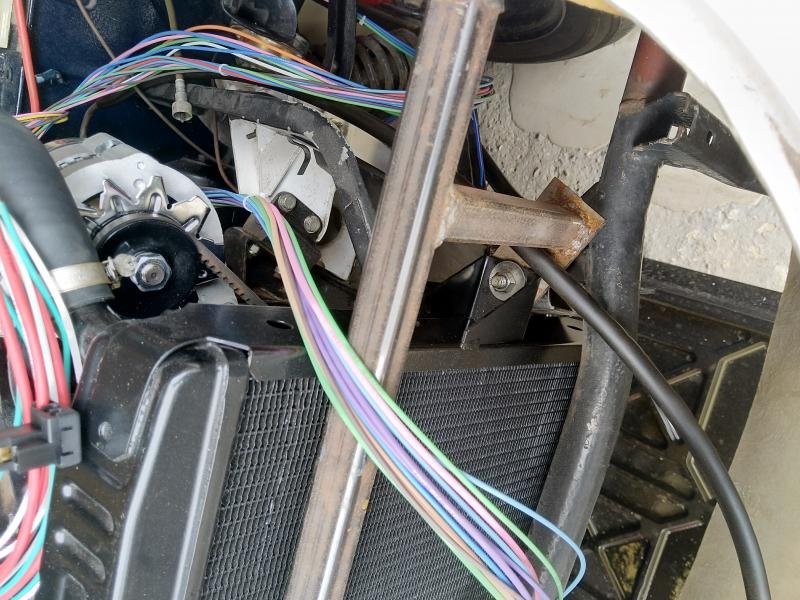
I have tried to show some details of the bonnet frame - they are different and I think I will end up moving one of them, in order to create some space for my brake master cylinder, as I am using the original Vitesse bulkhead which seems to set the pedals higher?

Miglia left bonnet.jpg


Miglia right bonnet.jpg


The front cross bar will also need to move forward when I adjust the side frames, as I opted for the original style radiator and want to fit a fan to the front of it, so need to make a bit more room.

Miglia radiator frame.jpg


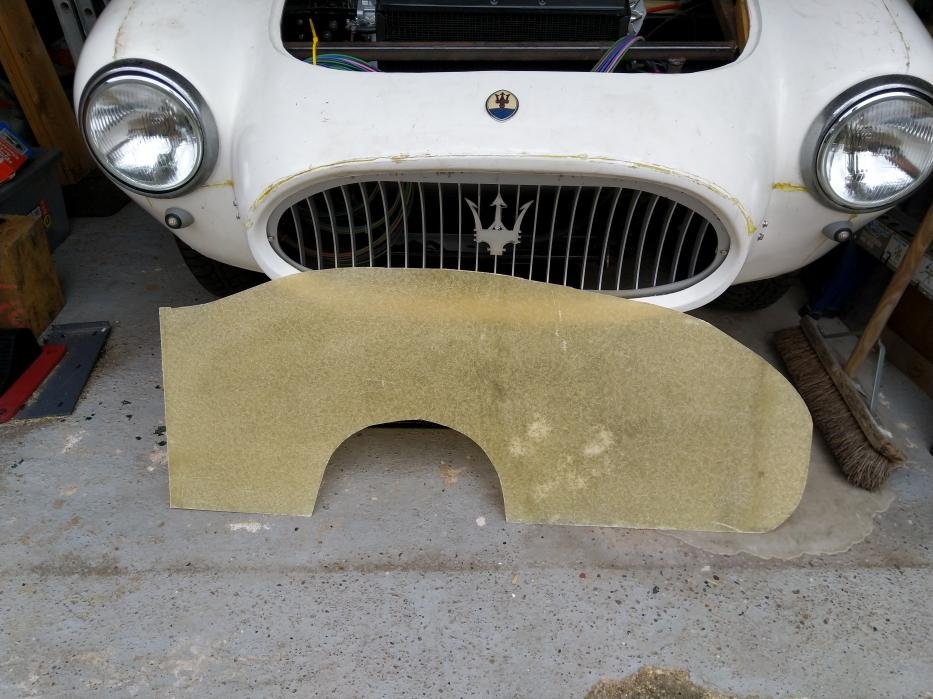
I don't have any front wheel arches but have read of others adapting trailer wheel arches to fit inside the front wings. I do have a pair of these for the rear and they will fit over the rear axle when I take the body off to complete the rear end surgery...

Miglia rear arches.jpg


Let me know if I can take any more photos or measurements and I will have a look at mine.

Cheers

Richard
22 Aug 2019, 5:20pm
Paul L - Thank you for your sound advice and the photos, valuable as always.
I'm intending to keep it as simple as possible and I'm hoping to avoid cutting the body and wheel arches if possible. I'm ok with it not being perfect, and I know I would end up chasing my own tail if I would try to make it perfect. However, it is good to get as much info/references as possible (not many Miglia builds are on the forum compared to Sammio) in order to find the best position before bonding the body permanently.

DerbyDreamer - thanks a lot, the photos are very helpful.

My frame also has different left and right bonnet rails, but luckily it is not difficult to modify this if necessary.

I saw you are using the original bulkhead, but I can't see any of photos from your old posts on your thread, so I thought I'll ask a few questions.

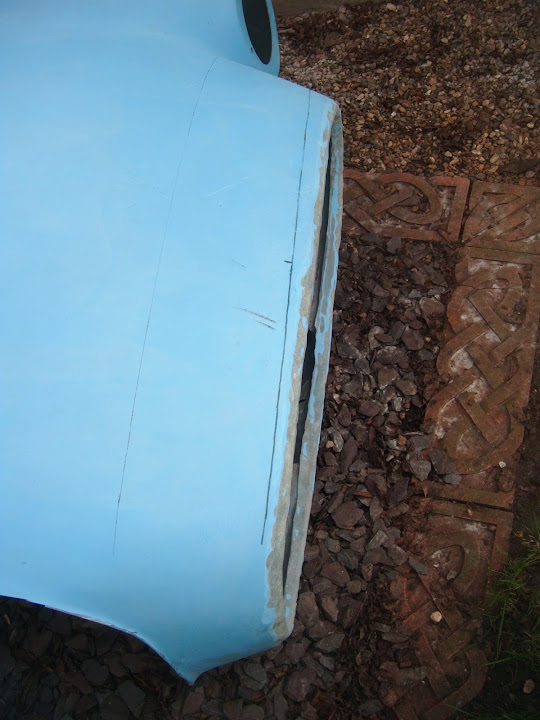
You can see in the picture I've posted that I have an alignment problem at the front. There is a big difference in distance from the front bonnet opening edge to the front frame rail on the left side compared to the right.

Can I just ask, now you have the body in position, how much difference in distance have you ended up with please? The measurement will do, but if you have a photo similar to mine, that would be great.


Thanks.
Deni
22 Aug 2019, 6:20pm
Body alignment

Deni,

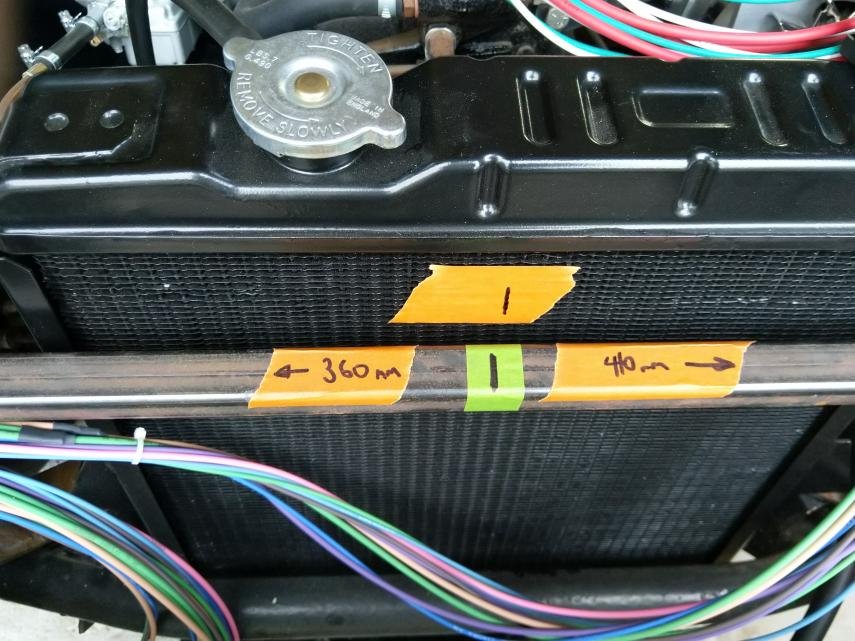
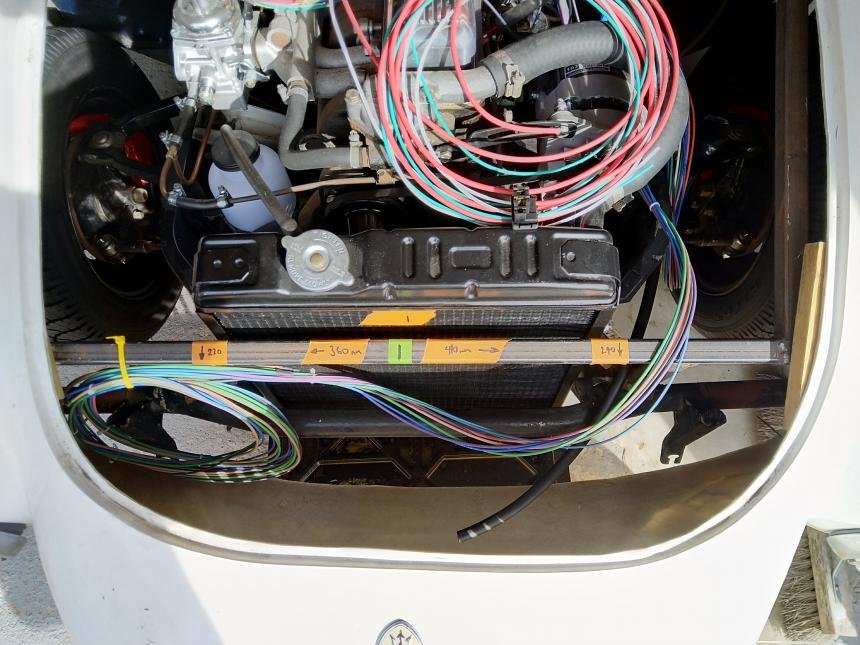
I have made some measurements: the line on the green tape marks the centre of the metal frame and the orange tape shows the distance from the centre of the frame to the edge of the bonnet opening; as you can see, there is 50mm difference. That said, the centre of the radiator (also marked in orange) is not far off the centre of the frame, leading me to think that the opening is off centre, which I can live with!

Body alignment.jpg


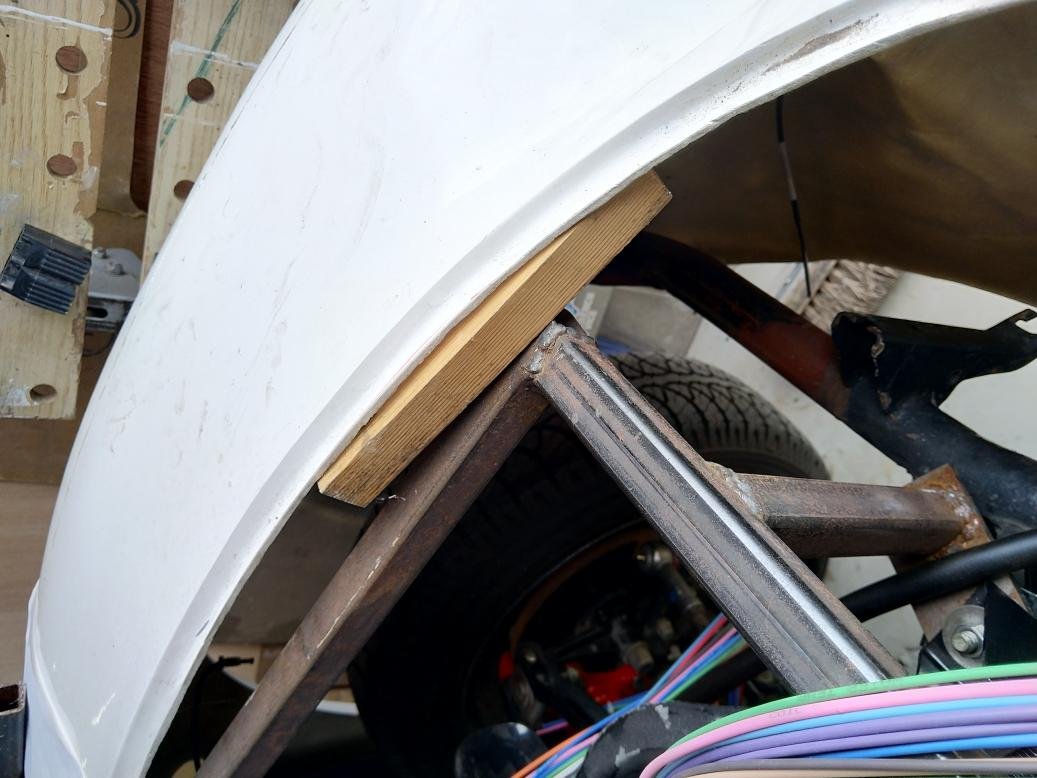
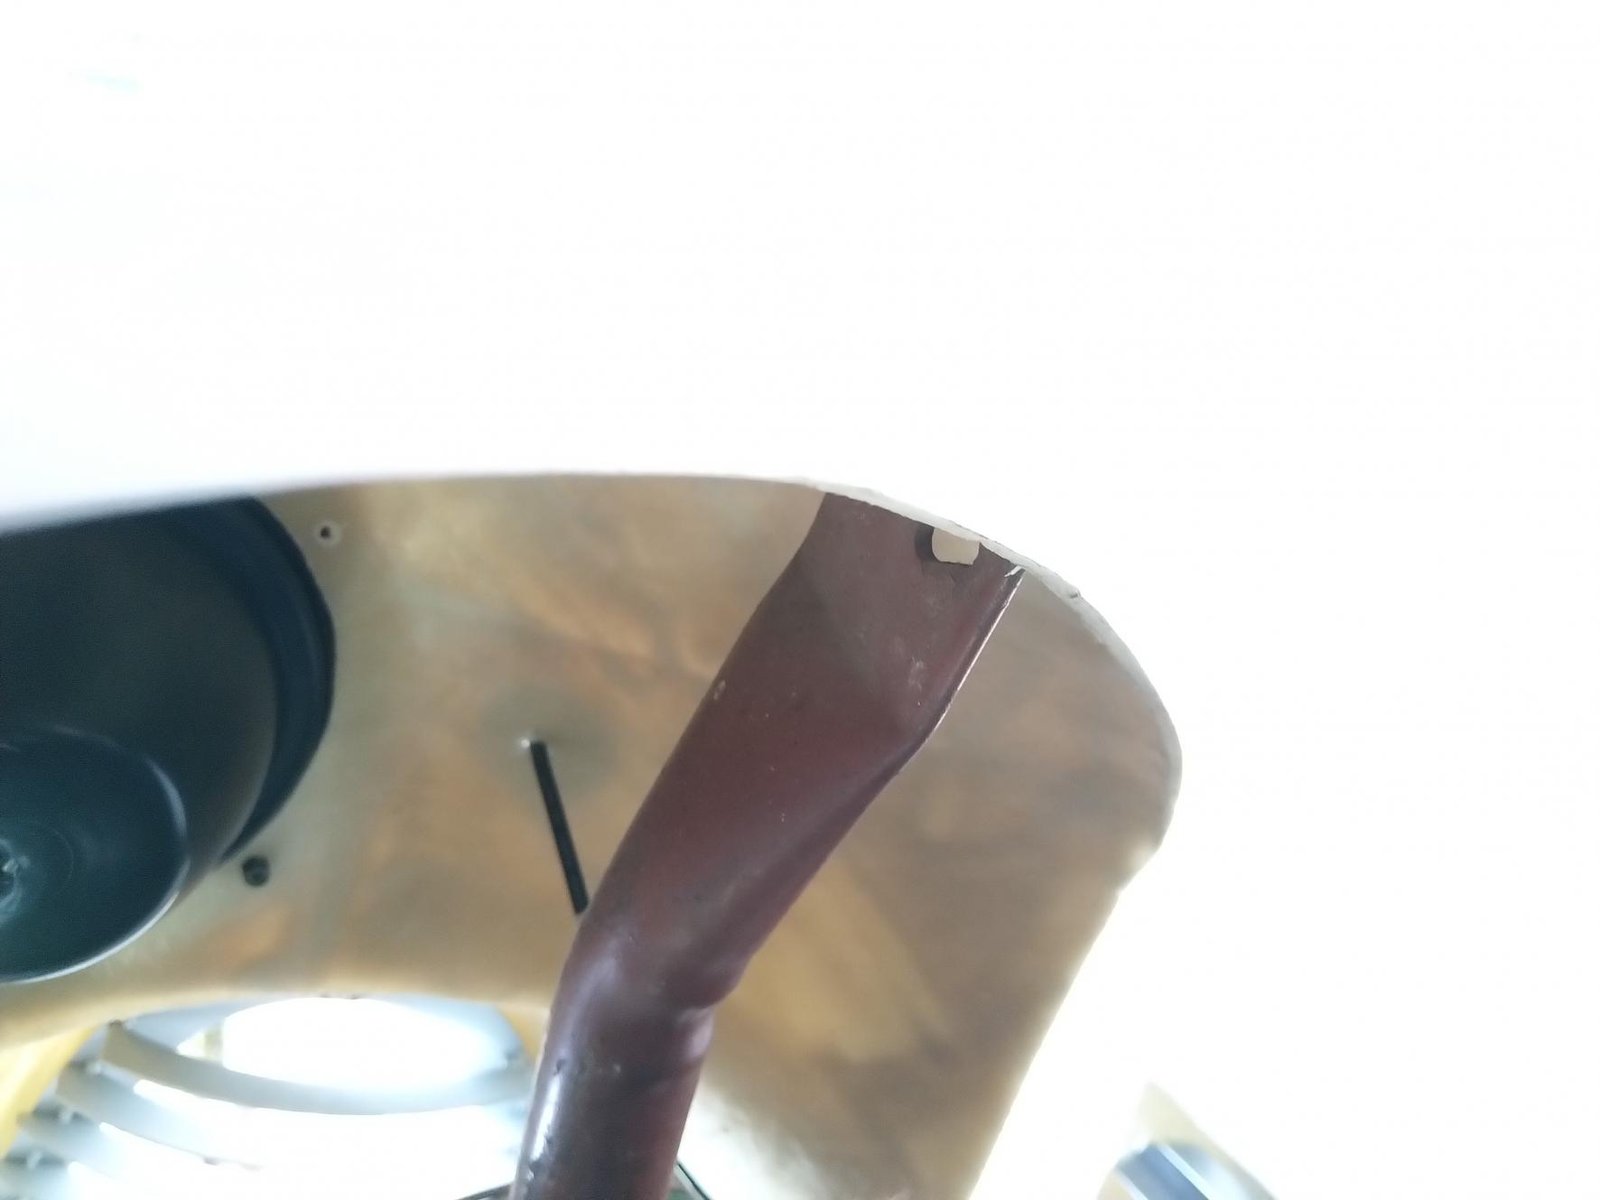
The other useful thing to check is that the front edge of the wheel arches actually tuck around the front chassis 'horns' quite well on each side and I think this will be a useful body mounting point...

Front chassis fitting.jpg


Hope that helps...

Richard
22 Aug 2019, 8:00pm
Thanks for your reply Richard.

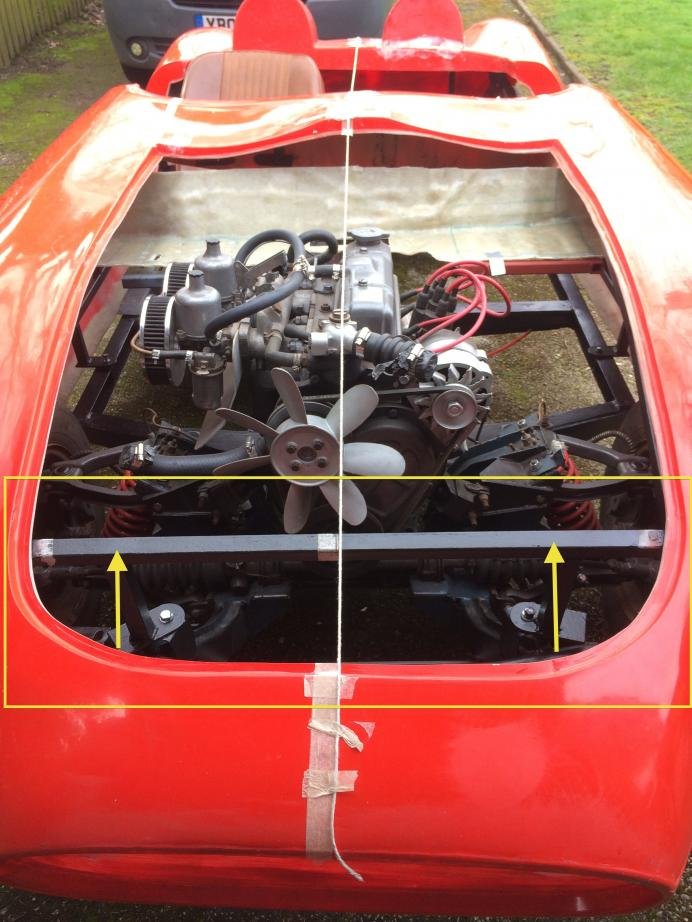
So sorry, but I meant the measurement length-ways (please see the arrows in photo below).....no rush, just when you have time.


IMG_1758-1.jpg


Thanks.

Cheers,Deni
23 Aug 2019, 8:51am
Body alignment update

Apologies, Deni - I misread your original question!

I have added the forward measurements here and there is a 20mm difference between the two sides (the measurements were taken at the edge of the radiator to the furthest forward edge of the opening, effectively where the bonnet will sit).

Body alignment 2.jpg


I did also check the distance from the front frame to the bulkhead and this is within 10mm on either side.

Hope that helps!

Richard
23 Aug 2019, 11:20am
Thanks a lot Richard, it's a great help. I was unable to work on my car since March now, but will start again in a few days hopefully - looking forward to it!

Your car is coming together well so far and it will look great when when it's finished. I like your dash design and its position, looks really good.
Looking forward to following your progress and good luck with the 'plastic (fibreglass) surgery' :).

Cheers, Deni.
16 May 2020, 10:56am
Progress

Well...all this time at home has led to me running out of excuses!

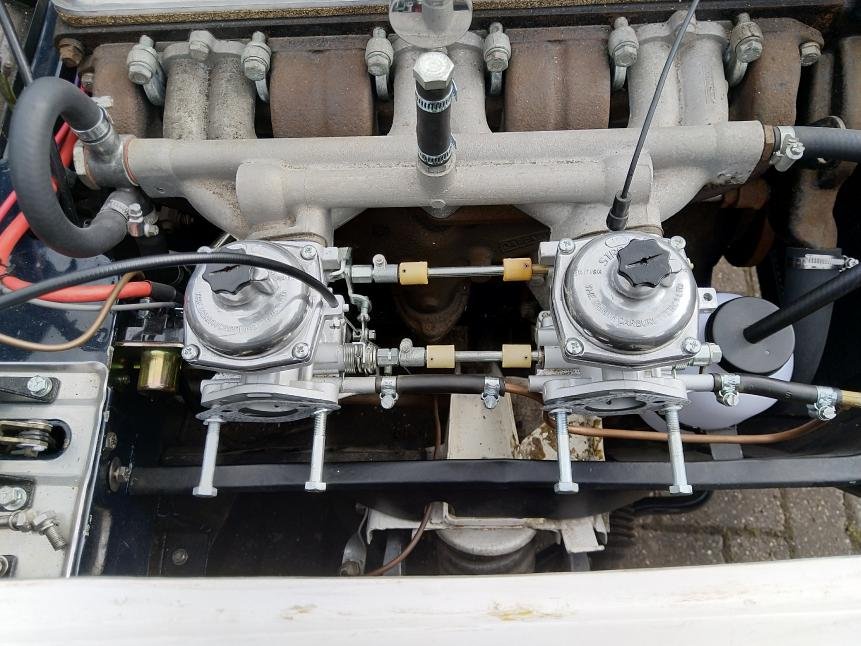
The good news.....she runs!! It looks like the carbs have been rebuilt at some point though and from what I can see looking at Vitesse photos, there should be a choke lever on the left hand side?...Hoping the wise collective will be able to advise...maybe someone even has one in their box o' bits? A close up photo would also help!

Carb setup.jpg


Choke position.jpg


Body is currently upside down on the drive and awaiting the completion of surgery to the rear wing - following Paul's yoga mat trick - photos to follow :icon_smile:
20 May 2020, 1:01pm
The body beautiful...

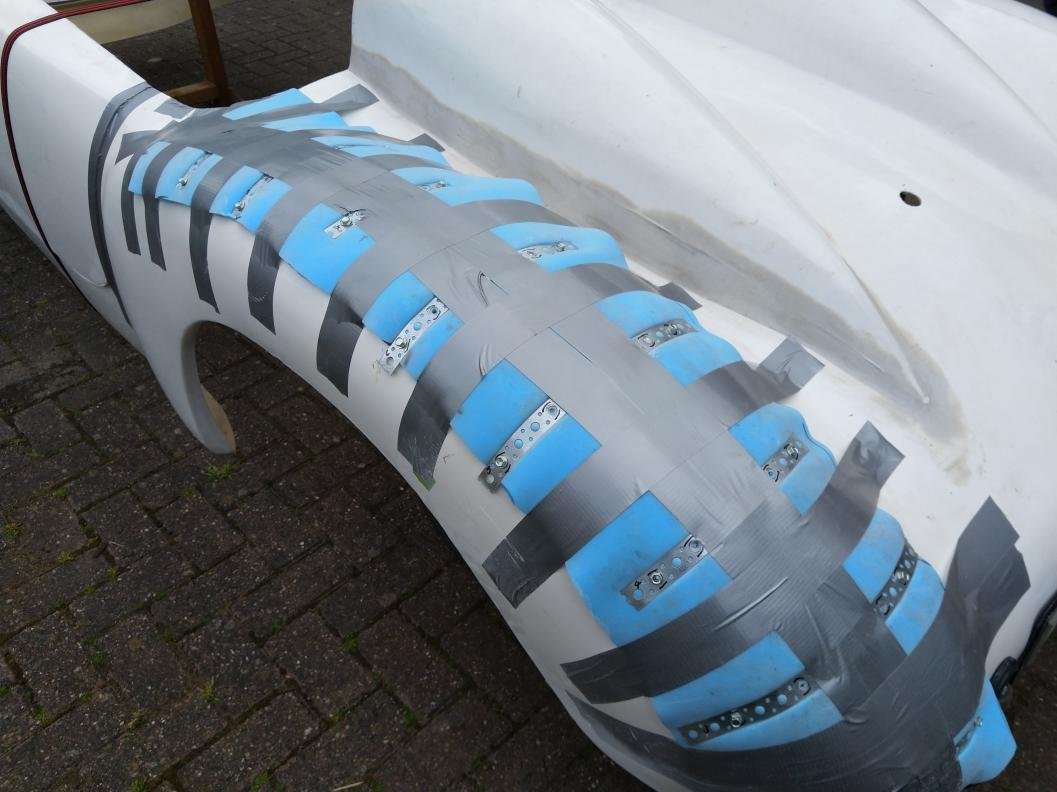
Having performed surgery on the rear wing last year (no point rushing these things!..) I have now filled in the gaps. Paul's 'yoga mat and parcel tape method' was brilliant:

Wing surgery.jpg


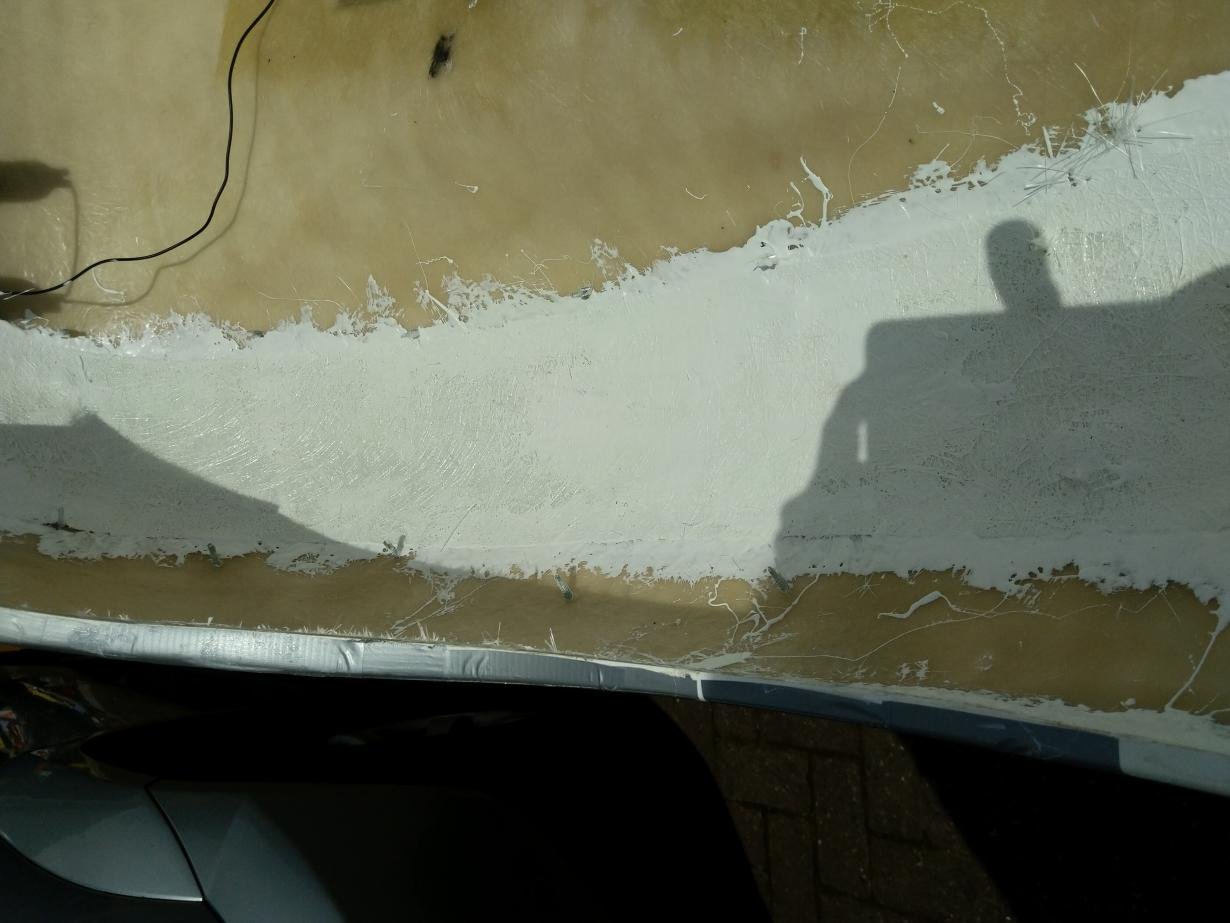
Having enough bodies at home at the moment allowed easy flipping of the tub to create access from underneath, with the body suspended on trestles:

Wing surgery 2.jpg


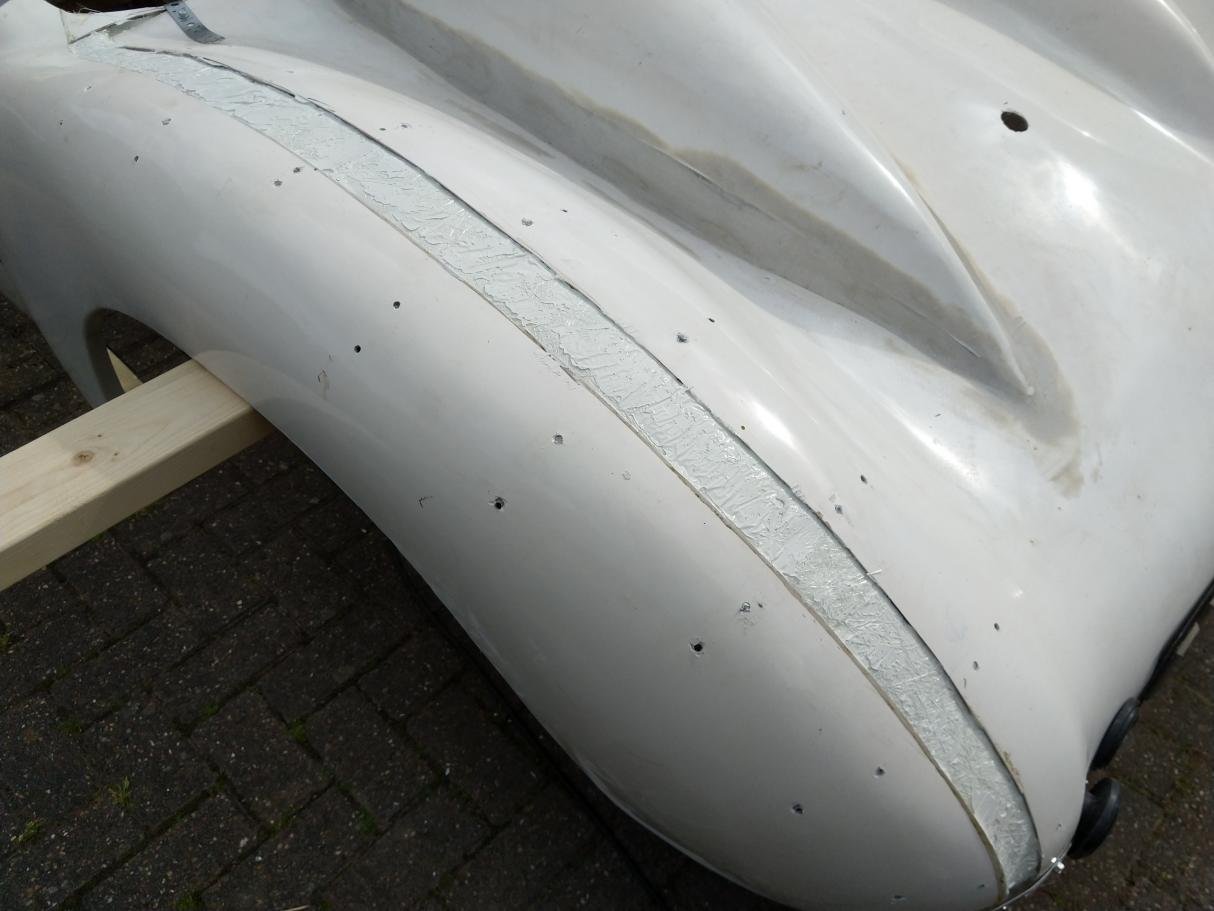
The great reveal the following day left a really strong valley which I can now add fibreglass filler and body filler to:

Wing surgery 3.jpg


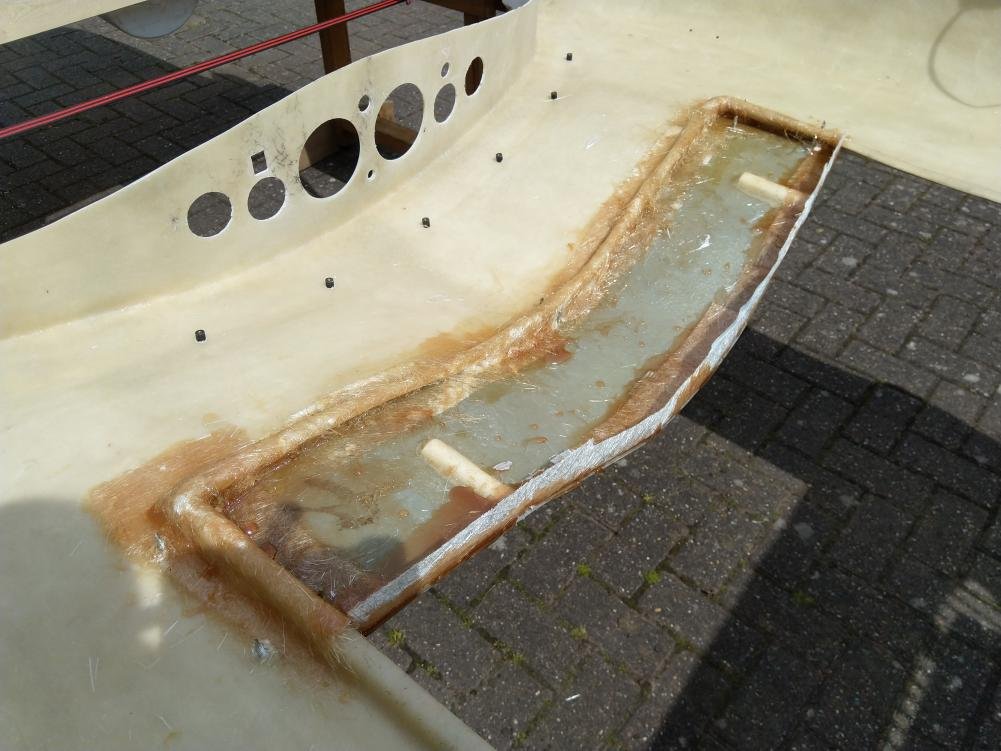
Whilst the body was inverted, I was also able to bond in the bulkhead extension which will hide the original Vitesse bulkhead which I have used:

Bulkhead bonding 1.jpg


Having created a return lip on the front of this, I can now get the bonnet to fit, although it does have a 3-inch gap at the front, so will need some cuts to get it to follow the wing curve, I suspect:

Bulkhead bonding 2.jpg


Have run out of polyester resin for now so turning my attention to modifying/remaking the steel frame that sits on the chassis....more soon!

Richard
20 May 2020, 7:01pm
Hi Rich, ref your post about the choke I think you have the throttle cable attached to the choke, the one to the left you are looking for is for the throttle. I have attached a picture of mine but you have got me wondering now if mine is the wrong way round, it runs perfectly so I am convinced mine is correct, hopefully a lot more knowledgeable than me will have the answer
20 May 2020, 9:18pm
Got my cables crossed...

Alex, thank you - you have saved me a lot of head-scratching! You are right, I had put the throttle cable into the choke position :doh:

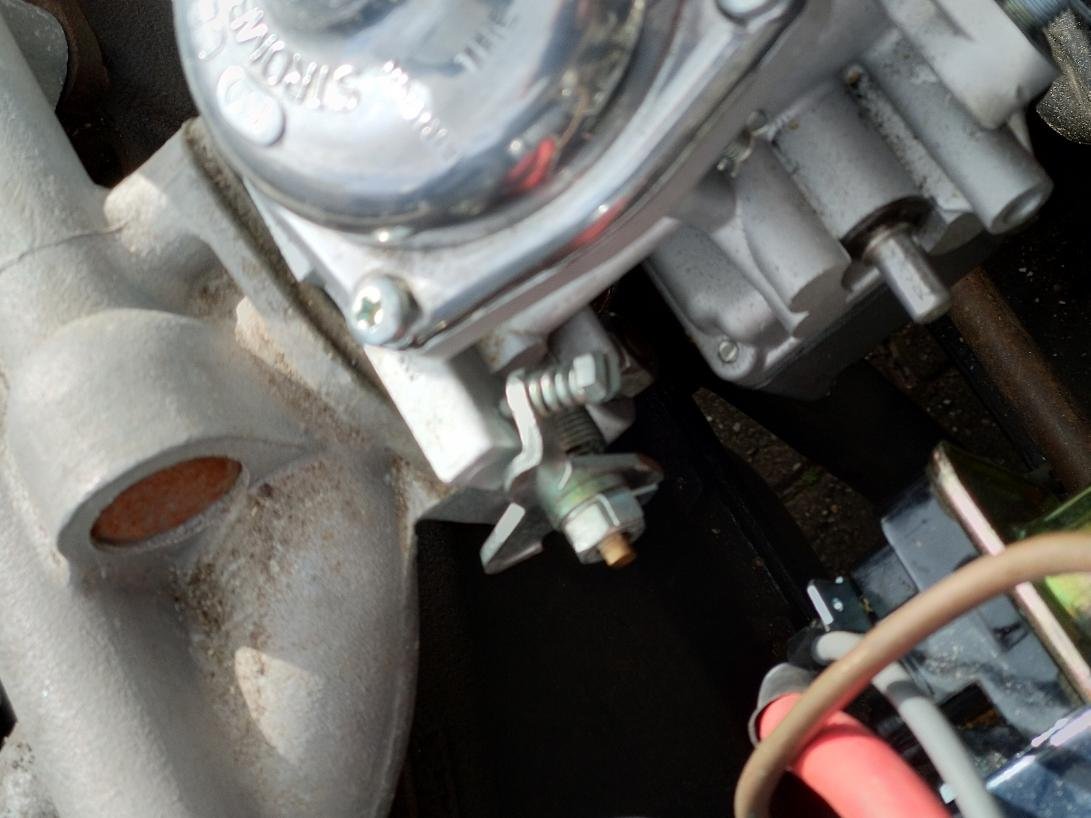
Now the problem I have is that the bracket on the manifold that supports the throttle cable and the one on the end of the butterfly spindle are missing....any close-up photos or dimensions would be great - thinking I might have to fabricate something....not short of time at the moment!....

Richard
21 May 2020, 5:18am
<Flash Back>

<Shudder>

<Nervous Tic>


:icon_wink:

Jokes aside, glad to see the yoga mat suggestion helped.

Don't forget to grind off the edges of 'channel' on the sunny side of the bodywork.

That way you can build up layers of fibreglass across the width of the join.

Good luck, Paul. :)
21 May 2020, 3:20pm
Hi Rich, I will take some photos and measurements over the weekend
27 May 2020, 4:55pm
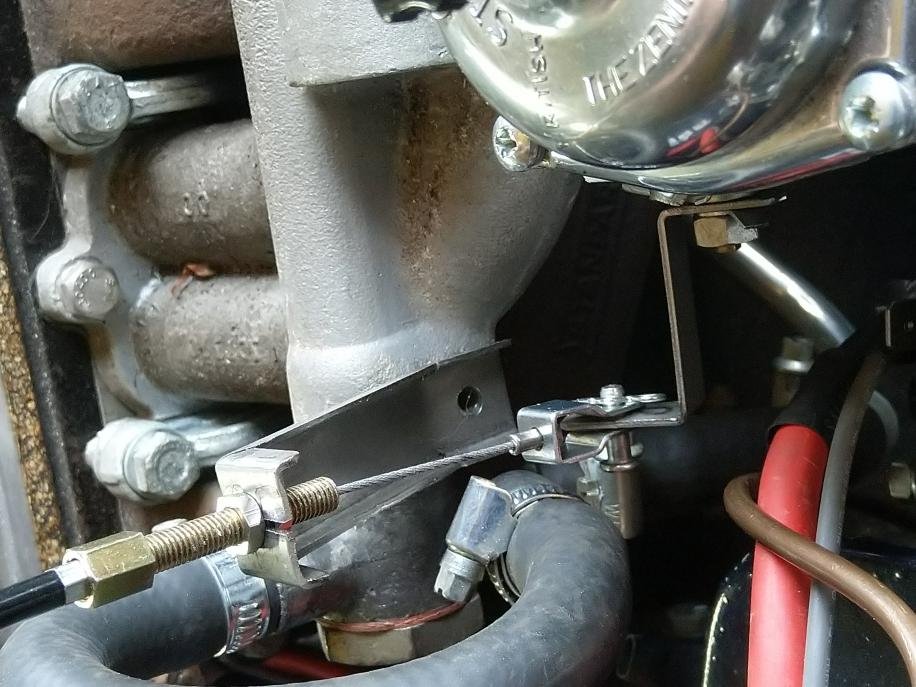
Hi Rich, close up photos attached and some basic dimensions, the bracket that the throttle cable attaches to is offset with a slight angle on it which is difficult to put exact dimensions on but hopefully the photos will help you to make something suitable
27 May 2020, 5:17pm
Above and beyond...

Alex, that is really excellent detail! I was hoping for a couple of pics and that would have been a start....but a full CAD drawing!!!! You are a star! I have the throttle cable on order which should be here this week, so that's my weekend sorted. Thank you!

Alex wrote:
Hi Rich, close up photos attached and some basic dimensions, the bracket that the throttle cable attaches to is offset with a slight angle on it which is difficult to put exact dimensions on but hopefully the photos will help you to make something suitable
12 Jun 2020, 2:53pm
Throttle bracketry

Thanks to Alex's accurate measurements and brilliant CAD drawing, I finally got the missing brackets fabricated - amazing what you can do with a vice, a hammer and an angle grinder! :smokin:

Throttle bracketry.jpg


Just missing the bolt to hold it to the manifold so thought I would check with the wise before I knacker the thread - a 1/4 UNF only goes in one turn so I'm thinking UNC for castings?

Hoping someone will know....

Richard
12 Jun 2020, 6:52pm
Great work Rich, really pleased it worked out, you could go into mass production now and probably make a few quid :thumb:
13 Jun 2020, 6:27am
DerbyDreamer wrote:
Just missing the bolt to hold it to the manifold so thought I would check with the wise before I knacker the thread - a 1/4 UNF only goes in one turn so I'm thinking UNC for castings?

Hoping someone will know....

Richard


Hi Richard, I can't find an exact reference for the accelerator bracket bolt specification, but it's likely to be the same as on the Spitfire. That uses two HU755 setscrews, which are 1/4x5/8 UNC. That would explain why your 1/4 UNF jams in the thread.

Rimmer Bros. have them in stock at 37p plus 13p for the locking washer -

https://rimmerbros.com/Item--i-GRID005608
14 Jun 2020, 12:07pm
Thanks Mr T - that's the mystery solved then! Ironic that the shipping is ten times the cost of the part!! With a bit of luck, I can go for a proper start this week - complete with cooling system plumbed in :-)
14 Jun 2020, 7:09pm
Most British cars of that era will feature imperial thread sizes, UNC and UNF being the most common. The Yanks still haven't gone metric so these old sizes still feature on their new cars to a large extent !
Saying that just about all European cars feature both imperial and metric sizing to this day, when was the last time you bought a fully metric tyre ? The width is metric but the diameter is imperial, lol !