This is a read-only archive of the old Madabout Kitcars forum. New posts and replies are no longer possible, but every thread is still here to browse and read.
Thats a very good suggestion, i will definitely do that as i don't want it too stiff and its considerably lighter than the original car. Thanks for the info :-)
see without my service hatch that would be a right pain :-)
Hello Cabage,
If you went this far with the service hatch (which looks very good), it wouldn't be a great problem to convert it into luggage space I suppose. If you fabricate some sort of basket you can hang in there, you are there. Ultimately it needn/t to be watertight. Just wrap the luggage like on a mototbike. Usage of 4 bonnet pins will do the job to (re)place the hatch.
A late and rather feeble update, but an update none the less.
There has been a lot more progress than is visible, the cabin is now completely enclosed and im sorting bodywork, designing the dash structure and how i shall line the cabin.
You'll notice i removed the old battery holder, this will be replaced with either a clamp down box with all eletronics inside like an old jag with the Li battery inside, oooor the electronics will be more exposed as original with the Li battery in a bracket on its side, so we shall see.
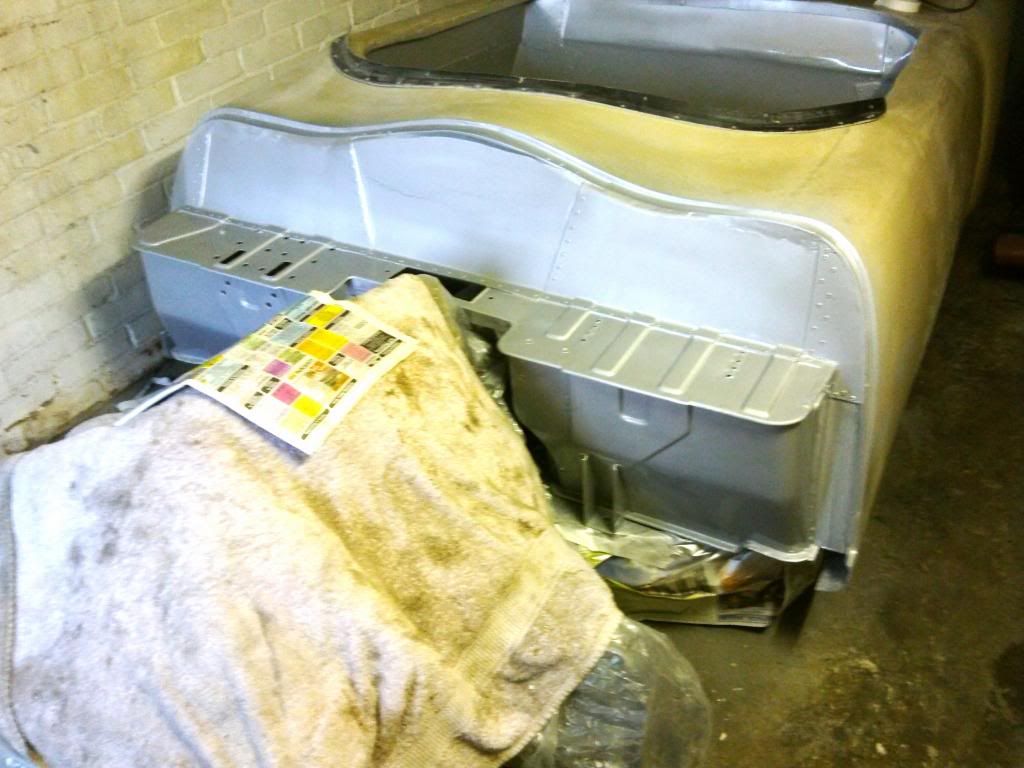
the whole bulkhead and cabin are silver, rather than cream as the silver is nice and neutral and im no longer sure what colour i shall paint it, so this allows me to progress without having to make that choice for a while.
The exciting stuff now happens as i start putting in the seat rails, seats, harness and various cabin decorations that will make it really look the part :-)
Yes, it does look really slick. I cobbled mine together with everything in situ and it ended up as a bit of a patchwork quilt. It's one thing I'd do differently if I built another. Keep up the good work.
Very nice work. I enjoy seeing builds that move away from the normal (if there is such a thing on a sammio/Ribble) and like to see builders use there imagination to get a personalised car just for them.
and yes, it is a 944, or a 87' 944s to be exact, i have a 83' 944 as well which is my daily driver.
Very Nice. I have been looking at 944s myself recently and I am giving serious consideration (read trying to get permission) to buying one as a semi-practical weekend toy, or more accurately, a semi-practical whenever Im in the UK toy. This will compliment my own Ribble build which is very non standard but there will be more on that in the near future.
Very Nice. I have been looking at 944s myself recently and I am giving serious consideration (read trying to get permission) to buying one as a semi-practical weekend toy, or more accurately, a semi-practical whenever Im in the UK toy. This will compliment my own Ribble build which is very non standard but there will be more on that in the near future.
I can't see either of these getting the green light before you buy the mrs a new house
On the plus side of buying a house is that you can choose one with a double garage
Yes 944s make a great weekend fun car and are so easy to maintain and reliable. If you do ever get permission give me a call as i sell / source them so could help you out :-)
It is rather shiny, its almost a shame to paint it, but i think i will have to in the same silver as the rest of the cabin, it will then be trimmed in quilted leather but i have yet to decide on colour. :-)
I see, said the blind man... i think we're due an update, so if you could supply some close ups that would be helpful. Once i get to this stage i was going to make round discs on posts that could be welded to the frame with bonding paste on disc stuck to body?
Sure :-) i'll get on to that tonight as there has been a bit of progress since :-)
The main areas i attached the body were
1) Alu sheeting around the bulkhead, this is composite bonded and riveted to the front of the body all around the front lip.
2) the top of the sides where you get in and out are riveted and bonded to the alu tub sidewalls.
3) the rear of the cabin, tob and frame are sandwiched, bonded and riveted in place.
4) aluminium brackets stretch from the fuel tank supports to the body either side of the access hatch. The load is spread via alu strips which are riveted down each side of the rear.
5) semi-circular alu plates are riveted and composite bonded to the outriggers, these mat up perfectly to the isdie of the rear body, stopping any vibrations, this gives enough support to sit on quite easily.
Tips)
1) I use rubber seals along any sharp edges of aluminium which are not bent over to avoid rubbing and damaging the body.
2) I use composite bond from a mastic gun style tube on all surfaces where the alu, fram and body meet to absorbe and vibration and avoid fatigue from the rivets, its very very strong stuff.