This is a read-only archive of the old Madabout Kitcars forum. New posts and replies are no longer possible, but every thread is still here to browse and read.
Was nice to meet you Dave and see a Sammio in the flesh,
Makes me wanna get the angle grinder out now!!! but will hang on till october and keep saving.
I thought it was ace that when I was talking to you that old guy drove up, stopped and got out with a camera and then started photographing your Herald! He would have had a breakdown if we'd told him what you were considering
After much reading over on Club Triupmph (they really are VERY....... knowledgable ) i finally figured out what was wrong with my fuel gauge.
When i bought my donor it didn't come with any instruments, which wasn't a biggie, so i had to by a set from Spritfire Graveyard and fit them myself.
As i had the alternator conversion i mistakenly assumed i didn't need the Voltage Stabiliser that is bolted to the back of the speedo so i took it off
After a quick check with the beard-farm (this term is meant in the nicest possible way as i am in awe at some of the things they know!) , i realised that this is actually needed! And i've just put it back in and the fuel gauge is now working fine!
Although i'll have to take her for a blat later on to double check how the temp gauge is now working. I wonder if i can make it as far as Cullompton?
I do sympathise with your instrument predicament - although my donor came with a standard set of Vitesse dials I removed the fuel and temperature gauges without bothering to see if I could remember how to reconnect them , and neither the speedo nor the rev counter worked: both had broken drive cables, but both the gearbox speedo output spindle thingy and the rev counter input had broken drive cable ends jammed in them so new cables wouldn't fit. I managed to drill and pull out the gearbox one but my attempt to do the same with the rev counter was only partially successful. It does work but I think it might wear the end of the drive cable prematurely as there's only a couple of mm of the cable engaging. I'm guessing I'll probably have to replace the rev counter sooner rather than later.
Phil J dropped by in his 2500 powered BRG Spyder this morning btw, and reports that a few changes have transformed his car for the better - a thicker anti-roll bar on the front (his donor started life as a Herald van, so had a really thin one fitted) has sharpened up the driving experience while balancing the prop-shaft with a jubilee clip (!) has made it much smoother. Seeing you guys on the road in your finished cars really does spur those of us with unfinished projects on to complete ours.
Anyway, looking forward to your next update - this running report doodad is a great idea.
Dave, the old road is much better Skippy has yet to venture onto a motorway the A303 dual is the biggest road yet, I can meet you half way if you like, I'm on hand signals at the mo till the flasher unit turns up and I'm going to head Barnstaple way also, but as always weather and work dictates regards, PAT
I did the Glastonbury / Shepton / Mendips / Cheddar Gorge, triangle in the end and it's a good job i'd put sun scream on before i left! I was almost looking for roads with tree cover towards the end as it was a bit toasty.
Also after weeks of thinking that I'm running a bit hot, and that the new thermostat i bought made it run too hot. Now the Voltage Stabilizer is in place i actually think I'm running a bit cool and that the new thermostat was working properly. ho hum
Pat - If you're around over the long weekend i may pop down? I wonder if Mulberry is going to be around as well? We could have a 3 Sammio run out and meet up somewhere central to us all? Would that be the largest non-factory gathering yet?
there is vintage and classic car show next saturday/sunday near south molton, we are going along with sammio. would be great if there was two there .....
dave you find most car insurance have "public liability insurance". i asked aplan ,when i took mine out with them, and chris said i was covered for publc liability..
the room behind my seats is what i call my tool box. spanners,screwdrivers, water, ptfe tape, zip ties, oh and last but not least 1 "blow up passenger doll"
Seeing as the sun is out i thought I'd use the Spyder for the commute today
And even more exciting (at least for me!) i decided to do the 'normal' commute with the 30miles of Motorway in the middle. Although i will be taking the scenic way home across the Mendips and down Cheddar Gorge to end
Now that I'm more comfortable with the car, i cruised at normal motorway speeds and only two times did i have moments of blind panic due to unusual noise/shaking. But those were both due to changes in road surface or "other stuff" and i guess that one side effect of Sammio building/driving is that you really are very aware of every noise and rattle !
I've also decided to adopt the Jaguar XK Enthusiasts Club parking method today!
This was partly on purpose and partly as i was so on edge when i arrived and so many people were staring out of the windows i just wanted to park and run
I now have a constantly updating weather forecast displaying on my 2nd monitor and i've briefed people that i may be off early if "rain stops play"
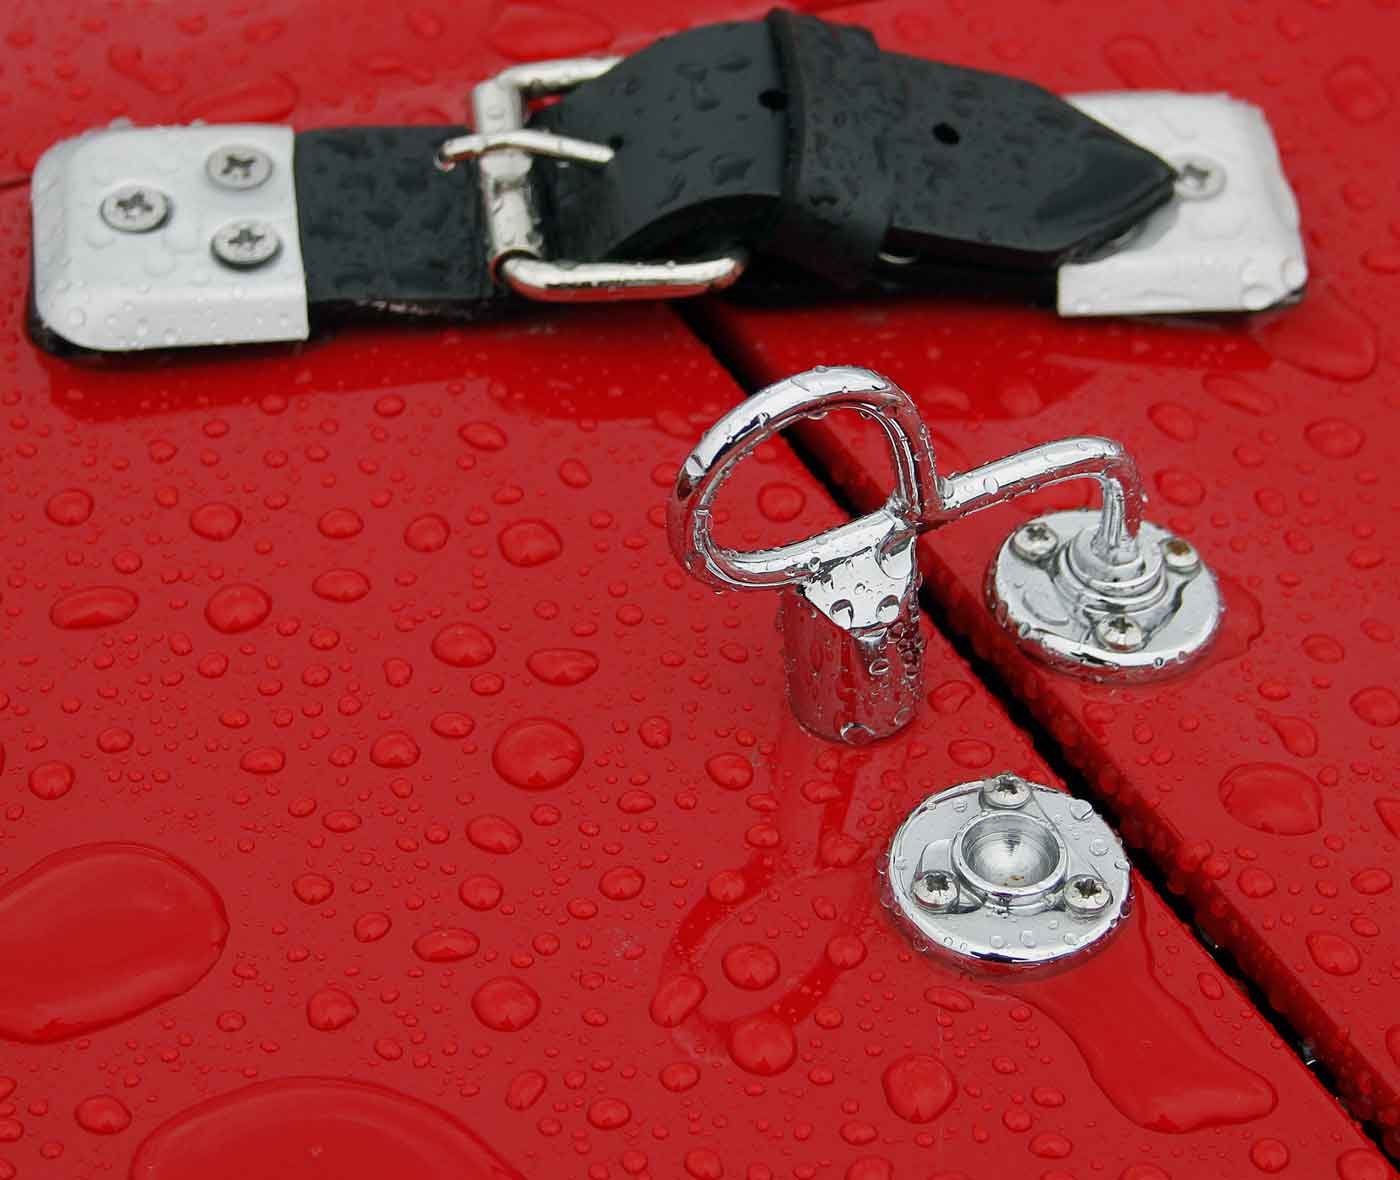
Remembered your comment i.r.o. bonnet pins when downloading from a folder the other week.
Unfortunately I couldn't find the owner of the 250 GTO replica in order to place something of scale on the bonnet, but the leather straps might help. The pins do look a little delicate.
Interesting to note the 'rest' the catch sits in when 'at rest', not sure about the Phillips screws though (or the leather strap fitting) and they seemed to be starting to rust.
That is the same leather strap as i've got on the sides of my bonnet so it's a good reference.
What I'm thinking at the moment is that when i take the bonnet off in the winter (after the Exeter show) to check the engine, i'll do the bonnet mods at the same time as i need to add some bracing to the bonnet and also do some reworking of the bulkhead, and then add some of these when it goes back together.
Until then i have bought a leather punch and added additional holes to the two straps and it's now much more secure.
It's quite funny that the only place on the car where the filler is noticeably cracking/sinking is the final bit across the top of the bulkhead where i rushed it right at the end and in the middle of winter! ho humm.... but it'll do for now
I actually made a 'bonnet pin' out of modelling clay and it should be quite easy to cast in aluminium - perhaps using the lost wax method. I was going to have a go ... but I'm not sure I'm going down the Italian car route yet.
I suppose the cracking / sinking (and air bubbles) goes with the territory with f/glass cars..
Ok, so I took the plunge and i've decided to do some paint corrections ready for Exeter and the end of year Bath & West classic show as i've been a bit self conscious!¬
As some of you know, not long after I'd got the car on the road i had left some tools on top of the engine when the wind caught it and slammed it shut leaving a large spider crack in my shiny bulge!
Plus where I'd rushed the final corrections to the scuttle there were some sink lines and some bubbles (i know, i know, never rush things!)
So i've taken the plunge (and lost a nice sunny driving weekend!) now taken a dremel to the cracks and chased them out completely, v'd them and filled with fiberglass filler, and i've just finished the 2nd round of filling/sanding/filling/sanding before i prime.
Hopefully the paint will be here this week and i'll be back on the road next weekend but i think this only goes to show that in the long run rushing any stage of prep/paint never pays off!
Looks good dave, I vowed I would run my around for a full year before I repaint it.
I am getting a few little bubbles here and there, and a few cracks and stress fractures, but that is just part of the car "settling down". - as you know!
Luckily I chose a very forgiving colour for mine, so the imperfections are not massively noticable until you are on top of it - literally!
Anyway, since I have built mine as a homage to the 50's, I am replicating the poor paint finishes of the time! (ie not too shiny on most cars - top marques excepted of course!)
Hats off to you though Dave, missing out on this fine sunday driving
I actually made a 'bonnet pin' out of modelling clay and it should be quite easy to cast in aluminium - perhaps using the lost wax method. I was going to have a go ... but I'm not sure I'm going down the Italian car route yet.
I'm not sure Aluminium would be strong enough. Bronze would be a better choice and chromes very well.
My approach would be to fabricate and weld one out of Stainless. I'd need something better for bending rod that i have at the moment though.
'I'm not sure Aluminium would be strong enough. Bronze would be a better choice and chromes very well.'
You are right, I just guessed it was aluminium, being a racing car, but thinking of the metallurgy it is unlikely. Also I am unaware of the strength of the spring and the forces acting upon the tang or the hook of the latch.
I wasn't following this up as I'm not going 'Italian' but the latch in question reminded me of a vintage coat hook (and there is a web site). It may be possible that a mild steel coat hook could be heated and bent or cut and welded...


 , and neither the speedo nor the rev counter worked: both had broken drive cables, but both the gearbox speedo output spindle thingy and the rev counter input had broken drive cable ends jammed in them so new cables wouldn't fit. I managed to drill and pull out the gearbox one but my attempt to do the same with the rev counter was only partially successful. It does work but I think it might wear the end of the drive cable prematurely as there's only a couple of mm of the cable engaging. I'm guessing I'll probably have to replace the rev counter sooner rather than later.