MadaboutKitcars

This is a read-only archive of the old Madabout Kitcars forum. New posts and replies are no longer possible, but every thread is still here to browse and read.

Another Cordite Is Born ...

28 May 2012, 7:09pm
Mister T - Let's face it, no Sammio builder can be described as 'normal'! :wink:

Charman.tech - If I don't sell all these parts soon, I'll be using the kitchen as a bedroom!


----------------------


Video Test

If I have followed Misted Towed's instructions, this should be a short video chip.

Be warned it might make you sea sick as I shake the camera all over the place. :rolleyes:

This is a quick tour of my donor body shell, so I can show potential buyers its condition.

https://photos.app.goo.gl/F7tctwhgXykGLsj1A

Normal build thread progress will be resumed shortly.

Cheers, Paul. :)
28 May 2012, 8:19pm
Video link works fine Paul. Clip is very 'Blair Witch project' - all shakey cam and heavy breathing. I like it!
2 Jun 2012, 5:59am
I'll post a proper progress report sometime over this long weekend.
As later this morning I'll see how the garage is getting on with donor.
But first I need to go to the supermarket and do the big family shop. :rolleyes:

So in the meantime, here is something I prepared earlier...

Colour Options:
Initially, British Racing Green, or Bright Red, would have made my colour short list.
And certainly, all the finished Spyders I've seen on here in those colours look great.

Instead, I drew up an alternative short list of four possible colours.
- Burgundy - Mulberry & AndyP57 have shown this looks great
- Other Old Greens - Think weather beaten Land Rover
- Yellow - The colour of my last Triumph, the motorcycle in my Avatar
- Blue - Although I was torn between light and dark blue

Then in the best of Blue Peter traditions, I did some cutting out & sticking on.
This gave me a number of A4 sheets of paper to help with the decision making.
( These look a lot better in real life that the photos suggest )


Another colour influence came when I saw the photos of the first Cordite at Stoneleigh.
It looked great in the gel coat and the unpainted finish actually made the car look "old".


After checking with Gary, I will add an optional extra to my Cordite order and get a LIGHT BLUE get coat. :cool:

My current plan is to get this Cordite on the road with no paint on the external bodywork.
That way, the joys of filling, sanding & spraying [+ Repeat] can wait for another time.
With a bit of luck, reworked areas (e.g. rear lights) will look like repairs to an old car.

At least that is one construction decision finally made. :wink:

Cheers, Paul. :)

PS
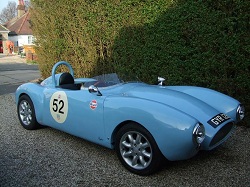
Another influence on my colour choice was this Spyder:

2 Jun 2012, 8:27am
I'm rather fond of that powder blue finish myself. Nice choice.
2 Jun 2012, 8:38am
It is strange that 'most' people, and I count myself in with that group, see blue as the 'natural' colour for a Cordite and Red for the Spyder. :noidea:
3 Jun 2012, 4:34pm
Rolling Chassis & Engine Inspection:
Previously, I'd left my Spitfire in the capable hands of Barry's Garage.
( 1 Glebe Road, Willesden, London, NW10 2JD - 020 8459 3354


They started work on the engine first, setting it up to meet an MOT emissions test.
Apparently fine tuning my shiny twin SU carbs has been a real pain in the ....!
The engine was back firing so loudly it sounded like a Wild West shoot out. :shock:
They are also going to replace a few parts they think are not helping the set up.

Next week they will turn their attention to the rolling chassis and test that.
The double Bank Holiday will restrict the time available to them.
So it is not clear when I'll get the car back, but hopefully next weekend.

Ebay Update:
I'm just waiting for the doors to be collected tomorrow (Bank Holiday Monday).
All the other parts have been collected and now have new homes.
Amazingly people have travelled from North Wales, Hull & Bristol.

Unfortunately the Dining Room 'Auto Jumble' has sold nothing to date. :icon_sad:
At least I've now taken photos of everything & they will be posted on Ebay soon.
In the meantime everything will be relocated to the Summer House out of the way.

I've also sent a link to the video tour of the body shell to 4 potential buyers.
Barry's Garage gave the shell a quick visual inspection & said it looked solid.

Rear Lighting Options:
I pulled together a number of photos of rear lighting here.
Which has helped me narrow things down to a final two choices.
Either:
- Use traditional dome lights for the indicators & stop/tail + a separate reflector
- Use modern lights with reflector outer rings, which are slightly bigger.
In both cases I have decided to drop the idea of having reversing lights.
Based on the photos, "Less in more" is definitely the way to go.
Here is another of my Blue Peter mock ups of what it might look like.


Next Steps:
Half Term for my daughters next week, so I'm off work to spend some time with my family.
( I've already cooked Sunday Lunch today & we've just come back from a game of Badminton )
I need to be careful as this Cordite project seems to be a Black Hole sucking in all my time.
I am under considerable pressure to ensure my new 'hobby' is limited to genuinely spare time.
( Which is pretty much what DaveCymru posted the other day, wise words indeed. )

Until next time, take care, Paul. :)

Replies:
Mister Towed & AndyP57 - Thanks, I really think the light blue gives a traditional old look.
12 Jun 2012, 6:47pm
Last week was quiet, mainly spent with the family for half term.
The highlight of which was getting a wave from The Queen. :wink:
But the project has also been ticking along in the background ...

Cordite Kit Order:
Apparently Cordite Kit No.6 has just rolled off the Sammio production line.
I had specifically reserved kit No.7 which means I am now next in line.
This gives me the option of using Barry Sheene's old No.7 racing number.

But since my last update there were some major changes in Sammio world.
So I have now agreed my kit order with AndyP57 & send my money today. :cool:
Thanks to both Gary & Andy for all their help as I tried to finalise my spec.
Unfortunately, I have plagued them both with my endless lists of questions. :rolleyes:
My kit will come with seat belt mounts & bonnet hinges fabricated for me.
This will help me with the major change I've had to make to my build plan...

Revised Cordite Build Plan:
I am now facing up to the harsh reality of building a car on the drive.
( The ridiculous weather and lack of practical working / storage space )
So I've made the decision to keep this Cordite build simple and sell it.
My double hump Cordite will wait until I've moved to a house with a garage.
Which was my original plan until this forum turned me to the Dark Side & I bought a Spitfire! :wink:

So yes, I'm already planning a second build, before I've completed the first! :rolleyes:
This has made a lot of the decision making about final spec. much easier.
I am going to aim for a very spartan interior, similar to Gary's original No.66.
I'm now pretty certain I'll have the same seats that GazDavies used in his car.
I'll also go for dome rear lights & reflectors (see top row in previous mock up photo).
( I recently spotted that Patton used these Land Rover lights successfully on 'Skippy' )

I was always planning a "rough & ready" look compared to other builds.
This will hopefully save me time and now provide the next owner with options.
As clearly a top quality paint job & smart interior both take a lot of time to achieve.
But I expect to have a "taxed & tested" Cordite on the road without these.
Well that is today's plan, but we will see how I actually get on when building it.

Rolling Chassis & Engine Inspection:
Setting up the engine to MOT emissions standard has taken a bit longer than expected.
This has been due to the engine having been rebuilt & then left unused for years.
The good news is there is nothing fundamentally wrong with it. :)
The short Jubilee working week means the garage will need a few more days.
But at least they've now started the rolling chassis and running gear tests.
I'll then get my donor back with both work done & a "To Do" list for me.
Thankfully the garage knows what I am capable of getting done at home.

Ebay Update:
My second batch of surplus Spitfire parts will appear on Ebay tomorrow.
I've loaded descriptions & photos on Sunday, but set the start date ahead.
So the sale end date avoids Father's Day + England & Ireland @ Euro 2012.
I registered with PayPal too, so my selling limits have been increased.
The Dining Room 'Auto Jumble' made the grand sum of £26. :rolleyes:
But at least it cleared a few more bits out of the house.

Next Steps:
What I have learnt so far is that Ebay selling is time consuming.
So if I just keep on top of that next week I will be doing well.

Until next time, take care, Paul. :)

PS
Sorry, I just realised there are a lot of words & no pictures in this post. :icon_sad:
I will make sure there are some photos in the next update.
17 Jun 2012, 6:31am
After exchanging PMs & missing each other on the phone, I finally spoke to AndyP57. :cool:
It was good to chat in the real world & I look forward to meeting him in person in the future.
We joked that he was just like Victor Kaim...
I was so impressed with my Sammio Spyder that I bought the company.
:wink:

Cordite Kit No.7 Update:
My framework is ready and waiting in Poole.
Work on the body started yesterday (Saturday 16th June).
So my Cordite's "due date" in not very far away now.
There is an element of expected father about all of this isn't there? :wink:

But rather than hire a van/trailer to collect it, I will get it delivered.
This works out at £110, which much cheaper than I could do it myself.
It also makes it more likely that I can make the Sammio gathering.
As I wouldn't get the chance to drive down to Poole twice in a short space of time.

Rolling Chassis & Engine Inspection:
Well my Spitfire has now spent 3 weeks in the garage, a lot longer than I was expecting. :icon_sad:
My engine's biblical back fire was traced to having the wrong distributor fitted.
This allowed the engine to idle all day, but got progressively out of step as revs increased.
They now hope to have finished with it by the end of next week (touch wood).

Ebay Update:
I put 11 lots up for auction this time, but only 2 have been bid on so far.
But all lots are being watched, so I expect the usual last minute Ebay poker.
I was amazed how much the bids increased in the last 24 hours on my first batch.
This batch includes brand new parts (see below), so I did set some opening bid amounts.
To be honest, my nerves couldn't cope with the 99p starting prices I used last time. :rolleyes:
And with my kit paid for, raising as much as possible will help balance the books.

Here are some of the parts that I hope will do well:

Double Duck Soft Top


Leather Seat Covers


Seat Foams


Doors:
OK, all you Spyder builders out there can look away now if you want to. :icon_twisted:

When I first saw the mock up of the Cordite, doors were going to be an option.
But as the project developed it made more sense to only offer the Cordite with doors.
So I am playing catch up with my research as I initially wasn't expecting to have doors.

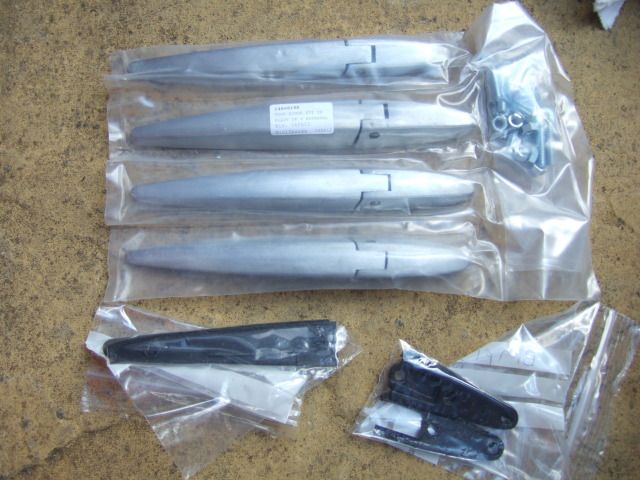
I bought some Mini external door hinges yesterday from here.


These are actually the same as the ones Gary used on the Stoneleigh demo.
I hadn't realised this when I asked if they would work on another thread.

Also by chance, AndyP57 saw my questions before heading to the Newark show.
So he kindly picked me up a set of these when he was there, another big help.


I guess I will need to fit some sort of door retaining strap / bracket.
But I'll wait until I see how the doors & hinges work in practise first.

Looking into the rules about door latches I stumbled across this MOT site...
[url]www.motuk.co.uk[/url]
Within the information section on door handles I found the following:

[COLOR="Red"]A lack of door handles because of original design characteristics or specialist modification is not a Reason for Rejection provided the door can be latched securely in the closed position.[/COLOR]

So no problems there. :cool:

Next we have details of the door test itself:

[COLOR="red"]Doors - Open and close the driver’s and passenger’s doors.
Check that:
a. each door latches securely in the closed position
b. the driver’s and front passenger doors can be opened from both inside and outside the vehicle

Check door hinges, catches and pillars for presence, security and condition.[/COLOR]


I guess it is OK to stand outside the car & operate the door latch inside the car.
After all there is no roof and in an emergency you can simply climb in & out without using the doors.

Remaining Shopping List:
I've enjoyed researching & comparing the various car parts needed to build my Cordite.
That is why I like build threads & finished car photos as they are great for picking up ideas.
Due to a lack of space I've held off ordering new stuff until the old Spitfire parts have gone.
I'd also like to double check some measurements on the kit before ordering lights, etc.

I think the seats will be next as they are a key reference point for the build.
I am going to get the same ones that GazDavies used in his Sammio.


Wing Mirror Debate:
I think I have narrowed this down to two options (for now):

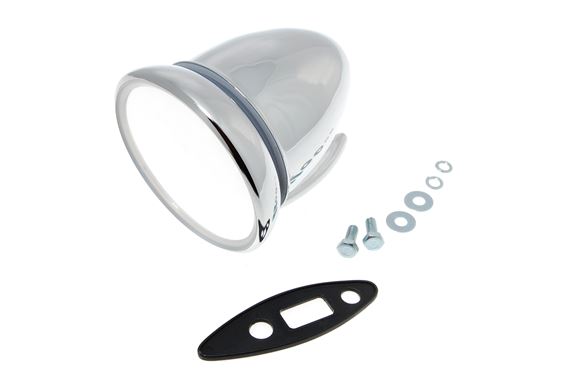
Follow the Sammio tradition of shiny bullet mirrors as they clearly look great.


The cheapest place I've seen these mirrors is here.

My somewhat "rat" alternative are these black plastic mirrors.
( Sorry, I just couldn't find a way to link the photo )

http://www.cbsonline.co.uk/product/Black_Gt_Mirrors_M19BK

Before I finalise my shopping I will need to agree what 'look' I am going for.
Currently this is a 'rough & ready' road legal car that looks like its had a hard life.
This will be easier for me to visualise when the kit arrives.

Next Steps - Project:
After a long period with not much happening the pace is now building...
- I need to make the final arrangements for delivery of my Cordite kit
- I need to get my donor back from the garage & start removing the body shell
- Hopefully all my Ebay parts will sell & free up some of my limited storage space.

Next Steps - Today:
Get off the computer to have a relaxing Father's Day including a pub lunch.
Thankfully the rest of the family are still asleep, so I can finish this update now.
This time yesterday I was already walking around Sainsburys doing the family shop.
I also spend hours in the garden trying to get it back into shape.
There are 11 bags of cuttings here and I still have a bit to do. :rolleyes:


But if I don't keep on top of my domestic chores I can't build my car!!

Until next time, take care, Paul. :)
23 Jun 2012, 3:07pm
This project has taken a big step forward since my last post...

Cordite Kit No.7 Update:

It has arrived!!! :D

Got a call from Gary on Thursday to say everything would be ready for Saturday.
Gary also arranged a courier for me to make the 100 odd mile trip up from Poole.
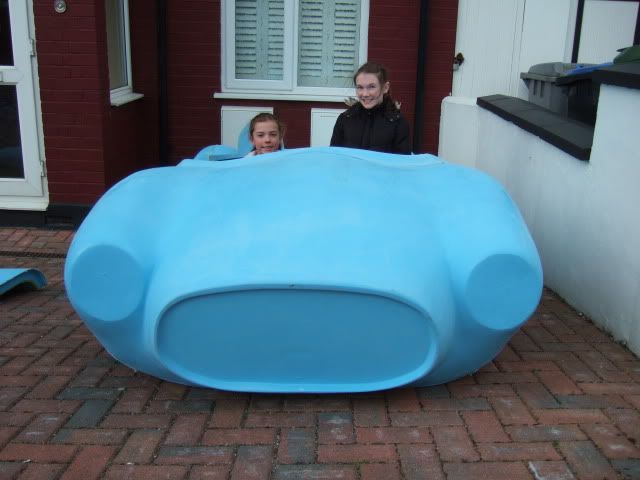
And here is what arrived on the back of a lorry earlier today ...


The beer crate grill and lowered floor pans will be delivered separately.
But here is the bonnet, body, two part framework, doors, screens, foorwells & dash.
Note: Blue gel coat & seat belt mounts are optional extras.


There is an extra cross bracing bar added to the frame for delivery.
So here is the first of many notes that I will be writing to myself. :rolleyes:


Obviously it started to rain before I could sort everything out. :icon_evil:
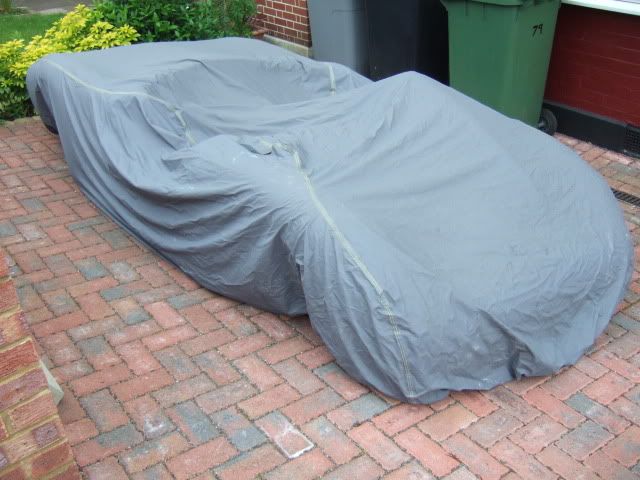
So for now, the body & bonnet are on the drive out the front.


Everything else was taken through the house to the back garden.
This is just a temporary measure until I can rearrange my limited storage space.


I'll add these to Psycho Pops' kit arrival photo thread shortly...


Rolling Chassis & Engine Inspection:
The good news is that all the work on the engine is complete & it runs smoothly.
The bad news is that some of the other tests couldn't start until this work was done.
Which means it is now looking like early next week before I can get it back.

Ebay Update:
A poor round of sales this time, 3 lots didn't sell & 3 went for the 99p starting price.
I've since cancelled one of the 99p items when my 'collection only' was read as 'post overseas'.
And whilst checking why I hadn't heard from another 99p winner, turns out they live in Italy! :mmph:
But at least I have raised another £432 (after deducting selling fees) which all helps.
And the 3rd 99p winner was very nice & is coming back next week for some more bits.
I'm new to Ebay and am learning as I go, which means I'm probably not maximising my sales.

Shopping Update:
The door hinges and door latches have arrived safe and sound.
My shopping list continues to borrow ideas from other Sammio builds.
In addition to GazDavies' seats, I also plan to order the bonnet parts TriTone used:


Next Steps:
Now the kit is here I will check some measurements & finalise my lighting choices.
Hopefully more of the parts I've sold will be picked up next week.
This will give me the space I need to start ordering new stuff for my Cordite.
But what I really need now is my donor back so I can get the body shell off.

Until next time, take care, Paul. :)

PS
My Cordite kit has wasted no time in "blooding" me.
I got my first fibre glass cut taking it off the lorry.
At about the time the driver was saying be careful it has sharp edges. :rolleyes:
And it was only when I had a chance to sit down I noticed another big scrape.
23 Jun 2012, 6:12pm
Ouch, wait until you start working with the raw fibreglass mat :(. Are you going to paint it or just polish the gel coat?
24 Jun 2012, 6:27am
Mr T - My current plan is to get the car on the road without paint.

Although as I follow your build I realise any bonding stuff, filler, etc. will stand out against the blue.

So I guess it will look patched up in places, but as long at it is road legal it will be OK.

Hopefully it will give the impression of an old car being restored & awaiting paint.

But that may just be wishful thinking on my part.

Cheers, Paul. :)

PS
I take your point about using the Vulcan dial on your own build.
24 Jun 2012, 7:51am
Funnily enough I've considered putting mine on the road for a few months before painting it to give things a chance to settle. The only trouble is that I may then never get round to doing the spraying :(

I think yours will look fine in the gel coat - the Cordite demonstrator looked pretty good in the blue gel coat at Stoleliegh and it was still pretty rough around the edges. With a bit of work it would easily look like a patinated paint job.

Anyway, keep up the good work and enjoy the experience.
24 Jun 2012, 7:56am
Hi Paul, I'm glad the kit arrived safely and it does look good in Blue Gel. The colour was chosen specifically from a RAL range (I'm sure it's RAL 5012 Light Blue but I'll confirm when I next look at the invoice) so you could easily get a colour match from stock to touch up etc. On a quick web search, it appears even Halfords market it as 'Gadget Blue'
24 Jun 2012, 12:48pm
Hi Andy,

It would be great if you could confirm the colour.

I'm sure touching up the paint would be a better idea that the "just repaired" look.

Cheers, Paul. :)
24 Jun 2012, 2:30pm
Hi Paul,
Just checked :ranger: and the colour code is definitely RAL 5012 Light Blue.
Cheers Andy
1 Jul 2012, 5:56am
Whilst I've barely touched the kit since it arrived, I am still taking small steps forward...

Spitfire Inspection Update:
My build plan did not include my donor spending 5 weeks in the garage for a "check up". :ohwell:
However, despite taking much longer than expected, ay least it is now finally back home.
The rolling chassis has been checked to MOT standard & thankfully confirmed as safe.
The engine needed work to get it to pass an emissions test, but that's all sorted now too.
By checking all this stuff now, I hope to avoid any real problems later on (Touch wood).

Unfortunately, just when everything was going so well, the radiator gave up the ghost. :icon_sad:
The garage used some Radweld (sp?) to form a temporary patch for now, but I will replace it.
I have been checking what Mister Towed did with his Honda radiator & may follow suit.

Sammio Gathering:
This is the second event I've missed this year (as I couldn't make Stoneleigh either). :icon_sad:
It would be nice to meet some people from this forum in real life & learn about their builds.
I'd also like to look around some finished Sammios, as I haven't seen one in person yet.
Hopefully I will get the chance to make it to another Sammio get together in the future.

Rear Lighting Layout:
With my kit here, I could finally see just how much space there is available at the back.
Effectively there is just over 101cm to play with, if you stay between the seam lines.


Again I did a 'Blue Peter' job & cut out circles from a cereal box to represent the lights. :rolleyes:
My initial lighting choices were 75mm dia. stop/tail & indicator + 72mm reflectors each side.
But they would have been too tightly packed together & the problems was actually the number plate.

My donor came with a new number plate which included a GB "sticker" & was 52cm wide.
A bit of research showed I could use a much smaller 6 character* plate which is just 41cm wide.
* Completely by chance, my "V" reg. donor only has two numbers in its registration.
So I''ll now order a smaller rear number plate & a stick on front plate while I am at it.
( For this build I will not be switching to an ageless plate, just to keep things simple )

I also decided to down side the lights at the same time to improve the layout still further.
My new lighting sizes are 70mm dia. for stop/tail & indicators + 60mm for the reflectors.
I will also fit four LED light bolts instead of a more traditional number plate light.


Front Lighting:
Again, now the kit is here I can finally confirm that my donor Spitfire headlights will fit. :cool:
The diameter of this rubber seal for the headlight unit is 8.5 inches in old money.


I just need to check my donor headlights work (weren't wired up) & then give then a clean.
I need to order some chrome rims to finish them off, as they were missing from my donor.

I have seen what looked like side repeaters being used for front indicators on some builds.
The rules I checked said there was no minimum size, as long as they were clearly visible.
So I ordered some 36mm diameter dome ones, which appear quite small in real life.
Although there isn't much space available for something very much bigger.
Any thoughts, or suggestions, are always welcome.


Other Shopping:
In addition to all the lighting above, I've now ordered some other stuff as well:
- The bucket seats & bonnet stuff I've mentioned before
- 2 wing mirrors (I went for the Sammio 'traditional' chrome bullet options in the end)
- Dash mounted rear view mirror
- Secure tax disc holder (designed for motorcycles)
- Some extra ratchet tie down straps to hold the body in place during bonding
( My current straps are showing their age a bit, as they are now over 20 years old :rolleyes:)

The main reason for ordering some of the finishing touches early is to check fitting.
This will allow me to build up, or reinforce, any area that I am bolting things to (if required).
Although I still need to work out how much fibreglass & bonding "stuff" I need to order.

Ebay Update:
More of my sold items have been collected which frees up some room for the new parts.
I cancelled another sale after winning bidder couldn't make it over from Italy to collect. :icon_evil:
On the bright side, a previous bidder came back for some more small bits.
And another bidder is considering whether to buy my leather seat covers.

Next Steps:
I want to test all the new lights with the current switches & wiring to check for problems.
I then need to methodically disconnect everything required to remove the body shell.
I hope photos, labels & taking notes will allow me to reconnect everything later on.

However, I have a lot of domestic chores to complete before I can do anything.
My wife's brother & his family are coming over from Ireland next weekend.
( Hence no Sammio gathering for me this weekend )

Until next time, take care, Paul. :)
1 Jul 2012, 6:53am
Front Indicators

Hi Paul
Looks like its all coming together nicely.
Regarding Front indicators have you considered following the example of one of the earlier Sammio's by drilling through the back of the headlamp and fitting indicators inside the shell.
I bought a set of lights same as Dave Cymru these are like a tin plate back and can be carefully drilled and the bulb fitted through the back.
I had a chat with the local MOT tester and he said no problem regarding seperation distance of lights, as he pointed out the new Minis indicators are on the same unit now.
Just a thought and the way I am going..
Cheers Pops
1 Jul 2012, 8:14am
Thinking up solutions to problems that don't exist yet is half the fun of Sammio ownership.

One thing you've picked up on that I knew I should have done but didn't is take loads of photos of connections, routing etc, to make it easier to put it all back together again months later.

Keep up the good work and I'm looking forward to seeing your Cordite build coming together. :)
8 Jul 2012, 8:52am
Progress Report:
Not much progress this week as I've been tidying, cleaning & fixing things around the house. :rolleyes:
But at least we are now ready for our visitors from Ireland & it will be good to see them later today.
I'll be off to the kitchen shortly to start preparing Sunday lunch (a man's work is never done :icon_twisted:).

Even with my wife's help we couldn't move the Cordite body through the house into the back garden.
I was planning to store it there for a while so I could have more space to work on the donor.
But there was just no way of manoeuvring it through our internal doors & we scraped the wall. :icon_sad:
If I need to, I can go through my neighbour's garden as they have the side access we don't.

Headlights:
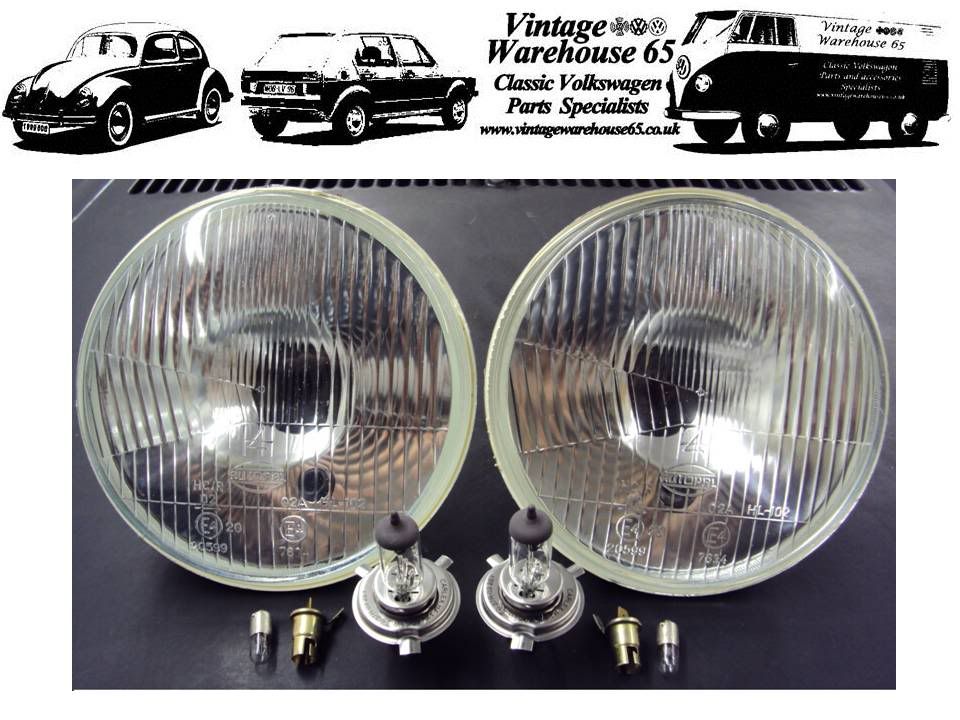
I did get a chance to test my donor headlights and the good news is that they still work.
Note: The lights are just sitting on the ground, not fitted to a very narrow car. :icon_wink:


The bad news is I'd completely forgotten that they don't include a side/parking light.
My Spitfire has a separate unit which combined side light with the front indicator.
So rather that reuse these as originally planned, I will replace them with these instead.


With the side light built in, it will keep the front of the car uncluttered. :cool:
I will also order 2 chrome headlight rims from Rimmer Bros (missing from donor).
Rimmer Bros will also be my source for the rear spring lowering block & long bolts.

Other Odds & Ends:
My donor came with just one ignition key, so I got a spare cut locally for £7.99.
The shop was very good as they had to order a "blank" in for me.
Can't imagine there is much demand for 30 year+ Triumph keys around here.

All my other shopping has arrived in the post & I have lots of nice thing to play with. :cool:
My neighbours have been very good at taking things in for me when I'm at work.

All my sold Ebay parts have now been collected.
I'm still waiting to hear if a previous Ebay buyer wants the new leather seat covers.
However I am being messed about by the one person I sent something do. :icon_evil:
All my sales were listed as 'cash on collection' and I should have stuck to that.
Hopefully it will all get get sorted out next week (touch wood).

So just small steps, but at least they are in the right direction.

Hopefully there will be more to report next time, cheers, Paul. :)

Replies:
Pyscho Pops - Thanks for the tip, which is effectively my side light solution (see above).
I actually like the idea of a separate indicator, even if it has turned out a bit small.
Mister Towed - I'm trying to learn from other builds, so tips always welcome.
I was planning to keep the heater if only to help in the event of the engine overheating.
So I might get a Honda radiator & add an expansion tank (just need to research it more).
16 Jul 2012, 9:11pm
Weather Update:
Apparently it is not my imagination, this will officially be the wettest summer in living memory. :icon_evil:
Unfortunately I've seriously underestimated the impact of this rubbish weather on my Cordite build.
Don't get me wrong, I always knew attempting to build outside was going to be a major challenge.
But these days, it seems almost impossible to align my limited free time with any sort of dry weather.

I can't relocate the project to a lock up garage as I promised to be 'just outside' for family reasons.
Also my wife doesn't want a 'Circus Tent' outside the house after I showed her TriTone's photos.
Although in fairness, this might still be possible for a very limited time at the end of the build.
So for now, I'll just deal with the weather as best I can & try to keep the project moving forward.

Thankfully Sunday gave me a glimmer of hope when time & weather finally worked in my favour.
I managed a few hours in both the morning & late afternoon, so some small progress to report...

Body Shell:
Wasted some time trying various ways of jacking up & supporting the car for access underneath.
Eventually came to the conclusion that doing this safely on a sloping drive requires more thought.
So I put the car back on the ground and moved on to the electrics instead...

I've now disconnected all the wiring from the back & middle of the car & pulled it to the front.
Despite the apparent mess, this is one of the few areas I feel pretty confident about (touch wood).
Also these wires will be thinned out before being refitted (see wiring loom section below).


I then started on the dash board and have now removed the left & middle sections.
In addition to labelling wires, I've also taken photos & made notes about what goes where.
As I plan to reuse the Spitfire fuel & temp. gauges, main light switch & probably heater controls too.
( Luckily I did have an allen key in the extremely tiny size required to remove the heater buttons )
Took out the passenger side heater vent + hose and put that in the 'may come in handy later' pile.
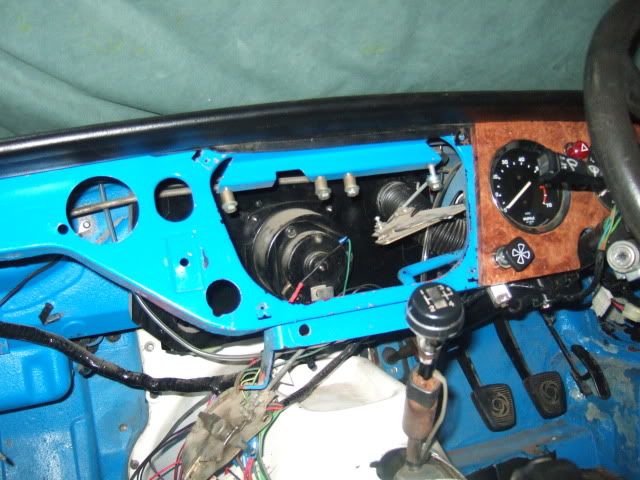


Removed the gear lever surround from the gearbox tunnel & then started on the tunnel itself.
Before Photo:


No problem with the self tapping screws, but I got stuck with the nuts & bolts through the bulkhead.
As the rest of the family were out, I was missing the extra pair of hands needed to hold a spanner in place.
It was about this time that the skies turned black & I had to start putting everything away again.
At least I was able to start the engine & move the car around the drive before the rain came.

Neighbours: ... everybody needs good neighbours ...
In addition to weather delays, as soon as I start work outside, all my neighbours seem to arrive for a chat.
Clearly Sammio building is not a common sight around here, so they all want to know what I am doing.
I'd rather keep on everyone's good side for now, as I'm sure I will be making a bit of noise in the future.

Internal Frame:
Initially I wasn't planning to paint the frame until I'd test fitted it to the chassis.
Given the experience of others, there are bound to be some minor adjustments required.
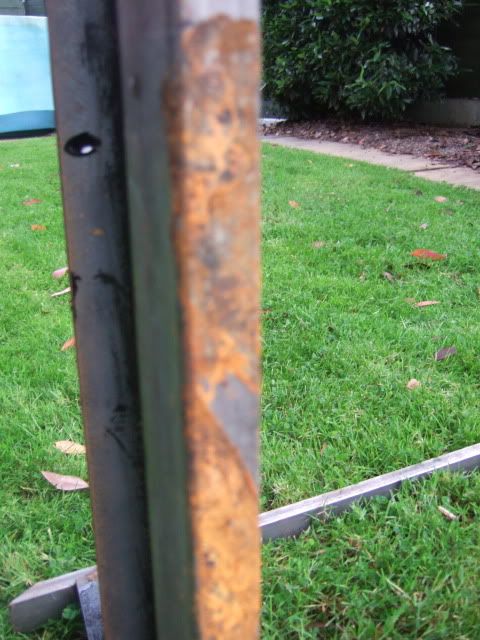
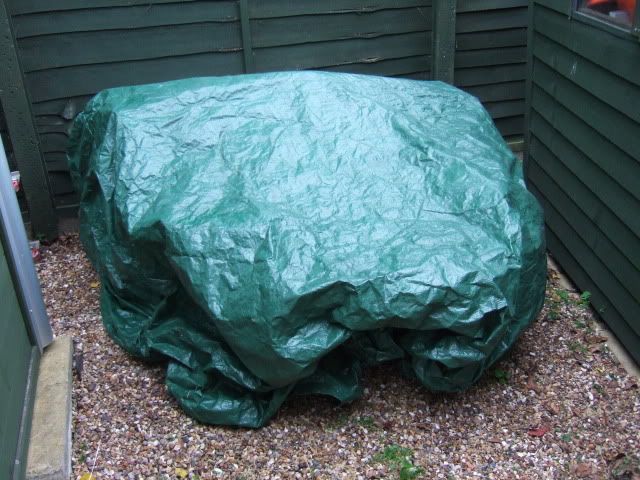
However, as I'm storing it under a cover outside, this means it is rapidly starting to rust. :icon_sad:

So 'Plan B' became clean off this surface rust & paint everything with smooth black Hammerite.
It will not be the end of the world if I have to remove the paint in some areas & repaint if required.
Thankfully this is something both my daughters are happy to help with (one missing from photo).
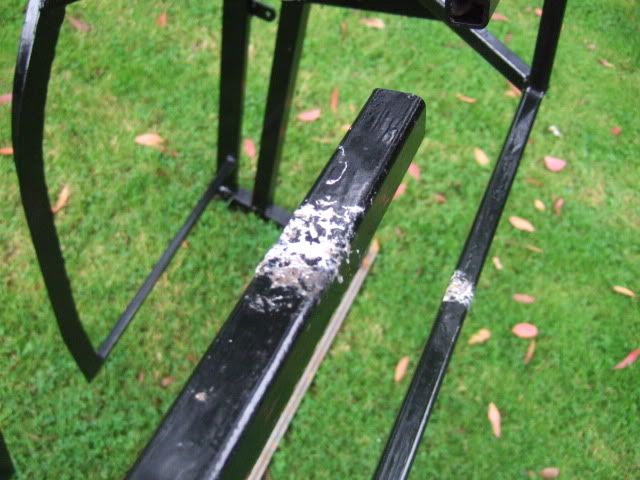
Couldn't cover the frame while the paint was drying, so obviously it was raining in the morning. :ohwell:


QUESTION - Has anyone treated the inside of the framework (as I can see rust inside there too)?

Wiring Loom Planning: - Thankfully something I can do indoors!
I started by simply blowing up my Haynes manual wiring diagram to A3 size at work.
I then highlighted the things I was replacing with new, or removing all together in the Cordite.
E.g. New tail lights & indicators, but no reversing lights, courtesy lights, wind screen wipers, etc.
This left me with a better idea of what wiring I actually needed and now it inter-connects.
( By chance part of this thought process was covered in another forum thread here. )
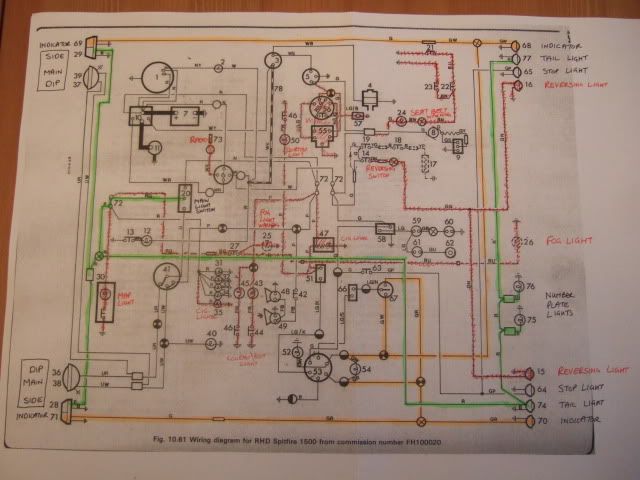


I'd like to say this was part of my thinking ahead approach, but it followed my own stupidity. :rolleyes:
I wanted to test my new lights with my old switches / wiring before I removed the body shell.
At this point I found all the bulbs from my new rear lights were missing (supplier error, bulbs now sent).
Then I couldn't get the LED number plate lights to work despite using the correctly labelled wires. :icon_question:

This was another day when rain stopped play, so I came inside for a proper look at the wiring diagram.
It became clear that they originally connected to the light switch via the Spitfire rear light cluster.
As I'd removed this (and not fitted my new alternatives) no wonder the lights wouldn't work! :frusty:

At this point I abandoned comprehensive testing & hope simply connecting things properly will be enough. :wink:
Although I did just wire the LED's up and connect them directly to the battery as a simple test.
I put them facing the back of the number plate to see how much was lit up and frankly they are rubbish.
I'll reserve final judgement for now until they are wired up with the engine running.
(Excuse the poor photo)


Also I was able to use a domestic 9 volt battery to test the bulbs were working in my new lights.
And I did wire up two brand new car horns that came with my donor & they are working fine.
Although it might take me a while to get the hang of a steering column mounted horn button.

Shopping Update:
My new headlights & all the various bits I needed from Rimmer Bros have arrived (see previous post).
Which brings the total I've spent to date on new parts for my Cordite build to just over £600.
The good news is that I think this covers the bulk of what I need for my planned spartan finish.
Although I'm still considering replacing/upgrading my radiator rather than risk the RadWeld repair.
Note: I will provide a detailed breakdown of everything I have bought at the end of the build.

However, I still have a lot of shopping to do in order to finish the actual construction of the car.
I need to establish the quantities of marine ply, fibre glass, bonding paste, filler, etc. required.
I couldn't believe the size of one of Mister Towed's bonding blobs when he did his body. :shock:
But, as always, he supplied a good explanation of what he was doing and it all made sense.

Until next time, take care, Paul. :)
16 Jul 2012, 10:01pm
Wow, impressed by the methodical approach, it will never catch on! Mind you, given that my donor was already stripped down before I bought it, I'm having to go for the usual 'hit and hope approach! Just started on the loom, interesting when you never saw it fitted!
17 Jul 2012, 5:37am
Good luck with your loom, I planned the same approach with mine - strip out the redundant circuits and add in colour coded new ones as required. That hasn't actually happened though as a previous owner had already taken an axe to the loom and removed and added random wires all over the place. I've managed to get everything working now but it ain't pretty...
17 Jul 2012, 9:45am
Looking good!

I wasn't intending on doing anything to my wiring loom, but the more i tried to get things working the more wonderful modifications i stumbled across from the last 43+ years the car has been on the road.

I ended up completley dismantling, rewiring, repairing and the reassembling my loom and having seen some of the amazing "twist the wires together and prey" mods that had been done on it over the years, i'm damn glad i did!
21 Jul 2012, 6:42pm
Amazing what you can get done when the rain holds off for a few hours...

Framework Update:
Apparently when I left the frame outside for the paint to dry it was hit by more than just rain...


Hopefully this "offering" from above is a sign of good luck for my build. :wink:

Body Shell - Part 1:
I've finally reached the point of new return in the process of dismantling my donor.
I can't remove the body shell without disconnecting all the things that are currently working fine.
So I fired up the engine & drove the car inside my drive for the last time as a Spitfire (or sorts).
My girls wanted "a lift", so after one took this photo, they both climbed on board. :cool:
As I don't need to restore anything, I will try to get everything reconnected & working again ASAP.


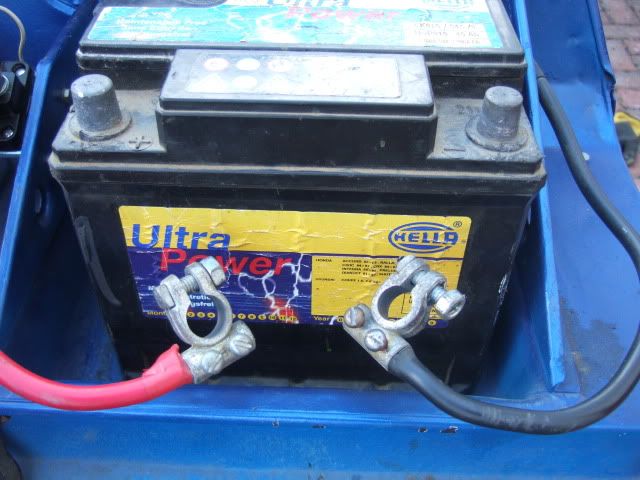
Reading about WorldClassAccident's fire reminded me to start by disconnecting the battery!
Although creating a similar space for the battery in the Cordite bulkhead is still on the "to do" list.
( I've already got a few ideas after seeing how DonnySoutherner built a box for his. )


My eldest daughter provided the extra hand I needed to hold a spanner on one side of the bulkhead.
This allowed me to work on the other side to remove the bolts holding the gearbox tunnel in place.
There is a small crack in the cover (near brace in photo), but that shouldn't be too hard to fix.
I am currently planning to reuse the Spitfire gearbox cover with the Cordite bulkhead if it fits.
Note: "After" photo was taken just as I finished for the day as I forgot to do it at the time. :rolleyes:


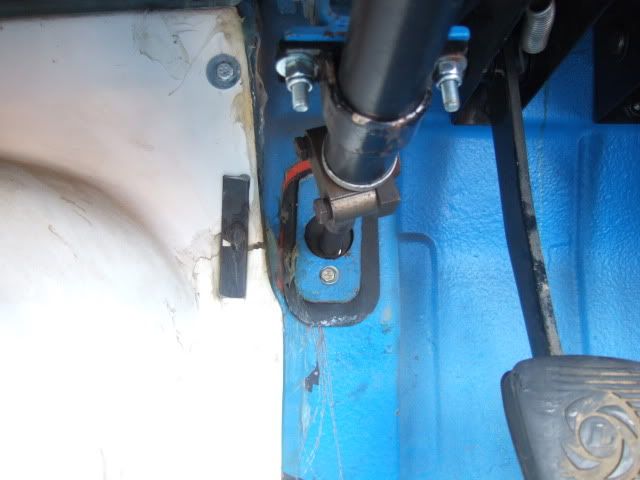
Removing the steering wheel was easy as I'd already discovered the retaining nut was missing.
( A new replacement nut from Rimmer Bros. has already been ordered & delivered )
However, my donor did come with a 14" Moto-Lita three spoke wooden steering wheel. :cool:
So I guess the previous owner started the job of swapping them over, but didn't finish it.

Thankfully all the wires around the steering column are in self contained connecting blocks.
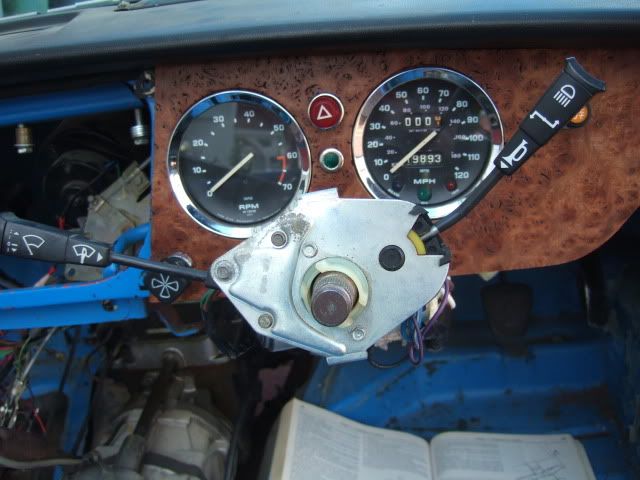
This allowed me to remove the main switch unit intact, will remove wiper switch later.
This gave me better access to remove the final section of the dash board.
I will reuse speedo & rev.counter, so once again I was taking notes & photos + attaching labels.
Removed choke cable after disconnecting it from the carbs. & indicator warning light was easy too.

I've got slightly stuck on the hazard warning light as I can't see what keeps it in the dash.
( I'll have another look at the manual at some point as it can stay in the dash for now )
I disconnected the heater controls, but couldn't see how to get the driver's side vent out.
Although as I look closely at the size of the heater, I need to confirm I'm going to use one.
( My initial thought was it would be handy for slow moving traffic if the engine over heated )


I then switched to the engine bay to remove the rest of the wiring loom.
Again, more photos and notes, but this was actually pretty straight forward.
Although I do keep finding random wires not connected to anything. :icon_evil:
So I have marked them as such and will double check against the wiring diagram later.
Eventually I was able to pull the whole loom out and that is a scary sight...


At this point I did a bit of "tidying up" as I want to get a good price for the body shell.
This black underlay / sound proofing stuff was all over the cabin floor & very messy.
One corner had a, still wet, paint stripping 'blob' underneath it which was a pain to get off.
I want to ensure any buyer can see the metal work is very sound all round.
Although I've found a few rough areas which were simply covered by interior trim. :mmph:


Next Steps:
With a bit of luck I'll get a few more hours on the car tomorrow too.
At some point I need to pick up some wheel ramps from a mate which might help.
I'm actually pleased with how quickly I've got to this stage in actual hours worked.
Unfortunately the weather has stretched those few hours across many weeks. :ohwell:

Still, progress is progress, so until next time, cheers, Paul. :)

Replies:
DonnySoutherner - My methodical approach is driven by a deep rooted fear of messing it all up!
Which is why I owe you some beer Simon for blazing a trail for me to follow with your own build thread.
Mister Towed & DaveCymru - There are signs of "home improvements" in my wiring too. :icon_evil:
So I will remove all the wrapping and have a proper look at everything when I thin the loom out.
22 Jul 2012, 7:20pm
A tummy bug struck half my family down today. :icon_sad:
So all car plans for the day went out of the window as they come first.
But I did manage to crab a couple of hours in the early evening...

Body Shell - Part 2:
I removed my rear twin tail pipes which was pretty straight forward.
A couple of bolts in the boot held the bracket below in place.
I will give them a bit more of a clean before refitting, but they still look good. :cool:
I left the rest of the exhaust in place & used low tech string as a temporary support.


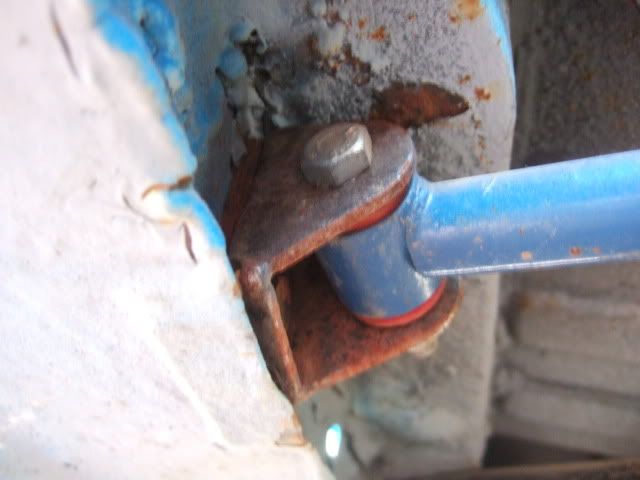
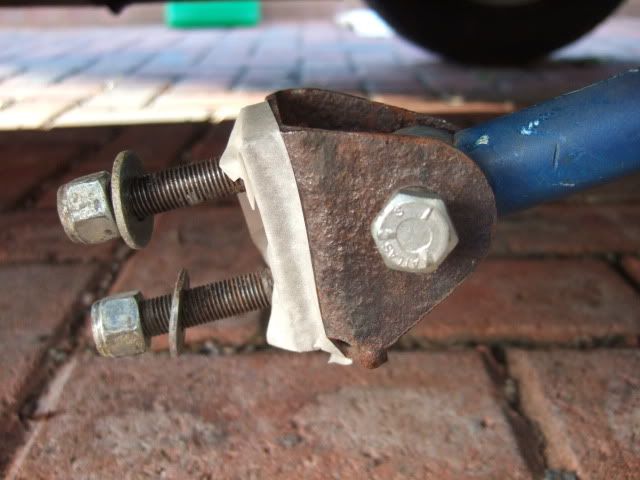
The rear suspension radius arms* are bolted to the body shell via detachable brackets.
Thankfully I'd seen a photo of how DonnySoutherner had reused these on his Cordite frame.
So I knew I had to remove & keep all these parts and not leave anything with the body shell.
Nice to see that the bushes have all been renewed by the previous owner, one less thing to do.
I've simply reattached the brackets & taped the shims in place so I don't lose anything.
* Credit to Haynes manual for correct technical term, as I have no idea what I am talking about! :rolleyes:


I just had time to remove both the clutch and brake pedals.
Simply remove split pin from end of pedal and then 8 bolts from the bulk head.
No need to label them as they already have "C" & B" stamped in them.


Next Steps:
Continue with the body shell and remove the following:
- Gas pedal
- Petrol tank
- Hand brake
- Steering column
I think that will leave me with just the retaining bolts to remove.

I will also get in contact with my 4 potential buyers and see if they are still interested.
As it would be good to get the shell sold and out of the way as soon as possible.

Take care, Paul. :)

PS
Found out the hazard warning light switch simply unscrews to allow removal from dash. :cool: