MadaboutKitcars

This is a read-only archive of the old Madabout Kitcars forum. New posts and replies are no longer possible, but every thread is still here to browse and read.

Tony's Build Thread....

26 Feb 2012, 8:54pm
Looking great.
26 Feb 2012, 9:13pm
Nice! i'm jealous of your chassis :)
29 Feb 2012, 5:26pm
I have eventually got round to updating my website! [url]www.mysammiospyder.co.uk[/url]

I am setting myself a target of getting the chassis rolling this weekend, although we have some friends coming - one of whom is a car sprayer, so I may be getting him drunk enough to agree to paint my Spyder. We had a similar situation 3 years ago when he agreed to paint my Herald 13/60 :thumb::becky:
9 Mar 2012, 10:03am
So I have not quite hit my target of getting the chassis rolling this week, as work seemed to get in the way!

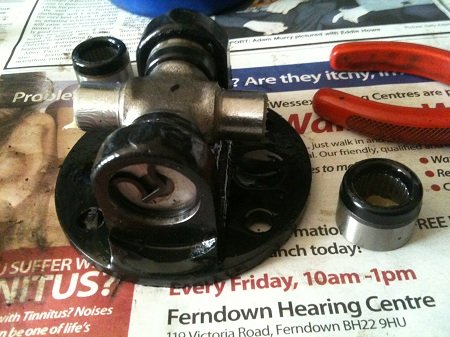
I did manage to get all the new UJ's fitted....

IMG_0837x450.jpg


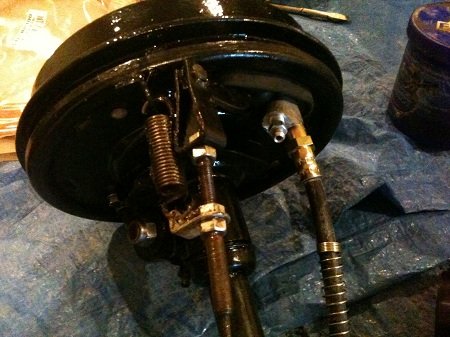
And built up the rear hubs and axles.....

IMG_0838x450.jpg


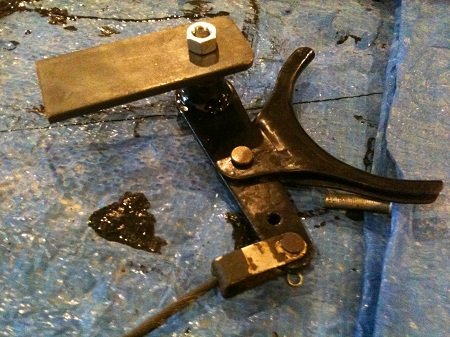
And then I played with the handbrake assembly, and made up a bracket to weld onto the frame this weekend. I will weld the nut on so I don't need spanners etc under the car to remove it in future!

IMG_0839x450.jpg


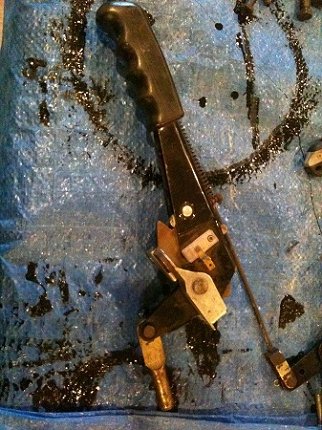
I am going to use a TR7 handbrake assembly as it has easy mounting plates and the connection is below. I am going to make up some easy way of adjusting the handbrake, but haven't though that far ahead yet! I will have a play when the frame is mounted.

IMG_0840x450.jpg


SO hopefully this weekend I will :

1. Get the chassis rolling!
2. Get the floorpans made
3. Trial fit the frame and have a look at the petrol tank mountings....
11 Mar 2012, 7:54pm
Well, this weekend moved things on a-pace! :flame:

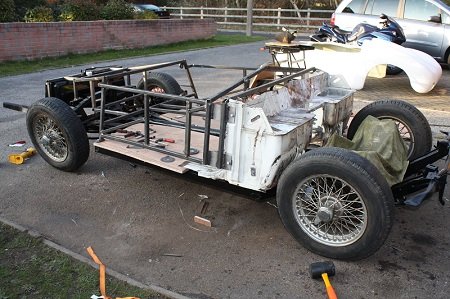
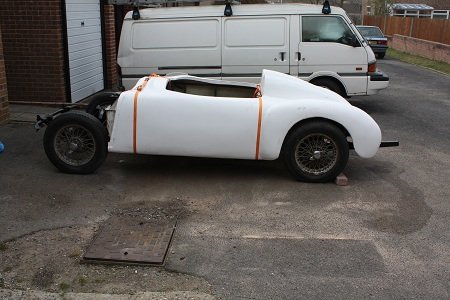
I got the chassis rolling and tried on the frame for size....

Attachment could not be found in the archived database.


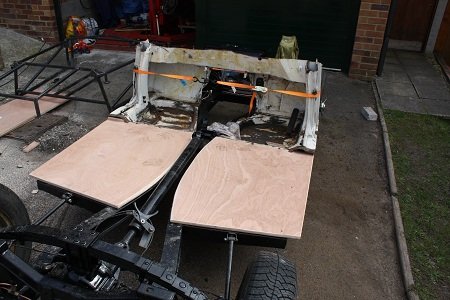
I then cut the floorboards (anyone interested I got 18 exterior plywood which i will coat with resin and paint in due course - B&Q I got them to cut a 8'4' sheet into two bits 950mm x 700mm which required just a but of shaping and trimming.) The bits of wood I had left over will be used for the storage bin and other bits around the car so it won't get wasted!

IMG_4733x450.jpg


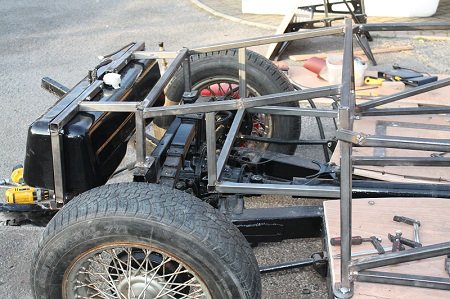
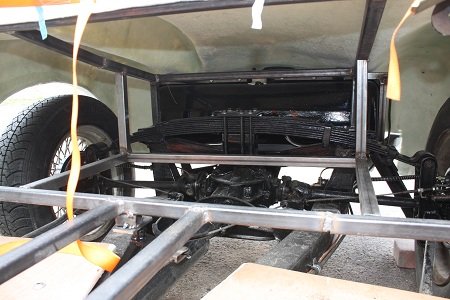
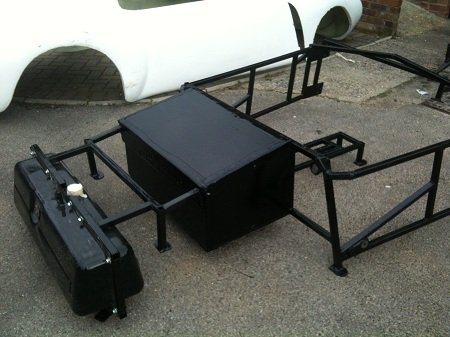
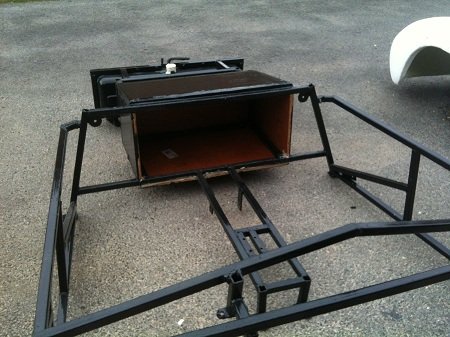
I then made up the frame for the petrol tank and a storage compartment behind the rear seats.... Everything is tack welded as my welder was playing us so I will get a bigger one for next weekend


IMG_4762x450.jpg


I then cut the frame for the door pockets I want to put in and mounted the handbrake pivot and handbrake lever - so that works now too!

IMG_4763x450.jpg


So all in all a good weekends work and several trial fits of the body to get things looking right. I did have to cut and tweak the frame to fit, although I kind of expected to do a bit of fiddling, so that wasn't a big trauma.

I still have the seat belt mounts to sort out and the welding to complete, but I am certainly where I wanted to be at this stage, so I am chuffed with the progress.

Next weekend I want to get all the welding done, and the storage bin lined, which will also form the inner wheel arches at the rear. I am going to do a lot of that while the body is off. And I am going to start on the wiring!
11 Mar 2012, 9:23pm
NICE WORK Tony .....

keep it up !
12 Mar 2012, 11:51am
Great job and nice pic's. That's exactly where I'm going to put my fuel tank so it will be great reference material for me. :love:
12 Mar 2012, 3:23pm
Towed, the rear frame on mine stands on two "feet" that will bolt onto the rear chassis struts, so as not to make any changes to the chassis for inspection purposes.

I did make mine a little high and have just noticed that the body rests on it at the back. However, that said, I am using 15" wheels and a 80mm lowering block so it gives just enough clearance IMHO. The suspension needs to settle down a bit and obviously with a full tank of fuel and my lardy frame in it, it will probably look slammed!

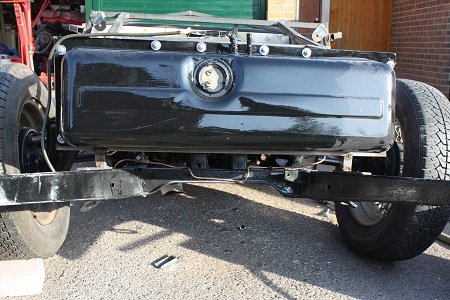
The tank is mounted with the sender facing backwards so I can change it at a later date if it buggers up and I will weld the bolts in so it is easy to refit tank by "hanging" it on the bolts before putting the nuts on! The tank should just come out the back underneath should I ever need to change it! I will coat it liberally in waxoly and it has had 3 thick coats of chassis paint so hopefully that won't be necessary in my lifetime!!

Here are a couple of extra shots for you...

IMG_4759x450.jpg


IMG_4771x450.jpg


IMG_4774x450.jpg


IMG_4781x450.jpg
12 Mar 2012, 11:13pm
Looks great and leaves a nice big luggage bay by the look of it. Will be copying!
13 Mar 2012, 10:06am
That is such a cool mod, nice!


Are you going to create a "boot" in the space you've now created?

If so then remember to design it so that you can get to the bolts on top of the leaf spring in case you ever need to get the diff out, although fingers crossed you never will :) The only reason i mention this, is because i was under my car the weekend and it's only now that it's all together i realise that a few of my design decisions won't make for the most accessible solution should things go wrong :)
13 Mar 2012, 10:39am
davecymru wrote:
That is such a cool mod, nice!


Are you going to create a "boot" in the space you've now created?

If so then remember to design it so that you can get to the bolts on top of the leaf spring in case you ever need to get the diff out, although fingers crossed you never will :) The only reason i mention this, is because i was under my car the weekend and it's only now that it's all together i realise that a few of my design decisions won't make for the most accessible solution should things go wrong :)


dave, the luggage space will be accessible via a hinged lockable panel in the cockpit. There will be an access hatch at the rear to get to the spring bolts, but they will also be accessible with the petrol tank removed - which is simply bolted in and will come out underneath at the rear easy enough! I am not putting in a bootlid or access panel in the body, don't want to ruin the lines.

I am trying to think ahead but will surely have fogotten something! :frusty:

Just brought my floorpans in now and gave them a coat of fibreglass resin to waterproof them. Several coats of paint this week to them and the frame (which will be fully weleded in the next few days) and I will be ready to get the body bonded on! :biggrin1:

Engine hopefully in too at the weekend!:faint2:
13 Mar 2012, 11:43am
Wow, you're really making some progress now and we seem to have the same ideas when it comes to luggage space and access to bits that might need replacing one day. Looking forward to your next update. :biggrin1:
13 Mar 2012, 2:41pm
Hi, great progress, really enjoy the updates and photos. Keeping me sane at the mo as banned from stripping our donor until the DIY is done.
13 Mar 2012, 6:21pm
froggyman wrote:
Hi, great progress, really enjoy the updates and photos. Keeping me sane at the mo as banned from stripping our donor until the DIY is done.


I am glad it's keeping you going. I must admit ot being a bit hooked on the build at the moment. I am either pottering in the garage cleaning something, or planning the next part of the build on the PC. I have made a list of the bits I will need to buy to finish the build, so roll on pay-day!

The frame has now been fully welded, including new seatbelt mounts and has had the first coat of black chassis paint applied today. The floorpans also got coated in fibreglass resin and a coat of black paint on the underside. I will do the top side when I have bonded everything in.

I am really aiming to get the body on and bonded this weekend, so I will also need to look at the wiring. Engine in next weekend, then off to get the registration doc changed by the end of the month hopefully!

PS I have just updated my website with more photos.... [url]www.mysammiospyder.co.uk[/url]
15 Mar 2012, 8:23pm
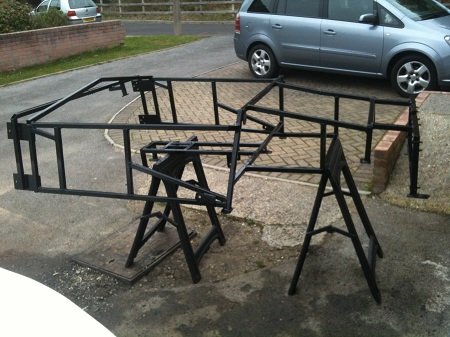
The last couple of days, I have managed to spend the early evening welding up my modified frame and getting it painted...

IMG_0874x450.jpg


I welded in some seatbelt mountings as well while I was at it. :idea:

I also got my engine enamel painted and got most of the ancillaries on my table with a coat of paint on, so it will hopefully all be ready to go back on at the weekend. I really want to get the engine in this weekend! :biggrin1:

I also stripped down the old wiring loom and won a couple of old ones on fleabay so I can modify them to suit my needs. My aim is to get the wiring done while the body is off so it is a whole lot easier to do! :hippie:
Roll on the weekend - although the weather looks pretty crap so may scupper my plans totally!!
15 Mar 2012, 8:26pm
How have you tackled the seat belt mounts?

I'm wanting to ditch the standard brackets and reposition them somewhere else and I'm open to ideas. :becky:
15 Mar 2012, 9:00pm
Mr T, I am going to use the standard 3-point belts (due to current budget constraints) and so will use the top one that Gary has already welded on, and then I have added the two lower ones on like the photos below.

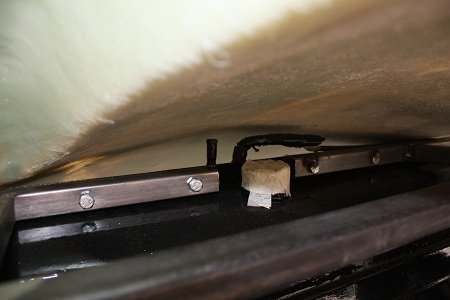
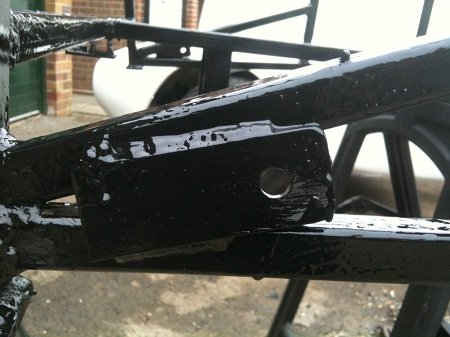
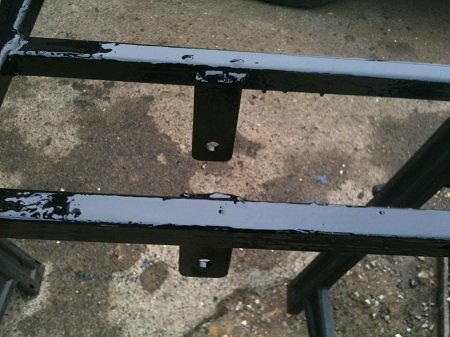
My chassis is a 1964 Mk1 so it does not have the inner seat belt mounts so I have had to make some up with 50mmx5mm flat bar. I will weld nuts on the back of them before the body goes on, so the belts can all be removed from the inside with a single spanner. Another factor was that I wanted to have a tonneau cover so I didn't want them above the cockpit line like Davecymru's (although I do like the look of them!)

IMG_0878x450.jpg


IMG_0879x450.jpg
15 Mar 2012, 9:20pm
Looking nice. Methinks I'll be doing something similar as I'm sticking with three point belts myself and I think the standard chassis belt mounts will be too far forward for my MGB seats.

I'm also having a tonneau cover, WHEN IT BLOODY ARRIVES?????

Sorry, but I placed the order and paid before Christmas and I still don't have it. Gary, are you there? :icon_confused:
15 Mar 2012, 10:13pm
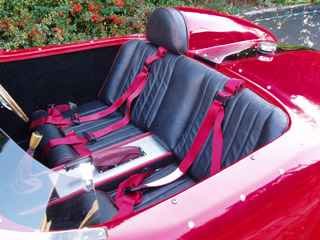
I am going to build my own seats :scared:

Well that's the plan until it all goes wrong. I really like the look of this one and so that is what i want to do. My seat back will hinge forwards to gain access to the luggage compartment.

IMG_0618.JPG


I am intending to glue various layers of foam and shape them with a leccy carving knife and then get 'er indoors to make the covers. :biggrin1: She did a good job on the Herald ones 3 years ago! :hippie:
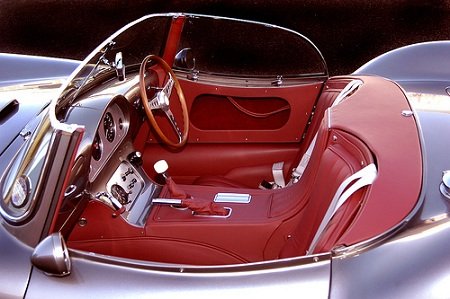
I would love it to turn out like this, but methinks it won't quite be up to this standard!!

2218256419_71a574ff79.jpg


PS I am seeing Gary on Saturday so I will see where your Tonneau cover is!
17 Mar 2012, 8:14pm
Quick update while I have a beer! :nod:

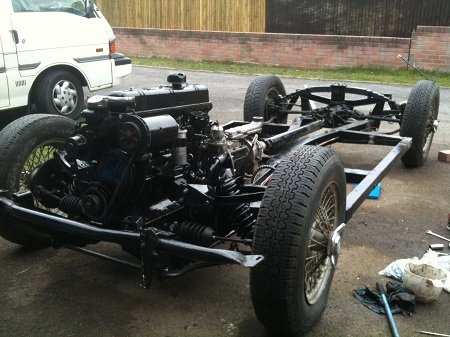
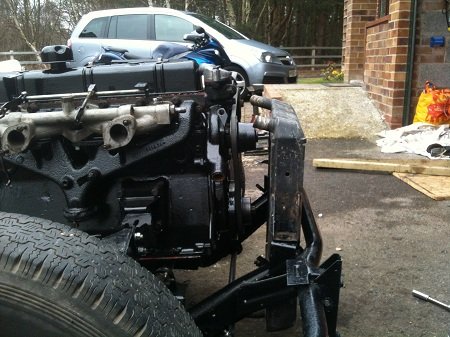
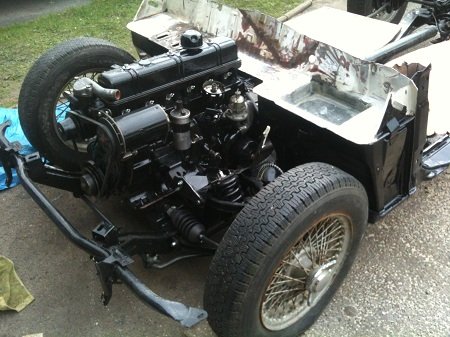
I have been painting the engine bits this week in the evenings and last night I built up the engine in the garage, and dropped it into the frame this morning!

IMG_0892x450.jpg


I then had a go at lowering my standard Vitesse radiator, inspired by Davecmyri (thanks Dave! :thumb: )

IMG_0896x450.jpg


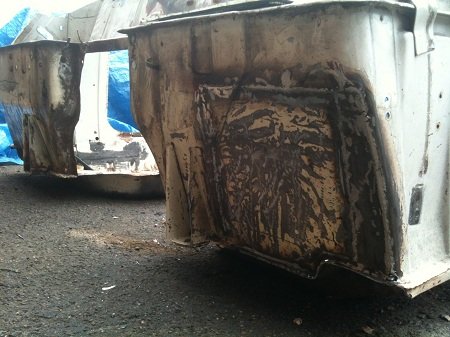
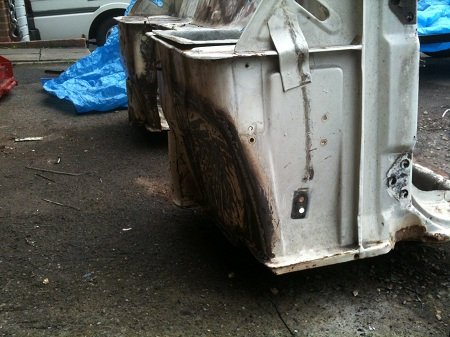
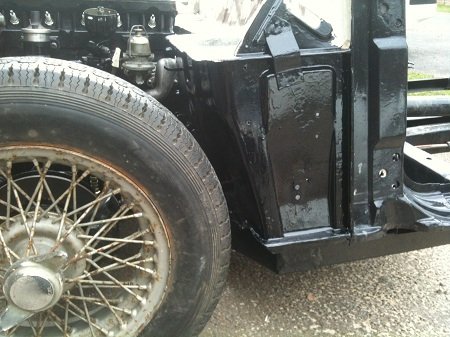
Having got on so well today and with no rain (which contradicted the forecast somewhat) I decided to have a go at recessing the bulkhead for the larger wheels/tyres. I wanted to try and keep it looking pretty standard, and so I opted to cut and weld the recess as opposed to just hitting it with a large hammer (although the latter would have probably had a similer effect, and a lot quicker!)

Anyway, this is where I ended up.

IMG_0901x450.jpg


IMG_0903x450.jpg


I also welded up a couple of other holes in the bulkehead and have given it a coat of chassis black. Will give it another coat tomorrow and start on boarding out the luggage bay
17 Mar 2012, 9:36pm
Coming along nicely, won't be long before it's roadworthy!
17 Mar 2012, 10:10pm
Mister Towed wrote:
Coming along nicely, won't be long before it's roadworthy!


I am having to pace myself due to funds not allowing me a quick build. I had planned a four month project, so I am at 8 weeks at the moment, and about halfway through.

Need to start thinking about the body on and getting it registered, although I will probably do that after easter. I want to get the wiring and heater sorted first before I put the body on!
18 Mar 2012, 8:26am
tlrtone wrote:
I am having to pace myself due to funds not allowing me a quick build. I had planned a four month project, so I am at 8 weeks at the moment, and about halfway through.

Need to start thinking about the body on and getting it registered, although I will probably do that after easter. I want to get the wiring and heater sorted first before I put the body on!


Sounds familiar. It's not so much the funding holding my build back - although I blew my original budget of £3k out of the water a long time ago now I have already bought just about everything I need to finish the job apart from the paint and associated materials.

For me it's the time it's taken to get the chassis and bulkhead ready for the road. I rather unfortunately made the mistake of buying a donor with a solid body and rotten chassis, completely the opposite of what you want, but at least I now know that everything's solid underneath.

My original deadline was mid January. Hmm, now looking at early June although the next stages, fitting the frame, floor and body do appear to be relatively quick jobs judging by the speed of some people's builds who started with a better base car.

Trouble with me is that, where engineering is concerned, I'm a bit of a perfectionist I'm afraid. My original plan of chucking a fun car together quickly is turning into a major detailing exercise. The reality is that I want this car to be as good as I can get it so I can enjoy it for years to come.

From what I've seen of your car so far we seem to share the same philosophy and I'm looking forward to seeing your finished car on the road.

Carry on Sammio(ing). :becky:
18 Mar 2012, 6:12pm
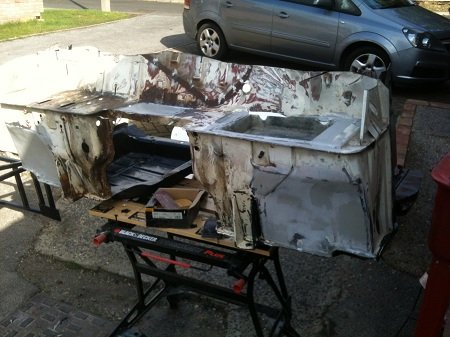
I managed to get the bulkhead finished and I am pleased with the results so far.

IMG_0917x450.jpg


IMG_0929x450.jpg


IMG_0935x450.jpg
18 Mar 2012, 6:17pm
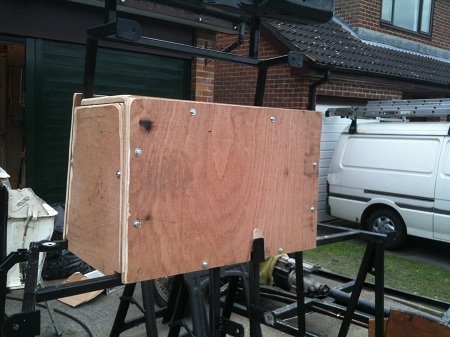
And I also got my luggage box finished. 18mm ply left over from the 8x4 sheet I got for the floorpans.

I sealed all the edges and then painted fibreglass resin all over inside and out with some fibreglass tape on the edges for additional strength. The boards are bolted to the frame with RivNuts, so should hold anything we are likely to put in there! I then covered the outside with chassis black to give it even more waterproofing!

IMG_0918x450.jpg


IMG_0924x450.jpg


IMG_0923x450.jpg