This is a read-only archive of the old Madabout Kitcars forum. New posts and replies are no longer possible, but every thread is still here to browse and read.
Now I'm just about done i know i've not done things exactly the way Gary would have and I'm aware of a few boo-boo's i've made that are now "design features" but any issues i've encountered i've always been ready to simply give-it-a-go and figure out how i want to resolve them with the skills i have.
I think as Gary suggests, our cars are so old and there are so many variations and changes that have been made over the years, no two donors are ever going to be identical and so the challenges we face will all be slightly different. In my case it turned out that my 'Vitesse' was actually a Herald 13/60 with a GT6 engine and box and Vitesse suspension, breaks and other bits.
So when i placed my shell on and it rested fine on the bulkhead but the front end sat slightly too high for the shell to be able to wrap under the front of the chassis rails. I simply assumed this was the way it was designed and i worked with it. I now know different, but you'll only ever know, if you're in the know, if you know what i mean?
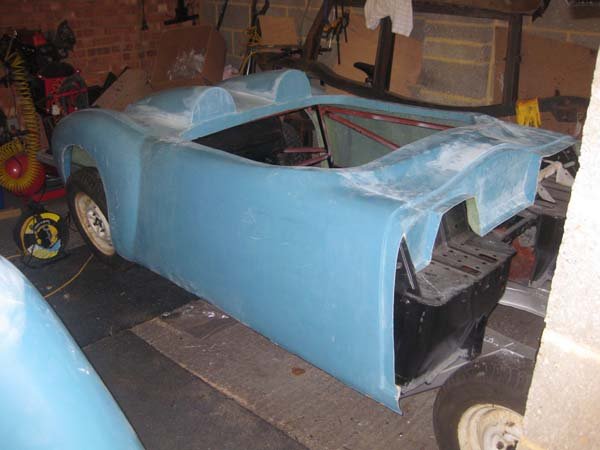
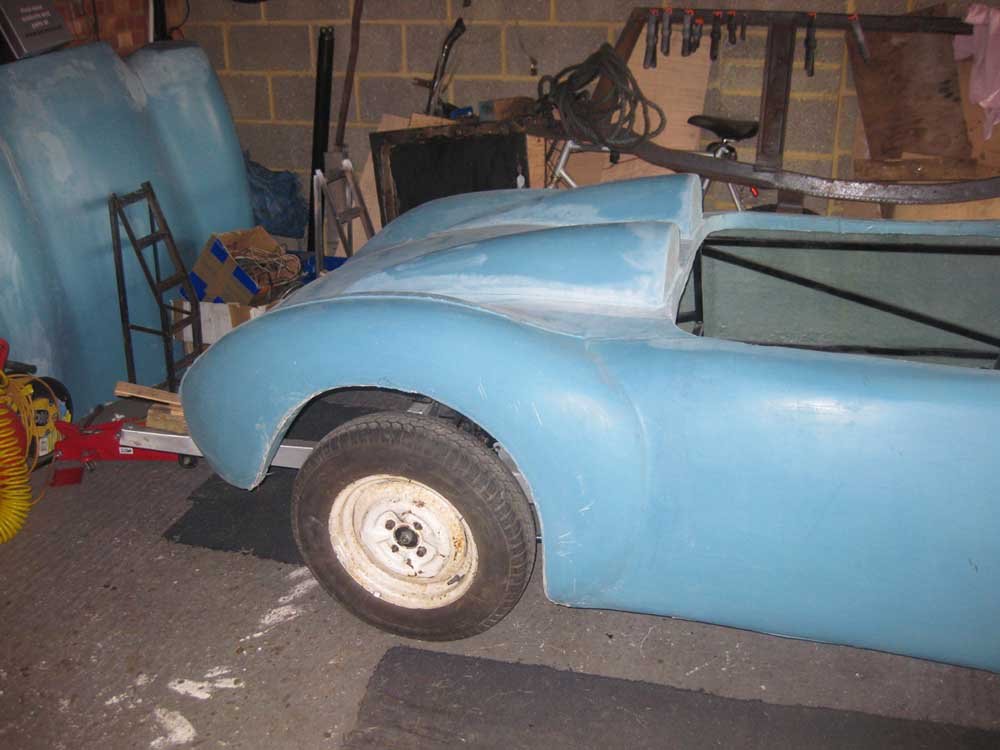
Managed to do a trial fit of the main body shell today.
Cockpit seems to be in the right position against the front and rear parts of the frame.
But the offside front of the shell seems to be sitting a bit high.
Attachment “Body 007.jpg” from the original forum could not be reliably recovered.
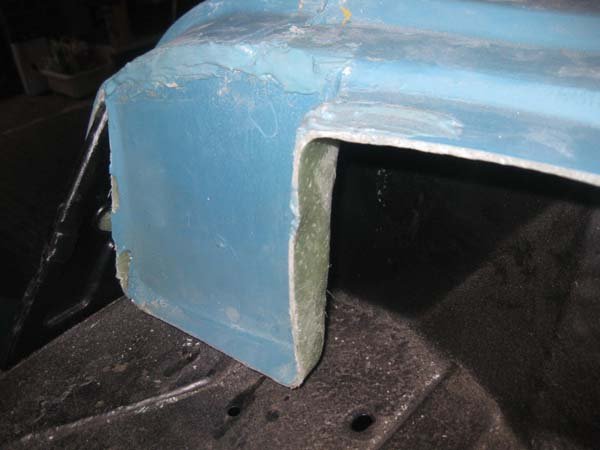
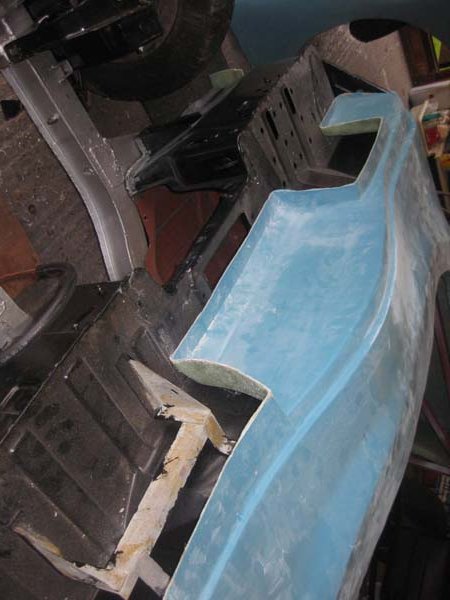
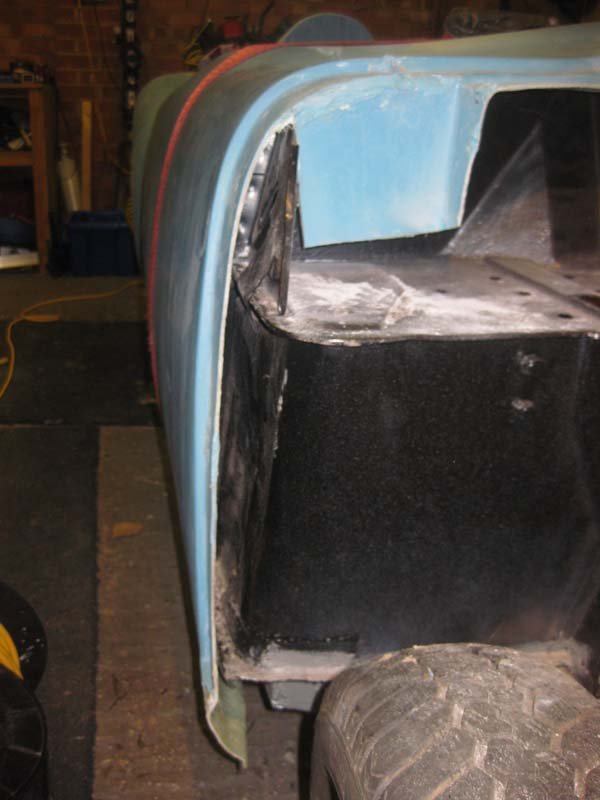
The web on the left hand side of the photo below is supporting the body and so I will take some height of this web with the angle grider. It is difficult to see on this photo but this fibreglass lip is about 1" above the bulkhead and there is a large 2" gap behind it.
The lip in the middle of the shell (ie where the heater used to be) is flush against both the horizontal and vertical faces of the bulkhead.
Mine was the same - Higher on the drivers side, in order to drop it down I took the following steps
Took the corners off my frame as the body was grounding out on these,
Took the foot of the casting in your fourth photo and took the top off the metal that sits into the moulding (Where the bonnet stops used to be )on the drivers side.
Now the body fits down to the side rail, see latest pics in Stewarts build.
Cheers Psycho
I have made a few 'adjustments' to the web on the offside of the bulkhead and also the foot of the bodyshell that sits next to the master cylinder. Bodyshell now looks to fit well on both sides.
Attachment “BodyFit 003.jpg” from the original forum could not be reliably recovered.
Attachment “BodyFit 002.jpg” from the original forum could not be reliably recovered.
So next stage is to get the engine/gerabox into place and adjust the front springs. Then off to VOSA to get the V5 changed.
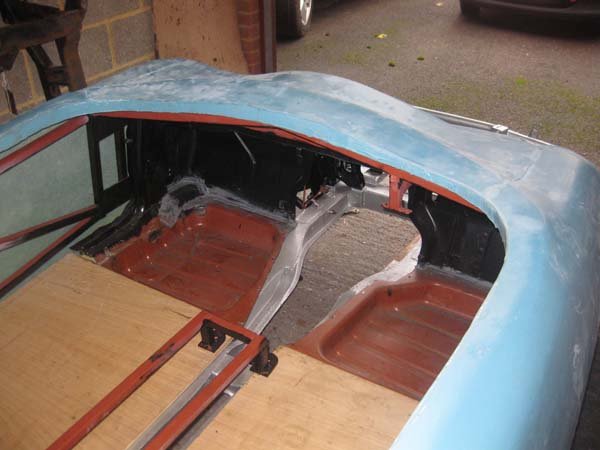
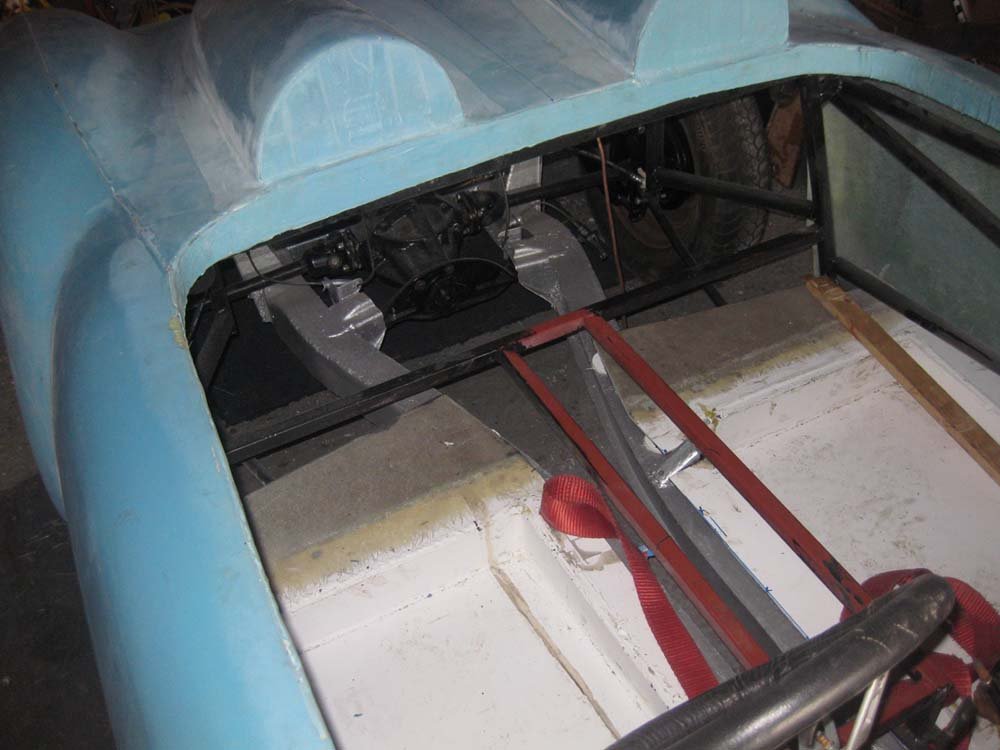
Just got around to bolting up the plywood floors to the flange on the rear of both floorpans.
I have put my floors on top of the metal flange which, itself, is sitting directly onto the chassis. I know that on the Herald there was a rubber strip between the flange and the chassis, but don't want to raise the plywood floors any higher off the chassis.
Wondering whether other builders have put the plywood underneath the floorpan flange so that it sits straight onto the chassis and is nice and flat?
What is the perceived wisdom out there? Plywood on top or underneath?
Crikey, had to go and check that... funny how soon you forget.
We put our plywood on top of the rearmost part of the flange, but set the plywood down onto strip rubber to isolate it from some of the chassis vibration.
Then through-bolted along the flange in three places, with partially countersunk washers let into the plywood to lose the bolt heads flush with the floor.
Mine is on top for max support as are most I believe, not a problem if you are careful with you choice of seats. The alternative being steal drop pans if you aren't vertically challenged like me...
Pops
My original ply floorpans are on top of the chassis rails, with a thick bead of Tigerseal between them and the chassis and then bolted in place as well.
But seeing as my legs were designed a bit long to fit the Sammio, i did chop a hole in the middle of the ply and fit a lowering pan, the bottom of which sits flush with the bottom edge of the chassis rail.
I know that another alternative is that Trevor had some small angle brackets welded on the bottom edge of the chassis rails so that his wooden floors sat lower naturally, if that helps?
Just finishing-off a few jobs before the body goes on for the final time.
Fitted the steering column tonight. In addition to the column support that bolts to the frame, there is another bracket on the column that looks as if it might have been bolted to the bulkhead in the past. But as it does not line up directly with any matching hole on the bulkhead I am a bit stumped. Can anyone advise please?
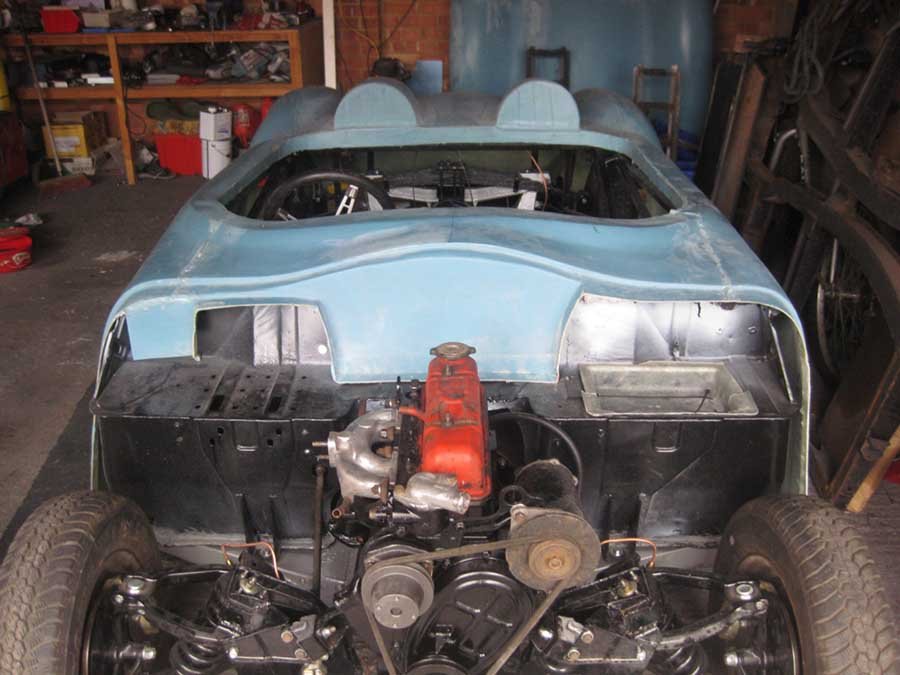
Having had to 'cut and shut' my outriggers to get the chassis true, I have fitted a pair of Gary's new floorpans and put the engine in place to see how the chassis now sits with the body rested in place. Photos below.
Just wondering whether there is an optimum test as regards levelling the body 'fore & aft' and would be grateful for any lessons learned by someone who is ahead of me.
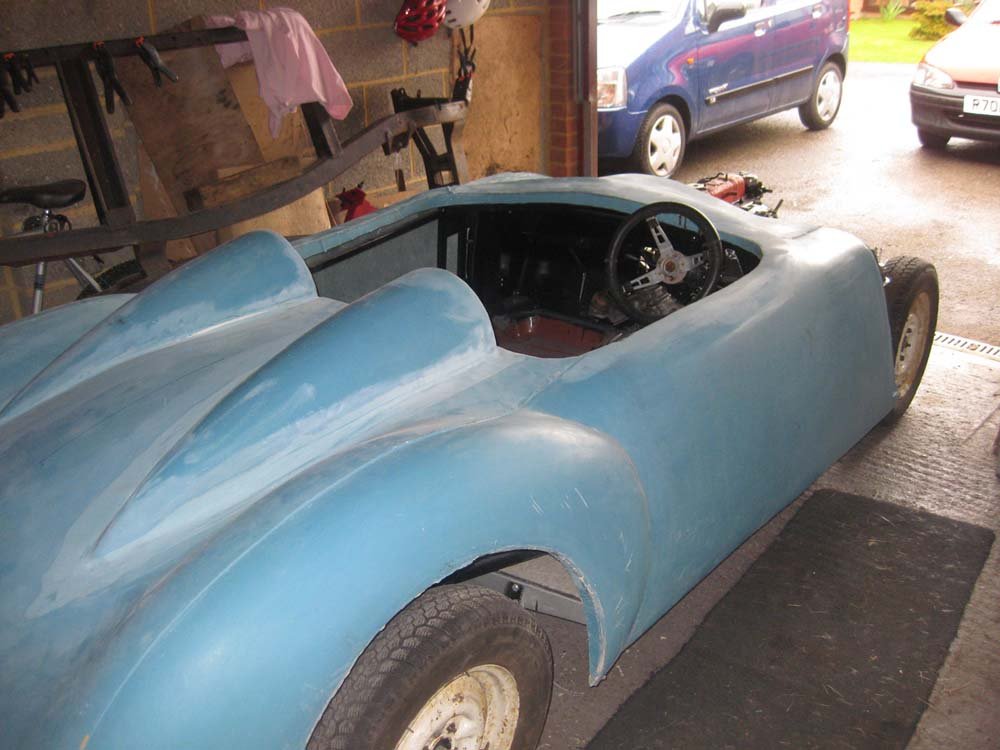
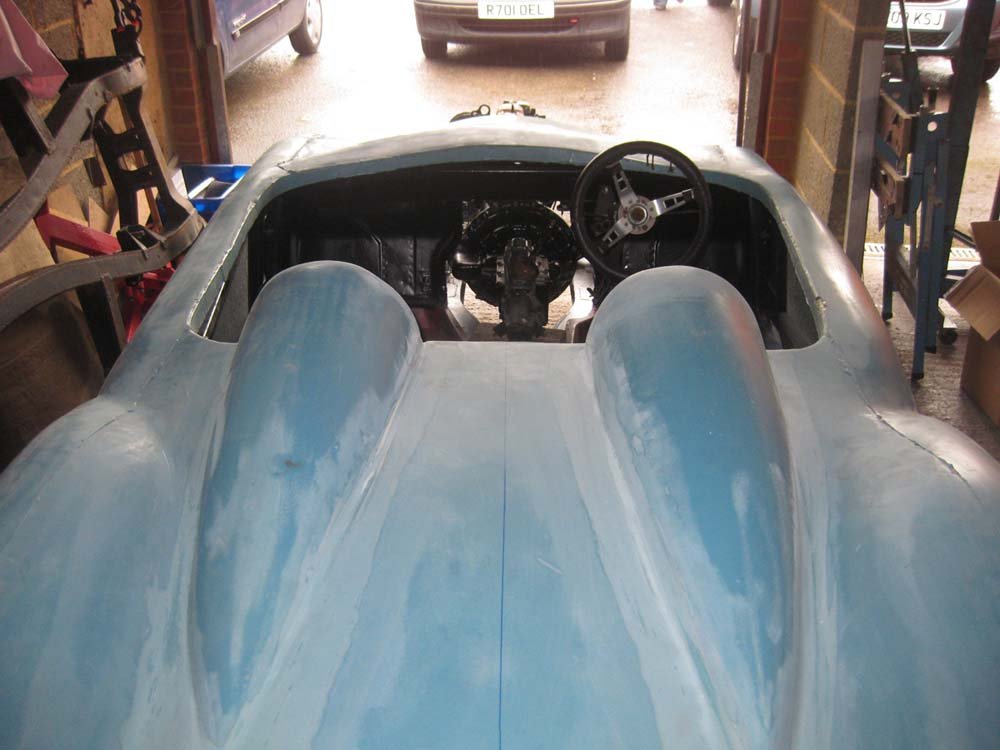
I am assuming that the front of the body is set by the ledge which sits on the bulkhead where the cut-out for the heater used to be. But you will see that I have cut some big slots in the back so that I could drop the rear of the cockpit down onto the frame but that looks too low to me as I feel that the sides of the cockpit need to be parallel to the ground. I realise that there will be no single, correct answer but want to avoid any knock-on problems later in the build.
Looking very good Chris. That's a good question about setting the body - will be reaching that stage shortly myself and I am awaiting the answers with eager anticipation.
Hi Chris
I am still test fitting my body, I cut slots in the rear for the outriggers and dropped the body until it rested on the framework, at the front it is resting on the lip in the centre, however i notice tonight it is slightly higher passenger side so will remove the lip to set it down slightly.
Are you running standard suspension? as your body is sitting higher at the back than mine. I will level mine off by dropping the front suspension a little.
Have twin exhausts at the rear with abut 4 inch clearance at the boxes.
I have Gary's lowering block on the back and have cut the same amount voff the front springs as Trevor did.
You have done exactly the same as me 'I cut slots in the rear for the outriggers and dropped the body until it rested on the framework, at the front it is resting on the lip in the centre..'
But I found that this looked wrong as the sides of the body were lower at the back than the front and photos of other builds look like the side edges of the cockpit should be horizontal?
So that is why I have packed the slots for the rear outriggers back out again, to lift the back so that the sides are more horizontal.
Chris, check your shell is true before altering anything else. The bottom edge of mine is horizontal on the passenger side and inclines up towards the front on the dirver's side, and it's not my chassis, bulkhead or frame that's not straight, it's definitely the body.
We bonded our shell onto the framework over Easter weekend. (I actually bought the resin for Easter 2011 - but that's another story!)
We also cut large vertical slots in the back, progressively dropping the tail to get it to 'look right', and ended up packing them back up a lot much as you have in your photo's.
The key thing I feel is to get the fibreglass sill to at least curve in level with, or preferably below, the chassis rails both sides. This is difficult on the front drivers side.
Like you, we cut off the bottom 'foot' of the moulding beside the master cylinders in order to drop the side down a bit, but left the centre moulding as made.
Using two ratchet straps, one across the winscreen area and one at the rear of the cockpit we pulled it all into shape for bonding. The drivers side front was touch and go, but with a bit of metal trimming we did get it just down level with the side of the chassis frame. Passenger side was no problem.
Ahh, it's not just me that's got a problem with the driver's side of the shell not covering the outrigger then...
Nope, mines like that and it all looks fine on the road! I know others who have picked up on that during the shell positioning have cut the bulkhead part down so that it sits flat. But TBH mine is all on the road with the front edge of the body not lipping under the chasis rails and it all looks fine! Well.... to me it does
Nope, mines like that and it all looks fine on the road! I know others who have picked up on that during the shell positioning have cut the bulkhead part down so that it sits flat. But TBH mine is all on the road with the front edge of the body not lipping under the chasis rails and it all looks fine! Well.... to me it does
Yes, that's exactly the issue with mine - the bulkhead is cut level, the chassis is straight and level, I put a spirit level across the cockpit and that's level but the driver's side of the shell doesn't cover the outrigger with the body on. You've got to look pretty hard to spot it though.
I'm going to do some more measuring just to be sure before finally fitting the body, and I might just extend the bottom edge of the body down so it wraps under the outrigger the same as the nearside one does.
I had the same issues with my build. In the end I decided to leave it as it is rather than modify anything to drop it. Like you, I made sure that the cockpit was level, which it was so after painting the chassis black it was hardly noticable even when looking for it.
Agreed, the drivers side on mine only just comes down level with the bottom of the chassis rail. Think mine is a bit lower than Towed because I removed the web from the shell that sits on the bulkhead outboard of the hydraulic master cylinders.
Attachment could not be found in the archived database.
I have also found, like tltone, that the front edge of sill on the passenger side sits 50mm further forward than same edge on the driver's side. So like him I am planning a bit of 'cutting & shutting'.
Attachment could not be found in the archived database.
Attachment could not be found in the archived database.
mister towed .......thats one big smile you have...love the grey and orange strips tooo....
The smile's because that was the first time I'd got the body on. You should've seen the smile I had on my face when Phil J took me out for a run in his finished Triumph 2500 engined Spyder!
As for the grey with orange hoops look, I think it really works...
Have taken some pic's to show the alignment we have ended up with. Not saying it's right, but it was the best we could get without major surgery. I think I am happy with it, see how it compares with yours.
Rear body blocked in place - now bonded as seen.
Passenger side front sill end.
Drivers side front sill end.
Drivers side rear sill end.
Passengers side rear sill end.
Hope this might give others some ideas, even if it is just to say where we have gone horribly wrong.
 but any issues i've encountered i've always been ready to simply give-it-a-go and figure out how i want to resolve them with the skills i have.