MadaboutKitcars

This is a read-only archive of the old Madabout Kitcars forum. New posts and replies are no longer possible, but every thread is still here to browse and read.

Royale Sabre - Take two!

7 Mar 2020, 8:34am
Are you planning to get to Stoneleigh?
7 Mar 2020, 7:45pm
Phaeton wrote:
Are you planning to get to Stoneleigh?


No, I won't be finished for this years show but maybe next year?
12 Mar 2020, 9:17pm
A bit early for Easter bonnets.....

Thanks to all for the positive feedback..........

----------------------------------------------------------------------------

So the next job was to fix the bonnets.
First I fixed the bonnet catches with polished stainless steel m4 screws.

Bonnet Catch by Sabrebuilder, on Flickr
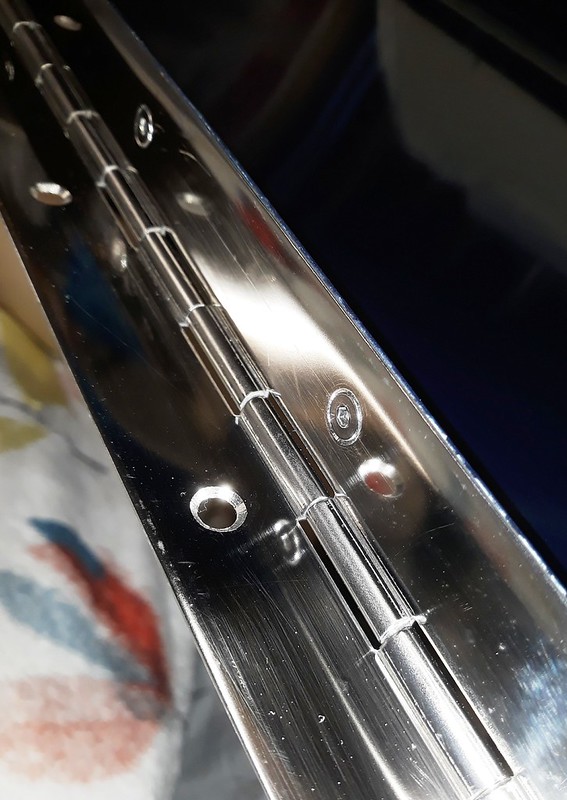
Again, I was lucky to find a complete set of new catches in the large box of parts that came with the car.

The original stainless steel bonnet hinge cleaned up and polished quite well. Royale suggest you pop rivet the hinge to the bonnets but I preferred to use screws and nuts so I counter sunk the holes.

Bonnet Hinge by Sabrebuilder, on Flickr

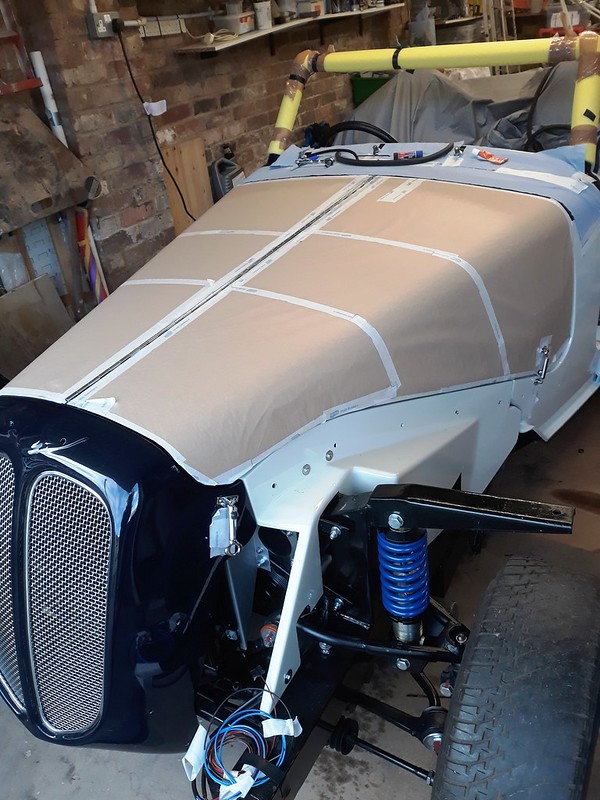
Then, after carefully masking the top side and edges of the first bonnet I attached the hinge.

Bonnet Hinge by Sabrebuilder, on Flickr

Then after masking up the second bonnet I could attach it.

Bonnet Hinge by Sabrebuilder, on Flickr

Here are both bonnets joined together with the hinge. I also fixed the lower bonnet catch plates at this stage.

Bonnets by Sabrebuilder, on Flickr

I then had to fit the bonnet seal which requires careful cutting and is quite tough on the fingers pushing the seal on all the way round.
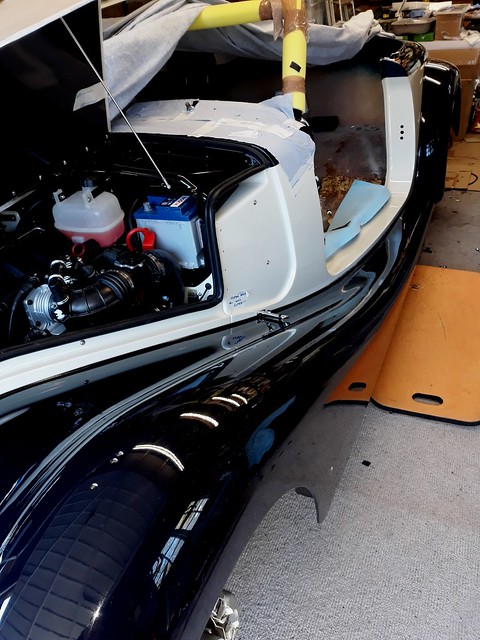
The bonnet seals close off the engine compartment so that only fresh air can enter the heater inlet. (Which is an IVA requirement).

Bonnet Seal by Sabrebuilder, on Flickr

The original builder had fixed the seal to a metal strip that was fixed with pop rivets to the four holes shown here, but it didn't really hold the seal in the right place so I made up new support strips that are made of angle.

Bonnet seal by Sabrebuilder, on Flickr

Then it was just a matter of carefully positioning the bonnets and fixing in place with the hinge end plates.

Bonnets by Sabrebuilder, on Flickr

Next up I've got to make some bonnet stays which unfortunately did not come with my car and weren't in the box of spares either. I've also got to fit the seal that goes along the back edge of the bonnets. Then I hope start on the fitting the front wings.........

.......peter
12 Mar 2020, 11:35pm
Nice work as usual!
25 Mar 2020, 8:06pm
Stay awhile.........

Thanks, Jack.
----------------------------------------------------------------------

This week I've been working on designing and making some bonnet stays.
So far I've come up with this...........

Bonnet stay by Sabrebuilder, on Flickr

The top mounting is designed to be 'windproof'. The stay doesn't fall out when the wind lifts the bonnet.

Bonnet stay top by Sabrebuilder, on Flickr

And here is the lower mount....

Bonnet stay bottom by Sabrebuilder, on Flickr

I'd like to get the parts plated but that will have to wait for another day.
Not yet sure how to secure the stays when not in use so the design may evolve a bit.
Now to make another one for the other side........

..........peter
26 Mar 2020, 6:19am
molleur wrote:
Nice work as usual!


+1 :cool:
26 Mar 2020, 8:18pm
Winging it....

Paul L wrote:
+1 :cool:

Thanks Paul.

------------------------------------------------------------

I was bit bored with bonnet stays so, taking advantage of the warm spring sunshine here today, I drove the car out of the garage so that I could retrieve some of the body panels from my garage's loft.

IVA status March 2020 by Sabrebuilder, on Flickr

Looking a bit like a hot rod without it's wings and doors :heh::heh:

I could then retrieve some of the body panels from the loft. My wife helped me get the wing down as it's very large and awkward.

Bodywork by Sabrebuilder, on Flickr

I then laid some carpet offcuts on the garage floor and then 'parked' the car as near to the far wall as possible, giving me space to work on the nearside wing. This was the first time I have unwrapped the wing since it was painted last year!

Nearside wing by Sabrebuilder, on Flickr

The camera on my phone has made the wing look a weird shape and I should really go back to using my proper camera.

This shot reminded me of this one..........(taken Sept. 2010)

Wing removal by Sabrebuilder, on Flickr


Now I've just got to fit the wing without scratching it :eusa_whistle:

..............peter
28 Mar 2020, 9:29pm
A little update......

Trial fitting the first wing. I have temporarily fitted the lights to work out the wiring routing under the wing.

First Wing fitting by Sabrebuilder, on Flickr


:biggrin::biggrin::biggrin:

...........peter
28 Mar 2020, 9:55pm
looks fantastic!
3 Apr 2020, 6:35pm
Bonnet stay - take 2....

peterux wrote:
...... my current design causes the stay to rest on the engine cover which doesn't seem right to me as the engine moves slightly.
I need to rethink the bottom mount... :eusa_think:


So the issue with the first version of my bonnet stays is that there is nowhere to clip it when not in use....

Bonnet stay issue by Sabrebuilder, on Flickr

To solve the problem, I have replaced the lower fixing point with an m5 stainless steel ball joint.

Bonnet stay - version 2 by Sabrebuilder, on Flickr

Which means it can swing across and be clipped on a bracket fixed to the side bonnet.

Bonnet stay clip by Sabrebuilder, on Flickr

The bracket for the bonnet stay clip was a bit of a challenge.

Bonnet stay clip bracket by Sabrebuilder, on Flickr
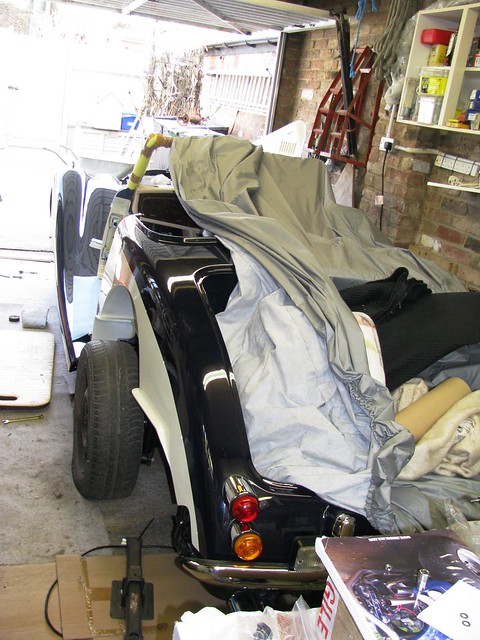
Moving on, I've been fitting the numerous bolts in the front wing (I think there are 15 or so) which takes some ingenious yoga positions to reach some of the nuts and bolts.

Wing fitting by Sabrebuilder, on Flickr
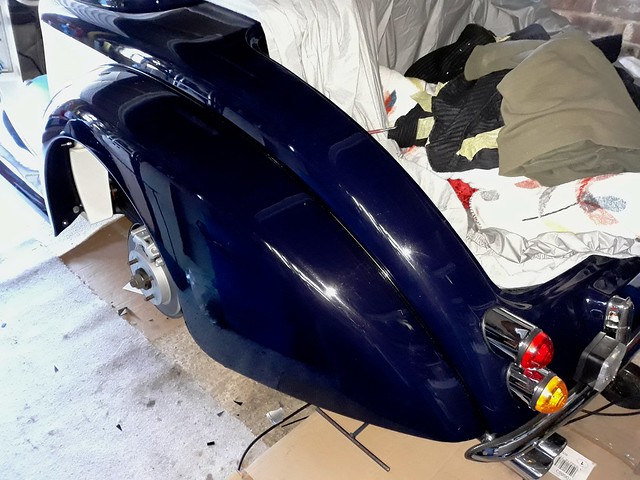

Then I can wire up the front lights. More on that next week.
Stay safe everyone....
....peter
4 Apr 2020, 5:01pm
peterux wrote:

Moving on, I've been fitting the numerous bolts in the front wing (I think there are 15 or so) which takes some ingenious yoga positions to reach some of the nuts and bolts.
....peter


A dodge that I have used to good effect in the past is to use Evo Stik! Option 1 is to put a smear of it in a socket, then pop the nut or bolt in the socket and wait 5 minutes. You can the manoeuvre it into position, even downwards, while fitting the opposite bolt / nut into position. Option 2 is to Evo Stik the nut / bolt, plus washer if there is one, into position on the body, if neccessary using a dummy mandrel and again wait for the glue to set a bit.

The advantage is this method is that the Evo Stik is strong enough for the fitting operation but easily shears away if you later strip down. Any remnants of glue in the socket spanner can easily be scraped out. Peter.
4 Apr 2020, 8:04pm
peterux wrote:
So the issue with the first version of my bonnet stays is that there is nowhere to clip it when not in use....

Bonnet stay issue by Sabrebuilder, on Flickr

To solve the problem, I have replaced the lower fixing point with an m5 stainless steel ball joint.

Bonnet stay - version 2 by Sabrebuilder, on Flickr

Which means it can swing across and be clipped on a bracket fixed to the side bonnet.

Bonnet stay clip by Sabrebuilder, on Flickr

The bracket for the bonnet stay clip was a bit of a challenge.

Bonnet stay clip bracket by Sabrebuilder, on Flickr

Moving on, I've been fitting the numerous bolts in the front wing (I think there are 15 or so) which takes some ingenious yoga positions to reach some of the nuts and bolts.

Wing fitting by Sabrebuilder, on Flickr


Then I can wire up the front lights. More on that next week.
Stay safe everyone....
....peter


Very nice indeed :whoo:
5 Apr 2020, 8:59am
Grey V8 Pete wrote:
A dodge that I have used to good effect in the past is to use Evo Stik! Option 1 is to put a smear of it in a socket, then pop the nut or bolt in the socket and wait 5 minutes. You can the manoeuvre it into position, even downwards, while fitting the opposite bolt / nut into position. Option 2 is to Evo Stik the nut / bolt, plus washer if there is one, into position on the body, if neccessary using a dummy mandrel and again wait for the glue to set a bit.

The advantage is this method is that the Evo Stik is strong enough for the fitting operation but easily shears away if you later strip down. Any remnants of glue in the socket spanner can easily be scraped out. Peter.


Thanks Peter, that is a good tip i'll try next time on the other side of the car.
My tricks include putting a piece of PVC insulation tape across the head of the bolt and then wedging the bolt or nut in the socket. The tape thickness is just enough to hold the nut or bolt in the socket while you position it through the hole and the tape holds the washer in place. I also use all my socket set extensions joined together to give me about 18" extension to my arm. It's difficult to show in the pictures but the front wings are so large (and beautiful!) that you can't reach both sides of the nut and bolt.
All good fun though..........:biggrin:
8 Apr 2020, 7:54pm
Mid-week update...

Mitchelkitman wrote:
Very nice indeed :whoo:


Thanks for the feedback.
---------------------------------------------------------------------------------------

A midweek update.....at least I think it is midweek but during these strange times all days are alike and equal.
But every cloud has a silver lining so I'm cracking on with my re-build....

I've now finished fitting the nearside wings.

Rear Wing by Sabrebuilder, on Flickr

(the shiny blue paint is difficult to photograph inside my garage with reflections from the windows and the fluorescent tubes above)

Rear Wing by Sabrebuilder, on Flickr

The wing piping was time consuming and the joint between the front and back wings was the trickiest bit to get a neat finish. I used patent look smooth PVC 'leathercloth' over a 6mm plastic cord. Eventually I figured out that you have to bolt the two wings together before tightening the bolts to the body. Obvious with hindsight.

Wing Piping by Sabrebuilder, on Flickr

And another weird shot off my 'phone.

Front and Rear wings by Sabrebuilder, on Flickr

Now I can finish wiring up the front lamps....
stay safe everyone,

......peter
9 Apr 2020, 12:17am
Outstanding! Nice...
9 Apr 2020, 8:14pm
Looking terrific!!
13 Apr 2020, 9:03pm
More wiring.........

Jack and Froggy, cheers for the feedback.

------------------------------------------------------------------------------

With the nearside wings in place I could crack on with the front lights wiring. To meet the IVA requirements I needed to securely fix the wiring under the wings. To fix to the GRP wings I made up these pads......... I pop riveted these special cable ties to 4cm square pieces of aluminium. (I've had a packet of these cable ties in my box for years and never found a use before.)

Cable tie mounts by Sabrebuilder, on Flickr

I then glued the cable tie mounts to the front wing with a good dollop of PU adhesive. This time I remembered to remove the black schultz coating and I roughened the surface with some sandpaper.

Wiring pads by Sabrebuilder, on Flickr

I also bolted a cable tie mount to the side of the headlight shell.

Headlight wiring by Sabrebuilder, on Flickr
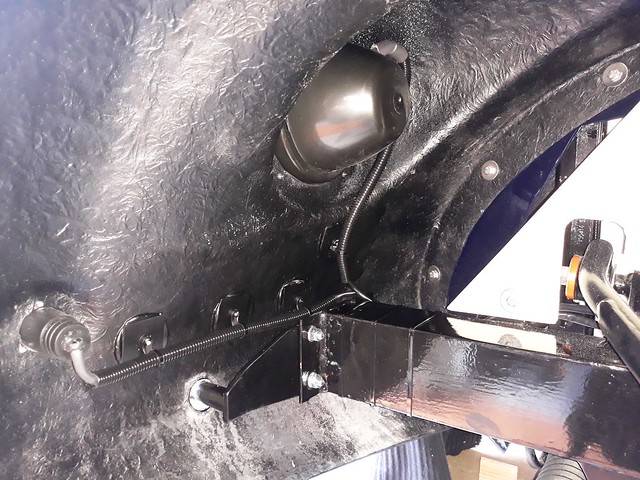
After painting the support pads and surrounding areas, i have completed the headlight and front indicator wiring.

Headlight and indicator wiring by Sabrebuilder, on Flickr

The side light wiring runs along the upper wing support.

Side light wiring by Sabrebuilder, on Flickr

..and the side repeater wiring runs along the lower wing support.

Side repeater wiring by Sabrebuilder, on Flickr

Now I need to do the same on the offside.......

.........peter
14 Apr 2020, 8:39pm
Very smart and tidy!
21 Apr 2020, 7:10pm
More wings.....

Thanks Dpa

-------------------------------------------------------------------------

I've now finished fitting the front and rear offside wings. It took slightly longer than planned because I got distracted and started playing around with door locks and window winders, but more on that another time :icon_surprised:

Offside Front wing by Sabrebuilder, on Flickr

Fuel Filler flap by Sabrebuilder, on Flickr

I had a small problem with the fuel filler flap hinge which fouled the fuel tank 'rollover' vent. I lowered the vent with an m5 hex spacer.

Vent mounting change by Sabrebuilder, on Flickr

Now I can get on with finishing the front lighting......

Stay safe everyone.

............peter
21 Apr 2020, 10:20pm
looking really good!
25 Apr 2020, 7:14am
Peter - As always, great attention to detail on the small things. :cool:

However, as more of the big pieces go back on, it is easier to see how good the overall result is going to be too.

Good luck, Paul. :)
28 Apr 2020, 6:58pm
Another milestone completed

Thanks for the positive comments, Jack and Paul :thumb:

----------------------------------------------------------------------

I achieved another milestone this week by completing the external lighting!

Offside wings and lights. by Sabrebuilder, on Flickr

I was thinking of starting on re-assembling the doors but a bit worried I might damage them whilst working on the interior so I have decided to work on that first. At least that's today's plan ....:eusa_shifty:

Stay safe..

........peter
28 Apr 2020, 8:11pm
wise decision Peter. Looking great!