This is a read-only archive of the old Madabout Kitcars forum. New posts and replies are no longer possible, but every thread is still here to browse and read.
Nope didn't pay a penny :-) guess they were feeling generous or more likely we having a kip when it went past on the conveyor!
I'm very happy with them and they were a piece of cake to wire up, have you got yours working yet?
Nope didn't pay a penny :-) guess they were feeling generous or more likely we having a kip when it went past on the conveyor!
I'm very happy with them and they were a piece of cake to wire up, have you got yours working yet?
I got stung for import duty about four weeks after my Chinese radiator arrived. Thought I'd got away with it too.
Well the big day has arrived! Now that I am confident in the wiring and the engine its time to fit the body permanently.
First step was to fit the Aluminium body mount to the rear of the frame, we just slipped it on and then fitted the body. As its a tight fit once it was in the right position we just lifted the body and fixed it in place using 3 M6 bolts through the frame.
You can see the ali mount in this pic:
Next we spent a bit of time getting the body as central as possible then marked out the spacing for the rivets.
Plenty of this stuff was applied to the face of the mount and the body lowered into position for the last time.
Rivets were fitted making sure there is enough space either side for the humps.
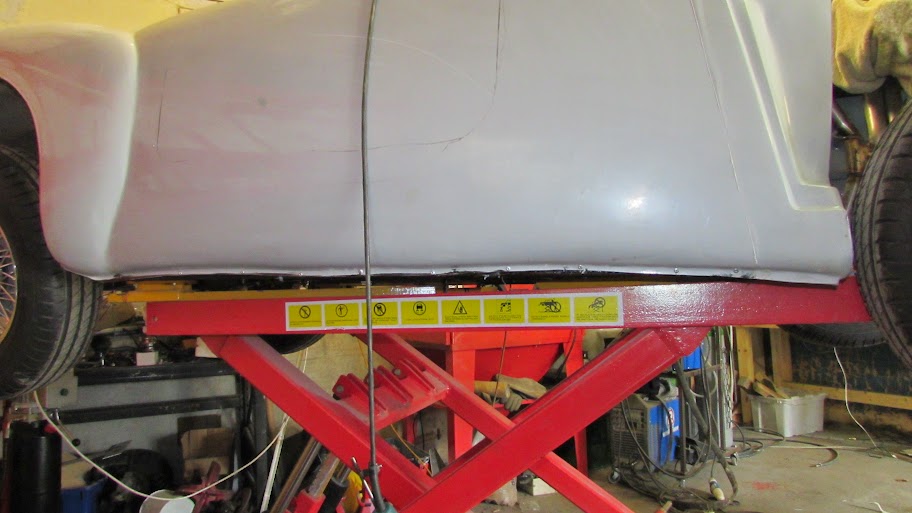
Next were the sides. The Ali drop plates I fitted to the frame earlier worked nicely and allowed the bottom of the body to actually drop slightly below the frame and also gave a good surface to bond and rivet to. Plenty of the gooey stuff later and voila!
as you can see there are still a few bits of the body that aren't as straight as on a production car but to my eye it looks fine. The only decision left on the sides is whether to trim the Ali drop plate to the body contour or to use fibreglass filler and bring the body to the drop plates thereby giving and dead straight sill line. im erring towards filling at the moment as it should be an easy job and I think will finish the bottom of the sills nicely.
Along shot showing the whole side.
about 30 minutes later and the other side was done.
Last job on todays list was to sort the drivers foot well, as I opted for a floor mounted pedal box which has a vertical face but the front bulkhead dives into the floor area at an angle the original idea was to cut a section out of the pedal box and make a box but looking at it it really didn't make much sense and would be a lot of fiddly fabrication work to make it look good so plan B was implemented, cut the front of the drivers foot well flush with the front of the pedal box so a single flat Ali plate will cover the lot, another factor was that by including some 3mm Ali bracing plates this will now be strong enough to support the steering column with the help of a spherical bearing. so this is what we ended up with for now.
Last job of the day was to make a start on the first of the Ali cockpit liners:
It fits nicely behind the spitfire tunnel section I modified giving a nice clean look.
all in all a very good day, been waiting for one to arrive for a while!
This is by no means the definitive way to fit the body but I have to say it worked well for us and was very easy to do, by the end of the day we could hang off it and nothing was moving! and neither Dave or I are exactly small!
There will be a short break in proceedings as I'm off to do a job in Weston Supermare for 10 days starting Wednesday, nice little break by the seaside...
Thanks Paul, I did spend quite a bit of time working out how the body was going to be fixed and as you said it has now paid off, in total the complete fitting of the body to a stage where it was rigid on the frame and very secure was probably about 5 man hours in total! much quicker than I could have hoped for, as I said above the nice thing is that its solid as a rock, even pushing against the rear wins moves the car before the body moves!
Nope didn't pay a penny :-) guess they were feeling generous or more likely we having a kip when it went past on the conveyor!
I'm very happy with them and they were a piece of cake to wire up, have you got yours working yet?
Unfortunately, not opened the box looked and them, then put them on the shelf, the only thing I get done this time was have the chassis shot blasted then weld the hole that where camouflaged with underseal.
I managed to shot blast a few other parts, then we had a few family problems (Father and Step-Father both ill), so I manage about 2 days out of my 42 days planned tinkering.
Chassis and frame will painted as soon as I get home, the rebuild will commence.
Ok so another good but bad day. remembered to dig out the jigsaw today, 2mm Ali is much easier to cut with a jigsaw than a 1mm cutting disc, the disc just tries to melt its way through!
Measured up and cut both side panels and offered them up and immediately discovered an issue. When I widened the cockpit did it with the body off the car, now its on the sides don't really line up!
The drivers side is too far inboard and the passenger side is way too far outboard.
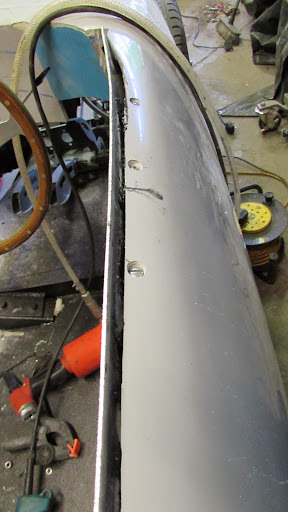
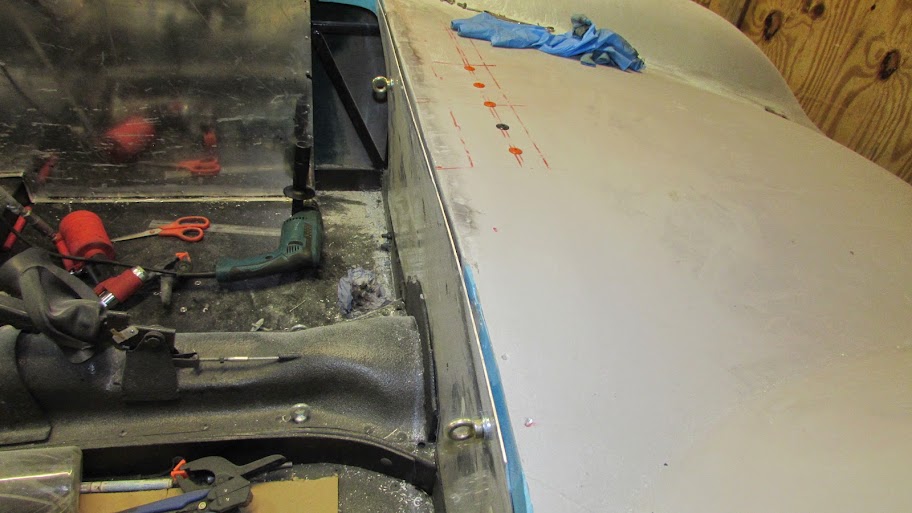
No point whinging lets come up with a solution, cut the returns off the drivers cockpit side so that the Ali lining panel now lies in its desired position which left me a gap between the top of the panel and the top edge of the Ali panel. I didn't take as many pics as I should have but basically I bolted and boned a new return in place made of Ali angle. You'll hopefully see what I mean in the pic below:
The bolts that hold it in place are well countersunk as luckily I had the sides massively beefed up in anticipation of cutting the skin out to use as door skins so there is plenty of meat. The small gap that you can still see will fill fine using P40 and a skim of normal filler to finish. The Ali panel has been left higher than needed so that it can be trimmed down exactly flush once the filler work has been done.
More Pics that hopefully make it clearer.
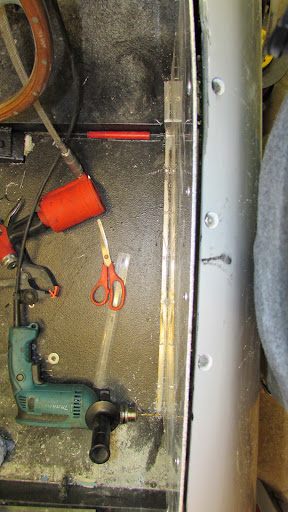
Internal Drivers side Ali Skin in final position
In this shot you can see the Ali angle I used to join the panel to the floor, I managed to do it in one continuous piece.
Rear Panel is going to be reworked as at the moment I'm not making use of the full length of the cockpit, ill use a similar process as I used for the passenger side panel. you can see in this pics how much it curves from top to bottom. Please don't forget that this body has been fitted using a hybrid frame based on a prototype from from Ribble so I'm pretty sure these issues wont occur on the current offering.
Some of you may question whether just riveting and bonding the panels on all 4 sides is enough to hold it securely and not let the panel flex and drum, answer is yes its fine, remember I'm using 2mm Ali which is pretty rigid just by itself, with a bit of thought in the order the rivets went in its a very tight fit and I cant deflect the centre of the panel at all by hand.
Sorry for the disjointed posting but I'm doing this and a couple of other things at the same time and am dipping in and out as things pop into my brain!
TTFN
Mac
Gary, I'll be trimming with a hockey stick profile, hopefully my trimmer will be able to cover it with a thin foam and leather to match the interior, if that doesn't work out ill just polish it.
Mac
Aha ! alluminium .... another idea to steal! I was considering plywood ..
Mind you I may still but it's a long way of yet.
Looking good
Keep it up
Slarti
I know traditionally these have been plywood lined but in my mind wood doesn't belong anywhere on a car except the dashboard of the gear knob :-)
Using 2mm Ali sheet I can already feel that the panelling is adding even more rigidity to an already pretty rigid body. It may add more weight than ply lining it but I save the weight saving OCD for my other track oriented vehicles.
TTFN
Mac