This is a read-only archive of the old Madabout Kitcars forum. New posts and replies are no longer possible, but every thread is still here to browse and read.
Hello again.
Not much news;lots of small jobs ,measuring ,thinking and reading this forum
I've got a question:in order to lower mij suspension I need longer studs,I've
become studs from Rimmer but they are not long enough.
I see You all use very long studs(UNF3/8?)but as that is not metric it is not available in Holland.
Does anyone have a adress were to get these?The things You use are they strong enough(4.8 r better 8.8)?
Hello again.
Not much news;lots of small jobs ,measuring ,thinking and reading this forum
I've got a question:in order to lower mij suspension I need longer studs,I've
become studs from Rimmer but they are not long enough.
I see You all use very long studs(UNF3/8?)but as that is not metric it is not available in Holland.
Does anyone have a adress were to get these?The things You use are they strong enough(4.8 r better 8.8)?
Thanks in forward
Hi Jerome, try ebay for the 3/8" UNF threaded bar -
Failing that drop Gary a line as he supplies bolts with his lowering blocks. I only went with the threaded bar because I lowered mine further than recommended.
Connected all the electrics up this afternoon, drew some fuel through to the carburettors, getting a mouthfull in the process, connected the battery and turned the key...
The engine turned over with gusto and I left the choke off for a while to make sure some oil pressure built up before the engine started. Once the oil pressure light had gone out I opened the choke and gave the throttle a couple of pumps to prime the carbs but it wouldn't start. It kept on turning over but there was no sign of it actually firing.
A quick check through all the ignition leads and wires showed everything connected, but then I took the distributor cap off and found this -
Now, that's the second rotor arm that's failed in the same way. Is this just bad luck or is there a fault in my distributor? Does anyone know if there's a problem with the Vitesse dizzy that causes rotor arms to break? If so, what's the cure?
If you can't find any obvious mechanical reason (like the rotor touching the cap) it might just be a duff part. There are quite a lot of cheap chinese reproduction rotors around that fail with abandon - get a replacement from a reputable supplier - for the couple of pounds extra cost, you should be able to get a decent quality part.
Thanks for the suggstions guys, the red rotor came free with the electronic ignition module so I guess it wasn't a top quality part. Will be ordering a more expensive replacement today.
Rotor arm arrived from Rimmers today and was fitted in seconds, turned the key and the engine fired into life instantly! I actually did a little jig.
Engine runs sweet as a nut and sounds terrific through the standard stainless system - really rorty but not too loud. It's still leaking oil from the sump gasket and a little water from the thermostat housing though
Will have a go at posting a video of it running tomorrow - anyone know how to post video directly? Or must I put it on youtube first?
nice to here your car runs well as for rotor arm if you can use lucas ones black as the red ones i had just give up car is come in on nice open road awaits..
If you are going to run without an airbox and filters you may need richer needles. I ran a 1200 with a toledo 1300 engine swap. The air filter casing fouled the engine bay side panel so I cut away some of the box lid to clear. The extra area for air to reach the filter element in addition to coming through the normal inlet tube was sufficient to weaken the mixture when the engine was pulling hard, going uphill and also when cruising on a small throttle. It would falter slightly. Pulling out the choke a little would clear the miss and the engine would pull cleanly. Gaffer tape over the missing section gave a permanent cure!
Yes it does sound great - really throaty without being deafening. It's a standard single box stainless system. Most of it came with the donor but the back box is from Canleys. 'nother video below...
Thanks for the heads up on the needles btw. I've not set the carbs up at all yet, just stripped them down and replaced all the rotten diaphragms and seals then fired it up and hoped for the best!
I'm still toying with the idea of making my own air box and plumbing in the water/methanol injection system I've planned to use from the start. It's occurred to me that it's taking me forever to finish the car though, so I might just add that after it's on the road.
Good news today was that I've located the oil leak and it wasn't the sump gasket after all, it was the filter not seating properly and allowing oil to piddle out. That's sorted now I've also all but eliminated the water leaks, apart from a little dribble from where the thermal switch sensor enters.
Slightly less good news is that the clutch bites way up near the top of its travel which suggests that I need a new clutch plate. Unless anyone can tell me another reason it would do that? My cheapo ebay thermal switch is also kaput, it doesn't seem to want to kick in at a set temperature any more, you keep having to fiddle with the dial and sometimes it just switches off the fan when it's set to maximum. I'll source my next one from someone I can send it back to if it's defective.
Anyway, more video. Not as exciting as Phil J's 'moon rover' blasting around his private land but pretty exciting for me. Oh, and see if you can spot the moment where I work out the inadvisability of holding the shell on with nylon ratchet straps that I hadn't realised were touching the exhaust...
I have to say that I really enjoy reading the progress of the builds here, both those that are nearing completion and those starting out.
Your hydraulic clutch, by its nature should always bite in the same position of its travel no matter how worn the centre plate is. Is there any adjustment either on the rod from the slave cylinder to the fulcrum arm or the rod from the pedal to the master cylinder where you can get some free play in so the bite point goes lower? Have you got standard master and slave cylinders? The ratio of one to the other will determine how far you have to push the pedal to disengage the clutch.
Hope this helps, good luck with the rest of your build, looks great.
Cheers Len, unfortunately there's no adjustment in the Vitesse clutch hydraulics. I'm going to pull the gearbox and replace the clutch plate, cover and release bearing - it's only about seventy quid for the parts and at least I'll know how much material there is over the rivets on the clutch plate. At the moment the biting point is really high and there's a sort of metallic screeching noise as it makes contact, so I'm guessing it's pretty worn out.
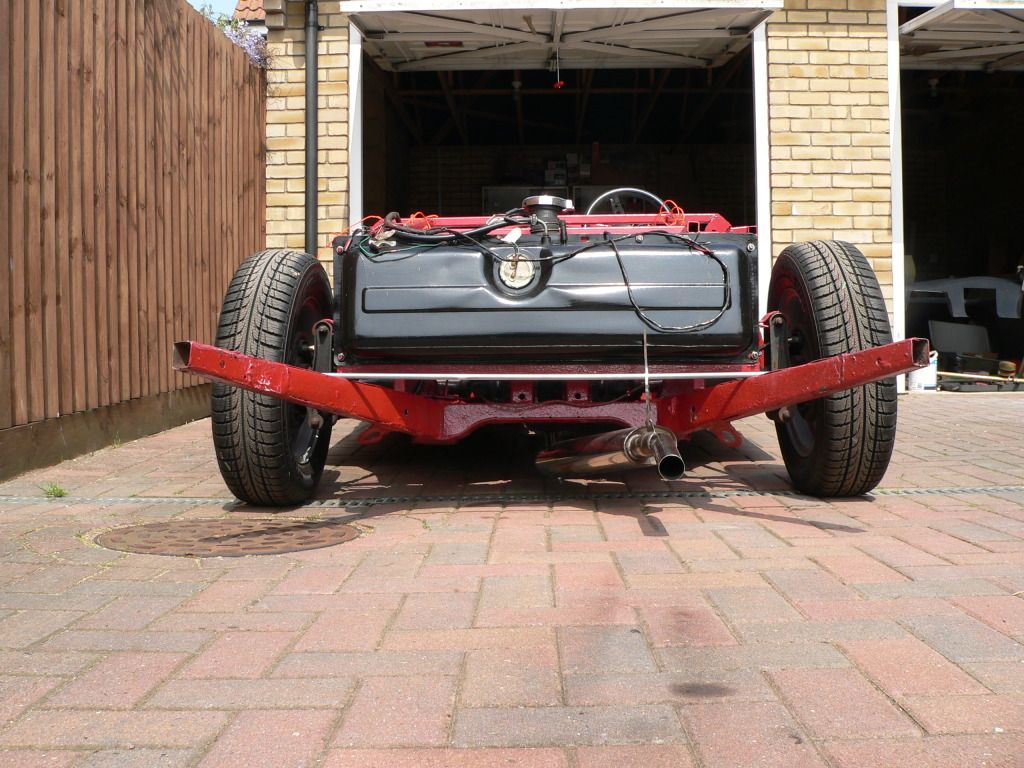
I'm pretty close to fitting my body now that I've got the engine running. Can anyone tell me if the shell is supposed to contact the frame along the underside of the rear of the cockpit - across the back under the base of the head fairing - as mine doesn't. I could cut more fibreglass out of the back end above the boot outriggers to drop the body a little but I'm kind of reluctant as the fit of the wheels in the wheelarches looks to be about right.
I'm also considering taking out my extra lowering at the back as with the weight of the fuel tank and luggage bay, the back wheels are starting to splay quite a bit...
I kind of like the look but ground clearance could become an issue.
Your car is looking great and I follow your thread with great interest as I am in a similar position as you. We also seem to be following the same build strategy (hasten to add I stumbled into it rather than made a conscious decsion!), namely to get the engine plumbed, wired and running before fitting the shell. But I am a couple of weeks away from running the engine so you are definitely ahead of me.
Anyway, back to your question about the way the body sits on the frame. I kept cutting above the boot outriggers until the back, under the base of the head fairing sat on the frame. But this meant the the cockpit sides were lower at the back than at the front and so I have had to build it back up again! If you look at my build thread http://www.madabout-kitcars.com/forum/showthread.php?t=3151&page=3 you will see Paul D commenting on the same point.
I, like you, have hung the fuel tank off the back of the frame and found that this would foul the body unless there is a gap between the base of the head fairing and the frame.
Cheers Chris, yes, I'm following your build thread with great interest too! It does look like we have the same build philosophy - make sure everything's right before restricting the access and it'll save time in the long run.
As for the body, I think I cut about 1cm too much out above the nearside outrigger today trying to get the body to sit on the frame. I'll pack that up again before bonding the shell to the chassis and frame as I rather like the stance with it 1cm higher. I'll just cut the cockpit rear panel to fit and support the back edge of the body. Can't wait to get it on the road now.
I put my body on and just played about with wedges and spacers and trimming the frame corners at the front until it sat where I wanted it and it looked right. I am not sure there is a hard and fast rule of where it should sit exactly and every one is slightly different.
Since you have to repair the area where the outriggers eventually fall off, don't be afraid to cut more out than necessary and then choc it up as Chris says. Keep the bits you cut out as you can bond them back in as they are the right shape!
Putting the body on is ultimately how it looks on YOUR car. I spent about 2 hours fiddling, supping coffee, standing back, adjusting and then at some point you just have to get that bonding paste and fibreglass out and do it!
(Just remember to add catalyst to the bonding paste this time Mr T!)
In my mind it was getting the front sills to sit properly and similar each side, and then ensuring the rear wheel arches are square in the wheels. The rest sort of falls into place. Once it is bonded and glassed in it takes on incredible strength!
After the body, it is plain sailing and it all comes together quickly, so you will be ready for the summer Mr T lane:
If Phil can drive up his rather, ahem, bumpy driveway with as much negative camber as he has I say fck the ground clearance, let's slam it into the weeds!
Don't forget to tell us how you embedded the video directly
Just shoot some video on your digital camera, then upload it to 'photobucket' in the usual way (it does take longer due to the larger file size). Then just copy and paste the img code and that's it. Quite simple really.
Been researching the high bite point on my clutch. Does the Vitesse/Herald have a self adjusting system? The linked thread below would suggest it does - that wear in the clutch plate is compensated for by the slave cylinder plunger simply not going so far back into the cylinder. Does this mean that the shorter the bit of plunger that's sticking out of the slave cylinder the thicker (and newer?) the clutch plate is?



 lane:
lane: 