This is a read-only archive of the old Madabout Kitcars forum. New posts and replies are no longer possible, but every thread is still here to browse and read.
Plan A to hold the mesh in place on the nose cone - fibre glassed a set of nuts to on to it, then bolt it on. Final status - Epic Fail. The nuts pulled out.
Plan B (Richard came up with this one) Tubes fibre glassed into the nose cone!
Fibreglassed in place
All tubes installed
Some paint to clean up the work
Complete
Mesh installed with ZIP ties
Close up of the final mounting
New bits of steel for mud guard holders
Spacing for the carbon wings - ended up using 1/4 of one of these as space.
Steel bent and fitted to the front of the carbon wing.
Original wing mounts chopped and mounted onto the car. The standard holes needed drilling out slightly so that brackets would fit.
Eyeing how much needs cutting off to fit the new steel.
After much fiddling, a bit of welding and grind and the wing is mounted
Fits is not bad but the carbon wings are not quite as wide as the originals so it gets very close to the tyre.
Just needs paint now and the other side making.
Once they were on it was out like the previous ones were with the stock mud guards. They would have needed a hole in the side to fit - I'm guessing its the offset of my wheels. So I thought it was a better approach to modify them. The stock metal was not long enough, the bend was about right though.
You don't need a spare for MOT or SVA, however if you do have a spare is must be in good condition and filled with the right amount of air. Not sure if they check the speed ratings at SVA on the spare.
You can drive to a pre-booked MOT as long as your insured on the chassis number
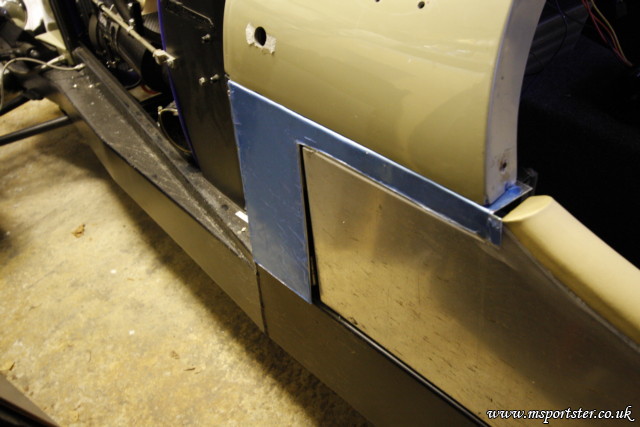
New scuttle side panel without louvres compared to the original with louvres. The new one also now has folded back edges which gives a much better edge.
New scuttle side panel on the passenger side with folded back edges.
These still need a bit of finishing including cleaning up the bottom and end plus drilling the mounting holes.
* Finished the scuttle side panels
* Opened up the indicator holes on the scuttle to fit the new ones
* Rear end break down
* Step one of filling the seat belt holes in the tub
I recommend everyone take their tub off after a year and check for rust issues, we've got a few area's that need to be cleaned up and protected.
Connected up the clutch this evening, the bite point is right at the bottom of the pedal travel, but is really controllable. It means the clutch will sit higher up that the brake at the moment so we'll have to see how it goes. The whole scuttle bends all over the place so reinforcement is required now.
And finally warm weather - well not freezing anyway
The new clutch system is now installed. The master cylinder has more than enough capacity to dis-engage the clutch without pushing it all the way down. The pedal position can be adjusted with the thread on the master cylinder so we've moved the clutch inline with the brake pedal. Due to the different leverage on the clutch it is now very easy to use. Only time will tell if all the problems are solve once we can go further than the end of the drive!
Constructing the scuttle panel re-enforcement plate
Heating along the cut to bend the 3mm steel.
Re-enforcing the pedal box
The metal is welded on in various places to strengthen the pedal box.
Welding complete on the pedal box
Scuttle re-enforcement plate painted and bolted in place, it bolts on to the bar than runs from one side of the car to the other. There is no flex at all when the clutch is operated now.
Pedal box and new clutch assembly reinstalled in the car.
Mark 2 exhaust hangers, these use the rubber mounts from a BMW 840Ci Sport. There is a 3mm steel plate that connects the exhaust boxes to the hangers.
A new bolt is welded in on the right side of the hanger, the other is the one form the fuel tank strap.
Driver side bracket, this one has some stress on it but the rubber mount is off a 12 year old car so the rubber has gone soft. A new pair will need to be ordered to finalise this.
The plates need a coat of paint and this can be marked as done.


 woohoo MOT pass. Did fail on 3 loose bolts first time through not bad!
 hoto: took video on the way over will process and post some time later!



 [url]
[url]


