This is a read-only archive of the old Madabout Kitcars forum. New posts and replies are no longer possible, but every thread is still here to browse and read.
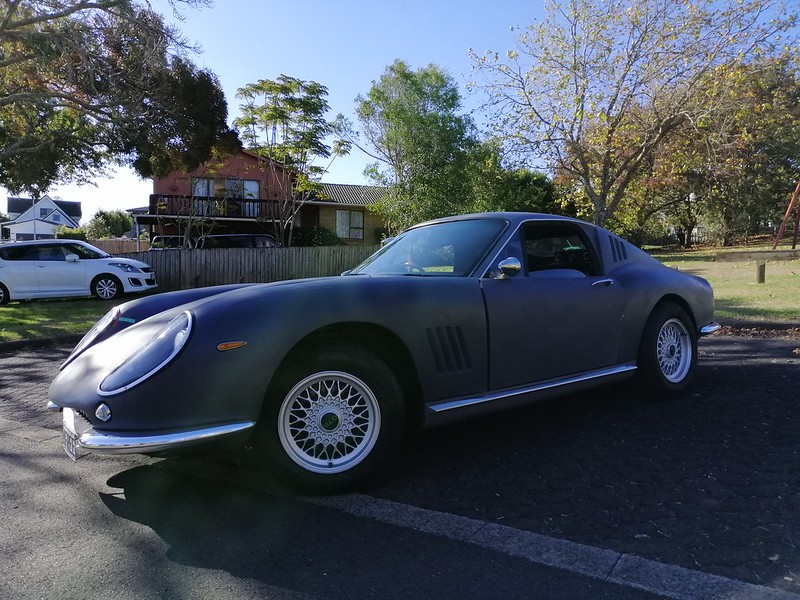
Love the way the angle of this photo shows off the shape of the car.
It is going to look spectacular when finished and painted.
Good luck, Paul.
Thanks Paul, be a wee while yet but pretty happy how it is coming together,,,,,just wish I had more dedicated time to spend on it. The older you get the more the clock is important and stretched! Cheers.
Hi guys, hope you are all well in lock-down - Ironically it has given me a window of opportunity to proceed with the car over the last 4 weeks.....
Update:
- Under bonnet blanket fitted
- Grille and surround fitted (at least until body paint process and change)
- Headlight covers fitted and captive nuts/brackets manufactures and fitted
- Front number plate bracket manufactured and fitted
- Rear lights removed, bodywork scalloped out for an original look and primed/refitted
- Front guards manufactured and fitted.
General to do:
- Wiring tidy up
- Interior finish panelling and fit rear window
- Fit roll tube protection and headlining
- Doors and handles/locking mechanism.
Looking good. The scalloped rear light recessing makes a big difference .
Thanks LLM, I may go a bit more aggressive with this before final painting but that may require a bit more strengthening behind the light pods, so thought this worked for now at least, but it does look much better visually....cheers.
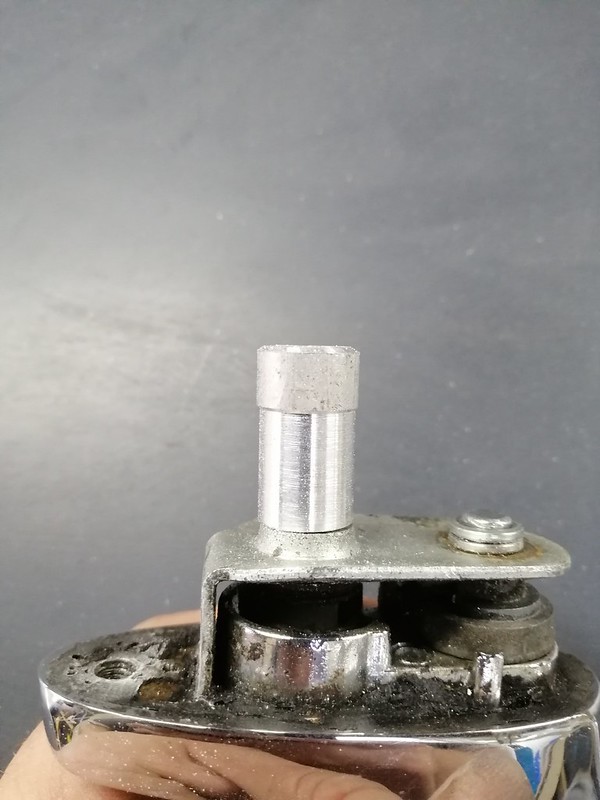
making progress, Rear face of car is primed majority now so looks quite smart. Started work on the door mechanisms for the locks, came up with a "push rod" lathed and made up of aluminium. This will be bonded and jubilee clamped on the door handle push rod and will have a bush going through the car door skin and brackets etc for stability. "long key approach for protection of getting locked out.....
When I did my rear lights I used the recess's supplied but I did build them up on the back with P40 filler then glass mat. That allowed me to open out the recess's at 45 degrees to the full depth.
making progress, Rear face of car is primed majority now so looks quite smart. Started work on the door mechanisms for the locks, came up with a "push rod" lathed and made up of aluminium. This will be bonded and jubilee clamped on the door handle push rod and will have a bush going through the car door skin and brackets etc for stability. "long key approach for protection of getting locked out.....
You will need to cut a rectangular hole in the door skin so you can fit the extended tab above the pivot point . If you don't do this there won't be enough leverage to push the button to open the door ! If you have already cut the outer skin to take the handle you'll have a bit more work to sort it out ! That's what I did on my car !
When I did my rear lights I used the recess's supplied but I did build them up on the back with P40 filler then glass mat. That allowed me to open out the recess's at 45 degrees to the full depth.
One of the best tools I bought in the past was this Drum Sanding Kit from Screwfix. Think it was about £12. Great for scalloping out GRP !
Hi LLM, thanks for all the above info, very helpful.
- rear lights good to know you bolstered the pods structure behind, I suspected that if I was a bit more aggressive I would run out of real estate!. I will have to think about this a bit more when I have the car on the road and progressing to paint. I do use the p60 grit flap wheels in my die grinder on the compressor which I have found to be very effective for the removal of fibreglass.
- door handle mechanisms you may have answered a partial question in my head about the force needed to open the door. I do have it popping with a direct button push, but until I had secured the handle on a trial bracket on the door I wasn’t sure if it was too great a force to overcome. Does anyone out there have pictures of their mechanisms using a mini door handle? I have some ideas but certainly don’t believe in re-inventing the wheel if it doesn’t need it. I may have mentioned before on my thread, plagiarism is the finest form of flattery!
Cheers Mark.
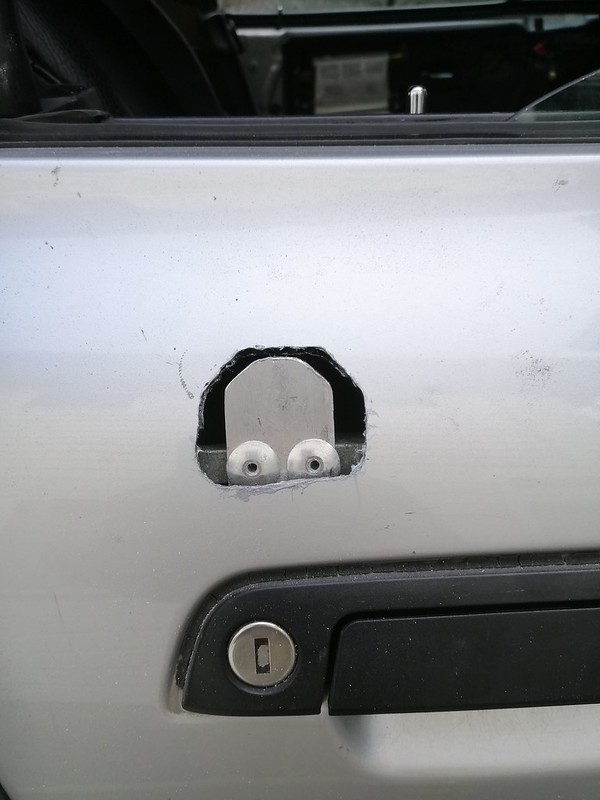
Here is the opening I made in the Z3 door skin and my Mk1 extended plate screwed in place. The Mk2 was 8mm or so taller and with two mounting screws. The Mk2 was 316 polished stainless which when greased gives a very smooth operation when you press the Mini handle button. Sorry I haven't got a photo of the Mk2 mods.
The spindle running from left to right is the pivoting point. You can't be too close to that with the Mini plunger, it simply won't rotate the spindle enough to open the door !
The rough edges were cleaned up and painted before the outer skin was fitted. I also trimmed the Z3 plastic outer lever back a little as it was touching the inner side of the outer skin when the Mini handle was operated.
Firstly thanks to LLM - Been a legend throwing me good ideas to minimise my thinking brain and grey hairs getting more prevalent.....Cheers.
I have managed to fit both sides striker plates to the doors, need of course some tidying and weatherproofing, but work really well. 3mm Aluminium striker plate riveted on to the door bar. Aluminium push rod that will be bonded and secured onto the end of the mini door handle plastic push rod.
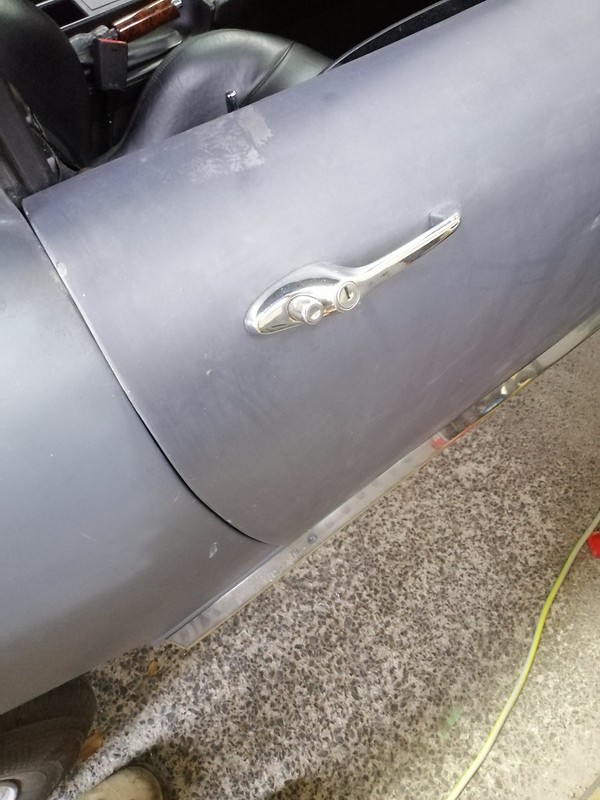
I have fitted the drivers door temporarily, fitted the handle and it works well. Some pics:
Door skins and handles have been fitted for the time being,
just tek screws holding on at the moment as I want to work an angle with the cert guy as to what he is happy with for temp fixings for skins before paint etc.
I may need to captive nut the door skins and bolt through the door for fixing. At least then I can remove the skin later on for paint and if needed for final gapping etc. Going to put a weather seal in the top of each door to minimise the water/moisture heading down into the door skin.
Gaps are not great but are workable, not too bothered at the moment with that. The L/H side of the car looks like it needs the body to be about 5 mm higher in places, nothing I can do now about that so good old profiling will have to occur to match the body to the door skin. I may be able to pinch half off of each which will help. Filler and sanding the outcome.....
Took the car for a "drive" into the cul-de-sac so I could warm up everything and get the trans working again. All door locks/mechanisms work well and are solid so happy with those.
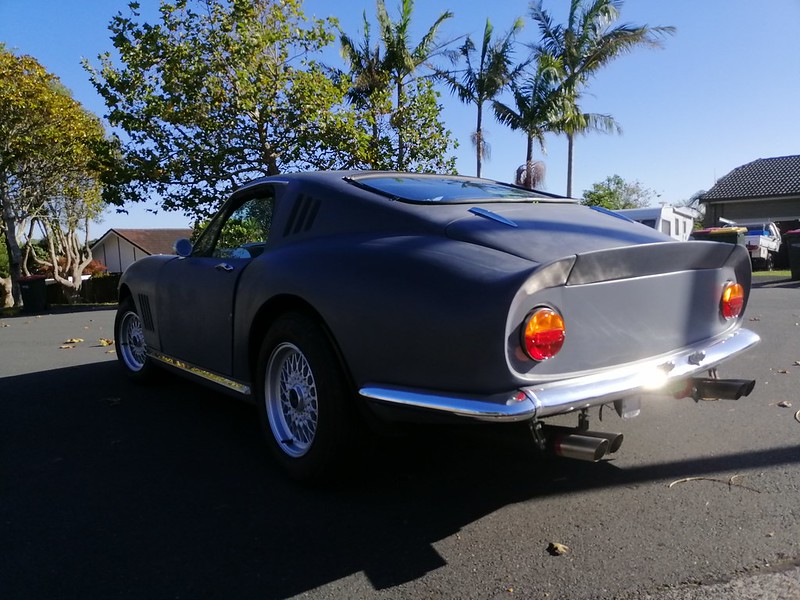
Some pics out of the garage......
With regard to water getting down behind the door skin, don't forget to put a few drain holes in the bottom of the outer skin.
Roger that fella will do! Gonna flowcoat the inner of both door skins once finalised and create a nice easy path for any water to escape hopefully.....
Thanks Dave, been a long time coming together, too long but things will get there. My industry (aviation) is as you probably know getting slashed and burned at the moment so things are not hot for me right now in COVID. Looks like I am safe at present in my role but heading for some kind of “hibernation period”. Unsure what that means fully yet but likely reduced hrs for the next 6-12 months. Looks like plenty of time to work on the car, just the money won’t be there to do it!
Sorry to hear your ‘real job’ might be at risk, as who knows what the ‘new normal’ will be for flying.
Good luck and take care, Paul.
Thanks Paul, it is what it is, 30 years in the industry has been fraught with times of crisis...just got to play with the cards dealt when they present. Positive spin, the car is getting the TLC that has been required way before this point!
Thanks for the kind thoughts and comments, it is great to see others responding well to how the car is coming together, with a long project you are always doubting how it is gonna turn out! Cheers.
Well not exactly to plan today, finished the interior rear trimming to the point I can fit the rear glass.
Tried the old classic cord fit method and failed miserably....as the slope of the glass is quite large, visibility a little limited. Not sure if my “ridge” for the pinch seal to sit on is too thick, but struggled to get it round the bottom corners and then cut the rubber seal with the cord quite badly pulling to get it in...
Net result I think it might have to be a new rubber and possibly some professional help.
If you guys can give me an idea of the thickness of your window ridges before you got your glass in appreciated. I have even’d out the dims around but don’t want to take too much away as you can’t put it back on easily!
Beer in hand so all will fix itself......Cheers.
finally the rear window is in. Took some professional hands (plus my scabby ones), one scoping attempt (i.e. thinks it will go in), one failed attempt (i.e. not a hope in hell getting the top in) and then removal of about 5mm all around the screen edge and re-priming.
Net result - third attempt, She's a tight one, but a bit of lube in the right places and she's in.....
Going to leave the ali trim out until I decide what next steps are with it and paint etc as it may come back out again and the trim is the expensive bit and will damage easily.
Left to do:
- Finish doors - fixings and lock
- Finish wheel arches - 90% done need some self manufactured fixings.
- Finish grille - Need to Ali weld the slats together
Finish rear bootlid locking/securing mechanism.
- Last look over things and drive on D plates to the testing station for either the good news, or the "more to do" news......Getting close.
One observation, though: I could be wrong, but I don't think the screen seal trim is just decorative, I believe it locks the seal and screen in place. That was certainly the case with my MG's 'Bermuda' Hard Top (in the background below) - when I restored it, before the trim strip was fitted the slightest pressure would flip the seals and let the perspex pop out.
If it's the same on yours, your rear screen could pop out if you drive it to the testing station without the trim fitted.