This is a read-only archive of the old Madabout Kitcars forum. New posts and replies are no longer possible, but every thread is still here to browse and read.
The last few days I've been addressing the 1001 small five minute (Ha Ha) jobs that are outstanding. Clutch and brake bleeding help has been unavailable as the lure of Overwatch et al seems irresistible during quarantining. I fitted the brake light switch to its bracket on the pedal box, having had to order the retaining nut. It operated correctly with no adjustment needed first time. Miracle!
I then had a play with the upright section of the seat. It was a massive fiddle to manoeuvre into position, negating my wanting to use the space behind as a handy luggage/shopping etc. area. After the usual head scratching, I decided to remake it in halves. Off with the vinyl (so many staples!) and out with the saw, job done. I then decided that the driver's side should be fixed in position and the other, access side, just sitting. I then offered up the vinyl but it's not big enough to cover the new reveals down the join. Scanning what's available on Ebay, I bought more, this time heavy duty in dark brown which I thought would complement the look better than black.
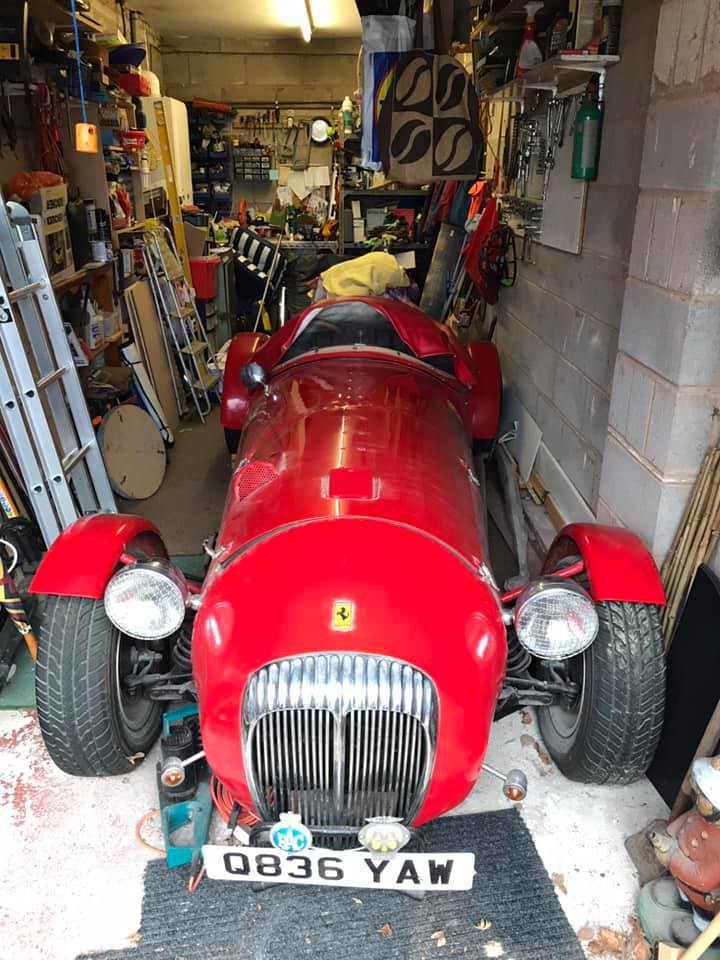
I then turned my attention to the rear view mirror mounting problem. The rear deck is much higher than the scuttle so, without a windscreen on which to mount it, some sort of pedestal would be required. After gauging the height needed using a long batten and spirit level I decided on a 3mm thick ally bracket braced with the remains of the stainless rod I'd used for mounting the one on the A352. Lots of back and forth, bending; drilling; thread cutting; trial fitting and, finally, polishing and the job was done. Having a sit in to view the back wall of the cave in my handiwork I decided to fit the 'wing' mirror. Locating it as near as possible to maximise the field of view, and fine tuning the angle with it held on by the front stud only, the job was soon done. Both these mirrors are Beaulieu Autojumble purchases, the second still marked in black felt tip with the original and knocked down prices. Also visible below are the Mille Miglia and Quadrifoglio stickers that have been patiently waiting their day in my Monaco folder.
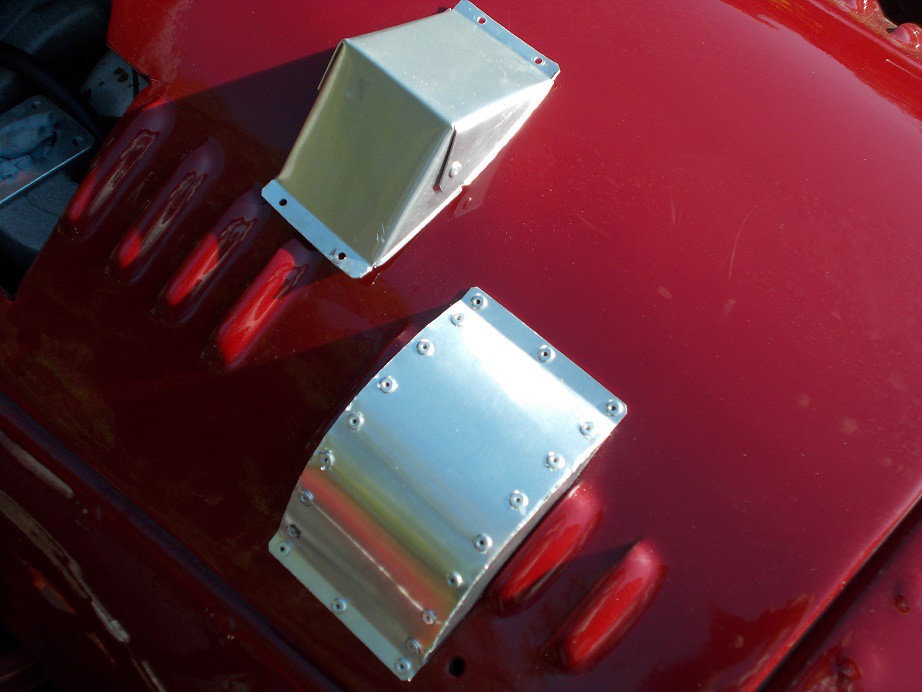
Yesterday's final effort was to remake the ally bulge over the radiator cap, which protrudes through the bonnet. I decided against the angular folded style of my first effort - the result to be revealed .
This picture appeared this morning on my Moss Owners' FB feed. It's Fiat Twin Cam powered on '66 MkII Spitfire underpinnings. Nice!
First job in the cave yesterday was to rivet on the MkII radiator filler cap bulge. I'd passed on doing it the previous afternoon as I know how good I am at cocking things up when I'm tired. I'm reasonably satisfied by the result, especially when comparing it to its predecessor.
I then decided to fill and bleed the clutch hydraulics as my live-in son was available. With the off side jacked up and an axle stand in place, I could just about worm my way underneath. I softened the end of the bleeding tube in very hot water and worked it over the nipple, which I'd fitted in the upper of the two tappings on the cylinder so that gravity would assist in purging air. Not that easy with the copper pipe in the way. I'd given both end nuts a final tighten as I'd not made up hydraulic pipe before, and was unsure if my flares would be OK. Five minutes with my son sat in the car and we had a pedal, and no leaks . The down side? After three years the driven plate isn't releasing, but, if experience is anything to go by, it'll free itself after the engine heat's done its bit a few times.
I then dug out the last of the 1"x1"x1/8" aluminium angle I'd scavenged when the pet supplies shop around the corner closed - it was the surround of its sign. I cut and cleaned two suitable lengths and Sikaflexed them to the floor to prevent the seat squabs from moving forwards. I'd done this on my Marlin to good effect. The heat in the cave was now tropical so I called it a day.
I'm a member of the 'Homebuilt Cars From Scratch Or Kits' group on FB and my hero, one Howard Baker, yesterday posted his latest sublime efforts towards his scratch built Auto Union C Type evocation. Another of his followers posted this video which had me itching to get down the cave and crack on. Skip to 1.56 to get to the highly inspirational meat - max volume and cans required .
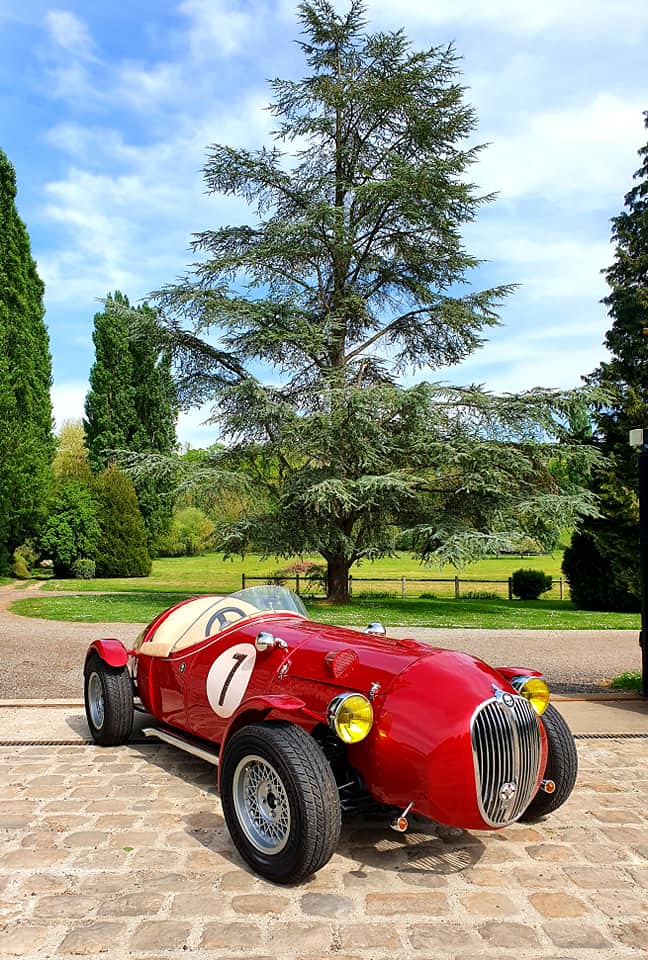
That is lovely. I notice the grill has changed. They really are a fun motor and unlike some kit cars, they are wide open to your own interpretation. Years ago there was a Green one parked at the side of a big house near Norcott Brook Nr Warrington. I kept meaning to call but never did, then it was gone.
Very good example. I wouldn't change much on that other than the front indicators and maybe some proper wire wheels with skinny tyres !
It wouldn't be too much of a challenge to build an aluminium version of the classic cigar shape racers. A simple wooden frame with aluminium wrapped over. Maybe a GRP nose section with a period looking grill inserted, lots of options with the rebody concept.
That's how it was done in the '50s & '60s. often using metal electrical conduit pipe. My uncle built a very nice special, MG ish but Triumph based. All done with hand tools no welder, no electric tools, and proper rivets, hand drilled and set! With all the inexpensive power tools and access to fittings we have now, it makes it easy. There weren't many regs then either.
I found this link today which I thought was appropriate for this post http://http://www.speedseven.co.uk/product-category/bodyshells/
It looks a bit like a Hamblin copy but not sure. There is a Facebook page as well. Seems a bit pricey at £2500 just for a body!f
I think you are right, it does look like a Hamblin cadet. But I don't think the Lulworth is a Hamblin. Speedseven are not cheap but specialists very rarely are. I have a Ser1 Landrover and the price of bits for them is ridiculous. I still fancy a Seven special rebuild. I had a Ruby in the early '60s a good looker ran well, MOT'd and cost £5!
Not a huge deal of progress since my last build focused post. I'd noticed when studying an exploded diagram of the 28/36 DCD that some tiny parts (whose function is a mystery) were missing. I ordered these from my old friends Pierce Manifolds in California. When they arrived there was a 93p customs charge and an £8 handling fee - almost as much as the parts cost. I fitted them, mounted the carb., connected the throttle cable and realised that I'd not made provision for the cockpit end of the choke cable. Pondering its location made me realise just how ugly my high-level dash was. After more head scratching I decided to re-mount it at its original level - as if I didn't have enough to do!
I'd originally raised it as I'd neglected to factor in the steering column's position, which clashed with the 100mm Spitfire tacho. After some careful measuring I hit on replacing it with an 80mm one. As ever, cardboard assisted design resulted in this masterpiece .
It's now been transferred to ally sheet and is awaiting the Smiths tacho. I won on Ebay. This cost me about half the price of a new one, which would have cost about £160.
In the meantime I've made up the Bundy pipes which fit on the Spitfire 1500 backplates. I only realised these were needed when I offered up the flexi hoses I'd bought, which were too short, bought the correct ones in stainless, and found their outboard ends weren't of the screw into the cylinder style. Study of exploded diagrams put me right - every day is a day at school!
The only other result I've achieved was getting a very local bloke to weld the extension into my inner steering column, which is now fitted.
Looking good Mick, you'll soon be on the road. I always enjoy the challenge of the final fitting of various components to get the car just how you want it. Can be a bit frustrating at times but the finished job is always rewarding !
Bit of a non-sequitur, but yesterday, whilst searching though my mountain of kit car photo's for Monaco ones, I found this.
I'd not long finished the blue Phaeton II, 1300 Triumph powered, when the grey one came to my notice. I paid £350. It was Ford 1700 V4 powered. This engine earned a few bob at the scrap merchants, all it was good for, to be replaced by a 1300 X-Flow and passed on to a club member. He completed it, had it sprayed, and promptly wrote it off.
My friend's red Phaeton started life in black with 1300 Triumph power, in the incarnation pictured it had a 1500 Triumph. He then painted in in Marlboro Mclaren dayglo and white and installed a 2500 Ford V6. We went to Le Mans in it in '91, blowing a half shaft on the way back. Its fourth and final incarnation was in BRG with a yellow centre stripe and a 3500 Rover V8. I took it round Castle Combe and can confirm it was a rocket. I'll post more pictures if I find any.
Regards, Mick
This appeared on ebay a few days ago. I'm tempted to take up the 'Make Offer' option, bidding what I paid for it back in '89 - £80 .
I brush painted it from its original yellow with Ripcerol left over from my first Phaeton above. I swapped it for yet another Phaeton which I fitted with a Rover V8. Happy Days.
Eighty quid? That wasn't much money even back then. It did look nicer in blue and it's perhaps a little pricey, but who knows, if someone really wants it they might just pay the price.
Eighty quid? That wasn't much money even back then. It did look nicer in blue and it's perhaps a little pricey, but who knows, if someone really wants it they might just pay the price.
Have you contacted the seller?
I neglected to mention that when I bought it in Worcester, the vendor had T-Boned someone and written off one side of the front. He was still limping. I cut off the front of the frame, got my welder to replicate it straight, and got a friend in the trade to weld it on. This all cost £120, so £200 was the real figure.
I know the vendor quite well. He lives in Australia (but is Covid quarantined over here) and we corresponded at some length prior to his visiting me a few years ago when he was over here. I gave him the original grille and 8" steering wheel which had lurked in my shed for decades, and quite a bit of guff I'd amassed, including a letter from Tim Dutton offering to buy it from me for scrap. I also passed on the transparencies I'd obtained from the original owner, whom I'd tracked down and corresponded with. The advert picture with the camper van is from one of them. The vendor also owns the green one.
I know chapter and verse on these cars from my Dutton years, during some of which I edited the club magazine. I could tell you a lot more about KPX594J but it's stuff I won't commit to print.
The type 12 caliper is held together with 2 bolts. The type 14 with 4. So it looks like yours are type 14.
Cheers Robin
A little knowledge is a dangerous thing! In February, armed with my recently acquired 'four bolt' fact, I bought a pair of Type14 callipers from ANG, a really good concern I've used many times . When they arrived I put the unopened box in the shed to await brake-time.
Having finished those at the rear, I last week jacked up the front, took off the wheels and wire brushed and emery'd the discs. I'd kept the brand new pads and the fixings gubbins, which I cleaned up ready for assembling into my new toys. I removed one from its packing and offered up a pad. WTF! The pad is way too big for the calliper! A little internet research revealed that my old callipers are Type 16 to match my (unbeknown to me) Vitesse/GT6 front suspension. I've been in touch with ANG and, once they've received the Type 14s and verified their unmolested state, we can sort out my latest SNAFU. Criticism of Robin's helpful advice is neither warranted nor intended, I simply should have noticed the big fat discs and thick anti roll bar, and the penny would have dropped!
The last lap of my dash saga has been trying, this car has fought me every inch of the way, but hopefully I'm almost there. I transferred the outline of my card template to ally, cut it out and carefully relieved the tacho. hole until it just fitted with a slight push. Next job was to rivet the plate to the existing, the steering column and padded Mole Grips holding it. My usual pop-rivet overkill soon had it in place. As its wiring differs from that of the Triumph impulse item it replaced, a little creative bodging of the relevant ends of the loom was needed, but this turned out not too untidily.
I'm going to have to dream up a bracket for the floating left hand end of the dash - the body seems to have changed shape slightly since pre-paint days - and fit a couple more fixing bolts where I've marked with black dots. Although it looks as though the steering wheel might mask the view of the tacho., the high seating position makes it perfectly visible, up to the 7,000 RPM mark, so not going to be a problem. The wavy line gear stick clears both the dash and the steering wheel, which I've embellished with my '82 vintage DOC badge as I regard the DOC as my kit-car spiritual home. The hideous butchering of the coaming moulding (guilty) will need some cosmetic treatment some time.
Once my Type16 callipers arrive I can fit them and bleed the system, then all that's left is covering the seats, sending off my V627, and getting the engine running. How I feel at the moment, I'll probably take her around the block once then immediately sell her to Marcel or whoever, time will tell...


 .
.

 in very hot water and worked it over the nipple, which I'd fitted in the upper of the two tappings on the cylinder so that gravity would assist in purging air. Not that easy with the copper pipe in the way. I'd given both end nuts a final tighten as I'd not made up hydraulic pipe before, and was unsure if my flares would be OK. Five minutes with my son sat in the car and we had a pedal, and no leaks