MadaboutKitcars

This is a read-only archive of the old Madabout Kitcars forum. New posts and replies are no longer possible, but every thread is still here to browse and read.

A Triumph Swordfish 1500 - On The Road

25 Jun 2019, 8:50pm
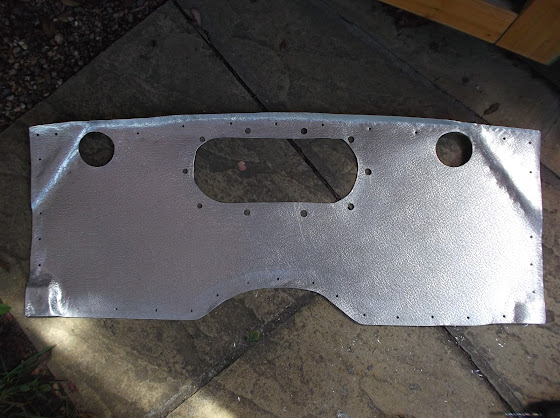
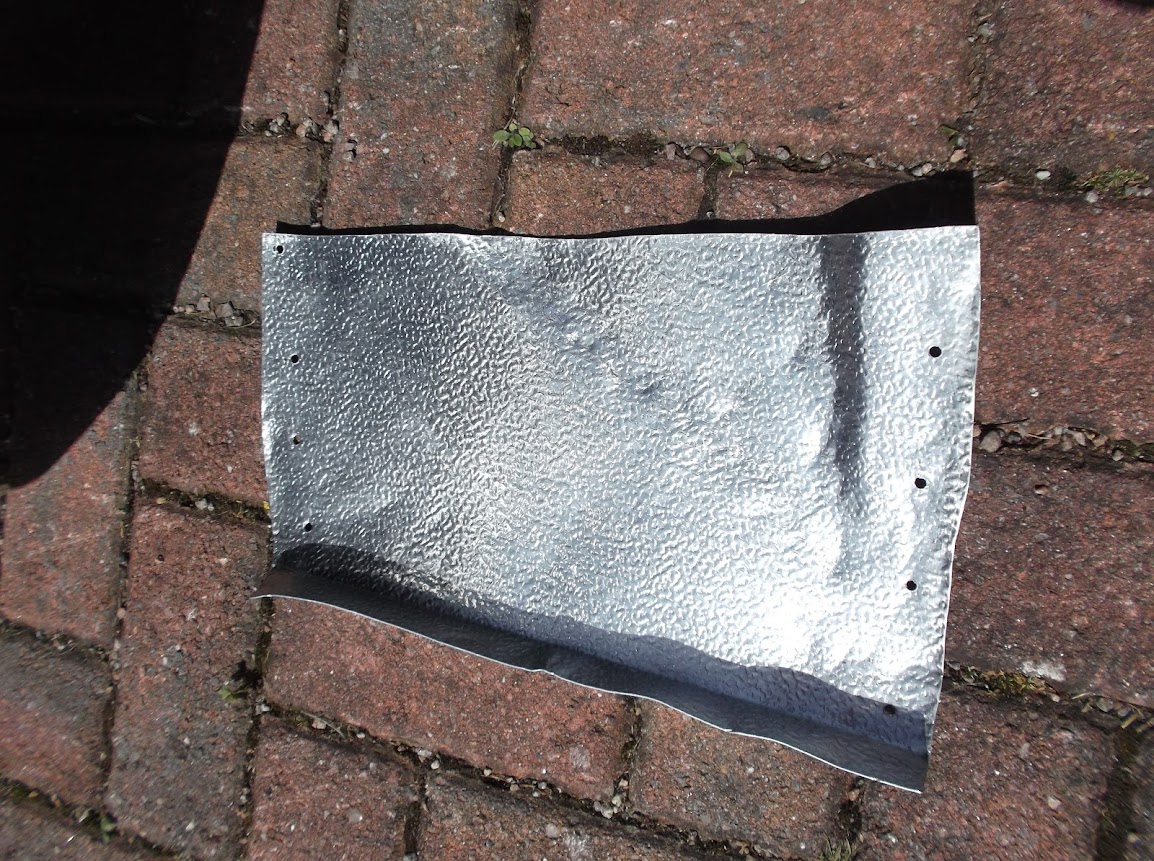
Oxford - The finish is called 'stucco' and these were left over sections from a building site.
( Think the air conditioning ducting that Bruce Willis always seems to find himself in. :D )

My hope was that this surface would 'absorb' the lumps in the cockpit walls better than milled alloy.

Check the post below to see if you think this has worked in practise.

- - - - - - - - - - - - - - - - - - - - - - - - - - - - - - -

Piguin - Cheers and I was able to take a big step towards getting these panels installed today. :cool:

- - - - - - - - - - - - - - - - - - - - - - - - - - - - - - -

Tuesday
Confession time…

The back of the cockpit wall has a small unfinished section, see the grey strip in this photo.


This is because when the car was in primer, I was planning to paint this section BRG.

But when I started painting, I realised it should be part of the cockpit walls and be painted black.

Unfortunately, by this time, the seats were fitted and I didn't want to remove them to get some black paint on.
( As fitting them almost broke me at the time. :rolleyes: )

So I need to touch up the black paint (Tetroseal) before the panels are fitted.

However in the meantime, I make a start on fitting and shaping the rear panel.
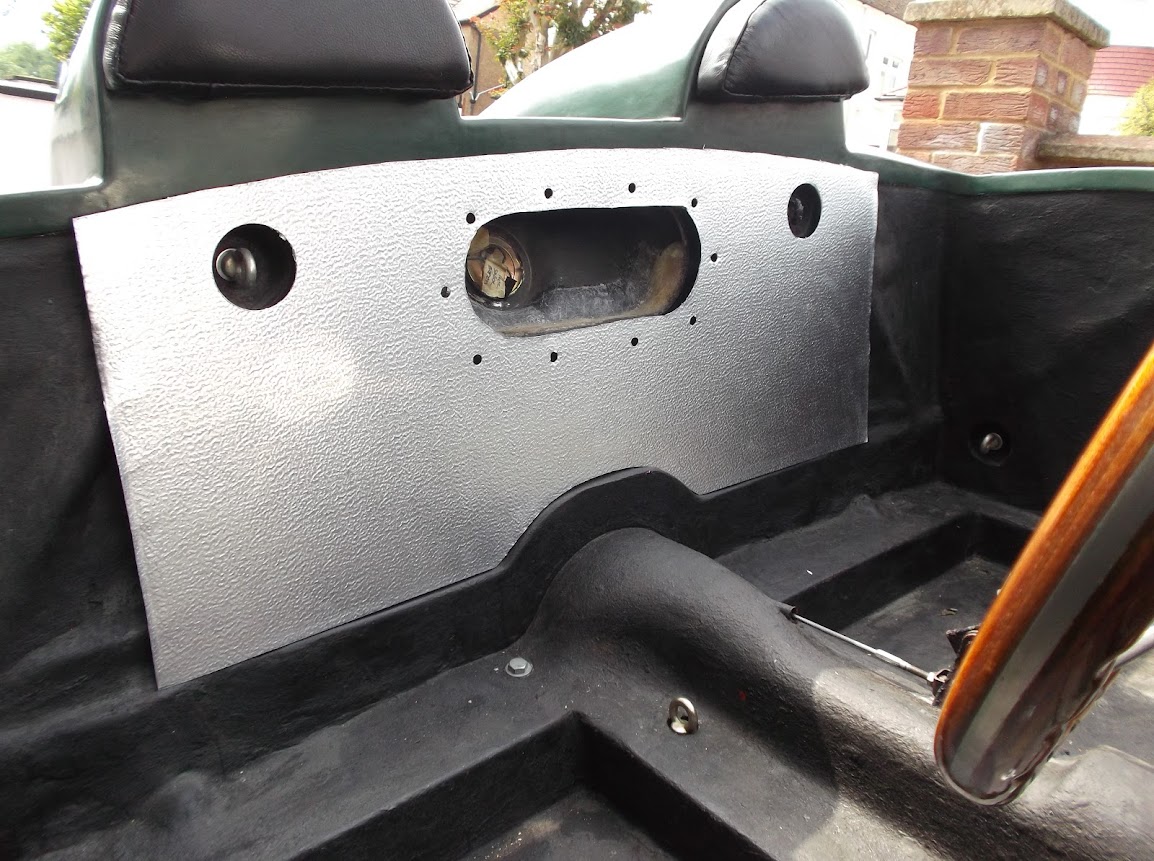


This involved testing/marking/trimming/hammering/etc.

Here is the work in progress along the top edge of this panel.
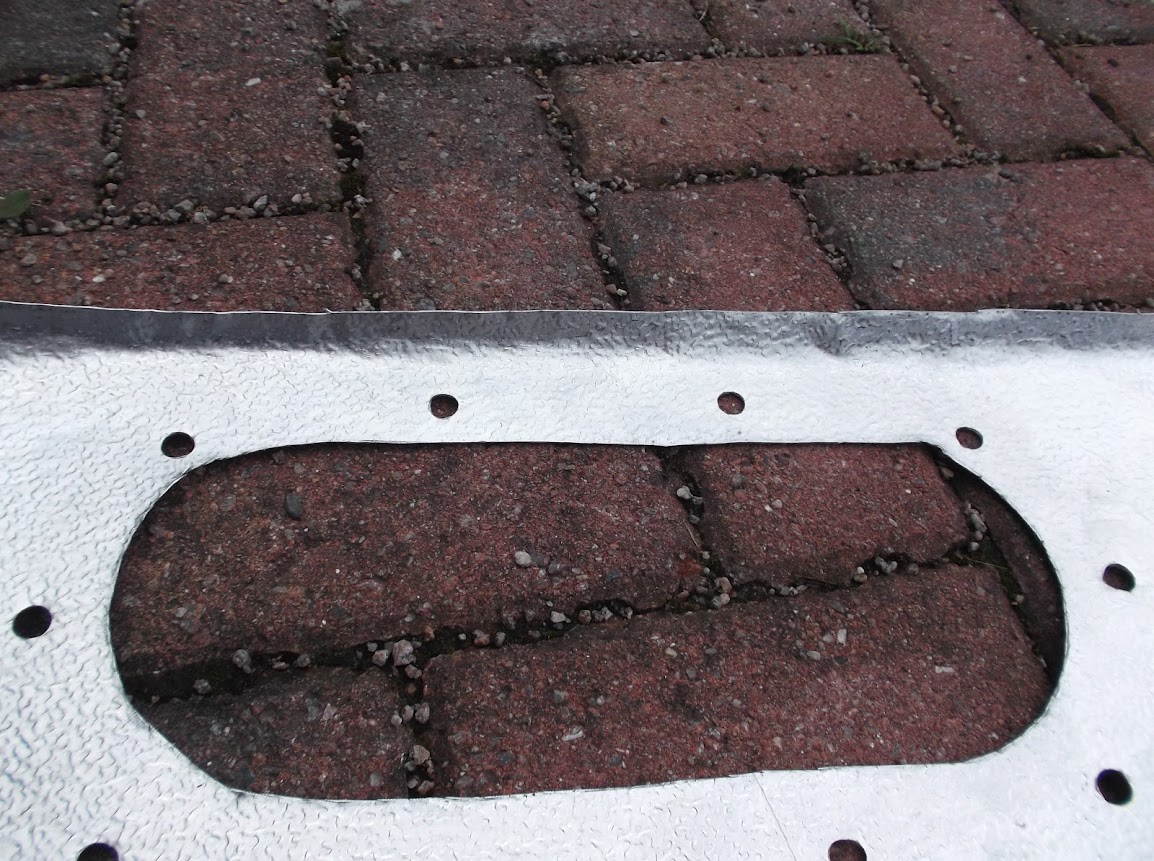


Which will tuck in under the painted edge of the cockpit.
( This photo is from the passenger side. )


Obviously, I can't get a tight fit until the panels are screwed into place, but this gives you the general idea.
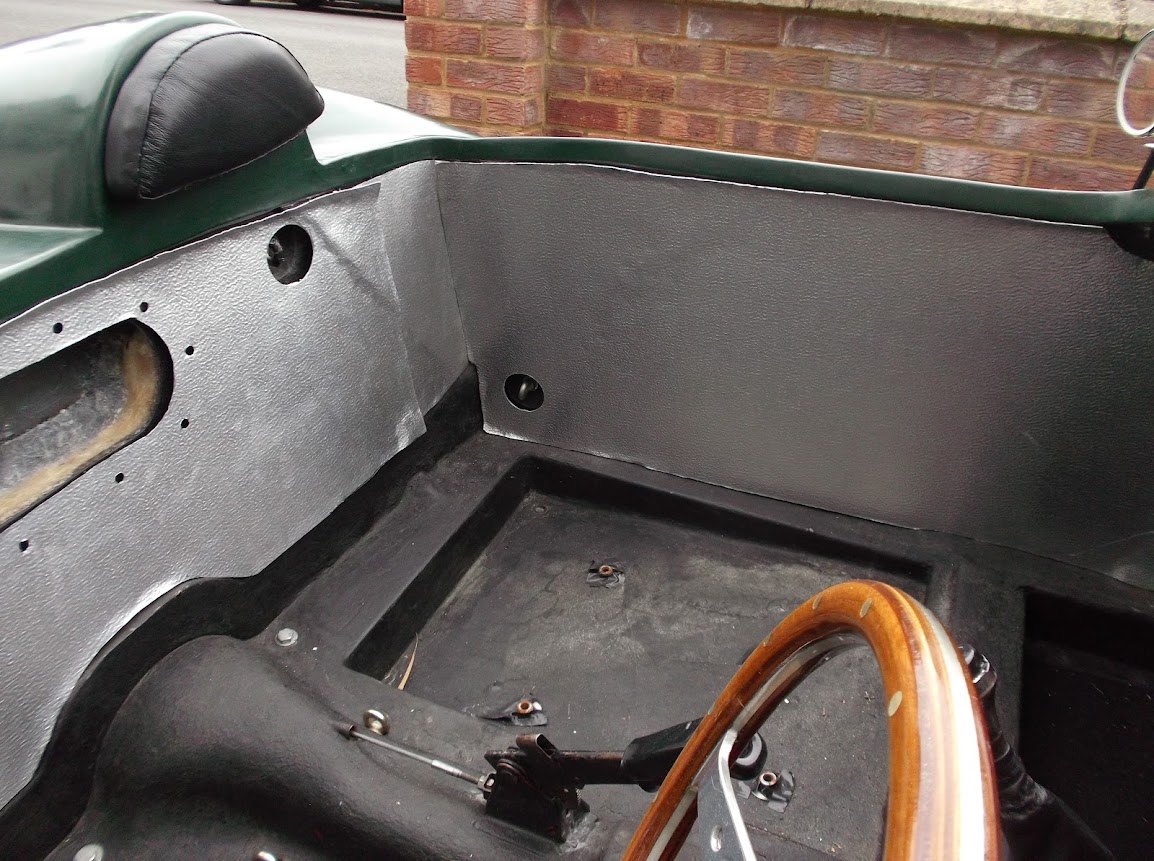


Hopefully, the black Spitfire edge at the bottom of the rear cockpit wall matches the start of the Spitfire bulkhead at the front.


Note: I still need to make access panels for the side mirror bolts.

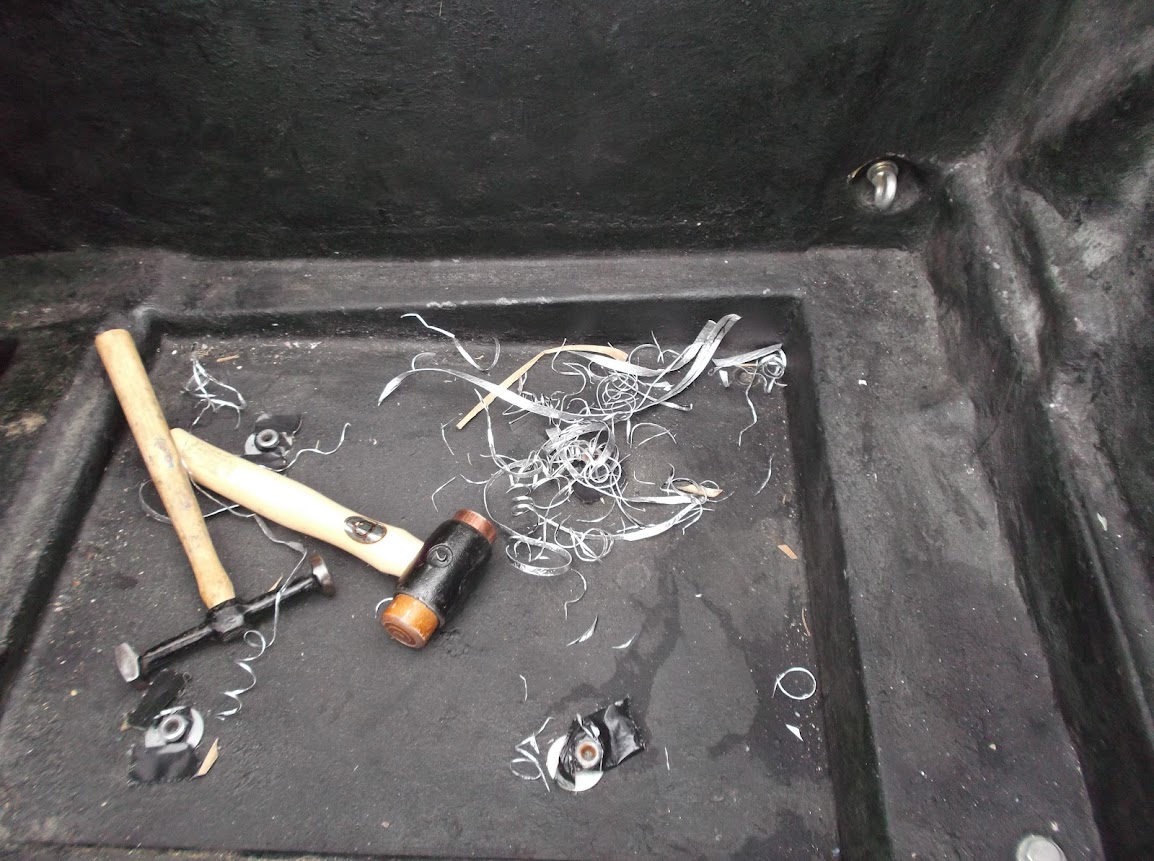
These two photo show the lumpy nature of the rear cockpit walls.


And this gives you an idea of the alloy trimming required.


The next step for these panels is to tidy up all the edges, but that is a job for another day.

So until next time, take care, Paul. :)
25 Jun 2019, 9:40pm
Looking good Paul, will you paint these panels?
26 Jun 2019, 7:35am
Molleur - The plan is to leave the alloy panels as they are.

But I may add some of the 'sponsor' stickers I didn't add to the outside of the car.
( Assuming they stick to the stucco surface. )

Cheers, Paul. :)
26 Jun 2019, 8:46am
Paul L wrote:
Molleur - The plan is to leave the alloy panels as they are.

But I may add some of the 'sponsor' stickers I didn't add to the outside of the car.
( Assuming they stick to the stucco surface. )

Cheers, Paul. :)


That will look good, so with the stickers.
26 Jun 2019, 8:48pm
Molleur - Cheers. :cool:

- - - - - - - - - - - - - - - - - - - - - - - - - - - - - - -

Wednesday - Part 1
The two parcels that arrived in the the post lead to a slight change in plans…


But before I tried to fix my fuel line problem once and for all, I did a bit of painting.

I started by masking off the BRG edge of the rear cockpit wall.


Before slapping on some Tetroseal.


I also covered the fibreglass between the cockpit wall and the petrol tank.


I then removed the masking tape to let the Tetroseal dry.


Note:
Most of this will be covered by the alloy panel, but any gaps at the edges will now look black rather than grey.

Then I started replacing the rubber fuel lines in the engine bay.

This is the new hose from the fuel pump to the carb.


The new hose was longer than the one I replaced to allow a better routing.

I also split the old hose to cover the braided oil line to prevent any potential rubbing.

Two new sections of hose connected the fuel filter to the hard line.


So far, so good. :cool:

End of Part 1…
26 Jun 2019, 8:48pm
Wednesday - Part 2:
For the new copper fuel line I had to use my cheap and cheerful pipe bender.


I then cut the old fuel line a bit further back to mock up the position of the new.
( As I wanted the end of the new pipe to be held by the P-Clip. )


At this point the rest of the pipe was just sticking up in the air.


After some more pipe bending, it was time to cut it to length.


Then I could fix it all into place, with just a very short rubber hose join.


Followed by a nice curve up into the boot floor.


To another P-Clip inside the boot.


Before cutting the new rubber hose (also seen above) to the right length.


Note:
The rubber hose is zip tipped to the framework, but I couldn't get a decent photo.

Then it was the moment of truth as I tried to start the engine.

The good news is that is fired up and ran without any problems. :cool:

So this photo is just like the last one except there is no petrol can in the shot.


Obviously, I couldn't take the car out for a test ride as there are no seats in it. :rolleyes:

I also remembered that I need to make the alloy access panels for the side mirrors before I fit the panels.

As I need to drill some holes in the cockpit side panels for the access panels' fixing screws.

So until next time, take care, Paul. :)
27 Jun 2019, 2:08pm
Made a start…
Normally, if I wanted to clean up metal edges I would get my angle grinder out.

However, as the alloy is so thin, I'm sure I would grind off too much too fast if I did.

So it was back to hand files and sand paper to soften up all the edges.

I also drilled the first round of hole to fix the panels to the cockpit walls.

I only had time to do the rear wall panels.


I also knocked up a quick test piece and decided to use just a screw, not a screw and washer.


So to fix the panels I will need these three bits for my drill.


One to drill the hole in the alloy, one to drill a pilot hole in the wall & one to fix the screw in place.

Whilst this panel looks good...


The top edge of the panel was sticking a little bit too far.


The layer of Tetroseal I added may have something to do with this, or more likely operator error.

Either way, I had to spend some time marking and trimming the top edge to get a better fit.

So now I have to go back and smooth out this top edge again. :rolleyes:


All was not lost though, as I was able to mark up where the main panel over lapped the passenger side corner panel.

So after drilling a few more holes, I was able to fix this in place. :cool:


Unfortunately, I managed to break my pilot hole drill bit. :doh:


But I had run out of time by this point, so I packed up for today and will try again tomorrow.

Cheers, Paul. :)
27 Jun 2019, 7:38pm
Paul Glad to see you'v fixed the fuel supply problem and the paneling is coming along nicely. I'v found that a small surform plane works very nicely on the edges of thin alloy sheet.

Cheers
Derek
29 Jun 2019, 5:49am
Deggsy - Cheers Derek. :cool:

- - - - - - - - - - - - - - - - - - - - - - - - - - - - - - -

[Meatloaf] Two outta three ain't bad [/Meatloaf]

Started off by tidying up the edges of the two side panels.


Then overlaid my simple guide to where the framework sits behind the panels.


Before marking up and drilling a lot of holes, all of which had to be de-burred.


Then I started the process of fixing the main rear cockpit wall panel into place.

At the time, it seems to make sense to start at one end and work my way across.


Unfortunately, I should have started in the middle and worked my way out instead.

The reason I know this?

Well, as I hammered the panel flat and screwed it into position, the 'center' moved to the left.

Which meant a lot of the holes I'd made for the access panel were now in the wrong place. :doh:


Thankfully it was easy enough to enlarge some of the holes.


But for others, I ended up cutting out a 'path' from the main access panel hole.

So at this point, it looks a bit of a mess, but none of this will be seen when the access panel goes back on.


Note:
Thankfully, I remembered to leave the final few screws from the left hand edge at this point.

As I needed to test fit the driver's side corner panel.


This allowed me to mark up and drill some more holes in this panel.


By this point' I had learnt not to pre-drill the holes where the two panels would overlap.

Instead, I simply started at the top of the overlap and worked down one screw at a time.
- Carefully drilling out the alloy on the lower panel through the top panel hole.
- Then drilling the pilot hole in the plywood wall.
- Fix screw in place.
- Hammer panel flat and repeat.

By working my way down from the top edge, this was the final 'lumpy' join at the bottom.


End of Part 1…
29 Jun 2019, 5:50am
Friday - Part 2:
Next I had a look at the side mirror mounting point on the passenger side.


Note:
You can see another 'edge' than I thought was going to be BRG, but should have been black and ended up a messy grey. :rolleyes:

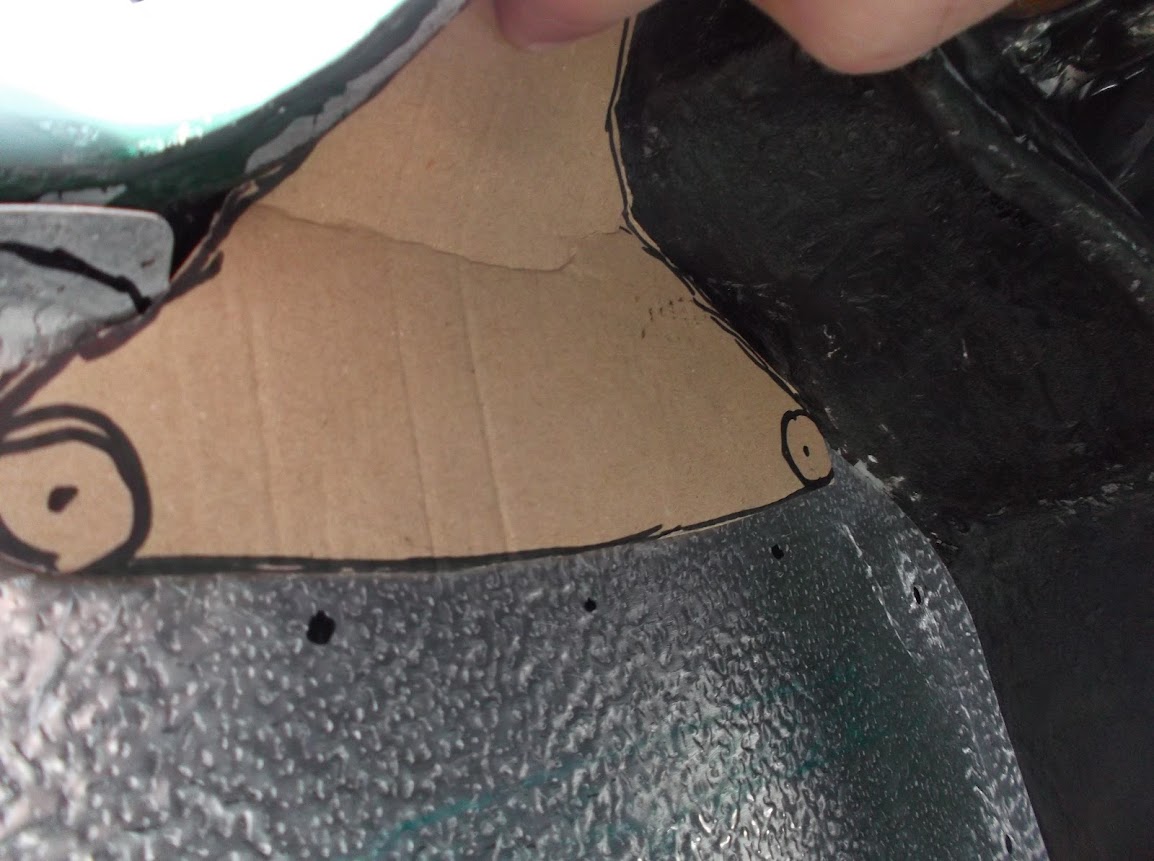
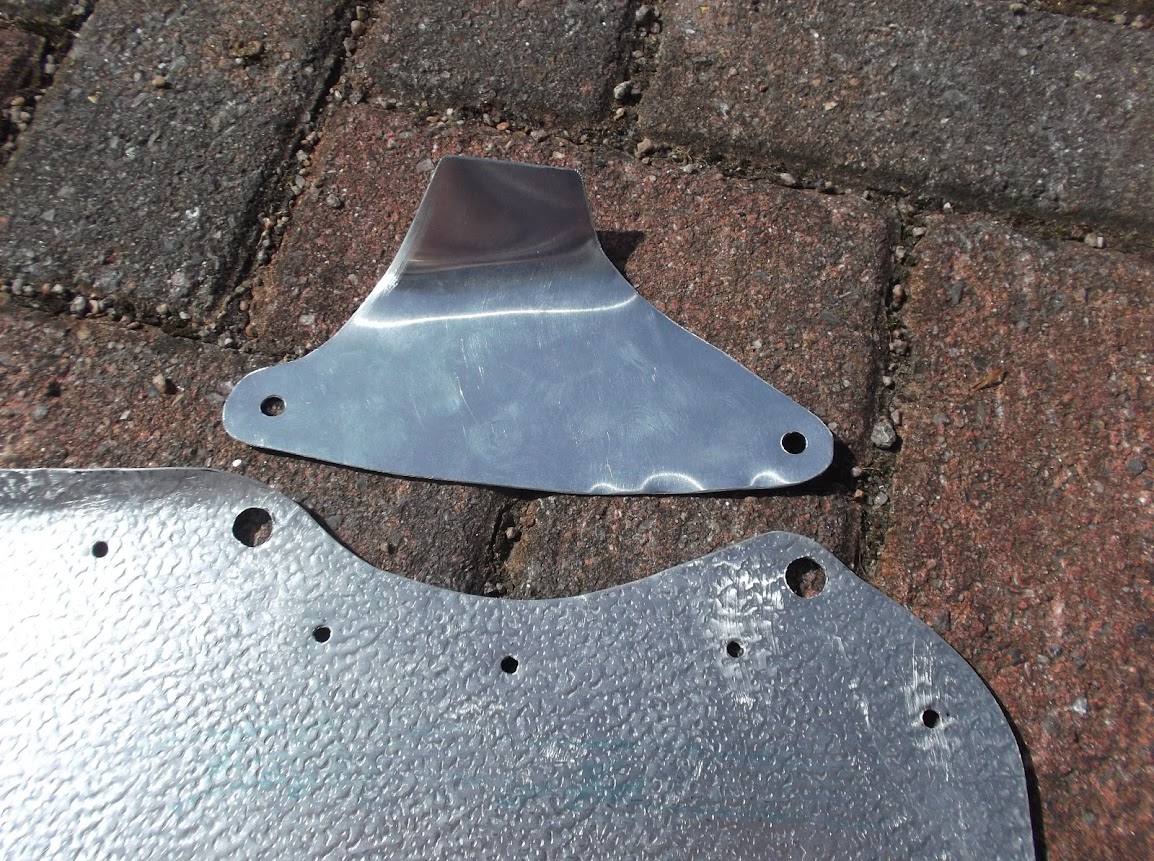
Made an initial cardboard template for the access panel and marked up the main panel for a slight trim in the corner and some fixing holes below the panel.


Cut the access panel out of milled aluminium and drilled all the holes required in both panels.


Despite giving the main passenger side panel an extra trim before I started, I still ended up with a problem corner. :icon_evil:

Not a great photo angle, but this is leaning over and looking down on to the top edge of the rear corner of the passenger side.


Part of the problem is that at this point, the join of the cockpit wall and the body shell is almost flush.

So I needed to trim a bit more off, which was tricky as the rest of the panel was already screwed in place. :rolleyes:

Thankfully, I was able to carefully tidy the edge up without accidentally running a metal file across the body shell's paintwork.

By this point, I'd spent many hours cooking in direct sunlight, bend over the body shell trying to fit everything as best as I could.

The fact that in some cases, each screw was taking three drill bit changes to fit was not certainly helping.

So when my wife suggested we ate out, I gratefully took that as a sign to pack up for the day.

Before I post the 'reveal' shots, remember this build is not a quest for perfection.

So whilst these panels may not be perfect, they are miles better than the Tetroseal finish I had before. :cool:


Notes:
- I didn't actually notice the fold line where I had to trim the corner edge, so I'll try to hammer that flat next time.
- I will be adding an extra horizontal row of screws along the middle of the panels to eliminate any possible vibration issues.

So 'two outta three' sides completed, but technically 'four outta five' panels fitted. :cool:

Until next time, take care, Paul. :)
29 Jun 2019, 7:49am
Will you add a small rubber slip on edging to protect your self from the sharp edges???
29 Jun 2019, 2:07pm
RedRatBike - The current plan is see how I get on.

As I've spend a lot of time making sure the edges are smooth to the touch. :pray:

- - - - - - - - - - - - - - - - - - - - - - - - - - - - - - -

It ain't half hot mum.
Made a few adjustments to the remaining side panel where it met the rear corner panel, as it seems too long.


As it turned out, by the time I'd got to fixing this edge in place it ended up being slighty too short. :doh:

One day I will trim the bolts holding the driver's side mirror in place. :rolleyes:


But for now, I just needed to make a template for the cover panel.


As before, this allowed me to mark up and drill the final holes needed on the side panel.


End of Part 1…
29 Jun 2019, 2:09pm
Saturday - Part 2:
By the time I was ready to start fixing the side panel it was after 11am and thankfully the sun hadn't reached the car yet.


It took over an hour to fix the panel in place, by which time I was sweating buckets and my back was aching.
( From all the reaching in over the side of the cockpit. )

Still, the final panel was in place and it was worth the sunscreen burning my eyes. :cool:


Note:
What looks like a crease is the panel trying to follow the contours of the cockpit wall, that does slope in.

My next job is to put a number of screws in the middle of the panels to stop any vibration.

I want to have a think about the best way to do this, so all thoughts are welcome.


Option:
A - Single row, evenly spaced, in the middle.
B - Two rows, evenly spaced, at 1/3rd & 2/3rds.
C - As above, but unevenly spaced.

My current preference is for "C", as I want to add a few extra screws around the seat belt cut outs too.

The postman delivered this today, a replacement float the fuel gauge sender


As I noticed that that the one I currently have has sprung a small leak and has some petrol on the inside. :icon_sad:
( I had removed the whole unit when I was trying to fix my fuel problem. )

That was all the time I had for the car, as I had other chores to do, including gardening in over 30 degrees heat.

At least all the rain we had at the start of June means the grass is still very green. :cool:


Hope to have a family BBQ this evening, so I'd better go and finish preparing for that.

Cheers, Paul. :)
30 Jun 2019, 6:11pm
Some finishing touches...
I decided to go with Option C (see post above) for the extra screws in the side panels.

This involve marking a couple of horizontal lines and then spacing out where to drill holes.


In addition to adding a load more screws, I cleaned up the rear cockpit wall access panel.

Which had lumps of Tetroseal stuck to the underside.


And some drops of BRG on the sunny side.


Thankfully, this all cleared up nicely. :cool:


But before I could fit this, I had to replace the float from the fuel gauge sender.

This was the small amount of petrol sloshing around the old one.


With the sender back in the tank and connected up...


I started the engine just to check the fuel gauge was working.


Note:
The fact that the engine now starts and runs without any issues still makes me smile. :D

End of Part 1…
30 Jun 2019, 6:12pm
Sunday - Part 2:
I have a bag of extra screws that match the ones used on the rear wall access panel "somewhere".

But after rearranging everything in both the new shed and the Summerhouse I can't find them. :rolleyes:

So rather than waste any time now, I simply 'borrowed' four from the rear panel to fit the side mirror bolt covers.


So there are some gaps in the rear panel that I will fix in the next few days.

However, you can still get a pretty good idea of how it will look in the end.


Plus here are the side panels.


Finally, some wider angle shots.


I must confess that this has worked out much better than I ever could have expected. :cool:

So until next time, take care, Paul. :)
30 Jun 2019, 6:31pm
The effort pays off! Looking fantastic Paul.
30 Jun 2019, 6:50pm
Looks great Paul, I love the continual evolution of your build.
30 Jun 2019, 8:53pm
Paul,

Loving what you have done to the interior. Looks just right. You should be proud of your effort. Great progress thread.

Dave
1 Jul 2019, 6:02am
Nice work Paul, definitely a worthwhile upgrade.
1 Jul 2019, 6:55am
That smartens the interior up nicely.
Will be interesting to see if you get any 'drumming' from the panels.
Shouldn't do, as you appear to have sufficient screws.
1 Jul 2019, 4:47pm
Molleur, Jones, Dave, Mr T & Colin - Thanks gents. :cool:

Note: If there is any drumming from the panels I have plenty of screws left over.

- - - - - - - - - - - - - - - - - - - - - - - - - - - - - - -

Just a token gesture...
While the seats are still out, I thought I should test fit the base panel for the hand brake gaitor.


Then I just rested a seat in place and realised it would be easier to drill the fixing holes now.

After a bit of trimming and hammering I was left with this.


Eventually, I will use the same 'access panel' screws to fix this in place.

But for now, I just used some screws to hold panel in place as I drilled holes on each side.

This panel will be scuffed before final fitment, as this looks way too shiny.


Other odd jobs today included using some Kurust on the seat spacers.


Plus I masked off the areas around the new mirror bolt access panels.


At some point, the underside edges will get a coat of Tetroseal.

But that was all for today, cheers, Paul. :)
2 Jul 2019, 9:13pm
Almost complete...
Lots of little odd jobs to do, including taping the seat spacers in place.

For some, the penny washer was nicely stuck to the Tetroseal on the floor.


For others, the washer also needed to be stuck into position too.


The seat belts need to be fitted before the seats can go in.

So I added a layer of tape on the inside surface of the fixing plates.
( In a vain attempt to reduce some of the rattles in the car. )


Unfortunately, the grey shows up some of the stains the belts have picked up over the years.


So I spent a little while giving them a scrub, but it made very little difference.


Driver's side in.


For the record:
Fitting these seats the first time around was almost the straw that broke me on this build. :icon_sad:
( Back in August 2016, that first seat took 4.5 hours to do! :eek: )

The main problem is that I can't see where the bolts are going into the base of the seat when I am underneath the car. :rolleyes:

So today's approach involved some 'sticks'.


Which then poked out of the floor.


I then applied copper ease to the bolts.


End of Part 1…
2 Jul 2019, 9:14pm
Tuesday - Part 2:
When the first bolt went in without any problems I felt a small wave of joy sweep over me.

Unfortunately, I then could not manage to get any of the other three to go in at all. :icon_evil:

At this point, my stiff upper lip may have experienced a slight tremble.

But I had another go at lining up the seat from above and this time all bolts went straight in. :cool:


This joy was short lived when I realised the top seat belt mount had slipped and was now facing down.

It took a significant amount of brute force and ignorance to get the fixing bracket the right way up.

But eventually the driver's seat was in.


For the passenger seat, I just needed to clean up a patch on the rear of the seat.


This time I taped the top seat belt bracket in the upright position.


This seat went in even quicker and so now both seats are in. :D


While I still can't find my big bag of screws, I did find four to complete the rear access panel.


It then gave me great pleasure to climb into the seat and start the engine.

But I just need to sort out the boot and my tool bag before I go for a drive.

Until then, take care, Paul. :)
3 Jul 2019, 4:57pm
Back on the road again...
There were just a couple of small jobs to do before I was ready to hit the road.

The first was a major tidy up of all the tools used recently and a hoover of the boot floor.

Then I could put my car tool bag back into place.


Last thing to do was to fit the new rubber seal for the petrol cap, that arrived yesterday.


Unfortunately, as I was in the process of fitting it, the petrol cap internals fell apart.


The good news is that nothing was dropped into the open petrol tank.

So I made sure that the tank was covered before attempting to re-screw the parts back in.


But no matter what I tried, the small little screw would not hold.

This leads me to believe it has actually snapped off, leaving a bit of thread in the hole.

There is no way for me to fix this, so I will look out for a replacement.

In the meantime, I just used the spring to hold the seal in place.

I was then very careful when I stopped to fill up with petrol.

But this arrangement works OK for now.

On the Road Niggles:
- The top seat belt bracket now seems to hit the alloy making more noise than before. :rolleyes:

- The new fuel gauge float was a little longer than the original and this is fouling 'somewhere'.
( As the fuel gauge didn't move very far despite putting a lot of petrol in. )

Just to be clear, none of these things could distract from the joy of driving around in shorts and a T-shirt. :cool:

I had to make a quick stop at B&Q, where it seemed like a good idea to park in the shade.


There was just enough time for a couple of photos on the way home.


But that's all for now, so until next time, take care, Paul. :)
3 Jul 2019, 6:34pm
Looking good!
Shame about the petrol cap bit.