MadaboutKitcars

This is a read-only archive of the old Madabout Kitcars forum. New posts and replies are no longer possible, but every thread is still here to browse and read.

Another Cordite Is Born ...

27 Mar 2013, 1:13pm
Good news Paul, i've also been in the same position as you with the same bits missing.

AndyP57, does this mean my parts will be with me soon?
27 Mar 2013, 1:16pm
Yes Craig. All backlogs are being sorted as soon as I can now we're in production phase.
27 Mar 2013, 1:18pm
Yey :eusa_dance: :eusa_dance:
28 Mar 2013, 9:19pm
CraigT & AndyP57 - I'm sure everyone will be glad to see the back of the last few "legacy" issues.
At which point, the only way is forward, which has to be good news for Ribble Kits and its new customers.

- - - - - - - - - - - - - - - - - - - - - - - -

Easter Weekend:
I have been given my wife's blessing to spend a big chunk of time on the car over this long weekend.
I really need to make some progress on this rusty body shell, as it is actually sitting in her parking spot!
So I headed outside as soon as I got in from work this evening to start the ball rolling...

Body Shell Preparation:
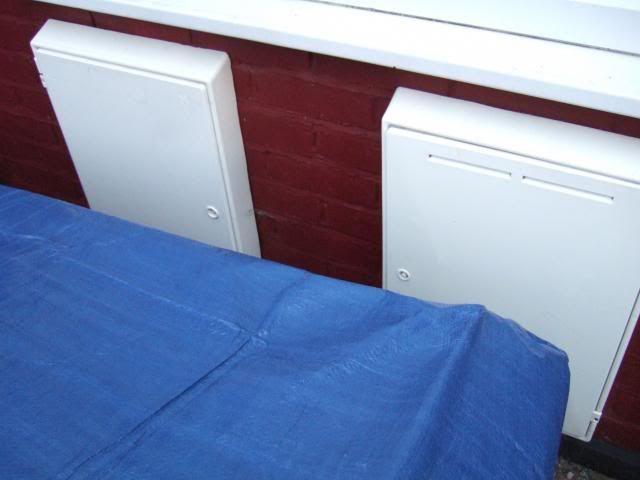
I started by moving the shell forward a bit with the help of my wife using a trolley jack as I lifted the front.
( I hadn't spotted we'd left the shell too close to our external meter boxes, so their doors couldn't open. )


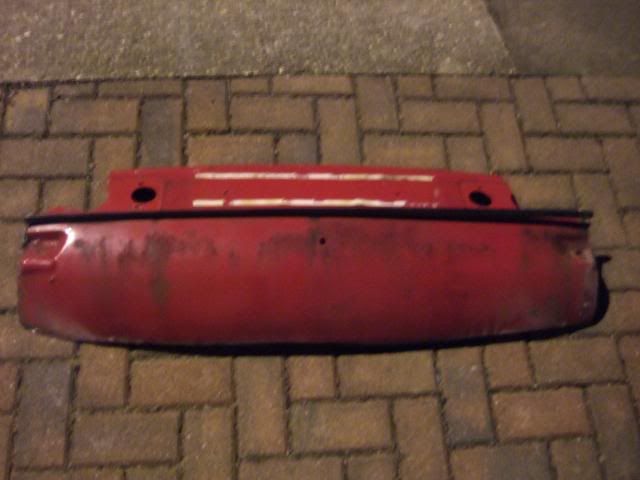
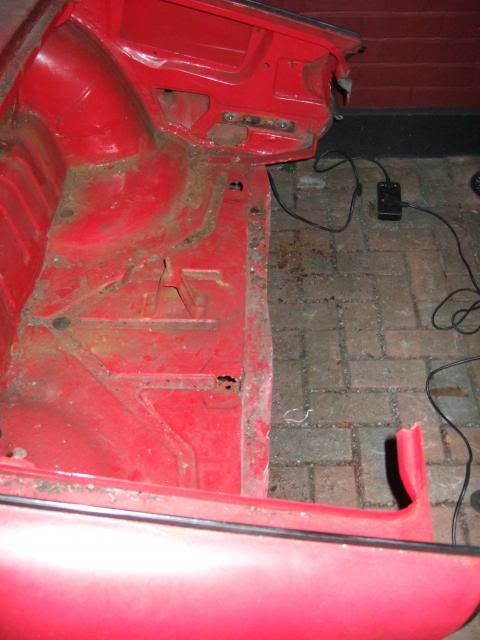
What ever my final build choice, I am going to use the rear section of body work, so that is where I started.
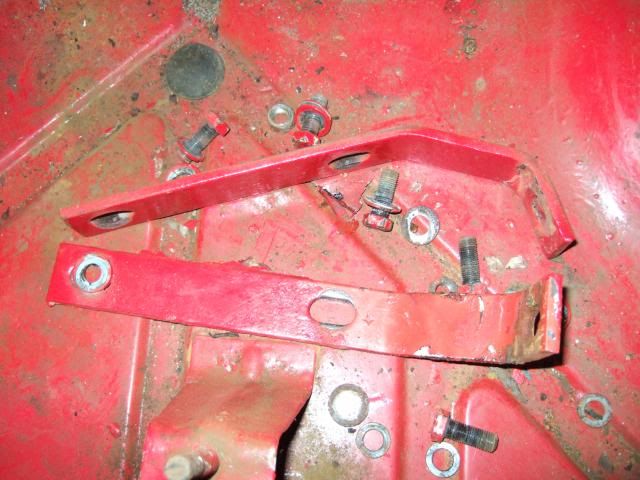
I removed two of the brackets that support the bumper first, I'll do the other two brackets in the morning.
( Both had nuts that wouldn't budge & it will be easier to see what is going on in the day light. )


Then I double checked the distance from the silencer mounts to the rear of the Cordite body shell.
( My twin silencers are simply pushed into place at the moment. )


These are the mounting bolts in my original donor, so I can see how much boot floor is actually required.
( Although I will still follow my traditional "it's easier to cut off more, than add some back" approach. )


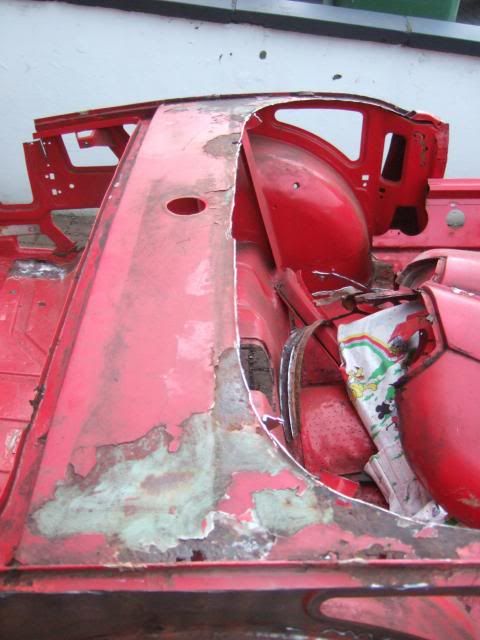
Again, regardless of which build route I take, I will need to cut out sections from both of the rear wings.
But I want to take a few measurements from both my Cordite & Spitfire shells before I go to town on them.
So for now, I decided to remove just enough from both sides to take out the section of boot floor cleanly.


Note the wavy cutting line, shortly after that I got a torch out so I could see what I was doing. :rolleyes:

After this I called it a night as I didn't want to disturb the neighbours with my angle grinder too much.
Although I figured they would prefer early Thursday evening to first thing Good Friday morning!

Frankenstein's Cordite - More Thoughts:
I came across this bulk head photo from Mister Towed's build and this was a big help visually…
( Spooky how we have matching colours and drives! )


If I do go down the Frankenstein route, I'm planning to leave a lot more of the Spifire bulk head in place.
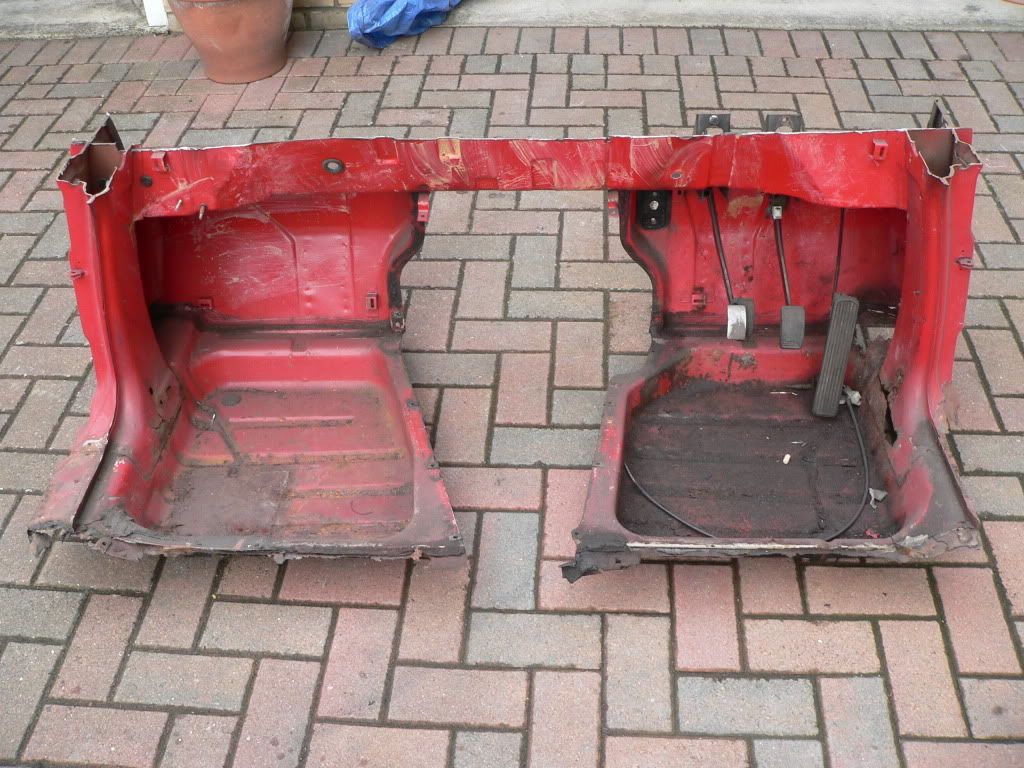
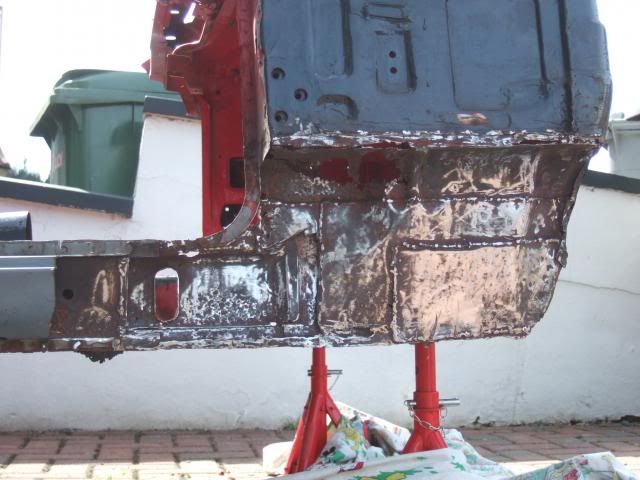
I would include the chassis mounting section before the foot wells (as seen in middle of the photo of my shell below).
Also the top of the bulk head over the dash area, as this is where the steering column mounts are.


From what I know, the Spyder framework bolts to the separate bulk head to hold everything in place.
So that would be something I would need to sort out, but hopefully well within my limited welding abilities.

Overall, I feel happier knowing 2/3rds of this shell could be used, even if the mid-section turns out to be scrap!

Quote of the Week...
... goes to Ian Cheshire, B&Q's Chief Executive, following their lower profits linked to the bad weather.

"…If you are a real optimist, we had the wettest summer for 100 years last year and March has been the
worst for 50 years, so we are clearly on an upward trajectory…"
:icon_wink:

Hopefully there will be more work to report on tomorrow, cheers, Paul. :)

PS
Angle grinding in the dark was pretty spectacular in terms of sparks flying everywhere. :cool:
29 Mar 2013, 12:29pm
Body Shell Preparation - Continued:
I had a chance to make an early start, but didn't want to disturb the peace, so I picked "quiet" jobs.
I started by applying a liberal coating of WD40 to the last 2 rear bumper brackets & the seat belt mounts.
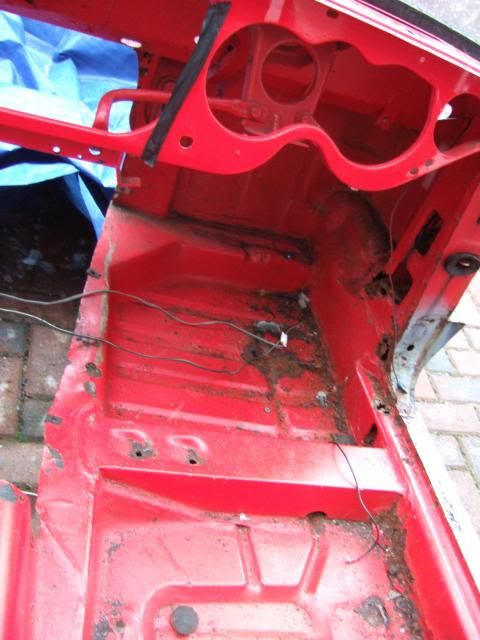
While I left them to soak, I started to clean / degrease the front bulk head area which has stuff caked on.
I also removed a few more of the remaining bits & pieces still attached to the shell.
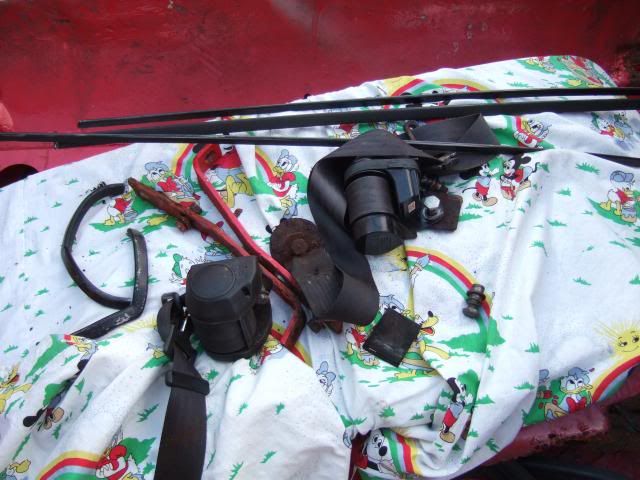
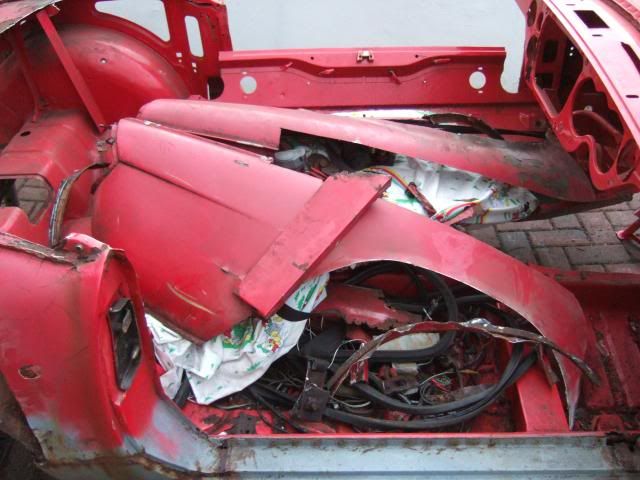
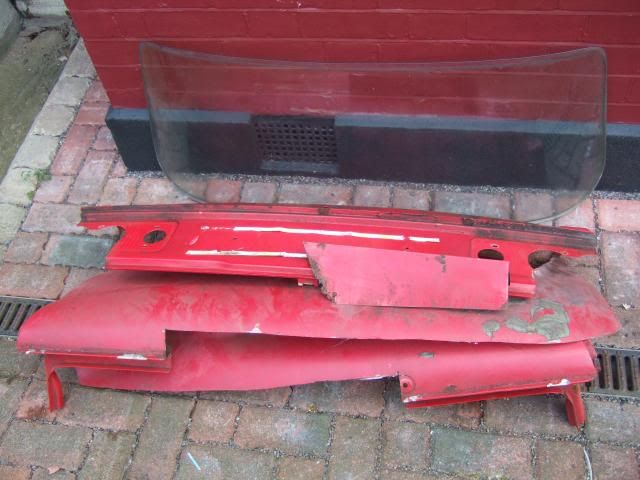
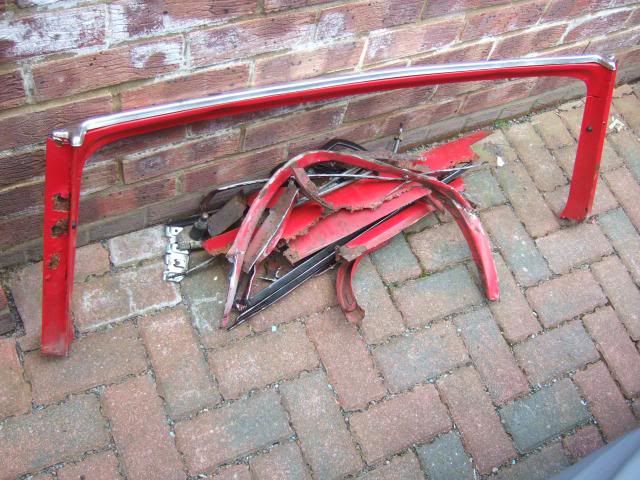
By the time I'd got the bumper brackets & seat belts off the pile of "stuff" in the middle was building up.


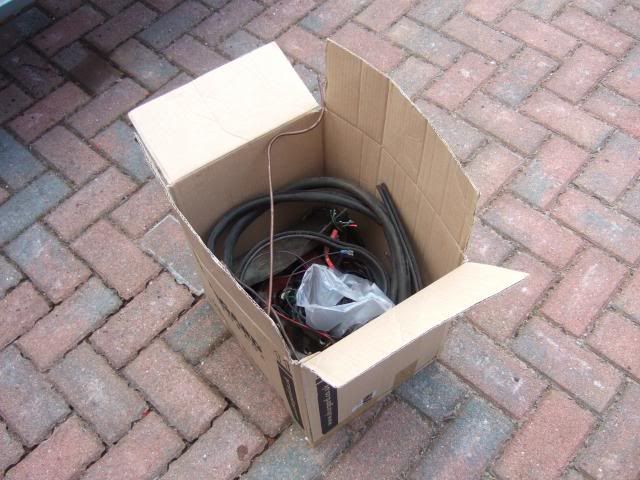
I will go thought this later & put any potentially useful bits in a box.
I'll also put the windscreen (wrapped in the dust sheet) & cut out metal in the shed for now.

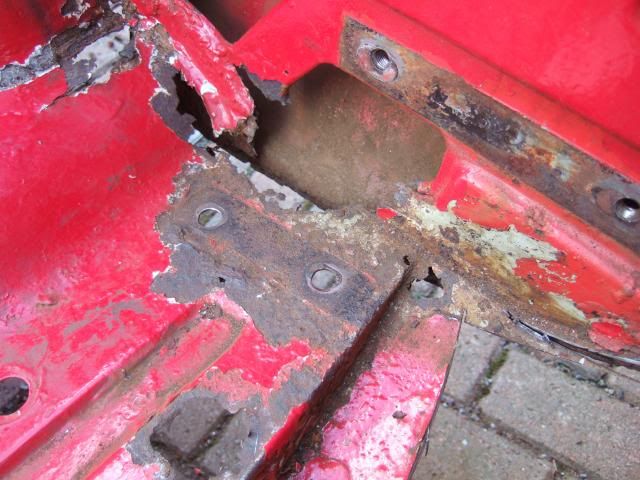
One seat belt bracket is rusted in completely and the floor it is attached to is coming away too.
So I'll cut that out when I start making noise after lunch.

One of the bumper brackets was also pretty stuck in, but did come out eventually.
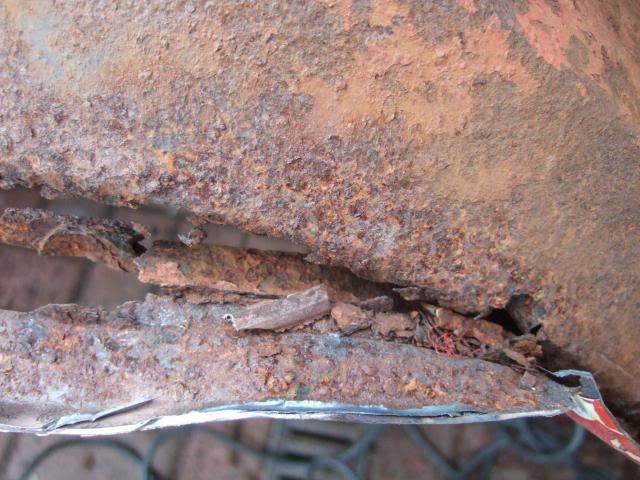
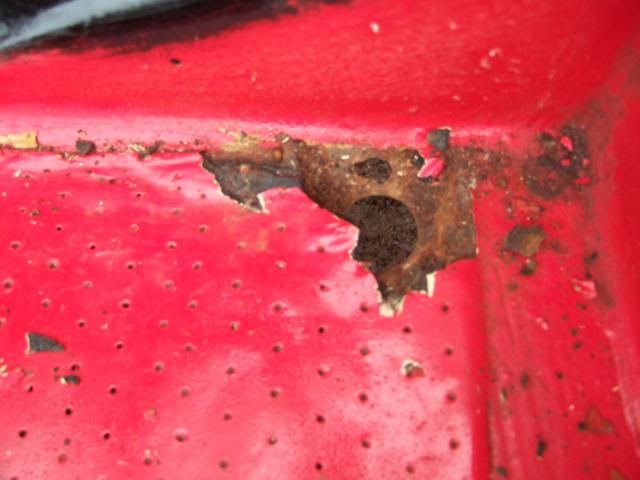
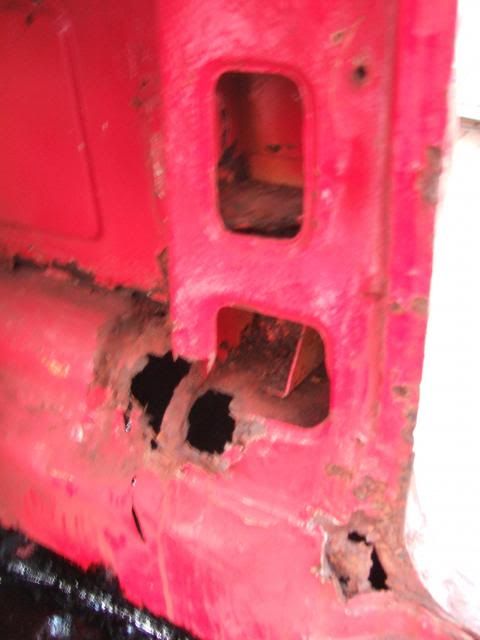
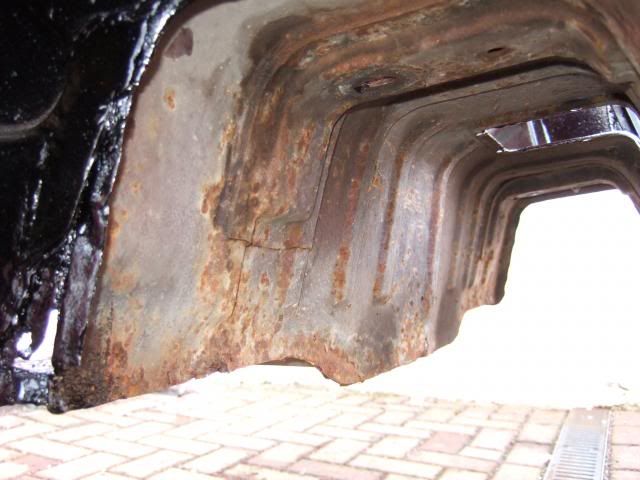
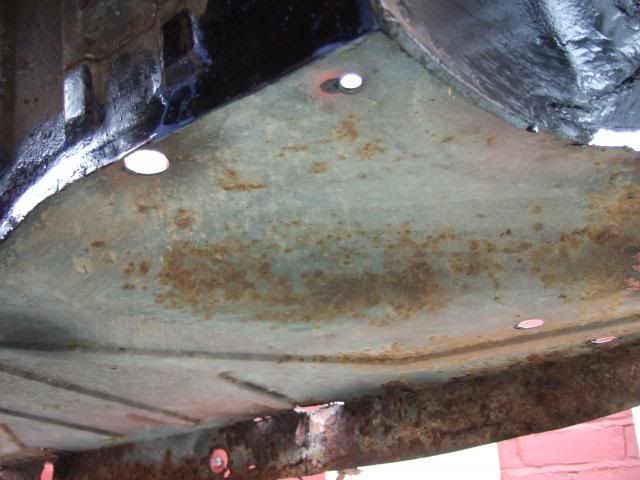
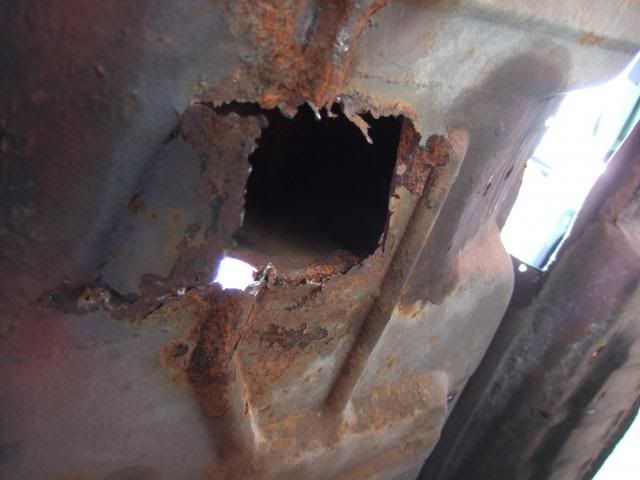
Unfortunately it revealed another huge rusty area...


Poking around with a screwdriver also revealed a large amount of mastic type sealant.
In some cases this has protected the metal behind, in others it has helped rot the metal. :icon_sad:


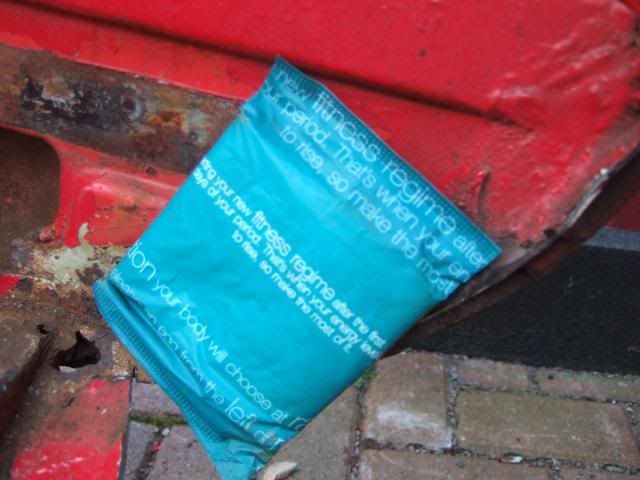
But the most unusual discovery during my rust removal work was this...


Don't ask me what a sanitary towel was doing jammed inside the rear wing.

Well there doesn't seem to be much to show for my morning's work.
But I will clean up more of the body work this afternoon with a wire brush on my drill.

I just need to warm up a bit.

Cheers, Paul. :)
29 Mar 2013, 3:49pm
Paul, your 'special find' looks more modern than the 70's so I can safely assume it was not a factory fitment! I know they used wadding covered with plastic as vibration damping......:icon_biggrin:


Obviously your car had one careful lady owner...... :wink:
29 Mar 2013, 6:00pm
Could you use it as a kneeling pad?
29 Mar 2013, 7:38pm
Body Shell Preparation - Continued:
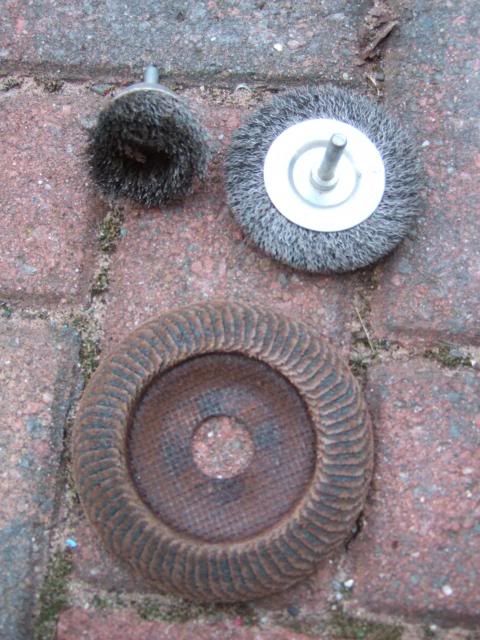
Attempting to tidy up the rust & old paint with various wire brushes in my drill just did not work. :icon_sad:
More on that later, instead I measured the distance between the wheel arches on both the Cordite & Spitfire.
The Cordite is around 143cm at its widest point, which makes the Spitfire just a few cm wider.
( Which seems consistent with the "fast build" Navigator photo where the arches are just poking out. )

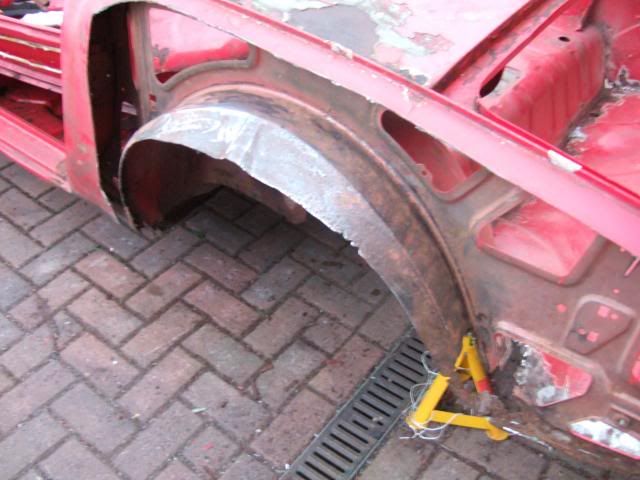
I did the cutting in stages so I wouldn't cut through anything I wasn't supposed to in error.
This gave me a much better view of what I was doing & I kept the arches as wide as practical.
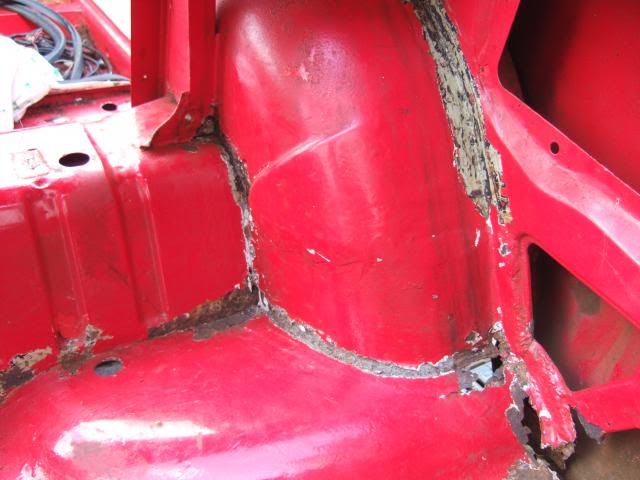
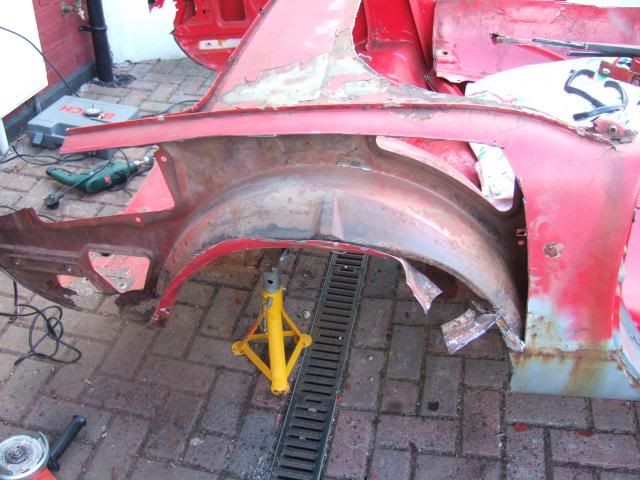
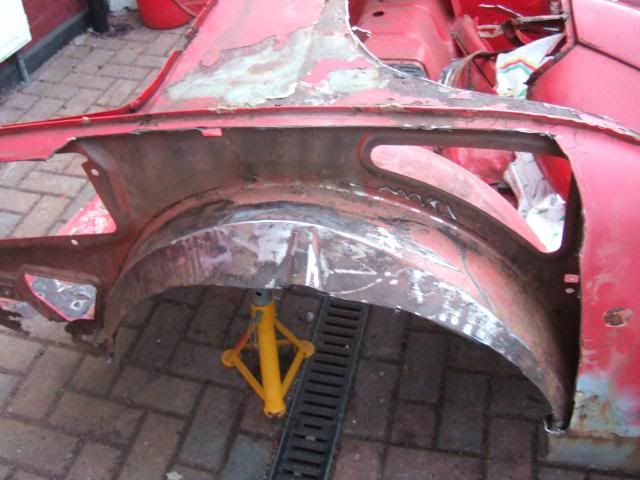
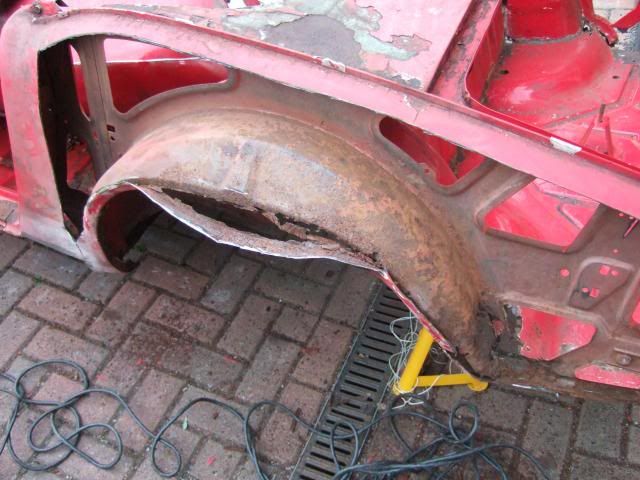
Overall, the arches were in pretty good condition behind the wing, passenger side was worst.

Driver's Side:


Passenger Side:


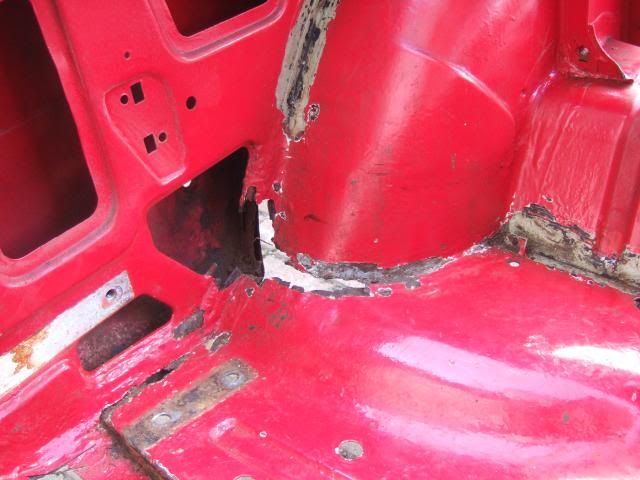
While the angle grinder was out, I tidied up the lower bulk head corner on the passenger side.
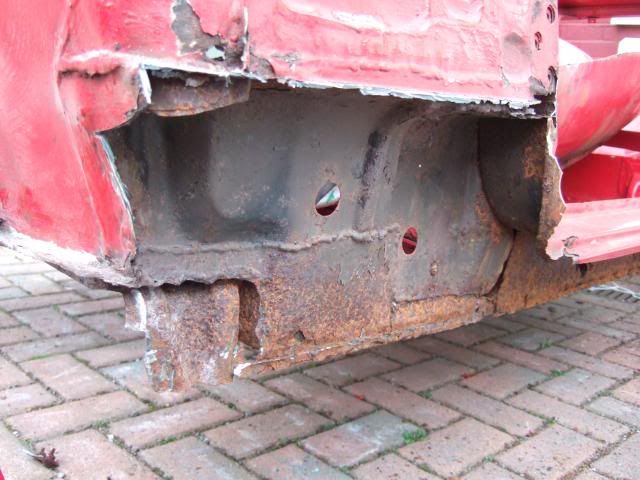
The sill was already rotten, so it was better to remove all that was left of it.
I also removed a few of the brackets that I don't need & which seem to be water traps.


I also removed the lip that the soft top poppers are attached to as it was a rusty mess.


So instead of tidying up the pile of stuff in the middle of the car, I'd made it worse! :rolleyes:


I then did a quick bit of shopping for some rust treatment & a sanding disc for my grinder.
This was definitely the right tool for the job compared to the wire brushes...


So I went around the boot & some of the other rusty sections to clean them up.


Unfortunately, by this time the light was fading & the weather turning, so I call it a night.
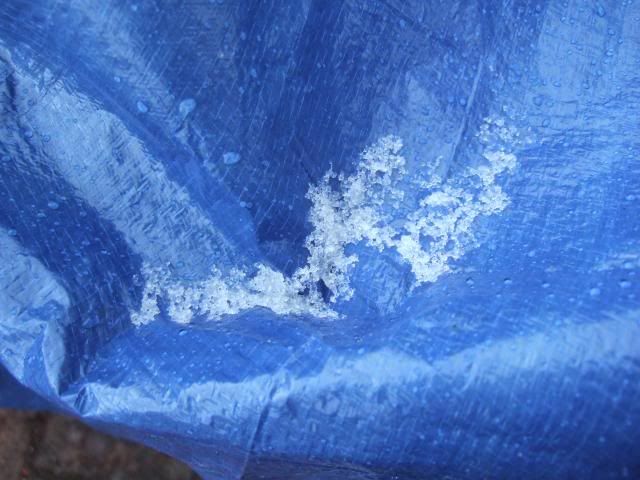
I was just putting the tarpaulin back on when the hail stones started, so good timing.


The plan for tomorrow is to prep both the front & rear sections for some painting.
I know I still have repair work to do, but I want to start treating / protecting the rust ASAP.

Take care, Paul. :)

Replies
Cheers chaps, it may have had one careful lady owner, but that was definitely a long time ago!
30 Mar 2013, 3:00pm
More Body Shell Prep.

With my self imposed "no power tools before noon" rule, I started the morning tidying up. :rolleyes:

So I have my "Hang on to for now pile" (which needs to be carried through the house later)...


My metal recycling pile (council here are very strict on what you can throw away)...


My box of bits that may come in handy later...


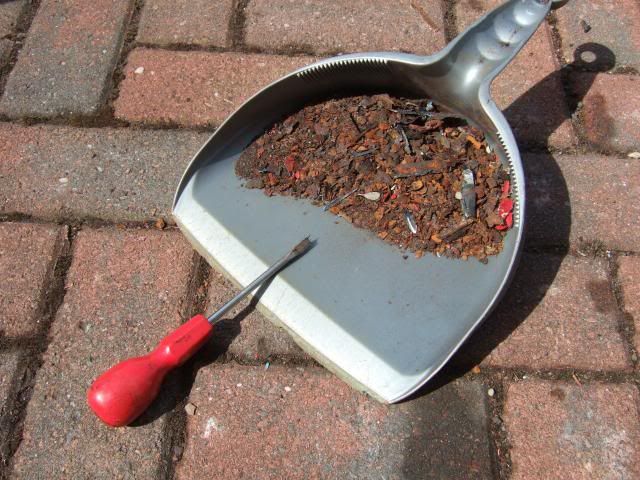
Everything else was swept up & put in the bin, leaving me with a shell I could at least see...


I then continued to clean up the old paint with sandpaper, scraper & screwdriver.
This is what one section of the bulk head looks like now...


One corner of one of the three "pads" stuck on the shell had lifted...


So I thought I should remove the whole thing just to check everything was OK underneath.
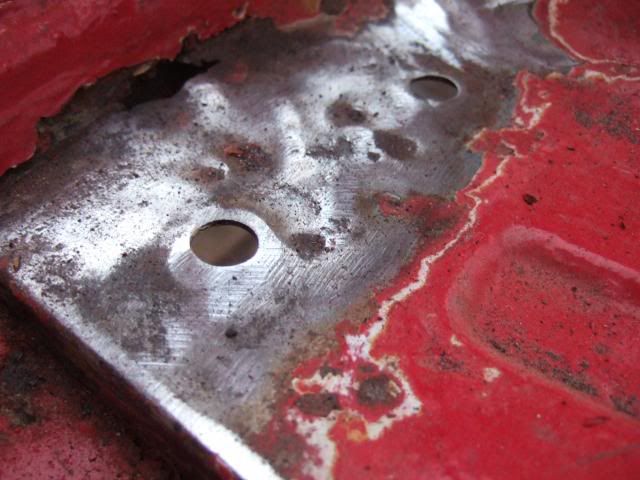
A lot of huffing & puffing later I had one pad off by which time I could use my grinder to clean it.


Everything seems sound enough as the sticky goo used to put them in place seems water tight.
So I'm going to leave the other two pads where they are & simply paint over them.

With the grinder out I finished tidying up the first sections that I am going to treat / paint.

This is the boot area now...


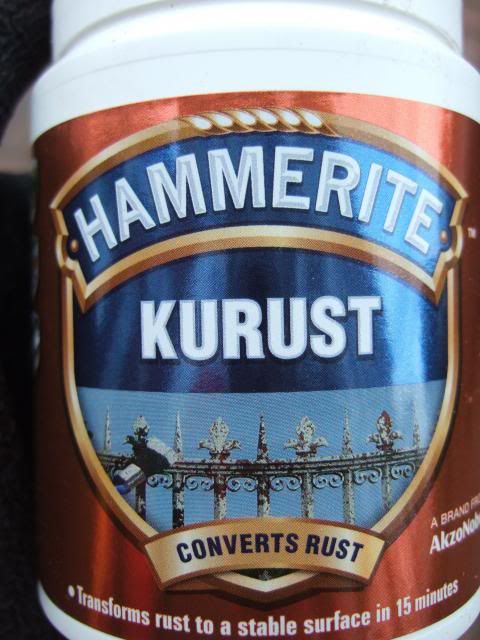
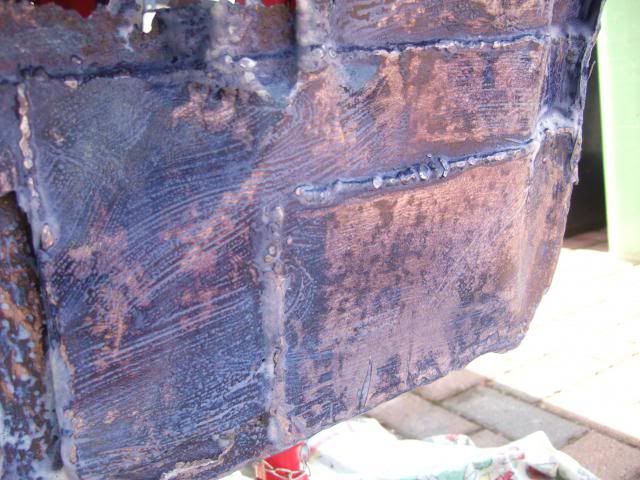
I bought this stuff the other day although I've never used it before.


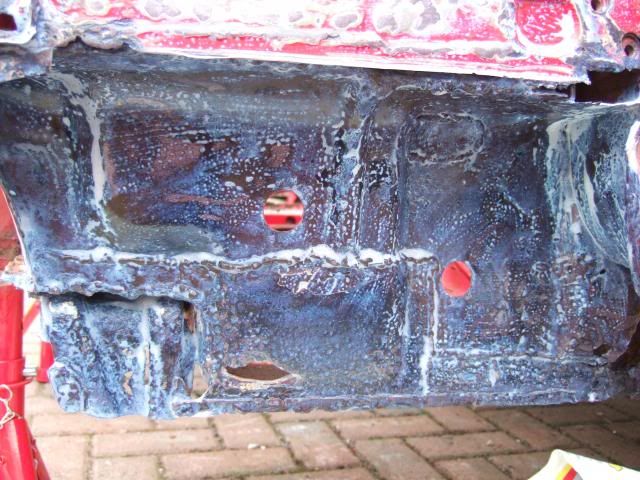
It seems very easy to use as it looks like milk when you start brushing it on...


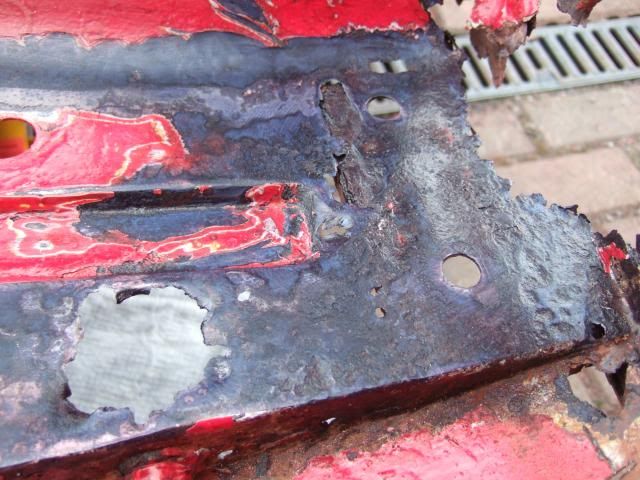
But then turns a blue/black colour when it has started to treat the rust...


While I was waiting for the areas I treated to dry, I started on some of the other areas.
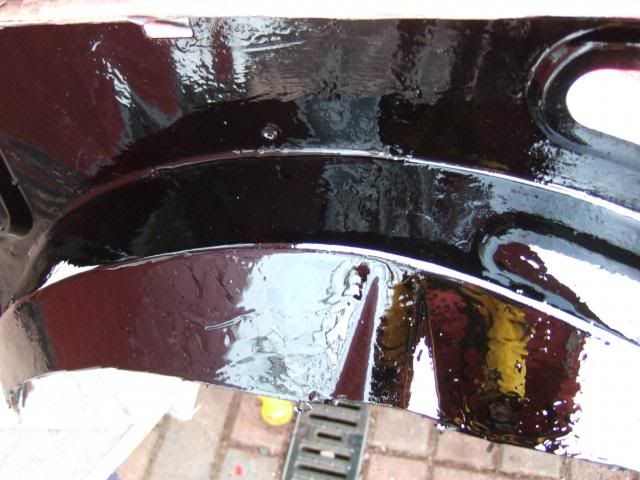
I just brushed on Wickes metal protection paint (see previous link) to tidy things up a bit.
( I know the Tetroseal stuff Mr T recommended was cheaper,
but I couldn't get any delivered in time due to the Bank Holidays. :icon_sad:)


Well I have warmed up enough to head back out and see it how the rust treatment it doing.
( It recommends you get a top coat painted over it after 3 hours. )

I hope to have more photos later on this evening, Paul. :)
30 Mar 2013, 5:16pm
Bloody Weather! :icon_evil:
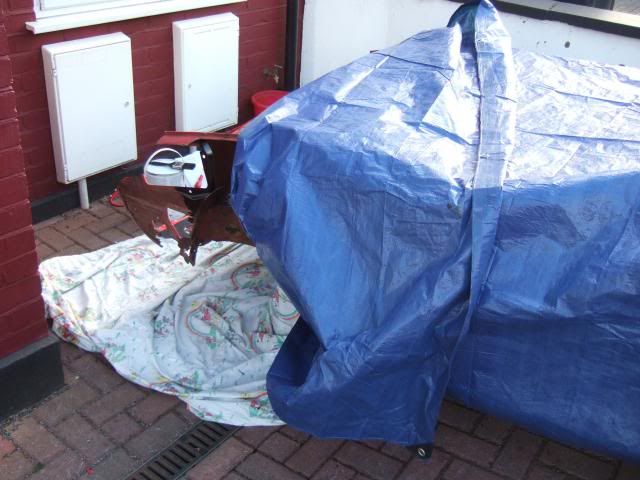
Just about to start painting when it starts to rain, so I stuck the tarpaulin back on.
Then I quickly carried the "hang on to" pile through the house before they got too wet.
( Dragging wet car parts through the house is never a good idea! )

I then moved the trolley jack & a few other bits from the porch to the summerhouse.
As the porch is currently packed with tools, extension lead, paint tins, etc. :rolleyes:

At which point the rain stopped, but it didn't look very promising.
So I did a few other domestic chores while waiting to see how it would go.

Eventually it looked like it was brightening up so I took a chance.
But hedged my bets by only unwrapping a section of the tarpaulin at a time...


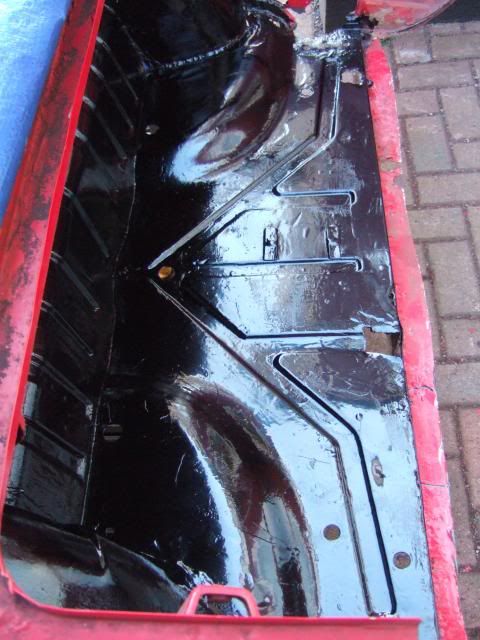
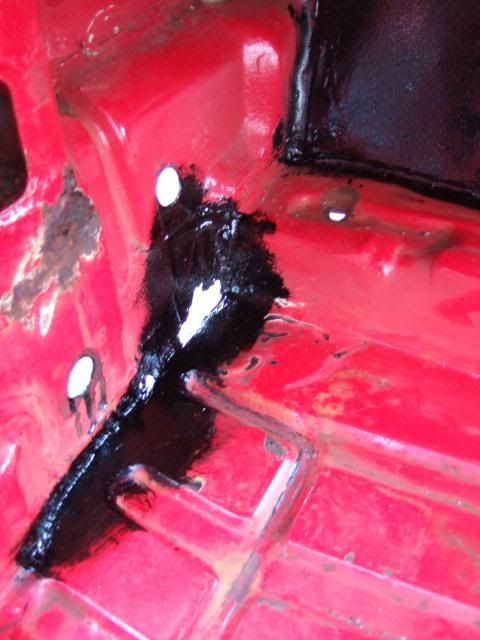
I did manage to paint the inside of the boot.
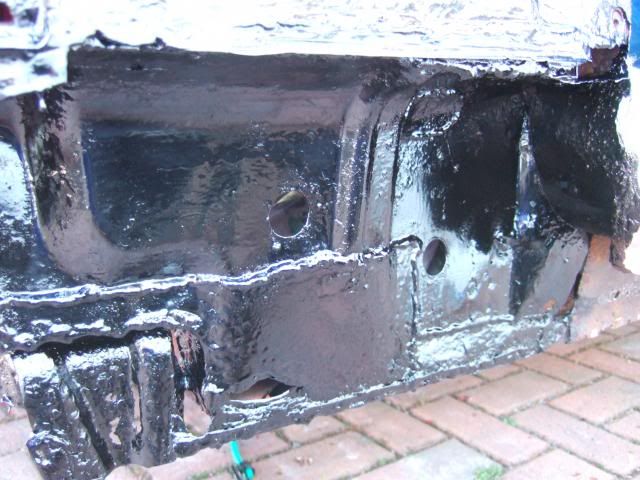
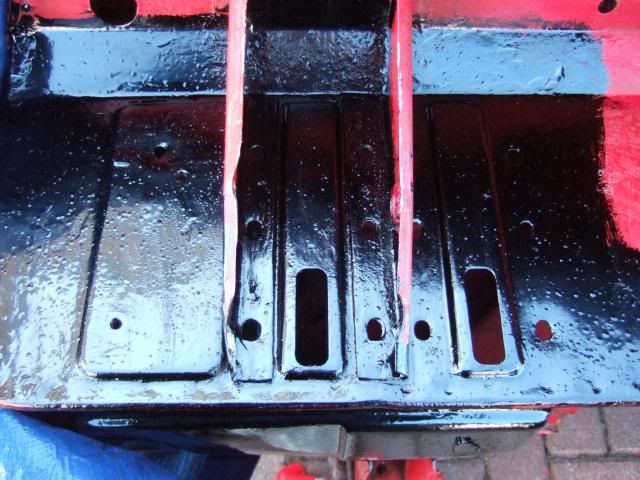
I also did the lower section of the passenger side bulk head.
( See rust treatment photo above. )
I just about finished the pedal mounting section of bulk head when the sleet arrived! :icon_sad:

So the "after" photos will have to wait for another day as they are under this...


We have a family lunch planned for tomorrow, so may not get a chance to do anything.
But hopefully I will get a bit more done on Bank Holiday Monday (weather permitting).

Until then, take care, Paul. :)
31 Mar 2013, 8:36am
Belated "After" Photos:
Just enough time to peel back the tarpaulin this morning and take a few photos...

The Boot Area:


Passenger Side Bulk Head - Outer Corner:


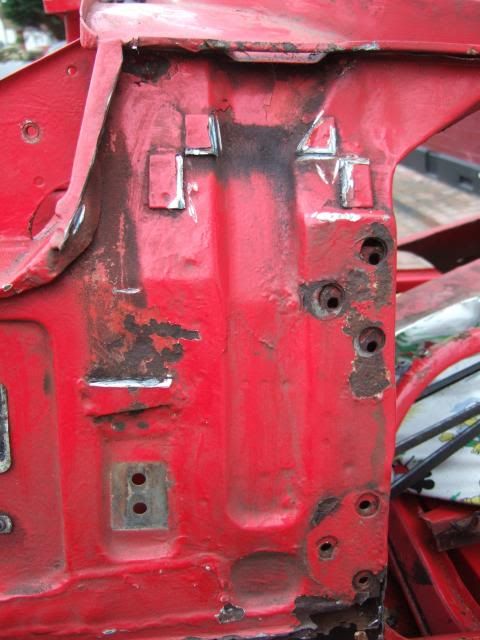
Driver Side Bulk Head - Top Corner:


If you look closely, you will see the impact of the sleet on the paint. :icon_sad:
I just wasn't fast enough covering up the wet paint, so I'll sand that down again.

Top Tip:
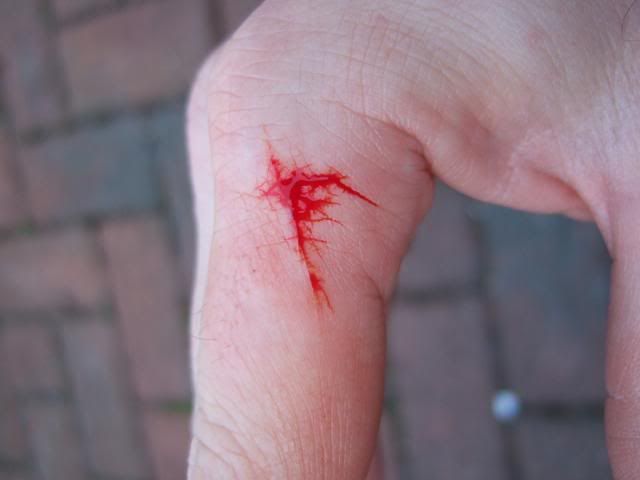
Even if you are just popping out to take some photos, wear your gloves.
For the second time in two days I've caught my hand on sharp edges of metal.


Obviously there have been photos of bigger injuries on here.
But I'm trying to keep blood off the camera. :rolleyes:

Happy Easter, Paul. :)
31 Mar 2013, 4:11pm
Great colour, i wonder what the beakdown would be?
1 Apr 2013, 5:01pm
After a relaxing Easter Sunday with my family, it was back to "work" this morning.

Cordite Internal Framework:
I started the day by checking the current gap between the two sections of frame work.
As I wanted to be sure that my Frankenstein build option was actually possible.
In other words, could I replace the front frame section with the Spitfire bulk head?

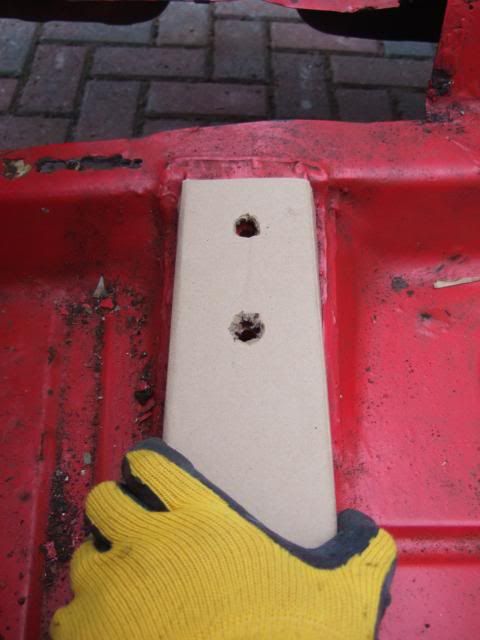
My plan would be to cut the bulk head so I kept this chassis mounting point section...


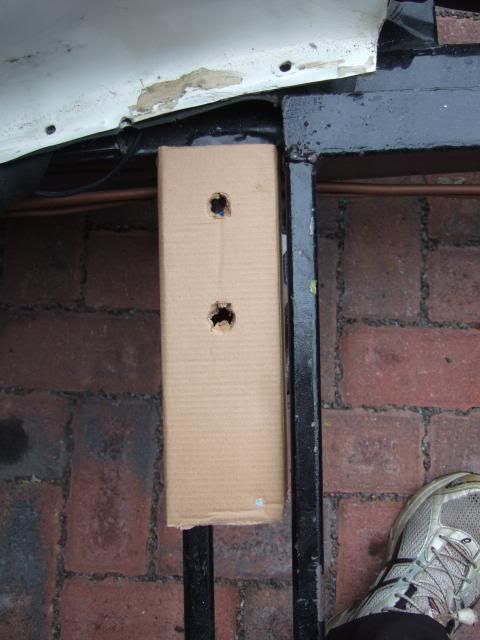
I used this slightly oversized cardboard template to check the gap...


The lowered floor pan rests on the frame rail to the right of the carboard.
Obviously I could trim the edge of the floor to line up with the edge of the bulk head.
Which means that this is definitely possible and that is a HUGE relief.
As this allows the rear section of Cordite framework to be used as originally intended.

However, while I had the Cordite's cover off, I just couldn't resist...

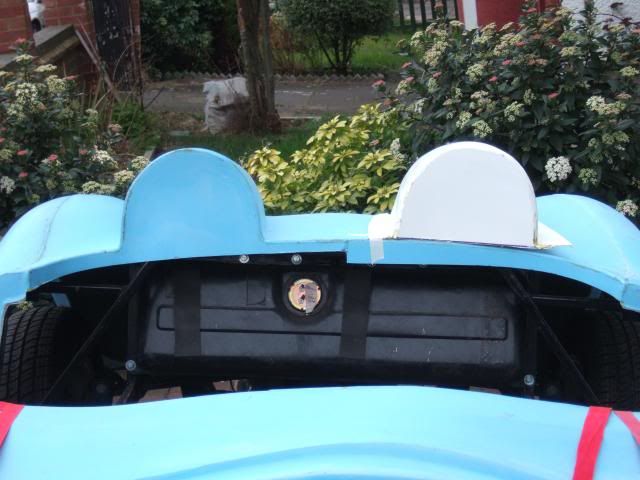
Double Hump:
I taped the Ribble independent hump very roughly into position to see how it looks...


The good news is that two humps do look good. :cool:

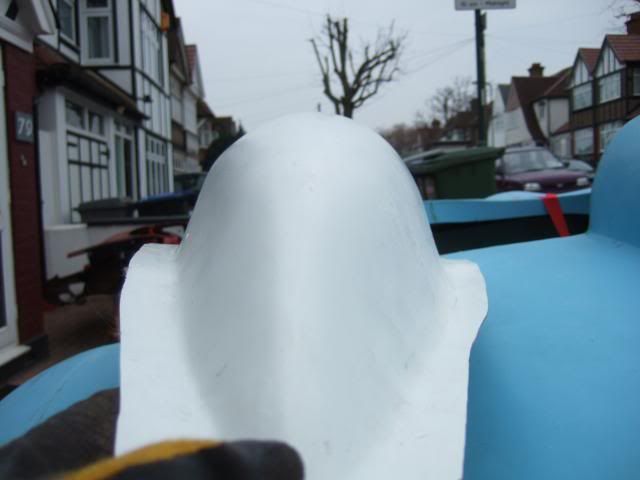
The bad news is I've actually been sent a second driver side hump by mistake.
( Don't worry about it Andy, I'll hopefully see you at Stoneleigh & we can swap. )

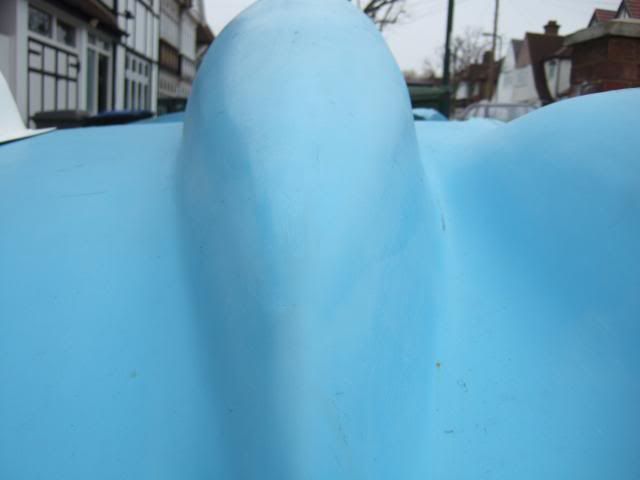
If you look closely, the hump is deeper on the right than the left.


And that is the way the spare hump is set up, when I need the deep side to be on the left.


Yet More Body Shell Prep.
I continued to work my way around the shell with my screwdriver checking for rust.
Unfortunately the passenger side "pad" was also hiding some rusty metal...


So I took the whole thing off, which is a real pain.
As it takes both time & effort and usually bits of skin off my knuckles too.


I am leaving the centre pad in position as hopefully water does settle on a slope.

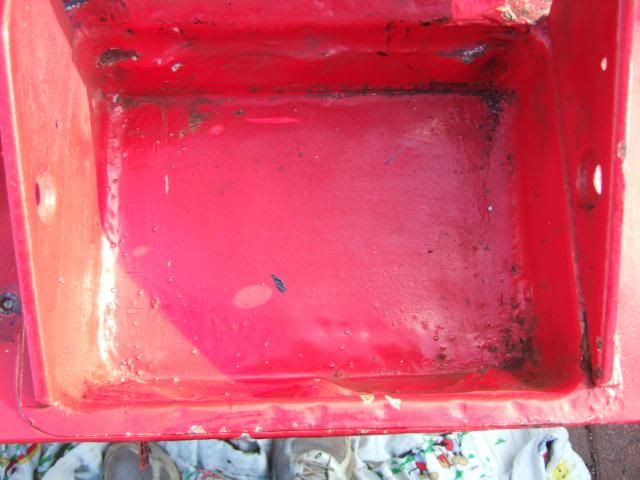
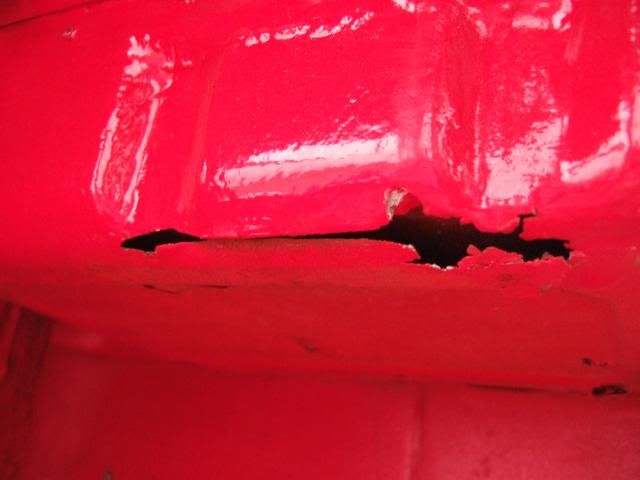
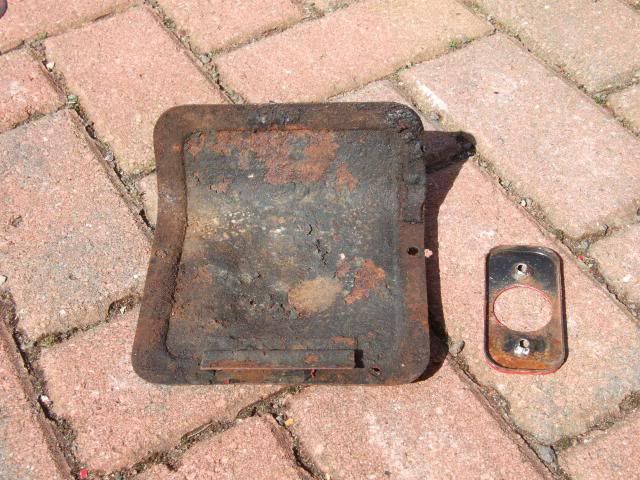
I noticed the battery box has been repaired in a slightly odd way.

It looks fine from above...


But the rusty section that needed repairing has been left in place below...


Eventually it was after noon, so my power tools could come out to play.
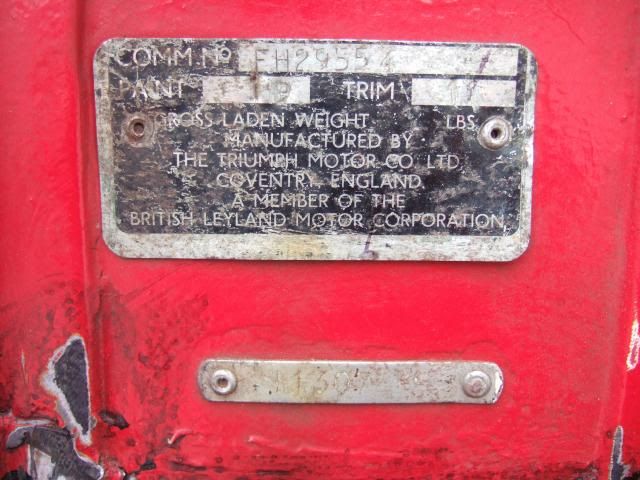
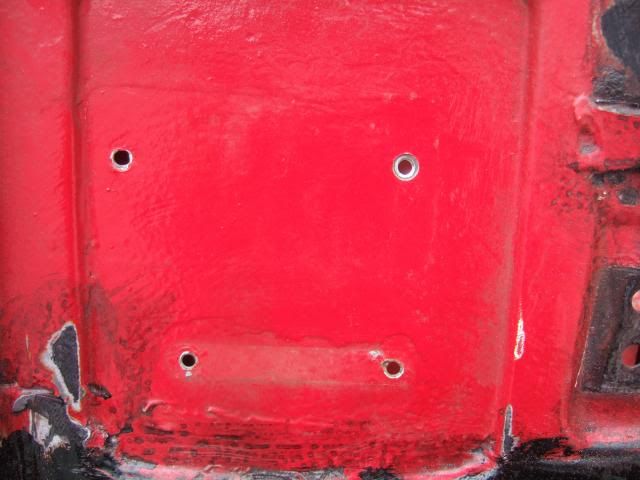
First simple job was drilling out the rivets holding on the VIN plate.


Then I set to work with the grinder to clean the next sections of rust.
I then wiped everything down with white spirits to clean off the grime.
I had a quick break for a late lunch around 2.30pm while that evaporated.

Then it was time to apply more of the rust treatment stuff.
After that I started to paint other sections that didn't need treatment.
And give a second coat to the sections that were painted on Saturday.

Here is a selection of photos from the work done today.

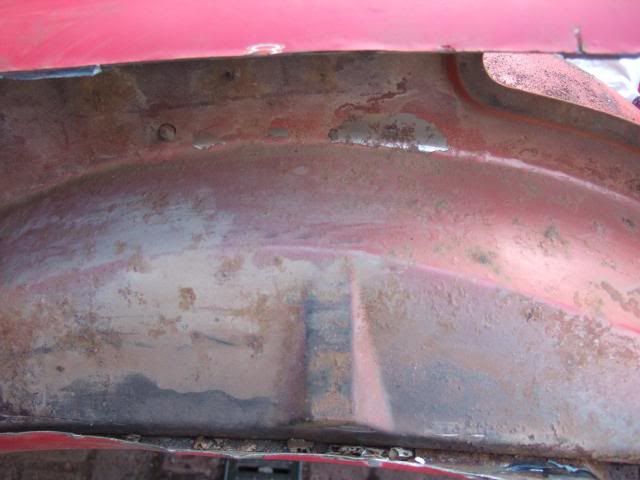
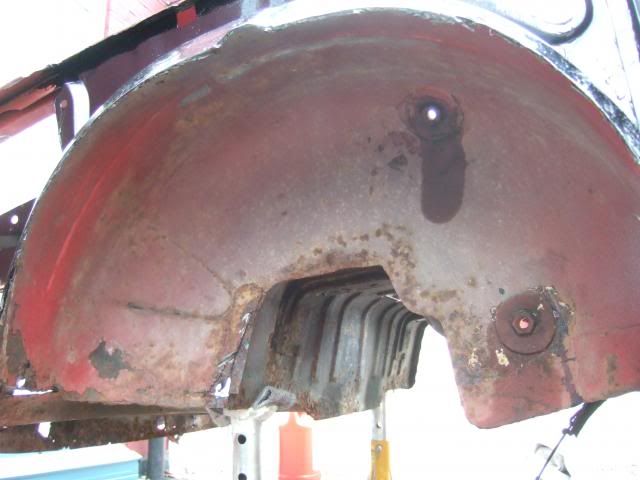
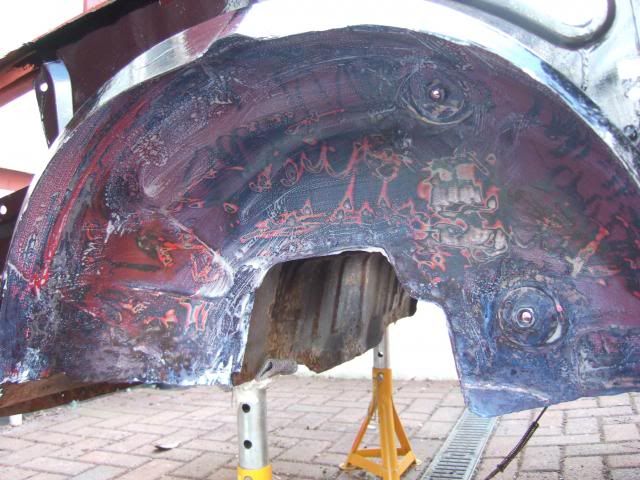
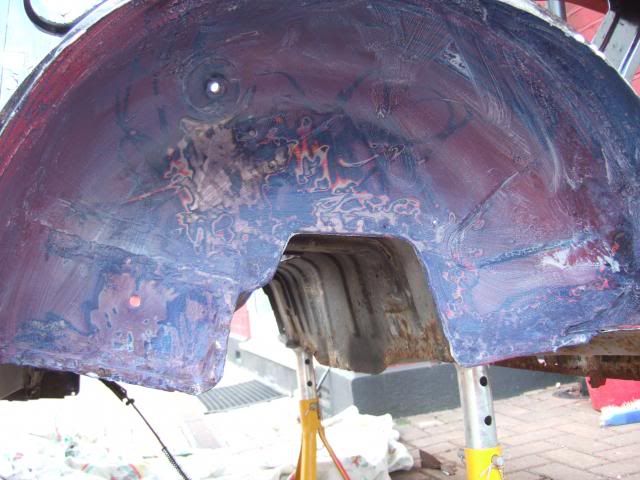
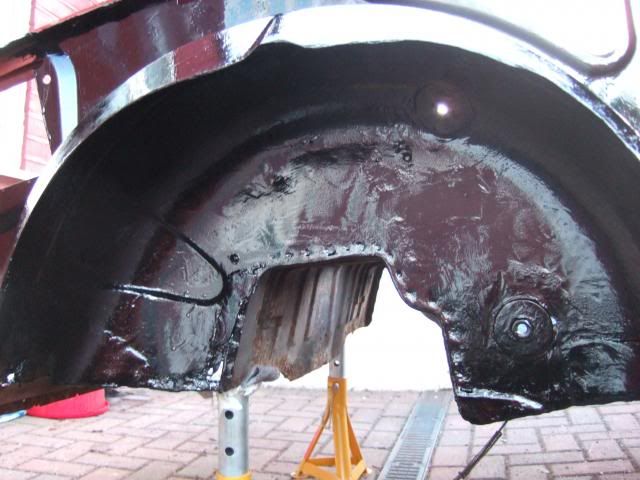
Inner Wheel Arch - Driver's Side

Before cleaning


After cleaning & rust treatment


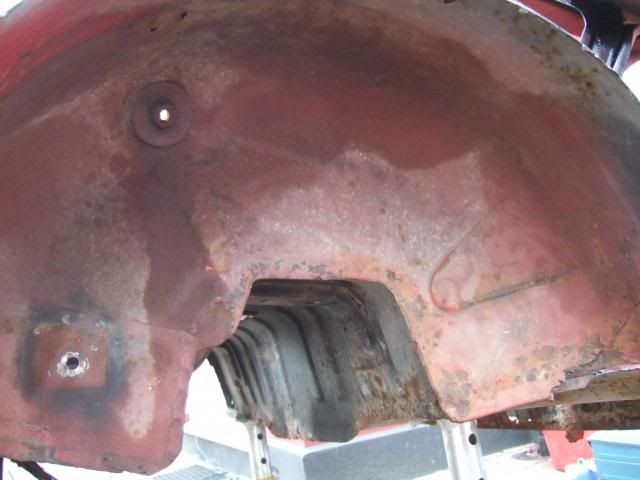
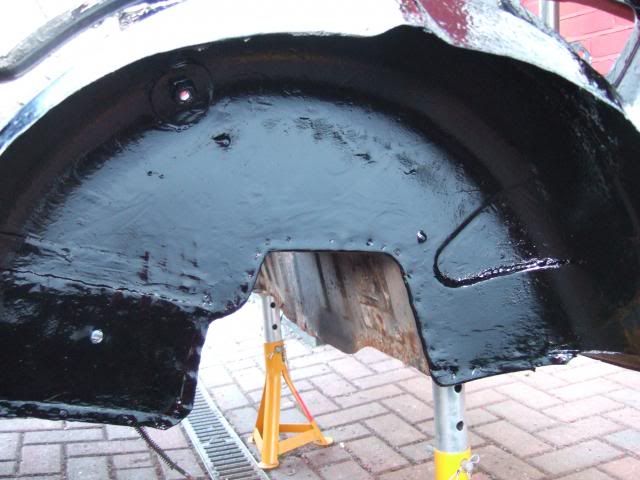
Inner Wheel Arch - Passenger's Side

Before cleaning


After cleaning & rust treatment


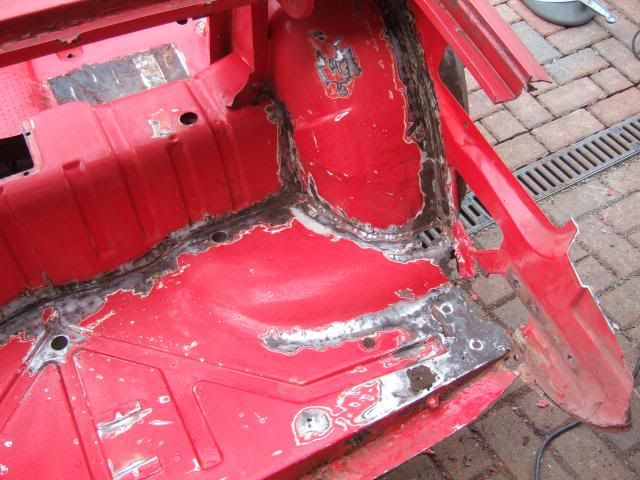
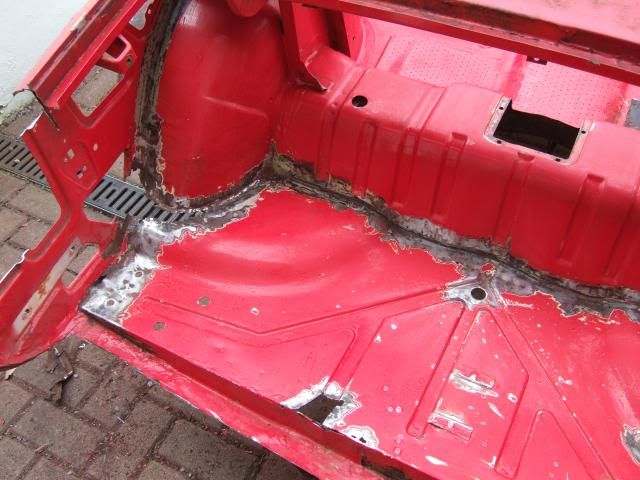
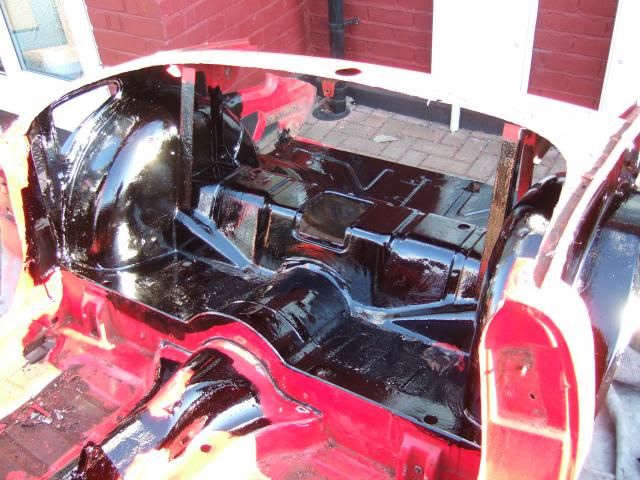
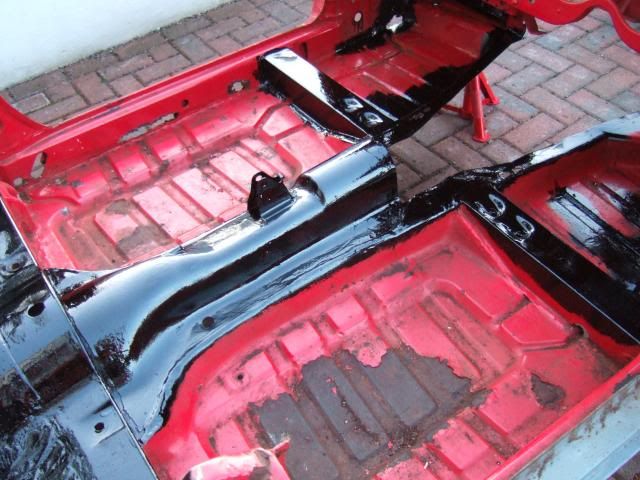
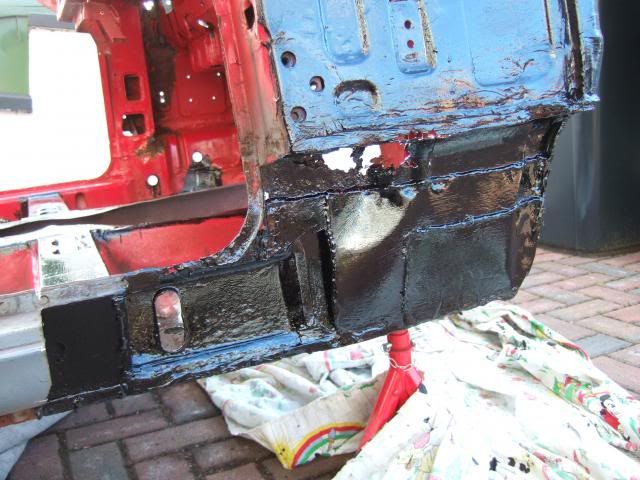
Rear Section & Bulk Head (with gaps around the areas treated for rust)


I'll be back outside in a few minutes to paint over the rust treatment.
So the clocks going forward the other night will be a big help.
Overall the weather has been good today, although it has threatened to rain a few times.
The only problems has been the wind blowing rubbish on the fresh paint. :icon_evil:
But what can you do? I'll take that over rain, sleet & snow any day.

I'll try to post some more photos tonight if I get the chance.

Cheers, Paul. :)

Replies
Gary - Not sure I understand the question, but the Spitfire shell will be matt black.
( Apparently, it goes on with a gloss finish, but dries to a matt one. )
The Cordite body shell will be light blue (initially gel coat & may be one day painted).
1 Apr 2013, 6:10pm
I think Garyh was referring to the colour of your blood!!

Good progress for you today.
1 Apr 2013, 6:18pm
Spot on Gman.
1 Apr 2013, 6:47pm
Froggyman & GaryH - Sorry for being a bit slow on the colour reference. :rolleyes:
Although I can't imagine the paint shop would be too impressed if customers started bleeding all over the counter and asking for a match! :icon_wink:

- - - - - - - - - - - - - - - - - - - - - -

Whilst it is sunny outside, when the sun goes down, the temperature really drops.
So just a final quick update from me, before I put the tarpaulin back on & call it a night.

Final "after" photos for the day...


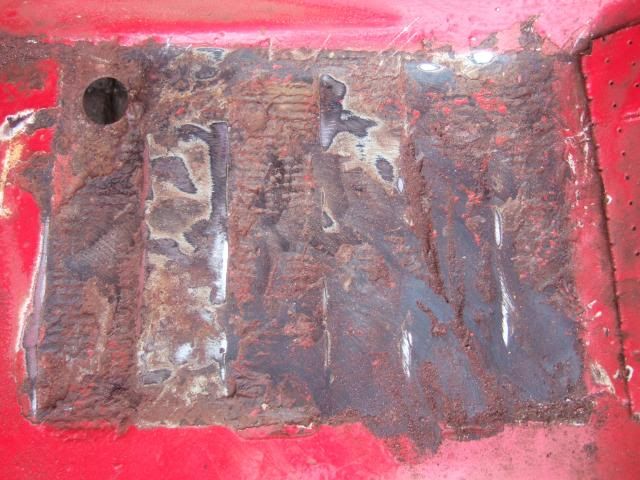
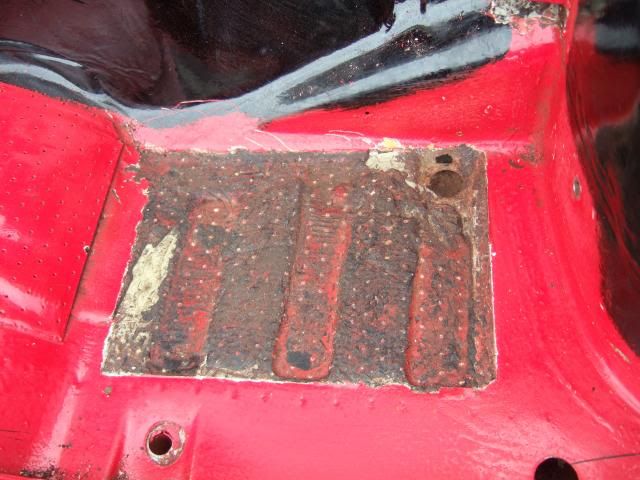
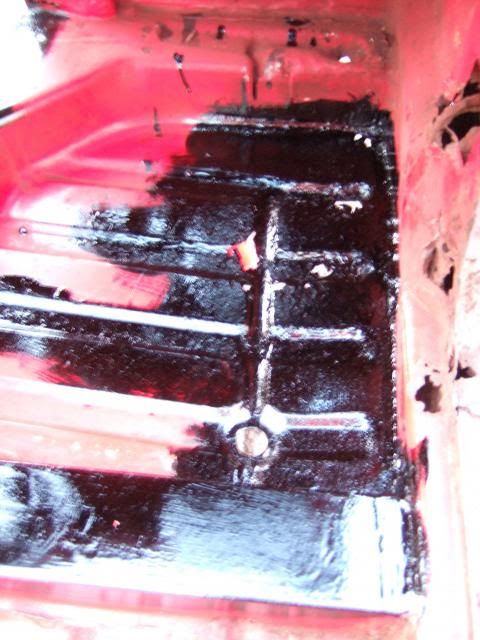
I'd also started work on the worst areas of the front floor pans...
( Sorry photo quality also dropped with the light fading. )


There is also quite a bit of rot on the driver's side of the bulk head here...


But I think the only way to treat it will be to remove the outside sill...


Which does look like it was welded on to untreated rusty metal behind. :icon_sad:

But I'll worry about that another day, take care, Paul. :)
1 Apr 2013, 8:02pm
Will you cover holes with mesh and fibreglass like T did? Or use your new welding skills?
4 Apr 2013, 5:45pm
GaryH - I think I will be carrying out repairs using both fibre glass for some & welding for others.
More details in the post below…

Possible Boot Option:
One big advantage of using the rear section of the Spitfire is the possibility of having useable boot space.
This is how Tribute "next door" approached this on their A352 project …


This boot area also allows the Spitfire floor & wheel arches to be joined to the new bodywork from within.
So I would cover / fill in all the holes / gaps in this area with extra fibreglass when doing that work.
It would also provide access to the silencer mounting points, otherwise, captive nuts would be needed.

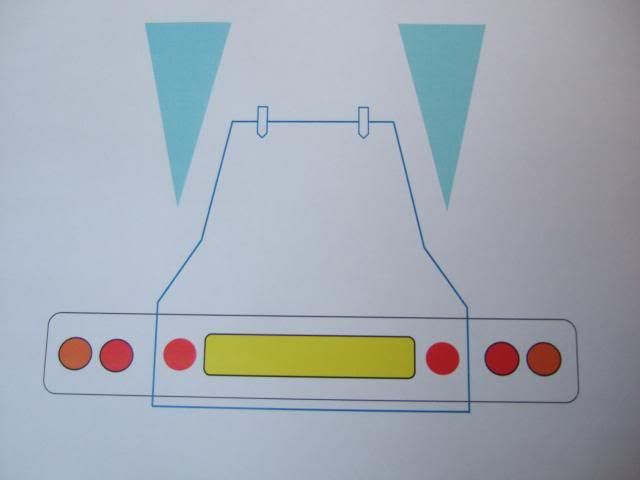
However, this A352 had a huge boot lid, as the optional D type hump & tail fin were not fitted.
I would need to start the boot lid between the humps & expand out to full width at the bottom.
I'd copy their idea of taking the whole bottom section out & mount my number plate & reflectors on the lid.
The boot would also provide great access to the rear lights which would also be protected from the elements.
As usually, this is an impression, the edges would need to be gentle curves, not sharp angles.


Build Options - Latest Thoughts:
The boot option above is one reason why I am happy with the decision to buy the 2nd hand Spitfire shell.
I got the whole tub for the price I'd have paid for just the rear section, so I have nothing to lose really.
I know I still have to tackle all the metal work underneath the rear section, another big job.
But so far, the cleaning up, rust treatment & painting of other sections of the shell has gone well.

In fact, the Easter weekend did show what could be achieved by spending a chunk of time on the car.
However, it also highlighted just how long some jobs can take, so I must remain realistic about my options.

In terms of my priorities, I think being able to use the bulk head must rank ahead of using the whole shell.
So I will remove the driver's side sill in order to repair the driver's side bulk head (see previous post / photos).
I'm sure that repairing this section may require some new metal to be welded in to strengthen the area.
But I can't really assess the work required until I can see the extent of the rust damage behind the sill.

At this point, I think I must face the facts that the "fast build" option is now effectively dead in the water.
I'd previously posted a picture of the extra bracing Pantoune used on his Spitfire shell for his A352.
But that bracing was in addition to the original Spitfire sills that look both solid & firmly attached to his donor.
It would take me far too long to come up with something that would work as well as the frame I already have.
Whereas, my Frankenstein option just needs me to join the Spitfire bulk head to the rear Cordite frame.

A Shell Of Two Halves...
Abandoning any thoughts about using the whole shell will actually make my life easier in other ways too.
If I cut the shell into two & remove further surplus sections, I should be able to carry it through the house.
Once in the back garden, I can put up the "Circus Tent" & have somewhere to continue the preparation work.
It would also give my wife her parking space back, once I've cleaned up the mess I seem to have made there. :rolleyes:
It will also be a lot easier to turn the front & rear sections over to work on the underside if they are separated.

Based on a comment Mister Towed made, I will need to do some preparation work before I start cutting.
He mentioned the flex in his bulkhead when it wasn't attached, so I will bolt some box section to it first.
I'll put one section across the mounting points at the front & another across the back which should help.

The last thing I want to have a look at before cutting the shell in two is the Spitfire’s main floor sections.
I’ve got new metal lowered floor pans, but if I use them, then I will probably need to change my seats.
My seats are inclined at the back when the base is horizontal and a sloping floor does exaggerate this.
I have a few ideas about a possible solution that I need to check before going angle grinder crazy!

As always, lots to think about, so until next time, take care, Paul. :)

PS
With one thing, or another, I'm not going to get a chance to work on the car for over a week or so. :icon_sad:
4 Apr 2013, 6:40pm
Don't dwell too long on the structural rigidity of the Spit body parts you're trying to incorporate. The strength comes from the chassis and frame bolted to it. So long as they're sound the internal and external body panels are purely decorative, so you can remove steel bits and add 'glass where needed. As for the MOT test, just make it all look smooth and rust free and you'll breeze it. :)
6 Apr 2013, 7:03am
Cheers Mr T. :cool:

Hopefully I'll get a chance to remove the driver's side sill next weekend, then I'll really know what I'm up against.

Having looked at your build (again) the Spyder frame extends into the bulk head area.

Whereas the Cordite frame comes in two sections bolted together & I'm hoping to join the Spitfire bulkhead to the rear Cordite frame.

But I will have the top section of bulk head left in place, unlike the Spyder approach of cutting that section off.
( So I hope that I will have some extra strength from there. )

However, for things like the holes in the floor, I will use fibre glass repairs.
( As the kit uses fibre glass floors. )

Paul. :)
6 Apr 2013, 10:28am
Paul L wrote:
GaryH - I think I will be carrying out repairs using both fibre glass for some & welding for others.
More details in the post below…

Possible Boot Option:
One big advantage of using the rear section of the Spitfire is the possibility of having useable boot space.
This is how Tribute "next door" approached this on their A352 project …


This boot area also allows the Spitfire floor & wheel arches to be joined to the new bodywork from within.
So I would cover / fill in all the holes / gaps in this area with extra fibreglass when doing that work.
It would also provide access to the silencer mounting points, otherwise, captive nuts would be needed.

However, this A352 had a huge boot lid, as the optional D type hump & tail fin were not fitted.
I would need to start the boot lid between the humps & expand out to full width at the bottom.
I'd copy their idea of taking the whole bottom section out & mount my number plate & reflectors on the lid.
The boot would also provide great access to the rear lights which would also be protected from the elements.
As usually, this is an impression, the edges would need to be gentle curves, not sharp angles.


Build Options - Latest Thoughts:
The boot option above is one reason why I am happy with the decision to buy the 2nd hand Spitfire shell.
I got the whole tub for the price I'd have paid for just the rear section, so I have nothing to lose really.
I know I still have to tackle all the metal work underneath the rear section, another big job.
But so far, the cleaning up, rust treatment & painting of other sections of the shell has gone well.

In fact, the Easter weekend did show what could be achieved by spending a chunk of time on the car.
However, it also highlighted just how long some jobs can take, so I must remain realistic about my options.

In terms of my priorities, I think being able to use the bulk head must rank ahead of using the whole shell.
So I will remove the driver's side sill in order to repair the driver's side bulk head (see previous post / photos).
I'm sure that repairing this section may require some new metal to be welded in to strengthen the area.
But I can't really assess the work required until I can see the extent of the rust damage behind the sill.

At this point, I think I must face the facts that the "fast build" option is now effectively dead in the water.
I'd previously posted a picture of the extra bracing Pantoune used on his Spitfire shell for his A352.
But that bracing was in addition to the original Spitfire sills that look both solid & firmly attached to his donor.
It would take me far too long to come up with something that would work as well as the frame I already have.
Whereas, my Frankenstein option just needs me to join the Spitfire bulk head to the rear Cordite frame.

A Shell Of Two Halves...
Abandoning any thoughts about using the whole shell will actually make my life easier in other ways too.
If I cut the shell into two & remove further surplus sections, I should be able to carry it through the house.
Once in the back garden, I can put up the "Circus Tent" & have somewhere to continue the preparation work.
It would also give my wife her parking space back, once I've cleaned up the mess I seem to have made there. :rolleyes:
It will also be a lot easier to turn the front & rear sections over to work on the underside if they are separated.

Based on a comment Mister Towed made, I will need to do some preparation work before I start cutting.
He mentioned the flex in his bulkhead when it wasn't attached, so I will bolt some box section to it first.
I'll put one section across the mounting points at the front & another across the back which should help.

The last thing I want to have a look at before cutting the shell in two is the Spitfire’s main floor sections.
I’ve got new metal lowered floor pans, but if I use them, then I will probably need to change my seats.
My seats are inclined at the back when the base is horizontal and a sloping floor does exaggerate this.
I have a few ideas about a possible solution that I need to check before going angle grinder crazy!

As always, lots to think about, so until next time, take care, Paul. :)

PS
With one thing, or another, I'm not going to get a chance to work on the car for over a week or so. :icon_sad:


We are currently playing around with the idea of having a boot option as part of the frame work but still 'tinkering' :biggrin: Watch this space!
6 Apr 2013, 6:33pm
Feel free to tinker with mine! a boot would be a big big plus!
13 Apr 2013, 11:53am
AndyP85 & Viatron - I think the more of these "mods" that become "standard" the better. :cool:
I am really looking forward to seeing the first new Navigator coming together.

- - - - - - - - - - - - - - - - - - - - - -

Just back from a nice week away with my family, hence no progress to report.
Although it looks like I didn't miss much in terms of weather while I was away. :rolleyes:


Although I did spend a bit of time drawing up a "To Do" list & some sketches of my options.
So with a bit of luck, I'll get a bit more done on the car tomorrow (weather permitting).

I'll also try to catch up on all the forum updates I missed while being away.

Cheers, Paul. :)

PS
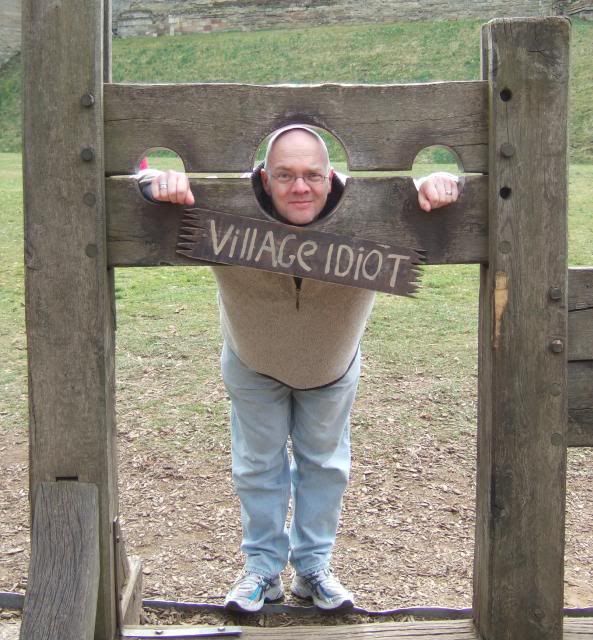
We took a trip to Warwick Castle & I found a kit car reference from the Middle Ages.
A special place for those who think it is a good idea to build a car without Ye Olde Garage...


:icon_wink:
14 Apr 2013, 9:42pm
Sunday - Part 1
A bit of a slow start to the day as I had some domestic duties to perform first thing.
But I finally got out just before noon to continue preparing the Spitfire body shell.

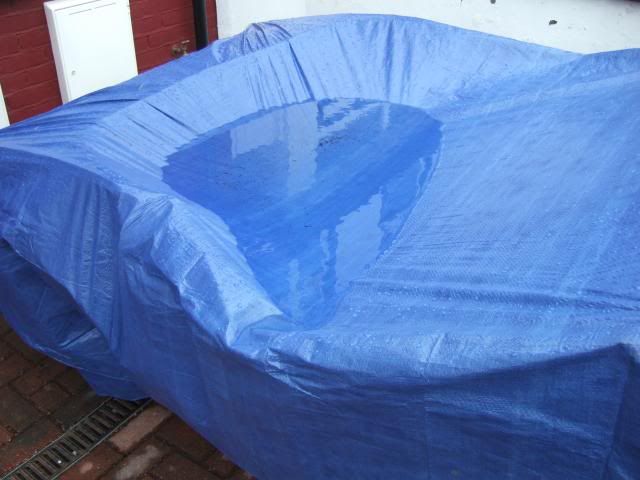
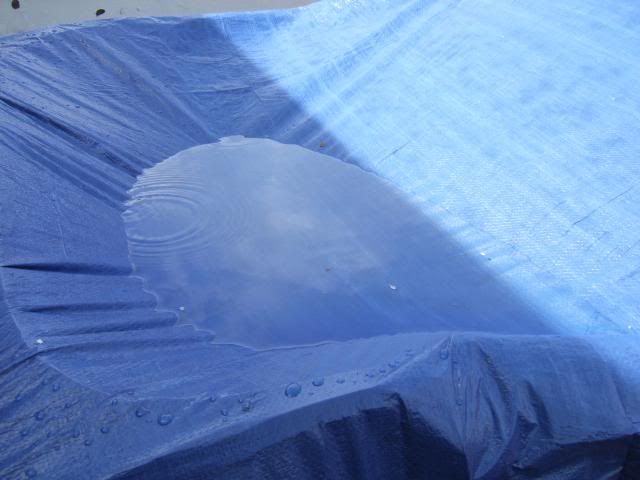
A bit of "deja vu" with the tarpaulin, as over night it had filled up with water again.
Although the fact the sun was shining was a bit different to normal.


I rearranged the car jacks so I could get better access to the front bulk head mounting points.
I will be using these to brace the bulk head when I cut the shell in half & wanted to paint them first.
Then it was the same process as before, clean up the area before applying the anti-rust treatment.

Driver's Side:


Passenger Side:


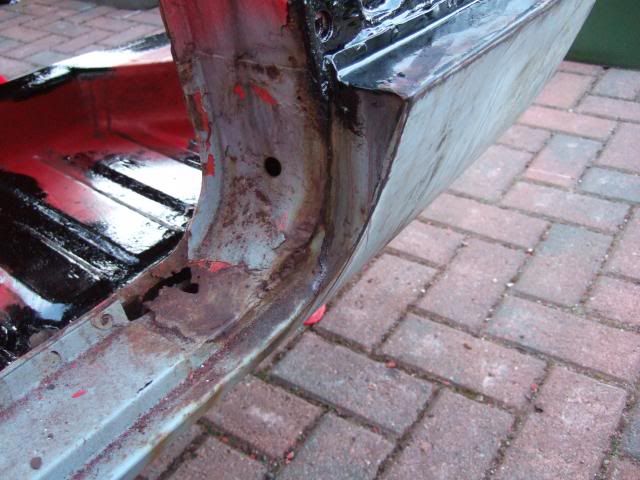
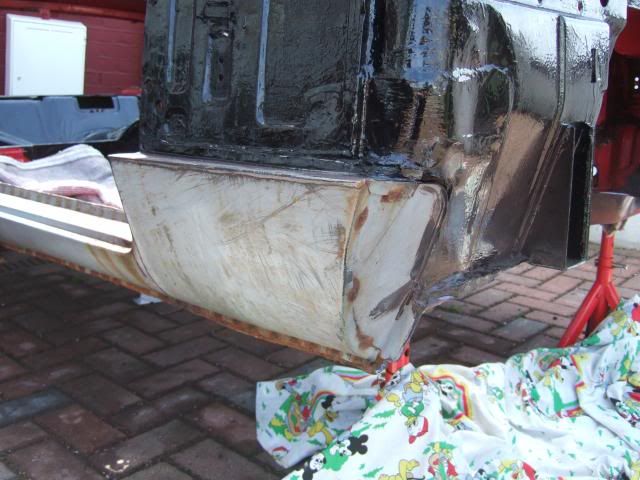
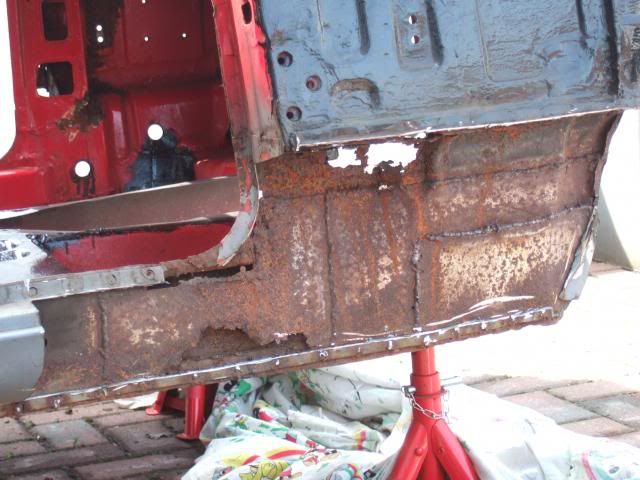
While I waited for that to dry, I attacked the sill on the driver's side.

Before:


After:


I knew there was going to be rust behind the sill, so I know it was right to remove it.
Unfortunately, when I started prodding it with the "screwdriver of truth, it got worse. :icon_sad:


So I cut a bit more out before cleaning the area up & applying the anti-rust stuff.


There were a few other areas I gave a quick clean up & treatment to...


The "after" photos will have to wait as it started to rain & I had to tidy & cover up. :icon_evil:

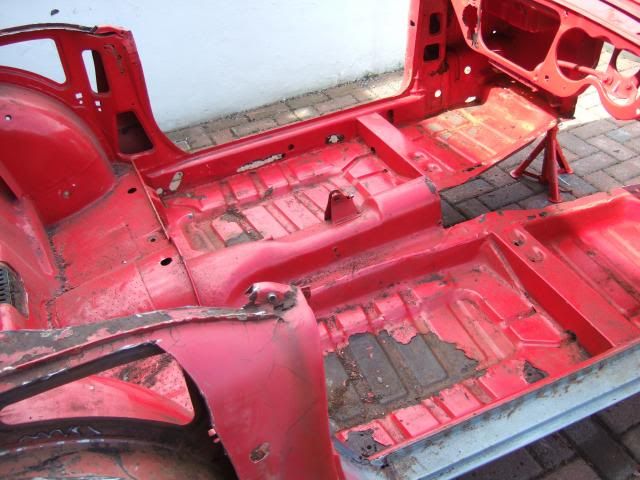
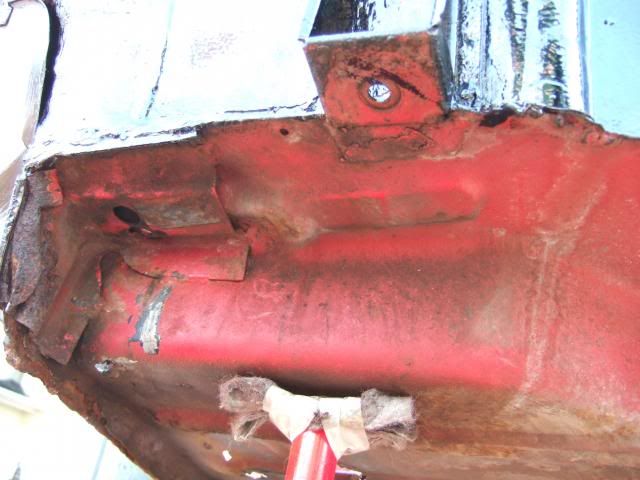
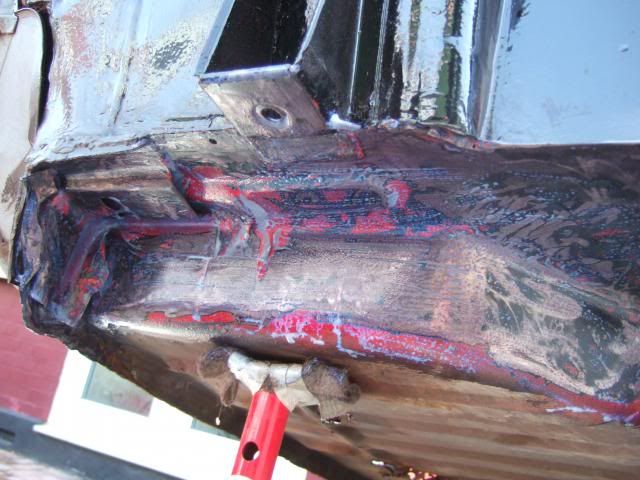
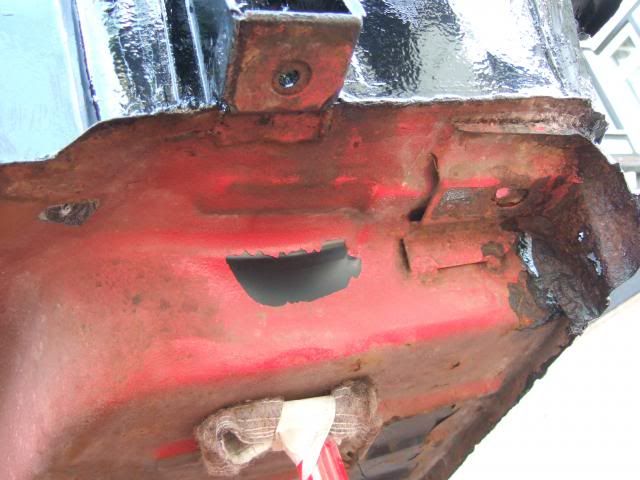
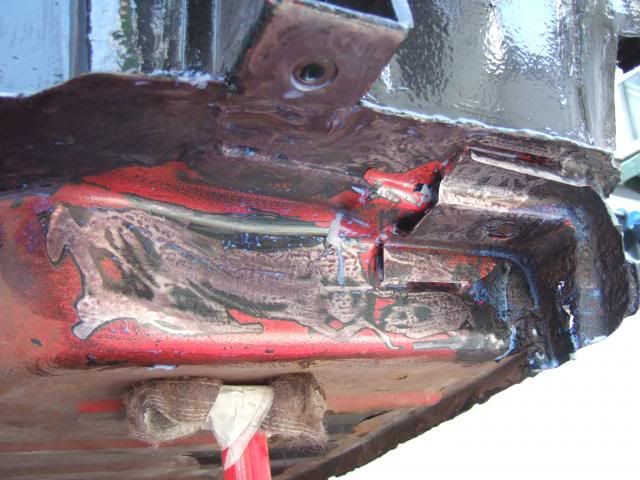
The other big problem area is underneath the front bulk head mounting frame.

Above:


Below:


I will not start sorting this mess out until after I cut the shell in two.
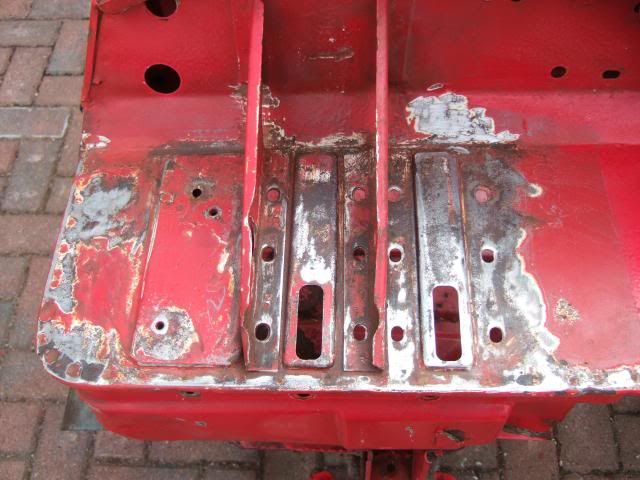
As it will be much easier to see what I am doing with the bulkhead turned over.
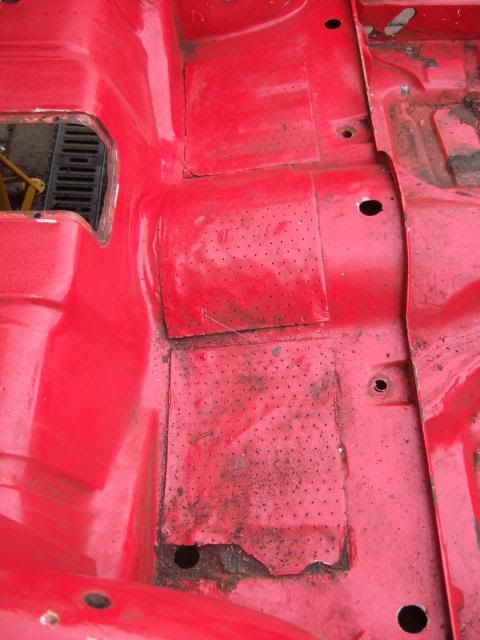
Well it looks like the rain has stopped so I'm heading back out to do some painting.
( The forum is currently off line, so I'll copy & paste this from 'Word' later on. )

Cheers, Paul. :)
14 Apr 2013, 9:44pm
Well the forum seems to be back again, so...

Sunday - Part 2
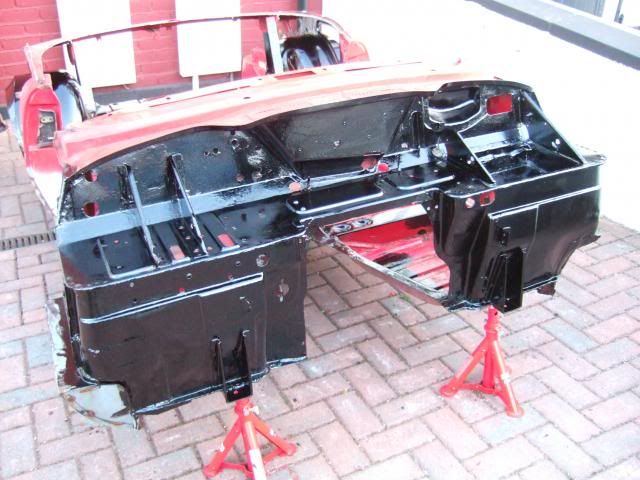
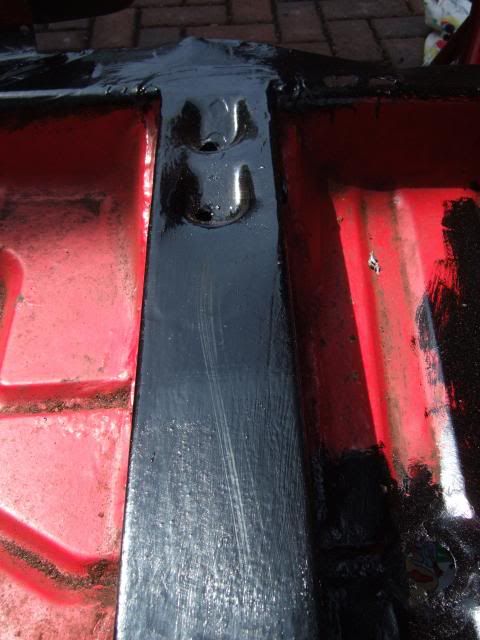
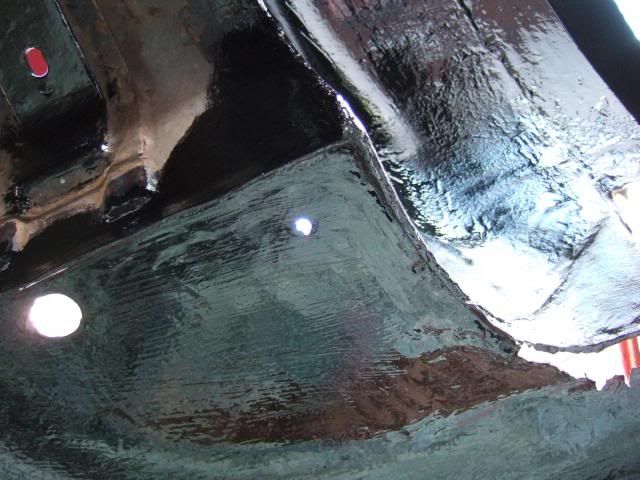
Thankfully the rain stayed away & I was able to do some bitumen painting.
I gave a second coat to the areas I had painted before going on holiday.
( Inner wheel arches, parts of the front bulk head & rear floor sections. )

I then did the lower sections of the bulk head around the mounting point.

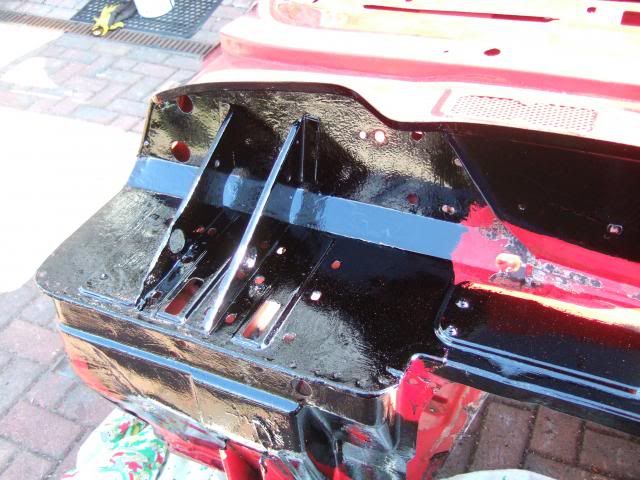
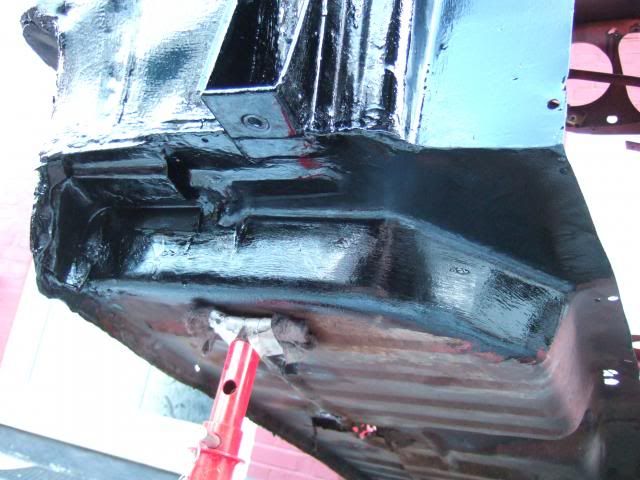
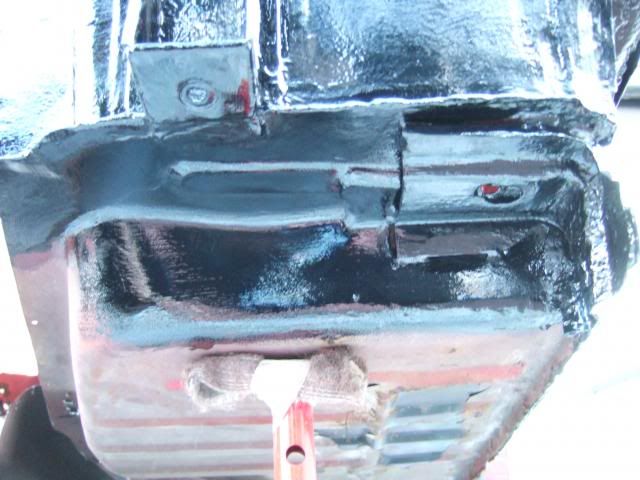
Driver Side:


Passenger Side:


Followed by the bulk head area where I had removed part of the sill...


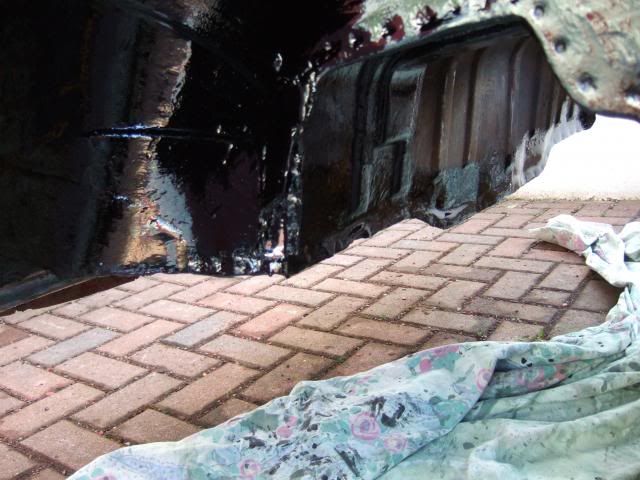
In the end I only prepared part of the area under the car.
It will be much easier to do the rest when the rear section is separated & turned over.
Still, it is a bit more done and every bit counts...


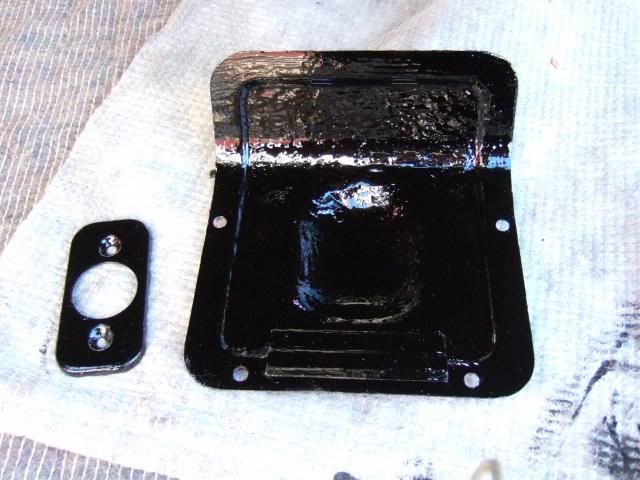
Finally I did one side of the parts I cleaned up.


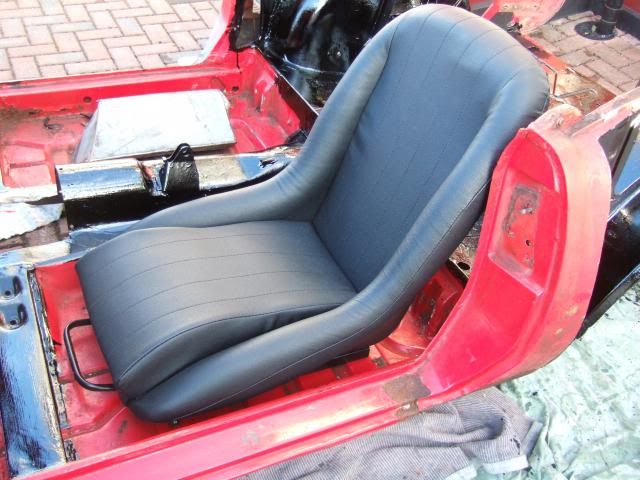
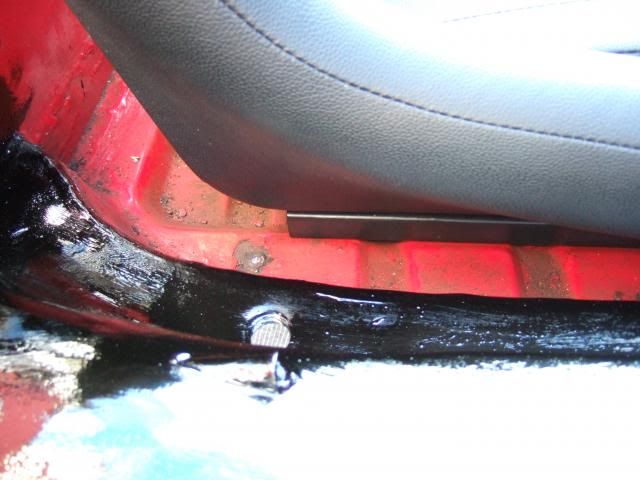
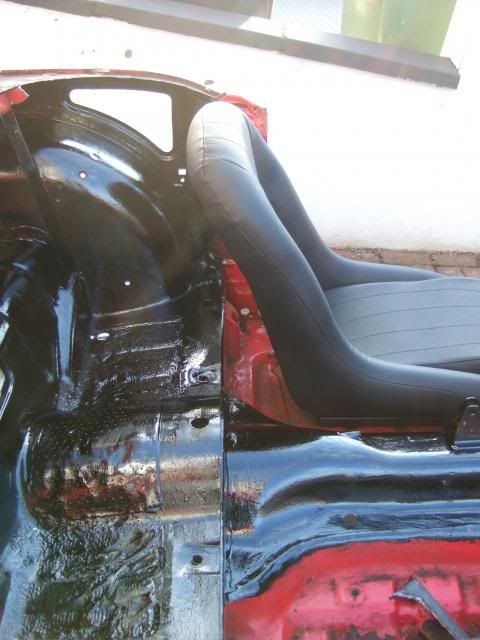
Seat Options:
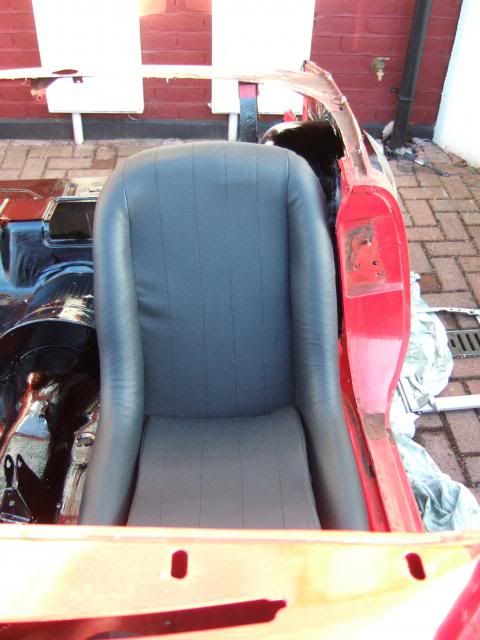
Just before I called it a night, I put my new seat in the old shell to check space.


I am slowing coming to the conclusion that I actually need different seats.
Whilst I think it might be possible to make the changes required to fit them.
It would add a lot of extra work to an already very long "To Do" list.
So it might be worth trading an extra cost for an easier build.
I will make a final decision when I see how my Frankenstein build evolves.

Until next time, take care, Paul. :)