MadaboutKitcars

This is a read-only archive of the old Madabout Kitcars forum. New posts and replies are no longer possible, but every thread is still here to browse and read.

A Triumph Swordfish 1500 - On The Road

25 May 2019, 7:26am
Not Much
Having repaired the water feature, I was not too impressed when the water pump packed up.

Which meant removing everything all over again to replace it. :frusty:


I really hope that is the last time I need to touch this for a while.

- - - - - - - - - - - - - - - - - - - - - - - - - - - - - - -

I also got some secondhand 'stucco' aluminium sheets as an alternative cockpit wall lining.


As the more I thought about how to make my previous 'patchwork quilt' idea work…


The more I realised the odd shapes and angles in my cockpit walls would really stand out on a shiny flat surface.

So "Plan B' will be to use single panels on both sides and the rear wall instead.

I just need to make some accurate cardboard templates and see what happens.

- - - - - - - - - - - - - - - - - - - - - - - - - - - - - - -

I've been under the weather recently, so just one 30 mile trip to report.

Which started after I had replaced the roadside zip tie repair on the throttle cable.


Only took one photo when out and this turned out to be blurred, but at least you can tell the sun is shining.


I then thought I'd try another 'drone' shot, but didn't park the car close enough to the house. :rolleyes:


Until next time, take care, Paul. :)
30 May 2019, 1:39pm
Short Hops
Took a quick trip to Wembley Stadium, where a large area around it is now has multiple building sites.


Which meant I had a lot of builders taking photos/selfies as I drove around.

Then one builder wandered into the middle of the road as I was waiting in traffic to tell me I needed to respray the bonnet.

Glass Half Empty - What a ****! :icon_evil:

Glass Half Full - He must have thought the paintwork was very old. :icon_wink:

- - - - - - - - - - - - - - - - - - - - - - - - - - - - - - -

I also took a trip to Sainsburys, where parking next to a 'Mini' always makes me smile. :D


Until next time, take care, Paul. :)
30 May 2019, 2:23pm
I still think calling those lardy beasts 'Mini' is taking the proverbial.
7 Jun 2019, 7:43am
Dpaz - I'll try to find a Countryman one day, as they are HUGE.

- - - - - - - - - - - - - - - - - - - - - - - - - - - - - - -

Made a start…
Managed on 30+ mile trip last weekend, when it was so warm I could wear shorts!

Unfortunately, I didn't manage to get any pictures from that trip. :rolleyes:

Still, I do have a few photos from my attempt at making templates for my alloy cockpit interior.

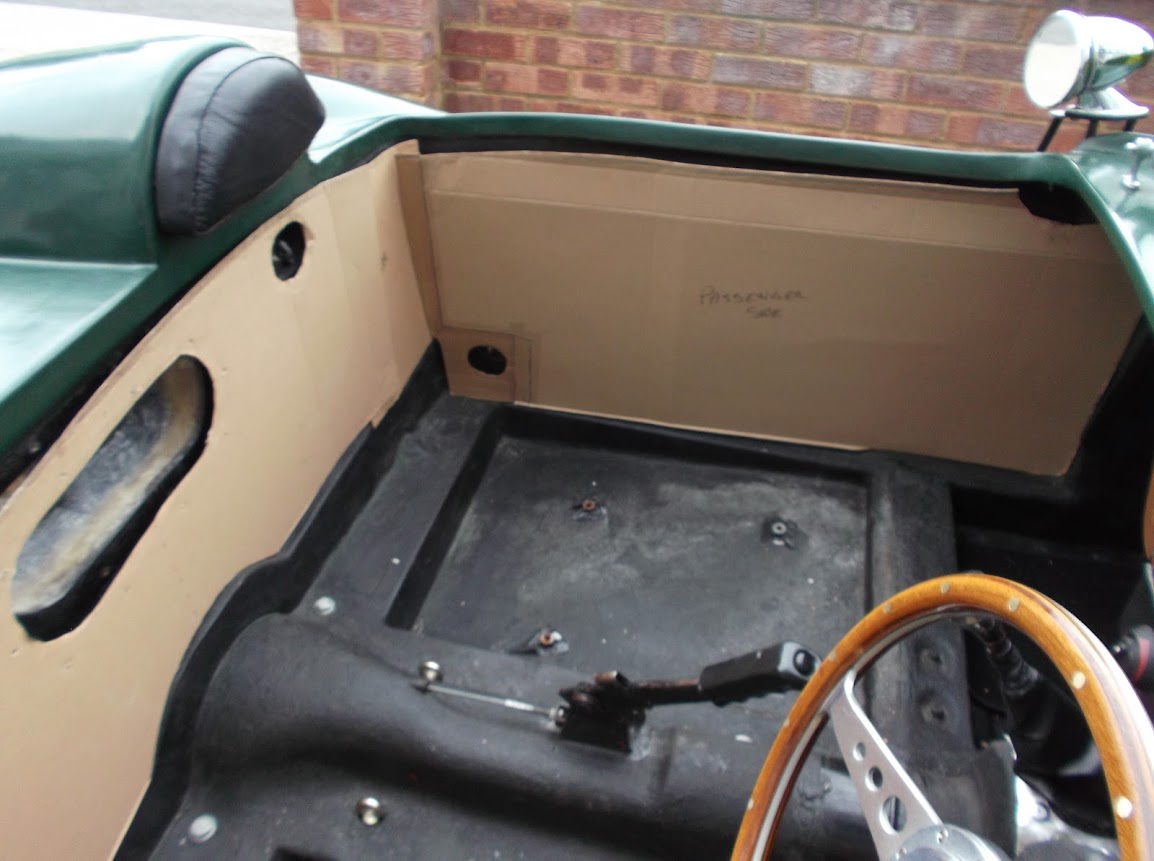
This is the smallest of the three panels I now have and it will go on the rear cockpit wall.


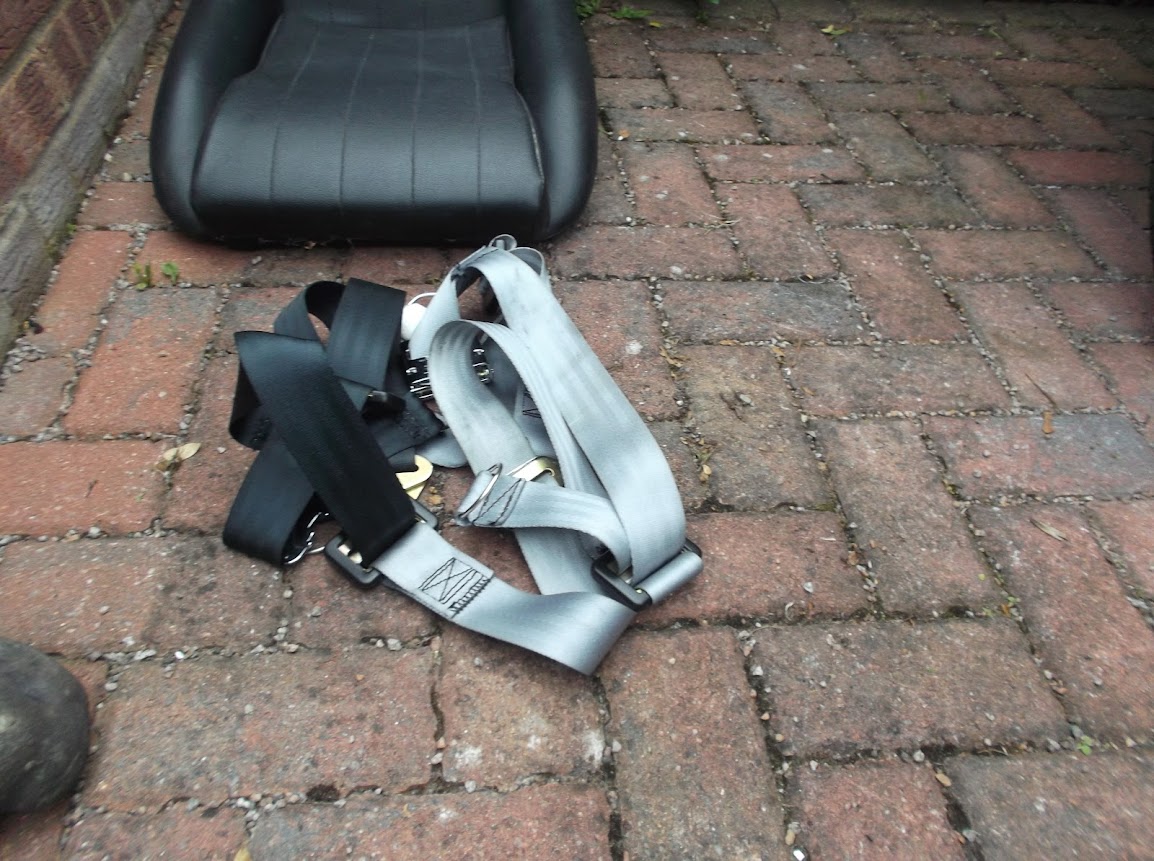
However, it didn't take long to realise that I couldn't actually reach the back wall with the seat belts in place. :doh:


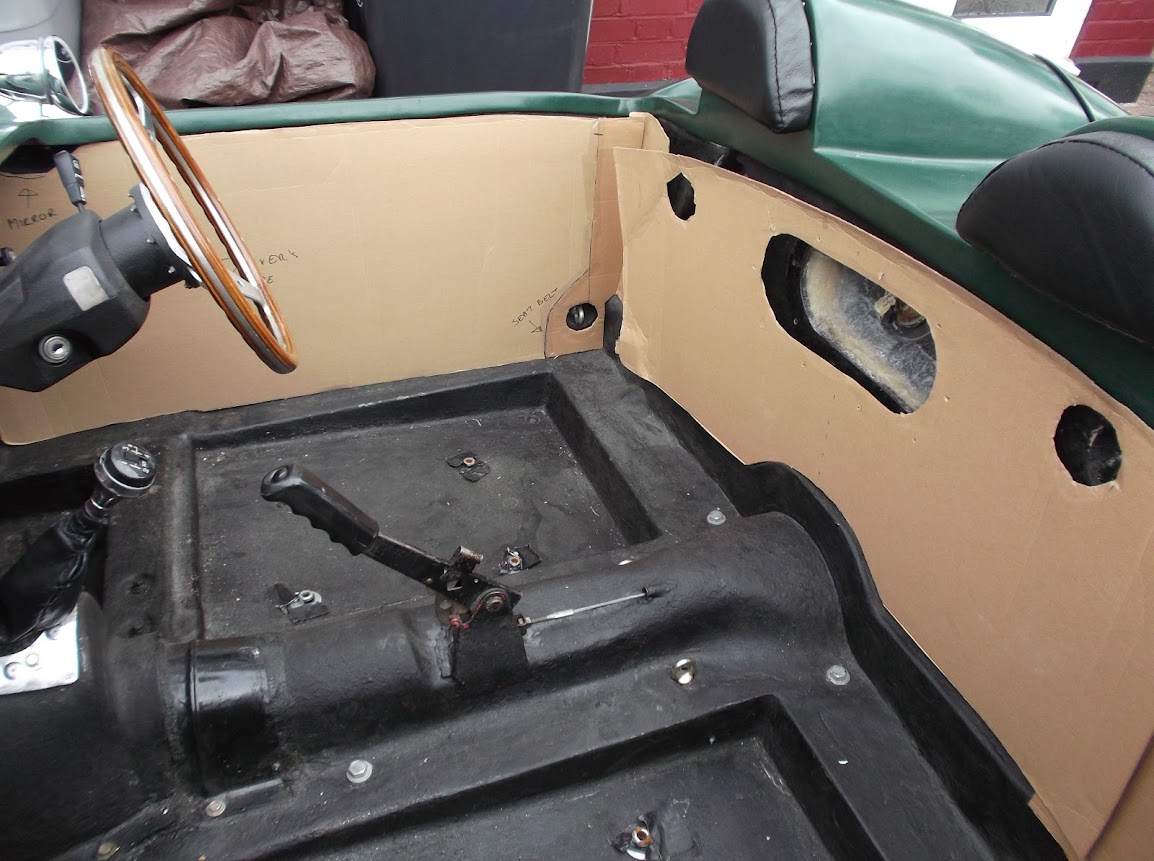
So I started on the driver's side instead.


Although I still need to remove the seats & seat belts to get access to the sides as well.
- To allow me to mark out a proper circle for the seat belt mount, where there is currently a cut off.
- To extend and run this panel around the rear corners, where the rear panel will go over the top.

Note:
I will make a separate removable access panel to cover the bolts holding the side mirrors in place.

Here is a very rough idea of how the panel will look and the mess it is going to cover.


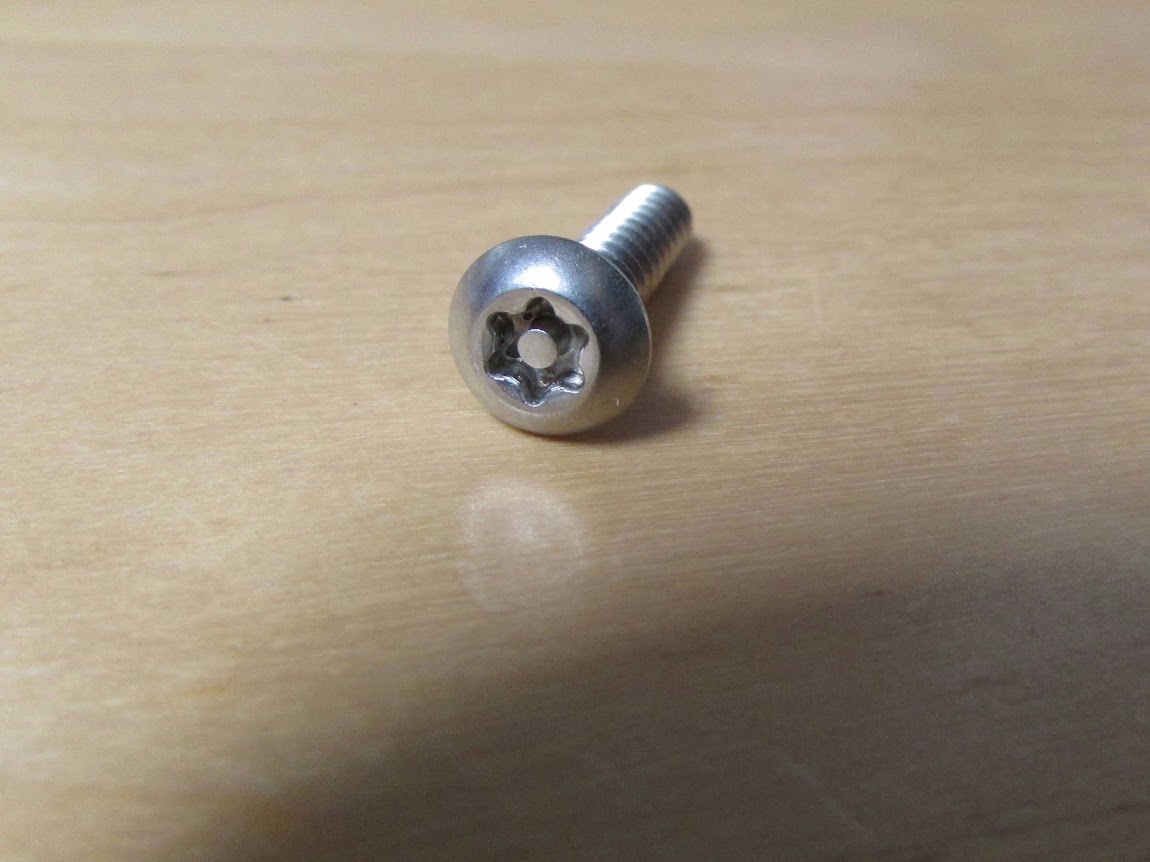
I already have a load of these Torx screws to hold the panels in place.


But I've just ordered a load of washers that I think would be a good idea to spread the load.

Once I've make some more progress with the passenger side panel I need to commit some time to doing this work.
( As I will be effectively off the road as soon as the seats come out. )

Until next time, take care, Paul. :)
7 Jun 2019, 4:27pm
Paul if it's not too late, put big washers under the trim and a normal washer under the bolt. It spreads the load and isn't so noticeable. It looks like a good time to do it with the rain coming.
8 Jun 2019, 8:01pm
Paul the car is still looking grate I like the textured alloy panels nice touch I wish i'd thought of that before I riveted mine into place doh!
8 Jun 2019, 9:53pm
Thanks for the update Paul.

Love seeing your motor near ‘normal’ ones.

Dave
9 Jun 2019, 12:38pm
Dpaz - Currently, the plywood cockpit walls are cover in Tetroseal.

So I am hoping the slight 'give' in that surface will be enough on the underside of the alloy sheet.

Unfortunately, the rain forecast for next week means I will be unlikely to make any progress on this at all. :icon_sad:

- - - - - - - - - - - - - - - - - - - - - - - - - - - - - - -

Deggsy - Make no mistake, your car's riveted panels will look a lot better than mine. :cool:

- - - - - - - - - - - - - - - - - - - - - - - - - - - - - - -

DaveP - Cheers. :D

Which remind me, where are your 2019 Kobra on the road photos?

:icon_wink:

- - - - - - - - - - - - - - - - - - - - - - - - - - - - - - -

Saturday - Windy

I left the cardboard, scissors and marker pen on top of my bins while I went to peel back the car cover.

But no sooner had I turned my back and the wind picked the whole lot up and threw it over the drive! :eek:

So it was a bit of a battle to cut out the first part of the passenger side template.


As before, I still need to extend this to carry on around the rear cockpit curves and do the seat belt mount properly.


- - - - - - - - - - - - - - - - - - - - - - - - - - - - - - -

Sunday - "Outta Gas"
Wanted to take the car out for a quick drive, but only got as far as the street.
- The car started up OK.
- I reversed out of my driveway OK.
- The engine idled OK (on choke) while I sorted out my seatbelt.
- But then died shortly after I pulled away and then refused point blank to re-start.

So I had to push it back to the side of the road to see what was going on.


My fuel gauge was low, but not empty and it had sounded like a fuel problem.

So a quick trip to the petrol station will a jerry can meant I could add 5 litres to the tank just in case.

But still nothing.

Then I noticed the fuel filter was messy.


So that was stripped down and cleaned.


The good news (I think) is that there appeared to be fuel at the end of the hard line.


At this point I tried to turn the engine over to see if fuel would come out of this pipe.

But nothing happened and it did take me a while to remember the fuel is sucked from the engine, not pushed from the tank. :doh:

So I tried to trace the route to the carbs and found this pipe was not sitting flush.
( Photo taken after I had pushed it in fully and retightened the jubilee clip. )


This pipe feeds this 'thing' next to the carbs.


Unfortunately, despite all this, there was still no fuel coming into the glass filter. :icon_sad:

Which meant I had to give up for now and push the car back across the street and into my driveway.

- - - - - - - - - - - - - - - - - - - - - - - - - - - - - - -

Help Required
At some point I will dig out my Haynes manual and see if there is a trouble shooting section.

In the meantime, if anyone has any suggestions for what else I should check/ do, I'd be very grateful.

Cheers, Paul. :)
9 Jun 2019, 2:50pm
Looking at all that dirt in the filter, I would flush out the line back to the tank.
Did you flush & reseal the tank during the build-up?
9 Jun 2019, 4:18pm
Hi Paul, fuel should not just sit in the delivery line, it should syphon out as the feed from in top of the fuel tank is higher.
Because there is fuel sitting in the delivery line I would check the connecting pipe between the petrol tank outlet and the delivery line.
If air is getting into the line it would explain the lack of a syphon and the pumps inability to pump.


From what you say it sound like you started and moved your car on what fuel was left in the carburettors float bowls.
10 Jun 2019, 7:07pm
fuel

I have a back up pump in the line ( facet) I use it when the car has been stood, a good move i think Ac used to do the same, befor I had it I would crank the car for ages to get action, a papal of mine gave me an old glass bowl filter and I canged several timems after the car was first on the rooad, got loads of crud out of the system, good filter is a must,
11 Jun 2019, 8:38am
Thanks for the replies gentlemen. :cool:

Colin - The tank was rinsed out, but not resealed, which (with hindsight) may have been an error.

Mike - I will have a looks at the fuel line from the tank when I get the chance.

Wharfdale - Due you have any more details about your extra pump?
( Like where is located, how is it wired up, etc. )

Cheers, Paul. :)
12 Jun 2019, 7:31am
Thanks. :cool:
19 Jun 2019, 6:43am
Hopeless…
Every since my fuel problem, I've not been able to line up my free time with dry weather. :icon_sad:

So I took a chance yesterday morning with a cunning plan that involved some left over clothes line.


This is plastic covered steel wire and I tried to use it like a drain clearing rods...


This was slow work, pushing and pulling, but it seems to be working.

As every so often there would be a trickle of petrol following the wire out.

In the end, I switched to a second section of left over clothes line that was a little thinner.

This was 'rammed' pretty much the full length of the car.

So I turned my attention to the boot area, where access to the fuel line into the petrol tank was tight.


Unfortunately, this photo was taken after the clothes line had got stuck. :eek:

The brute force and ignorance I had already applied to remove the cable at this point had twisted the pipe from the tank. :icon_evil:

So I had to remove the access panel from the rear cockpit wall.
( Photo taken after the screws had been removed. )


I'd actually forgotten just how entombed the tank is. :rolleyes:


I also removed the fuel gauge sensor to see if that was catching the clothes line.

Eventually, I was able to straighten the petrol tank pipe and remove the clothes line.

I was then able to run the thinner line through the pipe with no problem.

But by now it was starting to rain, so I had to pack up quickly and call it a day.

So not only would a garage have been handy for building the car, it would be useful for running it too.

Especially as the tarpaulin is slowly destroying my paintwork. :icon_sad:

Until next time, take care, Paul. :)
19 Jun 2019, 7:10am
Such are the joys of unusual car ownership. Why not get a Gazebo? I think Aldi is doing one at the moment. Working in the dry when it is raining is a bit sissy, but more like fun. Have you sorted the problem?
20 Jun 2019, 7:31am
Dpaz - Unfortunately, a gazebo won't work on my driveway due to the slope and the 'permeable' paving which prevents anchoring.

I will not know if the 'ramming' work has fixed the fuel problem until I get a chance to tighten everything up and try again.

Cheers, Paul. :)
21 Jun 2019, 5:00pm
Quick Update…
Due to the numerous failed attempts to start the car, I figured it was worth topping up the battery.


This morning I had my second attempt at getting to the bottom of my fuelling problem.

Eventually I found a kink in the fuel line near the rear of the car.
( Not easy to see in the photo. )


But the P-Clip bolt was next to impossible to reach, so I had to remove the wheel. :rolleyes:


I then bit the bullet and cut the pipe off before the kink.


Note: I will be making a cleaner cut a little further back.

This allowed me to remove the hard pipe from this point back.
( Which runs through the boot floor and up to a rubber hose connecting it to the petrol tank. )


There was definitely something restricting/blocking this section of the pipe.

The good news is I was able to feed clothes line through from the front...


All the way through to the back of the remaining section of hard line.


I then had to quickly cover everything back up.


So I could try a local Motor Factors for some replacement copper and rubber fuel lines.
( I am going to replace all of the fuel lines while I'm at it. )


Unfortunately, they didn't have anything in stock, so I've had to order some from Ebay.
( But they will not arrive until mid week. :icon_sad: )

At this point I figured I should test/confirm the problem was this rear section of pipe.

So I reattached some pipes at the front to a jerry can.


I know a photo isn't the best way to show this, but the engine fired up with no issues. :D


I even left it running for a while just be be on the safe side.

To say I am a very happy bunny would be a huge understatement. :cool:

Until next time, take care, Paul. :)

PS
I have a ton of replies to post on other threads and I'll try to do that over the weekend.
22 Jun 2019, 5:36am
Paul L wrote:
Dpaz - Unfortunately, a gazebo won't work on my driveway due to the slope and the 'permeable' paving which prevents anchoring.

I will not know if the 'ramming' work has fixed the fuel problem until I get a chance to tighten everything up and try again.

Cheers, Paul. :)


Bouncy Castles hired for children's parties use relatively small sandbags to anchor them. A bag of sharp sand and 4 rubble sacks? This could provide the means to use a cheap gazebo or garden greenhouse as a temporary shelter. (I have been looking into cheap spray booth solutions for my Lambretta and am considering the latter).
23 Jun 2019, 8:35am
Barber – Thanks for the suggestion. :cool:

I did look at all variations of weights, but the problem of the slope remains.

If anything, the slope of my driveway caused more problems than working outside! :icon_evil:

Anyway, I spend a lot of time working in the garden yesterday.

So, fingers crossed, I hope I will be able to spend some time on the car today.

Cheers, Paul. :)
24 Jun 2019, 7:56am
Sunday - Part 1
I have to wait a few days for the new fuel pipes to arrive to get the car back on the road.

Therefore, I figured now was the time to jump right in and tackle lining the cockpit walls with alloy.

I removed the passenger seat and tried hard to forget about how many hours I'd spend fitting it. :rolleyes:


Next, the seat belts came out.


This gave me a clear run to make the extension piece I needed for the passenger side panel.


Note how lumpy the back wall is! :eek:

With the extension piece added I had one side complete.


My original plan was to extend this panel further at the rear so it would wrap around the rear corner.

There is plenty of room on the aluminium sheet to do this.


But I realised the rear wall would be higher than the sides, like so.


This is due to this 'hump' section of original Spitfire.


Note:
The 'white' square on the rear wall was caused by me trying to shoved an oil can behind the passenger seat. :doh:

This is a long winded way of saying that I will need a pair of corner panels, something like this.


End of Part 1…
24 Jun 2019, 7:58am
Sunday - Part 2
This is the full size of the smallest of the three alloy panels I bought.


Which could be trimmed down nicely to fit the middle of the rear cockpit wall.


Although it was a better fit when I remembered that it was supposed to include room for my access panel. :rolleyes:


Next I removed the driver's seat and belts before making an extension piece for that side.


By the time I had made a corner section for this side I was left with something like this.


The next step will be to cut these shapes out and start fitting them.


But that is a job for another day, so until then, take care, Paul. :)
25 Jun 2019, 5:21am
Monday
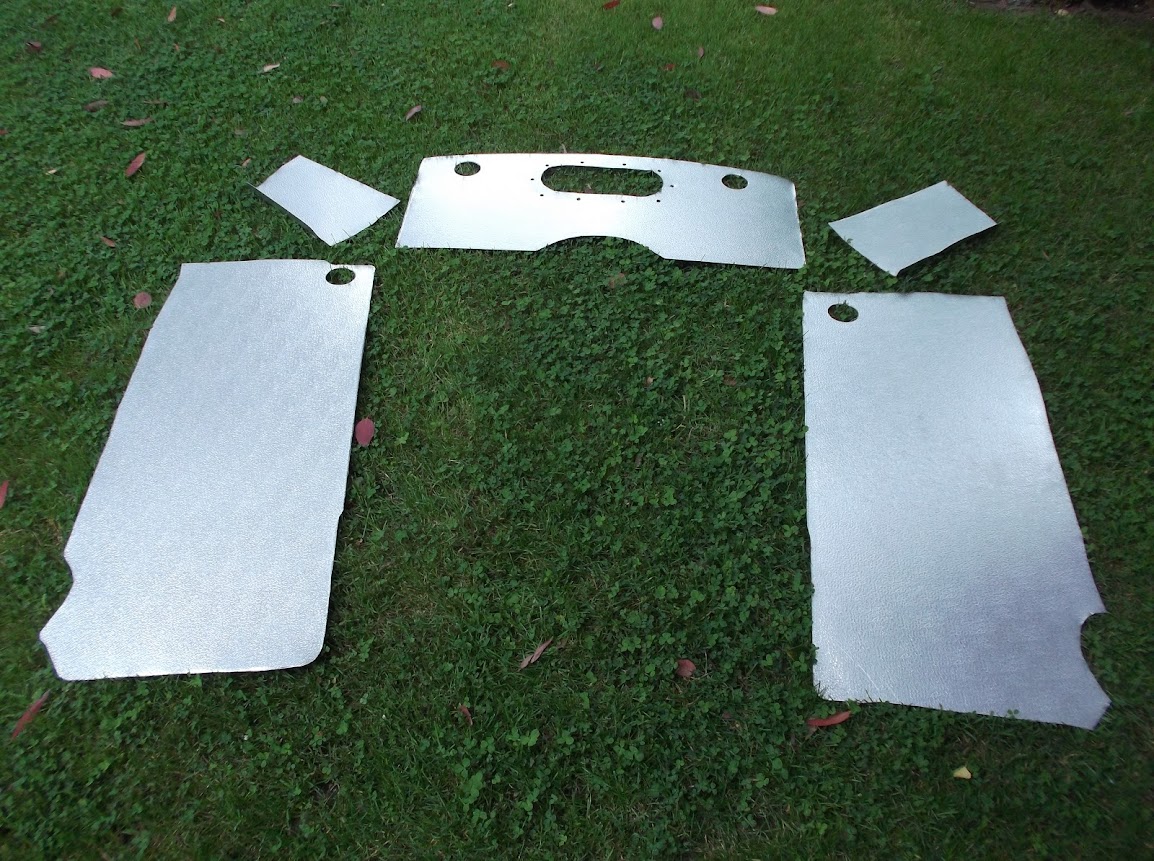
I've now cut out all five panels for the cockpit walls. :cool:


I used a hole saw for the seat belt mounting points to provide a nice cut out.


I am sure there will be some further trimming required when I test fit these.

Which will be followed by drilling the holes required to fix the panels to the cockpit walls.

After that I will then clean up / round / soften all the edges before actually fitting them.

Cheers, Paul. :)
25 Jun 2019, 8:41am
Nice one, Paul. What is that finish called?
25 Jun 2019, 9:12am
Those look really good, can't wait to see them fitted