MadaboutKitcars

This is a read-only archive of the old Madabout Kitcars forum. New posts and replies are no longer possible, but every thread is still here to browse and read.

Another Cordite Is Born ...

9 Mar 2013, 1:07pm
Paul you don't want to solve all the problems, what will you do for the next 20 years...
9 Mar 2013, 8:15pm
Another one of those frustrating days with just too much other stuff going on.

Still a few things to report...

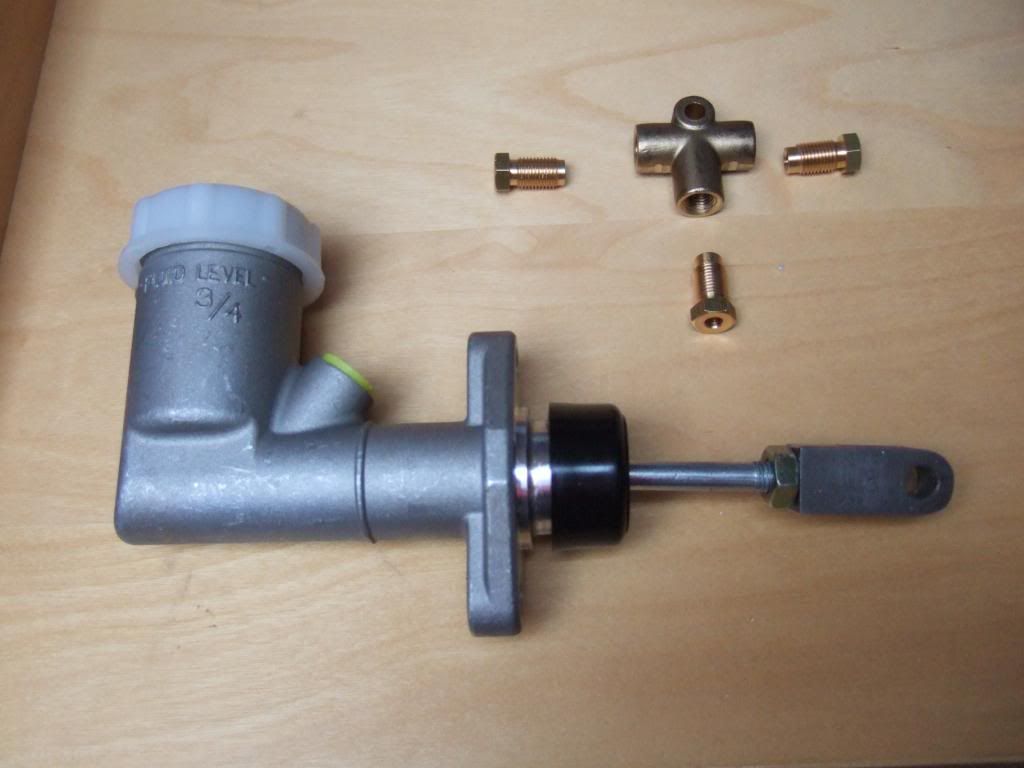
Brake Master Cylinder
Picked up my parcel this morning, which together with new fittings from Rimmer Bros. should work OK.


Door Fitting:
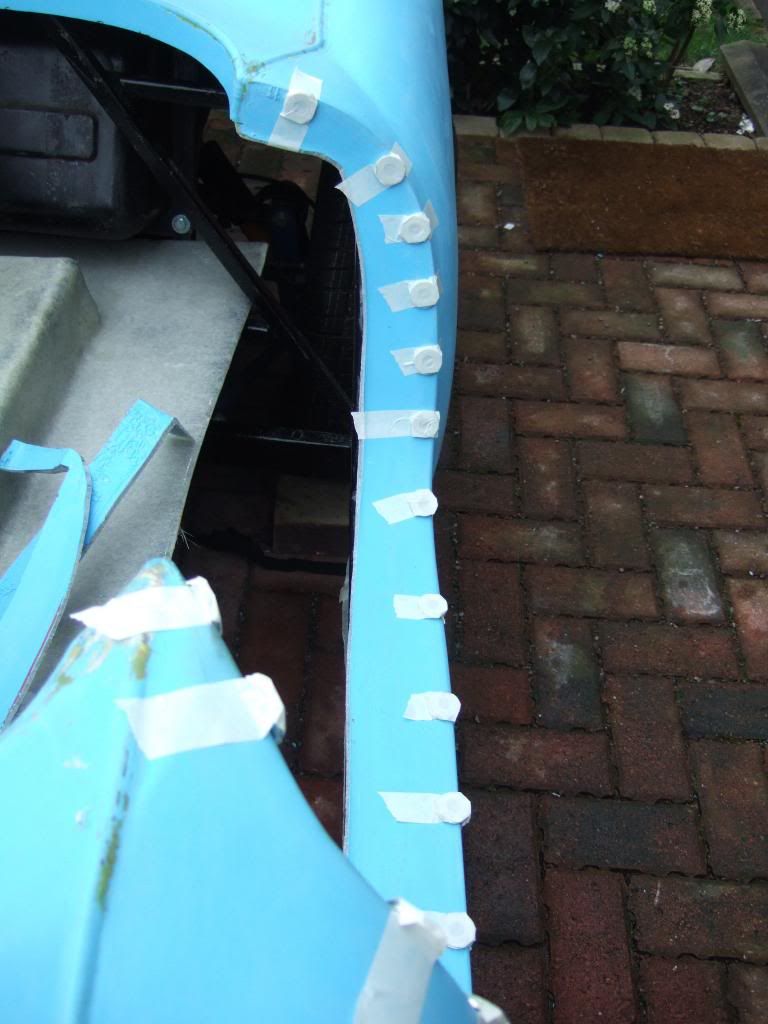
I started off by taping lots of "double washers" around the door cut out in the body shell...


Then I offered up the outer skin to the door gap to see where the worst oversize areas were.
Slowly but surely I followed a "trim, test fit, mark, trim" cycle to reduce the size of the door skin.

However, I was having trouble keeping the gap even across the whole of the door.
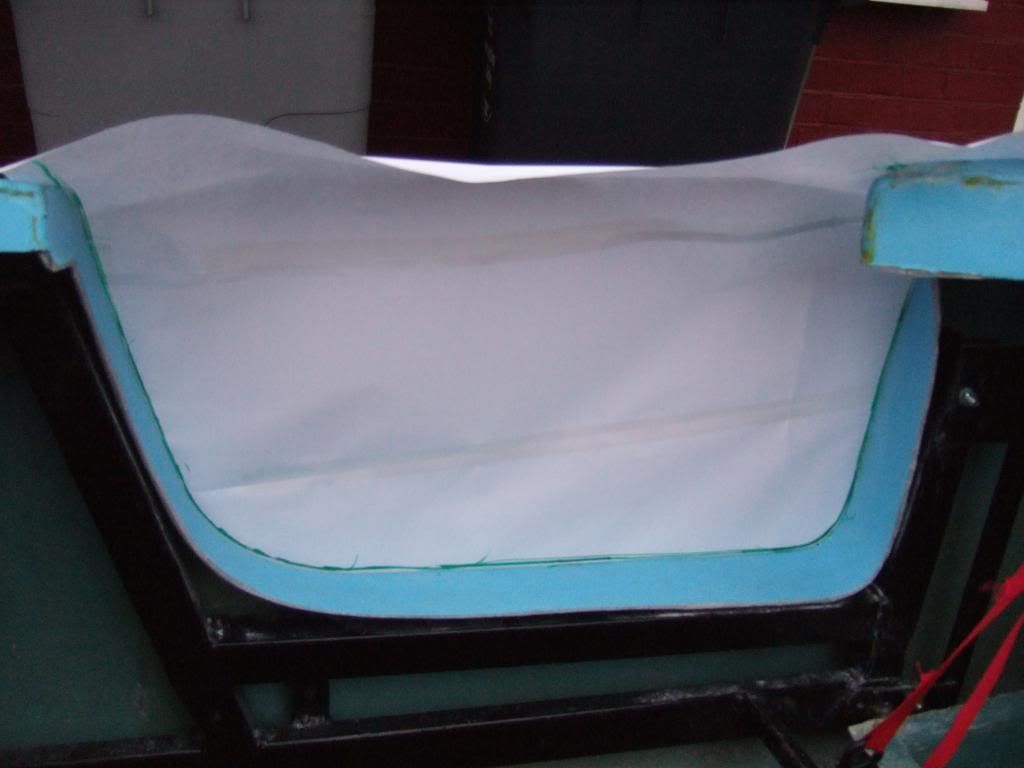
So I removed the washers and tried a "Plan B" which was to mark the size of the hole on paper.


But that was a waste of time as I was still missing something that I couldn't put my finger on.
By the time I'd reached "Plan C" (the used of cardboard gaps) it finally became clear...
... there is a slight twist in the door skin that prevented all the edges lining up at the same time.

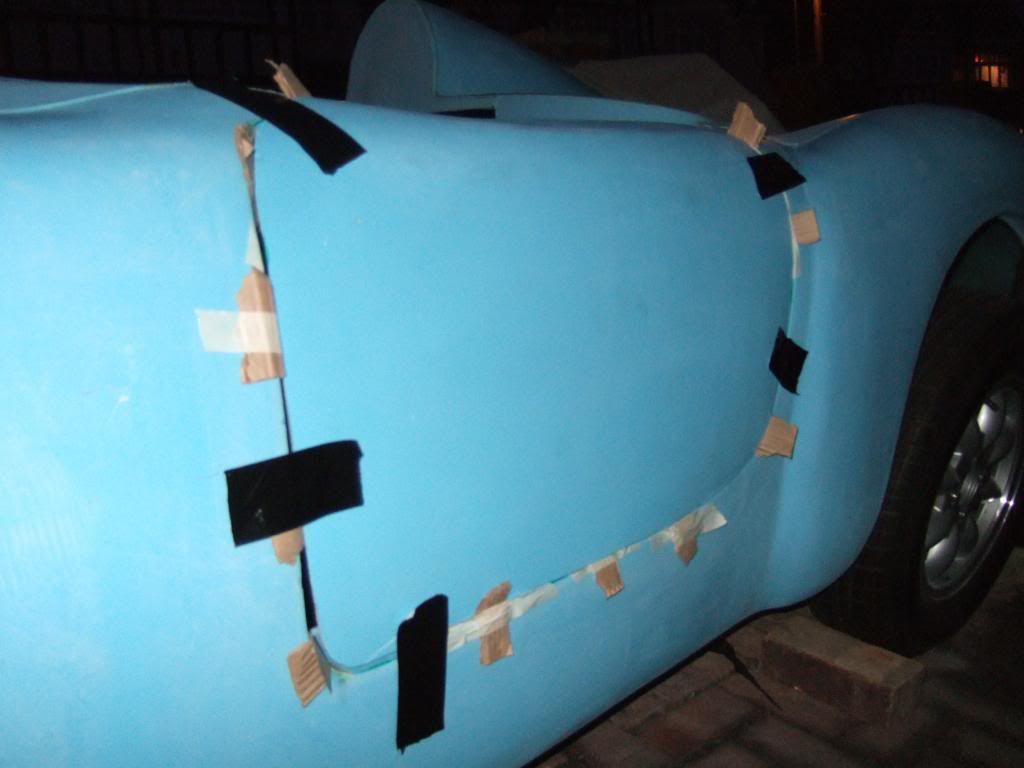
By taping the door to the body shell it gave me a better idea of the final trimming required...


However, by this time I was pretty cold and decided I would pick this up again another day.
As due to starting much later than planned, it was now 6.30 pm & dark outside.
( Looking on the bright side, it is definitely getting much lighter in the evenings now. )

Until next time, take care, Paul. :)

Replies:
Viatron - Thanks for the other Mac, but I've already got fibre glass stuff in the shed.
Although, something tells me your mate will do a better job, so I'll check your build too.
Pops - Cheers Stuart, I loved the way you curved your wheel arches. :cool:
Mr T - Thats good to know as people rarely take photos of that inner wheel arch area.
GaryH - At this rate, I'd be happy to solve any of the problems!! :icon_wink:
17 Mar 2013, 1:15pm
It has been a strange week in terms of making any progress on the car.
There has been stuff going on in the background, but with very little to show for it yet.
I'm also feeling under the weather myself, plus the real weather outside is rubbish.

Still, there is some good news on the horizon...

AndyP57 hopes to be able to send me my last remaining parts before the long Easter weekend. :cool:
These will include new floor pans which are a fundamental stepping stone to finalising other parts of the build.
( Seat & seat belt positions, modifications to frame work & internal cockpit edges, bonding body shell, etc. )
Only when I have all the parts of the jigsaw in front of me will I be able to weigh up the best way forward.

So until I am in a position to report some real progress I will leave you with this...


:icon_wink:

Happy St.Patrick's Day, Paul. :)
17 Mar 2013, 2:03pm
Paul, since Ribble are now going to be producing a retrofit door kit might it be an idea to see if Andy could do you a deal on one and use that to graft into your existing body, as I understand it the door kit will include a pair of doors and the shuts ready to glass in. Just thinking it might be a far easier option. I have to say that looking at the quality of those doors I am more than happy my original order went AWOL as to be frank the quality, or total lack of, is quite shocking! Those door skins would have dropped of in weeks if not days with a bit of road vibration.
18 Mar 2013, 6:27pm
Viatron - Hi Mac, I'd agree that delays with your original order have worked out much better in the end.
I picked the Cordite as it was supposed to have evolved from all the lessons learnt from 100+ Spyder kits.
The cold reality is this is simply not the case, although the Ribble Navigator should be a big improvement.
( I'm sure your frame work will allow pedals, steering column, exhaust, etc. to be fitted without extra work. )

As for my doors, it was scary how easily they came apart, but they really are a [American Slang] PoS [/Cuss].
However, fair play to Andy57, he did offer me a set of the new Ribble doors kits when he saw my photos.
I've not taken him up on his offer as my internal frame work is set around my two "non matching" door sizes.
( And the list of modifications required to that frame work is already pretty long & daunting as it is. )

Passenger Door Fitting - More Thoughts:
Talking of doors, I need to fix the twist in the outer skin to have any chance of making this door work.
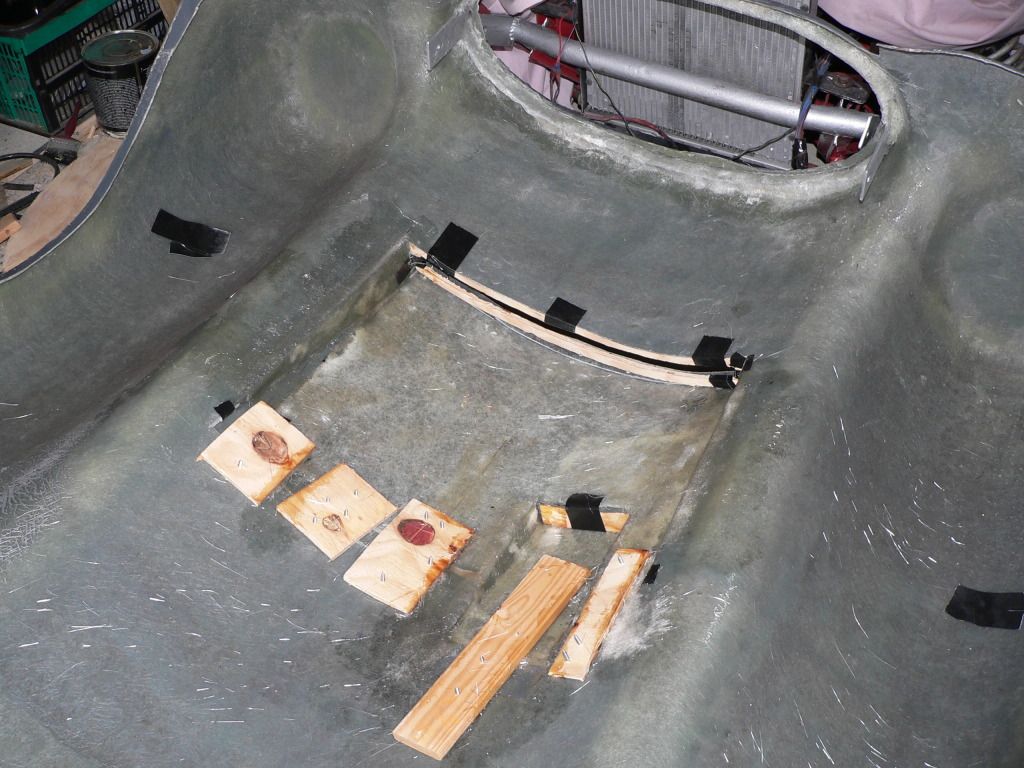
My current thoughts are to use some brackets to temporarily hold it in the correct position within the cut out.
Then I can add some fibre glass "cross bracing" which should allow the door skin to hold its shape better.
After that, I should be able to do a proper check on the door gaps & mark them up for final adjustments.

This idea is based on the sort of arrangements that I've seen on other builds…
( [COLOR="Blue"]Quick Question:[/COLOR] Are the small holes left by the fixing screws filled with body filler, or fibre glass resin? )


Shopping Update:
On Sunday night I bought something on Ebay which may help me make progress on my build.
But I don't want to start counting my chickens, so I'll explain more when (if) it is actually delivered. :pray:

Until then, take care, Paul. :)
18 Mar 2013, 7:06pm
Hi paul looking at your pics of your doors , realy bad by the way, who ever made them did not use any glass at all. Very poor work indeed..

Stick your door skin in the hole, and get your self a glue gun and stick some tags across the two surfaces, i e lolly stick , or small flat piece of timber. Once in place re glass the inner door to the inside of door skin and leave. Then it will
keep its shape when dry.
18 Mar 2013, 9:16pm
Paul my preferred method of filling screw holes is to grind it back a tad below the gel and force some p40 or similar in until it appears the other side, once cured grind back just below the gel and use a skim of filler. I have found that just use resin or filler nearly always results in defects, just my method I'm sure there are others, good luck with the doors, whoever made them needs shooting!
Although I can see your thinking about not using the door kit how about getting Andy to lay you up some new skins from the updated mould, if he makes them oversize you could just tape them over the hole and mark from behind and trim, at least they would be fibreglass right up to the edges, looking at yours a fair proportion of the edges seem to be nothing but gelcoat and without the glasswork behind it I fear that it will just chip off over time leaving a horrible edge and I think the work to replace just the gel with something more solid just isn't worth it.
19 Mar 2013, 12:06am
mikmiglia wrote:
Hi paul looking at your pics of your doors , realy bad by the way, who ever made them did not use any glass at all. Very poor work indeed..


Erm, weren't you Gary's 'glass man on that project Mike? :peep:
19 Mar 2013, 7:58am
I dont think so mate lol, otherwise it would nt turn out like that. Gary had several laminators in the the evening to lay up all the bodys , and lets just say a couple could nt give a toss what happend as long as they got the money .
19 Mar 2013, 10:11am
mikmiglia wrote:
I dont think so mate lol, otherwise it would nt turn out like that. Gary had several laminators in the the evening to lay up all the bodys , and lets just say a couple could nt give a toss what happend as long as they got the money .


Ahh, that explains why I can see through various bits of my bodyshell and bonnet :(
19 Mar 2013, 10:21am
I have seen condoms that are thicker than the lay-up on parts of my bonnet.
19 Mar 2013, 7:27pm
mikmiglia wrote:
... Gary had several laminators in the the evening to lay up all the bodies, and lets just say a couple couldn't give a toss what happened as long as they got the money...

Thanks for the honest reply Mike, it explains a lot.

I was planning to build up the door skin edges with fibre glass anyway to make them thicker.
But I hadn't picked up on the gel coat only sections until Mac (Viatron) pointed it out. :rolleyes:
So yet more beard scratching required to agree a door master plan.

Thanks everyone, Paul. :)
22 Mar 2013, 7:30am
I can now reveal the details of my mystery purchase on Sunday night as it has actually arrived…

Second Hand Spitfire Body Shell:
I've always liked DonnySoutherner's approach of fitting a section of Spitfire under the rear of his car.
However, I'd struggled to find anything suitable, until finally I saw something that just might work on Ebay.
The fact this was the only photo in the advert may have put other people off, as I ended up being the only bidder…
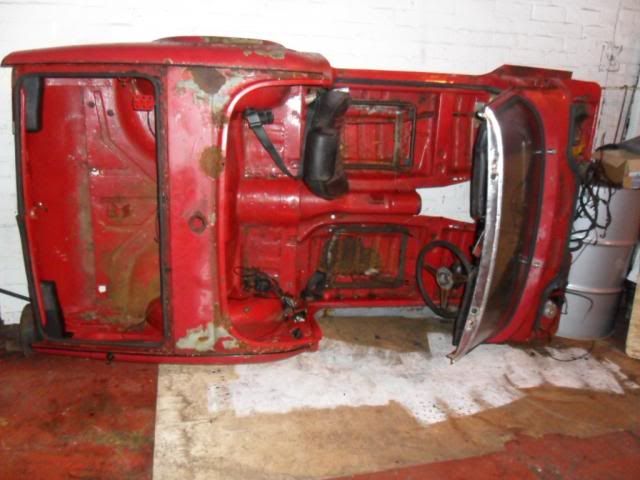


(Note: It was just the shell, all the other parts in the photo were being removed.)
However, in fairness to the seller, he did email me a lot of extra photos showing the condition of the shell.
But the real clincher came when he offered to deliver it from Cardiff if the price was right, so deal done. :cool:
Even including delivery, this cost less than I had been quoted by Breakers for just a cut out rear section.

On the one hand, it was daft to sell a body shell in great condition, only to buy another one not as good.
But I think this brings better Karma, as my good body shell is being used to bring another Spitfire back to life.
Whereas this shell would take a lot of work to be of any use on a Spitfire, but not as much work for a Cordite.

The deal was almost too good to be true, so I didn’t want to count my chickens until it actually turned up.
But sure enough, late one evening after work, it appeared stuffed inside the back of a big van!
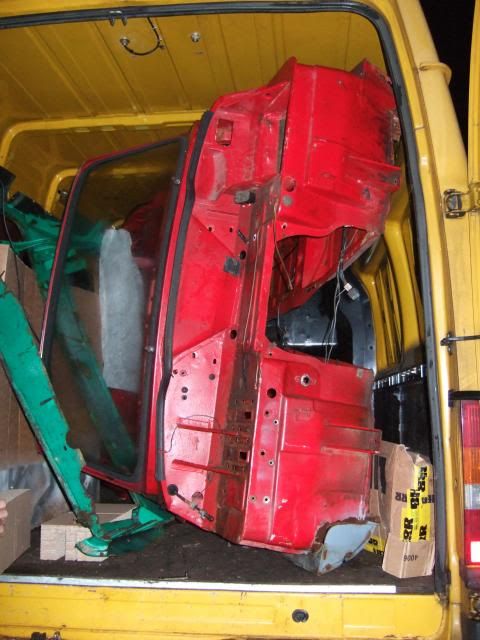


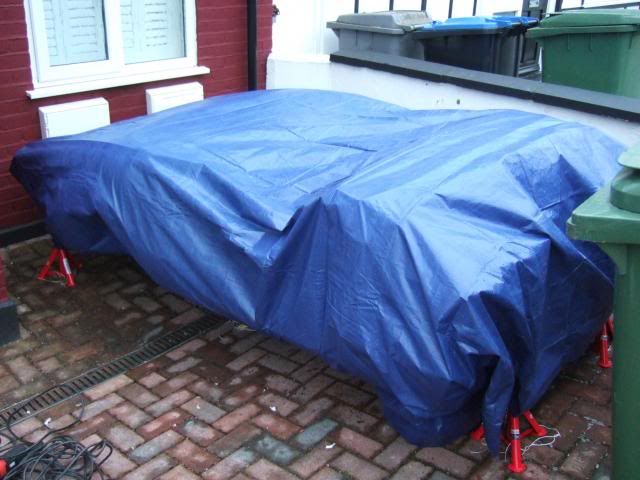
Unfortunately, the tarpaulin I'd ordered as an emergency cover for it hadn't arrived, so had to use dust sheets.
So this was the very sorry looking sight my neighbours were greeted with the next day…
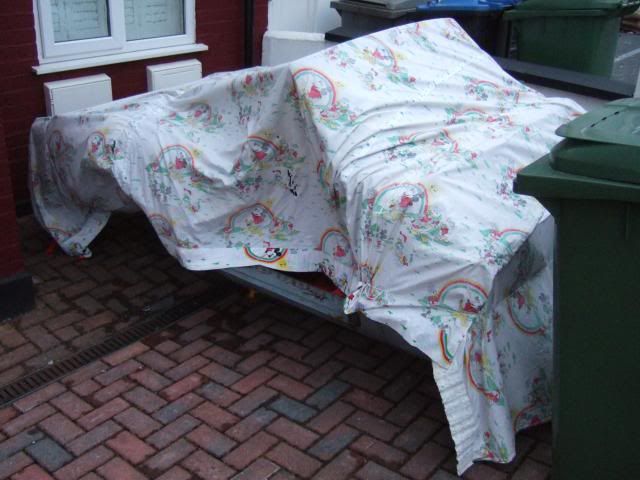


Thankfully the cover arrived later that day, so I could wrap it up properly when I got home from work…
( I'll have to wait until the weekend to get some decent photos of the shell itself in the daylight. )
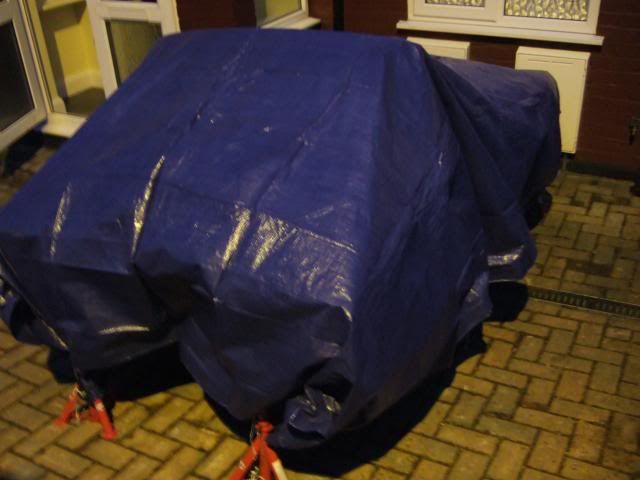


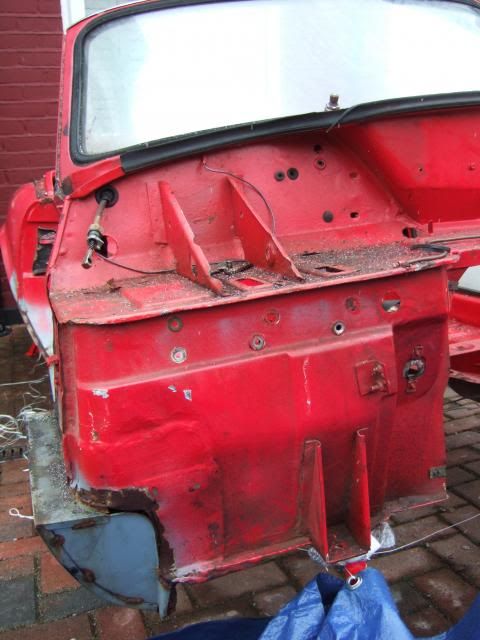
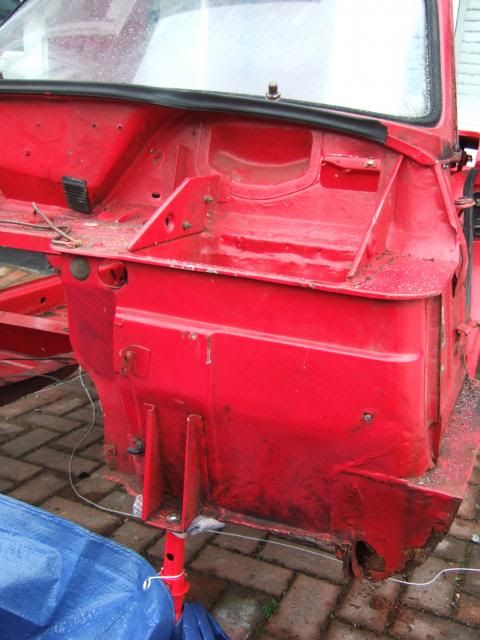
In terms of condition, the rear shell section has a few small rust holes, but generally appears pretty sound.
So I have definitely solved the "back end" issues of the "traditional" internal frame build, a big plus point. :cool:

However, having a complete shell to play with does open up the possibility of new approach to my build...

Possible "Fast" Build Option:
Technically, the fast build avoids dismantling most of your donor and just cuts down the body shell to suit.
So clearly the best time for me to have gone down this road was back in way July, when I could still do this…
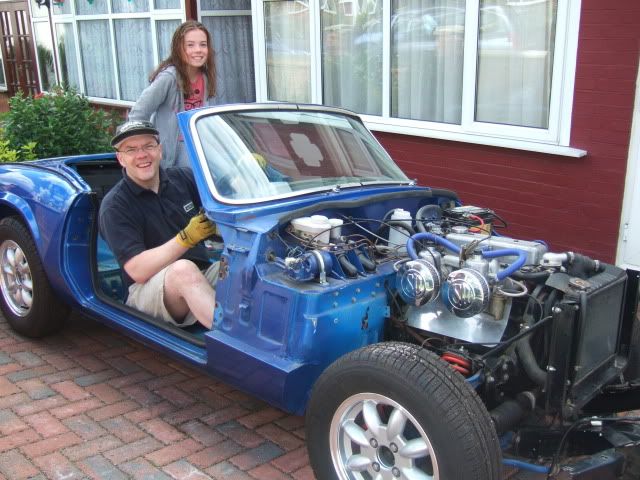


However, in fairness, the first time a Navigator fibre glass body was fitted over a Spitfire tub was Jan.13.
And as I can't undo the past, it now comes down to a choice of what will work best from this point forward.

"Traditional" Build:
When my last batch of parts arrive I will be able to drawn up a final "To Do" list covering all the mods needed.
These are mainly to the internal framework and the fibre glass bulk head to allow other parts to be re-fitted.

"Fast" Build:
Unfortunately, the body shell has a few problem areas that would need addressing before it could be used.
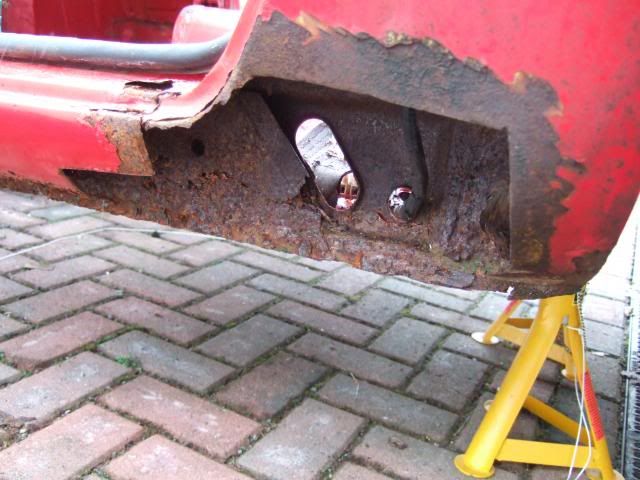
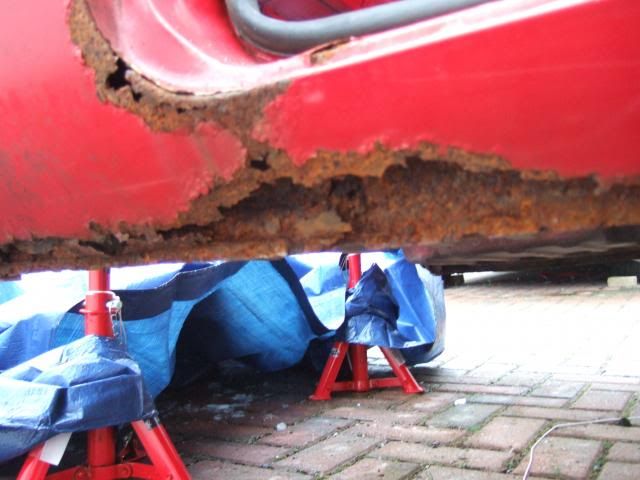
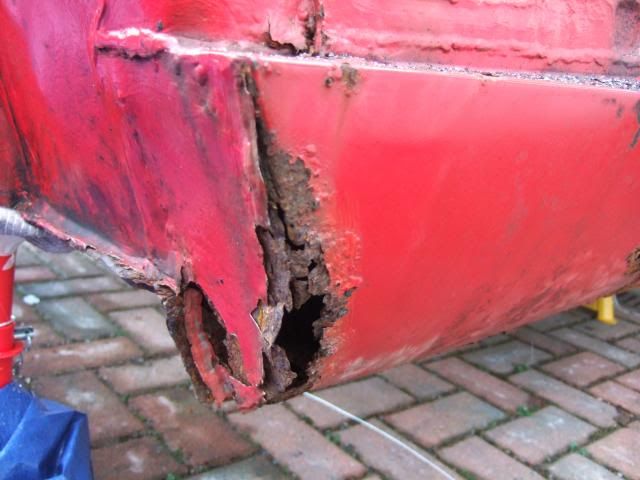
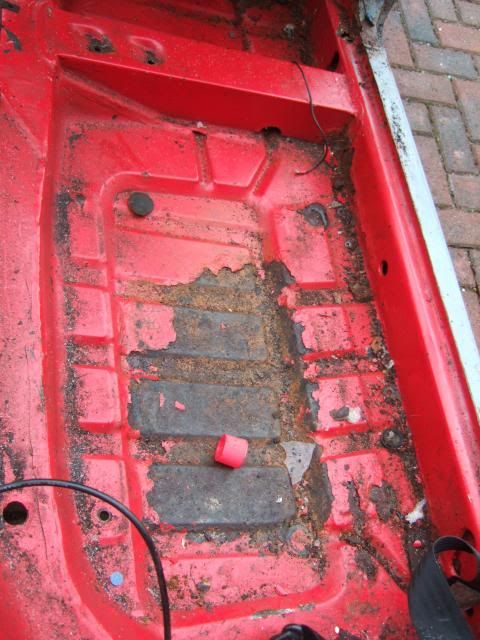
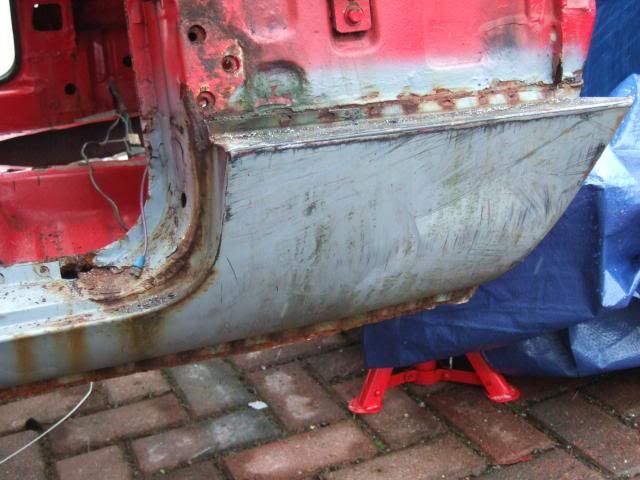
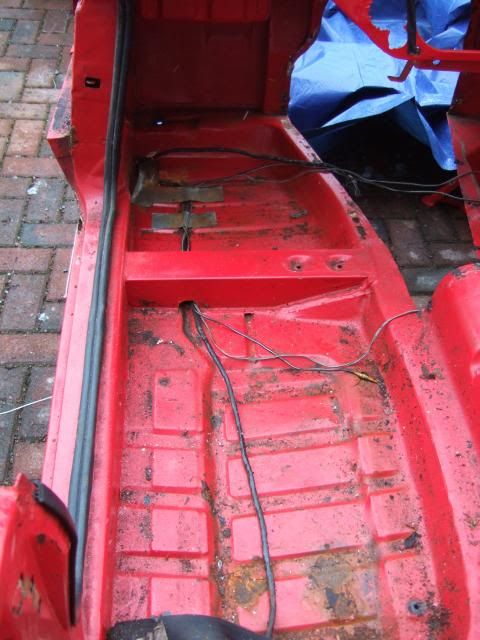
The sill on the passenger side has completely rotted away & there are a few more holes in the floor.
( And that is before I start a proper investigatiion in the daylight at the weekend. )

I did like the way Patoune reinforced the door openings above the sill on his A352 build "next door" .
So perhaps an extra length of box section could replace the sill, as it would be hidden by the Cordite body?
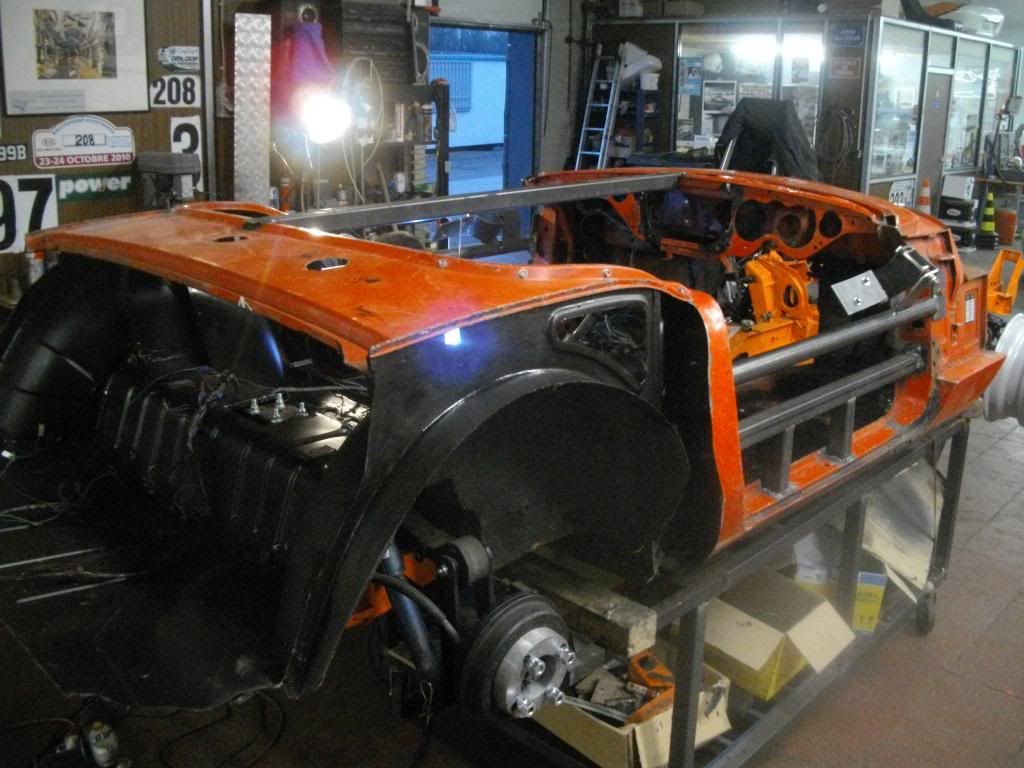


In addition, the Cordite bodywork would need to be extended back into the cockpit area as seen here…


So which ever build route I finally decide to take, there is still a lot of work required, but I remain hopeful.

Further Food For Thought...
Recently, SeaNick posted some wise words on this thread that really struck a cord with me…

seanick wrote:
... I think that listing is very sad, 10 years wasted, and nine of the work done himself-part from the oil cooler brackets!
He should have lowered his sights and got it finished to a lower level, then enjoyed it. He has failed to finish it due to an unrealistic idea of (for him) unobtainable perfection...


Whilst I am certainly not trying to achieve perfection, I do need to be realistic about what I am able to do.
My main aim was to get my car on the road (Taxed & MOT'd) with a spartan interior, but without final paint.
However, the cold facts are that if I haven't achieved this by Autumn 2013, it will not happen before Spring/Summer 2014.
( As the last few months have highlighted that trying to get things done outside in the Winter is not easy. )

So I intend to stay as positive as I can and hope that the long Easter weekend lets me make some progress.
I feel that after a long time 'tinkering around the edges' I will soon be in a position build some real momentum.

So until next time, take care, Paul. :)

PS
Good timing with the tarpaulin, as this morning ... the weather outside is frightful!.
22 Mar 2013, 7:39am
<sings>But the fire is so delightful</sings>
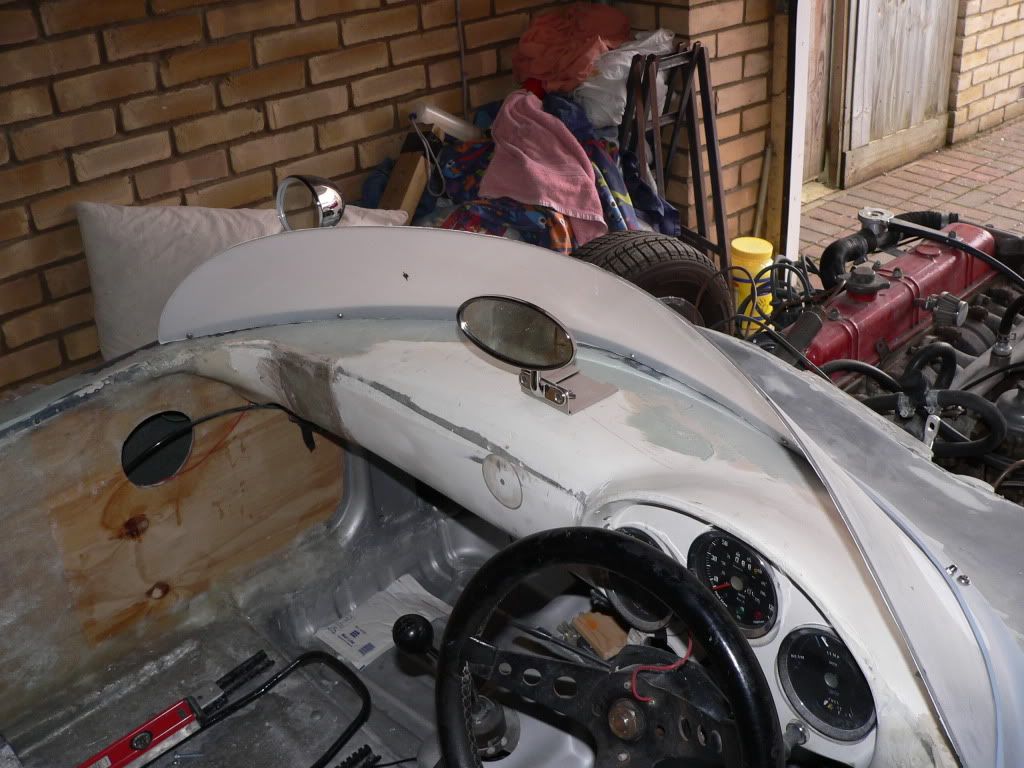
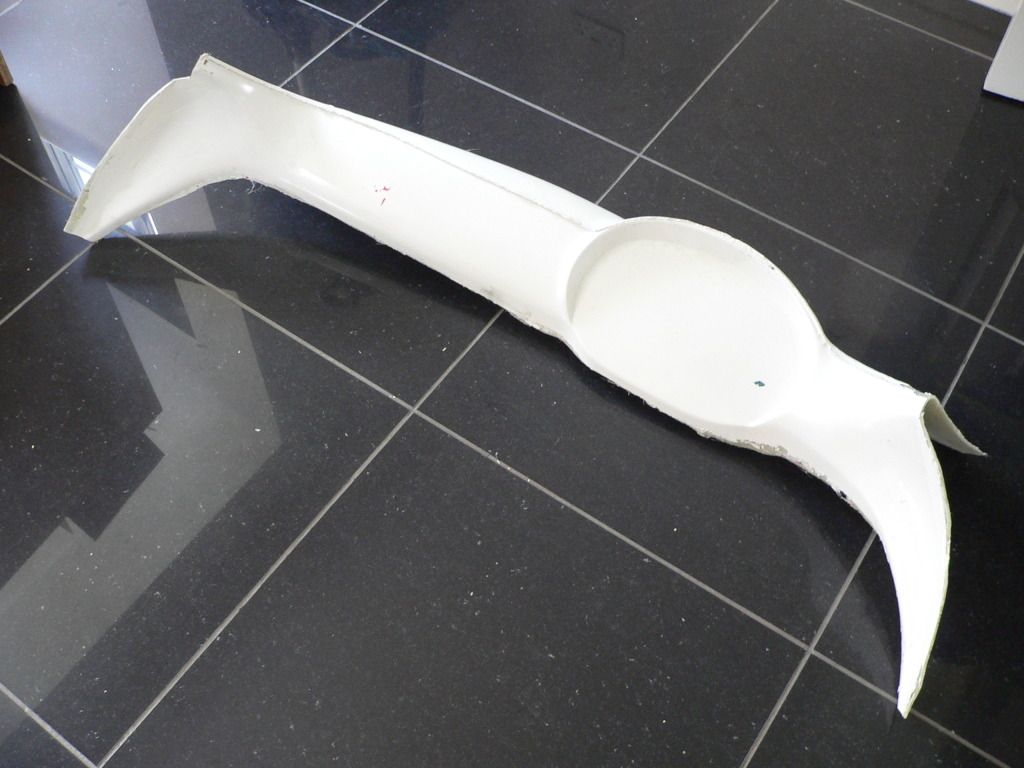
Sounds like a great idea to keep options open. We're putting some thought into that dashboard area. Could be a filler piece or a redesign of that top scuttle area. If the former it would be a separate part that could be supplied as an option.
22 Mar 2013, 8:17am
AndyP57 wrote:
<sings>But the fire is so delightful</sings>
Sounds like a great idea to keep options open. We're putting some thought into that dashboard area. Could be a filler piece or a redesign of that top scuttle area. If the former it would be a separate part that could be supplied as an option.


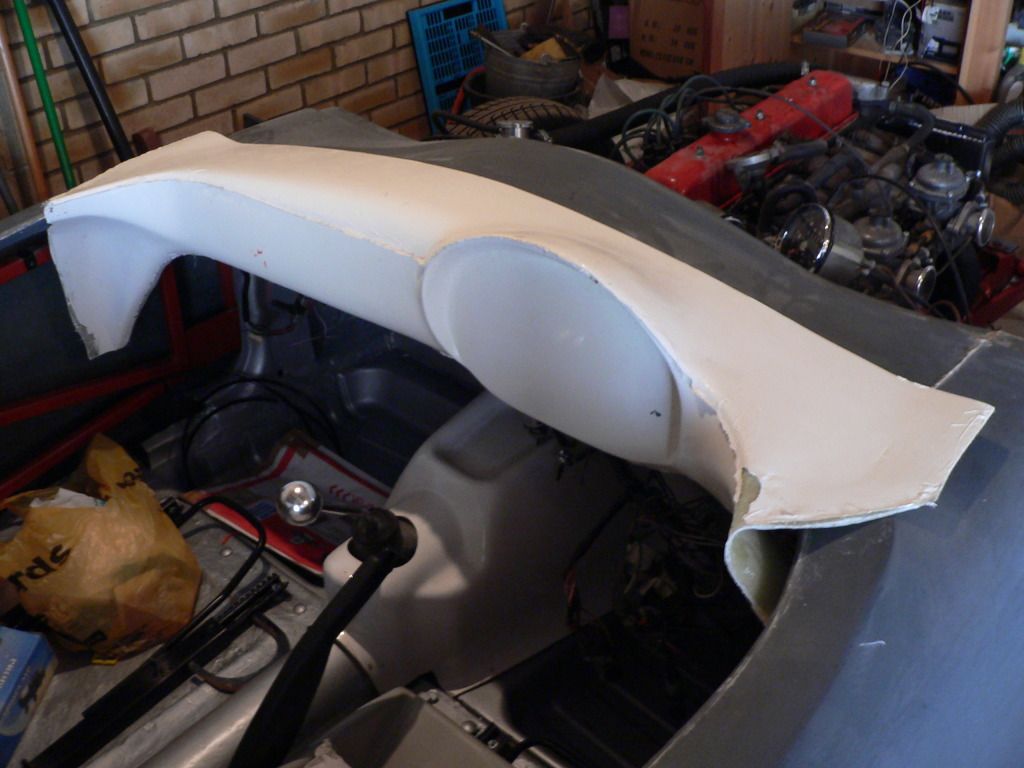
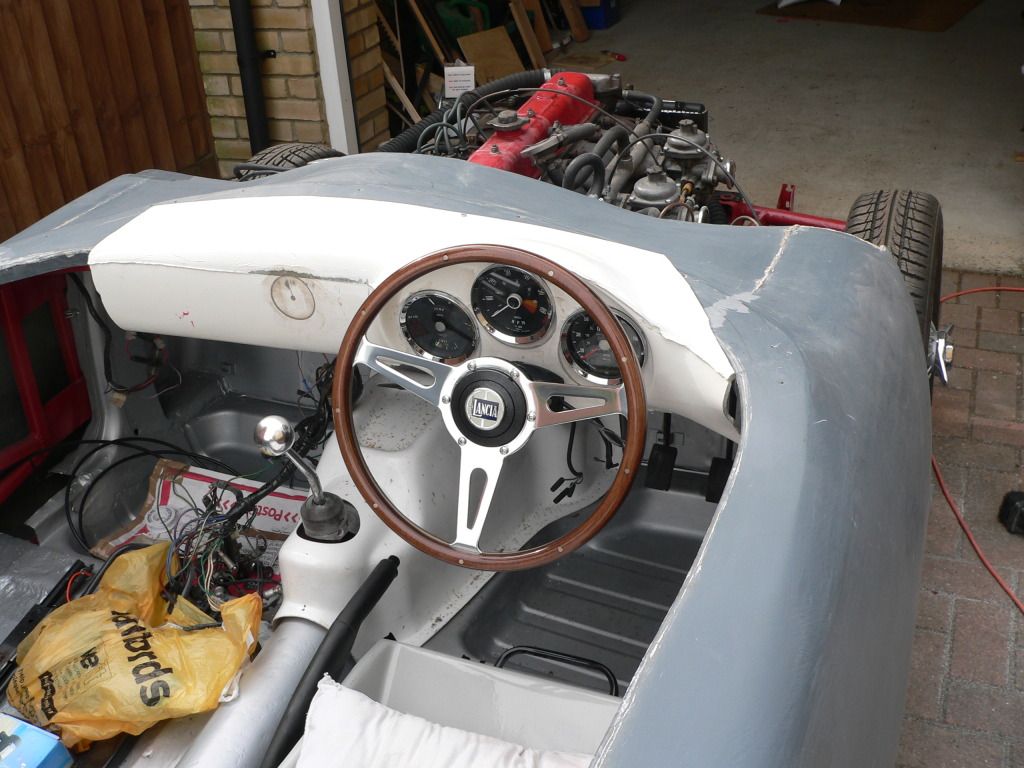
I'd suggest taking a moulding from a Porsche 550 Spyder replica. It needs widening by about 100mm (you can see the fillet in mine), but sits about 75mm further back into the cockpit area and it's also about 25mm higher as it rises up before curving downwards.


This should ould cover the bit of Spitfire dash panel that protrudes out from under the Cordite dash. Once you've done one you could use it as a 'buck' (I think that's the term) to make more. Just a thought. :)
22 Mar 2013, 8:40am
T, where did you get your dash moulding from?
22 Mar 2013, 8:44am
T, That's pretty much what we were thinking. If we can get away without changing the existing moulds but add a separate piece it opens the options at very little risk.
22 Mar 2013, 9:44am
Viatron wrote:
T, where did you get your dash moulding from?


Courtesy of Mr Gary Janes.

He took a moulding from his developmental 550 Spyder with the intention of using it on another project. He then sold on the Spyder demonstrator, moulds and jigs so he could concentrate on Orca for a while, but kept the spare dash.

When I posted my intention to try to recreate something like the 550 or 356 dash from scratch, Gary offered me his ready made one for a bargain price including delivery (less than the price of a decent meal for one!) It took a little modification to fit but I'm very pleased with the minimalistic, production car look it's given my dash.


I'm no expert on fibreglass moulding, but I think it'd be worth the Andys' while to source a Porsche dash to take a moulding from, modify it to suit and offer it as an option. I'd have happily paid £100 for mine (just don't tell Gary that) :spy:
22 Mar 2013, 7:35pm
Just got in from a curry out with my family and I must say I do love this forum. :cool:

Mr T - Your step by step guide is a really big help.

Which is one of the reasons I like to put as much detail as I can into this thread.

Given the weather, Saturday might be a "shopping" for odds & ends day.
I'll just pray for a break on Sunday to start giving the shell a once over.
( I just need to dig out my thermals. :rolleyes: )

Cheers, Paul. :)
23 Mar 2013, 6:45am
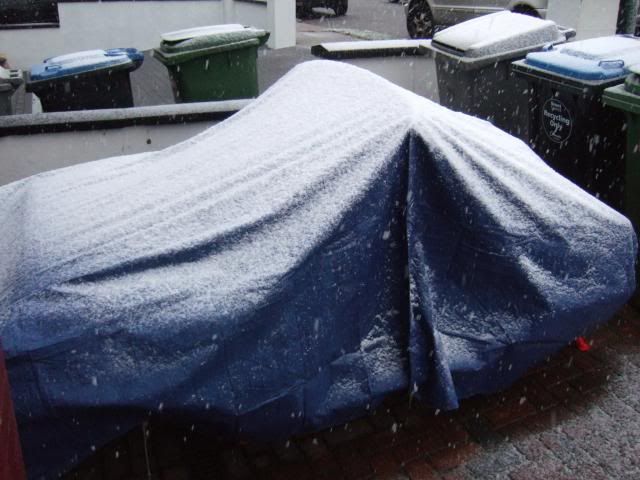
Not really the photo of the body shell in the daylight I had in mind. :rolleyes:


Still, the supermarket opens soon so I can get my domestic chores done early.
Plus I need to pick up my own car from the garage (MOT) at 8.30am.
Then I'll try to get a few bits for the body shell before the weather gets much worse.

Cheers, Paul. :)
24 Mar 2013, 11:28am
Caught a very short break in the weather this morning.
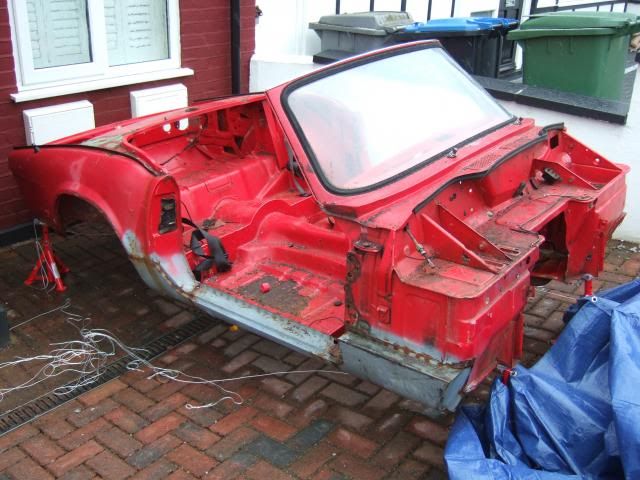
I had to clean some snow & ice off the tarpaulin before I could remove it & reveal...


Body Shell Investigation:
I wanted to assess the state of the body shell in two sections:
- The back end behind the cockpit, as that still remains the main reason for buying the whole shell.
- The rest of the body work to see whether it is worth repairing & using for the "fast" build approach.

Rear Section:
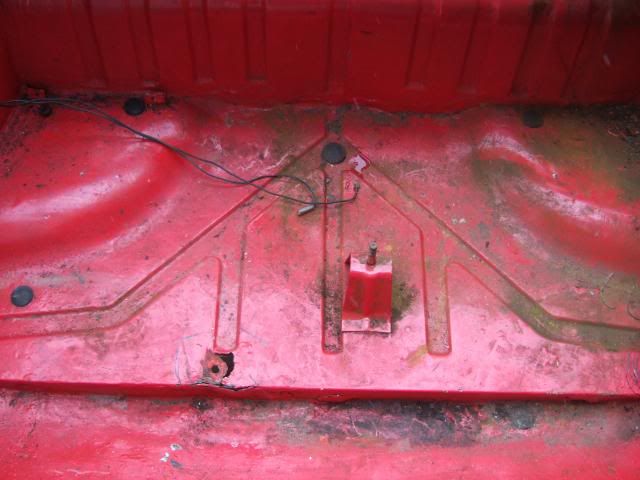
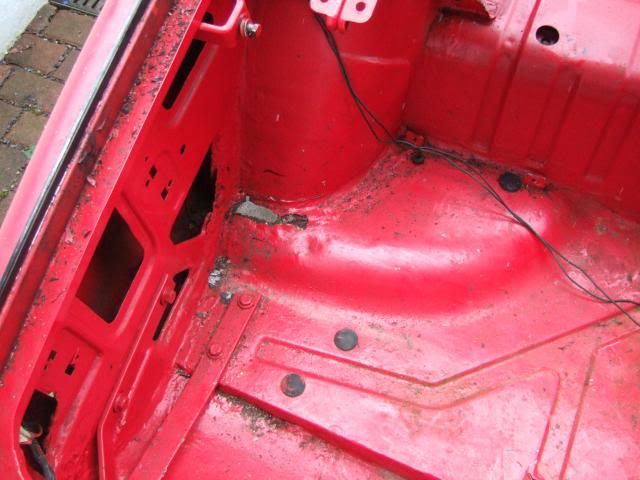
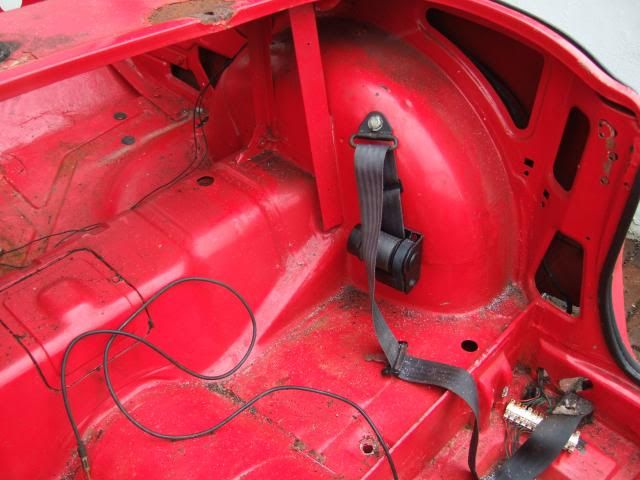
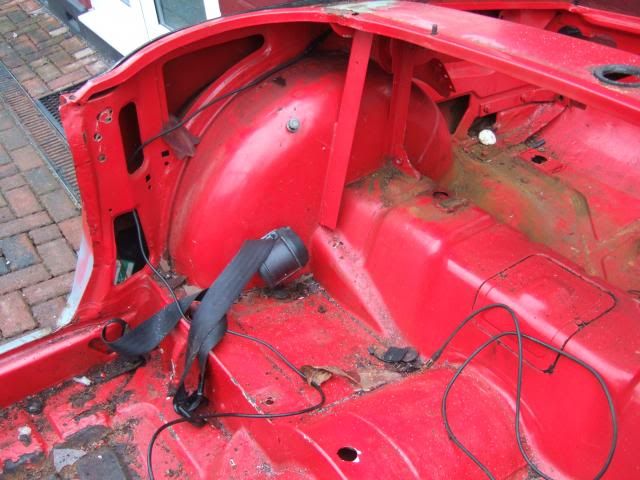
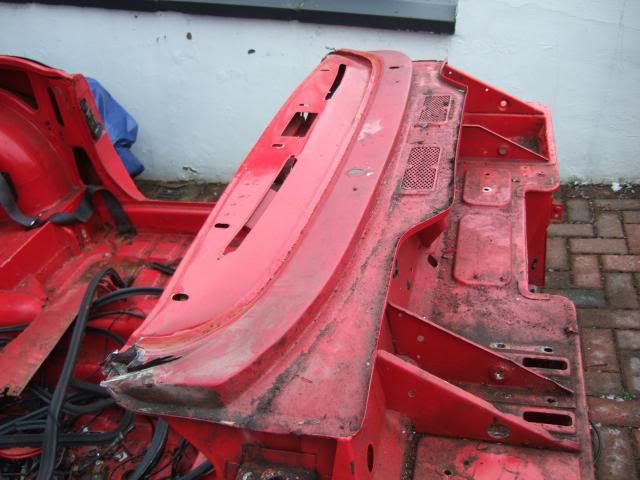
There are three holes rusted through in the boot floor that will need to be sorted out.
Although I need to take some measurements first as I might need to cut here anyway.
( The rear of the Cordite body shell is shorter that the Spitfire. )

Driver's side - Left of white circle (just some rubbish) in photo


Centre section - Below & left of spare wheel mount


Passenger side - Biggest hole where boot floor joins wheel arch


The wheel arches on the cockpit side are in better shape and appear to be pretty solid.
( Including around the seat belt mounting points. )


Rest of Body Shell:
Starting with the "Ugly"…
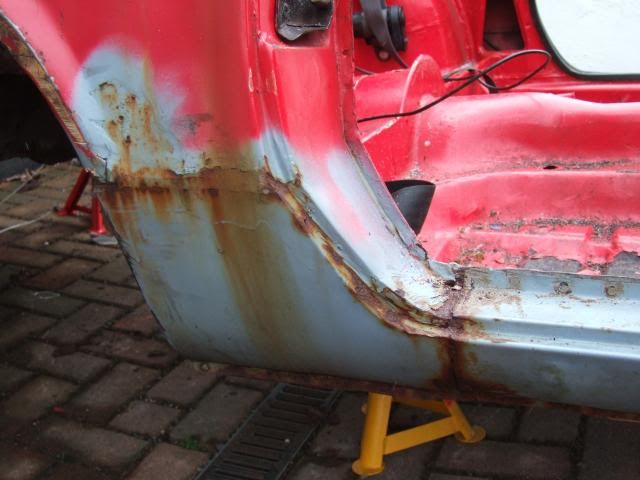
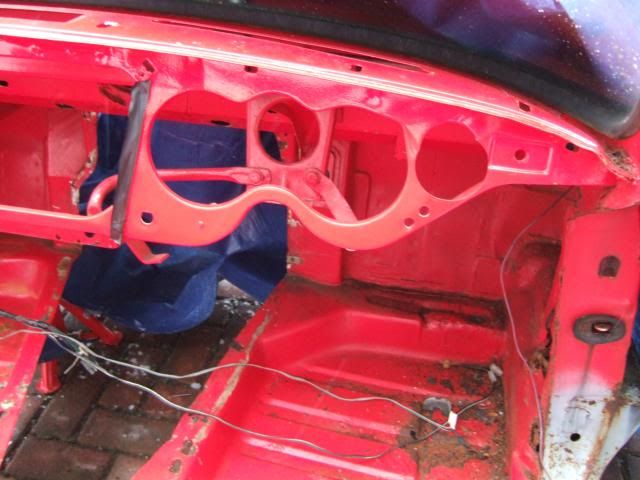
The passenger side sill panel below & around door cut out area is either missing completely, or rotting.


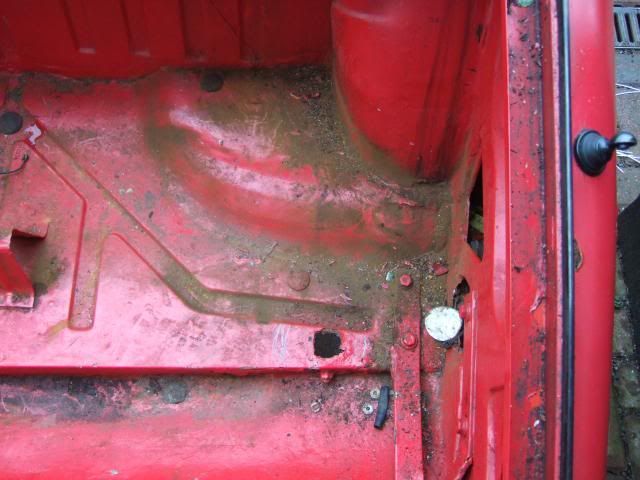
The "Bad" includes driver's side floor & front foot well which are rusted through in places.


And the new sill on the driver's side looks like it was welded to a rusty panel behind.


Still, at least the "Good" includes both bulk heads…


And the passenger side floor looks like it is a new panel.


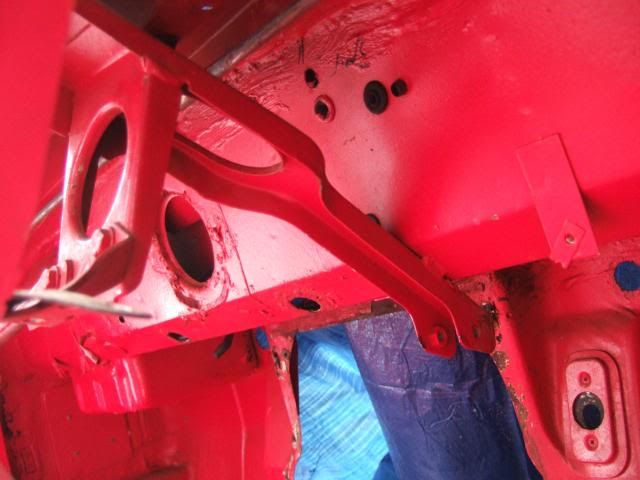
The dash seems intact, but more importantly the steering column mounts are OK.


Overall
Pretty rusty in places, but at the very least the rear section could be used.

Next Steps:
Remove the windscreen (mainly to reduce the visual impact of the tarpaulin on my neightbours).
Remove all the various bits and pieces left attached to the shell (seat belts, etc.).
Start cleaning up some of the surface rust to see just how bad the worst areas are.
Cut out all the rot, which will at least let me see what I have left to play with.

Quick Question:
What ever I do, I will need to cover a lot of metal with paint.
I saw a bulk tin of this stuff while looking for something else the other day...

http://www.wickes.co.uk/invt/241223/?source=123_75

Could this be used on the body shell, either underneath or "sunny side up"?

Not sure I'm going to get another chance to play outside today.
( I was getting snowed on as I tried to put the tarpaulin back on. )

So until next time, take care, Paul. :)
24 Mar 2013, 6:15pm
OK, just got in after a brief session outside.
The good news is that is has stopped snowing, the bad news is it is very cold out there.

Body Shell Preparation - Step One:
The first thing I did was remove the last bits of windscreen wiper parts still attached.
Then realised I wasn't going to be cutting any where near here anyway. :rolleyes:
( I came back in for a look at the Ribble Navigator photos on here just to double check. )

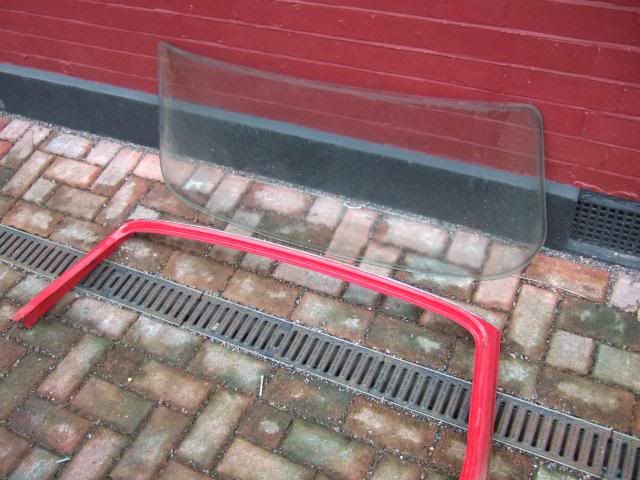
Plan A was to remove the windscreen & the frame around it in one go.
However, I quickly realised it would be easier to see what I was doing without the glass.
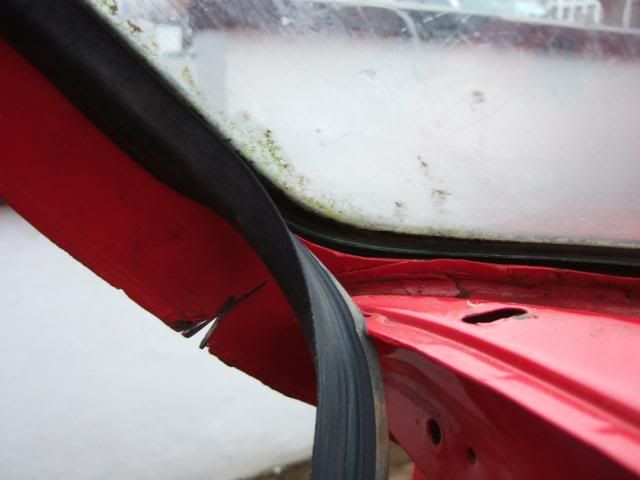
So after lots of huffing & puffing I finally managed to pull the inside seal away...


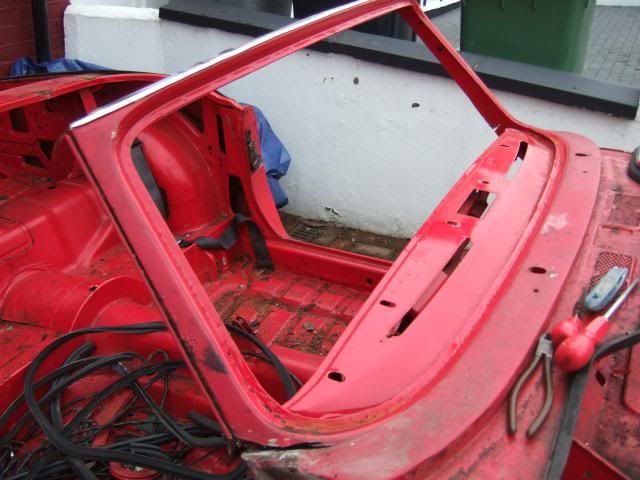
With that gone, the outside seal wasn't much trouble and I was left with this...


Then it was back with the angle grinder and off with the frame...


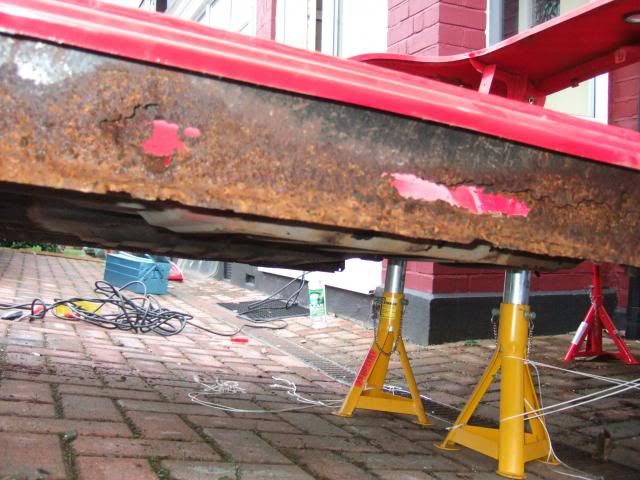
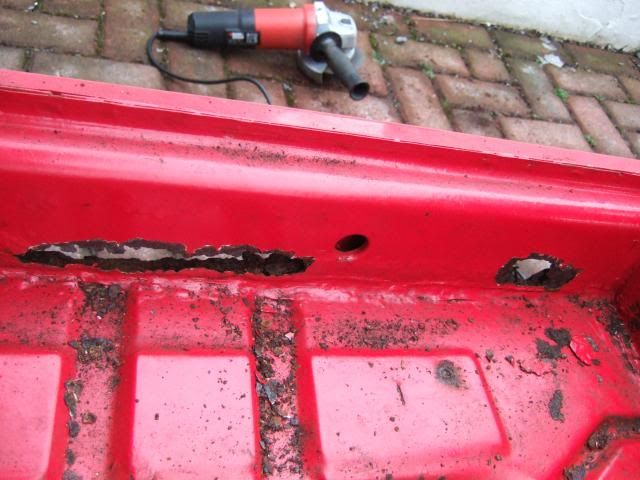
But while I had the angle grinder out, I removed what was left of the passenger side sill.
While that was bad, what it was hiding was worse and the rot along the edge is bad.
This was all pushed out with my fingers and very little effort...


I also went around the shell removing all the bits that had been left behind...


I will take a wire brush on the end of my drill to all the rusty areas to clean them up.
As I need to see just how much good metal there is left to play with before a final decision.
But at this stage it doesn't look too good for the whole shell being used I'm afraid. :icon_sad:
( Using just the rear section like DonnySoutherner is definitely possible)

Looking on the bright side, at least the neighbours have a slightly better view now. :rolleyes:


Right, I'm off for a hot shower as despite typing this up, I'm still cold.

Cheers, Paul. :)

Replies:
Mr T - Thanks for the link.
I was due to look up Tetroseal for the inside of the fibre glass shell.
I just didn't pick up on the fact you could use it any where on the car.
26 Mar 2013, 10:12pm
A Complete Kit! :eusa_dance:
First of all, a big Thank You! to AndyP57 for these final parts needed to complete my kit. :cool:
( Delivery guy dropped them off at 9.20pm, so I guess he is having a long day. )


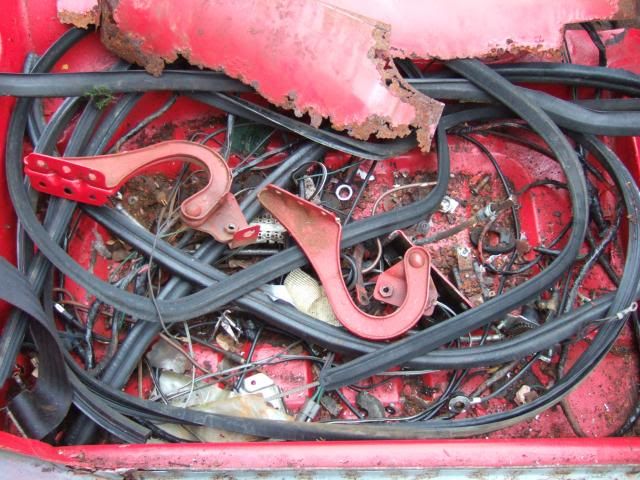
These items were either missing from my original delivery, or arrived "used" / damaged & needed replacing.
In addition, Andy has been kind enough to include some "extras" to make up for the long delays.
So I now have a new Ribble "independent" hump to fit on the passenger side of my body shell. :cool:

I must stress that these problems were not of Andy's making & it was a real shame he inherited them.
( Based on Mikmiglia's post the other day, the situation Andy took over was clearly worst than I thought. )

I believe my front foot wells & side screens came from Chap68's car (the 2012 Stoneleigh demonstrator).
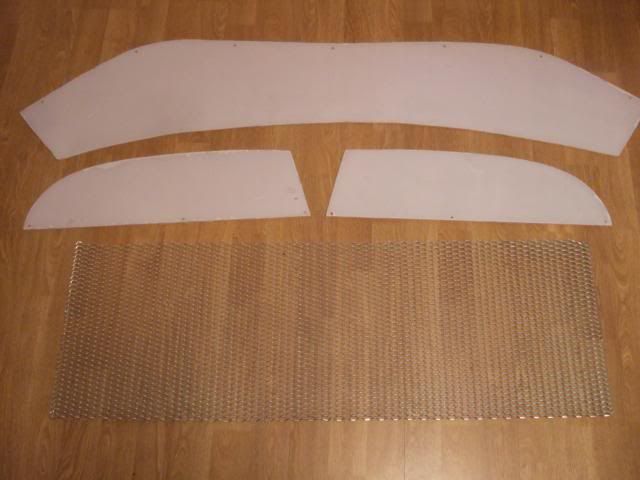
All three pieces of perspex arrived with no protective film on them & were chipped / permanently stained.
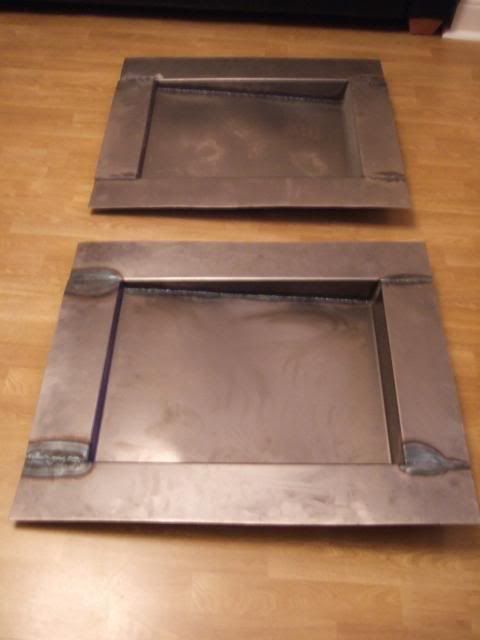
It took over 4 months for my lowered floor pans to arrive (after Andy collected them personally from Poole).
By which time the edges were so warped they didn't sit flush with the frame, so Andy's upgraded these too.
My beer grate grille never arrived at all & has since been discontinued, so I can't have one of those now.
Instead, I have the new Ribble 'diamond wire mesh' style grille which you can just see in one of the photos above.
( Sorry it isn't a very good photo. )

I must confess that the 9 month wait since the initial kit delivery has been pretty soul destroying at times.
Which is why I've always appreciated the messages of help & encouragement I've had on this build thread.
It was this forum's community spirit that drew me to this kit in the first place & you have kept my spirits up. :cool:

I figured that RANTING & RAVING about things outside my control would only increase my stress levels.
But now I can simply draw a line under everything associated with the last days of the original Sammio Co.
I know the Cordite's replacement (Navigator) will be a better kit & I wish Andy & "Ribble Kits" all the best.

Frankenstein's Cordite:
Continuing a "Glass Half Full" approach to tackling my build has lead me to consider another build option.
I am sure that the rot in the middle of my Spitfire body shell will get worse when I attack it with a wire brush.
I might be able to save it by adding various lengths of box section to brace / support it, but it’s a long shot.

However, I revisited the "Getting Started" photos on the Ribble website & Mr T's chassis restoration.
And what occurred to me was the possibility of adopting a "semi-fast" build approach for my Cordite…

Use a cut down Spitfire bulk head in place of the front section of internal framework & fibre glass bulk head.
As this area needs the most modification work & this approach would replicate the Spyder/Pilot kit builds.
Then I could use the "rear" internal framework as originally intended with my new metal lowered floor pans.
Finally, I would still be able to use DonnySoutherner's approach of fitting the rear section of Spitfire shell.
With the added benefit of leaving the hand brake panel still connected to this rear section for added strength.

Send your answers to the "What could possibly go wrong?" question on a postcard to the usual address. :icon_wink:

Until next time, take care, Paul. :)

Replies:
Viatron - That stuff will certainly look good on your car. :cool: