This is a read-only archive of the old Madabout Kitcars forum. New posts and replies are no longer possible, but every thread is still here to browse and read.
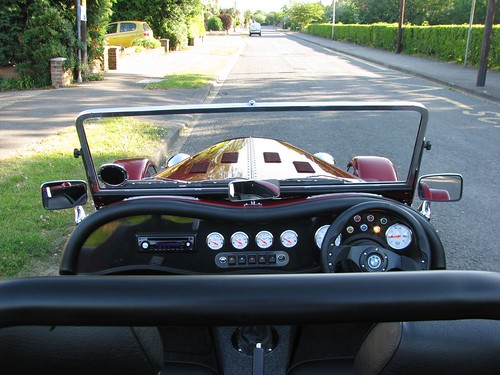
It's black, but with a subtle red flake in it. When the sun catches it, it's a very, very dark red, but in all other lights it's black.
Goo
This just what I had in mind, but could not find it - I've always called it Aubergine: a really dark almost black colour with a hint of red.
There was a Cobra on the Dax stand at Stoneleigh which nearly has this look but not quite.
I shall have to visit the Jag showrooms - I think it looks great.
Mike[/QUOTE]
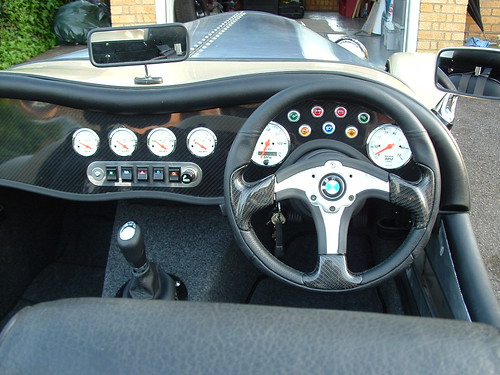
I forgot to post these latest pics - I've fitted some new bits and bobs I picked up at Stoneliegh at the weekend:
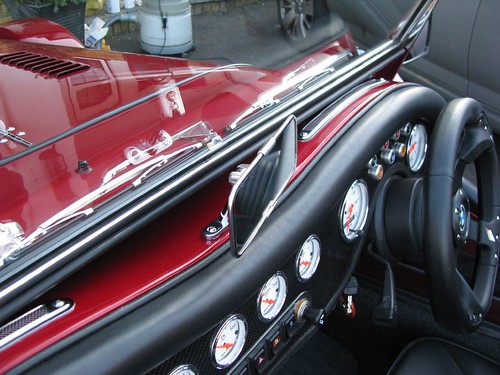
Wind deflectors - Perspex for the time being, as I could buy ready shaped blanks without mounting holes, and drill my own to match the hinge positions. The hinges themselves are placed as far apart as possible considering the length of the windscreen post. You can see why it was neccessary to make the new windscreen knobs now, as the original black plastic ones wouldn't have allowed the deflector to sit where it is.
I'll see if I can get some toughened glass ones made up to the same shape as the perspex ones later on, as they can be used as templates.
Another bit of bling - a badge bar. I wanted it as I liked the MOC enamel badge, and wanted to mount it 'properly'. I then had to get something to balance it out, hence the vintage repro AA badge. I guess I better join now.
The wind deflectors work a bit. It cuts down buffeting from the front, but of course they're useless with side winds.
Yes, they are drilled and tapped. It was easier than I expected, but I guess that was down to my birthday present from Pauline - a new swanky tap and die set, that came with a set of the correct size tapping drills. They, along with the new taps where nice and sharp, and lots of cutting oil made short work of it.
Tell me about taking your car off the road during the summer. I decided to do something about my oil burning engine a couple of months ago and haven't got back on the road since.
Cabrioman gave me a replacement engine, and I though I was going to be able to do a simple swap, but my old engine ran on carbs, and the new one was an efi model, and foolishly I've been trying to make one out of the two...
Interesting setup Jason.
A comment if I may be so bold that might be useful.
One of my hobbies is flying and I use headsets for aircraft communication. I notice with your Peltor headsets it would appear that you have foam filled pads which cover your ears. After about an hour they can become quite painful if the spring tension is reasonably strong in the head band. The solution in most headsets now is to have gel filled pads which mould to your individual ear shape. I can wear mine for many hours in total comfort. The pads can be changed retrospectively.
But a clever idea of yours, it would be pointless on mine as my exhaust is far too noisey. When I was at Stoneleigh this year I was amazed at how quiet all the Sportsters were. I will be content to look at the scenery.
Great technical detail Jason and I'm sure it will be good to use. However, I seem to remember that recently someone was prosecuted for wearing headphones whilst driving. Something about not being able to hear external sounds. I may be wrong but perhaps its worth checking.
I agree and also rally crews use headphones between the stages. However, I'm sure I remember reading details of the case. Of course, with my memory at my age, it could all be complete b*****ks!!!
Yes - well, there will be. I need to take it off again and see if I can re polish the sides again. I'm not completely happy with the finish, as I haven't got all the tooling marks out.
I'll be putting some rubber in the barrel that holds the pipe, and on the inside of the clamping collar
I've already started on my next parts as well - I'm making some brackets to mount on the inside of the windscreen for a rod mounted rearview mirror (ala E-Type or early MG) so I can move the rearview mirror up. All I can see at the moment in it is the spare wheel!
It'll also mean that I can get a second clamp, and with a bit of jiggly pokey be able to clamp my iPhone to the lower section of the rod so I can see my sat-nav app.
I've already started on my next parts as well - I'm making some brackets to mount on the inside of the windscreen for a rod mounted rearview mirror (ala E-Type or early MG) so I can move the rearview mirror up. All I can see at the moment in it is the spare wheel!
I found getting the right mirror position a bit challenging.
My original mirror was on a longish stalk so I could see over the spare wheel, but I found it obscured my view when looking left when pulling out of junctions.(But I am quite short and my seats quite low) Drivers view by marlinpeter, on Flickr
I tried a stick-on one at the top of the screen but I couldn't see out when the hood was fitted and was constantly falling off! So I threw that away.
Marlin Sportster by marlinpeter, on Flickr
I do get a good view of the spare wheel cover
A rod mounting sounds ideal as you will be able to adjust to the right position
Do be careful when drilling the windscreen surround or you'll end up with a cracked windscreen like mine
P.S. those brake hose clamps might look nice black anodised? Just a thought?
That's exactly the same rear view mirror as I have.
I'm not looking forward to drilling the windscreen... I think it'll have to be nice sharp drill, slow speed, plenty of cutting fluid. And then a plug tap.
That or take the windscreen out before I do it, and then reseal it afterwords.
Well, I've done it - I've made up a stainless rod and some brackets to hold it to the windscreen.
I had to start from scratch again on the brackets - my carefully engineered ones I made on the mill at college where complete bobbins. Yes, very accurate, let down by piss poor drilling of the rod holes at the end of a session...
Anyway - I did all of this this afternoon with nothing put a pillar drill, a hack saw and my trusty wet & dry and polishing kit. I'm quite pleased how it's turned out.
The brackets are 12mm square section aluminium bar stock, cut to length (40mm) with centred fixing holes at 10mm and 30mm. The holes are counter bored to 8.5mm to suit the stainless fixings I was using (M4 countersunk cap head)
The rod is stainless and 5mm in diameter, and the brackets are tapped to accept an M5 thread to approx 8mm in depth. Both brackets had 45 degree shoulder cuts with a hacksaw in my vice, and then they where neatened up with a file. Then the sanding and the polishing commenced. The metal is shiny. My fingers are black.
The windscreen was remarkably simple to drill and tap - I used my cordless drill on the slow / high torque setting, had a bit of cutting fluid and went to it. It was so easy I have my doubts that my windscreen surround is stainless steel. I think it's Aluminium!
Any way - I have two chrome rod mounted mirrors on order. One will be used as intended, the other will be dismantled and remade into a mount for my iPhone.
I can confirm that the windscreen surround is made of aluminium, not S/S.
I think you have been very lucky drilling those holes without hitting the glass. I've just seen my old cracked windscreen now that it's been replaced.
It confirms that the reason mine split is that the glass was mounted only 4mm from the top edge of the screen surround. So insufficient clearance for the hood retaining pins. My new screen has cut outs in the glass to prevent any re-occurrence.
It will be interesting to see where you find the best position for the sliding mirror.
I think you have been very lucky drilling those holes without hitting the glass. I've just seen my old cracked windscreen now that it's been replaced.
Not luck. Skill!
Honestly though, it wasn't that scary.
As I said, my cordless drill has two torque ranges - fast, low torque and slow, high torque... plus it has the usual variable speed according to the trigger position. So with a sharp bit, a dab of oil and a slow start to keep the drill point wandeing, is started to cut very easily and freely.
I stopped every couple of seconds to make see how deep I was, and when you're going that slowly you can feel when your about to break through. At that point I just took all pressure of the drill and allowed it to finish off itself.
The tapping was fine as well. Because the screen is aluminium, it's easy to tap, with very little resistance. so you can tell that you've reached the bottom or a touching the glass as there is a sudden change in resistance to turning the tool.
That's when you come to a full stop and ring down to the engine room for full reverse.
The fixings have been cut to length so they're the thread protruding from the back of the bracket is the same length as the depth of the screen surround.
I finally got the mirrors today, after Royal Fail lost the package for a week...
The eBay description said that it would take upto a 5mm diameter rod... So either my mirror had an undersize hole bored through it, or my rod is a fat 5mm... I had to open the hole out with a 5mm drill bit. It fits fine now, and seems to be tight enough when the clamp is nipped up.