MadaboutKitcars

This is a read-only archive of the old Madabout Kitcars forum. New posts and replies are no longer possible, but every thread is still here to browse and read.

Another Cordite Is Born ...

9 Oct 2017, 1:59pm
Paul, absolutely fantastic. I love the almost matt look of older race cars. Yours is shinier than that and looks perfect. I wouldn't do any more. Get the roundels on and enjoy. Congratulations.
9 Oct 2017, 7:14pm
Jag, Molleur, Slickshod & Oxford – Cheers chaps. :cool:

Unfortunately, I have neither the time, nor inclination, to improve the paint finish any further. :icon_sad:
( But I do appreciate both the advice given and the good intentions behind it. )

There are two main problems with the paint as it currently stands:
- A number of ‘blotches’ where the different shades of BRG have come to the surface.
- A number of areas that have rubbed through to the primer underneath.

The harsh reality is that I was getting trapped in a never-ending cycle of trying to fix these small problems.
( The fact I need to leave the car uncovered for the thick end of a day when painting doesn’t help. )

This game of ‘Whack-a-mole’ could go on for months, so I have to draw the line somewhere and yesterday was it.

I know the finish isn’t perfect and I know that throwing more hours at it would improve it.

But, for me at least, it is good enough. :cool:

In fact, for a car painted al fresco, with a brush, the final dull shine is nothing short of amazing. :D

It was never my intention to fake patina, but I seem to have managed it whilst trying my best. :rolleyes:

I actually think the paint is appropriate for the overall wonkiness of the bodywork. :icon_wink:

As the shiner the paint gets, the more the undulations in the panels themselves shows up. :icon_evil:

Anyway, I am now going to start bolting the shiny bits back on and try to get back on the road ASAP.

Although, with both the weather and work against me these days, that might take a while. :icon_sad:

Deep down, I am really looking forward to seeing the reaction the car gets now it is in ‘colour’.

Take care, Paul. :)
9 Oct 2017, 7:38pm
I think it really will be fine. Looks pretty good as it is now, and I can appreciate your decision to leave it alone. With the shiny bits and roundels it will be fantastic and period looking. Well done, and kudo's for "sticking with it".
10 Oct 2017, 5:03am
10/10 For Dedication!

I must add my accolade to all the others. It's really looking the part now and will doubtless be besieged every time you park when it's back on the road. Let's hope for some dry crisp autumn/winter weather!

Regards, Mick :hail:
10 Oct 2017, 6:26am
Molleur & Mick – Thanks gentlemen, 'period looking' works for me. :cool:

- - - - - - - - - - - - - - - - - - - - - - - - - - - - - - -

I really hope my last post didn’t come across as a flippant reply to Jag, as that was not my intention.

I do appreciate his advice and I know using the right tool for the job would make a big difference.

But I’ve already spend 100s of hours on this over the last 5 months. :rolleyes:

Which added to the 1,000s of hours over the last 5 years has produced ‘the straw that broke the camel’s back’. :icon_sad:

But it is really my life outside ‘car building’ which is having a bigger influence on my paint finish.

As, with a bit of luck, my eldest daughter will be leaving home for Uni next year.

So I’d rather spend some quality time with her than turning my paint finish from good to great.
( Note: Good is a relative concept in this case. :icon_wink: )

Cheers, Paul. :)
10 Oct 2017, 8:35am
I know exactly what you mean but honestly an afternoon with the correct polisher and compound makes all the difference, you are so close.
I have a red Mitsubishi GTO on the drive, it is one of those dreadful reds that goes to a matt pink colour, to look at it you would value it at £1200, an afternoon with the polishing buff and you honestly would not believe it was the same car, after polishing it I would put it up for £4500. The shine (or lack of) is the first thing your eyes go to.
Get it back on the road without the stickers and you can pop round and I'll help you have a go.
They say you can't polish a turd but with the right polisher you can! (not that I'm saying your car is a turd of course!)
10 Oct 2017, 4:11pm
From the pictures posted I personally think the matt look suits it better than the satin look, I'd go back and 'rough' it up again :hug:
10 Oct 2017, 8:51pm
Jag - Thanks for the kind offer, it means a lot. :cool:

JG - Go and stand in the corner and think about what you wrote. :icon_wink:

Driving In Central London
The video below just appeared in my YouTube suggestion box.

So if you want to get an idea of the reaction I get when sight seeing in my Swordfish, have a watch of this.
( Although I have to give this guy full credit for driving something that small in town, scary stuff. :eek: )

Enjoy, Paul. :)

https://www.youtube.com/watch?v=4Fo1ngtXoXI
14 Oct 2017, 5:46pm
A Long Week
It seemed that by the time I got home from work each day this week, it was either dark, wet, or dark AND wet.

My earliest start on the work lap top was 5.15am and my latest finish was 10.55pm. :eek:

So to say I am knackered would be a bit of an understatement.

Still, I did smile when I saw a photo of the little car in the video clip in the Metro.


Turns out this is actually another one and not the one in the video, but £46,000!

- - - - - - - - - - - - - - - - - - - - - - - - - - - - - - -

Saturday - Part 1
Given it was getting dark when I finished the polishing last Sunday, I was looking forward to seeing the paint in daylight.

Unfortunately, I think all the rain during the week created a damp environment under the covers (via the sheets?) and car looks a mess. :icon_sad:

As there is now a 'tiger stripe' effect all over the place, which was really quite hard to take and I'm absolutely gutted.


I spent a while just wandering around the car in a bit of a daze as I just couldn't believe it.

But, to avoid giving up on this project completely, I decided to regroup and focus on getting back on the road.

So my first job was to treat the leather bonnet straps.


At which point a little Red Robin dropped in and that lifted my spirits quite a bit. :D


Next it was time to put the filler cap back into place.


Notice the two big green paint drips on the petrol tank. :rolleyes:

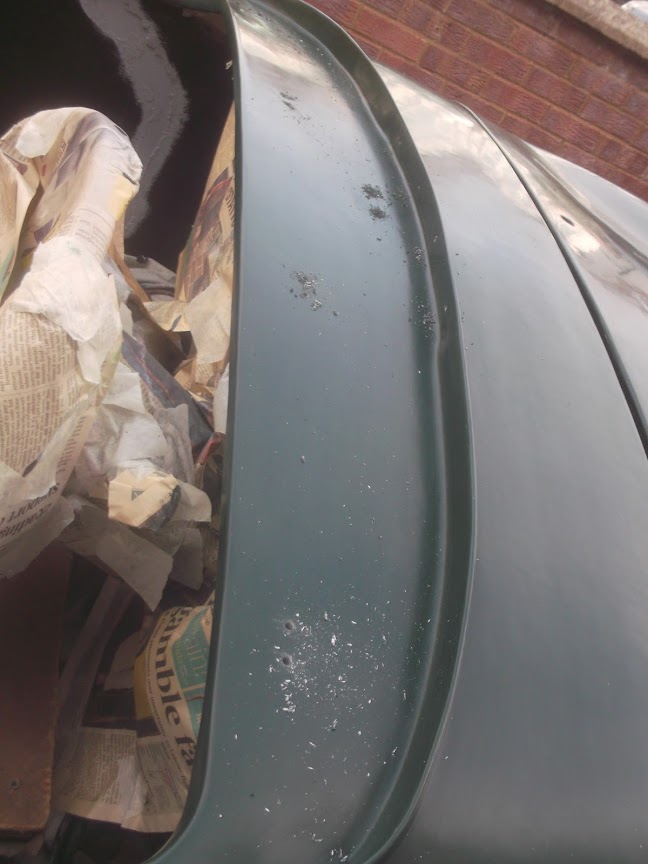
Next I started to clean up all the holes in the bodywork that had been part filled with paint.


End of Part 1…
14 Oct 2017, 5:48pm
Saturday - Part 2:
Finally removing the newspaper from the dash was a little job that also lifted my spirits. :cool:


As did fitting the first aero screen.


In order to fit the other screen I had to find the new spare bracket I'd bought to replace the original one that broke.


As you can see the new one is slightly deeper at the base than the original and it expects a thinner fixing bolt.

So I had to spend ages opening up the holes in the new bracket until they were big enough to take the bolts I had.

I also put the bonnet straps on and the Union Jack badges too, starting with the driver's side.


And this is the passenger side, showing the second screen fitted too.


By this point it was starting to cloud over.


I just wasn't in the mood to take a chance with the weather, so the covers went back on and I swept up the leaves on the driveway instead.


Including the pile that had collected in the drip tray under the car. :rolleyes:


I did get a chance to do a bit more in the afternoon, starting with cleaning up the holes for the bonnet locks.


This is the "open" position.


End of Part 2…
14 Oct 2017, 5:49pm
Saturday - Part 3:
The thickness of the paint made fitting the grommet for the number plate light wiring quite tricky.


I then ran into a small technical problem when I couldn't find the allen key for the bolts. :rant:


And I need to have this tightened up before I can fit the rear number plate over the top.

Still, at least I had already cleaned up the number plate before I realised I couldn't refit it.

So I fitted the rear fog lights instead.


Last job of the day was to crawl around under the boot floor to sand down the filler.

Not easy to get some decent photos, but you get the general idea.


There are also a few normal 'patches' on the boot floor that need a coat of Tetroseal too.


With a bit of luck I will be able to do that tomorrow, which will then allow me to refit the tail pipes and restart the engine. :pray:

Until next time, take care, Paul. :)
14 Oct 2017, 6:02pm
Awesome Paul she's really coming on now you'll be back on the road in no time
14 Oct 2017, 7:45pm
Looking good Paul, pretty soon now....
15 Oct 2017, 9:33am
Tigers are cool

Paul.

I'm so glad you are putting the car back together. You deserve to get out in it after the hard work on the paint. When you get back in you'll fall back in love with the darn thing.

Keep the updates coming

Dave :)
15 Oct 2017, 12:06pm
DaveP wrote:
Paul.

I'm so glad you are putting the car back together. You deserve to get out in it after the hard work on the paint. When you get back in you'll fall back in love with the darn thing.

Keep the updates coming

Dave :)


Agreed , when you drive them , the last thing on your mind , is ''I hope no one notices the paint issues ...''
For what its worth , I actually like the paint finish , it looks in pictures like its 60 years old !! not what you were heading for , I know , but it looks great to me .....choice of paint and the blooming issues etc have given you a very cool , 'established' look ...
15 Oct 2017, 5:24pm
Deggsy, Moulleur, DaveP & Lancelot - Thanks Gentlemen. :cool:

Comments such as "Very nice" & "Beautiful" from people passing by today confirm that poor paint is not the first thing people see.
( What is more surprising is that the car still doesn't have any wheels fitted, so it is hardly looking at it's best. )

Towards the end of today I found something that might have caused the problems with the paint finish…


Yes, that is a pool of water in one corner of the passenger floor. :icon_sad:

No idea how long that has been there and it must have soaked through the dust sheet over the seats before reaching the floor.

Whilst it doesn't help restore the mess, at least it may help to explain it.

- - - - - - - - - - - - - - - - - - - - - - - - - - - - - - -

Sunday - Part 1
My day started well enough when I realised that the 'missing' allen key was being used my my youngest daughter for her school project.

So that both saved me wasting hours looking for it and allowed me to fix the rear number plate light in place.


Closely followed by the number plate itself.


Next I cleaned up the holes to mount the headlights.


And fitted the headlight bowls on both sides.


This is the view from the inside and painting the inside of the bonnet has paid off.


A problem for another day is to mask off the BRG along the inside edge of the cockpit and get some Tetroseal along the top edge.


This is because when I originally painted the inside of the cockpit black, I wasn't sure where I was going to end the green.

At some point, I will have to clean up the yellow around the nose, as it now has got a lot of BRG smudges in it.


End of Part 1…
15 Oct 2017, 5:24pm
Sunday - Part 2:
Anyway, back to today's problems and I wanted to paint the inside of the side mirror mounting areas.


I'd previously left this unpainted because, at some point, I will make/fit a removable cover out of alloy sheet.

But for now, it was time for a coat of Tetroseal, after covering the mirror holes with tape.


Not a great photo and the 3rd "hole" is actually a reflection of the camera flash.


I also painted over the mess I had made on the passenger side cockpit wall.


Plus the control arms.


Before spending quite a bit of time crawling around under the boot floor with my paint brush.


And whilst it may not look it in the photo, the boot floor is now one colour again. :cool:


I just need to wash the dirt off some parts and give a second coat of Tetroseal to others and the floor will be done.

Then it was time to remove the centre section of the dash.


So I could spend ages fitting the rear view mirror in the tightest of tight spots.


Before refitting the dash section.


Next up were the side mirrors.


End of Part 2...
15 Oct 2017, 5:25pm
Sunday - Part 3:
Then it was back to drilling out holes so I could mount the front indicators.


Both the mounting sections went in with no problem.


But I really struggled to fit the orange lens.

Eventually, I worked out this was a problem I had before and I also had a fix.

Previously I had to shape these washers to mount the indicator.
( Sorry about the blurred photo. )


But I'd already filed the inside edges of the lens to match.
( Another blurred photo. )


Once I had lined up the thinner sections of the lens with the washers, everything fitted perfectly. :cool:


It was at this point in the day when I discovered the water in the passenger floor.

I was also pretty knackered by this point, so I started winding down for the day.

So the last job of the day was to apply some etch primer to the inside of the boot floor.
( Note: This covers a much bigger area that I actually need. )


The seat belt buckles have been chipping away at the hand brake panel in the cockpit.


So I slapped on some etch primer here too.


Unfortunately, the sun is now too low in the sky to reach the car on the driveway.

So I was unable to get a decent photo of the tiger stripes and then the sun messed up this photo as I was standing on the pavement.


The good news is that it is slowly starting to look like a car again. :cool:


It seems like only yesterday that I was cleaning up a big pile of leaves. :rolleyes:


The last thing I did was dig out the bracket to mount the rear view mirror wind deflector screen.


Next time I will sand this down so it matches the rest of the scuttle.

Until then, take care, Paul. :)
16 Oct 2017, 8:38pm
Monday Morning
After doing some excess hours last week, I took some time off this morning.

I cleaned up the yellow band around the nose.


But although it was hard to get a decent photo, the paint isn't great along some sections of the edge of the opening.


So with a dry forecast for the day, I took a chance and added some more yellow paint.
( Being very careful to stick to the front edge and avoid the rear where it meets the BRG. )


I also made a start on sanding down the bracket for the rear view mirror screen.


Then there was just time to rearrange the covers and head off into town.


During the afternoon the sky over London turned yellow, which had me slightly worried. :eek:

But thankfully everything was OK when I got home and pulled the covers back over.

Cheers, Paul. :)
17 Oct 2017, 4:09pm
Paul the Swordfish looks great. I can't believe you're (nearly) done and hats off for the patience and the amount of effort and time you have invested in making the car look so good. Now it's time to enjoy it....Regards, Deni
22 Oct 2017, 7:48am
Deni - Cheers. :cool:

Despite my final set back with the paint finish, I am still looking forward to getting the car back on the road again.

Recently, I've also been considering just how long I've spent on this build since I first started back in April 2012.

Unfortunately, the simple fact is that the hours are beyond counting, but it is comforting to know I am not alone.

As there are many builders on here who (through no fault of their own) are still chipping away at epic builds too.

After freeman41 posted photos of his Sypder, I worked out he had also been building from 2012 to 2017.

Archived forum photo


I hope the sight of Sammios finally getting on the road helps to inspire others towards the finish line.
( As I know I was always encouraged by seeing builds I'd followed pass their MOT. :cool: )

- - - - - - - - - - - - - - - - - - - - - - - - - - - - - - -

Windy Saturday Afternoon
Didn't have much car time available yesterday, but I did make a little bit of progress.

First job was to make sure the cover over my wheels and tyres didn't get blown away.


As, by this point, I'd already had to rescue the BBQ cover from down the garden path. :rolleyes:

Then I did the first round of final flatting back on the boot lid and headlight rims.


After cleaning everything down, there was the final round of flatting back.


But by the time I'd finished wiping that down it was getting too dark to see what I was doing.


Unfortunately, the summer house lighting was not much help.


So I called it a day and will have a proper look at the paint later today instead.

Cheers, Paul. :)
22 Oct 2017, 6:38pm
Positive Steps:
A bit of an odd day as far as car work went as I managed to get quite a bit done around a lot of other stuff.
( And have just got back from a family meal out, which is why I didn't post this update earlier. )

Although the first job of the day was to clear the leaves from the driveway.


So that is an almost full wheelie bin in less than a week.

I figured with the painting done (for now), it would be safe to start using the wooden tonneau covers again.


Yet, despite having some parcel tape over the rubber pads...


They still left a visible mark on the body work. :rant:
( Excuse the poor photo. )


The only good news is that there is clearly a shiny surface under there somewhere.

Then it was back to crawling around underneath the rear of the car to put the second, and final, coat of Tetroseal on the underside of the boot floor.


I also gave the hand brake panel its first coat.


Then decided to use the same stuff on the inside of the boot too.


I then gave my dented silencers a quick polish.


Before heading back under the car again to remove the plastic from the ends of the exhaust pipes.


One down and one to go.


Except that when I tried to fit the second silencer, I realised that the first was too high.

So a quick bit of adjustment later and both silencers were in. :cool:


Whilst crawling around underneath, I spotted a dent in one of the main exhaust sections.


Not sure that I noticed that before, but clearly the car falling off the jacks did a lot of damage. :icon_sad:

End of Part 1…
22 Oct 2017, 6:39pm
Positive Steps - Part 2:
Then I fitted the aero screen for the rear view mirror.


Whilst painting the 'big washer' for this screen was a real pain, it has worked out very well.


Then it was time to see if I could restart the engine after the much longer than expected break. :pray:

With the car on blocks, I need some steps to climb in the driver's side. :rolleyes:


I took the fact the ignition lights came on as a good omen that the battery cut off switch was doing its job.

But there was absolutely no sign of the engine even attempting to fire up when I first started turning the key.

However, I tried to be patient, as I knew the fuel line would be empty and it would take a little while.

But there was still no sign of life and I was beginning to wonder if I would end up draining the battery.

In fact, I was just about to stop when there was the first glimmer of hope from the engine.

So I waited a few seconds and tried again, sure enough the engine burst into life and a HUGE grin appeared on my face.

I stayed in the car until it was idling nicely with no choke, before I got out to take this photo.

Unfortunately, the blur of the fan blade is the only sign of life.


This really was a moment of deep joy and I could instantly feel my personal motivation being recharged. :cool:

The temperature gauge showed signs of life, but I'm either low on fuel, or the angle of the driveway is messing up the reading.


Either way, I will get some fresh petrol in a can and top the tank up before I drive to the MOT.

Next job was to thread the headlight wires through the shells and getting the rubber seal in place was hard work.


At this point I should point out that the boot lid was a bit of a mess when I looked at it in daylight.

But by the time I had applied some cutting compound it was looking much better.


I then added some polish.


Before cleaning out the holes and re-fitting the 'furniture'.


I know the paint isn't great at the moment, but I took great pleasure from just looking at the passenger side hump.


As I should keep reminding myself, that neither this hump, or the boot lid itself existed when I first got the kit.

Given all the 'leaps of faith' I had to take during this build, I am still amazed at how well if has turned out. :cool:

So until next time, take care, Paul. :)
28 Oct 2017, 6:42pm
Saturday - Odd Jobs:
After another hectic week at work, there was a lot of domestic stuff for me to do today.

Still, I did get a chance to do some car work in the late afternoon and every job done is a step closer to the finish line.

Unfortunately, I had to start by re-fitting a couple of the boot lid locks as they were rotating the wrong way.

Thankfully, it didn't take too long to sort that out.


At this point I should point out that I still haven't removed all the messy masking tape around the boot rain channel. :rolleyes:


But despite this, adding the boot lid makes a big difference to the way the car looks. :cool:


The light was already starting to fade at this point, so the photos are showing some funny shades of green.


If I was being brutally honest, I would say the boot lid panel gaps have got worse during the painting process. :icon_sad:

I then had to re-do another job, as the spacers on the driver's side front indicator were twisted.


So these needed to be turned slightly to ensure the lens would sit nicely.


I then started the car up again and this simple task still brings a smile to my face. :cool:

Then with the engine running, I was able to start testing some of the electrics.


I then double checked both the rear indicator and rear stop/tail lights using the old lights on both sides.


End of Part 1…
28 Oct 2017, 6:43pm
Saturday - Odd Jobs - Part 2:
At some point I need to transfer the wiring from the old lights to the new 'old' Lucas lights that Micky1Mo sent me.


I also need to work out the best way to fix these to the body shell, as the holes currently don't line up.


Unfortunately, as the lenses are made of glass, I can't cut any reliefs into them the same way that I did with the plastic lenses at the front.

Whilst it was too late in the day to start applying Tetroseal, I was able to start some masking off.


Hopefully, this will leave me with a crisp line between the BRG and the Black.

I then did a bit of scrubbing to clean up some of the old Tetroseal areas.


As this will make it easier to see which areas need a top up of Tetroseal when I have my brush out.

The last area I looked at due to the fading light and other stuff I had to do was the fuse box.
( Please excuse a run of blurred photos. )


I've never liked the idea of having the fuse box on display, so I am going to make a cover for it.


The cover will be a very basic design.


So when I get a chance I will cut this out of my last bit of alloy sheet.


With a bit of luck, I might get a chance to chip away at a few more jobs tomorrow.

So until then, take care, Paul. :)