MadaboutKitcars

This is a read-only archive of the old Madabout Kitcars forum. New posts and replies are no longer possible, but every thread is still here to browse and read.

Royale Sabre - Take two!

20 Jan 2018, 6:53pm
Patrick wrote:
I like the 'torque wrench' nice work :)


Amir Manzoori wrote:
Your improvisation is second to none. Good on you Peter.


Thanks, chaps. With hindsight (which is always a wonderful thing!) I could have made it more accurate by using a small ring spanner as I didn't take into account the weight of the adjustable but its done now.
20 Jan 2018, 7:45pm
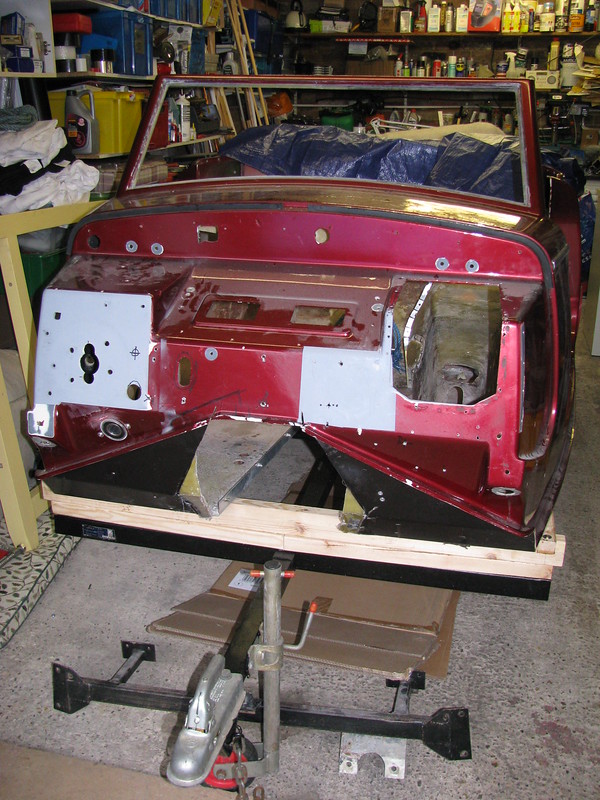
Despite the cold weather, I've removed the body tub (again!!) which is now mounted on the trailer. I can now finish off the gearbox tunnel mods and prep the body tub before painting.

Gearbox tunnel by Sabrebuilder, on Flickr

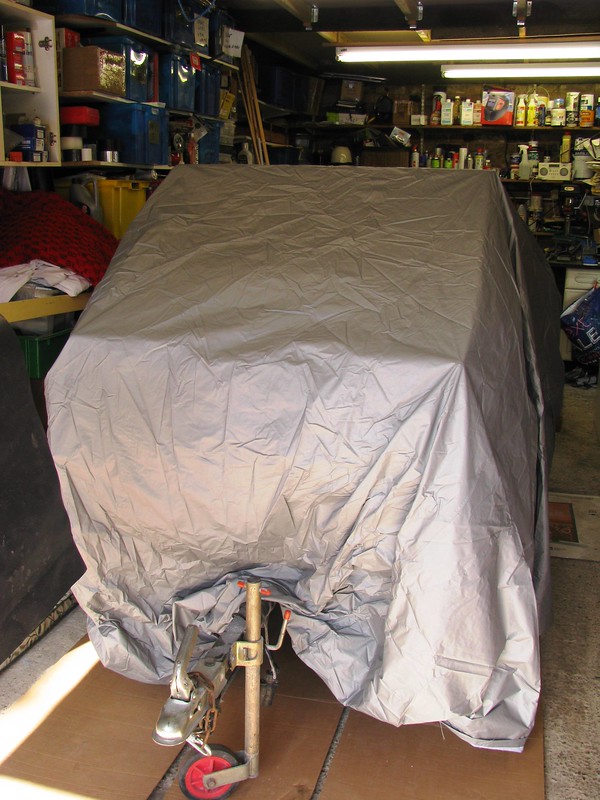
I need to keep the body tub dry in the garage as it's prep'ed for paint so the chassis will have to live outside for a while.

Chassis under tarp by Sabrebuilder, on Flickr

( Note to self: a trip to the dump is overdue :icon_lol: )

Gearbox tunnel mods need to be bonded on this side and finished.

Gearbox tunnel by Sabrebuilder, on Flickr

More next week....


...peter
27 Jan 2018, 9:15pm
Getting my body into shape....

This weeks report is a miscellany of updates but all with the same aim of getting the body tub in shape for the paint bodyshop.

Following on from last weeks update I've done some more work on the gearbox tunnel reshaping.
I reinforced the gearbox tunnel mods by first grinding back the gelcoat on the surrounding bodywork and then bonding on a layer of chopped strand mat followed by a layer of tissue. I then sanded back, smoothed out with a skim of P38 filler and then sanded smooth. It will be finished off by the bodyshop.
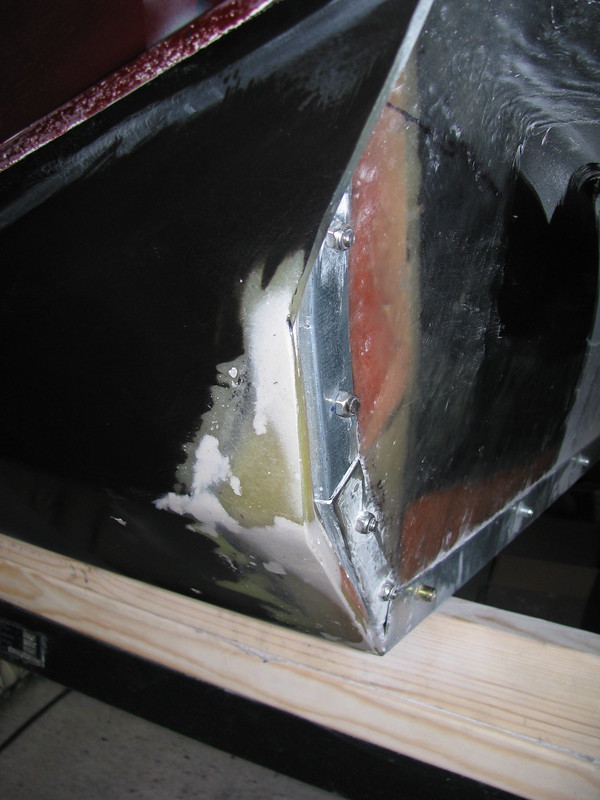
Gearbox tunnel mods by Sabrebuilder, on Flickr

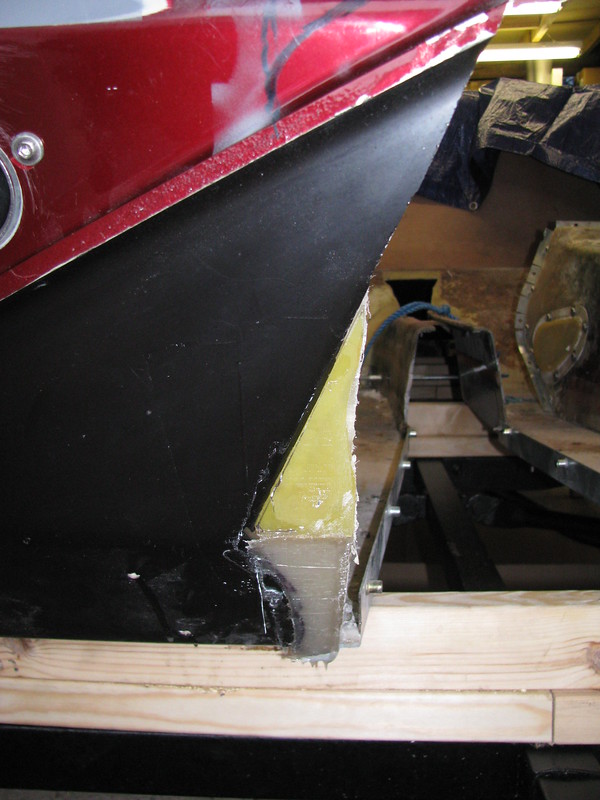
The modified gearbox tunnel jointing angle doesn't quite fit flush to the body. My original idea was to fill this gap with a closed cell foam strip but I wasn't happy about the size of the gap. So I covered the angle in parcel tape and filled the gap with body filler. When I finally fit the gearbox tunnel it will only need a thin smear of mastic sealant.
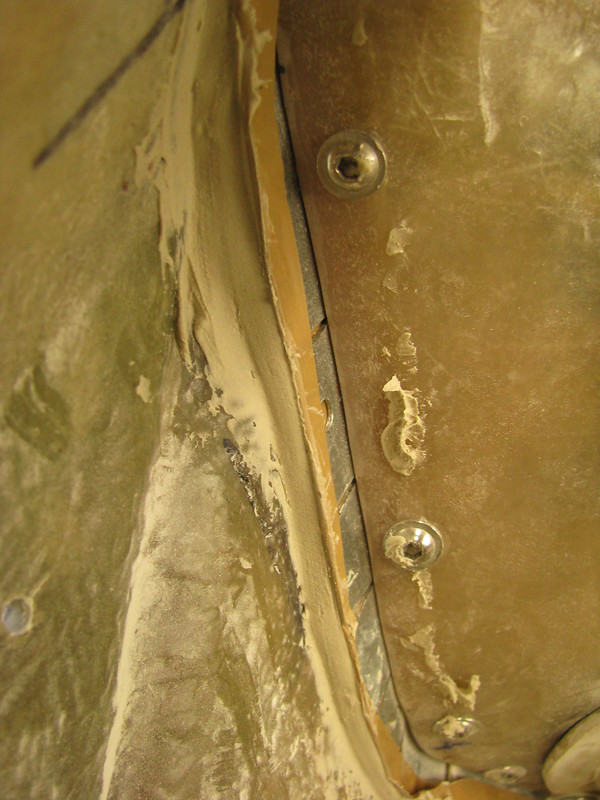
Gearbox tunnel mods by Sabrebuilder, on Flickr

Another small job was to enlarge the heater hose hole to take this rubber grommet.
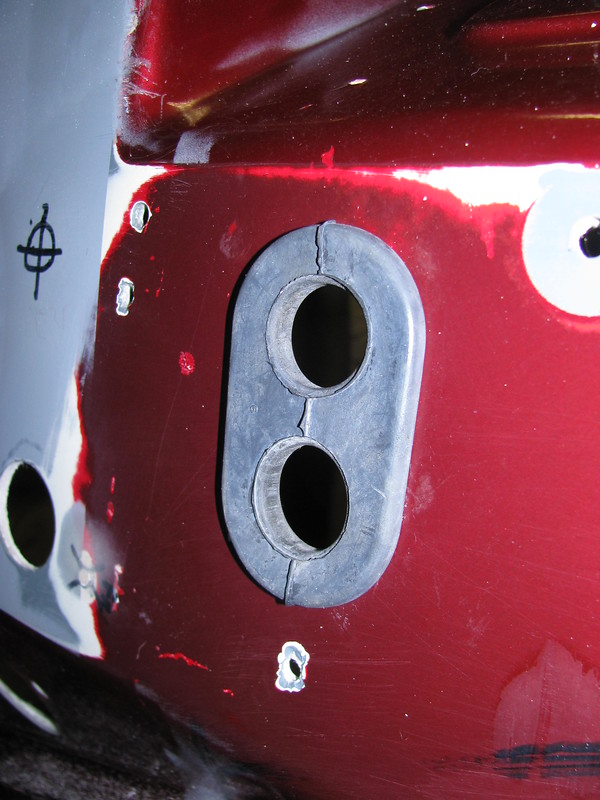
Heater Hose grommet by Sabrebuilder, on Flickr

And the bulkhead had this rather ugly hole where the OB had cut a hole for the loom connector.
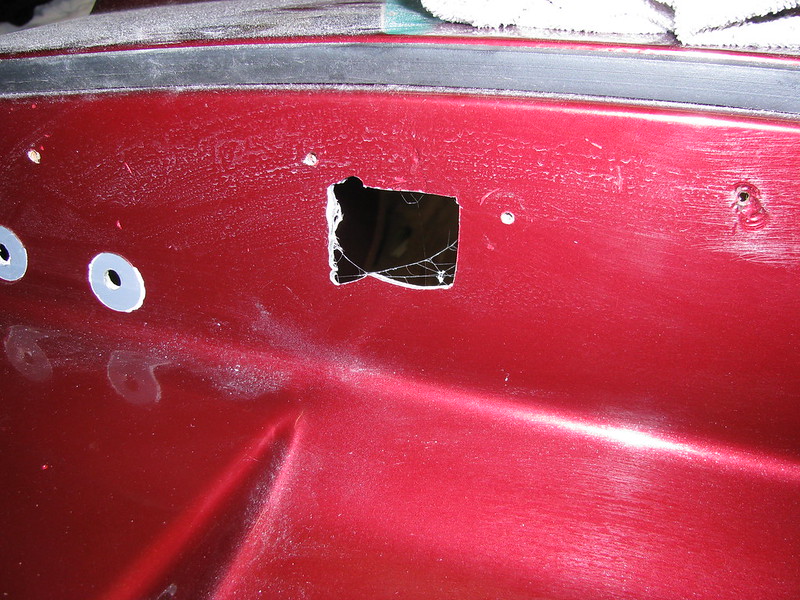
Body mods by Sabrebuilder, on Flickr

I have tidied up the hole by cutting a circular hole with a hole saw. An off-cut of MDF was screwed to the bulkhead to support the hole saw's central drill bit. The mounting holes will be filled and I'll fit a suitable grommet after the tub is painted.

Body mods by Sabrebuilder, on Flickr

I then turned my attention to the windscreen surround sides which are supported by steel inserts. According to the Royale build manual these should be painted and then bonded to the GRP frame with body filler. On my car the filler has cracked and I wanted to see if the supports were still bonded securely.
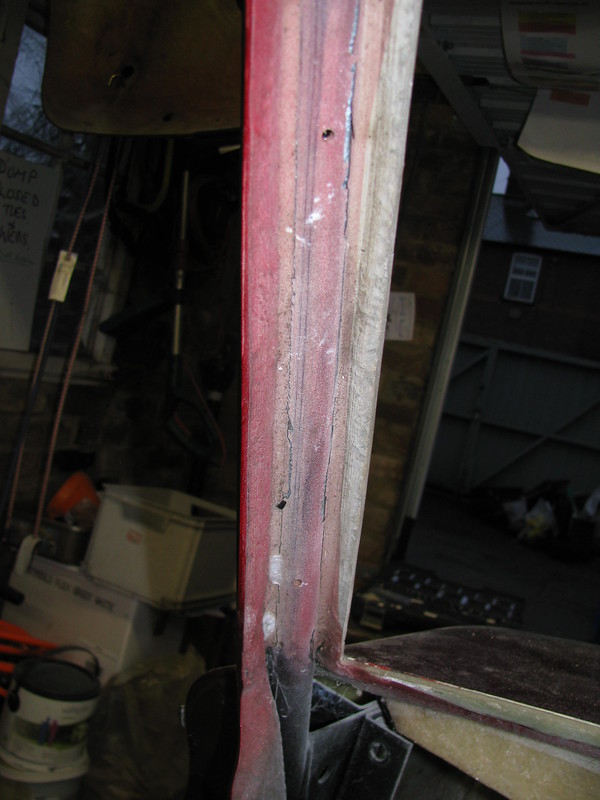
'A' Post steel by Sabrebuilder, on Flickr

Close up of the cracks.
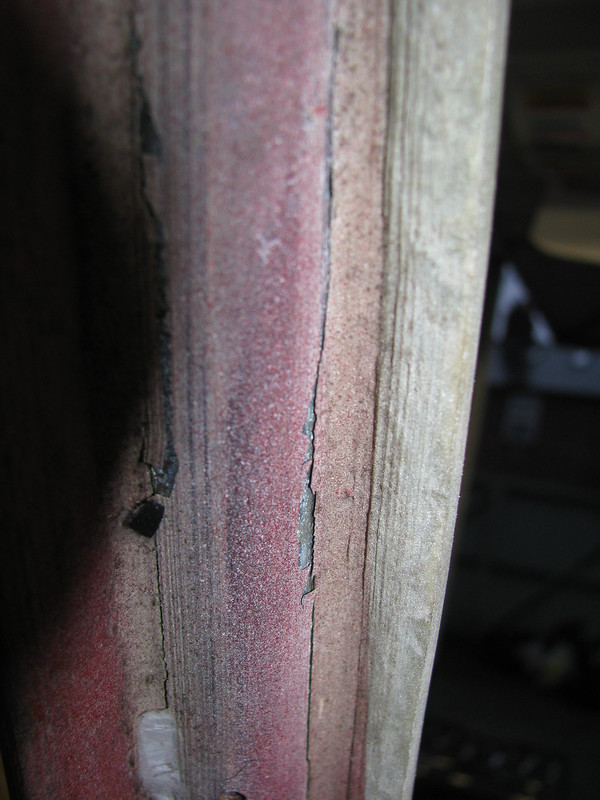
'A' Post steel by Sabrebuilder, on Flickr

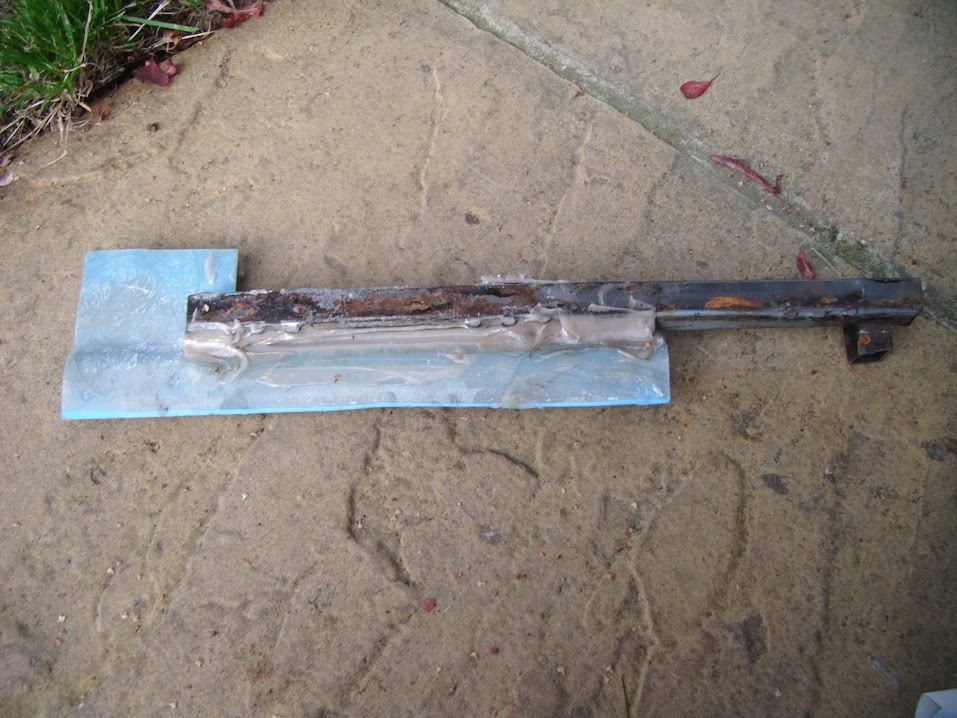
On the drivers side I had already removed the door hinge, so I cut out the filler with a plunge cutter multi-tool. The filler was really soft and came away easily. When I finished cutting out the filler, which only took about 5 minutes, the steel support fell out.
The bond between the steel and GRP had completely failed!!!!!!
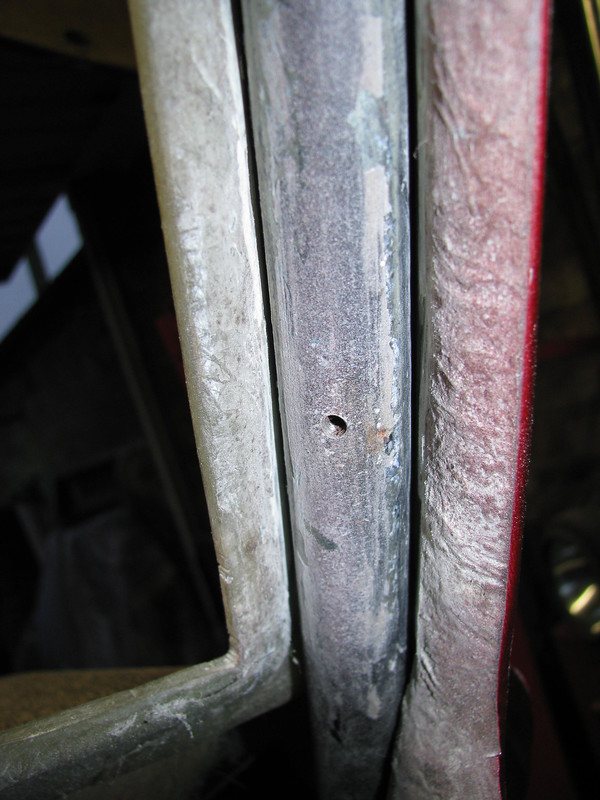
'A' Post steel by Sabrebuilder, on Flickr

Here you can see the very little bonding used by the OB.
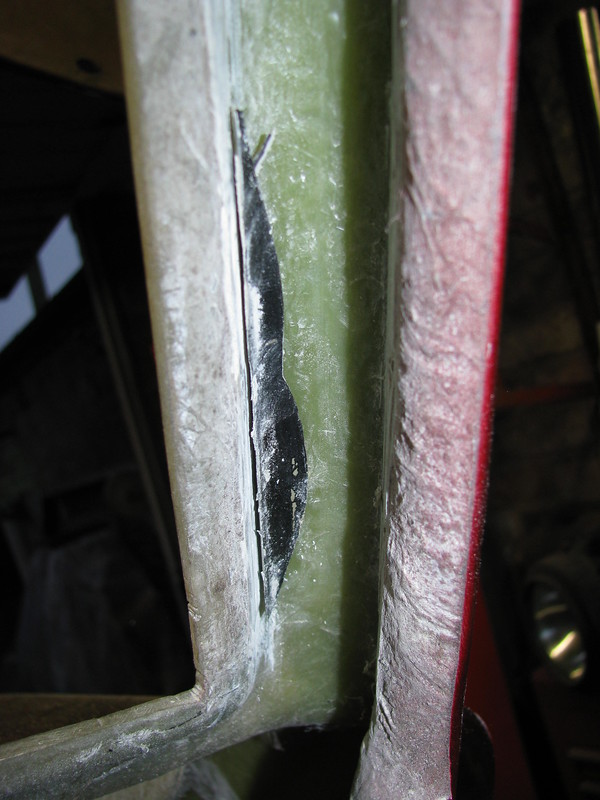
'A' Post steel by Sabrebuilder, on Flickr

And the bond between the 'A' post steel and the back of the hinge box had also failed.

'A' Post steel by Sabrebuilder, on Flickr

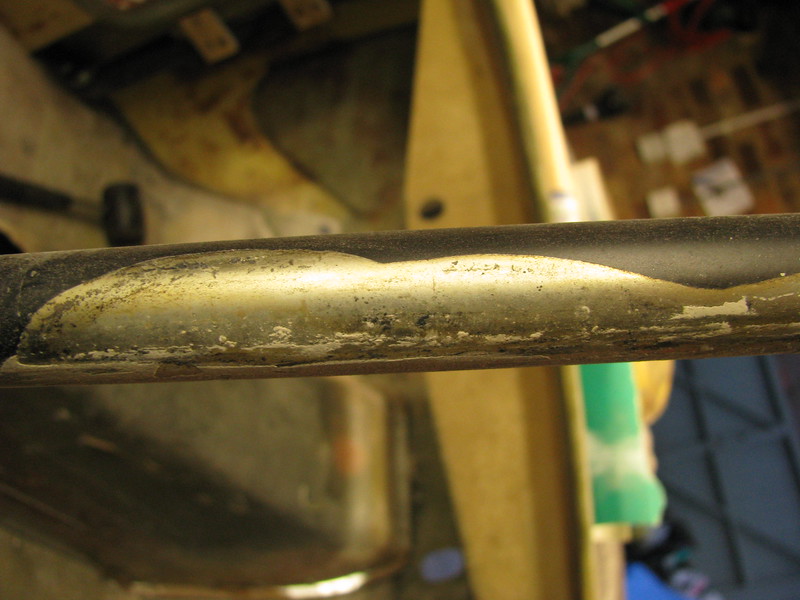
This photo shows where the windscreen surround steel bonding has failed.
'A' Post steel by Sabrebuilder, on Flickr

I'm thinking of using something like Tiger Seal to re-bond the 'A' post and windscreen surround but I'm open to expert advice:yo:


Hopefully more updates next week....

....peter
28 Jan 2018, 4:28pm
peterux – Hi Peter,

I’m certainly no expert, but based on the advice of others on here, I bought some bonding paste from Glasplies.


This works with a catalyst, in a similar way to fibreglass resin.

This was a test piece I did to stick metal to fibreglass and it was rock solid.


I used the bonding paste to join my bodyshell to the inner framework.

But I also used Tiger Seal to close any small gaps that were left.

Hope that helps, Paul. :)
PS
Not really sure why I haven’t posted on your thread before?

As it is a very meticulous build with great attention to detail and problem solving. :cool:

Good luck.
28 Jan 2018, 8:35pm
Hi Paul,
many thanks for your feedback, but I had a 'free' day today and the weather was quite mild so I was keen to crack on whilst my motivation was high.

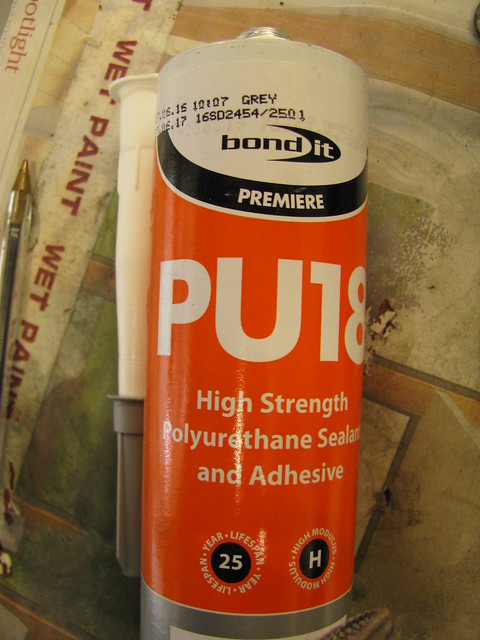
I found a couple of tubes of this stuff in my 'come-in-handy-one-day' box and a quick check on the manufacturers website confirmed it was suitable for bonding GRP to steel (amongst many other things). I can't remember why I bought it but its seemed to be suitable so I've used it on the first side.

Polyurethane Adhesive/filler by Sabrebuilder, on Flickr

The first side is setting over night so I'll see how strong it is tomorrow.....


....peter

P.S. I've watched your car building and I'm amazed at what you achieved on a slopping front drive. It's a great looking little car, well done!!
29 Jan 2018, 1:22pm
That stuff looks idea as it remains flexible once cured (according to the data I read). One of the main problems and causes for failure when bonding disimilar materials is their different expansion rates so a flexible addhesive has got to be a good bet.

Cheers, Robin
29 Jan 2018, 8:33pm
MartinClan wrote:
That stuff looks ideal as it remains flexible once cured (according to the data I read). One of the main problems and causes for failure when bonding dissimilar materials is their different expansion rates so a flexible adhesive has got to be a good bet.

Cheers, Robin


That was my theory and hope.

Looking closer at the steel parts I can see that the original parts were plated before they were painted black. (I don't know what kind of plating was used but it has a slight silver/yellowish tinge ). The paint scrapes off very easily. It appears that the body filler has adhered to the paint but the paint has come away from the plating.
So before refitting I abraded the steel surface with a flap disc in my angle grinder so that the PU sealant was in direct contact with roughened bare metal. I plan to paint any exposed metal after the PU has fully set.

I checked the first side this morning and the adhesive was a bit softer than I expected. I'm hoping it is still curing due to the low temperatures in my garage overnight so I'll leave it clamped for a few days.

Oh the fun of re-building an old kit! :nerd:
31 Jan 2018, 9:05pm
Bonding......

Here are some more pictures of re-bonding the drivers side 'A' post steel support.....

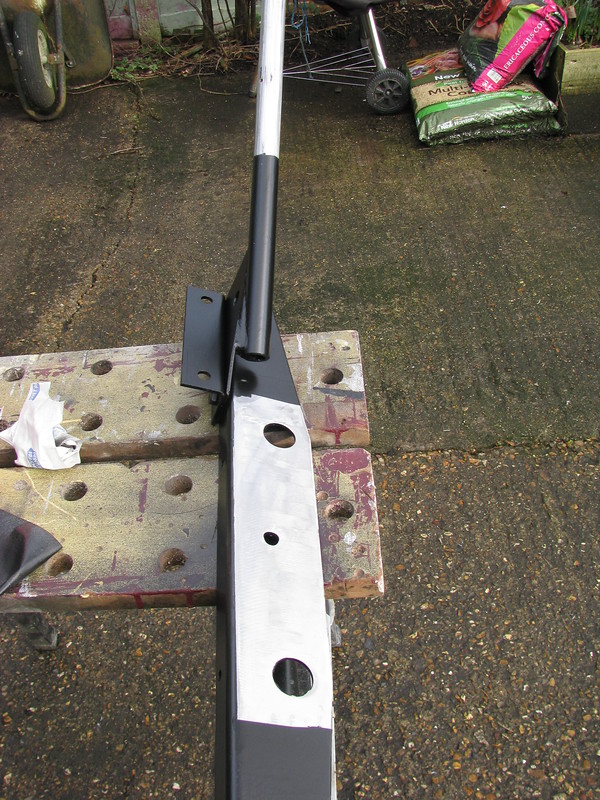
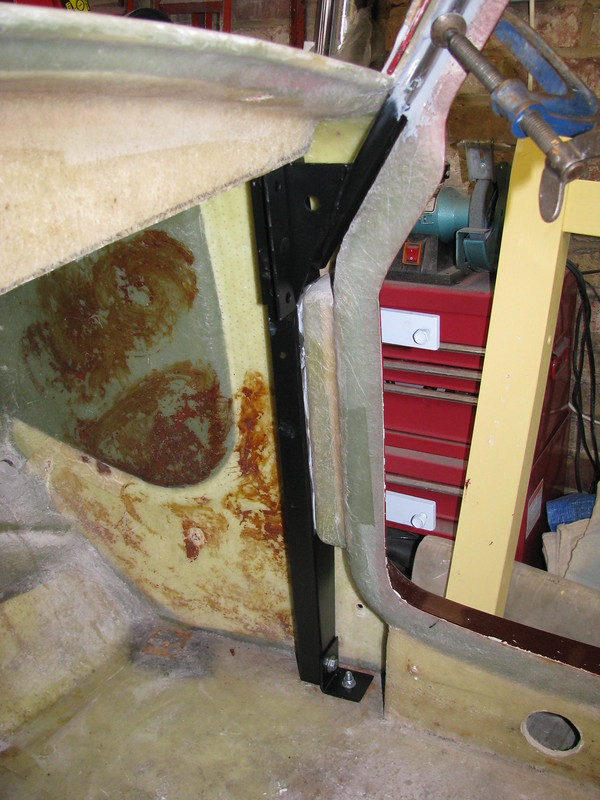
This is the 'A' post steel support after painting. I have abraded the areas that will be bonded to the GRP bodywork.

'A' post steel by Sabrebuilder, on Flickr

'A' post steel by Sabrebuilder, on Flickr

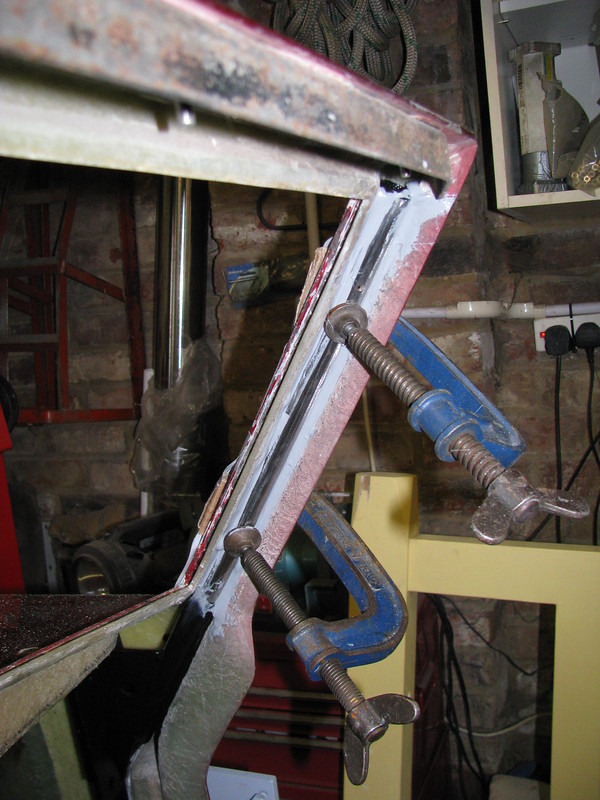
The windscreen support was clamped in place while the bonding is setting.

'A' post steel by Sabrebuilder, on Flickr

Drivers door hinge by Sabrebuilder, on Flickr


Passenger hinge by Sabrebuilder, on Flickr

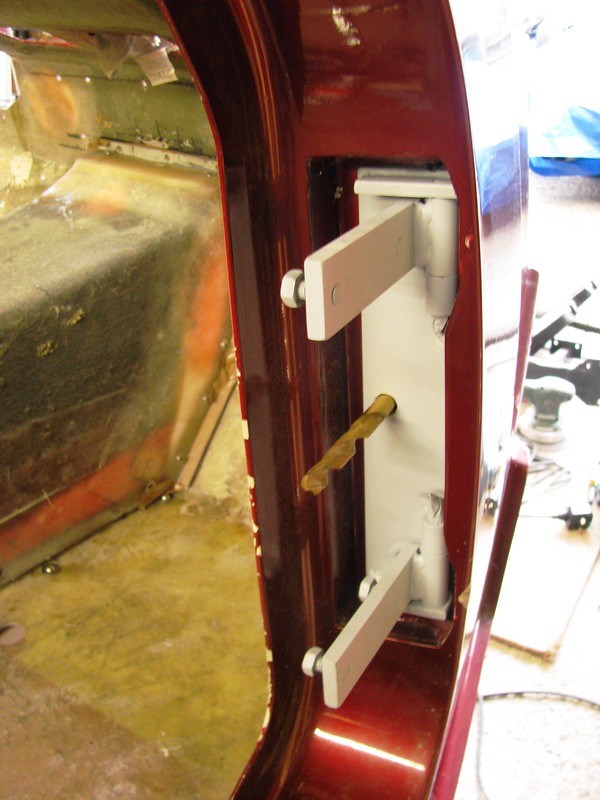
The hinges and doors must have been in place when the OB had the body painted. The hinges were primed and painted but the primer had not adhered well to the plated metal. I was able to scrape off all the paint with a hand chisel.

Passenger hinge by Sabrebuilder, on Flickr

Paint removed and degreased. I've painted it with and acid etch primer with the hope that this will stick better.


It was too cold in the garage today to do any more bonding so I did some woodwork....

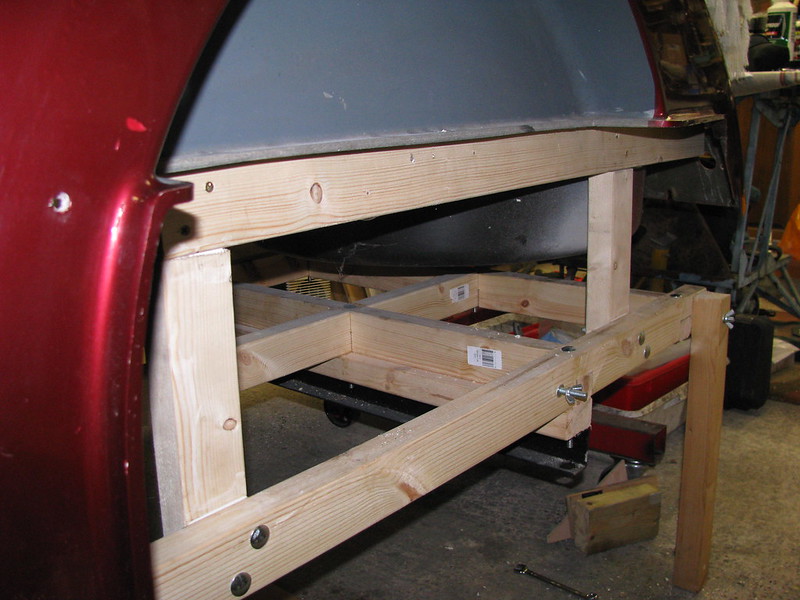
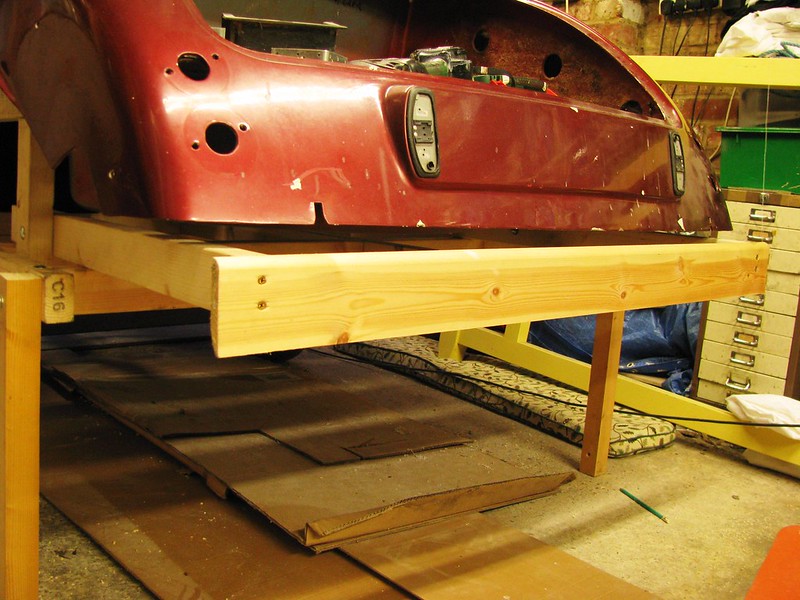
I've built an additional frame to support the rear of the body tub.

Body Support by Sabrebuilder, on Flickr

The body is now bolted down to the wooden frame on the trailer.

Body support by Sabrebuilder, on Flickr

I also added this support to take the trailer lightboard.

Trailer lightboard support by Sabrebuilder, on Flickr

Hopefully the weather will warm up a little next week so I can on with rebonding the passenger side post.:hail:


....peter
7 Feb 2018, 8:05pm
Cold winter work

The following update is not directly related to kitcar building but was a necessary step in my build plan......

The continued cold weather has stopped any more work on the body tub so I turned my attention to fitting a towbar.

To get the Sabre's body tub to the bodyshop I need a towbar fitted to my regular car.
I picked up a second hand towbar and electrics off ebay.
.
.
.

EDIT 19.02.2018
The towbar electrics are either faulty or not compatible with my BMW.
Either way I've decided to cut my losses and stop wasting anymore time on this activity.
As this is no longer part of my plan I've deleted the rest of this post.

Plan B to follow....


....peter
25 Feb 2018, 8:30pm
And we're off....

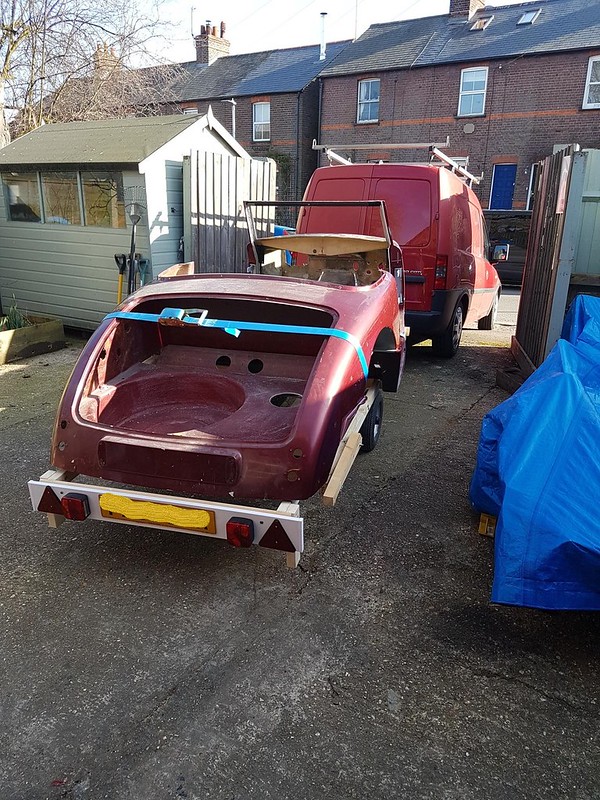
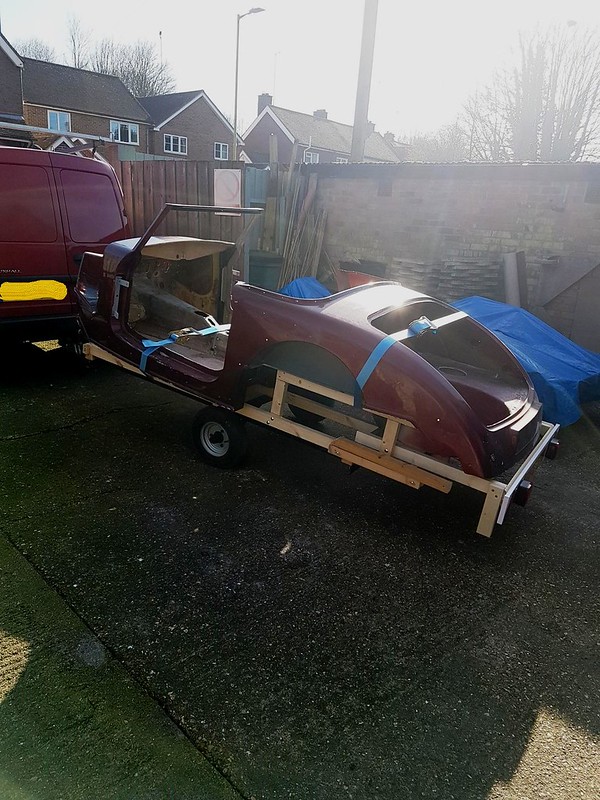
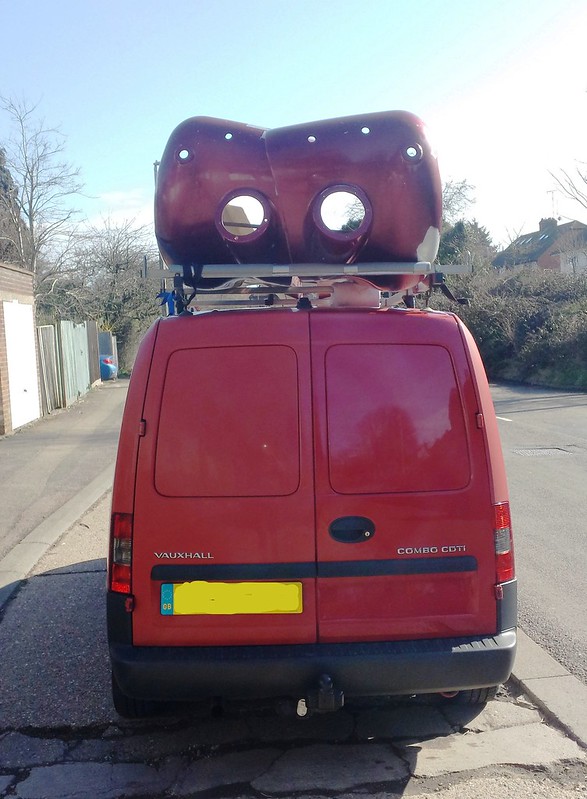
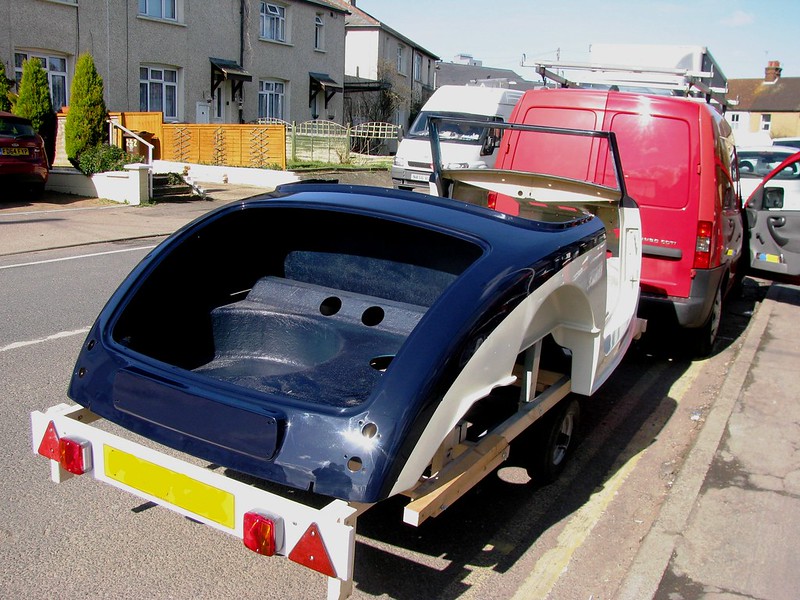
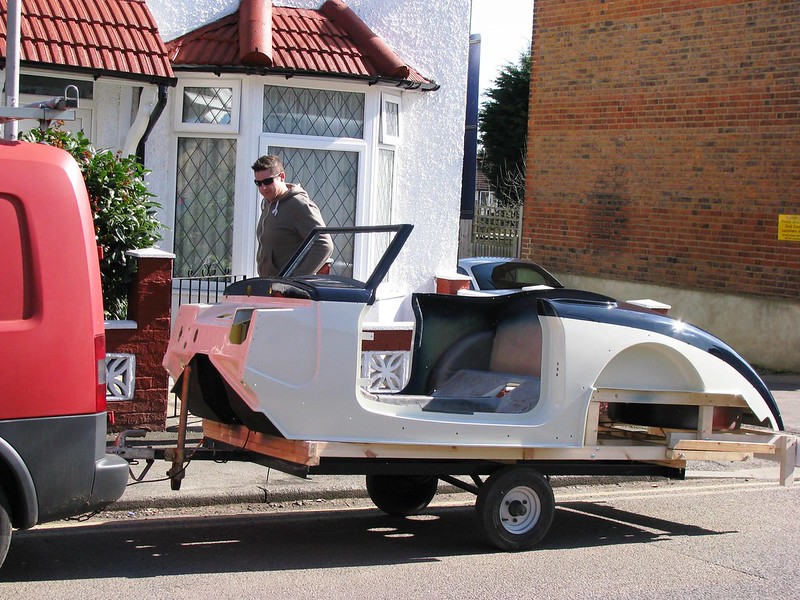
So after nearly five and a half years the body is off to the body-shop for a complete re-spray. The official tow vehicle is driven by my son-in-law James.

Off to the body-shop by Sabrebuilder, on Flickr

The bodytub was bolted down to the frame and a couple of ratchet straps added for safety. It'll be a couple of months before it's back which will give me time to finish off a few jobs on the chassis.

Off to the body-shop by Sabrebuilder, on Flickr

Exciting times!!:icon_biggrin::icon_biggrin:
7 Mar 2018, 8:57pm
Radiator Cowl Repair

Whilst the bodytub is at the paintshop I've turned my attention to a number of smaller tasks. (actually quite a long list!)

First up is to repair the radiator cowl......

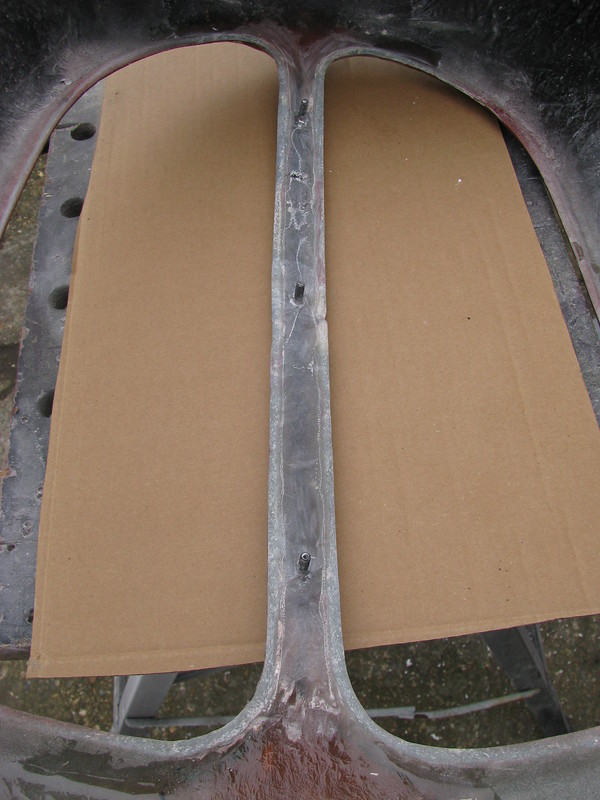
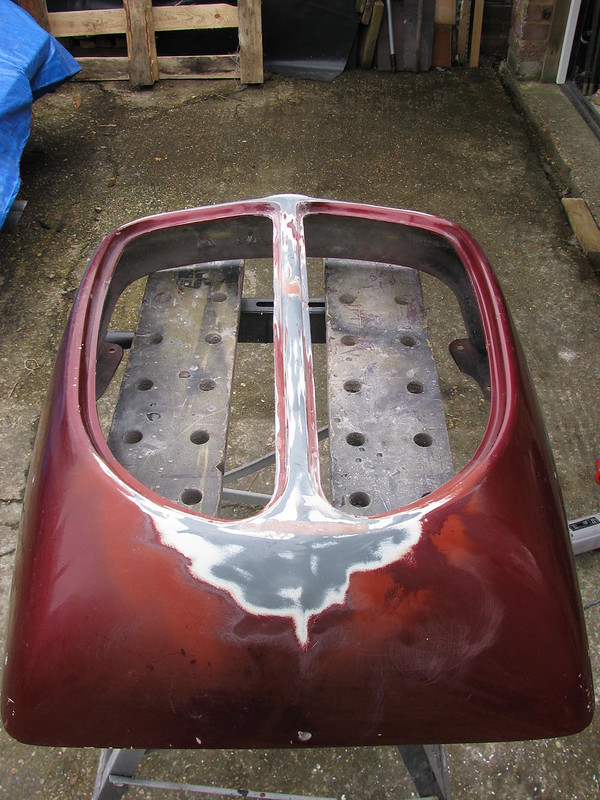
The radiator cowl had been damaged at some point before I purchased the kit. I think it had been rolled into a wall which had cracked the grills central bar. I first dug out the grill retaining bar and then Araldite'd the cracked GRP back together. This was just to hold it aligned.

Radiator Cowl repair by Sabrebuilder, on Flickr

The kit is supplied with what is called a grill retaining bar. It had been bonded into the radiator cowl but the resin had deteriorated so much that I could remove it by hand with an old chisel. Moisture had been absorbed by the bonding resin so the bar was quite rusty. After a good clean up, it was coated with rust converter to neutralise any rust left..

Radiator Cowl repair by Sabrebuilder, on Flickr

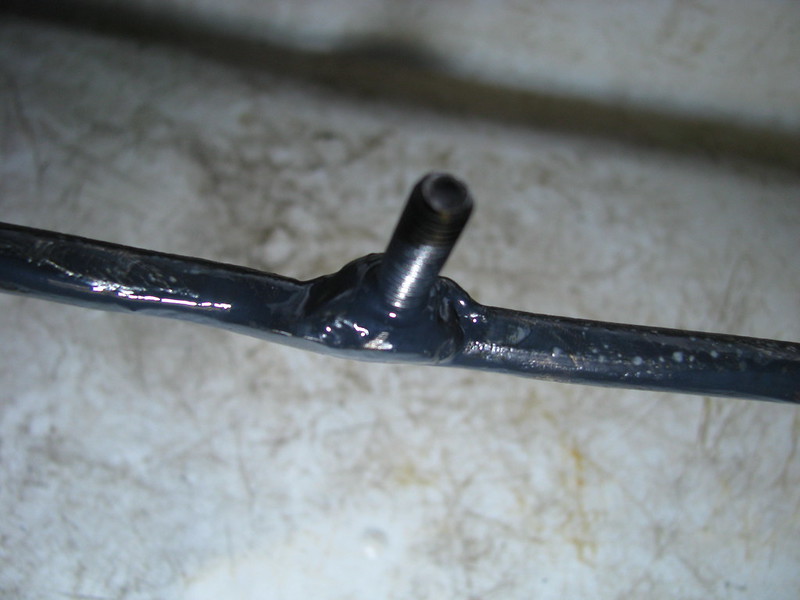
The grill retaining bar is a pretty rough bit of steel wire with threaded studs welded on.

Radiator Cowl repair by Sabrebuilder, on Flickr

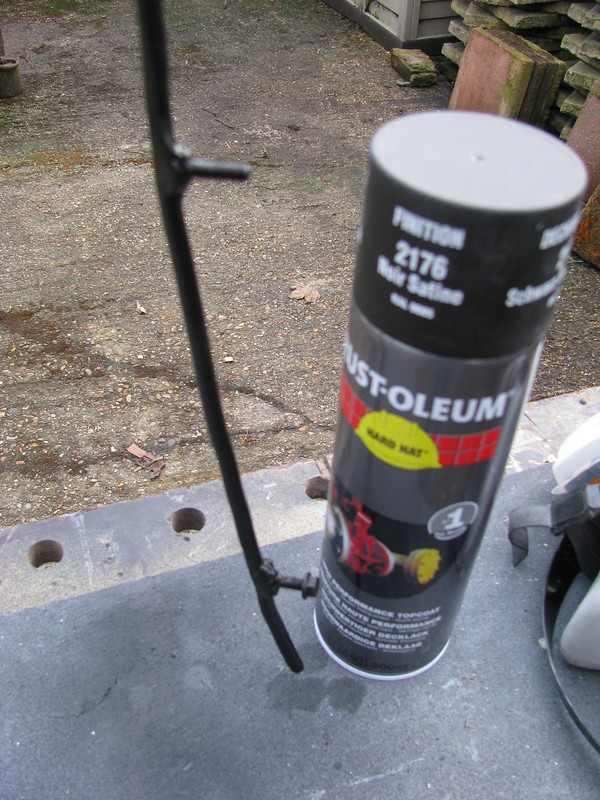
The grill retaining bar was then given a coat of black paint. I've been trying out this Rust-Oleum hard hat paint which covers well and drys in 15 mins.

Radiator Cowl repair by Sabrebuilder, on Flickr

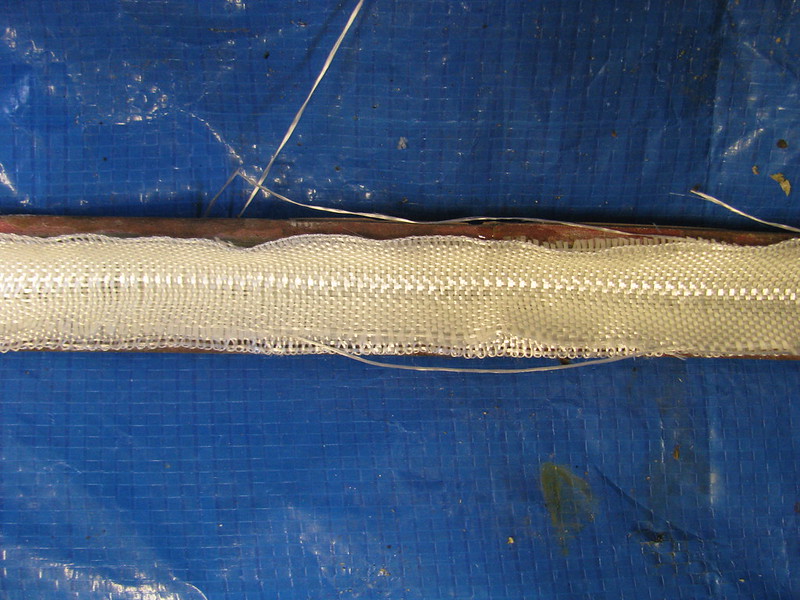
I then cut two lengths of woven glass tape. This has very high tensile strength and was chosen to strengthen the central bar.

Radiator Cowl repair by Sabrebuilder, on Flickr

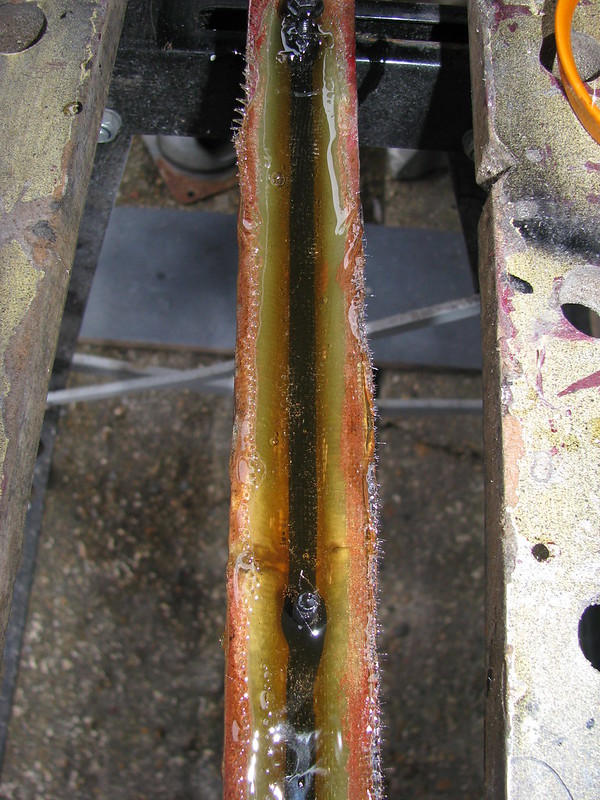
I then embedded the glass tape and steel bar in resin. You can't see the tape after it is wetted but it is there!

Radiator Cowl repair by Sabrebuilder, on Flickr

I just need to pour some more resin to cover both ends of the bar. It should now be a lot stronger than before.

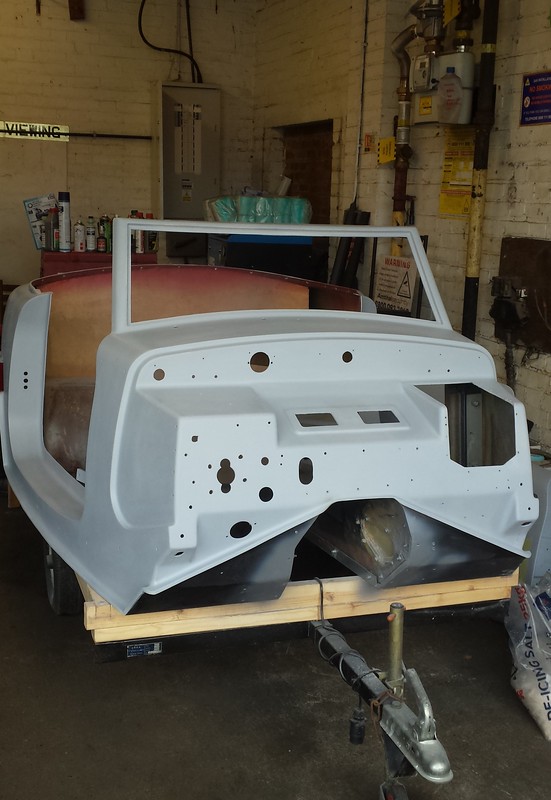
I had a call from the paintshop yesterday to say that the body tub had been baked, sanded and primed so I popped down to take some photo's. Not very exciting photos but really pleased with the progress so far....

Painting by Sabrebuilder, on Flickr

Painting by Sabrebuilder, on Flickr

Next up on the list is to modify the fuel tank sensor.....

....peter
8 Mar 2018, 9:21am
This project is coming along nicely and gathering pace. Your attention to detail will pay dividends with longevity and low maintenance in the future. Keep up the good work.
13 Mar 2018, 8:28pm
Another step forward....

froggyman wrote:
This project is coming along nicely and gathering pace. Your attention to detail will pay dividends with longevity and low maintenance in the future. Keep up the good work.


Thanks for the feedback!

I popped over to the bodyshop today to check on the paint colours.

The body parts have now been flatted back and a second coat of primer applied. This will be followed by the base coats.

Painting by Sabrebuilder, on Flickr

Very pleased with the progress and finish.

....peter
14 Mar 2018, 7:29am
Enjoying every one of your post, it shows how meticulous you are and I can visualise how perfect the finish product is going to look like. Well done.
14 Mar 2018, 8:20pm
Exciting update!!!!!!!!1

Amir Manzoori wrote:
Enjoying every one of your post, it shows how meticulous you are and I can visualise how perfect the finish product is going to look like. Well done.


I hope I can meet your expectations!!

------------------------------------------------------------------------------------


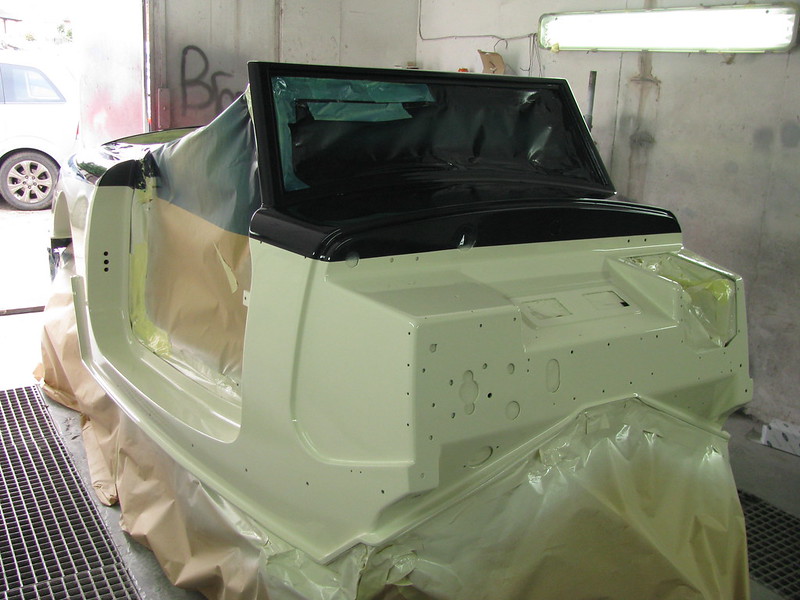
I was surprised to get a call today from Dave at the bodyshop.

He said 'bring your camera' ....so I did...........


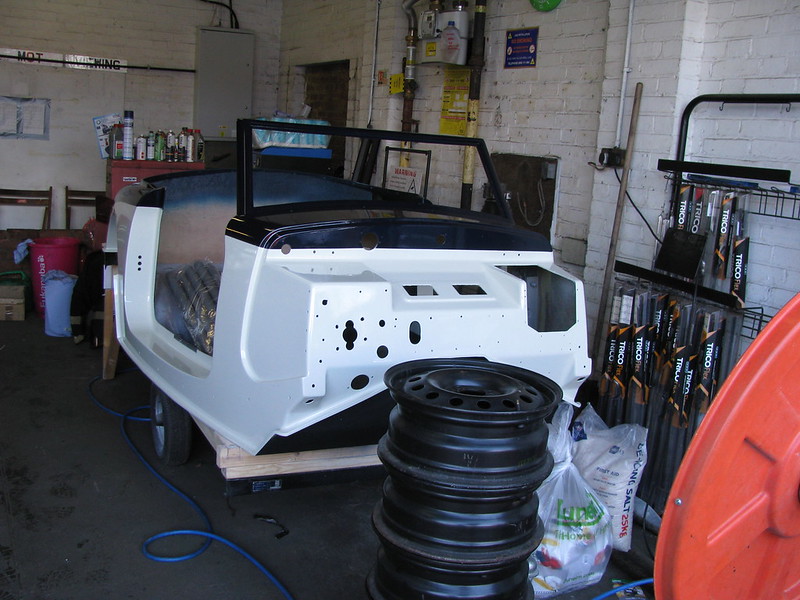
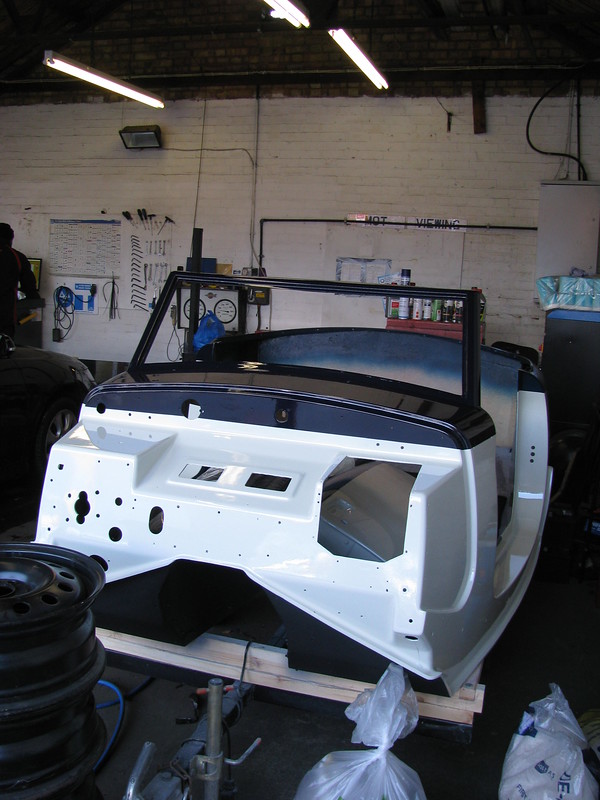
Painting by Sabrebuilder, on Flickr

Painting by Sabrebuilder, on Flickr

Painting by Sabrebuilder, on Flickr

Still a long way to go but a very significant milestone!!!!:party::party::party:
15 Mar 2018, 7:32am
It's going to look amazing :yo:
15 Mar 2018, 7:40am
Wasn't the original demo car that colour? Looks great.
18 Mar 2018, 1:57pm
It must be exciting seeing the bodywork in paint. :cool:

Good luck, Paul. :)
18 Mar 2018, 2:48pm
WOW looks good!!
Sweet choice of colours.
22 Mar 2018, 10:07pm
Painting update...

Thanks for all the feedback, it's a little nerve wracking entrusting this kind of work to someone you don't really know but Dave has exceeded my expectations and is doing a superb job. IIRC the original John Barlow demonstrator was all blue but that is based on adverts I've seen in old mags.

-------------------------------------------------------------------------

Earlier this week I popped over to the bodyshop to drop of more panels. I delivered the rear wings, bonnets and wheels. The steel wheels are going off to 'Dave's mate' to be shot blasted before being painted.

Things are coming along nicely......

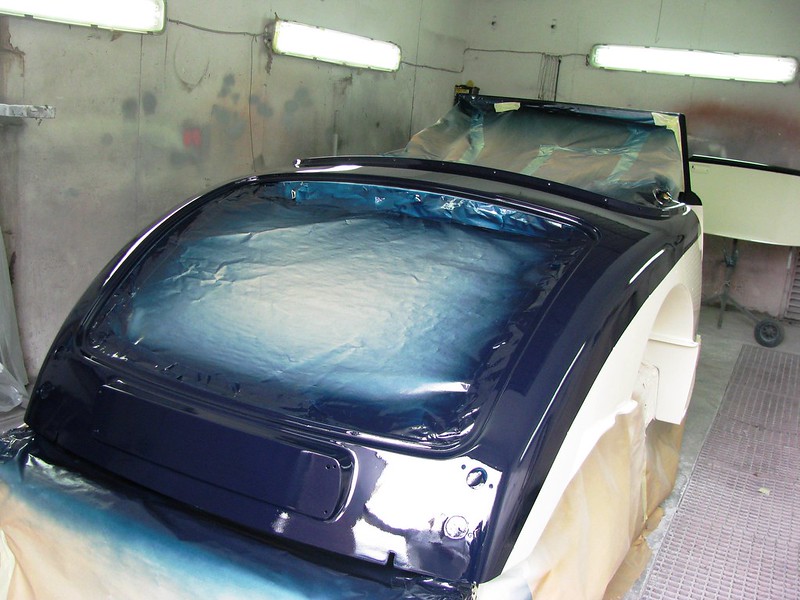
Following flatting back Dave decided to apply another clear coat.

Painting by Sabrebuilder, on Flickr

Body tub after second coat of lacquer. Wheels delivered awaiting shot blasting and paint.

Painting by Sabrebuilder, on Flickr

Gearbox tunnel has now been Schutz underseal coated.

Painting by Sabrebuilder, on Flickr

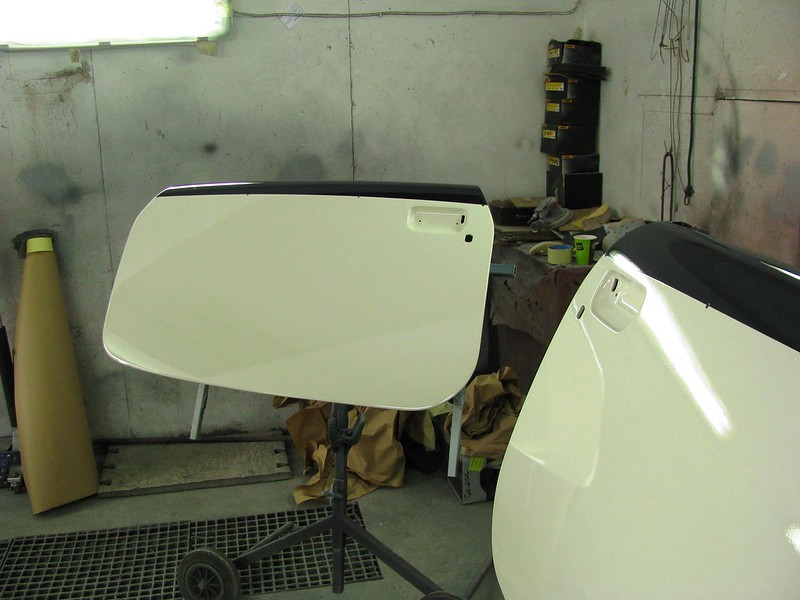
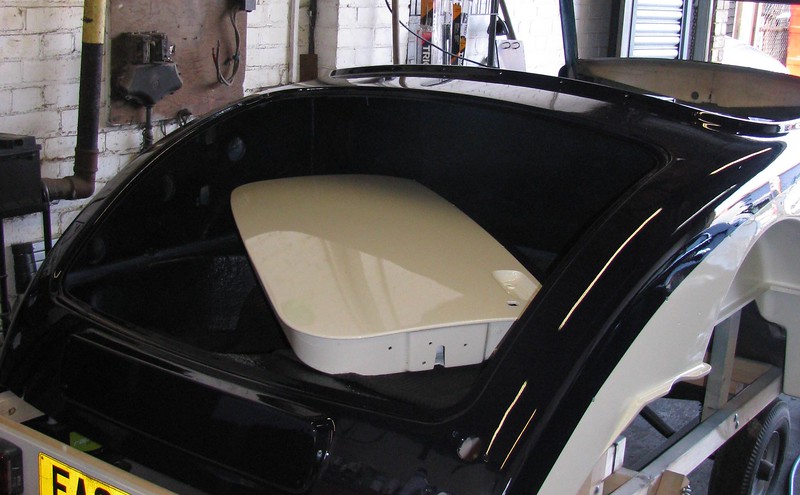
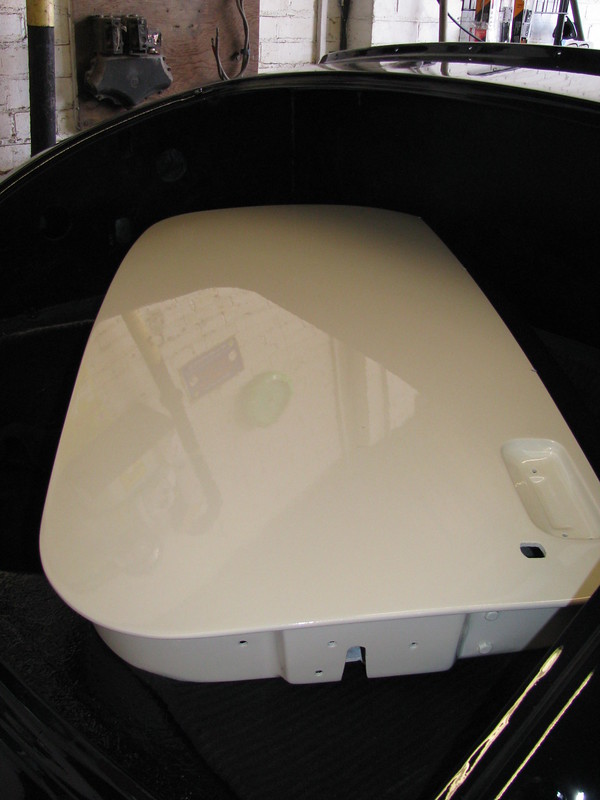
Passenger door before machine polishing. The boot inside has been colour coded.

Painting by Sabrebuilder, on Flickr

The body tub should be ready for collection early next week so fingers crossed for dry weather for the journey back :eusa_dance:


.....peter

P.S. the 'Midnight blue' looks black in these shots but it is painted blue:laugh:
26 Mar 2018, 8:31pm
My baby is back at home.....

Over the weekend I found time to complete the repairs to the radiator cowl.

I finished re-enforcing the back of the cowl with glass mating and resin and then ground it flat with a flap disk in my angle grinder.

Painting by Sabrebuilder, on Flickr

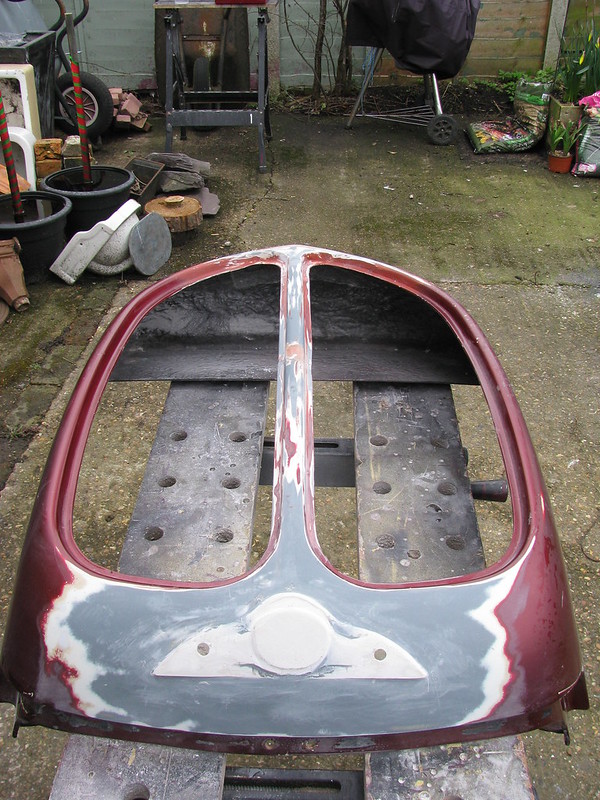
After I sanded down the front I found the damage was much worse than I first thought. It had already been repaired before being broken again. I dug out all the cracked gelcoat and filled it with GRP filler.

Painting by Sabrebuilder, on Flickr

I also created a raised 'plinth' for the badge....

Painting by Sabrebuilder, on Flickr

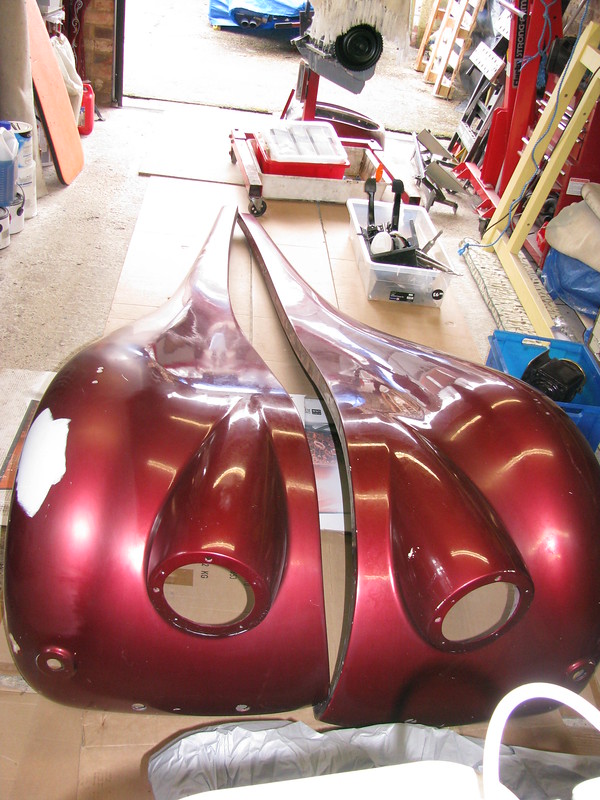
I then retrieved the front wings that have been hanging from the garage rafters for the last few years. They were covered in dust and spiders poo so I gave them a quick wash.

Painting by Sabrebuilder, on Flickr

Today, we collected the body tub and doors from the painters, but first we loaded up the front wings.

Painting by Sabrebuilder, on Flickr

And then the trailer was hitched up for the journey back home.

Painting by Sabrebuilder, on Flickr

Painting by Sabrebuilder, on Flickr

And it's now tucked up safely back in my garage at home.

Painting by Sabrebuilder, on Flickr

Happy days :icon_mrgreen:


....peter
4 Apr 2018, 7:33pm
Fuel level sender mods

A few weeks back I mentioned that I will give an update on the Fuel level sender modifications I've been working on.

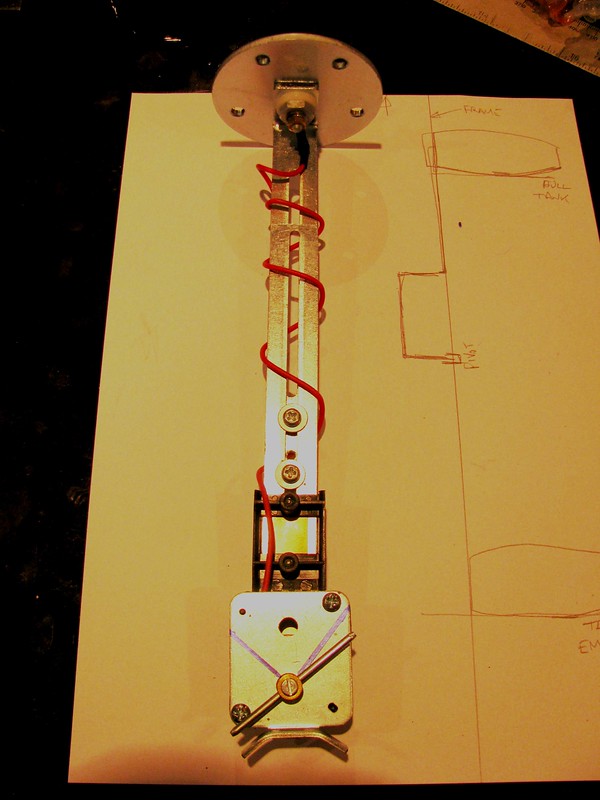
This is the Ford combined 'lifter pump' and fuel level sender that fits the Granada fuel tank installed in the Sabre. But the Ford sender's resistance is not compatible with the ETB Fuel gauge that I have bought.

Fuel Level Sender by Sabrebuilder, on Flickr
(sorry about the poor quality photo's)

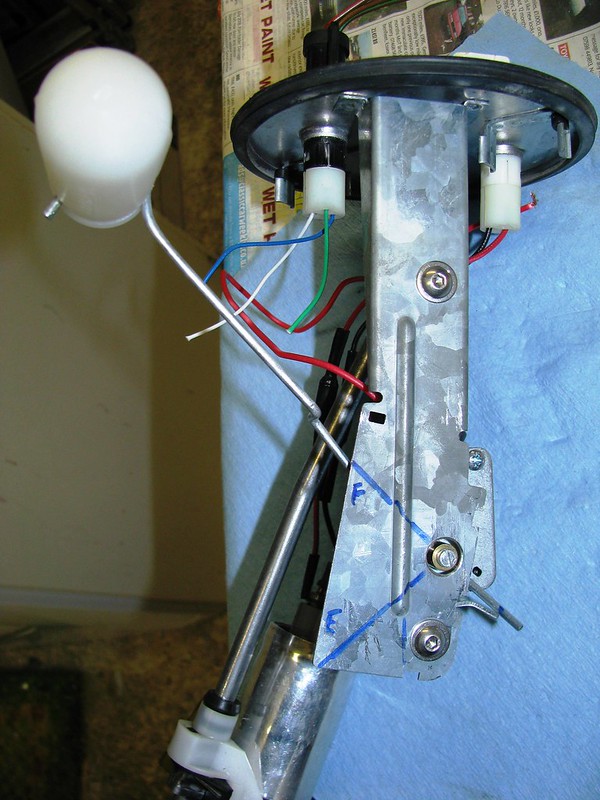
This is the ETB fuel level sender. Luckily, the full range from Empty to Full is covered by a 90 degree sweep which is the same as the Ford sender. Also, the RTB sender's variable resistance part is easily unbolted.

Fuel Level Sender by Sabrebuilder, on Flickr

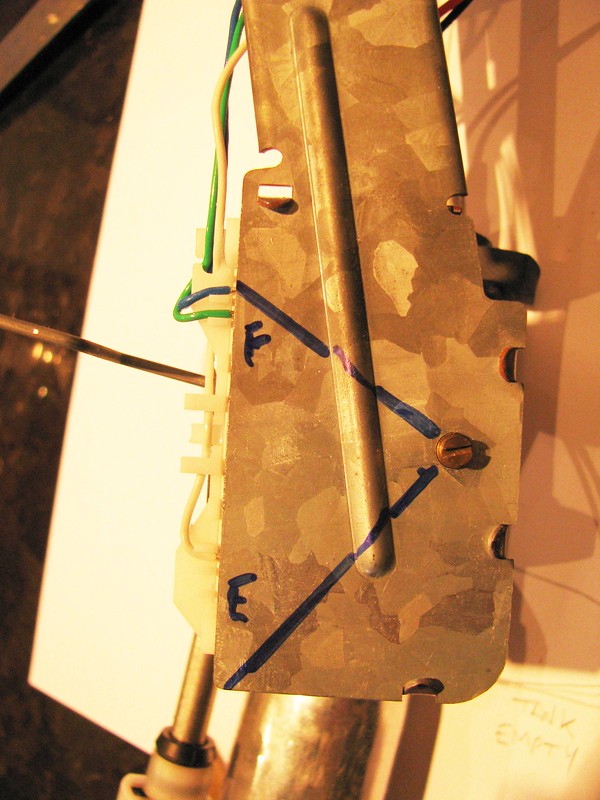
Before dismantling the Ford sender I marked the Full and Empty positions. It was easy to remove the Ford variable resistor by just bending back a couple of tabs.

Fuel Level Sender by Sabrebuilder, on Flickr

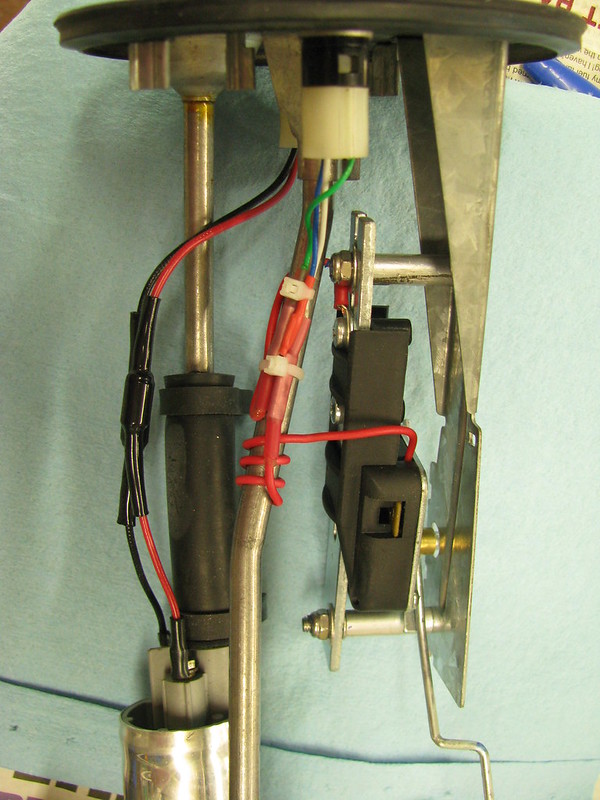
I then mounted the ETB rheostat to the Ford support leg using M6 screws and some aluminium tube spacers. A very fiddly job!!

Fuel Level Sender by Sabrebuilder, on Flickr

And here is a side view of ETB sender mounted on Ford fuel tank unit. In the Full position.

Fuel Level Sender by Sabrebuilder, on Flickr

It seems to work OK so just need to wire it up and make sure the gauge reads correctly; and then make sure it fits OK in the tank.

Another little job ticked off the plan :icon_mrgreen:

.....peter
5 May 2018, 7:12pm
Nearly done....

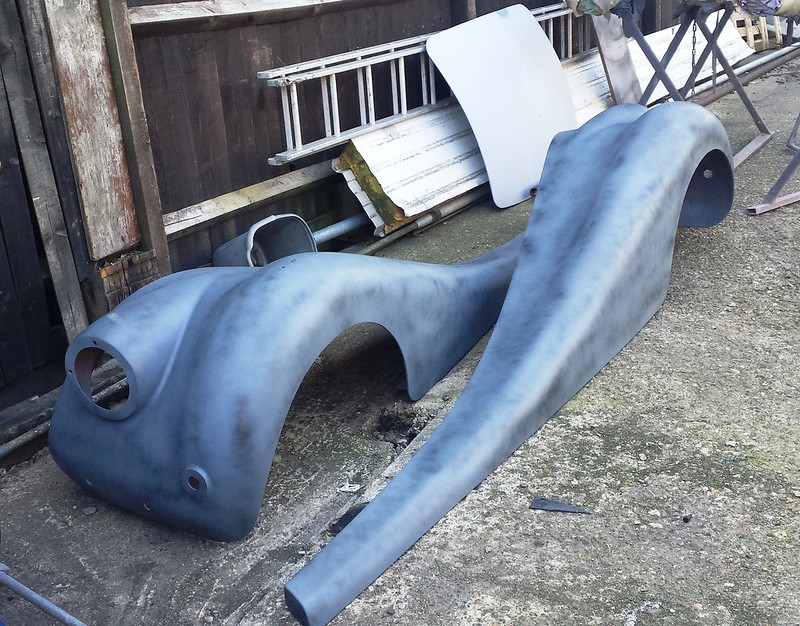
Well the final three body panels are being prepped for paint. The front wings and boot lid have been stripped of the old paint and primed ready for flatting.

Front wings and bootlid by Sabrebuilder, on Flickr

Should be finished next week.

I then just need to find the time to start the re-assembly :lol:

...peter
5 May 2018, 8:09pm
There is something special about those cats.
10 Jul 2018, 7:35pm
So, very little progress on the Sabre over the last few months due to other priorities and projects taking up all my time. The painting of all the body parts was completed and all parts are now safely stored back in my garage loft awaiting re-assembly.

Here's a quick summary of a few jobs completed over the last few weeks.
Picking up on my last update back in May, I finished modifying the fuel tank level sender and tested it.

Fuel Level sender by Sabrebuilder, on Flickr

I then fitted it to the tank to seal up the tank and stop anymore dust getting in. I did give the tank a good hoover out before fitting the sender/pump unit.
I really struggled to fit the locking ring until I made up this improvised tool. With my hands on the wooden baton I was able to push down and turn the ring.

Fuel level sender locking ring tool by Sabrebuilder, on Flickr

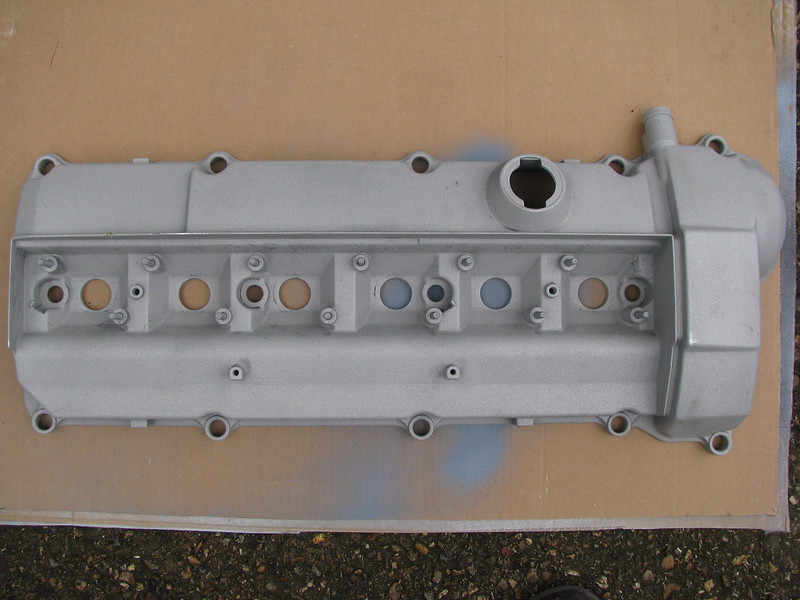
Some weeks back I chemically stripped the paint from the camshaft cover but everytime I finished cleaning it, it then oxidised and left white powdery residue. So I decided to have it shot blasted. It was amazing to find a grit blaster in a farm building only half a mile from my home. Nice matt finish ready for primer.

Engine Camshaft Cover by Sabrebuilder, on Flickr

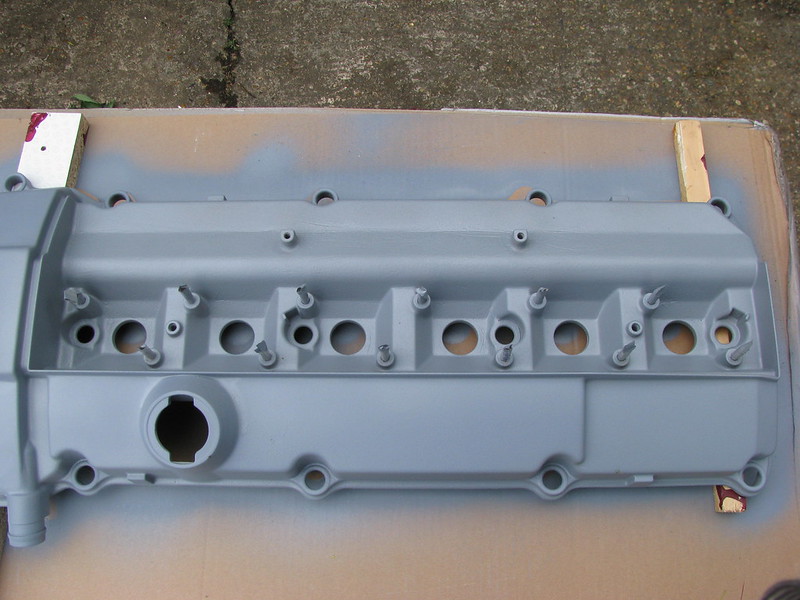
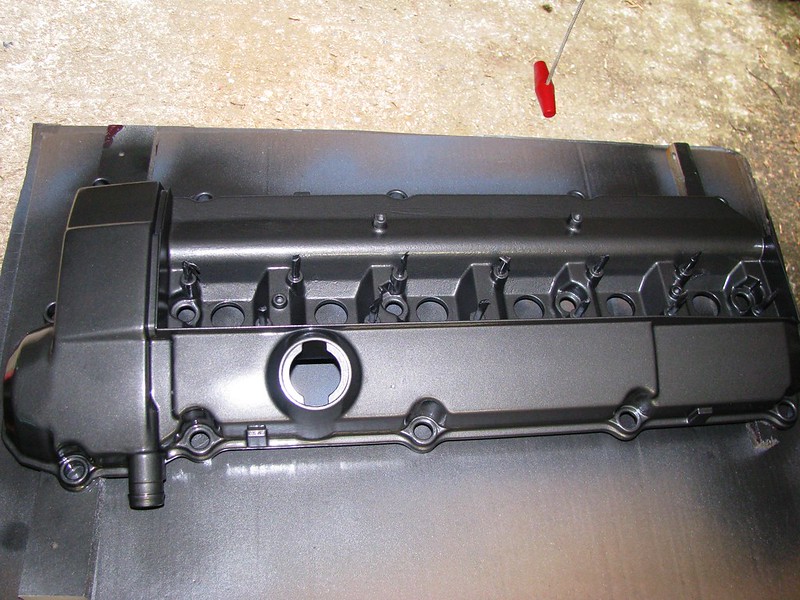
Then a quick coat of VHT primer and topcoat.

Engine Camshaft Cover by Sabrebuilder, on Flickr

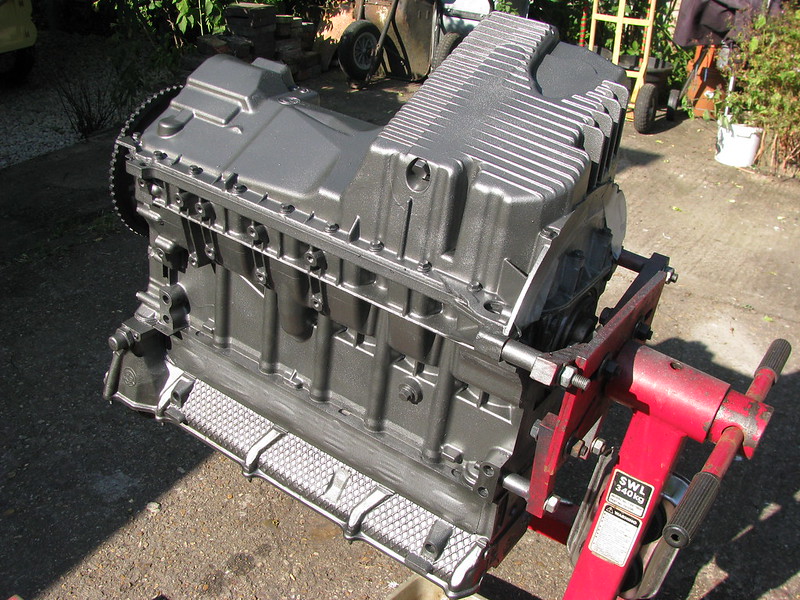
I've also painted the engine sump.....

Sump painted by Sabrebuilder, on Flickr

I know I've said it before but I hope to have some more regular updates to follow :flypig:


....peter