MadaboutKitcars

This is a read-only archive of the old Madabout Kitcars forum. New posts and replies are no longer possible, but every thread is still here to browse and read.

Another Cordite Is Born ...

5 Jun 2017, 5:59pm
Paul L I thought of you and you fantastic efforts over the past few weeks when I saw this at a local rally.


Only after I had been told it was painted by hand did I notice the very few blemishes in the paint !!!!
6 Jun 2017, 6:00am
Molleur – Cheers, although the photos are more flattering than the reality of the finish in places. :rolleyes:

But I am still taking positives from all the mistakes I am making and now expect to achieve a decent finish (see below).

- - - - - - - - - - - - - - - - - - - - - - - - - - - - - - -

Micky1Mo – Thanks for the encouragement. :cool:

If I was able to cut and polish the BRG to get anything like the reflections in that paint job I’d be very happy.

- - - - - - - - - - - - - - - - - - - - - - - - - - - - - - -

Quick Update:
Yesterday was lost to a combination of some ‘real work’ to do inside and the wet and windy weather outside.

But since my last post I spotted this short video clip on YouTube featuring an XK120.

https://www.youtube.com/watch?v=2vrKv3D0jME

The close ups showed a number of areas where the paint was chipped/missing and yet it still looks great. :cool:

I know I certainly haven’t got the skills to fake the patina that an old racing car wears with pride.

However, seeing it does help me overcome any lingering OCD tendencies to stress over tiny imperfections that really don’t matter.

Provided I tackle the worse bits, that fact that other areas will not be 100% perfect will still be OK. < Touch Wood >

Cheers, Paul. :)
6 Jun 2017, 6:43am
Interesting clip, best quote for me was '...it drives like a very fast tractor...'
6 Jun 2017, 7:44pm
Mr T - It certainly sounded like he loved driving the car more than he worried about the paintwork. :cool:

- - - - - - - - - - - - - - - - - - - - - - - - - - - - - - -

Baby Steps Forward:
There was only a small chunk of time available for car work today.

So I did a little test on one of the runs in the high build primer.


Which is a bit easier to see after the first round of sanding.


It was a mistake to use my long board for this, as I often missed the run itself & therefore sanded too deep. :rolleyes:


Still, I am definitely living and learning!

Next I sanded down the stopper putty from the front of the scuttle.


My second mistake of the evening was to get my tape measure out to double check the bonnet lock locations.

After a lot of wasted time, I decided the rear view mirror was going to be my centre line.


Which quickly reminded me that the wind deflector screen is not centred around the mirror.


As that screen actually sits equally between the Brooklands screens.

Which in turn align with the aero humps which are in different locations for driver and passenger. :rolleyes:

So this is the final resting place for the bonnet locks, well at least for today.


You can clearly see one spot on the bonnet where I made a mess trying to touch up a thin spot in the paint.
( Just behind the tear drop bulge. )

But the reflection of the sky in the tear drop itself does give me hope.

Thankfully, I had the covers on before the heaven opened once more.

Until next time, take care, Paul. :)
6 Jun 2017, 10:37pm
I always look forward to your posts.

"How do you eat an elephant?"
7 Jun 2017, 5:31am
Molleur“One bite at a time.”

:drum:

That expression really does sum up this build, as despite the odds against me, just constantly chipping away finally got the car on the road. :cool:

Although the sheer scale of the task and the really stupid numbers of hours required has slowly ground me down a bit over the years.

Thankfully, I’ve now reached the point where I just need to keep throwing hours at this for a few more weeks to see the car painted. :pray:

Because as soon as I bolt all the lights, mirrors, etc. back on I will be ‘Good to go’ as the car is already road legal. :D

Cheers, Paul. :)
7 Jun 2017, 6:39am
Posted 23rd June 2012 -

Paul L wrote:
This project has taken a big step forward since my last post...

Cordite Kit No.7 Update:

It has arrived!!! :D

Got a call from Gary on Thursday to say everything would be ready for Saturday.
Gary also arranged a courier for me to make the 100 odd mile trip up from Poole.
And here is what arrived on the back of a lorry earlier today ...


No pressure now Paul, but in just over a fortnight it'll be five years since you took delivery of your Cordite body.

Happy anniversary!
7 Jun 2017, 6:29pm
Mister Towed - A deadline?

< Cough >

For a Sammio build?

< Splutter >

Are you mad?

< Shakes Head >

:icon_wink:

- - - - - - - - - - - - - - - - - - - - - - - - - - - - - - -

More Bites Of The Elephant:
Started today early when I sanded down the stopper filler from the boot lid.


But there appears to be some kind of 'Pin Hole Fairy' at work here, as it then need another round. :rolleyes:


At least I remembered to do the front faces this time.


Put some high build primer on the bottom edges of the headlight rims.


Then I headed to the front drive, where I made a big mess with some fibreglass filler.


Plan A was to create some sort of tear drop mount, but this really wasn't working at all.


So I decided to sand it all back, just leaving the minimum size required to support the lights.


Which looks miles better as it will not really very visible when painted. :cool:


Next I switched my attention to the bonnet, where I drilled & filed the first hole for the locks.


End of Part 1…
7 Jun 2017, 6:30pm
Wednesday - Part 2:
I'd like to use just the smaller of the two washers, but think it would be safer to spread the load more.


There is an extra large spacer/washer on the underside too.


Then I did the same thing again for the passenger side.


This is both locks in the 'Open' position.


Then I spent ages messing about with bonnet lip seals trying to get the best fit.

This lead me to mark up sections of the bonnet and the bonnet lip for trimming.


Note: The bonnet lip will be getting a skim of filler at some point to 'fill in' the rough patches.

I ended up with a few of the spots like these after I'd tickled them with my angle grinder.


I also had to trim a bit off the bonnet lip to make sure the fixing nut for the locks cleared nicely.


The good news is that it looks as though I will be able to make these locks work. :cool:

I should point out that all day the wind had been playing havoc with my sanding/grindings/drilling.

As it blew dust all over my neighbour's house and garden before I had a chance to sweep it up. :icon_sad:

So to make up for the mess I was making, I took a break from car work to trim the grass verge in front on both of our houses.


I forgot to take a 'Before' photo, but the next pair of houses along will give you some idea.


This was bloody hard work and I was completely knackered at the end of it.

So I made sanding down the boot lid (for the second time) my last job before packing up for the night.


Overall, a very productive day, as getting the rear light plinths sorted out, together with the bonnet locks, was a big step forward.

So until next time, take care, Paul. :)
7 Jun 2017, 7:58pm
Moving right along, and looking better each session!
8 Jun 2017, 6:44am
Grandmother, Eggs etc.............

Hi Paul

Ignore if you already know, but the cover of Kit Car magazine I spied on Smith's shelf has 'How to paint a Kit Car' amongst its contents.

I take my hat off to the dedication you're showing in body finishing, I'd have got to "That'll do" long ago!

Regards Mick
8 Jun 2017, 6:55pm
Molleur - Cheers. :cool:

Hopefully, the rear light plinths and the bonnet locks are the last of the 'sunny side' modifications required.
( I still need to repair some damage on the underside of the boot at some point. )

- - - - - - - - - - - - - - - - - - - - - - - - - - - - - - -

Mick - Thanks. :cool:

I'll keep an eye out for the magazine, but I can't imagine that my approach is being encouraged. :icon_wink:

I must confess your "That'll do" comment is a timely reminder that I don't need to achieve perfection.

Thankfully, I think the worst of the preparation work is over and I just need the weather to brighten up a bit.

- - - - - - - - - - - - - - - - - - - - - - - - - - - - - - -

Token Gesture:
Only had a chance to work on the car in the evening.

But no sooner had I peeled back the covers and started sanding when it started raining. :rant:


Eventually. I managed to extend the sanded down areas around the rear light plinths.


Unfortunately, the area under the rear number plate plinth will have to wait until I remove the tail pipes.


But that is not happening until I fire up the engine one last time before the car is put on blocks.

I really wanted to get a fresh coat of etch primer around the rear light plinths this evening.
( To check what they look like when everything is one colour. )

However, the risk of rain was too high. :icon_sad:
( It is actually raining again as I type this. )

I've got a meeting in town tomorrow, so I will see if I can squeeze any car work around that.

So until next time, take care, Paul. :)
9 Jun 2017, 5:43pm
Friday - Morning:
It was an early start, but I got some fresh etch primer on the scuttle.


But I realised there were still bits of stopper filler that still needed sanding along the sides of the cockpit.


I also etch primed parts of the rear end.


Which was enough to see that this has turned out better than I expected. :cool:


The boot lid was the last of the etch priming for the morning.


Next up was some normal body filler across the bonnet lip.


And over some of the scars around the bonnet nose.


There was just enough time to sand down the bonnet lip.


By which point I needed to wash all the dust off me and head into town.

End of Part 1…
9 Jun 2017, 5:44pm
Friday - Afternoon:
The clouds did not look very promising when I got back, so I didn't remove the covers fully when I started the engine.


Next I marked up where the bonnet hinges come close to the bonnet.

As the driver's side had very little clearance...


Compared to the passenger side.


I then ran my angle grinder across the filler I'd applied in the morning.


Before taking a deep breath and removing the bonnet.


Which left the front end of the car feeling very sorry for itself.


Unfortunately, at this point in time I was on my own, so it was a bit of a struggle to get the bonnet…

Into the house...


Through the kitchen and onto the patio...


And then down the length of the garden and into the Summer House.
( Which needed a major tidy up to clean enough room for it to fit. )


Then it was time to pack up and head out for an early evening meal with my family. :cool:

So until next time, take care, Paul. :)
10 Jun 2017, 6:35pm
Solid Saturday:
First job of the day was to get some Kurust on any exposed bits of metal from the the bonnet hoop...


And the bonnet hinges.


Then it took two sessions to get some normal body filler around the bonnet opening.


A small batch of fibreglass filler covered a small gap next to the hinge mounts on both sides.


Then it was time to get some high build primer on the back edge of the bonnet.


Note: I think you can see the HUGE drip I left on one of the lock holes from space. :rolleyes:

I also did a couple of test patches on the inside of the bonnet too.


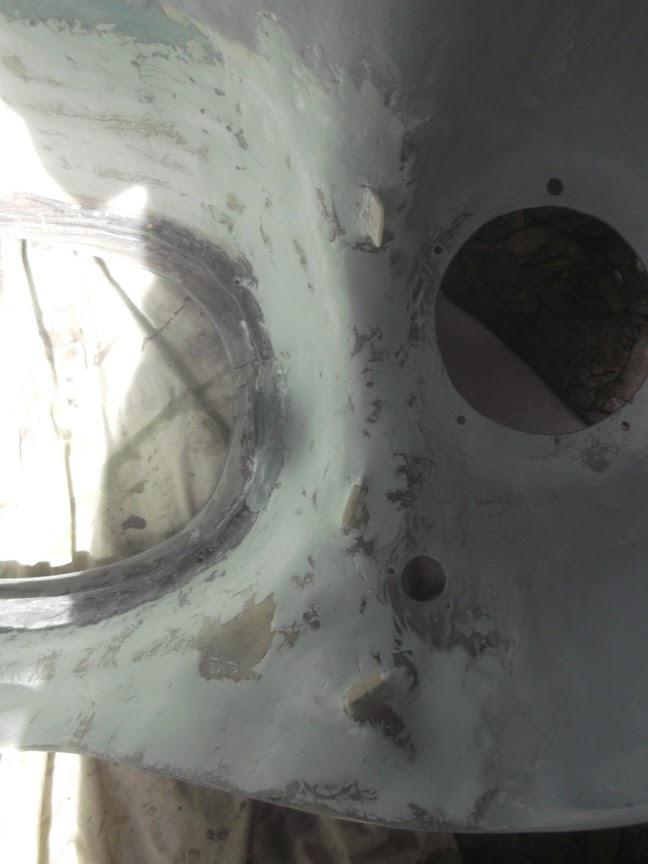
If you look closely at the photo above, you will see the various areas that need another coat of etch primer.

I cut a wire coat hanger in half to hang up the headlight rims so I could do both edges at the same time.


The final area for some high build primer was the boot lid.


I applied some finishing putty to the areas around the rear lights.


End of Part 1…
10 Jun 2017, 6:36pm
Saturday - Part 2:
I ended up spending far too long sanding down the filler on the inside of the bonnet.
( As there was washing on the line, so there was no way I could use the angle grinder for a first pass. )


Unfortunately, I opened up a small air pocket on one of the tabs for securing the wiring loom.

So I had to mix up an absolutely tiny batch of fibreglass filler to fill in the hole.


Eventually I was able to finish getting some etch primer on the inside of the bonnet. :cool:


Preparing this inside surface has taken me a lot of time I wasn't initially expecting, but it was definitely the right decision to do it.

So the plan now is to apply a single coat of high build primer, then a coat of BRG, which I know will highlight the rough finish.

However, if I am actually showing anyone the inside of the bonnet I can talk them through all the work involved in building it.

My last job of the day was to make a start on sanding down the putty on the rear end.


I will finish this another day, as by now it was time to start preparing a BBQ for the four of us. :cool:

If this wind ever drops, I will put up the Circus Tent in the back garden for the bonnet and boot lid.

Until next time, take care, Paul. :)
11 Jun 2017, 6:19pm
Odd Sunday:
Due to a variety of reasons, I had the chance to rack up some billable hours today, so the car work was sidelined a bit.

However, I made an earlier start by moving the bonnet and boot lid out of the Summerhouse and wiping them both down before 9am.


Then I started 'real work' while I left them to evaporate fully and got some more high build primer on mid-morning.

A second (and final) coat on the boot lid, although not much difference to see in the photo.


Whereas, you can definitely spot the difference after the first (and only) coat on the inside of the bonnet.


I must confess, I really like the 'honest', warts and all, nature of the inside of the bonnet. :cool:

I left all that drying while I went back to my laptop.

Unfortunately, there was just time for me to do one other job today and that was to start preparing for jacking up the car.

So I pulled some of my recycled timbers out from behind the summerhouse and gave them a quick trim.


The bottom ones were old roof joists from a local loft conversion and they are firmly nailed together.

So that was it for today, cheers, Paul. :)
11 Jun 2017, 8:21pm
Looking good "One bite at a time"!
12 Jun 2017, 6:34pm
Molleur - Thanks, although I could do with eating a bit faster. :icon_wink:

- - - - - - - - - - - - - - - - - - - - - - - - - - - - - - -

Life Is A Rollercoaster:
Things started off well enough as I wiped down the inside of the bonnet.

As I needed to get the bonnet out of the Summerhouse so I could get the car jack and drag that to the driveway.

I also moved all the wood from the patio out onto the driveway too, at which point I then had a 'brainwave'. :rolleyes:

Rather than start jacking the car at the front, I thought I should start painting the bonnet instead incase it was going to rain.

I painted most of it while it was flat on the lawn...


Before lifting it back up to get better access to paint around the nose.


I then left it back down, to avoid the wind catching it, and removed the masking tape from the edge.
( As I want to paint the edges at the same time as the 'sunny side'. )


At this point I realised that my change of plans demonstrated the fact I am, deep down, 'Biblically Stupid'. :doh:

Remember the last time I didn't leave a long enough gap between wiping the surface down and painting?

Well, apparently, I clearly forgot about this and lightening does indeed strike twice! :rant:

The only good news is that there was only a few small reactions to the paint in a few small areas, the bulk of the bonnet is fine.

But boy was I kicking myself for not sticking to my original plan.

Anyway, I then tried to remember all of the lessons I've learnt from jacking a car up on a slope…

First job was to mark all the wheels, just so everything can go back where it came from.


I then couldn't resist starting the engine at this point and I left it running for a while.


This time I made sure that the wheels stayed on until I was happy that the car was stable.

As it was, this really was a good plan, because I almost had another toppling over incident. :eek:

In the end the rear end in on two sets of blocks at different heights to level the car out.
( Ignore all angles due to the way I was holding the camera compared to the slope of the drive. )


Whereas, the front end is supported by the chassis cross member across two sets of blocks.


Despite what it may look like, the car is as steady as a rock. :cool:

Unfortunately, the suspension allows the front passenger wheel to drop and keep in contact with the ground.


So I needed to jack up the suspension to remove the wheel.

From another lesson learnt, I refitted the wheel nuts, to limit the damage caused to myself.


With the car secure, I could remove the tailpipes.


End of Part 1…
12 Jun 2017, 6:35pm
Monday - Part 2:
By now, the car was looking very sorry for itself. :icon_sad:


The wheels have only got as far as the patio for today.


When I put the bonnet back in the summerhouse, the BRG did make me smile.


Until next time, take care, Paul. :)
12 Jun 2017, 6:37pm
If you used panel wipe you shouldn't get a reaction, it evaporates off in a few seconds. I think the reaction may be from something else.
12 Jun 2017, 8:00pm
Jag - Would you believe I grabbed the white spirits instead of the panel wipe? :doh:

I think I've been out in the sun too long recently. :rolleyes:
12 Jun 2017, 8:06pm
Thats probably what caused the reaction, Put the white spirt back in the drinks cabinet where it belongs.
13 Jun 2017, 4:37pm
Jag - The white spirits are now safely tucked out of the reach of children and stupid people. :icon_wink:

- - - - - - - - - - - - - - - - - - - - - - - - - - - - - - -

Filling The Void:
Latest update from my 'real' work project is that I may be on 'standby' for a couple of weeks. :icon_sad:

Which means I really need to make as much progress as possible while I have time & weather on my side...

Started by sanding down the areas where the paint reacted on the inside of the bonnet.


Ended up getting a bit OCD about this, doing far more than I needed to.

Especially when this is an example of what a 'good' section looks like. :rolleyes:


Amazingly, I actually remembered to use the panel wipe today!

I then covered a much wider area with a coat of the high build primer to 'join up' some of the rough patches.


So it was really only the top and bottom ends that had any problems, a very large middle section was fine.

Back on the front driveway, I removed the petrol cap and taped up the petrol tank.


Then sealed up the boot area again.


I also sealed up the ends of the exhaust pipes.


End of Part 1…
13 Jun 2017, 4:39pm
Tuesday - Part 2:
I started working on the area around the tail pipe cut outs.


Whilst I fully sanded down the body work, I just gave the exhaust surrounds a light sanding.
( As these would actually look better with a bit of wear on them. )


I sanded down the return lip of the rear wheel arches on both sides.


Note:
You can see the dirt clinging to the Tetroseal I used on the inside of the rear arches.
Which ties in with Jag's suggestion for not using it on the the inside of the bonnet.
( Especially as I still haven't fabricated any inner wheel arches for the front yet. )

It may not look it, but sanding back the area around the boot opening represents many hours of hard labour. :icon_sad:


Unfortunately, the sun was beating down on me for most of this time and I'm slightly overcooked.

So I switched to mowing the lawn.


Which will allow me to put up the tent one of these days.

I also moved the wheels from patio to the bottom of the garden.


I've got to head out shortly this evening, so I will carry on tomorrow morning.

Until then, take care, Paul. :)