MadaboutKitcars

This is a read-only archive of the old Madabout Kitcars forum. New posts and replies are no longer possible, but every thread is still here to browse and read.

Another Cordite Is Born ...

19 May 2017, 9:54pm
lancelot link wrote:
Paul ..if you are set on using those latches ..put them as far apart as you can ...


Yeah,

one at one end of the garden and one at the other end lol...
20 May 2017, 6:08am
OK, OK, I get the feeling there is very little love out there for my bonnet latch idea. :rolleyes:

So I'll have another look at how to keep the bonnet from flapping around later today (weather permitting).

Although, I reserve the right to just paint my bathroom locks BRG and fit them anyway. :icon_wink:

Cheers, Paul. :)
20 May 2017, 7:44am
Paul L wrote:
OK, OK, I get the feeling there is very little love out there for my bonnet latch idea. :rolleyes:

So I'll have another look at how to keep the bonnet from flapping around later today (weather permitting).

Although, I reserve the right to just paint my bathroom locks BRG and fit them anyway. :icon_wink:

Cheers, Paul. :)

My 2 cents for what there worth, I would fit the catches wide apart and paint them body colour.
Old race cars were functional, nobody cared if it had chromed wheels, or if there was an odd bit of mesh behind an air intake or vent or if a catch was an ad hoc fix.
British racing green itself was made out of left over military green and black paint. Which varied each time knocked up a batch

So for that authentic - it may have completed the Targa Florio look I would carry on as you have been Paul
20 May 2017, 8:00am
Hmm, some quite unkind comments amongst the helpful ones which is a shame.

Paul, it's your car so build it your way (I know you will anyway).

The latches Lancia fitted look like they came off the inside of a couple of doors in the bagni pubblici at a race track somewhere after the bonnet started lifting at speed -

'Luigi, what're we gonna do about the bonnet lifting at speed?'

'I dunno boss, I go for a crap and have a think about it...'


It's the little details like these that make our cars look more authentic, not less, so just go ahead and fit them, paint them BRG and knock a few chips into the paint where the bolts enter the sleeves.

If you don't like them once you've done that just change them for something else. That's the beauty of building and painting your own car yourself, you're not going to be fretting over damaging your shiny and (justifiably) expensive pro paint job as you know you can touch it up yourself after any changes or damage, just like Lancia, Ferrari, Maserati, Jaguar et al. did at the track side sixty odd years ago, and it'll still look authentic, if not perfect.

If you decide to keep them and they rattle open you could always drill through them and add a securing pin, or go for a spring loaded alternative, like these -

https://www.thehardwarehut.com/catalog-product.php?p_ref=296566

Keep up the good work, now get some paint on it.
20 May 2017, 8:35am
I can see why Jeffy Baby isn't keen , but I agree with Towed's comments above ...zeus fasteners ( probablie spellt rong ) would be the cleanest , easiest route to hold the top down , covered with a strap if deemed too modern , but I don't think they are and painted body colour , virtually invisible .. ...but I don't mind the crudeness of the latch ...for all the reasons Towed said ...the only downside is that people outside of the hobby viewing the car won't ''get it'' and you can't carry a picture of a D24 everywhere ..

Lots of cars from that era are quite basic .....thank god !
20 May 2017, 9:06am
It's Dzus, which is, of course, pronounced 'Zeus' as in the Greek God. They were all over military aircraft from the 50's onwards and work great when they're new. Trouble is that they wear out really quickly - the wire that the 'screw' twists into bends and then they tend to look and feel secure but rattle open under stress. We had more than one panel drop off Jaguars (Sepecat, not JLR) through worn out Dzus fasteners that weren't secure.
20 May 2017, 1:46pm
Paul your car is a semi retired period race car that has seen plenty of competitive use,not a 'trailer queen'. Just do it, as so eloquently put by Towed. Lol
20 May 2017, 1:56pm
Paul space them as far apart as possible, give them a worn patina look then with a splash of paint they will match the look your after.

Good luck matey.
20 May 2017, 2:25pm
Roadster - Cheers. :cool:

Mr T - Thanks and I'm sure there will be an interesting true story behind the D24 bonnet locks. :D

Gary - It is your point about the cars from that era being quite basic that gives me some comfort. :pray:

- - - - - - - - - - - - - - - - - - - - - - - - - - - - - - -

Dark Clouds - Literal and Metaphorical:
This run of rain is seriously getting me down, as I just can't seem to make any decent progress at all. :icon_sad:

So at some point I will try to work on the boot lid independently from the rest of the car.


So my first job was to seal off both the boot & the cockpit.


As there is no way of sanding this corner down without making a real mess.


And this is the area I want to skim with filler after sanding.


This one is for JeffH. :icon_wink:


As by now the dark clouds meant that I couldn't risk starting the filler work and then getting caught in the rain before it set (again).

So the covers went back on the car at the front and I retreated to the SummerHouse, which is a complete mess (again).


I dismantled the bolt locks, sanded them down and gave them a coat of etch primer.
( As if they are going to get used, they will definitely be painted BRG. )


Despite all the gloom with the weather, as least this view of my 'workshop' made me smile.
( As it puts the reality of my facilities and build quality standards into context. )


By the time the rain finally came I'd cleared enough space to store the boot lid for now.
( Further tidying up is required before I will have enough room to do any work in there. )


Since then, the sunshine and showers keep swapping places so often that the day is a write off.

So until next time, take care, Paul. :)

PS
Froggyman & Swifty - Sorry chaps, I only just noticed your replies as I was about to post this update.

So all I can say is thank you both, and everyone else who is still encouraging me towards the finish line. :cool:
21 May 2017, 3:54am
Bonnet Bolts

Roadster wrote:
I would fit the catches wide apart and paint them body colour.l

Yep

Mister Towed wrote:
The latches Lancia fitted look like they came off the inside of a couple of doors in the bagni pubblici at a race track somewhere after the bonnet started lifting at speed -

'Luigi, what're we gonna do about the bonnet lifting at speed?'

'I dunno boss, I go for a crap and have a think about it...'

Ditto.

FWIW I think they're absolutely fine. If anyone comments negatively, just tell 'em to bog off.

Regards, Mick
21 May 2017, 5:48am
Mick - Thanks. :cool:

Your post about some of the issues with your Moss Monaco adding to the "retro charm" also helped. :icon_wink:

- - - - - - - - - - - - - - - - - - - - - - - - - - - - - - -

Saturday Shambles:
A brief burst of sunshine, after I'd already packed up, was enough to tempt me back outside again and so the covers were peeled back.


I decided to use the new tin of filler this time.


But it was a complete disaster and its looks like I've been supplied two duff tins in a row. :rant:

In fact, it was so bad that I actually decided to scrape it all back off again.


By which point I was having a complete sense of humour failure and just covered it all back up again.

- - - - - - - - - - - - - - - - - - - - - - - - - - - - - - -

Internal vs. External Feedback:
Given the complete mess of filler I ended up with yesterday, this part of Mick's reply did make me smile this morning. :D

Mick O'Malley wrote:
… If anyone comments negatively, just tell 'em to bog off...


However, given some of the recent crossed wires over on the Tribute forum, I do want to make one thing clear…

I have been covering my build in great detail for years and all feedback (good or bad) is always welcome here. :cool:

As the help, support, advice and encouragement I have received so far has helped me to create something very special.

I know the 'bathroom' bonnet bolt option is a real 'marmite' one, so I certainly expected the range of feedback to match.

Without a doubt, the standard bonnet pins I have would looked miles better, but I've made yet another school boy error here. :rolleyes:

As I should have sorted out the mounting brackets for those before I re-fitted the heater & dash to the bulkhead. :icon_sad:

Unfortunately, time really is against me if I want to get this car painted in the next few weeks, so I need to compromise and move on.

So unless an alternative KISS jumps out at me in the next few days, the race day pit lane modification story will win the day.

Finally, and again, just to be clear…

I may use some of my extensive range of industrial language on any random stranger with negative comments in the 'real world'. :icon_twisted:

Anyway, today's weather forecast looks promising, so hopefully I will be back later on with more progress to report.

Cheers, Paul. :)
21 May 2017, 7:32am
As you all know, with these cars you can apply to the DVLA to have the name changed on the V5.

Due to the controversial choice of bonnet lock I would like to suggest

"The Bogster"

or

"The Flying Commode"

:icon_twisted::icon_twisted::icon_twisted::icon_twisted::madgrin:
21 May 2017, 9:04am
Paul,

Hard lines with the filler - must be bloody annoying.

For what it's worth I approve of the slide fasteners as they add a touch of unusual detail. Functional with no frills. The swordfish is going to look as you want and built it.

BRG is just right too. When I finally do my Kobra people will hate my colour choice :icon_eek::icon_eek:

Dave
21 May 2017, 6:06pm
Jag - Did you want me to direct some industrial language towards you? :icon_wink:

Dave - Cheers. :cool:

Don't get me wrong, I'd prefer the look of normal bonnet pins, but time is really against me.

- - - - - - - - - - - - - - - - - - - - - - - - - - - - - - -

Sunday Sunshine - Part 1:
I was out in the Summerhouse by 8am, so I wouldn't disturb anyone while doing car work.

First job was to note which way the boot lid locks were facing before stripping the boot lid and bagging the parts.


Then I sanded down and cleaned up the inside surface, as this will be my test piece for painting.


Then brushed on some etch primer.


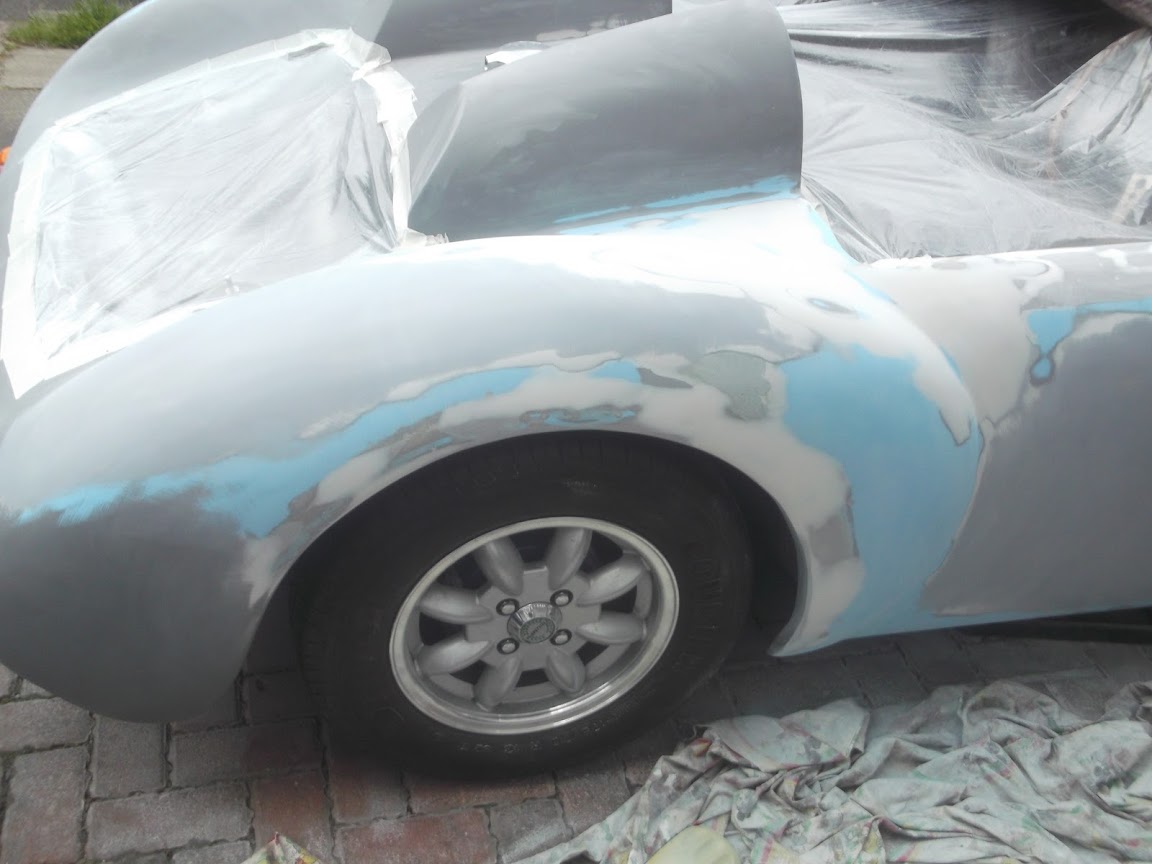
By now it was safe to start working out the front and it was deja-vu time as I sanding this corner down again.


I also sanded down the part of the rear wheel arch on the passenger side.


Put some filler on the driver's side.


And etch primed the passenger side.


First coat of high build primer on the boot lid.
( Not easy to see in the photo, but this is a very light brown(ish) colour. )


The filler was sanded down.


End of Part 1...
21 May 2017, 6:07pm
Sunday Sunshine - Part 2:

I also extended the sanding to include more of the rear arch.


The top edge of the cockpit side was also sanded, but this remains slightly undulating.


Then I rearrange the covers so I could work on the front.


I started my pushing the bonnet strap back into place and marking up for my Union Jacks.


Two small holes later...


So it will sit something like this.


The badges are parallel to the top of the bracket, with is at an angle, rather than the horizon.

Slightly easier to see on the passenger side.


Then it was time for my first bit of fibreglass work in ages...


As I added some extra matting strips to the under side of the bonnet.


While the bonnet was open, I removed the headlight and indicator from the driver's side.


Unfortunately, by now I was knackered and had to call it a day after 8 hours on the car.

Last job was to apply some knifing putty to some pin holes on part of the boot lid.


I am going to experiment with fixing some and leaving others to see what difference the various layers make.

As this is the underside of the boot lid so will not be seen under normal circumstances.

Until next time, take care. Paul. :)
21 May 2017, 6:19pm
5th picture from last, please tell me you're not fitting a toilet roll holder as well:jaw:

Looking so much better, you must be pleased with the results. At this stage I found the "Dolphin Glaze" from UPol very useful, fills those tiny bubbles you get left with. You only need to mix a very small amount, dries very quickly and sands down quickly and smoothly.
22 May 2017, 1:10pm
Jag – Will you behave?

I actually scrolled back through the photos fearing that I’d somehow missed how something else I’d fitted could look so out of place. :rolleyes:

As for my overall progress, I do have some mixed feelings:
- I know the filler work I am doing is improving the worse areas of the body shell/bonnet.
- I also know that whilst I am getting a smoother surface overall, it is still “undulating”.
- I also fear that as soon as the BRG goes on, every imperfection will be highlighted. :icon_sad:

So I can only take comfort from the positive reaction that the car got when in primer. :cool:

Yes, there will be those who will think the paint job lets the car down.

However, I really don’t care what people who know nothing about this build think.

Note: - I don’t want that to sound like I’m happy to be cutting corners within sight of the finish line.

But the harsh reality is that a high class finish requires far more preparation time than I have available.

So I will just have to accept my lot as the inbred Hillbilly cousin of the Sammio family. :rolleyes:

Although I do live in hope that, quite by chance, the car ends up looking it was badly repaired following a big shunt in 1968. :icon_wink:

Cheers, Paul. :)
22 May 2017, 1:27pm
I used a long bed hand sander bought from Ebay for about £10, uses hook & Loop so easy to use.
With 80 and 120 grit it made short work of any section that was undulating or needed blending. I then used 320 for final smoothing using a small head held sander from Ebay for about £15. I also bough a block set, again velcro that has different curvature blocks for smoothing out the curves. As luck would have it the hand held blocks also attached to the little velcro sander so not too much hard work.
I did find it helped to mark sections with a felt tip pen, that way you are sanding a manageable area.
After the 320grit I applied the ReFace and that seemed to cover almost all of the sanding marks.

Yours is looking far better, theres light at the end of the tunnel.
22 May 2017, 6:10pm
Keep up the good work Paul It's looking better with every post.
22 May 2017, 8:19pm
Jag - I have all the manual sanding blocks (no powered tools) and I am slowly getting there. :pray:

Deggsy - Thanks, although the photos make it looks a bit smoother than it actually is.

- - - - - - - - - - - - - - - - - - - - - - - - - - - - - - -

Living & Learning:
Managed to get a bit more done after work this evening, starting with sanding one half of the boot lid.
( The half that had the knife putty applied. )

I am also experimenting on how smooth I sand down this half.


Today's lesson was that you should not apply the high build primer until after the putty work.

As I managed to sand down past the etch primer layer. :rolleyes:

Which meant going back a stage to add some etch primer.
( You can see the colour difference much better in this photo. )


Which obviously ate into the high build primer.


I also sanded the driver's side headlight surround back to bare metal.


Before giving that a coat of etch primer too.


I then moved to the front drive.

Where I had already cleaned down the driver's side ready for some etch primer.


Then using today's lesson I went on a pin hole hunt around the areas I'd previously etch primed.

Obviously, the side of the bonnet I had chopped off, needed more knife putty than the other side.


I also tackled the passenger side of the cockpit.


Finally, I returned to the Summerhouse.

And those of you who are not feeling the love for my possible tribute to the mighty D24, should look away now. :icon_wink:


Then I had to leave everything to dry / set before packing it away / covering it up.

I'm busy tomorrow night, so it might be Wednesday before I can get some more done.

So until then, take care, Paul. :)
23 May 2017, 5:21am
Wavy Line Body

Paul L wrote:
I also know that whilst I am getting a smoother surface overall, it is still “undulating”.
My A352 has a far from perfect surface. In fact, being honest, it's a bit rubbish, especially where I glassed in the original bonnet - the worst bit is right in my eye line as I drive. However, the overall look of the car has jaws dropping, and a knowledgeable guy I was chatting to at a local classic meeting on Sunday thought it was aluminium!

If anyone comments on that aspect of its appearance I'll just say it's from where I hit a dog on the Mulsanne Straight :)

As has been said many times, your build only has to please one person. Keep up the good work!

Regards Mick
23 May 2017, 6:33am
Mick's absolutely right - just have a close look at the cars in the pits at Goodwood Revival and you'll see lots of dented and distorted panels and imperfect paint finishes. Step back a couple of feet and just look at the cars though and they are just fantastic.

They were, after all built to do a job: to win races, not to win concourse events.
23 May 2017, 9:31am
Given that these cars are all about theatre, I have considered glassing-in a fake dent.....after all aluminium dents, GRP doesn't.
23 May 2017, 2:33pm
Mick, Mr T & Oxford - Thanks chaps. :cool:

I've spent a long time on this build convincing myself that a 'rough and ready' race car look would be good enough for me.

So now that I am finally getting close to paint, I just need to keep the faith with this idea and pick my battles.

Going back through old build threads, I was reminded of this great post about a less than professional finish…

Mister Towed wrote:
So, that's another couple of hours spent smoothing down the little blobs of knifing putty.

I've found that there are a couple of areas, on the rear wings especially, where I've damaged/altered and repaired the body and I've left ripples and dints that I just don't have the skill (or patience) to get straight, so they'll have to stay. :(

There is a danger though, that the finished result is going to look like a 60 year old race car that's had a hard life on the track and been damaged and hastily repaired in the paddock occasionally in its past. :ohwell:

Hang on a minute... :icon_cool:


- - - - - - - - - - - - - - - - - - - - - - - - - - - - - - -

Bonus Session:
Went into central London for a meeting, only to find I'd been 'stood up' due to illness, which was a big waste of time.

Still, at least I got an unexpected slot for working on the car that I tried to take advantage of…

The boot lid was sanded down and given another coat of high build primer.


Then I switched to the front drive to sand down the knife putty applied yesterday.

I also started sanding down the area around the driver's side headlight/front wheel arch.

Unfortunately, at this point it started to rain, so I just dropped what I was doing and got the covers on.

Although I did manage to take a few photos first.


Note: I need to do a bit of remedial filler work around the fixing points for the front indicator.

Slowly, but surely, more of the car is reaching this first stage of prepping for paint.

Given it was a bonus session, the fact it started to rain didn't seem to bother me.

So until next time, take care, Paul. :)

- - - - - - - - - - - - - - - - - - - - - - - - - - - - - - -

Manchester Attack:
With two teenage daughters of my own, my heart goes out to everyone who suffered in this attack. :icon_sad:

I've also taken my children to concerts like these and, more recently, been standing outside waiting to pick them up.

My girls will be taking their A levels and GCSEs next year and that is one of the main reasons the car needs to be painted now, or never.

As I want to use my spare time next year to support them, not crawl around on the ground sanding places no one will see!

"Let's be careful out there."
23 May 2017, 8:16pm
Keep plugging away Paul you will reach a finish you are happy with and at the end of the day it's your car/creation which no matter what will put a smile on both your face and countless others.