MadaboutKitcars

This is a read-only archive of the old Madabout Kitcars forum. New posts and replies are no longer possible, but every thread is still here to browse and read.

Swifty's Navigator

7 Dec 2014, 9:18pm
Finally managed to get into the garage to do some work with the heater on.

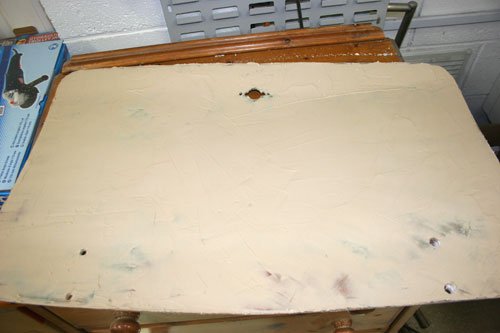
Started with the boot lid making sure the rubber seal is compressed slightly all the way around, there was a few areas where daylight could be seen so these areas were built up with fiber filler then rough smoothed to check again, once i was happy it was time to cover the whole inside boot lid surface with body filler to hopefully give a smooth surface.
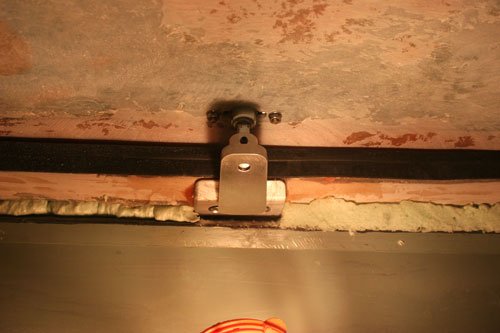
IMG_4886.jpg


View from inside the boot of the latch and striker plate.


Attachment “IMG_4887.jpg” from the original forum could not be reliably recovered.
IMG_4891.jpg


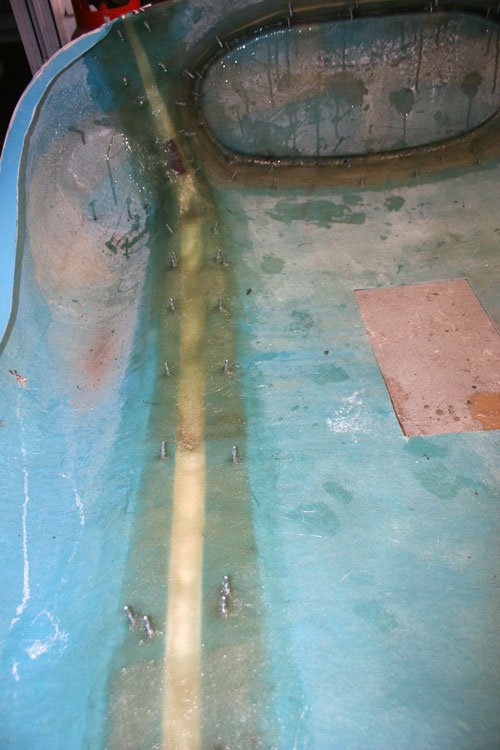
First image shows the rough fiberglass surface and the second is with a coat of body filler, just need to sand it down.

IMG_4885.jpg


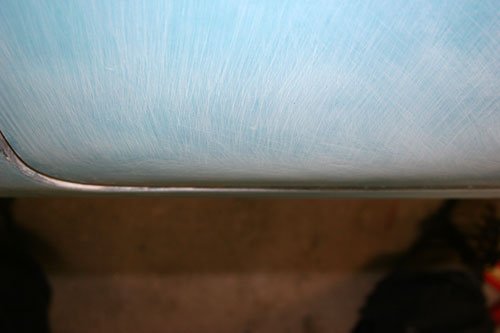
After fitting the lid there are a few areas on the outside that need building up to the level of the body, will use fiber filler then body filler with the lid in position to gauge the correct alignment and height.


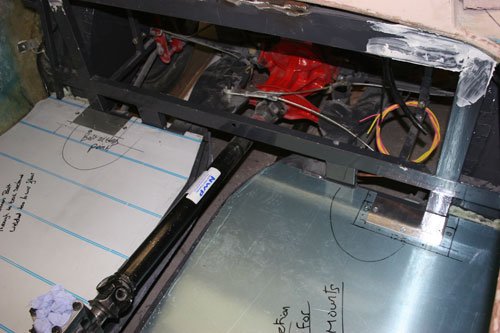
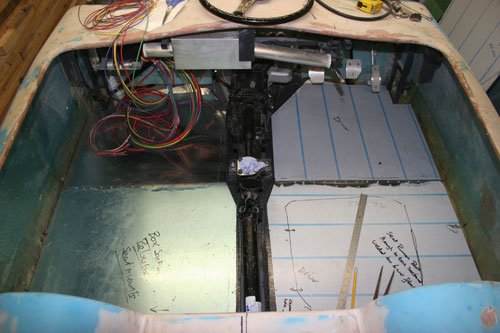
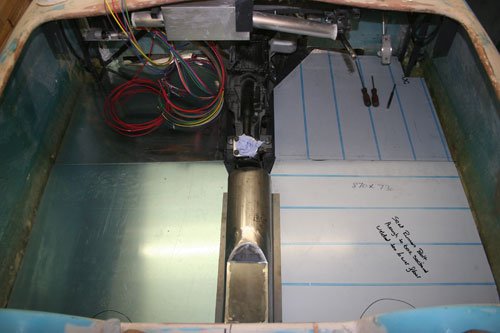
After leaving the body filler to go off i moved on to the floors. Cut these from 3mm ally sheet to a rough shape, all of the cut edges will be hidden by the interior trim.
IMG_4892.jpg


There's a sheet of 2mm steel welded to the bottom of the sub frame i made then sealed around all edges and finished off with etch primer and top coat to match the grey chassis colour.
The ally sheet sits on top the sub frame with box section welded to the 2mm steel plate in the area's where the seat mounting brackets will be, i will then be able to pick up the seat mounts through the ally plate into the box section below for a good sturdy fixing, probably use rivet nuts welded in place for extra security.

Well that's it for now see you all soon.
8 Dec 2014, 12:24pm
Swifty - Looks like you are making really good progress. :cool:

How did you get that photo of the inside of your boot?
( As I thought you had already finished the panelling. )

Good luck, Paul. :)
8 Dec 2014, 6:37pm
There no grass growing on you Paul LOL

I persuaded my youngest daughter to lye in side with the boot lid closed, no just kidding i would be up for child cruelty with that one.

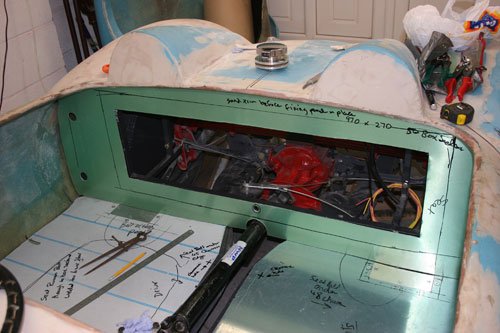
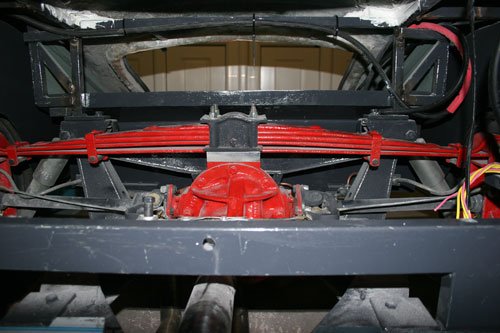
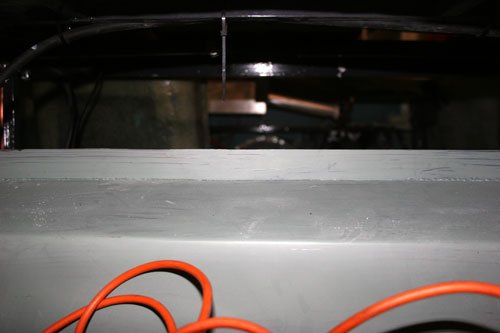
I have made the frames etc so that there's removable inspections panels, one behind both seat's to gain access to the tank and sender (the gap is large enough for the tank to fit through in case it needs to be changed in the future) and another at the back of the boot panel top to gain access to the leaf spring etc as i have been led to believe the leaf spring anchor bolts have a habit of loosening off plus it's good for future maintenance.

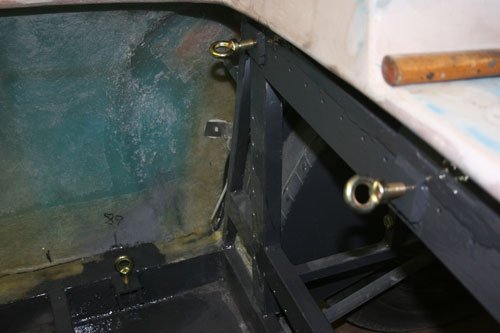
The original photo in the previous thread was taken from the cockpit area through where the fuel tank will be bolted in, here's a photo of the area concerned.

IMG_4894.jpg
IMG_4893.jpg


The first image is looking through from the cockpit and the second is looking through from the rear of the car towards the cockpit where the inspection panel will go.

While i am talking about inspection panels i have made two small bolt in panels to go in either side rear floor panels where the rear trailing arms bolt to the sub frame, this i thought would be handy for future rear wheel toe set up, will post pictures once they are fitted.

Well that's it for now see you all soon.
13 Dec 2014, 10:13pm
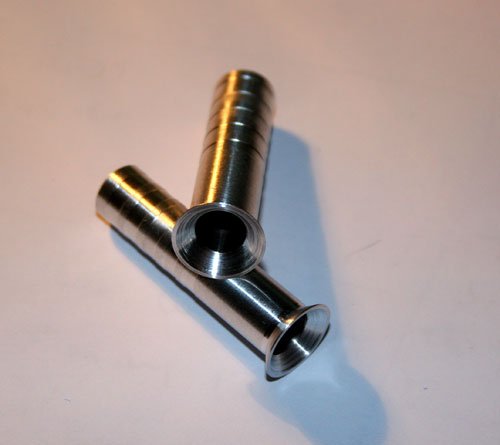
Not a great deal done just made a couple of ally drain plugs for the boot gutter, will fix them into position with fiber filler or bonding paste.

IMG_4896.jpg


Also finished the inspection panels in the floor to gain access to the rear track control arms.

IMG_4901.jpg


Photo of the floor underside.


IMG_4902.jpg


Top shot with the panel removed, you can see the two nut heads which hold the track control arm onto the sub frame.


IMG_4903.jpg


Panel held in place with 3 6mm counter sunk allen heads.


IMG_4904.jpg


Both access panels fitted.

That's it for now see you all soon.
14 Dec 2014, 8:04pm
Swifty - I'm lovin' the drain plugs. :cool:
14 Dec 2014, 9:47pm
Cheers Paul

Finished the pedal box and the floors today then moved onto the rear back panel.

IMG_4906.jpg


Floors fitted into position pop riveting them together with angle line for strength, only have to finally fasten them to the sub frame i made, they are made from 3mm ally sheet with steel box section in place underneath which i intend to pick up with the seat mount bolts. The pedals now sit at the right height for the floor I've fitted which is higher than if i had used the standard sunken floor panels.


IMG_4905.jpg


Rear panel cut to size, made a cardboard template first then transferred to the 1mm ally plate, used 1mm as it's very easy to work with and flex into place as i wanted it to be in one piece but to follow the shape of the body. Once i am happy it will be pop riveted in place with polyurethane sealer around the edges. The removable panel will have the edges folded over to add strength as it too is made from 1mm ally sheet.


Looking at various ways to hinge the bonnet and i think i will make a couple of mount brackets out of ally to fasten to the front chassis rail then fabricate a tubular frame to carry the whole bonnet, hopefully the tubular frame will add strength to the flimsy bonnet, i might have this started over the xmas hols.

Well that's it for now see you all soon.
20 Dec 2014, 8:19pm
Made a little more progress today.

Sprayed the back of the seat's rear ally panel with etch primer before fitting to the sub frame also etch the underside of the ally floor panels.

IMG_4916.jpg


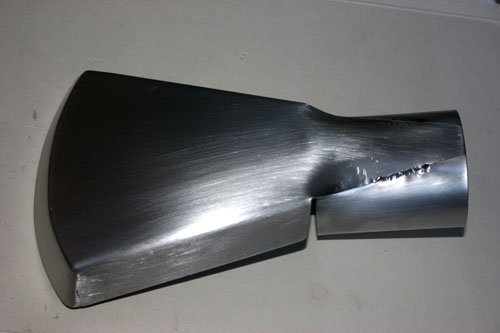
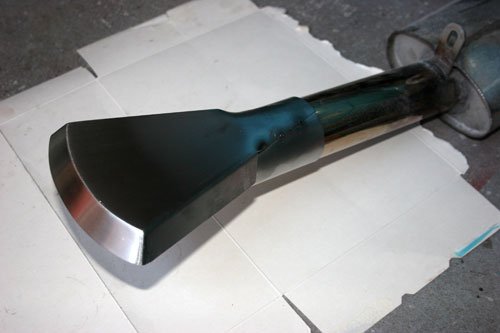
Then made a fan exhaust trim out of 1.5mm stainless steel, first i made a drawing on cardboard then cut it out stuck together with sellotape and folded to shape to make sure it looked ok and transferred the template onto the stainless sheet. Cut it out by hand and tig welded the seams, the sides and end plate are angled slightly out over so the end plate was separate from the main body so more careful tig welding so as to give a smooth edge all the way around. Gave it a brushed finish with 180 grit wet and dry followed by a rub over with a scouring pad, the 60mm id tube was rolled by hand using a piece of 40mm od bar as a former.

IMG_4912.jpg
IMG_4915.jpg


The second image shows the fan trim fitted to the single exhaust pipe, i may not use it if i decide to fit twin tail pipes but will wait and see how it looks.


IMG_4909.jpg
IMG_4910.jpg


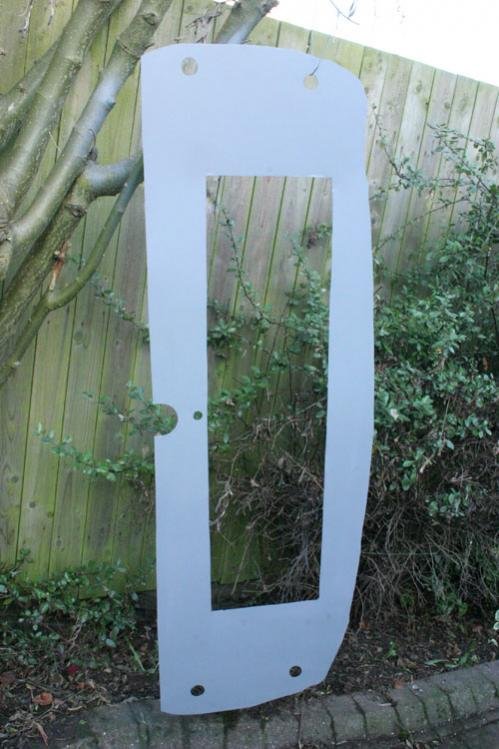
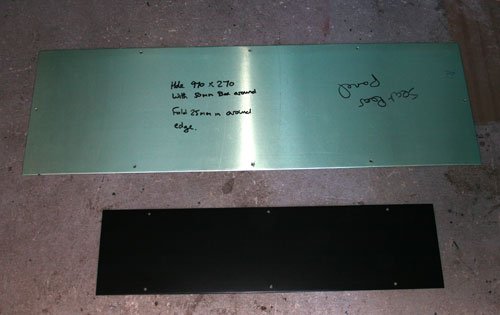
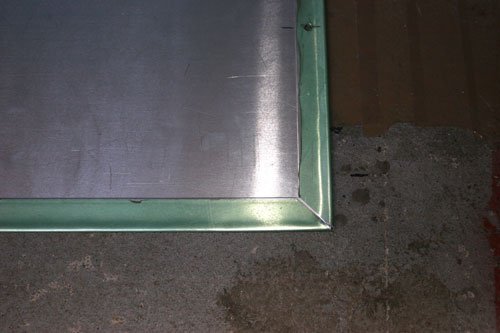
Made two covers out of 1mm ally sheet, the large one goes behind the seats to cover the tank inspection access and the black one is for the back of the boot to cover the suspension access point. The edges have a 25mm fold which stiffens the 1mm ally sheet and also gives a better edge to bolt through.


Well that's it for now see you soon.
21 Dec 2014, 7:32pm
The weather was pretty good up here for this time of year so i decided to make a start on cutting the bonnet up, had to push the car outside to be able to see what was required plus cutting outdoors keeps the dust down in the garage.

After looking at what Viatron and Paul have done to their bonnets i followed suit in much the same manner.

IMG_4929.jpg


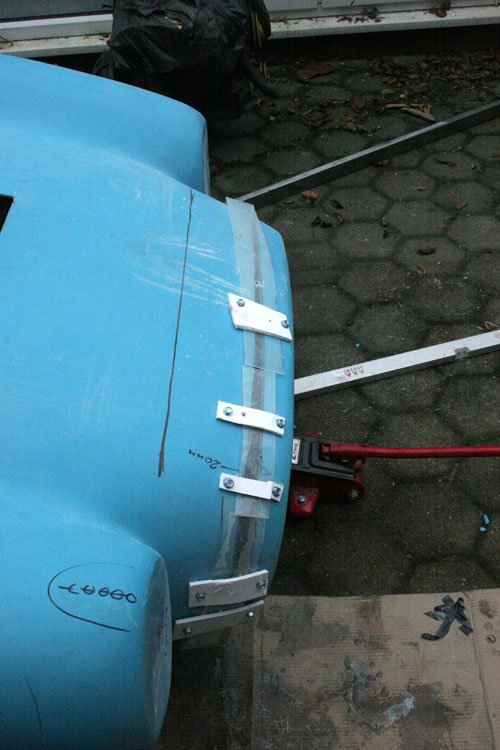
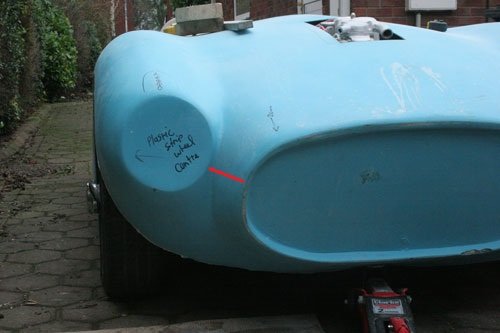
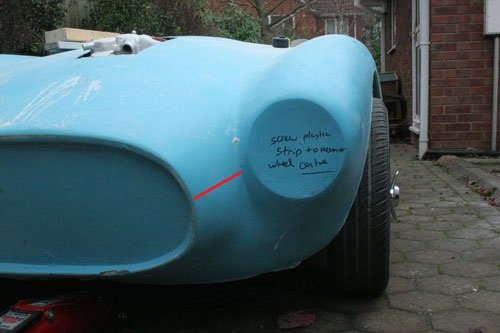
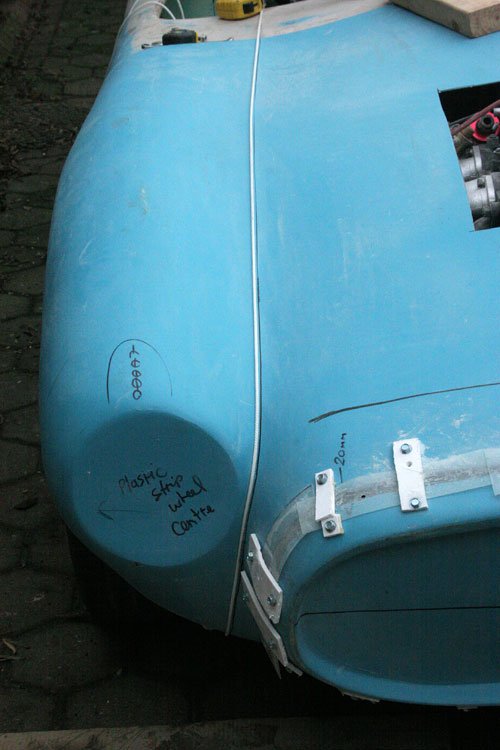
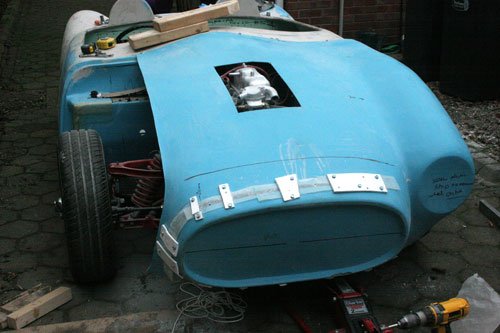
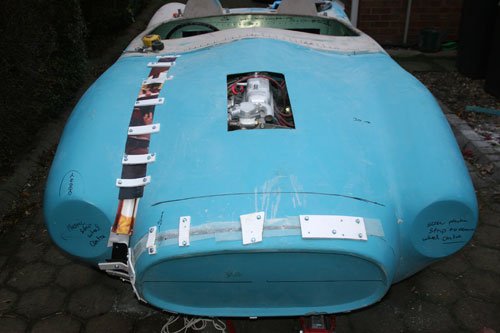
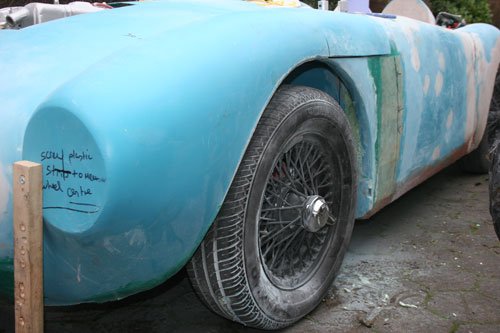
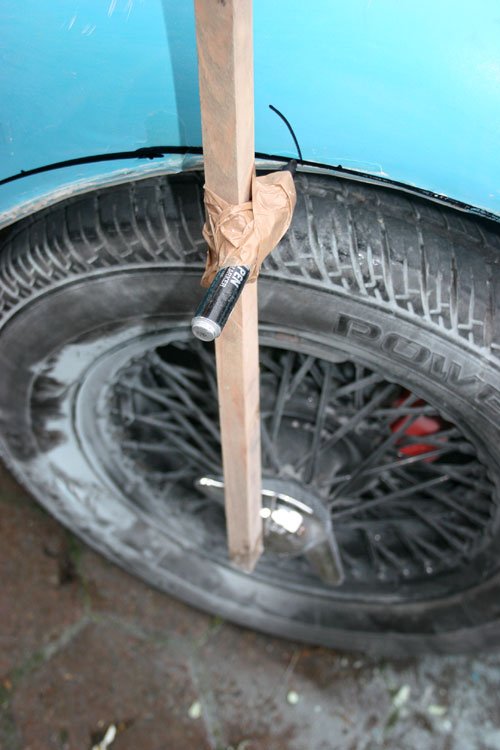
Cut the front nose section on the offside and moved the front part forward by 20mm which has brought the nose parallel with the front wheel hubs, i used the wheel hub center for a datum then bridged the gap ready to glass over.


IMG_4925.jpg
IMG_4924.jpg


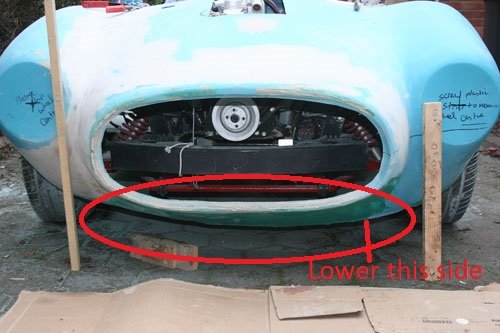
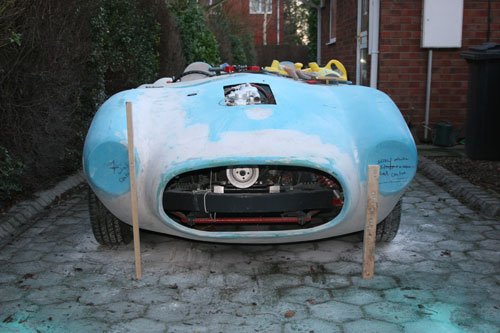
These images show just how much the wheel arches are out in relation the tyres but also the distance between the light housing and the oval grill aperture differs, i've added a couple of red lines to show what i mean.
With this in mind i decided to cut the offside arch off then move the bonnet over to cover the nearside wheel, the extra distance created should make the headlight to oval nearly the same on both sides give or take a couple of mills.

IMG_4931.jpg


Used a weighted piece of string as a guide to mark the cutting line onto the bonnet.
21 Dec 2014, 7:39pm
IMG_4934.jpg


It looks worse than it is with the wing cut off, its just as well the kit was not an expensive one otherwise i think i would be thinking twice about cutting lumps off.

I screwed the chopped bonnet to the bulk head after cutting the bonnet where it meets the bulk head, by screwing it in place it was easier to re attach the offside wing while balancing the front on a trolley jack.


IMG_4935.jpg


Wing back on ready to glass over.

IMG_4936.jpg


Gap glassed over so will leave it a day or two as the temperature is low at the minute so the glass takes that little bit longer to go off.


IMG_4918.jpg


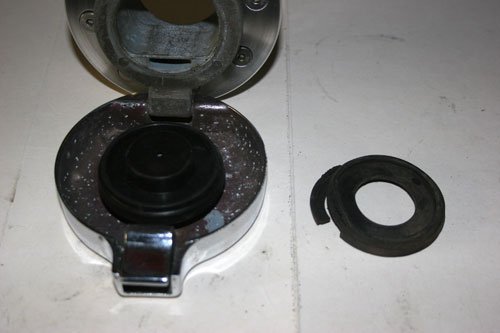
Fitted a new rubber seal to the original triumph petrol flip cap.


Well that's it for now see you all soon.
21 Dec 2014, 8:08pm
I applaud all of the work that you are doing to do a quality build and correct the body. You'll have a special piece in the end.
21 Dec 2014, 9:01pm
Tony
Interesting that you seem to have had to widen your bonnett more than Paul or I have? But by the sae token seeing others follow the same route at least reinforces how much some bits are off! As you say good job it's not an expensive kit! I think it was Paul who said that if Sammio had still been going when he looked closely at his body he probably would have returned it under the sale of goods act!
Keep at it
Mac
21 Dec 2014, 9:02pm
Actually..scrub that I've just looked again and it looks about the same
Mac
23 Dec 2014, 9:20am
Swifty - Great job on the bonnet. :cool:

( As it's Christmas, let's just gloss over why such wholesale butchery is required in the first place. :icon_wink: )

Looking at your "nose job", I think I might try to copy that approach myself.

What sort of bonnet scoop design are you planning?

Good luck, Paul. :)
24 Dec 2014, 7:10pm
JMC14 Thanks for the comment it's now becoming one of those projects that i keep thinking while i am at this stage i'll just do another slight mod to the body which goes on and on especially due to the poor alignment issues.

Paul Thanks, i think the scoop will more than likely be curved to match the body shape but to be honest i may change my mind as time goes by as i make it up as i go along.

Did a little more to the bonnet mods today before the xmas celebrations begin.

IMG_4937.jpg


A before i start to fill in the gap photo.

IMG_4942.jpg


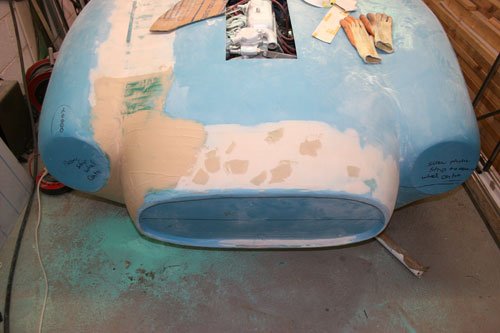
Filled in the gap with fiber filler to get a rough shape.

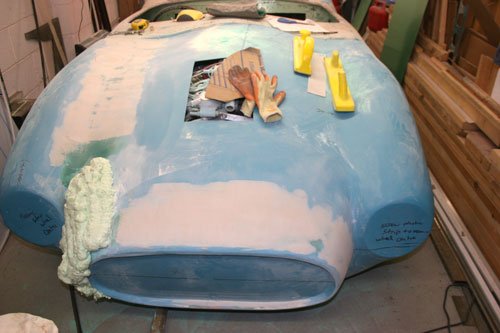
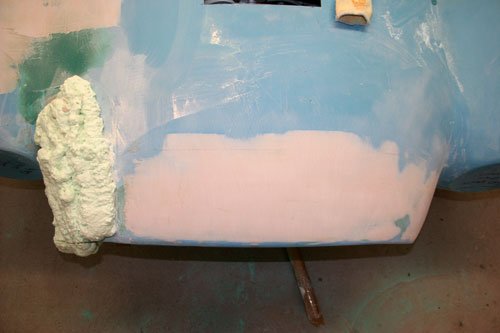
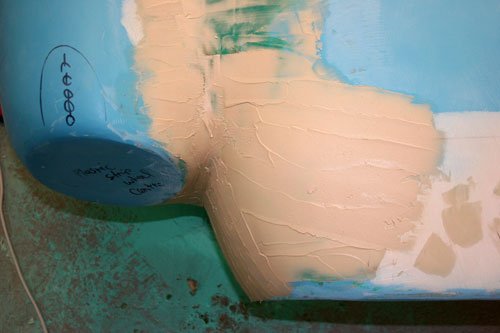
I made a card borad template of the nearside bonnet edge to compare with the off side which is a mile out and decided to cover the area in expanding foam as i did on the rear wing.

IMG_4940.jpg
IMG_4941.jpg


You can see in the second photo the difference between the two sides which i felt was unacceptable to leave as is. The gap i felt was a little too large to fill just with fiber filler so i used expanding foam, once the foam goes off i'll shape it then cover with fiber glass matting before finally blending in with body filler to match the nearside.

IMG_4943.jpg


Fiber filler roughly sanded ready for the body filler to be applied.
24 Dec 2014, 7:15pm
IMG_4946.jpg


Body filler applied and smoothed over ready for the under coat, hopefully in a couple of days the foam will of fully cured so it can shape to match the nearside and blend the whole area in.

IMG_4944.jpg
Attachment could not be found in the archived database.


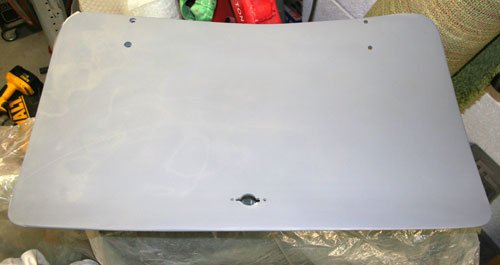
Also finished filling and sanding the internal side of the boot lid and gave it a quick coat of under coat, i think you'll agree it now looks better than it did as the rough fiber glass surface.

Well that's it for today and it's time to settle down before the big guy in red arrives tonight.

See you all soon and i hope you all have a good Christmas.
26 Dec 2014, 10:47am
Swifty - Your bonnet is starting to shape up nicely. :cool:

Plus your boot lid now looks the part too.

Good luck, Paul. :)
27 Dec 2014, 6:21pm
Made a little more progress with the bonnet mods and started the interior side walls while the filler etc was going off.

IMG_4949.jpg


Started by cutting the foam back with a hacksaw blade to an under size shape to match the opposite side.

IMG_4950.jpg
IMG_4951.jpg


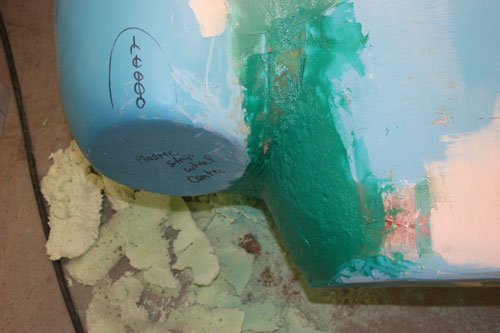
Foam shaped and a layer of fiber filler applied to fill any air holes and seal the foam surface before two layers of fiber glass mat was applied for strength, the remnants of the shaved foam are on the floor.


IMG_4952.jpg
Attachment could not be found in the archived database.


First layer of body filler applied which i will sand back tomorrow. The second image shows just how much the bonnet profile/alignment was out.

I've also noticed that the front valance is not symmetrical so this area may need a little attention but will take a better look tomorrow outside in daylight.

Well that's it for today off out for a few beers now, see you all soon.
29 Dec 2014, 8:10pm
The weather out side was -2 today with clear blue sky, i needed to do some welding and cut the bonnet so decided to push the car outside to tackle the jobs while there was no rain or snow and i can say it was brass monkey weather and i don't envy Paul L in any way having to work outside he must have excellent thermals.

IMG_4954.jpg


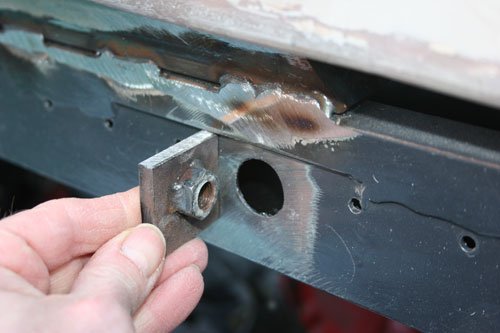
Welded the seat belt mounts into position before the ally panel is fitted to the rear of the seat area. Made from 6mm steel plate with a nut welded to the reverse side, the plate was tapped in line with the nut threads for a secure mount.


Finished the front nose alignment but will cut the lower valance once i have the hinge brackets in place to see how much clearance is required to hinge the bonnet up. With this in mind I've now moved onto the sides.


Attachment “IMG_4962.jpg” from the original forum could not be reliably recovered.


I did have the front balanced on a jack but after a lot of swearing i decided a more secure way would be to screw two bits of wood to the headlight mount area. First i marked the center of each light then positioned the bonnet at the height i think is ok and measured from the floor to each light center datum point to make sure they were equal then screwed the wood in place, hey presto the bonnet now stays in place.

IMG_4956.jpg


Once the bonnet was position i used a spirit level to mark a line across to the top of the wheel arch and cut the lower arch off. I had the top lip of the bonnet screwed to the bulkhead to prevent it moving.


Attachment “IMG_4965.jpg” from the original forum could not be reliably recovered.


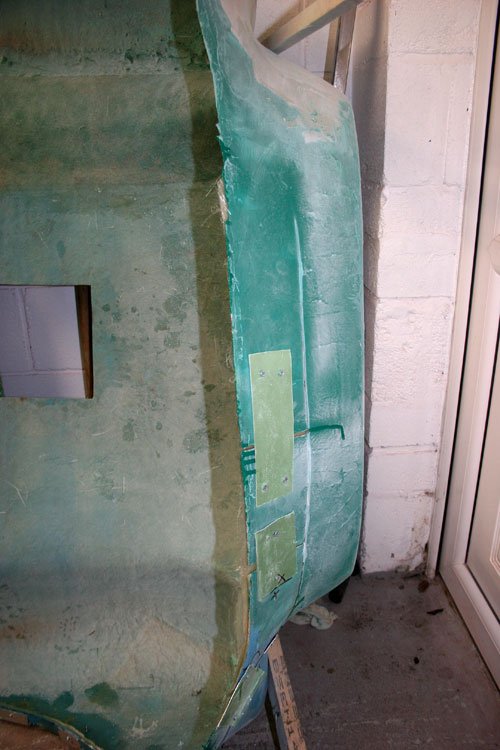
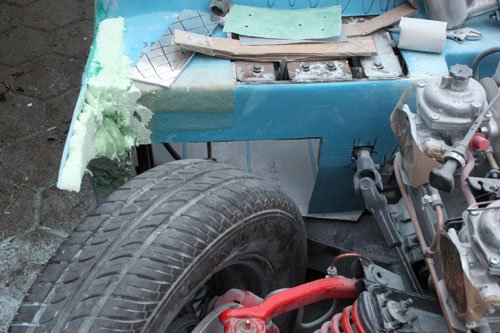
I am using the fiber glass section cut out to fill the side of the bulkhead, made a small bracket to both strengthen and act as a spacer guide and temporary fitted two ally plates down the outside.


Attachment “IMG_4966.jpg” from the original forum could not be reliably recovered.


Then back filled the void with expanding foam, once this has cured ill shaped it back and fabricate a 3mm ally plate section for the top surface for the bonnet to drop down onto and to fasten the locator pegs i made some months back.
29 Dec 2014, 8:18pm
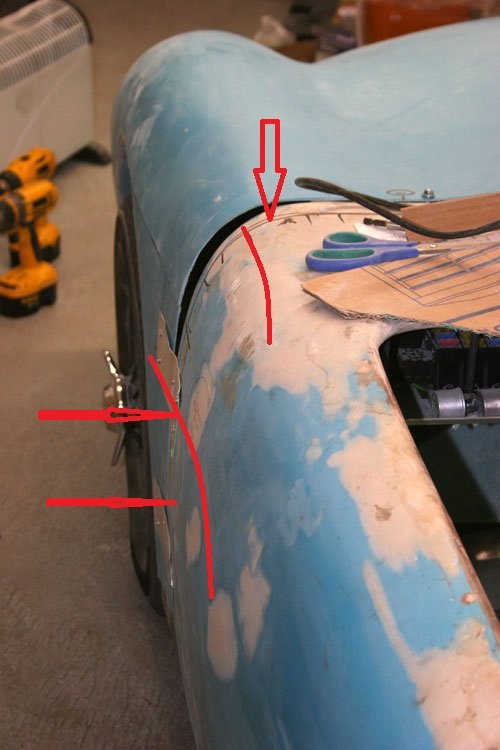
When viewed from the rear the nearside of the shell curves inwards at the point where the bonnet starts so my intentions are to build this area out over so that it replicates the offside as near as possible plus it will look more stream line.

IMG_4959.jpg


I've tried to show what i mean with the curved red lines. It's more work but while i am at this stage it is wiser to align the body now.

Attachment “IMG_4963.jpg” from the original forum could not be reliably recovered.


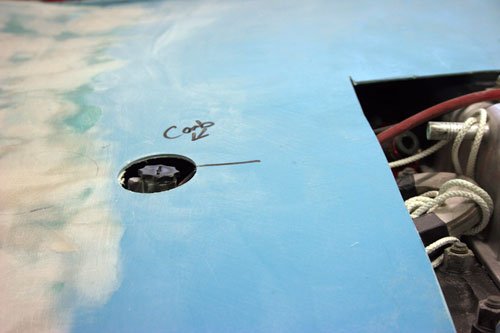
It now look's like i will have to add another bulge to the bonnet as the front carb dash pot touches the bonnet, it's roughly where the black cross is to the left of the main cut out.

Well that's it for now see you all soon.
30 Dec 2014, 9:09am
Swifty - I know you are putting in a ton of work to get the bonnet & bodywork right, but it looks like it will be well worth it. :cool:

Good luck, Paul. :)
31 Dec 2014, 10:04am
swifty wrote:

Attachment “IMG_4963.jpg” from the original forum could not be reliably recovered.


It now look's like i will have to add another bulge to the bonnet as the front carb dash pot touches the bonnet, it's roughly where the black cross is to the left of the main cut out.


That opening in the bonnet looks like it will take a Lancia D24 style scoop perfectly -


Put a bulge or small secondary scoop over the dashpot and it'll look convincingly 50's race developed. :)
31 Dec 2014, 8:04pm
Mr T Cheers for the photos, i'm still out on what the finished car will resemble.

Did my last mods on the car for 2014 and worked out side most of the day as the temperature was relatively high and i had a bit of cutting to do.


IMG_4968.jpg


Hole cut for the carb dash pot to poke through slightly, its not much but i'm trying to make the bonnet line as low as possible at the front nose.


IMG_4974.jpg
IMG_4975.jpg


Both side panels are now glassed in to position and bonnet trial fitted to see what it looks like. Side straps will help to pull the bonnet edges in plus i have a couple of locating pegs to fit to aid alignment.

IMG_4977.jpg
Attachment “IMG_4982.jpg” from the original forum could not be reliably recovered.


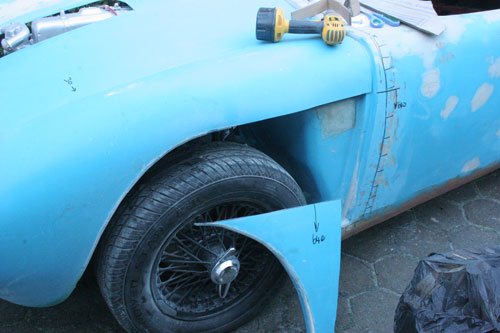
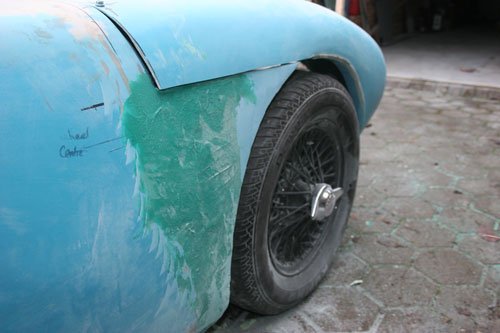
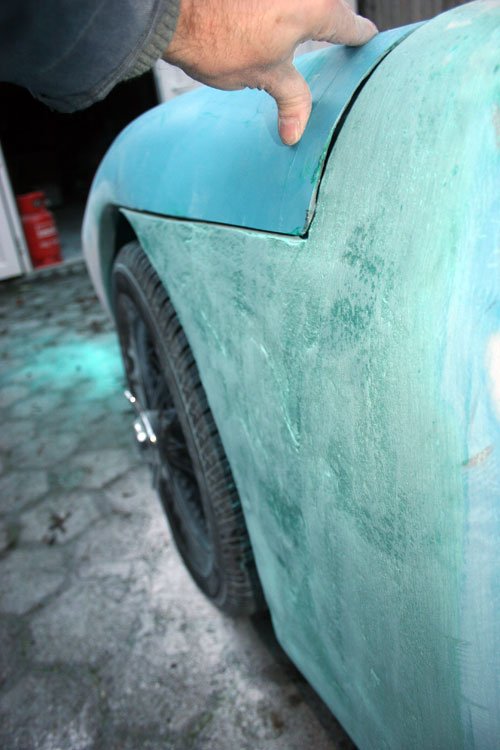
Moved my attention to the front wheel arches which are all over the place so i decided to cut them up and reposition before glassing over.
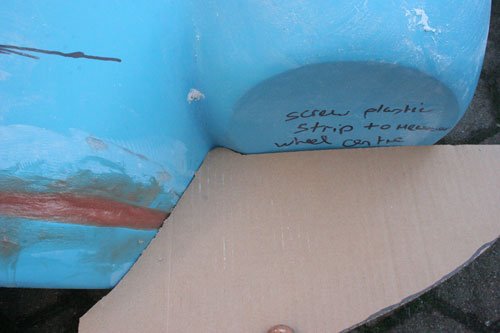
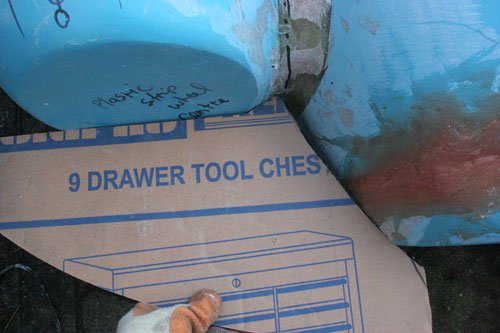
Used a marker pen taped to a piece of wood rotating from the wheel center point, a bit Heath Robinson but it works.

Off to have something to eat now so will post part two of today's mods.
31 Dec 2014, 8:45pm
The front valance was lower on the nearside which looked out of balance so i decided to cut it up and re glass the area to give a more balanced looked.

IMG_4979.jpg


IMG_4983.jpg


Made a few cuts through the glass fiber and some cuts not all the way through but just enough to allow the fiber glass to bend, then held together with ally sheet before glassing over the inside.


IMG_4970.jpg
IMG_4972.jpg


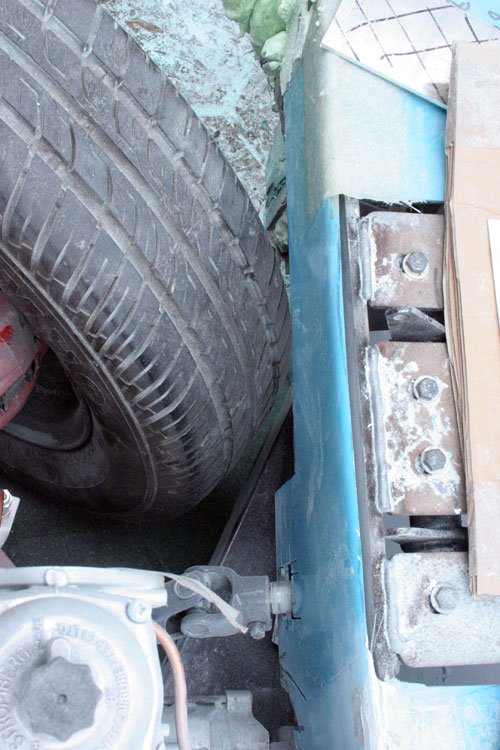
Next was to remove the front part of the bulk head where the tyre's fowled on full lock. My intentions are to panel this area in ally sheet creating a recess to clear the tyre's. The second photo shows just how close the tyre's are to the chassis.


IMG_4987.jpg


The seat belt anchor points are finished, i did manage to use the original inside mounting holes so in total i have four mount points per seat.


Well that's is for now and i wish you all a Happy New Year.
1 Jan 2015, 4:41pm
Swifty - Wow! You really are flying through the bodywork issues now. :cool:

It is great to see how you (& Mac) approach fixing these things, as it gives me lots of ideas.

Good luck, Paul. :)
2 Jan 2015, 8:57pm
Paul Thanks, i am trying to have the car finished this summer if possible so are taking every opportunity i have to work on it.

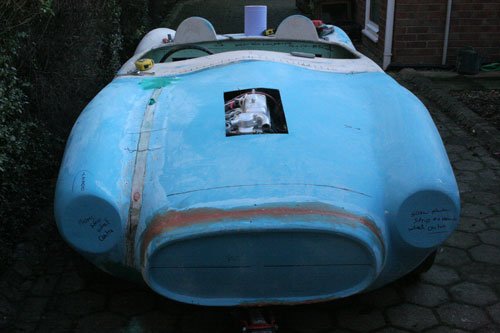
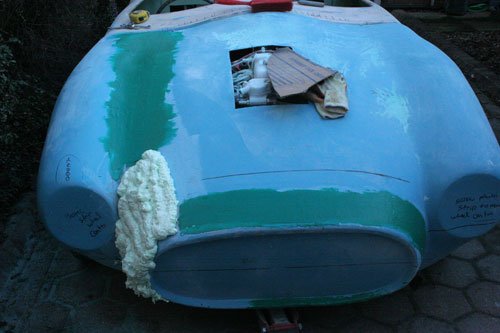
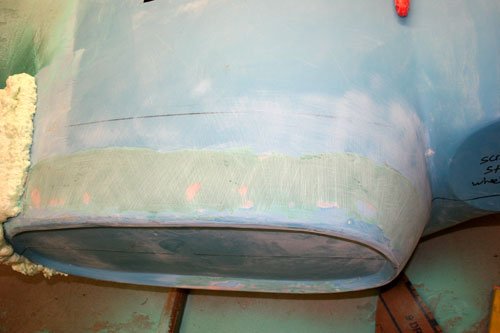
Finally finished the front nose and valance area mods which have turned out ok.

IMG_4993.jpg


My next mod is to try to blend the top edge of the bonnet curve to match the bulkhead curve, the reason it doesn't match is because i moved the bulkhead curve in to the center of the car as it was originally over to the nearside which looked out of balance.


Attachment could not be found in the archived database.


This image was taken some months ago when i removed the glass fiber curve before re glassing and blending into the center of the car.


Attachment “IMG_4998.jpg” from the original forum could not be reliably recovered.


You can see how far the two edges are out with one another, this i think may be a bit of a challenge to complete as there are curves running in two directions on the bonnet in the area that requires re shaping so it may be a bit of a challenge.


IMG_4990.jpg
IMG_4991.jpg


The edges of the side panels are beginning to take shape and match up to the bonnet lines, i will be holding the bonnet down on the sides with a couple of leather straps for good measure. Before i finished tonight i gave the two side panels a final covering in fiber filler to level the surface's out before rubbing over and applying a thin layer of body filler tomorrow.