This is a read-only archive of the old Madabout Kitcars forum. New posts and replies are no longer possible, but every thread is still here to browse and read.
Or could you just rivet a piece of thin Ally over the whole sill, granted the rivets may be visible but you could make a feature of them, i.e. a circle of rivets around each opening but at least it would draw the eye less?
Obviously use a PU adhesive or similar to seal all the way around.
WCA, can you lower the rear end a bit? - Already scraping the exhausts on the bumps, perhaps bigger tyres?
access to the back of the holes - No real access as it is basically a box girsder. I can poke sticky tape through the holes and try to get it to stick but that is about as good as it gets.
P40 - If I get the tape stuck to the back of the holes and then fill with P40 is there much likelyhood of the P40 shrinking back or working loose over time?
rivet a piece of thin Ally - Possible but I would prefer to simply fill the holes rather than cladding it and then trying to blend the edges and hoping the panel doesn't work loose.
WCA, can you lower the rear end a bit? - Already scraping the exhausts on the bumps, perhaps bigger tyres?
access to the back of the holes - No real access as it is basically a box girsder. I can poke sticky tape through the holes and try to get it to stick but that is about as good as it gets.
P40 - If I get the tape stuck to the back of the holes and then fill with P40 is there much likelyhood of the P40 shrinking back or working loose over time?
rivet a piece of thin Ally - Possible but I would prefer to simply fill the holes rather than cladding it and then trying to blend the edges and hoping the panel doesn't work loose.
I would have thought the ally skin would be the easist. Personally I would go to a local sheet metalworker and get them to make up a simple sheet with a return lip at the bottom edge. I would then glue it on with something like tiger seal (it will never come off).
Mucking about with all those holes filling and flattening sounds hard work.
I would have thought the ally skin would be the easist. Personally I would go to a local sheet metalworker and get them to make up a simple sheet with a return lip at the bottom edge
Unfortunately the side of the car isn't straight so there would need to be a slight curve along the length (not fixed radius) and there is a diagonal kink near the front.
The side profile also starts vertical and then bends under at around 40 degrees before flattening across the bottom. This means the return lip would need to be about 5cm.
I think getting a flat plate to fit that would be possible with enough clamps to hold it in place while it stuck but to do this with a sheet with a deep return would be more difficult.
Also, P40 and sandpaper keeps the price down and hides the receipts from MrsWCA ;-)
Why not use a piece of Conti-board (with a border around it) to laminate a strip of GRP which can then be stuck on with Tigerseal or other PU? The GRP will bend to where you need it to go to some extent.
other alternatives is to paint the seal gloss black so your eye is guided to the lines of the masser shape at the top. then add a chrome trim round the top of the door line and along the windscreen and round the convertible hood area. some massers have a silver colour in the headlight area brings attention to the shape of the light area. just idea's. deviant art did a pic.
zagmad - link? or is it one of the ones I found on Page 2 or this thread?
Back to the filling the holes question - Any reason not to simply use patches of glass matt and resin bonded to the cleaned metal rather than P40? The holes are set back into the sill a bit so I could cut cirlces of matting slightly larger than the holes and then slap the resin on them to bond them in place.
Hoping to get some of this done tomorrow so much advice welcome
To be honest if you just want to fill the holes get some sheet fibreglass laid up and cut discs from it then just glue them in using PU adhesive ( the stuff they fit body kits with)
WCA . You should attack it in your useual fashion , which I love by the way so don't take affence at this ! why don't you break of some crusty Tescos bagettes in the holes and stick some fablon over it. quick bit of humbrol airfix paint and the job is as me old dad would say , a good un
If you fill or fibreglass the sill areas your MOT man may think it is a dodge to cover up corrosion. I would cover it to save any possible future hassle.
Right, first conference call of the day gave me a chace to prepare a reference photo for project completion. Hopefully I will have time to do some of the work in the coming weeks, work and weather permitting.
I am planning to get the paint done professionally and the wheels powder coated nicely in the new year which means I can try different things now to see how they look safe in the knowledge that they will get painted over properly later.
I am still undecided about whether to fill the sill holes or panel over them so will leave that for the moment. I will try a few of the quick cosmetic bits in the gaps in work I have today. The plan is:
1 - Side exhausts given and extra paint coat in black and reattached
2 - Headlight bowls in black
3 - Possibly a grille emblem
4 - Possibly some silver paint on the wheel rims
Your car is looking great. I understand what you mean about having a full windscreen instead of a flyscreen, where you would also lose that all year round practicality. I have seen a Z3 with a chopped windscreen and it didnt look too bad, but could only be used on a nice day.
A few more little touches and you are nearly there.
Screen surround, black? - tried black in a photo mock up and it made the windscreen surround look very thick as the glass has a black border, then the black rubber strip and a black metal surround on top was too much
The original plan was chrome wrap which is currently out of budget but after the powder coating for the wheels and the proper paint job...
That's the pic. Gives a few ques to what chrome bits could use to keep it period but not over the top. Could as k Chris to mix yours with it to see how it looks. The new mini has chrome detailing rat the bottom of the windows to give an idea of modern use of chrome. Just ideas to combine the style of the 300 and the introduction of the hood and screen so it blends well.
Work stop play for most of the day but managed to get a few bits done. Lots of time spent being blown about by the gale which meant I kept shuffling one end or the other into the garage as I worked on it.
I painted the headlight bowls black. The problem wasn't dust particles in the paint it was leaves and twigs!
Chrome highlights around the main grill and on the top of the bonnet vet
I fixed some mesh over the hole in the boot panel. I would have painted it black but I had put the brush I was using in the thinners by then.
I also fitted the fog light behind it and temporarily wired it in. Permanent wiring will be done when it is not dark, raining and blowing a gale.
Quite please with progress. Suprised what a difference the chrome grille surround made although the photos don't really show it.
Hey Nick, the photo of the two cars together shows what an excellent job Tribute made of your car. I do like the candy red of the other car but it must have cost a fortune. Am loving the details you're adding to make it your own. Nice job.
Steve

 the pic was of a 300s. headlight area was black and the wheels had black spokes with chrome lip.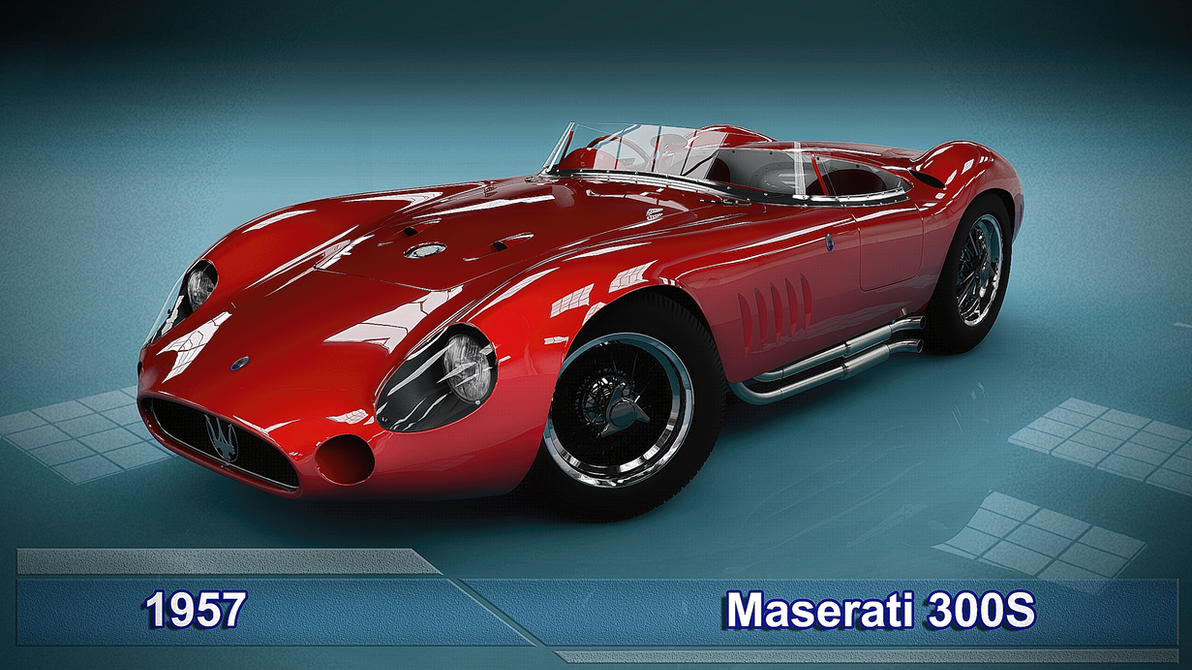

 That's the pic. Gives a few ques to what chrome bits could use to keep it period but not over the top. Could as k Chris to mix yours with it to see how it looks. The new mini has chrome detailing rat the bottom of the windows to give an idea of modern use of chrome. Just ideas to combine the style of the 300 and the introduction of the hood and screen so it blends well.


