This is a read-only archive of the old Madabout Kitcars forum. New posts and replies are no longer possible, but every thread is still here to browse and read.
Here's the second of my summer 'catch-up' updates to bring my diary up to date.....
Next up was to remove the engine for a partial recondition and spruce up.
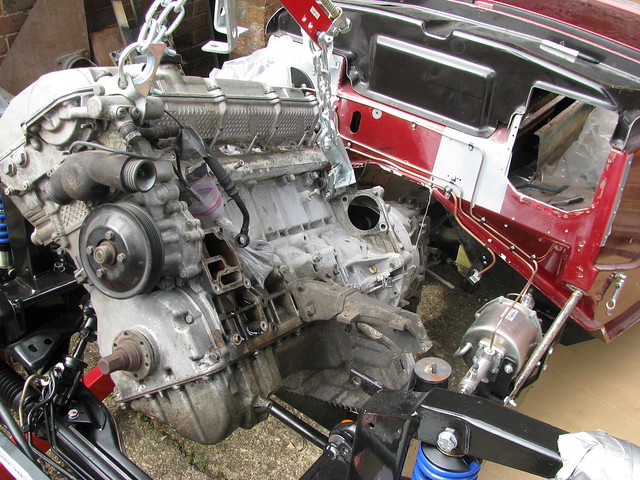
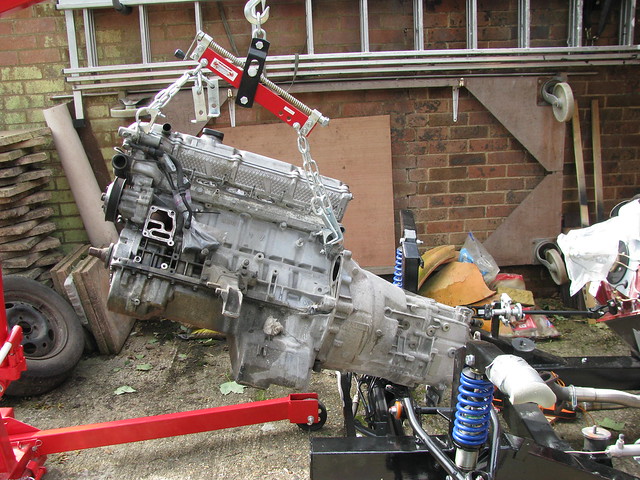
I wanted to see if it was possible to remove the BMW from the Sabre without removing the central body tub. Once the car is finished it would be a huge amount of work to remove the body so I wanted to make sure it is possible to remove the engine should the need arise.
Firstly, I removed the radiator, exhaust manifolds, handbrake, propshaft, clutch slave cylinder, gearbox support, gearbox leaver, etc.
I decided to leave the gearbox bolted to the engine although for something like a clutch change it would be possible to drop the gearbox on it's own.
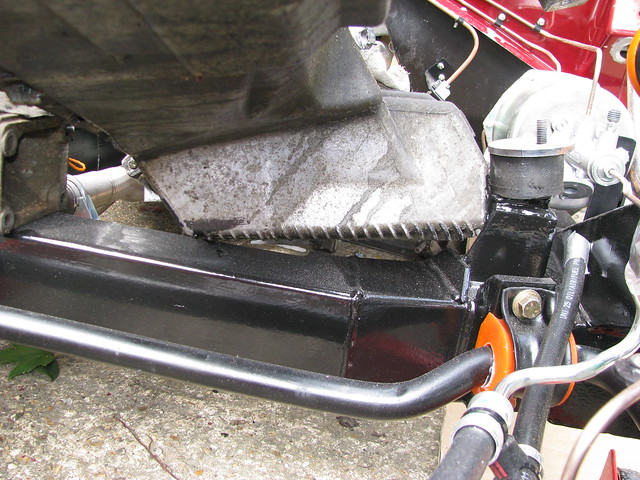
With the engine at the right angle the sump just clears the chassis with the clutch pipe on the bulkhead still in place. It was a very tight squeeze and removing the clutch pipe would have been safer. I did not need to remove the brake master, steering column or the servo.
My unconventional BMW engine installation means that the sump sits behind the chassis cross member.
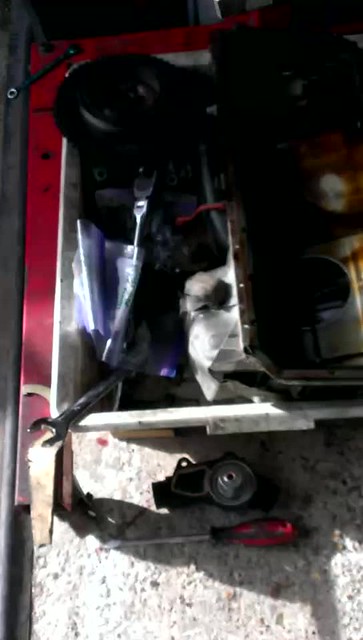
In this shot you can see the sump just clears the chassis with the engine and gearbox at an extreme angle.
The trial was a success and the engine is out! Of course, my wings nose and bonnet are not fitted but I am now confident that the engine and gearbox can be removed with the wings and body tub still in place.
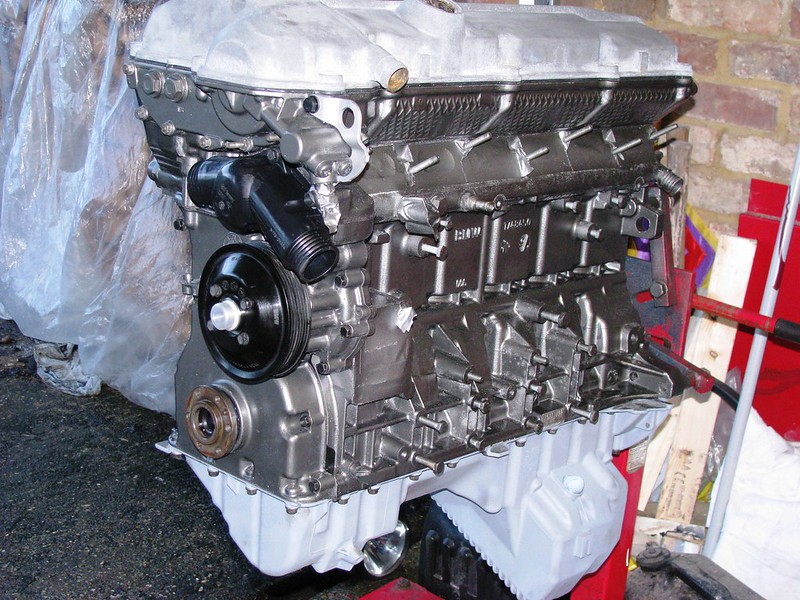
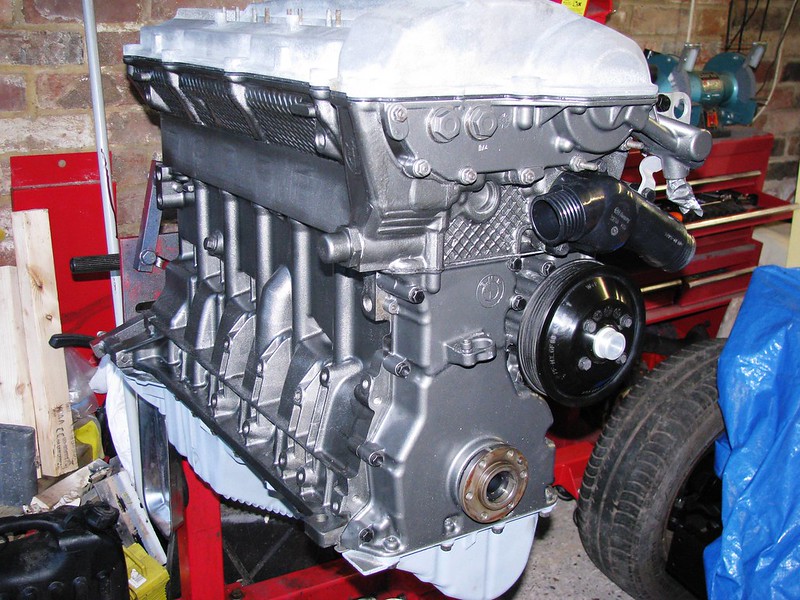
The engine and gearbox were then separated and the engine mounted on my engine stand for refurbishment.
Ok, so here comes the third of my 'catch-up' updates......
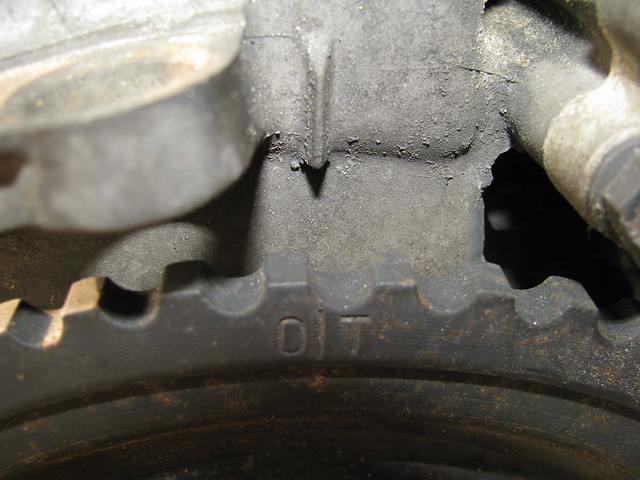
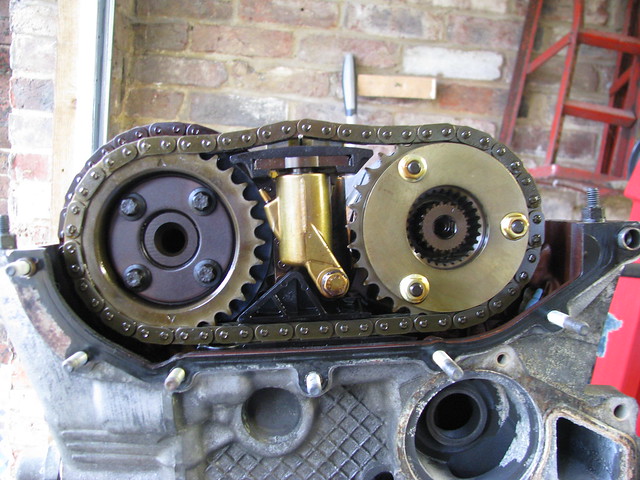
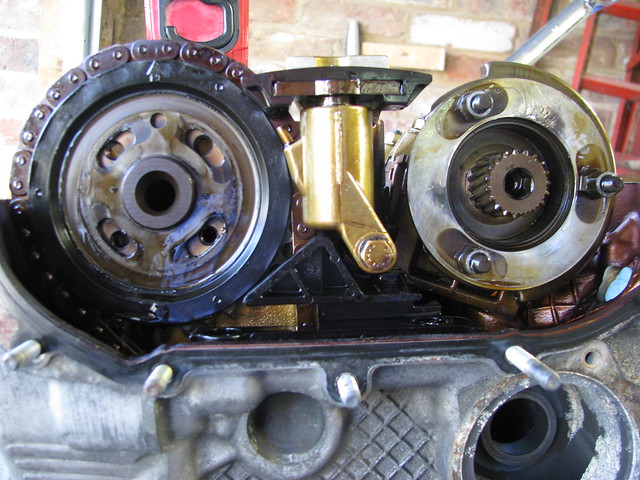
I'm stripping down some of the engine for inspection and some refurbishment. One thing I'm looking for is the source of a rattle on first start up. I suspect worn chain tensioners......First job is to loosen the crankshaft hub bolt and then set the crank at TDC. The hub bolt put up a real good fight but I won!
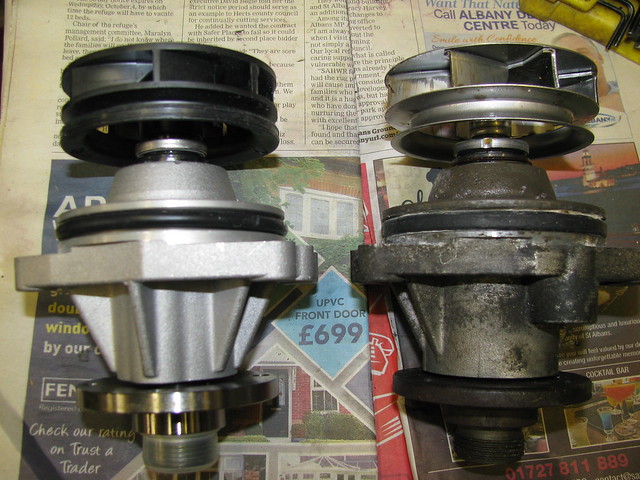
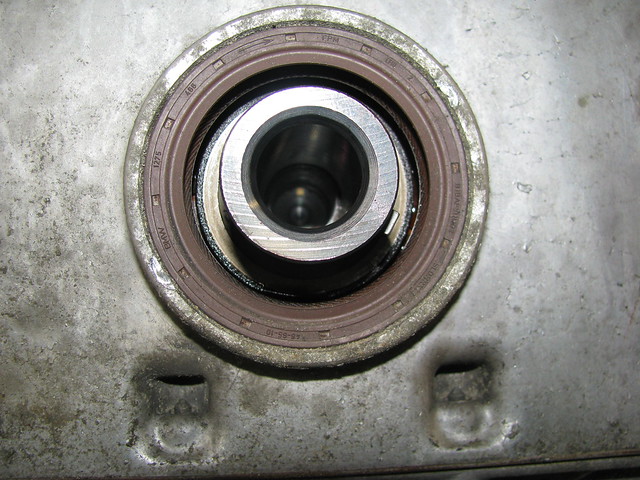
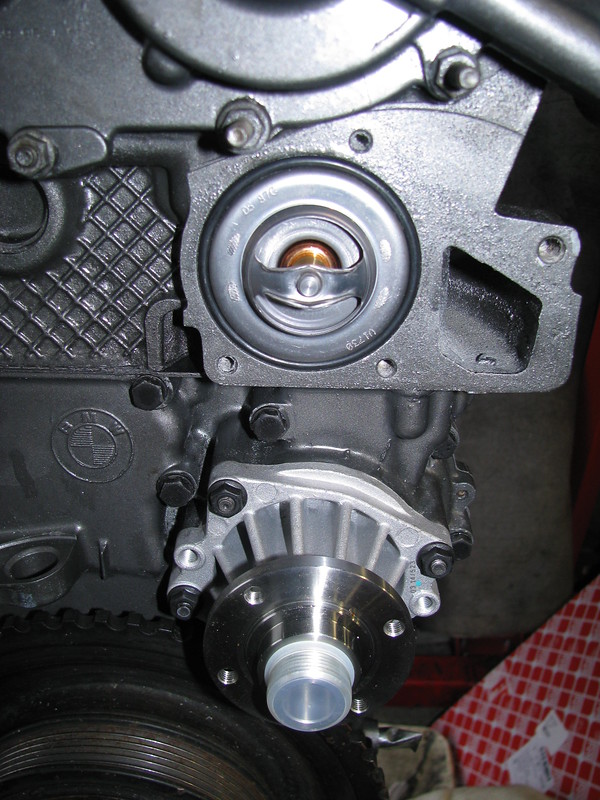
I was surprised to find that the water pump had a stainless steel impeller. No sign of any BMW logo so I presume the water pump had already been replaced at some time in the engine's life. I had already sourced the new pump shown on the left, so that will be fitted.
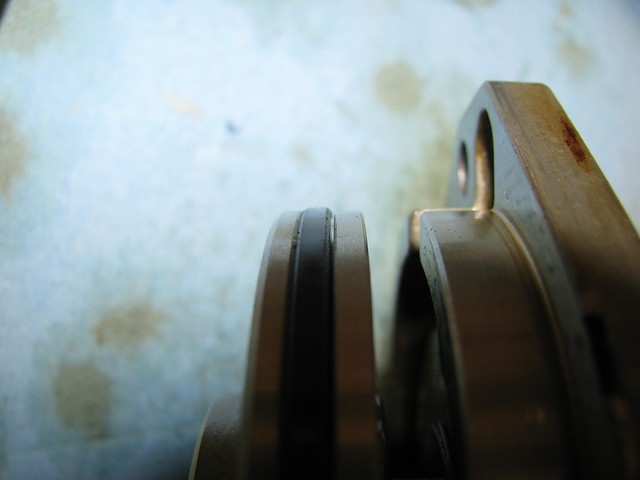
These are two common failure modes on the BMW M52 engines. These are fully described on the Beisan Systems website here.... http://www.beisansystems.com/
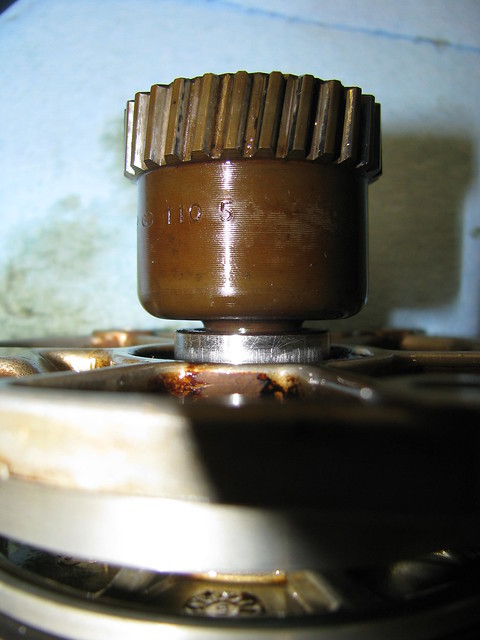
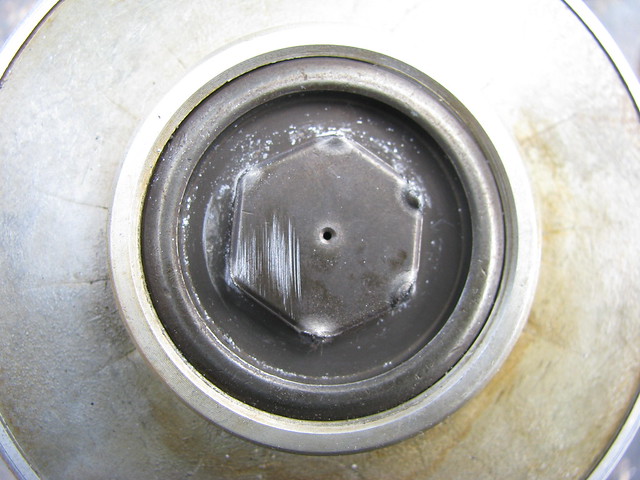
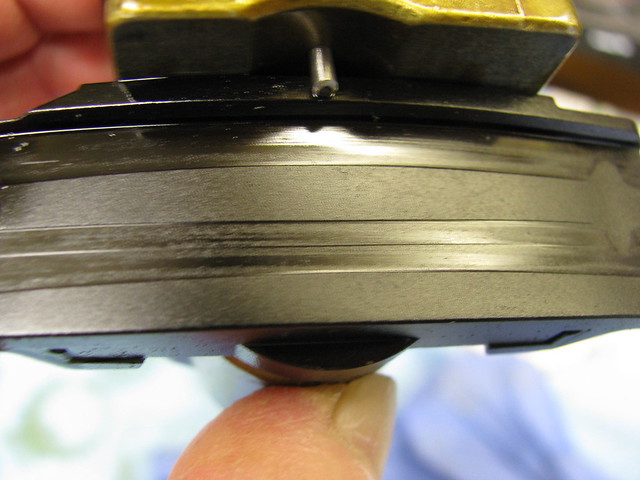
Despite all the warnings I managed to mess up the Vanos piston cap screw. I had to revert to welding a nut on top to get it undone.
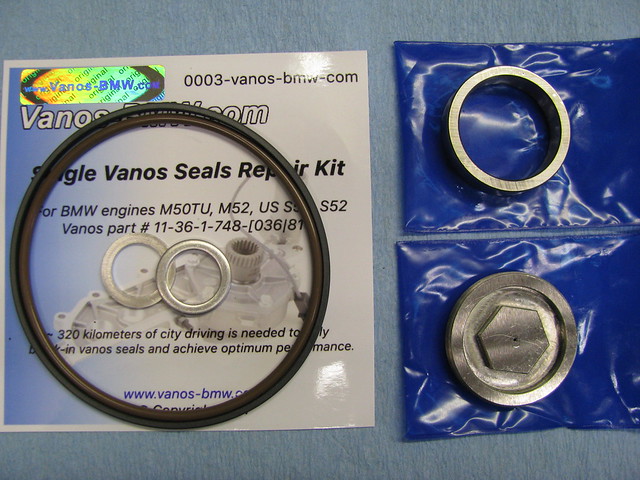
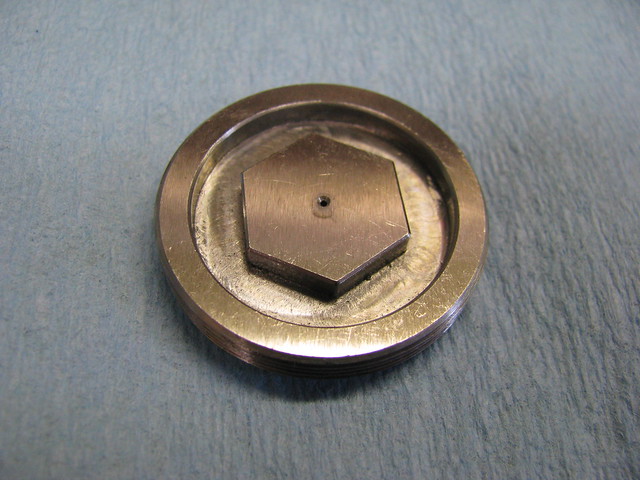
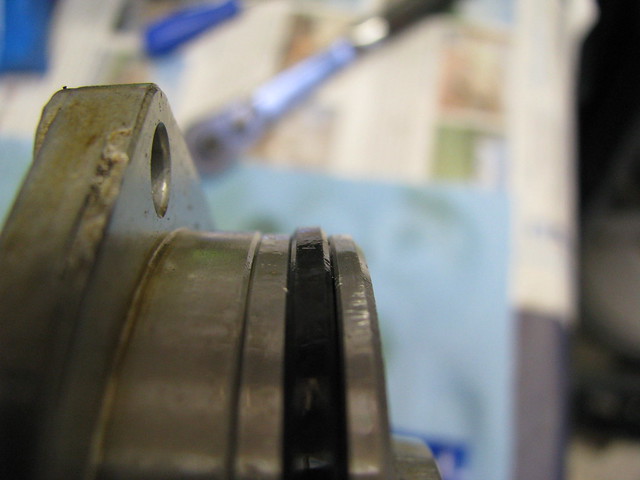
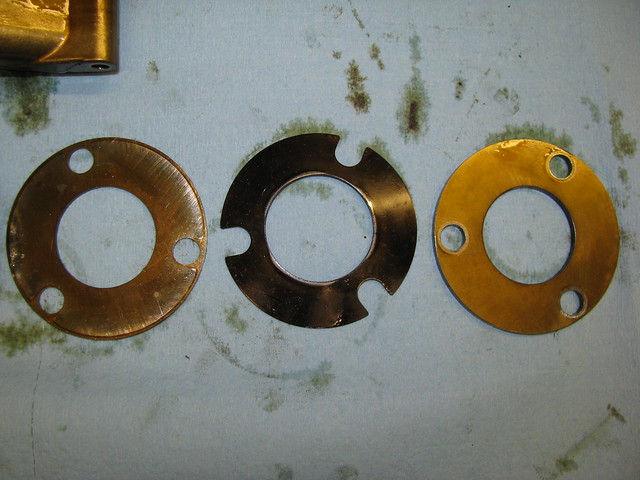
I bought a Vanos repair kit from VANOS-BMW.com. I was a little wary as they are based in Moscow but the parts are very high quality, well packaged and arrived safely. Teflon and Viton piston o-rings, new bearing ring and piston cap screw. The bearing ring was a perfect fit first time and didn't require any lapping. The kit cost £58 inc delivery and payment is by paypal.
The new piston cap screw has a 17mm profile that is deeper than than the original BMW part. This part is not available from BMW as they don't expect anyone to service the Vanos unit.
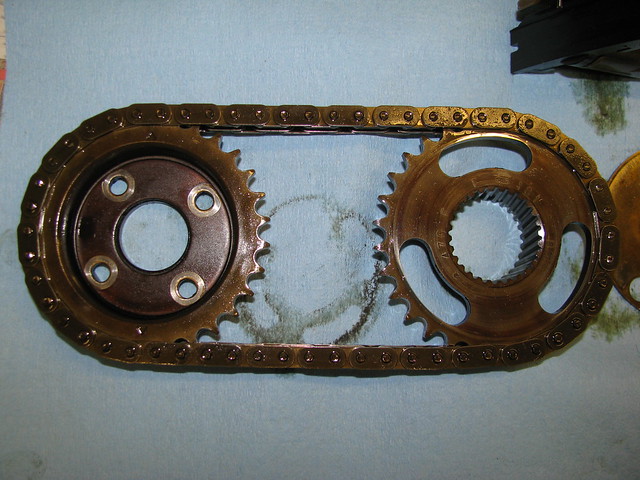
There is no chain tensioner on this engine and I cannot find anyway of adjusting the chain tension. Googling suggest this normal but I cannot find a spec on what is normal. A new chain is only £25 so I decide to replace it.
After I fitted the chain deflection was down from 12mm to a much more acceptable 6mm.
I have been off internet for a long time and today for the first time I checked your progress and as always, job very well done and I can't wait to see the finished article which I am sure is going to be the best.
Not a lot of progress in the garage this week due to a bout of 'man-flu' but prior to that I had collected a useful addition to my back yard.
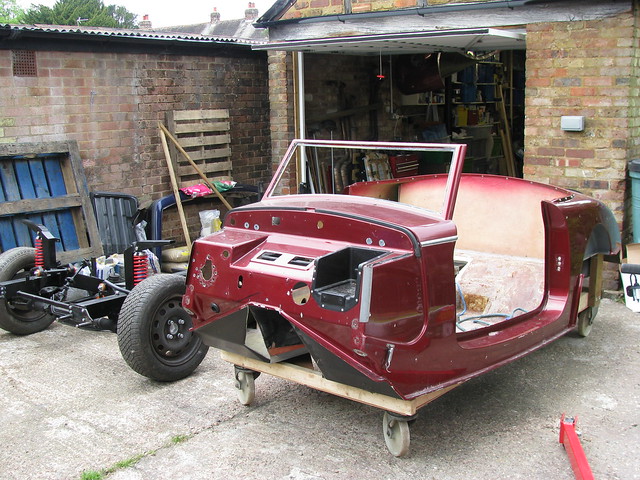
The established method of building a Royale Sabre is to have the central body tub painted prior to the final fitting to the chassis.
For those not familiar with the Sabre here is a picture of the body tub.
It's always been my intention to have the car professionally painted but I plan to do as much of the preparation work as possible bearing in mind the existing paint is in poor condition. I still have some work to do on the tub following the re-shaping of the transmission tunnel but that hasn't stopped me thinking about how I will transportit to and from the painters.
My initial thoughts were to buy a small car trailer and then sell it after I've finished with it so I've had a search running on ebay for some time.
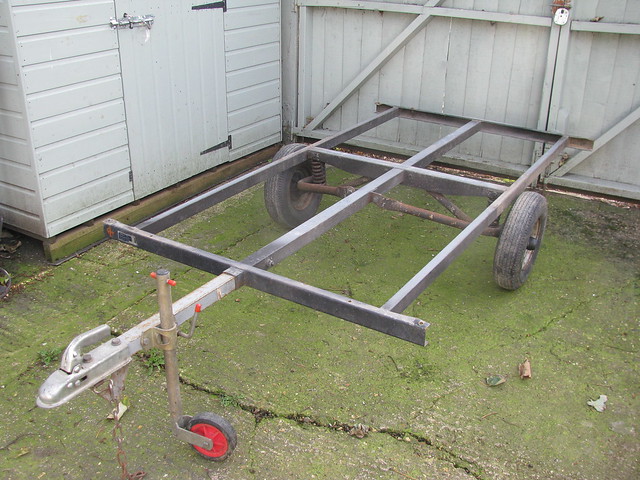
One day this popped up and only about an hours drive from home.
It is the remains of an old Trailer Tent and seems to be just about the perfect size. It's in good condition and has now had a coat of Hammerite to protect it from the elements as it has to live outside. I plan to build a wooden platform to support the tub during transport. But more on that next spring.
Hopefully i'll be back to my engine refurb once my cold subsides....
I am really enjoying this thread. As mentioned previously, the Sabre is something I looked at a long time ago, and concluded it was above my competence level to complete. - I was right. I am now experiencing a vicarious build.
Hi Peter,
As always, I admire your patience, dedication and quality of work. This Royale Sabre, as I see it, will be one of a kind and a pleasure to own and drive. I hope you get rid of your cold and back to the real work, producing the best Sabre.
Meanwhile wishing you and family happy Christmas and New year.
I am really enjoying this thread. As mentioned previously, the Sabre is something I looked at a long time ago, and concluded it was above my competence level to complete. - I was right. I am now experiencing a vicarious build.
Thanks, Barber. Glad you are enjoying my updates. Happy to be your surrogate builder
Amir Manzoori wrote:
Hi Peter,
I hope you get rid of your cold and back to the real work, producing the best Sabre.
Thanks Amir for your best wishes!
Whilst staying in the warm waiting for my cold to pass I spent a good few hours studying the BMW wiring diagrams for my BMW 328i engine.
The engine management wiring loom terminates at a 25 way circular multiplug known as the x20. This is very convenient but the details of the individual terminals are scattered across multiple pages of the wiring diagrams.
I've created my own x20 connection diagram from the BMW diagrams. I then checked my spreadsheet with my actual loom and I found only one discrepancy.
The picture below is the 'car side' of the connector that will be spliced into to the main wiring loom, although only 12 wires need to be connected.
Hi Peter, glad to see things are still ticking along on your build.
Question for you, do you know if the sabre owners club is still active?, I am considering buying a Sabre next year and tried to contact the owners club to join but got no reply, wondered if you knew if it was still going?
Have you seen the 2+2 Sabre conversion thats being done on kitnet, worth a look if you have not.
Royale Owners club is up and running and the website is [url]www.royaleownersclub.org.uk[/url]
Yeah I had seen the site. I made an enquiry via the contact information on the site to ask if the downloadable member application form and membership secretary address was current before I sent off payment but I never got any response.
I was also wondering if there was an online payment system for membership rather than sending a cheque.
Hence the enquiry to Peter who I know from the Marlin forums.
Hi John,
As peter couldn't get into madabout-kitcars.com he replied to me and you can read it below.
Amir
Amir,
It seems I need a user name and password to reply, does John not have an email address? Feel free to give John mine for any enquiries, and yes he can apply through the treasurer and pay by bank transfer if he wishes.
Kind regards Peter
Hi Peter, glad to see things are still ticking along on your build.
Question for you, do you know if the sabre owners club is still active?, I am considering buying a Sabre next year and tried to contact the owners club to join but got no reply, wondered if you knew if it was still going?
Have you seen the 2+2 Sabre conversion thats being done on kitnet, worth a look if you have not.
John
Hi John,
I think Amir has answered the first part of your question. Thanks, Amir.
Are you thinking of buying a Sabre kit to build or a completed car?
I hadn't seen the 2+2 conversion before your comment but now I've had a chance to have a look it's a very interesting development. Some of the early Royale Motor Company adverts have a reference to a 2+2 model but I'm not aware of any cars or kits produced by the factory. It will be interesting to see what he does about the hood?
I’ll most likely buy a car thats useable and then do project updates to it rather than buy a basket case or build / rebuild from scratch. I am hoping to retire next year and quite like the idea of going off for trips in it. With a Sabre I think it could include the Mrs but with the existing Marlin its a bit too snug a fit for her liking.
I thought the + 2 on kitnet looked interesting. Not that I need the seats but it looked like it would create some useful space behind the front seats. To be honest I have always thought the hood on the Sabre could have been better if it had been a bit bigger ( extended towards the back of the car) so you would assume the + 2 would have to do that. As you say it will be interesting to see how he approaches the hood.
Do you happen to know if there is an electronic version of the Sabre build manual available from anywhere, I would like to have a look at it but searching the web has not turned up a source.
Whats the timescale for yours to IVA, you seem to have nailed most of the difficult development.
I’ll most likely buy a car thats useable and then do project updates to it rather than buy a basket case or build / rebuild from scratch. I am hoping to retire next year and quite like the idea of going off for trips in it. With a Sabre I think it could include the Mrs but with the existing Marlin its a bit too snug a fit for her liking.
Do you happen to know if there is an electronic version of the Sabre build manual available from anywhere, I would like to have a look at it but searching the web has not turned up a source.
Whats the timescale for yours to IVA, you seem to have nailed most of the difficult development.
Cheers
John
Hi John,
I think the Sabre is an excellent choice for touring. It would be worth chatting to Peter Gibbons as he has done extensive Continental tours in his car. I'll PM you about the Build Manual.
Timescales to my IVA are really just as long as it takes
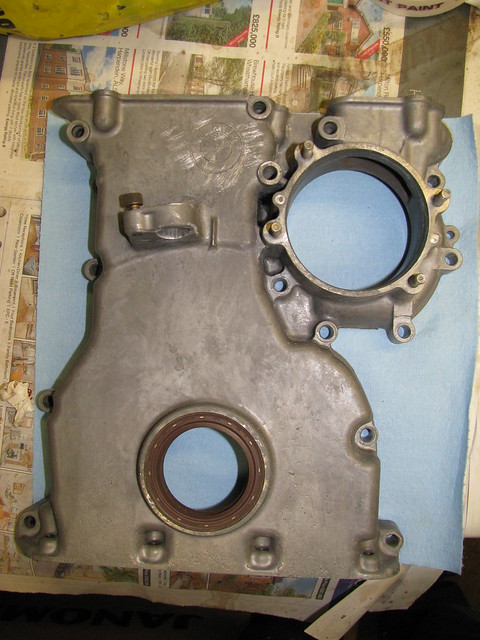
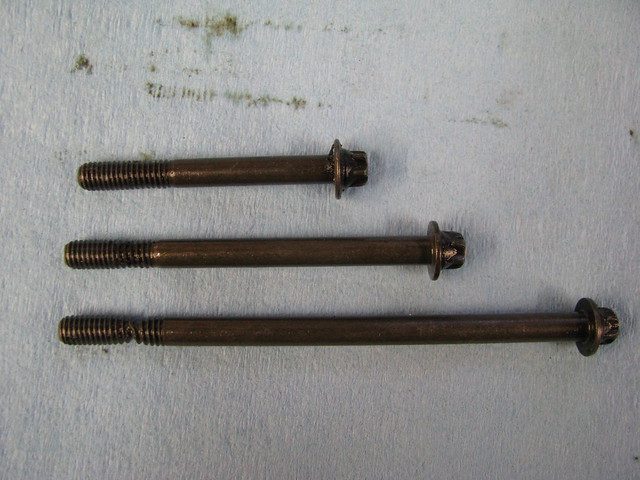
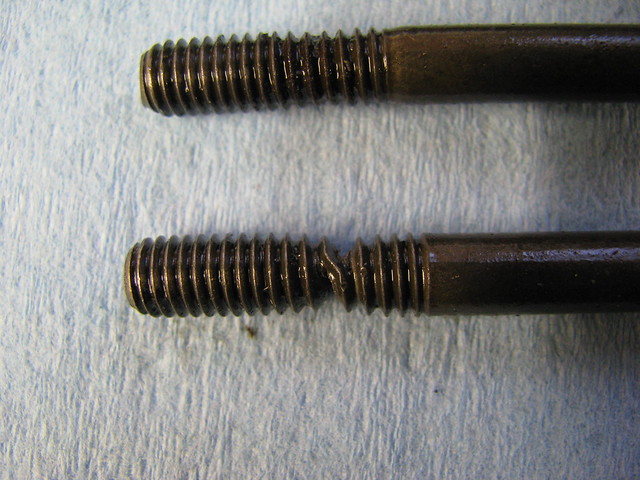
The timing cover on the BMW M52 engine has three M6 torx-head bolts that go down through the cylinder head into the top edge of the timing chain cover. I was refitting the cover and following the tightening procedure in the Bentley workshop manual. It said to tighten the M7 bolts to 15Nm. Without checking I assumed that the bolts were M7 and set my torque wrench to 15Nm. As I started to tighten the bolts it was odd that the bolts kept turning without the wrench reaching it's clicking point. At first I thought it was just the new gasket compressing when suddenly one of the bolts gave way and went loose.
TBH I thought I'd snapped the bolt and was amazed that when I removed the bolt it came out complete albeit stretched by a few mm.
It turned out that the bolts are M6 and the correct tightening torque for M6 bolts is 9-10 Nm but I'm still surprised that these bolts would stretch to the point of fracture before only 15Nm.
Anyway, no harm done and I now have a new set of bolts from BMW.
As I discovered to my cost, the "core" of a threaded bolt is actually a lot less than the actual bolt size by the time you take into account how deep the thread is. As I recall, for M6, it is less than 5mm. Considering that the strength is related to the area, and that is related to the square of the radius, the thread reduces the strength considerably.
A bit of a rambling explanation but you get the gist...
With a combination of the very cold weather and the Christmas preparations now in full swing, I've had little time to do any major work on the Sabre.
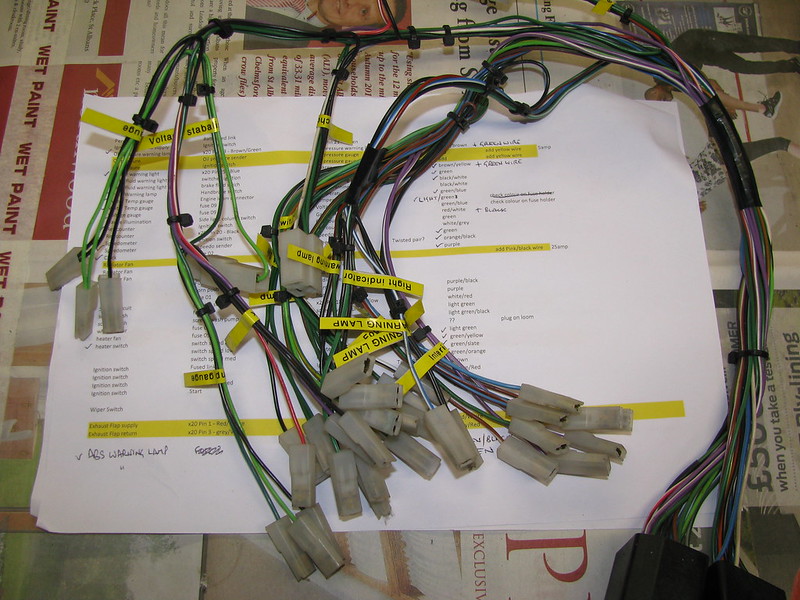
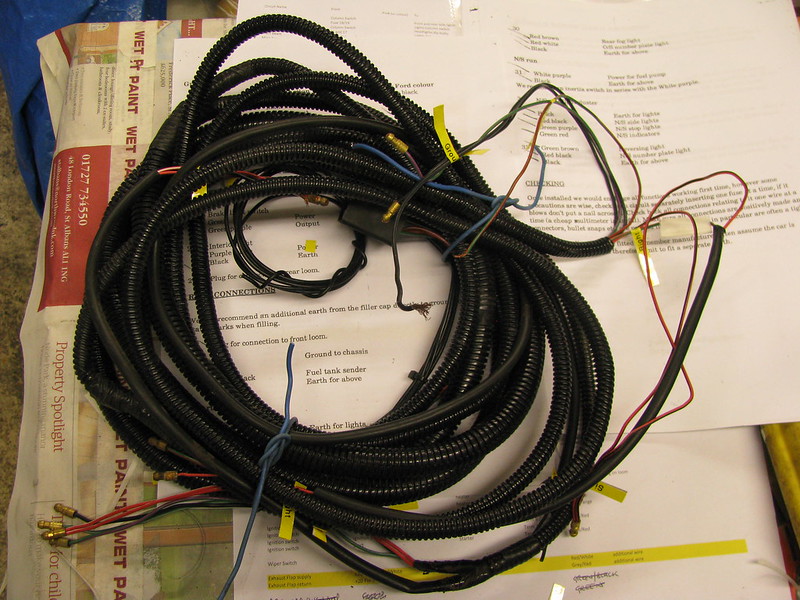
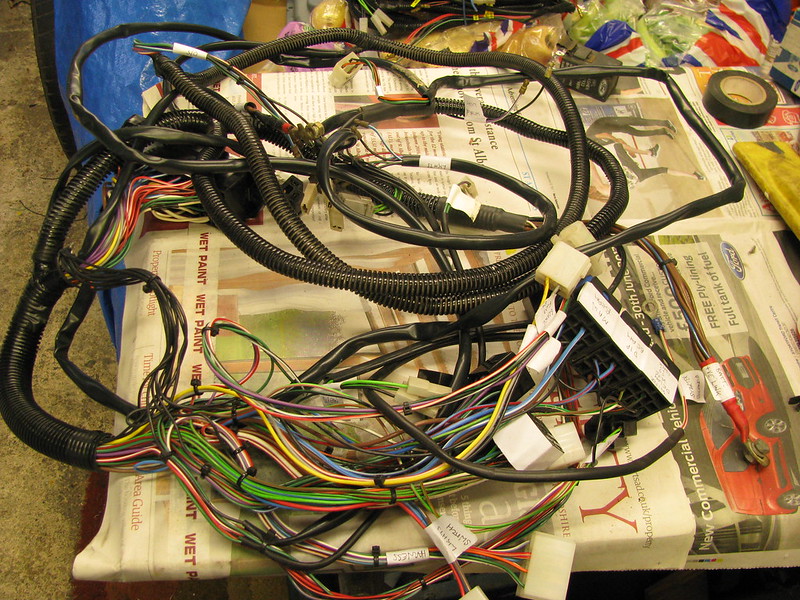
Grabbing the odd 1/2 hour here and there, I decide to dig out the Sabre's wiring loom and started to check it over and label it properly. The original builder's hand written labels on masking tape (that is now over 22 years old!) are all but unreadable. The wiring section of the build manual has the cable's colour codes so its a case of identifying which cable is which and then sticking a label on it.
I'm still a long way off installing the loom but it is a job that I can do as and when time allows. It should make the installation of the loom much faster when the time comes.
The Sabre's main loom has a number of subsections separated by large multi plugs.
I started with the dashboard subsection....
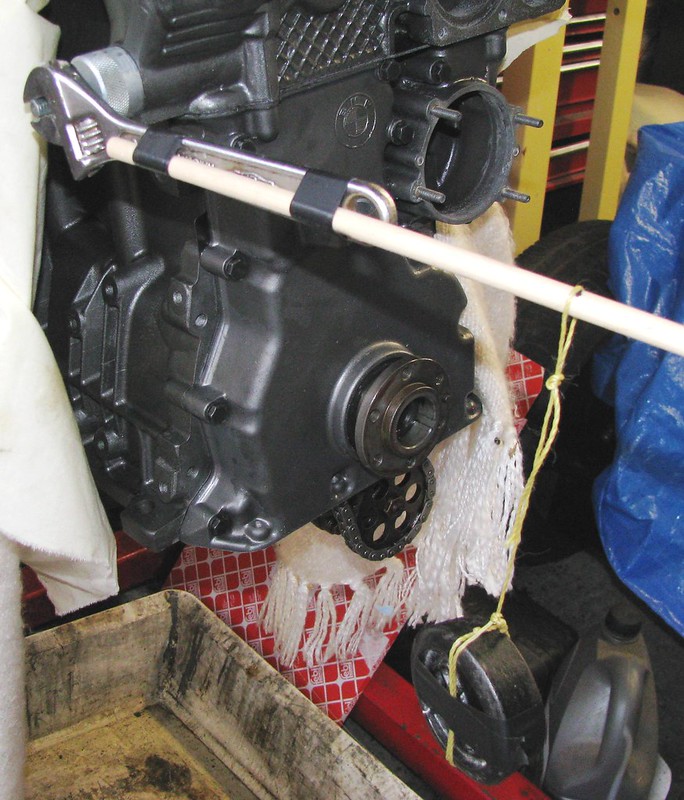
So after a bit of a pause I finally got round to re-assembling my engine after the refurbishment of the VANOS unit. Before tightening the exhaust camshaft sprocket bolts you need to pretension the timing chain with a tool that replaces the primary chain tensioner.
The chain tensioning tool has to be tightened to 11 inch lbs.
So I hung a 1 pound kitchen scales weight 11 inches from the pivot.
 Engine Removal Trial by Sabrebuilder, on Flickr
 Engine Removal Trial by Sabrebuilder, on Flickr
 Engine Removal Trial by Sabrebuilder, on Flickr
 Engine Removal Trial by Sabrebuilder, on Flickr
 Engine Removal Trial by Sabrebuilder, on Flickr
 Engine Removal Trial by Sabrebuilder, on Flickr