This is a read-only archive of the old Madabout Kitcars forum. New posts and replies are no longer possible, but every thread is still here to browse and read.
It is great to see this coming together. Keep the momentum going.
Cheers Barber will try my darndest!
Got together with the cert guy for LVV today, have agreed a few changes that need to be made.
Fuel filler needs to be moved from by the rear window and forward onto the rear arch. There is just not enough room to get the filler pipe through in between the roll cage bar and the rear tub construction without removing base metal. So we have agreed to move it onto the arch which solves that issue and the fact the filler was in the boot directly over the battery.
Rear body support needs to be modified/improved as the rear boot extension doesn’t give enough rigidity for cert. So I am working now changes that are likely to include glassed in brackets for the extension to rear bumper, the rear body onto the original rear guards location and some fixings between the sills/rear arch and in the parcel shelf area. Bit of work but needs must!
Have got a bit of work to redo on the front screen area as well as the r/h front screen edge does not fit tight enough because the infill trim I bonded in is slightly in the wrong position. So likely I will have to cut it and take out half, reclean/prep and re affix.
Lots to do as I will have to also come up with a plan/method to seal off the rear wheel arches from the cabin. Better get my fish oil stocked and brain food working!
On my build, I turned the alloy bumper strengthener upside down. This gave me a flat boot floor that I was able to bolt the boot infill panel too (with a bit of modification). The boot infill panel was strengthened as well and made a great support for the rear body clam.
On my build, I turned the alloy bumper strengthener upside down. This gave me a flat boot floor that I was able to bolt the boot infill panel too (with a bit of modification). The boot infill panel was strengthened as well and made a great support for the rear body clam.
Thanks for the info Jag, i’ll bear that in mind when trying to work it all out. I think I remember attempting to spin it round when I stripped the car and found an attachment bolt seize after half a thread turn. It torqued back up ok but I may be tempting fate if I attempt to get it back off. We’ll see......if I can work out the right heights and use wide enough/thick enough ally angle slotted and bolted I may be able to get the right support and leave it where it is. Thanks fella.
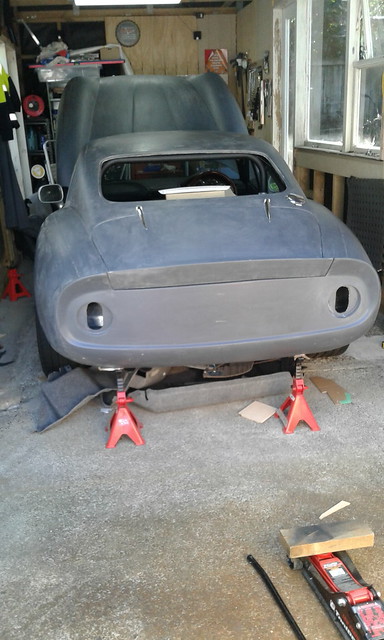
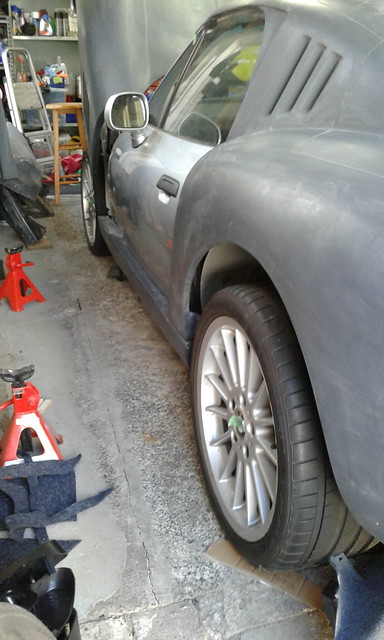
small progress today, did a bit of lining up and initial fixing of the rear boot extension so I could get an idea of the gapping/lines/fix of the rear clam body. Also fitted the side sills to allow an idea of that initially.
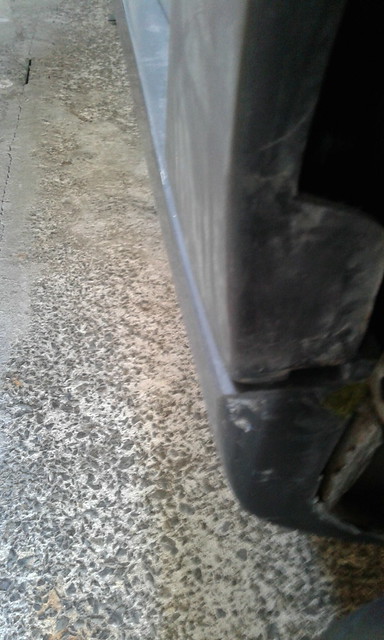
Generally ok, maybe a bit of massaging on the sill lines, but the lines do sit evenly when asked to do so. The front clam is a little outwards, something that may be able to be pulled in as there is a bit of flex, might have to be something to live with initially until maybe some adjustments on the bracket. It will need to be spacered in places to fit where I have photographed it. - Decent starting point though!
I found doing a trial fit in the middle of the build help keep the motivation going. All the jobs are fiddly and take time and to get a glimpse of the end result does wonders.
My 250 SWB had the same slight offset to the rockers as your car. I Wedged those corners out to match, ran a single stainless sheet metal screw to hold them and 'glassed them to the rockers. Much cleaner looking IMO.
I found doing a trial fit in the middle of the build help keep the motivation going. All the jobs are fiddly and take time and to get a glimpse of the end result does wonders.
Keep the pics coming
Dave
Will do Dave, only issue I need my mates to assist with the lift off/on so a bit of time needs to be spent lining up the kit and my lining up my ideas.....
molleur wrote:
My 250 SWB had the same slight offset to the rockers as your car. I Wedged those corners out to match, ran a single stainless sheet metal screw to hold them and 'glassed them to the rockers. Much cleaner looking IMO.
Thanks Molleur good stuff. Hoping to match the sills/rear drops inline and fix once more work done underneath. Does looks if it will push out and line up which is good. Good solution. Just so I am clear though, you are talking about the rear clam when you say “rockers”? Or do you mean the sills? Just never heard the term rockers other than in a valve sense! Cheers fella, M.
Hey guys, not too much to report as doing a lot of thinking about next steps for me. Have ordered the washer jets, fuel tank sealer and mini door locks which will give me a few bits to get on with. Had the car running today, everything so far still working and speaker system in rear area that I fitted is working.
My mini to do list is as follows:
- finish ideas for rear structure support. Going to affix bolt into the lower rear arch area into the monocoque tub for solid fix at that point, fix at front location to chassis and rear sill area, various brackets on the rear boot extension and side wing x 2 and then packing/bonding onto all necessary surfaces.
- remove rear body and tidy up alignment at screen upper support area.
- overhaul/tidy mini door handles and fit new lock barrels, make new gaskets.
- fit and tidy front screen washer jet system and piping.
- work on “tide line ” on the inside of the rear body so I can work out where to flowcoat to and where to start developing rear guard to cabin sealing panels.
- purchase a low lying aerial fin that will fit nicely under the rear, as per jagtvrs ideas....
- start the extension on the rear light harnesses and sealing off the light assy holes in the rear boot original area.
FYI there are three Fiat 850 lenses on Trademe at the moment (maybe a tail light body as well if my memory serves me) if you need spares or alternatives,
cheers
Ross (in Auckland)
FYI there are three Fiat 850 lenses on Trademe at the moment (maybe a tail light body as well if my memory serves me) if you need spares or alternatives,
cheers
Ross (in Auckland)
rossnzwpi wrote:
Oh, and the same guy has two pairs of complete Stars brand replica Lancia 037/Ford GT40 tail lights - new old stock.
Thanks Ross, really appreciate this. Already have the Lancia light assy's, they came over from the UK when I got the kit. They are the top and bottom lights with the reflector centre strip I will try and get them on and photographed sometime soon once I have made some progress with the back.
Spent the day at the Brit and Euro Car show, awesome to see 1071 cars registered this year, has grown from 250 cars 2 years ago and 650 cars last year. Sun was shining and some awesome examples. My classic favourite was the Aston DB 2/4 in a stunning gun metal metallic. Modern favourite was probably the Alpine. Very big fan of the original A110 and for a modern homage it is a very nice car up close.
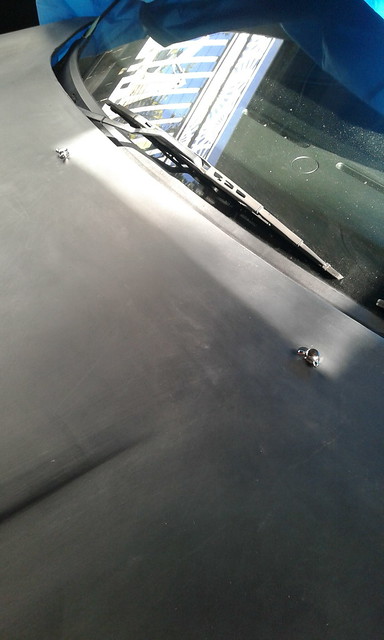
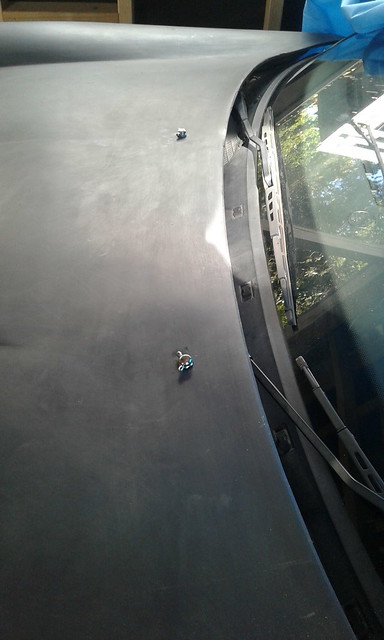
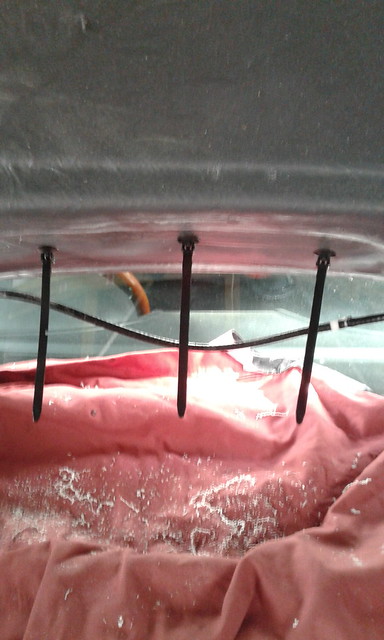
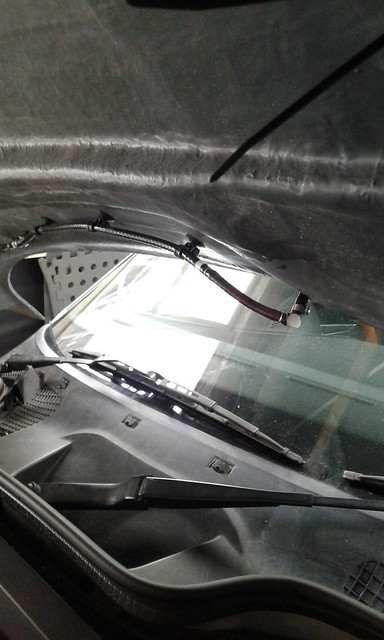
Anyway it all spurned me on this afternoon and fitted the washer jets - Need to get inline valve and joiners/clamps to finish underneath, have fitted with tube extensions from the original BMW tubing and clamps. Fiddly to enlarge the lower skin surface and have enough clearance to get the nut and washer on, but a bit of tape/grease and perseverance and it wasn't too difficult. The BMW clamps helped as I could get them to snap on with long nose pliers
Here's the top view.
Sorry, I've had a few and this made me giggle:
"Anyway it all spurned me on this afternoon and fitted the washer jets "
Get on with it matey, you are doing a great job.
Just a guess but I think your jets are facing the wrong way...
Loving your build, keep it up!
Cheers Jones, I have fretted over which way to fit them myself. If I want a straight v spray then this is the right way to fit. If I want to cross the streams and go one high, one low then they need to be the other way. Although I can’t stop thinking of ghostbusters or poor urinal etiquette when talking about never crossing streams! I will wait and see what the spray pattern is like as to where they end up, but any knowledgeable feedback, answers on a postcard to the Blue Peter office please!
Barber wrote:
Sorry, I've had a few and this made me giggle:
"Anyway it all spurned me on this afternoon and fitted the washer jets "
Get on with it matey, you are doing a great job.
Cheers Barber, glad I made ya chuckle. The job was a little more than just jets as I needed to open out the lower skin on the clam and clip the hoses through the opening a la a gynaecologist, but I know what you mean! I am smiling now!
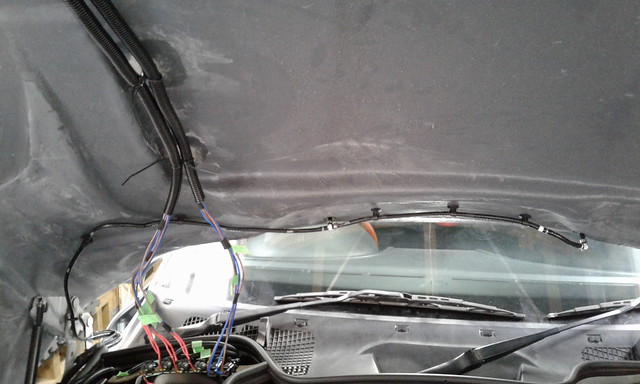
Got the washers finished and tested - All ok and the spray pattern as fitted is good. Ran out of clips so some piping wirelocked in place until I can get more.
As you can see below fitted tie clamp clips to hold pipework in place.
Still need to tidy loom wiring and P-clip into standoffs in the bonnet but you can see the general idea......
Hey guys, been off the grid for a while after my knee surgery and what can only be described a long dose of apathy. Trying to change that.
Latest on mine is I am hoping for on the road and certed (not painted) by end of September. Certainly doable if I can knuckle down.
Latest state of play and updates on where I am heading.
- Ordered Z4 hubs and going to fit E46 discs to the rear with a narrower track. Will help me to fit the style 5 bmw alloys for the moment with a decent offset and later on when finalising painting will be fitting wires.
- Fuel filler position being changed but still an issue with the filler I have and clearance to the chassis. I may have to lower it from where I have cut the latest hole which not really happy about but may have to be the only outcome to get it to fit.
- Haven't trolled all the threads for a while but really interested in your discussions on the locking issue and getting to the key location under the door skin. I am in the camp of fitting the mini door handles with a stainless keyhole/escutcheon under the handle and in line with the original hole. It will have a stainless short tube welded to it to ensure the long shaft key that I am going to get will be guided straight into the original lock key hole. Simple solution but keeps the locking standard and the only change is the long key. Maintenance/lubrication and usage of the key lock should keep the issues at bay.
A few piccies: IMG_20190505_115711
How about using the DNA approach to the fuel filler?
They used a small flap to cover the existing fuel filler and used the original BMW hinge. Shouldn't be too hard to replicate.
Had a chat with the guys at Grassbank today. They had a very convincing 250 SWB Tribute kit on their stand at Stoneliegh fitted with deep dish wires tucked well under the standard arches. They have used the shorter rear hubs but also narrowed the front suspension control arm and moved strut mount in slightly. Not a massive job by all accounts so worth a thought if you want the right look.
How about using the DNA approach to the fuel filler?
They used a small flap to cover the existing fuel filler and used the original BMW hinge. Shouldn't be too hard to replicate.
Thanks Jag, I can’t do the filler flap way out, I just love the look of the Aston flap, so even if I end up with it raised off the body skin for the clearance (a la cobra style) I will investigate those options first. Thanks tho fella.
Lucky@LeMans wrote:
Had a chat with the guys at Grassbank today. They had a very convincing 250 SWB Tribute kit on their stand at Stoneliegh fitted with deep dish wires tucked well under the standard arches. They have used the shorter rear hubs but also narrowed the front suspension control arm and moved strut mount in slightly. Not a massive job by all accounts so worth a thought if you want the right look.
Awesome LLM, thanks for that. Hubs turned up today so as long as my measurements are good it should be good for the 275 as there is no flare on the arches. Good to know though not a big job to shorten the front track width if needed. That is a good solution how they dealt with it as long as toe-in-out doesn’t change too much and the handling isn’t affected. Cheers.