This is a read-only archive of the old Madabout Kitcars forum. New posts and replies are no longer possible, but every thread is still here to browse and read.
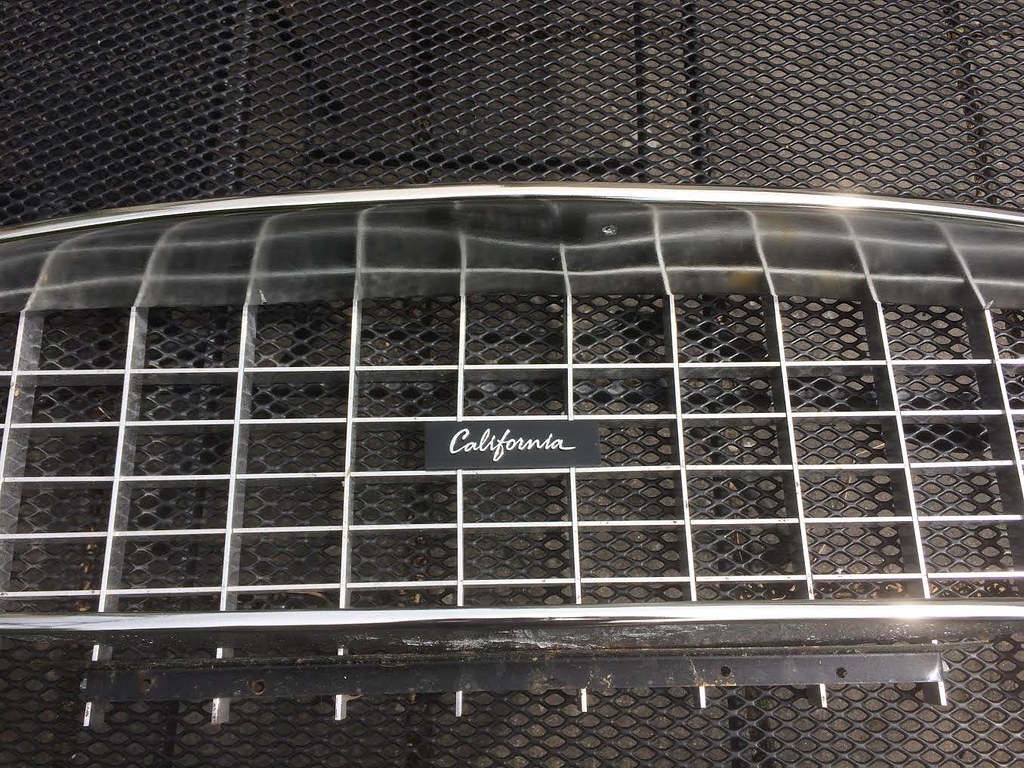
The black behind the grill is my trusty black felt pen!
These fit the same either way round so I can't cock them up. The front duct is larger than the rear and both fit just about perfectly.
Sometimes less is more so was a bit worried that I might be overdoing it.
Getting very close to painting so I need to nail down some details.
Been progressing nicely with my home spraying. Doors, boot and bonnet primed in reface. Have now had notification from next door that they are knocking their house down in the next two week for a rebuild. There is going to be dust everywhere so I need to pull my finger out.
Professional spray both set up in the rear garden (gazebo)
Professional heating system ( gas patio heater)
Full filtration system (fold back panels)
Been progressing nicely with my home spraying. Doors, boot and bonnet primed in reface. Have now had notification from next door that they are knocking their house down in the next two week for a rebuild. There is going to be dust everywhere so I need to pull my finger out.
Professional spray both set up in the rear garden (gazebo)
Professional heating system ( gas patio heater)
Full filtration system (fold back panels)
H
What could possibly go wrong?
Out in the gazebo today, sorry the professional spray booth! A coat of flow coat to the inside of the front clam and a coat to cover the dark blue on the small bonnet. I gave the bonnet a good clean with meths to get rid of the wax from the previous for coat. All looks very much neater. I can confirm that light blue matches very well with green grass and a green gazebo. Someones going to be in trouble when you know who spots it.
I also cut some alloy brackets to hold the grill and grill surround. I have fitted the spots to these brackets so they double up for holding the spots and surround. I now only need 1 small screw in the underside of the surround to hold it firmly.
As soon as the flow coat is dry I will flip the bonnet and give it a couple of coats of reface and am then having a go at priming it before refitting everything to drive it to the painter.
I think I am going to cut the slots in the wing vent and fix stainless mesh behind. Sort of a compromise.
2 coats of Reface on the front clam. I bought a cheap gun from Ebay for about £20 with a 2.5 nozzle. The Reface tech sheet says 2.0>3.0, I have a reasonable compressor with a 150 litre tank but it is hobby rather than pro. It takes a while for the paint to come out of the gun, in hindsight I think the 3.0 nozzle would have been better. Saying that it's gone on ok and is baking now. It was 60f this morning and my small space heater has brought the temperature up in the gazebo to just over 80f.
Now all I've got to do is get the paint of you know who's food mixer before she gets back from work, otherwise i'll be sleeping in the gazebo tonight. Hope to get it flatted down tomorrow and a coat of primer filler on over the weekend.
I was pleasantly surprised by how little filler I had to use, most of the shaping was sanding down the gel coat rather than building it up with filler. Being white it is very hard to see low and high spots so I found the best way was to close my eyes and do it by feel. This can be quite boring so just imagine you are giving Liz Hurley a breast exam. It's surprising how thorough you can be, looking forward for another go as soon as the paint is dry!
Primer filler painted yesterday, I was using the 2.5 nozzle cheap gun I used for the reface. I was a bit worried as they recommend a 1.8>2.0 nozzle. Good news is that it went on perfectly, good coverage and no runs. I fact it went on so well I'm tempted to do the top coat as well, but I know that if I do I will only fcuk it up.
I have been spraying the inside of the gazebo with the remaining thinners in the gun that I leave in it when not in use, this kills any bugs or flies. Then pull back 2 flaps when spraying to keep the mist down. As soon as I have finished spraying, drop the flaps and fire up the space heater. So far all my panels have come out very well with no flies or bugs landing in the wet paint which I have always found a problem.
I would suggest that if anyone buys a kit that they ask for the gel coat to be any colour other than white. It has been very hard to see any imperfections or low/high spots, same with the recoat. As soon as the grey primer filler was applied everything became much easier to see.
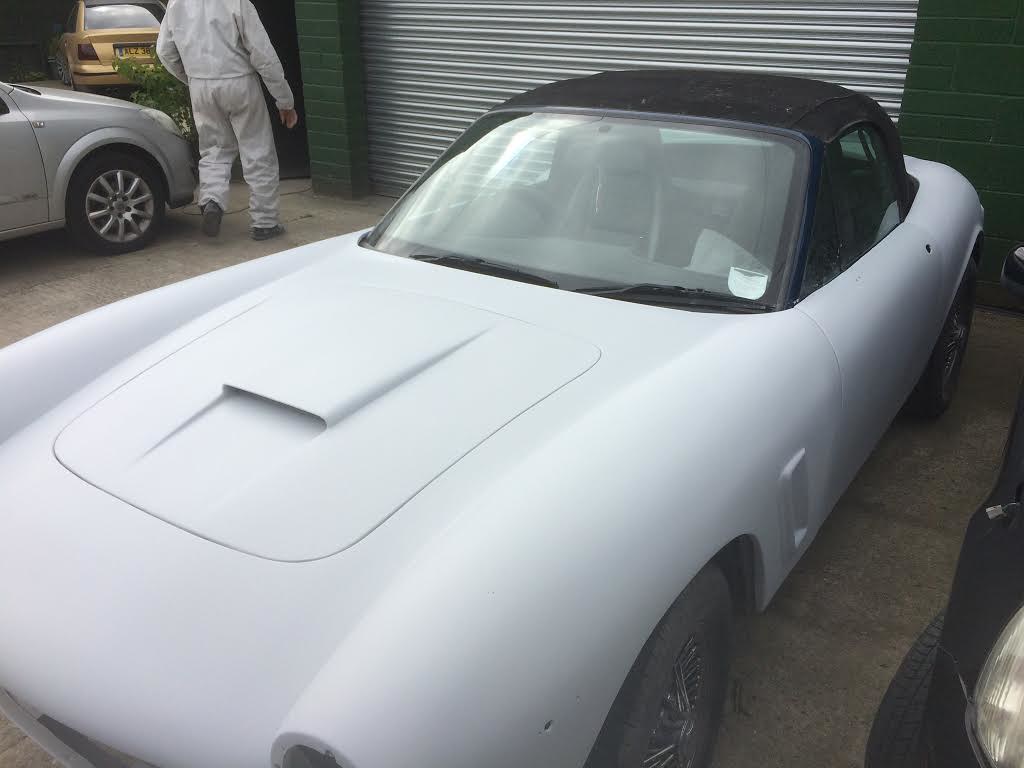
Coat of reface has been rubbed down and 2 coats of primer filler sprayed on. Bonnets, door skins all flatted back, rear,boot and sills hopefully to be flatted off tomorrow. Each time you finish a couple more defects seem to appear. Off tho the painter on Monday, whats the betting I get a great deal of sucking of teeth and rolling of eyes!
Grill surround has gone off to be chrome vacuum plated.
I hope not, he is a friend who paints all my bike panels. I've bought the paint and hopefully done 95% of the hard work. Can't possibly be more than £40......can it?
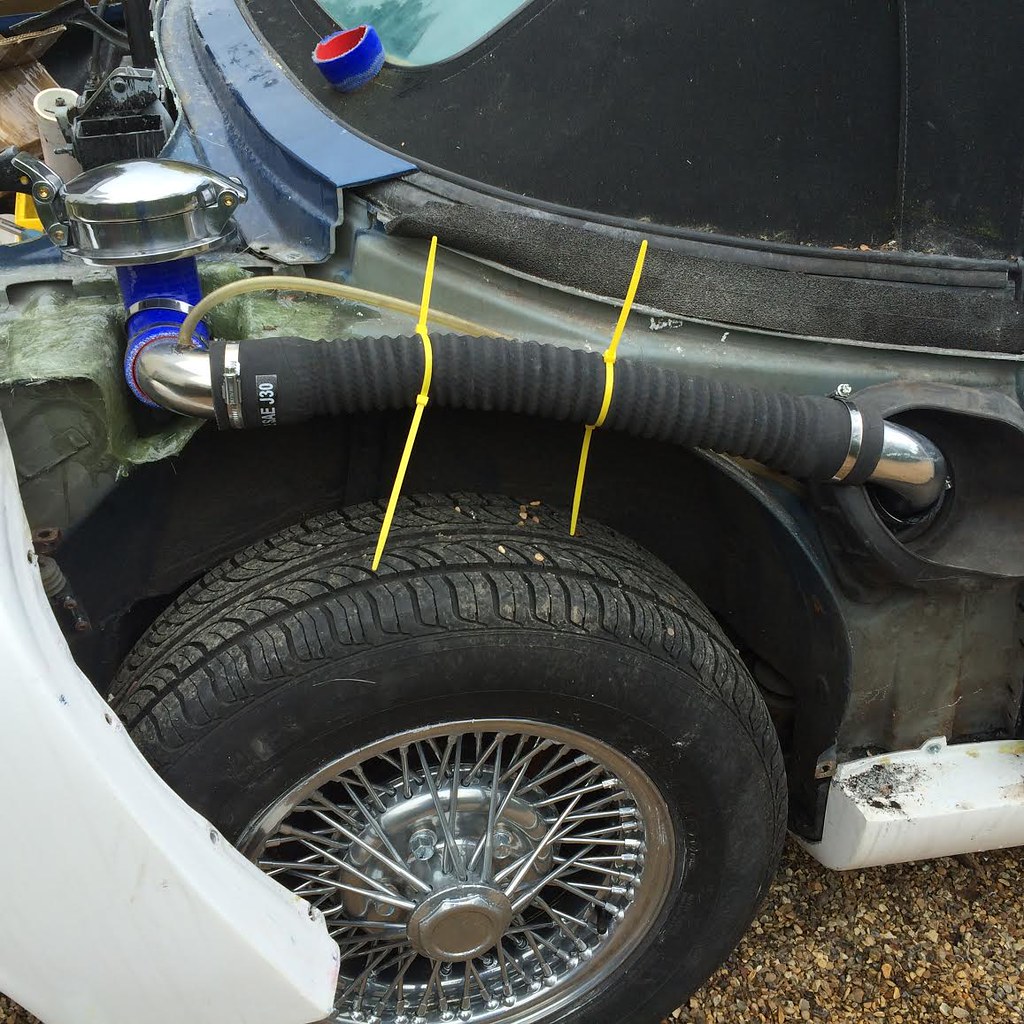
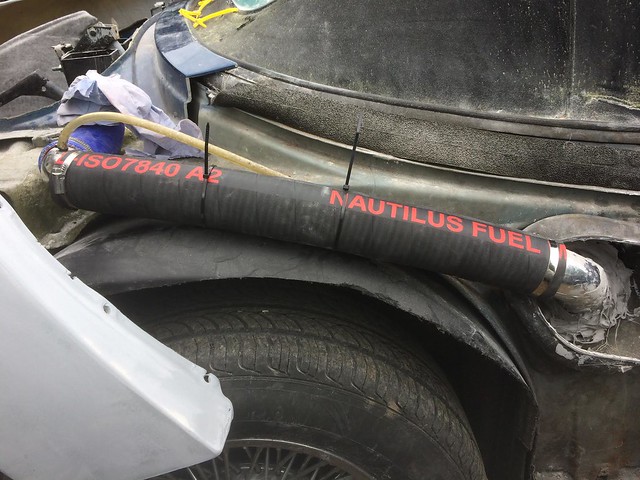
With the rear end being off I have looked again at the petrol filler tube. At one point it bows slightly upward, I think I can route it better so it is all downwards. The flexible pipe is wire reinforced (CBS) and has a concertina effect, I have ordered some
smooth boat petrol pipe, hopefully this will speed up refuelling. I will report back when fitted and trialled.
Coat of reface has been rubbed down and 2 coats of primer filler sprayed on. Bonnets, door skins all flatted back, rear,boot and sills hopefully to be flatted off tomorrow. Each time you finish a couple more defects seem to appear. Off tho the painter on Monday, whats the betting I get a great deal of sucking of teeth and rolling of eyes!
Grill surround has gone off to be chrome vacuum plated.
Friend of a friend, nudge nudge wink wink.
He did quite a few Triumph motorcycle radiator grills for me.
I'll wait to see how this one comes out and how much he charges and if good I'm sure I can get a few done.
He does them on the basis that he can do them when there is room in the machine (& crispy £ notes).
I struggled to get the surround and grill to fit nicely. it rattles and shakes when opening or closing the bonnet or when driving.
Having the bonnet upside down on stands with the small bonnet removed meant I could stand inside the bonnet aperture and get great access.
I had the grill and surround fitted but I was now able to make some alloy brackets and glass them into place. I fitted some brackets that hold the spots and also the surround. The surround is now held by one self tapper at the top where it can't be seen and the 2 spotlight brackets. The alloy grill is also mounted to some alloy brackets and the whole thing is now nice and snug and secure.
The spots are the smaller BMW Mini type, they are stainless and sit in better (IMHO).
The surround in chrome Finnish I'm hoping to be the finishing piece, should be ready next week.
DNA use the chrome spraying method and very impressive it is. I was going to use Beemabuild to spray mine but he has not yet had time to set his equipment up.
Not a great deal of progress, I'm still waiting for my painter to have a free slot. He is stuck on an ice cream van! It has stripes and painted panels for the ice cream menus and is just taking ages.
While I had the body off for priming I attacked a couple of small but annoying jobs. First is the fuel pipe. I was hoping the original that I fitted would work as it had a straightish run and also a breather pipe but it still took ages to fill. fuel6 by jaguartvr, on FlickrI think the problem may be the concertina effect that the pipe has causing a turbulence that slows the flow, so pipe2 by jaguartvr, on FlickrThis is a straight marine fuel pipe, because the run is pretty straight it doesn't need to be flexible. The inside diameter of this pipe is 2 inches, the concertina pipe is about 2 inches in diameter at either end but the middle section of the pipe is less than 1 1/2 inches so hopefully this will cure the fueling problem. Pipe was from Ebay and much cheaper than the flexi pipe. 1/2 meter is all you need.
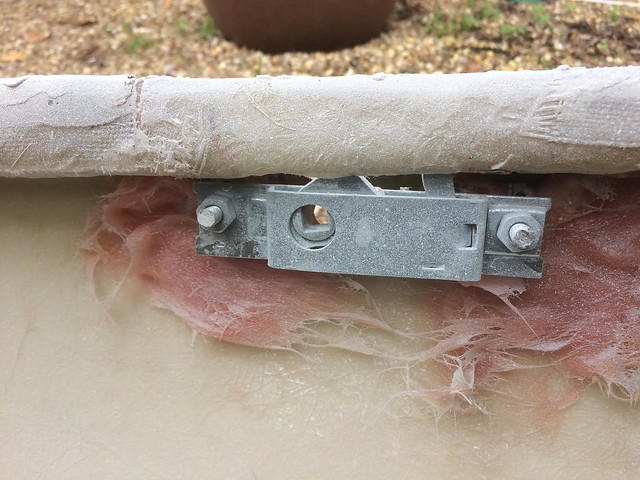
My other problem was the boot lock. I had made my own catch so that I could fit the boot handle lower so it didn't foul the boot lid when opening. It all worked ok but it didn't have a spring to hold it into place. I could just see me forgetting to lock it and it slipping open on the move.
I resorted to the same catch everyone else has used but a different boot handle, just a basic T shape that clears the lid, again a cheap £17 purchase from Ebay. As my boot floor is flat rather than sloping like everyone else's I bonded two studs to the rear bodywork and attached the lock directly too them. I can now remove the whole rear end in one go including the boot lock, much easier. lock1 by jaguartvr, on FlickrIt looks wonky but it all pushes up level with the boot aperture rim. A nut on the inside of the lock allows you to position the lock precisely in the slot. You can also take the boot handle off without having to disturb anything else.
Should have my chromed grill aperture back next week. Should be £120. One interesting thing he said is that the silver nitrate chrome spraying has a tendency to go "blue" after exposure to UV light, so if anyone has this process done, make sure that the clear coat has a good UV absorbing properties.
Forgot to add, I bought a cheap sharks fin Ariel from Ebay
I cut away most of the plastic and it sticks next to the original ariel, small screw connects to the original ariel and it gives great reception.
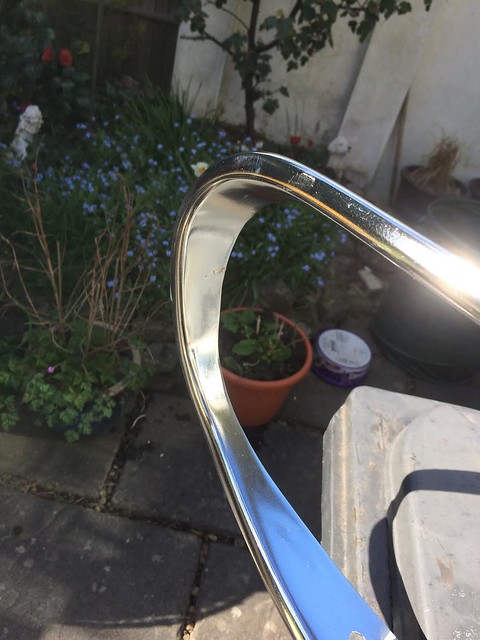
Collected it this Friday, very shiny and chromey but not as good as I hoped for as the flatting marks are showing.
It was sanded down to 600 grit and then a wet & dry 2000 grit. Looking at it you would think I had finished it in 80 grit. There were also some hole that I filled and looked to be super smooth but are now showing. It doesn't help working on white GRP, it does tend to hide a lot of things.
I think that I will probably do another but get it painted first so I can see the finish and then get it plated. But it will do for now.
Still waiting to go into paint, have been promised that it should start sometime this week. grillc1 by jaguartvr, on Flickr grill badge by jaguartvr, on Flickr
When I did my apprenticeship way back when, we made all our test pieces in the worst quality mild steel but every piece had to be mirror finished, by hand . Huge amount of time to go through every grade of emery. After two or three days you could see your reflection in it.
Flatting down GRP is the same when you want a mirror finish at the end. Wet n dry used wet, through every grade down to 2000 and you should be done.
Trouble is the closer you get to "ready to paint", the more blemishes appear. It's getting to the point that I'm tempted to use Dulux and a big F off roller.
I'm trying to do them as I find them but the little buggers keep multiplying! Starts to become soul destroying.
Any signs of stress in the front wings after the flappy lugs fix? Are you still waiting for the paint job, or is there going to be a big reveal at one of the meets?
I do wish you hadn't mentioned my flappy lugs on a public forum, it's my problem and I have to live with it
However the cars is showing no signs of cracking!
Although taxed and MoT'd I haven't been using it on the road so it hasn't been stressed but I don't think it will be a problem as the layup seems pretty thick and strong.
I have had the sills painted in the final colour, my preparation leaves much to be desired (F**king awful), on a brighter note the colour looks great. Hopefully it is going to my painter on Friday, famous last words.
I am hoping for a reveal at the BBQ if all goes well (and that bastard Jeff doen't bring his car with the flawless paint finish!), if it doesn't all go well I'm moving to another country. Hoping Smash will be there so I can park next to him (mean but I just can't help myself).
I think the problem with the bonnet needing slicing to bring it in is not the bonnet itself but the bonding paste used to fix inner and outer sections together, a bit too much paste and the wings are pushed out everso slightly, the slice just brings them back to the correctly moulded position so the bonnet shouldn't be under any extra strain. So far only one car has had problems in this area as far as I know.
Mentioned to my painter about the BBQ on the 10th and would it be ready in plenty of time and he started sniggering and sucking his teeth again!
I've just been round to visit him with my sharp pointy stick to give him a bit of enthusiasm
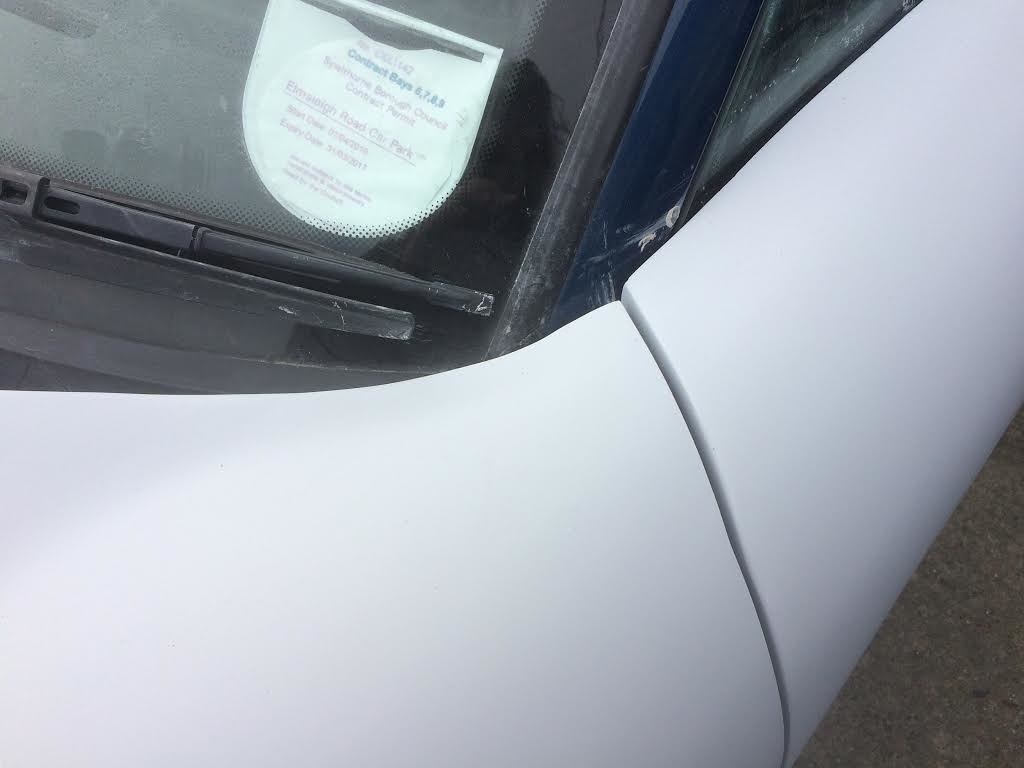
Good news is the primer is on ready for me to start rubbing down and it is looking much better. Gaps not a 100% but they are good enough that I can live with them. I am very pleased with the way the top of the door and the rear of the bonnet have turned out. unnamed-51 by jaguartvr, on Flickr
Am very pleased with the way the gapping is looking on the small bonnet. unnamed-50 by jaguartvr, on Flickr