MadaboutKitcars

This is a read-only archive of the old Madabout Kitcars forum. New posts and replies are no longer possible, but every thread is still here to browse and read.

Davecymru's Miglia build :)

27 Apr 2015, 11:30am
Great to see it up and running, looks really nice and clean.

Inspired me to keep going on mine - spent Sunday cleaning my work bench back to clinical standards, ahead of engine build. Got my stand built, but need some really long bolts to attach to the back of the engine now - hope to pick up at Stoneleigh on Sunday. Got back plate off - some surface rust on flywheel but hope a bit of gentle wet and dry will sort that. Hoping to start the engine build in anger in two weekends time - after shopping this Sunday.

Will you be bringing your car up to Stoneleigh?
2 May 2015, 5:44am
Glad I could kick-start things! I'm sure the weather getting better always helps as well?

TBH I'm still not sure I'm going to make the great trek up yet but I will try and get to the Castle Coombe show.

Plus it is still a bit cold, although the motorbike helmet has come as a revelation in terms of comfort! :)
2 May 2015, 4:18pm
I'm Renaming You MR SPEEDY WOW!!!!!

Very impressive. Exactly how many months?
I am blown away with the final finish. I ground to a halt during all the can't get hold of Mike period, but thats behind me and it WATCH THIS SPACE.
You've got me buzzing, time to visit my lockup and post some new build pics. Would be great to see it at Stoneleigh. WELL DONE. WOOOOOOW!!!!!!!
3 May 2015, 6:43pm
ta muchly :)

Some people have been asking me about the steering column change as I didn't cut-n-weld mine. I'd forgotten to post pics so I've just had a dig around on the camera and I have a few, so I hope I can explain without showing it at every step.

The std Herald/Vitesse column is made up of two parts, and outer and an inner, held together with a big clamp and designed to compress on impact as there were no UJ's on the std setup.


If you take this apart you can shorten the entire setup quite considerably, but you may have to grind a new 'flat' on the inner shaft.
I don't have a pic of when I was finished, but here's a 3/4 done pic that shows what needs to be done.


Then I got a prefabricated length of steering column from CBS along with 2 pressed steel steering column Universal joints and a pillow block bulkhead bearing from e-bay.

I fitted the UJ's and new short shaft, then bolted in the steering column (still not clamped back together at this point) and adjusted the main column section until it was the right length and then took it out and finished off the 'flat'.

Then it was clamped up and reassembled


And the view from the other side of the bulkhead


The 2 UJ's also mean that I have an IVA level of collapsible column without having to grind a long flat on the inner column shaft.

Simples! and I am a lot happier than if I'd had to weld it :)
28 May 2015, 12:28pm
Hi Dave, now you're driven around in it a bit, how important do you think dropping the front footwell floor is? How would it be if the floor was at the level of the chassis rails?

T
29 May 2015, 6:32am
Personally I'd say it was essential as you're putting your feet in the same position as the Herald/Vitesse and if you look at my pic above of the steering column you can see where the pedals sit and there's not much room for adjusting them.

Thinking about it, even if you went for a floor mounted pedal box then without the dropped foot wells it is going to be awful tight as far as I can see?
29 May 2015, 8:47am
I think you'll find that the clutch pedal won't go down far enough to fully disengage the clutch without the dropped floor.

Like DC says, even if you went for a flat floor and floor mounted pedal box, it'd be quite difficult to make it work - even with the bulkhead moved back in the Miglia the front tyres might still foul the ends of the master cylinders on a typical installation -

http://www.ebay.co.uk/itm/Floor-Mounted-Kit-Car-Bias-Pedal-Box-Hydraulic-Clutch-/230672784019?pt=LH_DefaultDomain_3&hash=item35b52b5a93

You could always give it a go though...
29 May 2015, 9:54am
Thanks Dave, mr t. You guys have been (and remain) great inspiration for me.
T
27 Sep 2015, 6:29pm


It's just that as soon as I finished on the Miglia I started 'er campervan.
And that doesn't' fit in the garage and so it's been V E R Y, V E R Y.. slow...

Until I finally bit the bullet and copied what some of the old Sammio boys did, and purchased a cheap 3mx6m Gazebo/Mini-Marquee from fleabay.

So this has been the scene on my drive for the past 2 months, with the poor Miglia trapped in the garage :(


But..... i'm nearly there making it watertight (don't ask!!!! But my neighbours now know 'exactly' what I think of 40yr old VW's!) and so like a moth from a cocoon, the camper will soon emerge and the Miglia should be free to catch the end of the summer :)


As you may have spotted from the picture the gazebo has been pegged, starapped and screwed to the drive as I live on the edge of the Somerset levels and it can be a bit windy. Which I why I _have_ to get it down before winter really sets in!

Even in the 2 months I've had the gazebo, it's managed to bend a few poles and I've had to tape and cable-tie the sides on! But when i'm done with it, it seems a shame to throw it in the skip, so if anyone wants to take it off my hands then it's yours for a few Ciders!

The gazebo that is, not the Camper van! Although given how much trouble that's been..... ;)
27 Sep 2015, 9:14pm
Welcome back DC. Nice to see you're still wielding the spanners, albeit on a Type 2.

Wise move bolting your gazebo to the planet, I tied mine to buckets of concrete on the drive and it still blew away in Dorothy's house stylee at the first sign of a hurricane.

I know nothing about the Migiias(?) on the motorway, but there are at least 150 Spyders out there plus an unknown number of Miglias, so there's a good chance one or two will pop out of the woodwork occasionally.

Anyway, good luck with the belligerent camper.
28 Sep 2015, 8:27am
What a great idea - the marquee. Next year when I get round to spraying I should consider something like that - maybe a bit wider, and not as long. I will ponder eBay at the time.

And don't forget to check the emmissions - we all know those VWs are not good these days...
28 Sep 2015, 6:33pm
Dave - Sorry to hear that your car has been trapped in the garage for so long. :icon_sad:

Sounds like you have made solid progress on the campervan. :cool:

Good luck, Paul. :)
31 Oct 2015, 12:02pm
Cheers guys. VW and emissions.... As long as my exhaust smoke is on the right side of black i'm happy, if that counts? :)


And on that note; the marquee is down, the camper moved and I've finally managed to get the car out and sorted ready in time for the Classic car and restoration show at the Bath & West showground next weekend.

Sadly the excitement was short lived as my first run-out resulted in a weird smell which turned out to be a leaking rear gearbox seal dripping oil onto the exhaust! So a quick order was placed with Rimmers last weekend and the new seal cost about a fiver all in!


When I was building the car I left access hatches for bits I may commonly want to tinker with, but I also tried to fit the interior panels so that I could remove certain ones to get to certain whole 'areas' should the need ever arise.

Well that was the theory!
And luckily it turned out to be a good one in practice :)

Left-middle gearbox tunnel panel removed on the passenger side and I had direct access to the gearbox flange and coupling (whoo hoo - I love it when a plan comes together!)


A quick read of the Club Triumph forums and I found an article by a local Triumph owner about how to change the seal in situ using a locking bar and the original bolts.

With the driveshaft cable-tied out of the way, the procedure was a doddle even after a long day at work!


And the offending nearly fifty yr old bit of rubber!


And then this morning I woke up to clear skies and a lovely warm October day so I thought it was time to see if it was just that seal causing the issues, or a bigger problem (which would normally be my luck)

A quick run-out seemed to indicate all was good, so I decided to go for it and finally venture up Cheddar Gorge for the photos i'd been promising myself to take ever since I started this project.

:bounce:


30 miles of barrelling around the Mendips later and still no oil leak, so job well done :)

So now i'm all set for next weekends end-of-year show and I hope to see some of you there?
31 Oct 2015, 4:15pm
Dave - Love those "glamour" shots, especially the last one, your car looks great. :cool:

Enjoy the show next week, take care, Paul.:)
31 Oct 2015, 7:11pm
Paul L wrote:
Dave - Love those "glamour" shots, especially the last one, your car looks great. :cool:

Enjoy the show next week, take care, Paul.:)


I second that.

The car looks great, i think photos always look better away from the standard garage shots.

Enjoy matey.
31 Oct 2015, 9:11pm
Cheddar gorge is great but the pics could be from the Targa Florio
23 Nov 2015, 3:55pm
It looks great! Some chrome trim around the portholes might help it look more finished. See: http://www.ebay.com/itm/1953-6-BUICK-PORTHOLES-EXCELLENT-REPRODUCTION-/111146690117

The Vignale Ferraris, which were clearly the inspiration for that styling aspect of the Miglia, had chrome trim around their portholes. See: http://www.boldride.com/ride/1952/ferrari-225-sport-spyder-tuboscocca-by-carrozzeria-vignale

Also, have you thought about opening up the rears of the front wheel holes, in the style of the 625 TRC Ferraris? It might help balance the design a little. See: http://www.favcars.com/photos-ferrari-625-trc-1957-134482.htm
14 Dec 2015, 1:05pm
Cheers for all of the feedback guys, and JJMCD - thanks for the interesting ideas! There are certainly a few things there for me to ponder over :)


Seeing as i had the poor little thing trapped in the garage all summer I am trying to get out-n-about a bit. I know it's winter.... but I have fitted the Miglia Winter pack, i.e. a bike helmet, flying jacket and some thick gloves from Mountain Warehouse!

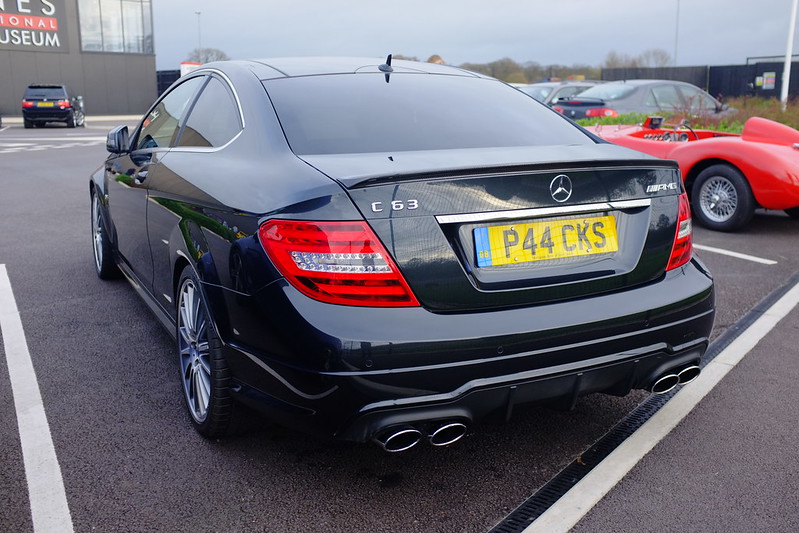
So Sun the 6th was the "1st Sunday of the Month Breakfast Club" at the Haynes Motor Museum and it was dry(ish), so I gave it a go!

Excuse the bad pic, but I forgot to get any pics of the Miglia and then I found this one that it photo-bombed over on the Pistonheads forum :)


What a great little meet-up, at a great location and with a really nice café selling a well needed cup of coffee and Bacon buttie :)

There were good turnouts from the TVR club, Aston owners club, Porsche owners club and a load of Hot-rods, yet despite that there was quite a bit of interest in the little Miglia especially from the Triumph boys there. And a few of the old guys were impressed to hear about the re-emergence of the 'Special' when I described what Miglia / Sammio / Tribute are doing.

The trip did raise a few things I am going to 'fettle', but more about those over the coming weeks :)
16 Dec 2015, 7:48pm
Dave - Good to see you out and about in December. :cool:

Do you use a full face, or open faced helmet?

Cheers, Paul. :)
22 Dec 2015, 8:02am
I bought a full face, but a flip front one that can be driven with the front open.
Although TBH I've found that if I'm wearing the helmet, it's cold, so it's closed and if it's warm enough to be driven with the front open then I simply wear a baseball cap and sunglasses :)
22 Dec 2015, 9:08pm
Miglia

Any one know how many miglias are on the road up and running merry Xmas to all rattler
23 Dec 2015, 12:06am
I almost got the GTE out to go to the Haynes meet this weekend (I lived in Ilchester 2004-2011) but spent the day working on the SS1 sprint car instead!
23 Dec 2015, 8:37am
From just looking at this forum i recon there are about a dozen Miglias that i know of. Out of those I'm only aware of a couple that are on the road, but that is just going from what is on here!

ScimJim - please come and say hi if you see me out next year as it was a great run-out and just the right sort of distance for a Sunday morning :)


Some of you have been asking about SWMBO's camper as that's diverting me from the Miglia mods i want to do.
Just to give you an idea of what's been tying me up over the last 9 months here it is as i bought it:


Note all of the black paint! It turned out that it was all THICK underseal / Hammerite and it was all hiding rust / cracks / bodges from over the years :(

But that has all now been stripped off as far as possible and while i'm not willing or able to do a a full back-to metal rebuild, all of the bodyfiller has now been replaced with actual real metal!! The roof is now once again watertight, the window seals replaced with rubber that actually stops water, the window sills are now metal rather than filler and the interior has been stripped, cleaned and no longer smells of mold!


Just need to finish refitting the interior, fix the wipers and then do a quick engine service and i can official hand it over and get back to the Miglia!!
23 Dec 2015, 4:50pm
Nice looking Bay Dave, that colour suits it much better than lime green.
16 Jan 2016, 12:23pm
I gave SWMBO complete freedom of colour choice and she picked that one, which i found funny as on the tin it's "RAF Roundel Blue" :)

Back to the Miglia i have it planned to line the inner front wheel arches with alloy over the winter, but seeing as it's currently very cold and handling sheets of freezing cold metal isn't exactly my idea of fun, i have put those plans on hold.

So looking for other things to do I've been having a play with my latest toy, a 3d printer.
I'm still 50/50 about putting logos on the back of the car as it's fun to keep people guessing what it is when i pull up, but i've been using this as an exercise to get up to speed with the 3d design, transform and print software as i do want to make some bits for when i start to fit the heating later in the year.

The first task was to choose a font and come up with a basic printable design.
So i managed to add some text in Segoe Script font on to a plinth for the moment (plus it took a few hours to learn how to get that far!)


Then that was translated into a printable model, which is a quite a quick and simply process now that I've got the hang of it!


That was fed to the printer and just over an hr later it was done

(Note for the teeccys amongst you, it's already been peeled off of the base plate for this photo

Then up to the garage and a bit of a tidy up and a trim and an initial coat of grey primer to show up bits i need to tidy up further. apologies for the bad focus but i was shivering when i was taking this!


By this point i was already froze, so it's time to wait for paint to dry and have a bit more of a tinker with other things i need to design.