MadaboutKitcars

This is a read-only archive of the old Madabout Kitcars forum. New posts and replies are no longer possible, but every thread is still here to browse and read.

Another Cordite Is Born ...

31 Jan 2013, 2:14pm
Both look like great choices, but really worth ten to fifteen times the price of a basic mma rig? I suppose it depends how seriously you take your hobby engineering.
31 Jan 2013, 2:21pm
Mister Towed wrote:
Both look like great choices, but really worth ten to fifteen times the price of a basic mma rig? I suppose it depends how seriously you take your hobby engineering.


Come and have a go, you may say yes!
Anyway, all tools tax deductable:icon_biggrin:
31 Jan 2013, 4:23pm
seanick wrote:
Come and have a go, you may say yes!
Anyway, all tools tax deductable:icon_biggrin:


I'm sure a decent mig welder would be a dream to use compared to my budget mma jobby, just as I'm sure a new Porsche would probably be more exciting to drive than my Primera. But one has to live within one's means, sniff.
31 Jan 2013, 8:49pm
It is funny how you always need to consider the knock on impact of one job on another job further up the line.
So sorting out my doors is now linked to the work required to get a better fit between the body shell & frame.
And issues with the body shell fit are also linked to my dashboard, which in turn, is linked to my electrics…

Dash Board Ideas:
Previous 'mock up' work showed that the 'wrap around' dash would need a lot of work before it would fit nicely. :rolleyes:


Despite this, my original plan was to mount most of my donor's original dials & gauges into this dash panel.
Although I was considering mounting the choke level on a metal bracket to make it more solid to pull against.
( With similar considerations for fitting the hazard light switch and the trip milometer reset switch. )

So I'd knocked up another simple spread sheet to play around with some possible layouts (not to scale).
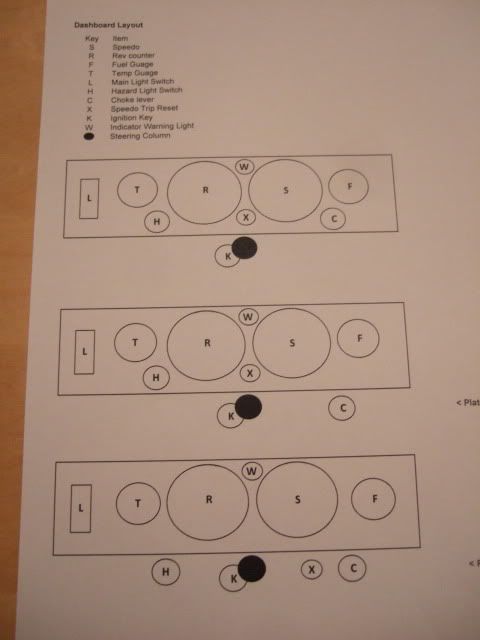


This was all pretty standard stuff, although I did swap the choke lever to the right of the steering column.
( I found it a pain start trying to start the car with both ignition key & choke on the left side of the column. )
I'd also taken on board Mister Towed's tip about moving the light switch towards the middle of the car.

But then Nike 55 put this photo on Mr T's build (relating to side mirrors) and I had a big re-think.
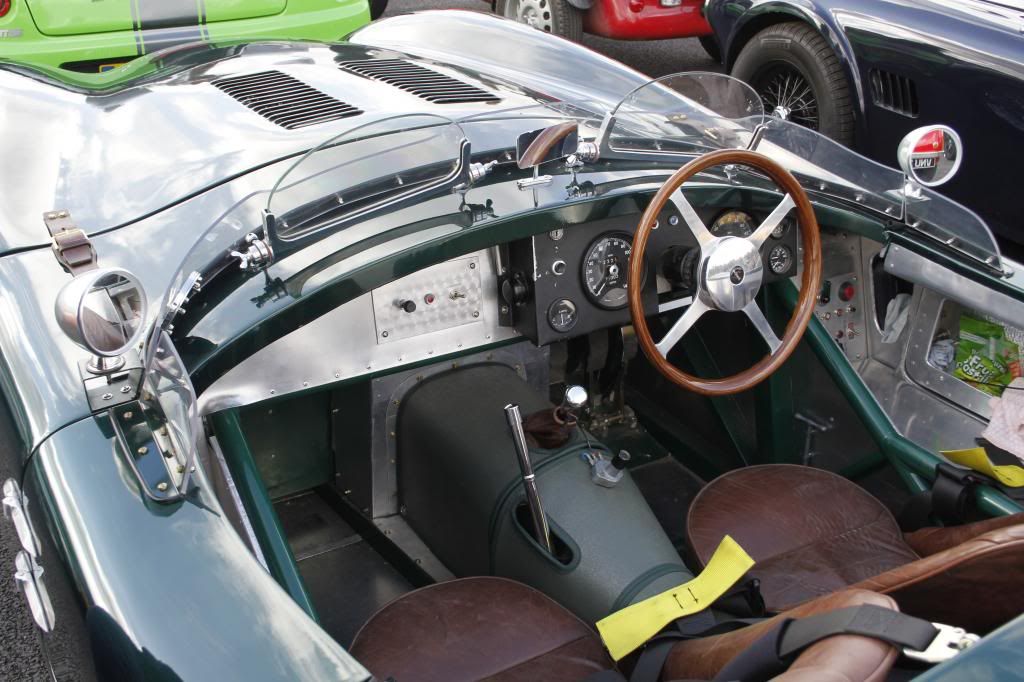


I think this approach would be easier to build below the existing dash board "lip" in the body shell.
Note: I mean the box section for the dials, etc. not the alloy finish (even though that does look great).

I have also decided to add a simple battery cut off switch to the dash as part of my security measures.
Although I plan to fit this on the passenger side of the dash to reduce the length of battery cable needed.


But before I can mock up a 'life size' dash on cardboard, there are other inter-connected areas to deal with.
I can't test fit the steering column (to arrange the dials around) until I modify the frame to accommodate it.
And I can't modify the frame until I've learnt how to weld and had some time to practise.

The final part of the dash puzzle is the position of the driver's seat, which in turn is linked to the floor pans.
If I make the seat runners work, then the seat will be higher than if I have to bolt it straight to the floor.

Pulling It All Together:
I know the above reads like some sort of never ending jigsaw puzzle that just wont fit together properly.
But I hope all of these long winded decisions will eventually make the final construction phase a bit easier.
AndyP57 has put a lot of effort into soring out my missing / damaged parts, which will also be a big help. :cool:

I abandoned any finishing deadlines a while back and that has actually taken a lot of pressure off me.
After all, this is effectively my spare time hobby, not my full time job, working around family commitments.
And that is before I start ranting & raving about my own dumb idea to build this outside & battle the weather.

But a key stage of my build is now approaching when I will be in a position to start modifying the frame.
I will post my framework "To Do" list separately, and thankfully they are all little jobs, just a lot of them.

Until next time, take care, Paul. :)

Replies:
Gentlemen - Thanks for all the feedback and links, I work through then at the weekend.
Unfortunately, I can't remember what sort of welder my mate has. :rolleyes:
Hopefully I'll have a better idea of what I will be doing next week.
31 Jan 2013, 9:20pm
Looks like you plan to fit the dash panel behind the tub lip, thats how I started out and the fit looked similar, however when I actually came to fit mine I ended up placing it in front of the tub and bolted it through the two parts with bonding paste sandwiched between them, its amazing how flexible the dash panel is and when tightened up with nuts and bolts it actually pulls into the contours of the tub, once set the bolts were removed and the whole thing remained rigid.

Maybe worth considering
Pops
2 Feb 2013, 1:19pm
SpitBitz
Made the 90 odd mile round trip to have a look at the back section of a Spitfire this morning.
Most of the rear section is in good condition...


The boot floor may have few issues, but not too bad...


The only really rotten section is on the driver's side.
( Where the seat belt was mounted & further round the inner arch too.


The guy there was very friendly and helpful, but couldn't quote a price for delivery.
And it was going to be just a fraction too big to fit in the back of my Mondeo estate. :icon_sad:
So I have come back to have a think about whether to "take it or leave it".

Rust Question:
If I cut out the rusty section, could I simply repair it with a section of fibre glass?

I was expecting to join the Spitfire inner wheel arch to the Cordite body shell with fibre glass.
So this would simply be an extension of the general bonding & 'glassing of body to frame, etc.

Cheers, Paul. :)

Replies:
Pops - Cheers, I've seen the progress on your dash, so I'll re-read that part of your build again.
2 Feb 2013, 9:11pm
Evening Paul, nice to see a thread about building cars!
T fibreglassed his footwells, and they came out alright...
4 Feb 2013, 1:24pm
Just taking a break while I sort out some lunch, so I'll be quick...

First Welding Lesson:
My best mate came around with his MIG welder and I've now had my first go at welding. :cool:

I started just working along a metal sheet so see what it was all about...


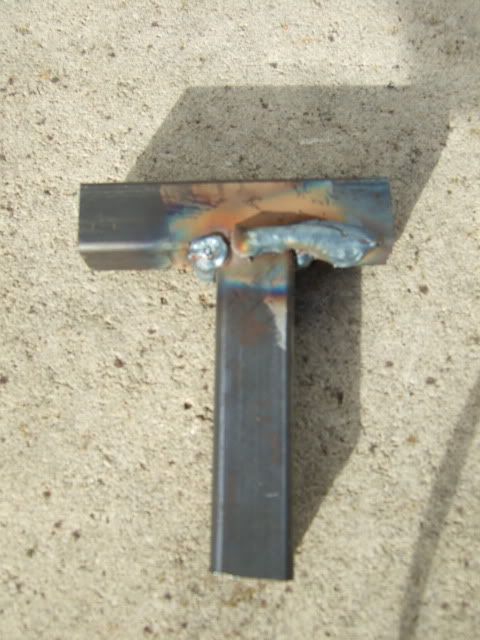
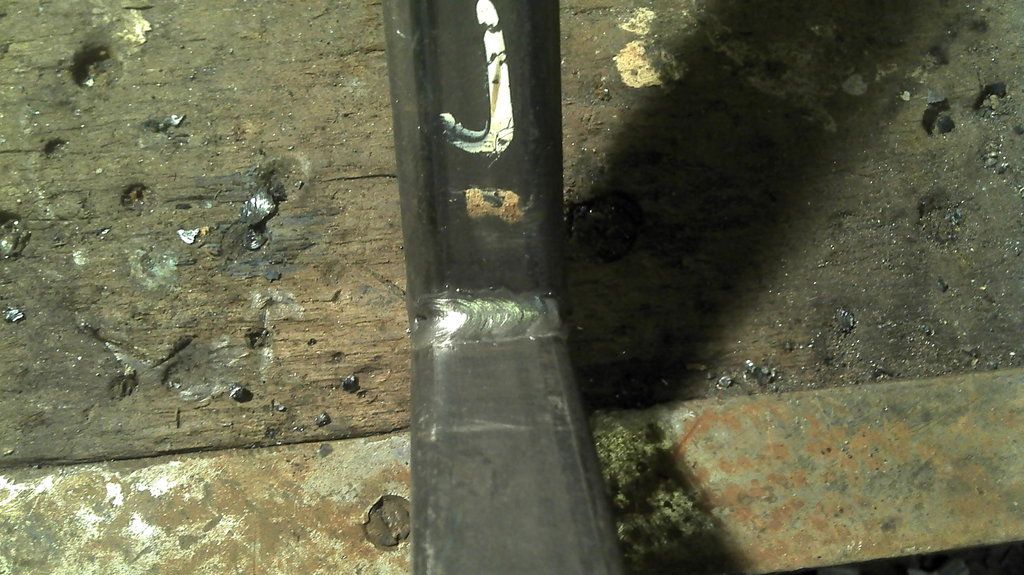
Then had my first go at joining two pieces of box section together...


Some welds are certainly better that others, but it does seem a pretty solid join.
Although you can see where I kept going beyond the T join on one side. :rolleyes:

I guess it takes a while to get used to using one of these...


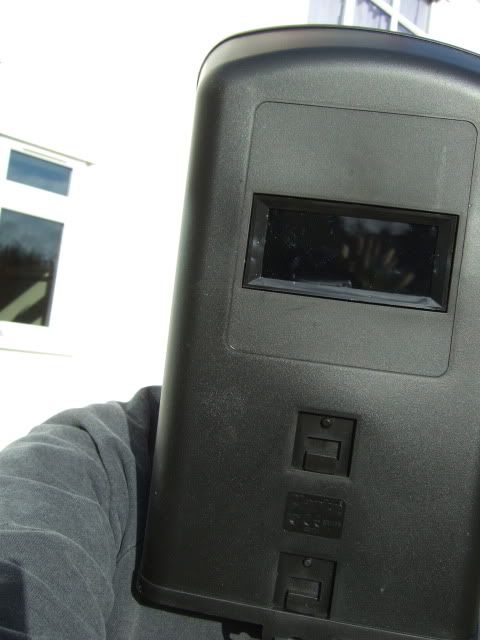
Excuse the dodgy self portrait, but my mate had left me to it by now.
It is pretty blustery outside at the moment, but at least it isn't raining!

The other thing I will bear in mind is this quote from the Ribble Frame Debate ...

seanick wrote:
... The difference between blobbing something together with a budget MIG and producing smooth fluid welds with the correct level of deposition and penetration. Unfortunately, you will only find out how good your welds are when you have crash, and your welds fail... I dont want to br prophet of doom here, but I did a City and Guilds welding course about 26 years ago, and after 26 years regular practice l know I still have room for improvement! ...


So I am not about to start modifying my frame until I have a bit more practise.
And even then I will accept my limits and get some one else in if required.
The good news is I am off work for a few days, so I will keep practising.

Cheers, Paul. :)

Replies:
GaryH - It is pretty depressing to see build photos & notes being deleted. :icon_sad:
4 Feb 2013, 3:36pm
stick with it, the ability to weld is probably the best skill you can develope whilst messing with cars. looking at you test t piece i would say you either need more gas flow or your working in a breezy location thats blowing the gas away. In addition the way your welds seem to sit on top of the piece would leave me to presume you need to try upping the power a bit as well.
HTh
Mac
4 Feb 2013, 4:34pm
grind it back hit it with a hammer if it falls off try again
4 Feb 2013, 5:54pm
More Welding:
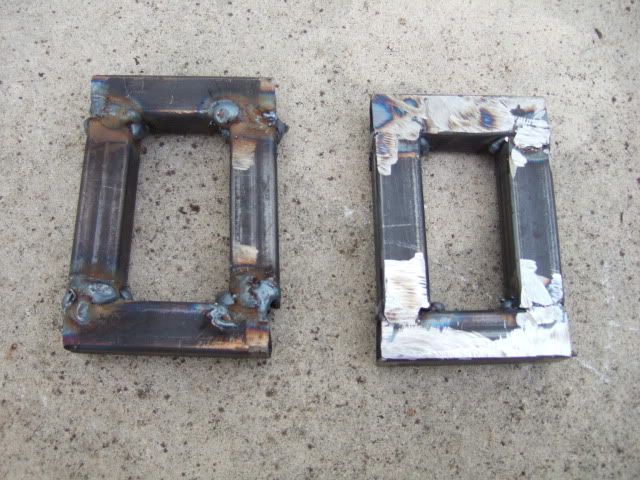
I wanted to practise making a section that I planned to use in the frame work.
The steering column will foul the existing frame rail (which was modified on later kits.).
So I will cut out a straight section & replace it with a "box" the column can pass through.


I simply cut out some box section and gave it a go.
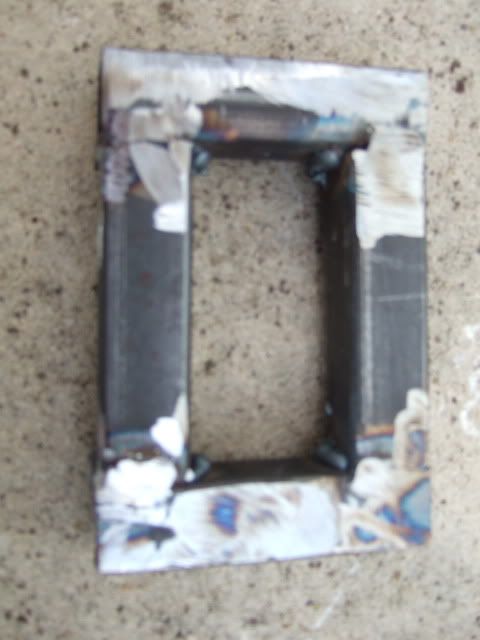
My first attempt is the box on the left and my second attempt is on the right.


I was really pleased with my second attempt, which is shown after I ground down the welds.
( Sorry the close up photo is a blurred. )


There is more than enough room for the steering column to pass through.


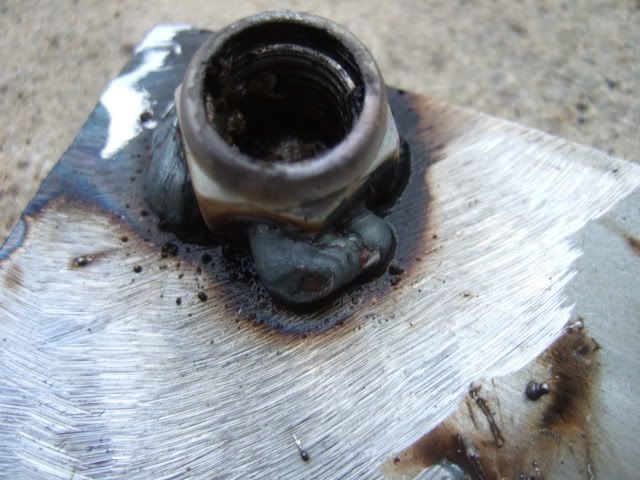
I had a small mis-hap when I had a go at welding a nut to some metal to make it "captive".
I'd picked up a Nyloc nut without noticing, although the small fire did catch my eye. :rolleyes:


So lots of practise still required, but the weather forecast isn't looking too good.

With that in mind, I turned my attention to a job I would be able do some of it indoors.

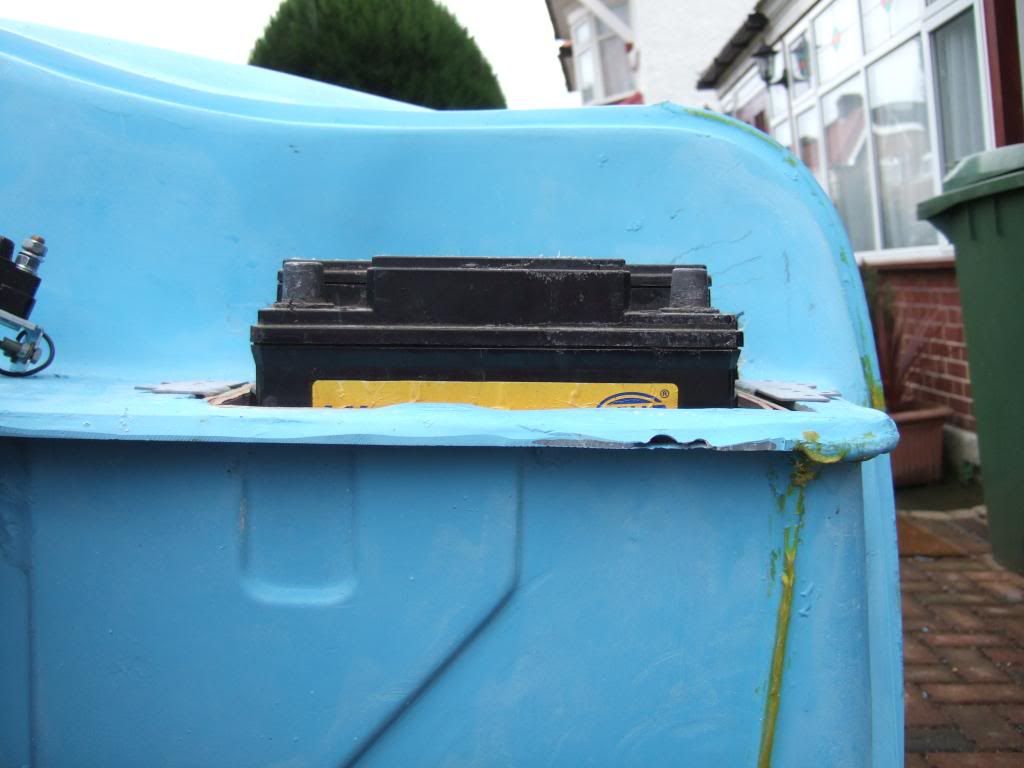
Battery Box - Part 1:
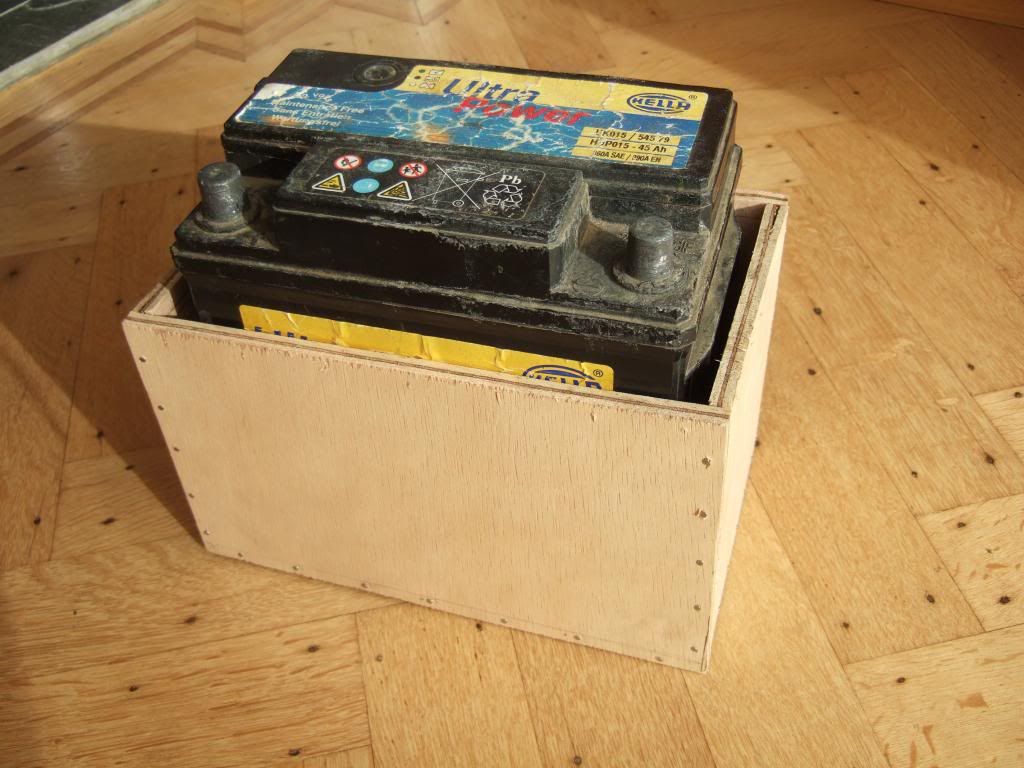
I'm building my "sunken" battery box out of exterior plywood, before sealing it in resin / fibreglass.
It is based on DonnySoutherner's design, but modified to steal an idea I saw on the battery tray below…


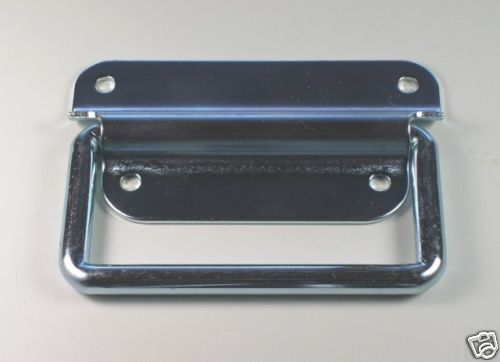
I intend to use a combination of "Chest D Handles" & a simple luggage strap to hold the battery in place.
Similar to these items below, but I haven't decided on my final choice yet.


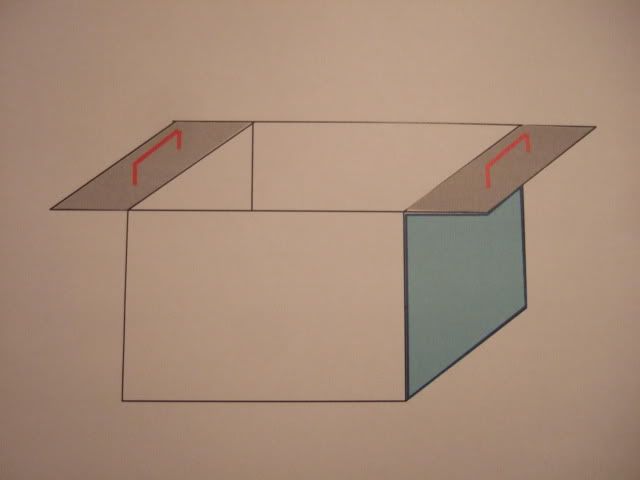
I used Power Point as my poor man's CAD system to draw up the basic idea for the box.
( Perhaps I would be better off sticking to my dodgy sketches! :rolleyes: )


I thought a plywood "lip" on the edge would give me something sturdy to mount the strap handles to.
Although when I had another look at the bulk head, I decided this was a bit OTT for what I needed.
So I will just mount the handles directly to the bulk head and re-inforce that area if required.

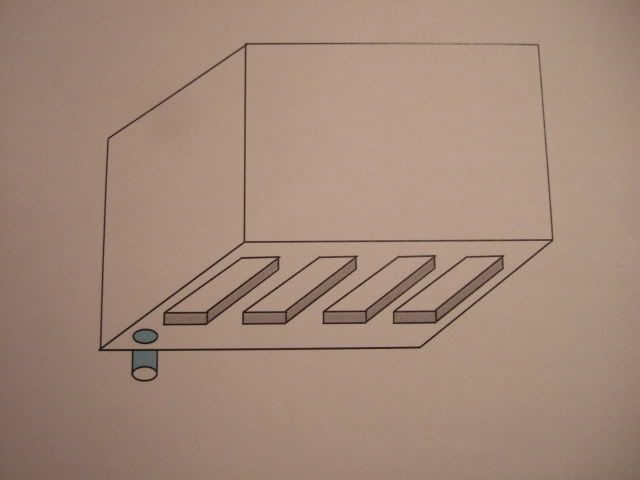
The other thing I need to consider is a simple "drain pipe" to avoid water collecting in the box.
This needs to go from the box & back out through the bulkhead, as the box is over the passenger foot well.
So I will build some ridges in the base of the box for the battery to sit on, allowing water to drain freely.
( Final layout to be decided, but hopefully you get the general idea. )


I worked out the the sizes of ply I needed based on my battery and the bulk head space available.
I also allowed enough space to replace my battery with a new one if required (no idea how old this one is).
Then is was simply a case of marking up a "spare" section of plywood, before cutting out with my jigsaw.


Hopefully I will be able to assemble this tomorrow.

Until then, take care, Paul. :)

Replies:
Viatron - Cheers Mac, yes it was a bit windy working outside today.
In the end, I re-arranged things, so that my body was forming a wind break.
CarNoob - I'll try the hammer test tomorrow.
5 Feb 2013, 1:59pm
A little bit of tinkering this morning before I do some more welding practise this afternoon.
I figured it would be better if I could actually feel my fingers when operating power tools. :rolleyes:
My drive is North facing, which means no sun gets to it in Winter and it is bloody cold out.

Hump Head Rest:
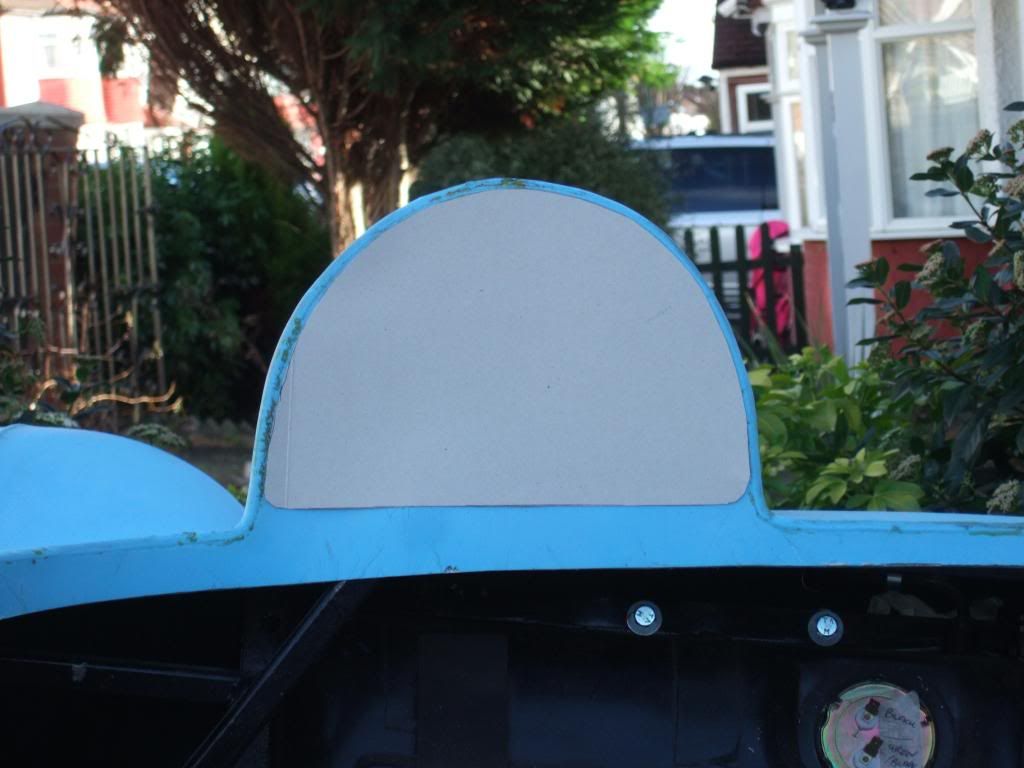
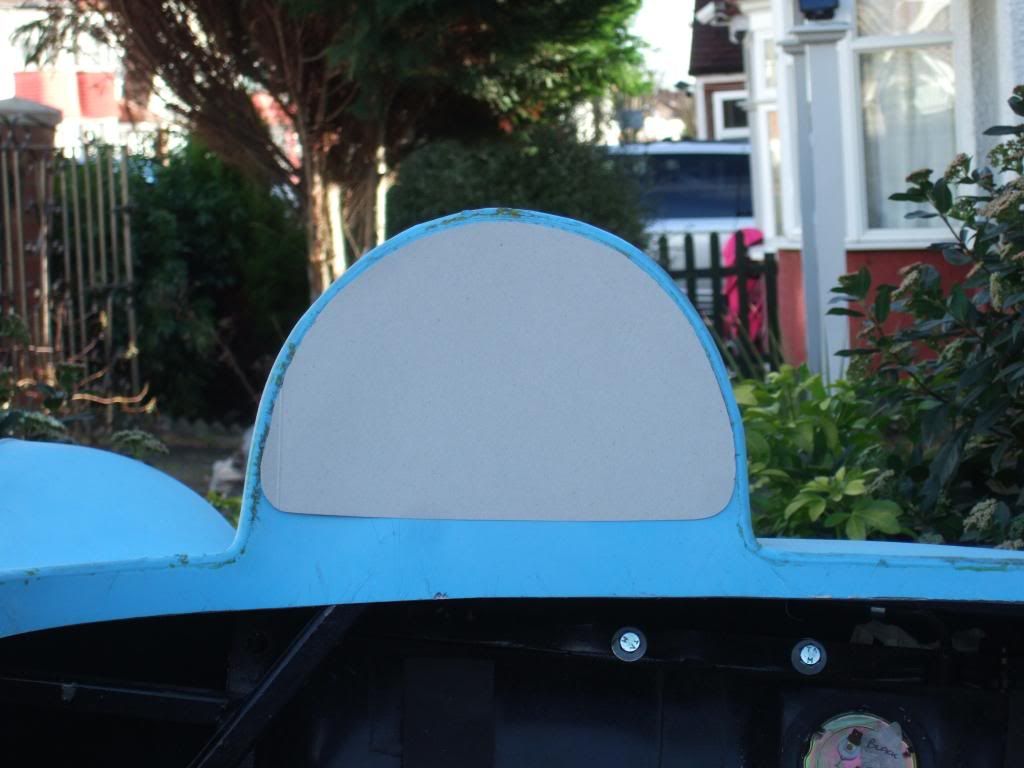
I wanted to make a template that I could send off to get a padded head rest made to fit.
However, after two attempts, I am still not happy with what I have done so far...


Should the bottom line of the head rest be equidistant from the hump top like a semicircle?
Or should it be at an angle in line with the slope in the body work either side of the hump?
The fact the car is on a sloping drive & the edge of the body varies too doesn't help either.

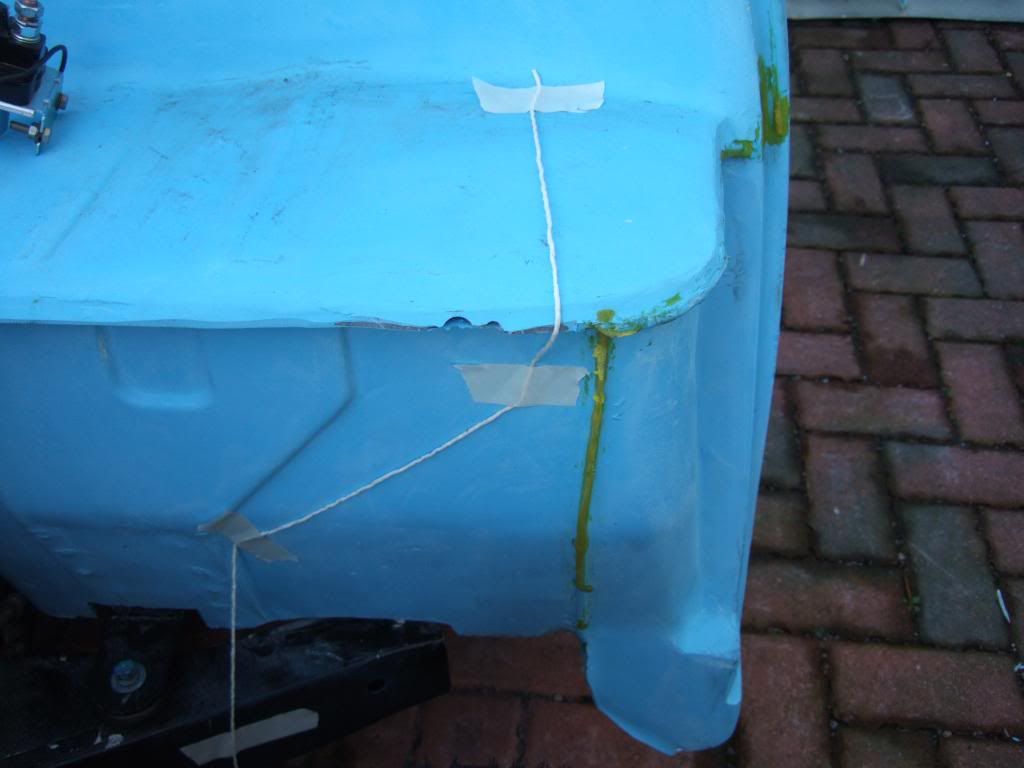
Flexible Fuel Line:
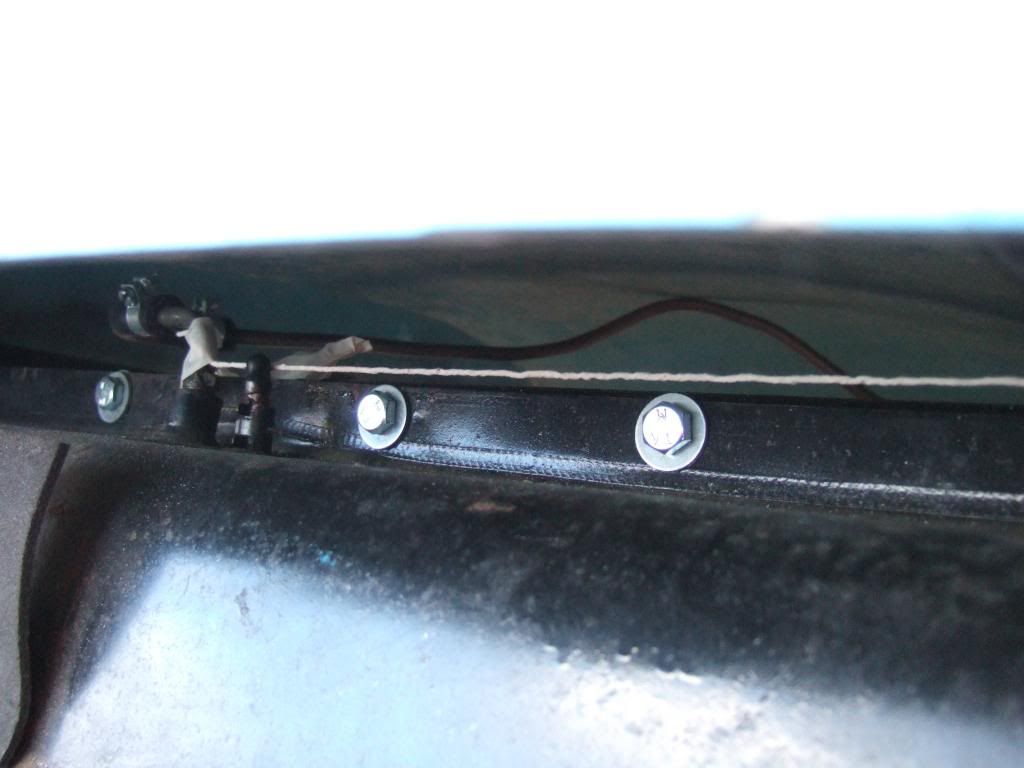
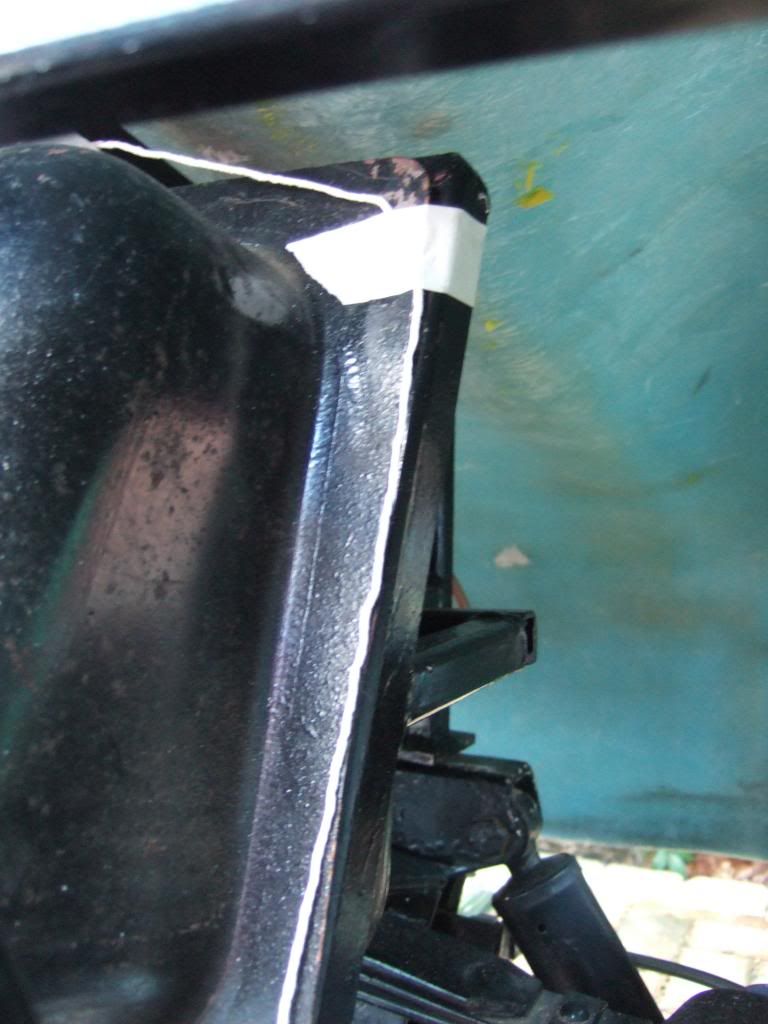
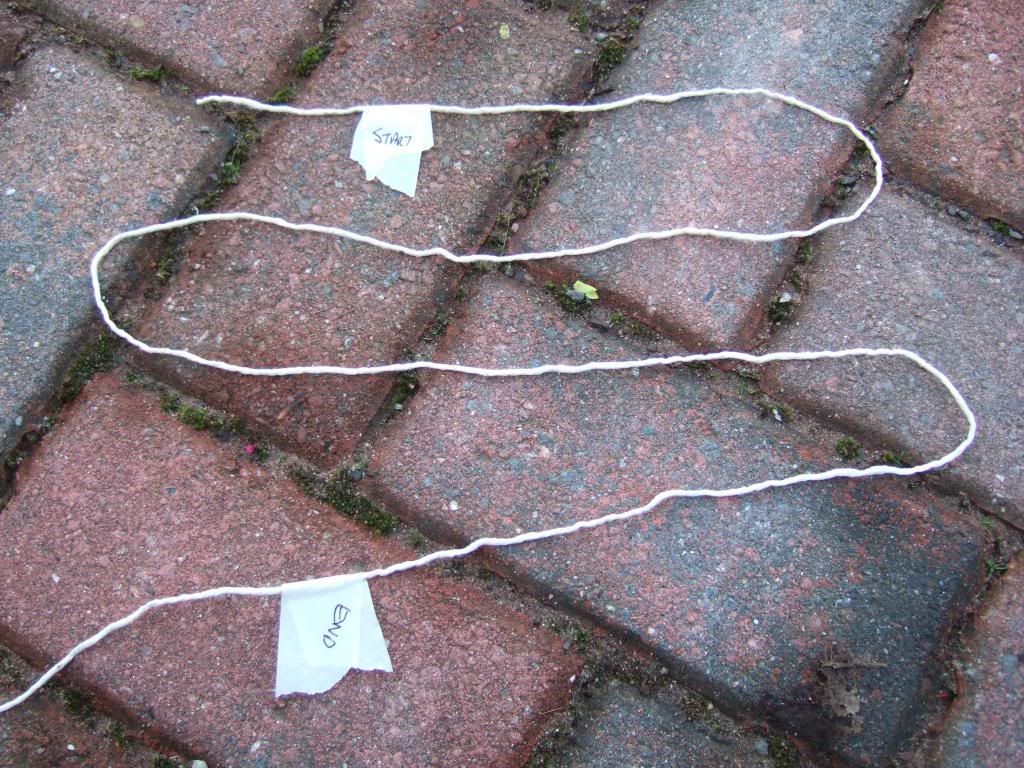
I wanted to check the maximum length of fuel line I needed to order.
So out came the string and I ran it along the top of the tank & down the side.
I then left a bit of flexibility depending on where it will join the existing hard line.
Then the distance between the two tags is the length of hose I need, simples.


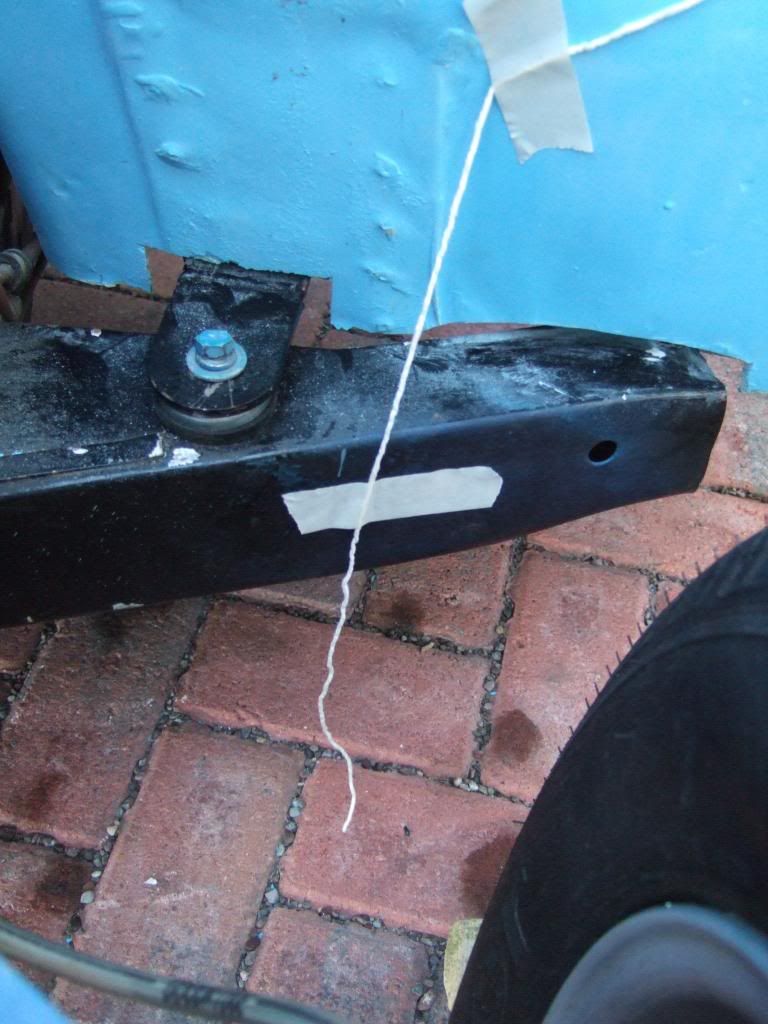
New Earth Lead:
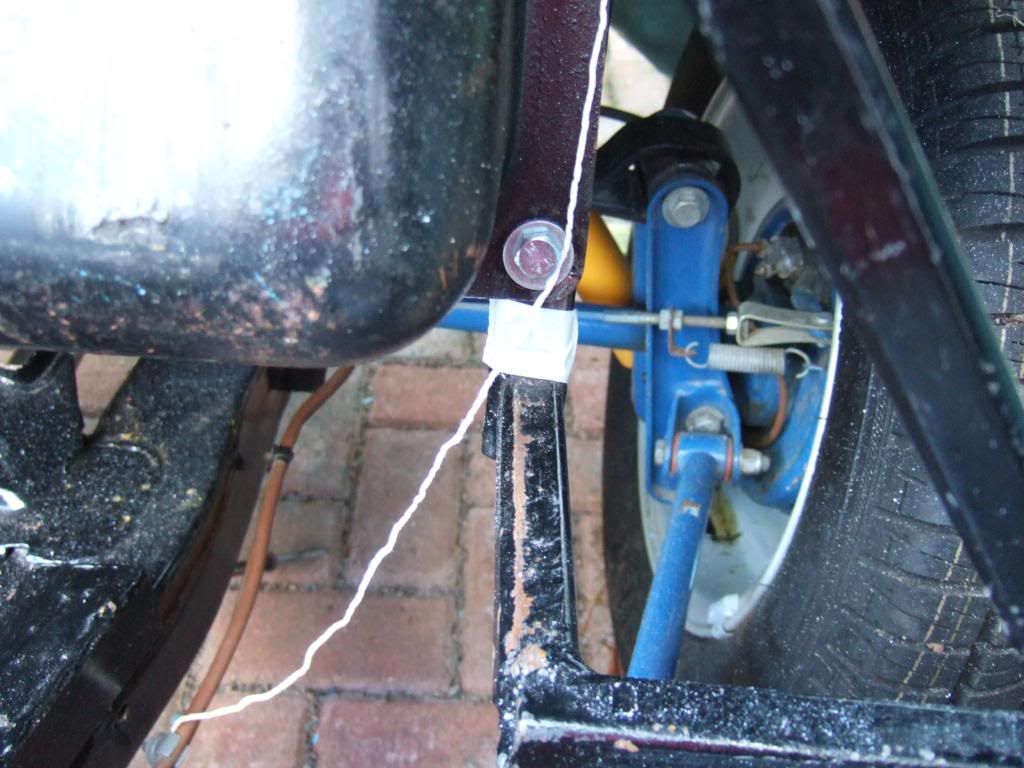
While the string was out I had a look at where I might earth the battery.
Again, I want to know roughly what length of new earth cable I need to order.
I think the chassis where the front of the Cordite frame bolts to will be my new earth.
Whilst the tape marks the spot, I could move the earth point to the outside a bit.


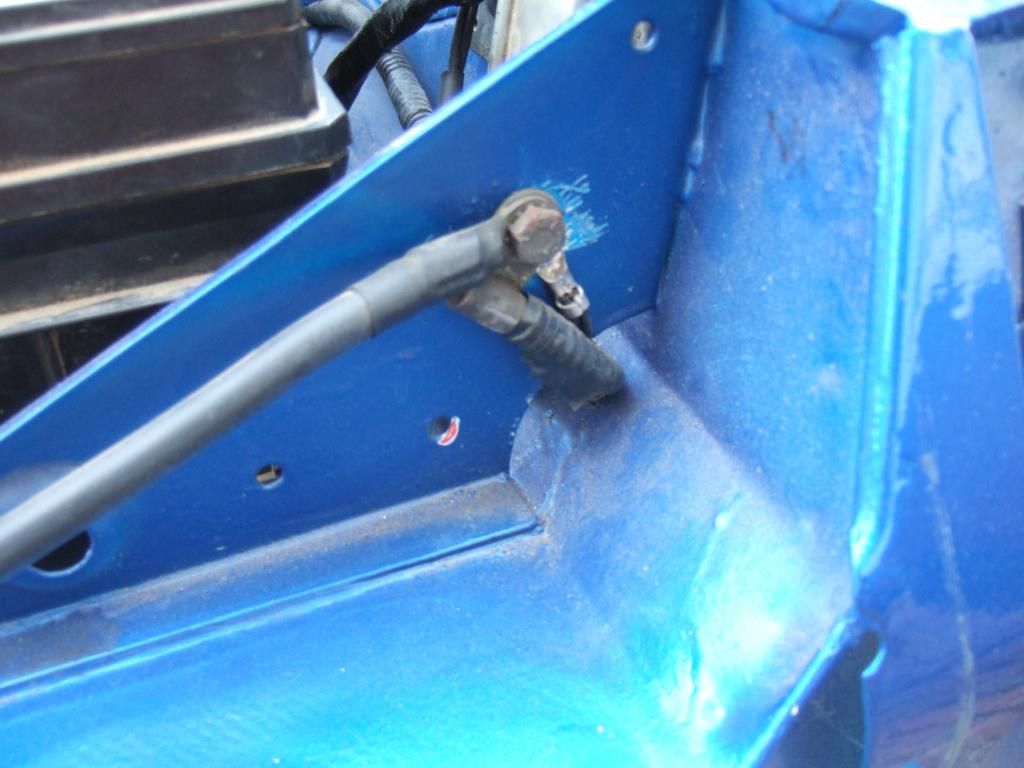
Previously, the engine earth strap joined the earth lead from the battery here...


This also earthed another part of the loom that went back through the bulk head.
So I might create a mounting point to connect the earth wires on the bulk head.
Again, the tape just below the bulkhead ridge marks a possible mounting point...


Can I connect the engine earth strap directly to the new chassis earthing point?

Battery Box - Part 2:
I drilled some pilot holes along the edges of my plywood sections.
I then used panel pins to form the box shape I wanted.


Note: This was a dumb idea, as the pins slit the ply layers in places. :rolleyes:

So I've had to add a small corner "L" bracket to hold it in place on one side.
I am not too worried, as the final strength will come from adding resin & fibre glass.
But at least this will allow me to position the box in the bulk head & cut a hole.
( A job for either later today, or sometime tomorrow. )

Other Top Tip
Don't let you finger get trapped between a lip on the battery & the edge of the plywood. :tape:
I removed a section of skin just below my finger nail. :icon_sad:

Right, well I have warmed up again, so back outside I go...

Cheers, Paul. :)
5 Feb 2013, 2:13pm
Hats off, or on, to you for working outside today Paul. With regard to your template I would make the bottom parraelle to the...cockpit coaming. Then the next price of trim will fit against it easily.
5 Feb 2013, 3:05pm
You are braving this weather aren't you! There's always the option of a round cushion that can be placed to taste. In that way, there isn't the question of whether to line up with coaming or horizontal to ground.
5 Feb 2013, 3:12pm
Yes that would be nice. Maybe a buttoned bar stool cushion would look good!:laugh:
5 Feb 2013, 4:41pm
More Welding Practise:
I moved to the bottom of the garden in the vain hope that I'd have more shelter there.
But there is no escaping the fact that it is windy and this is not helping me to weld at all.
I will keep an eye out for arc welders on Ebay just in case, but I'll stick with the MIG for now.

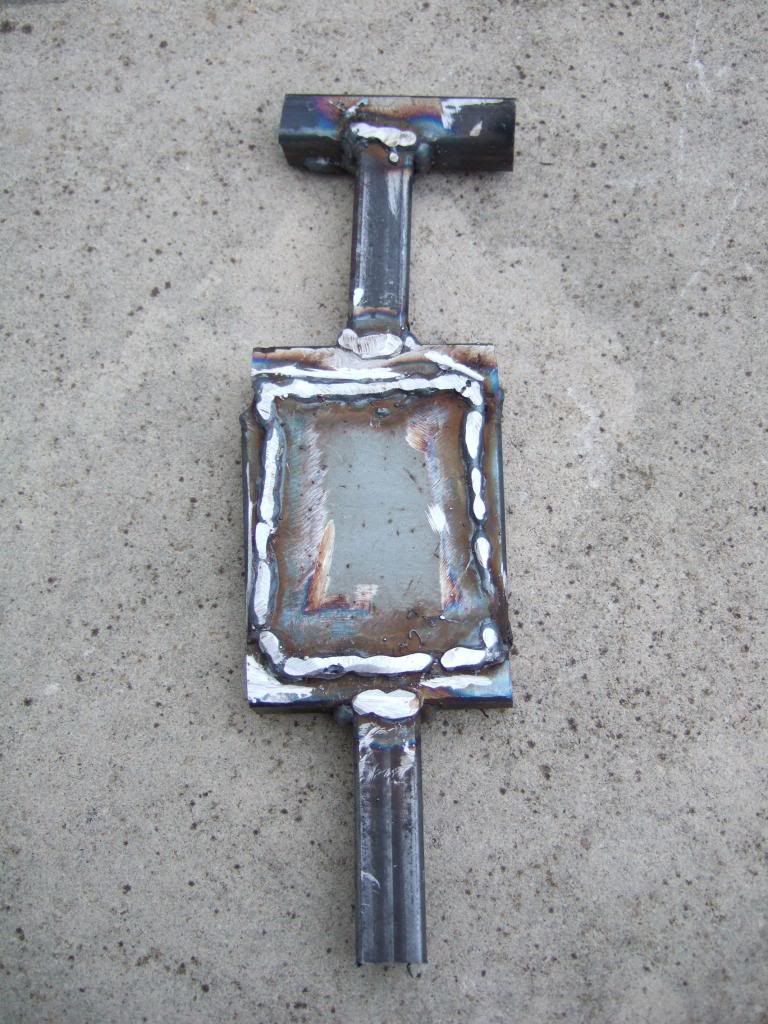
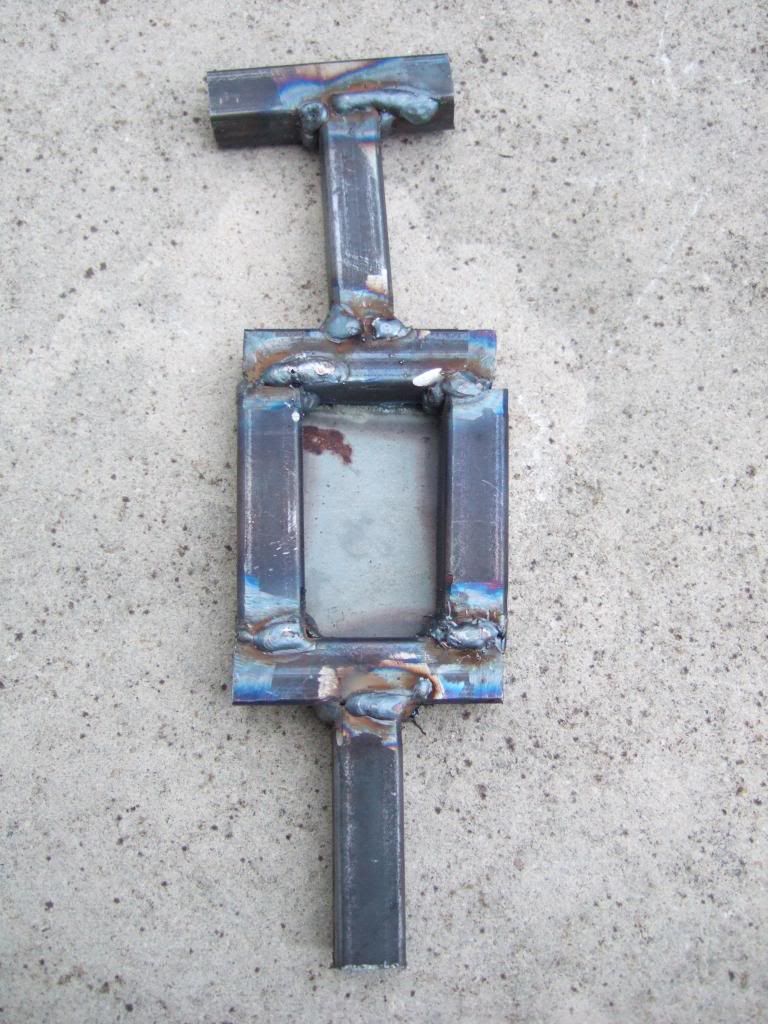
The first thing I did was weld the "T" section & my first attempt at a box from yesterday together.
Then I cut another section of box section off & welded that to the other end of the box.
Then I cut out a section of the steel sheet my mate supplied & welded that to the box.
Note: No attempt made to line things up nicely, just wanted them to stick together.


I know it isn't great welding, but I am really happy that they are at least joined.
But I know I can't get ahead of myself & my attempt at patching a panel showed this. :icon_sad:

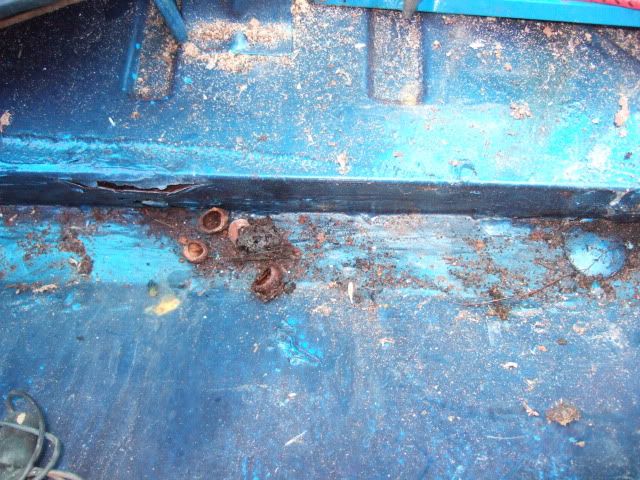
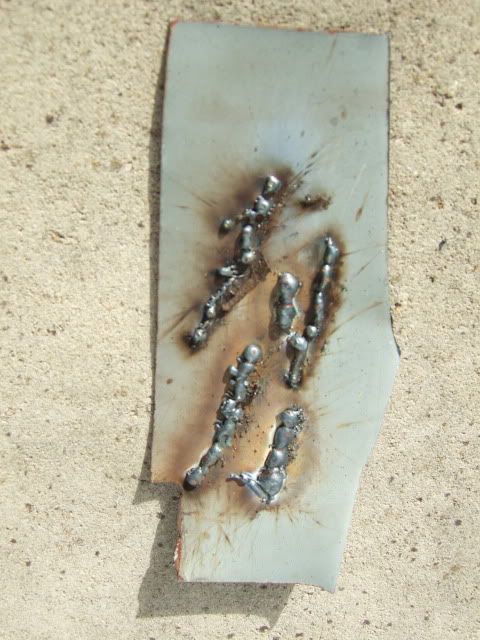
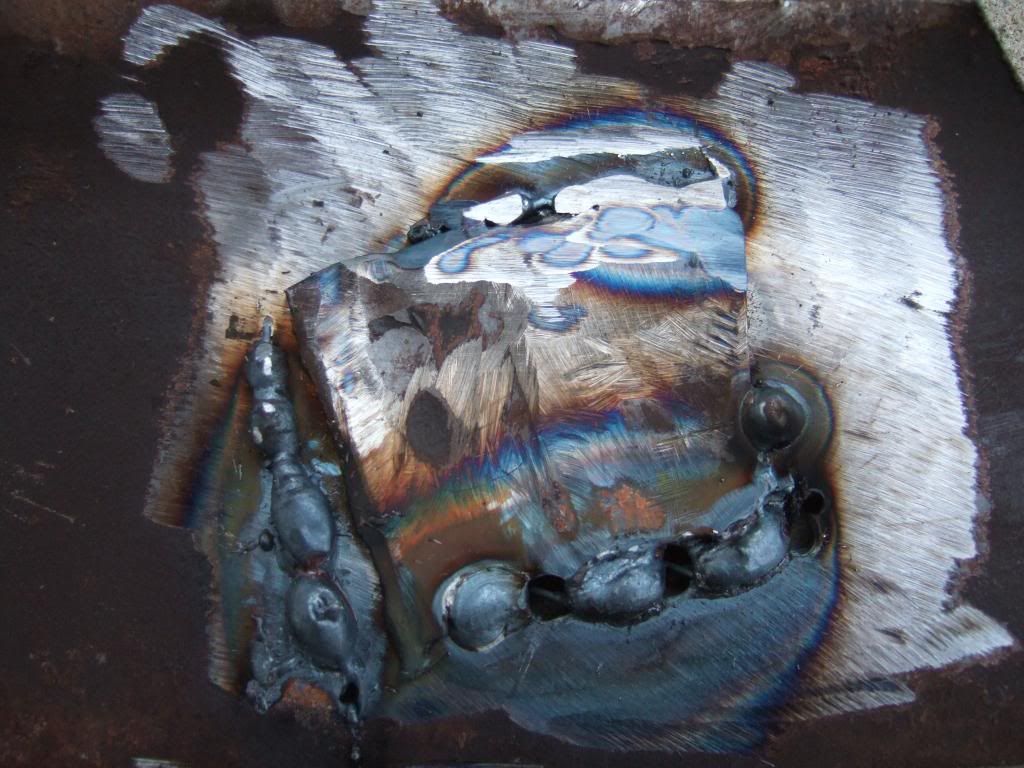
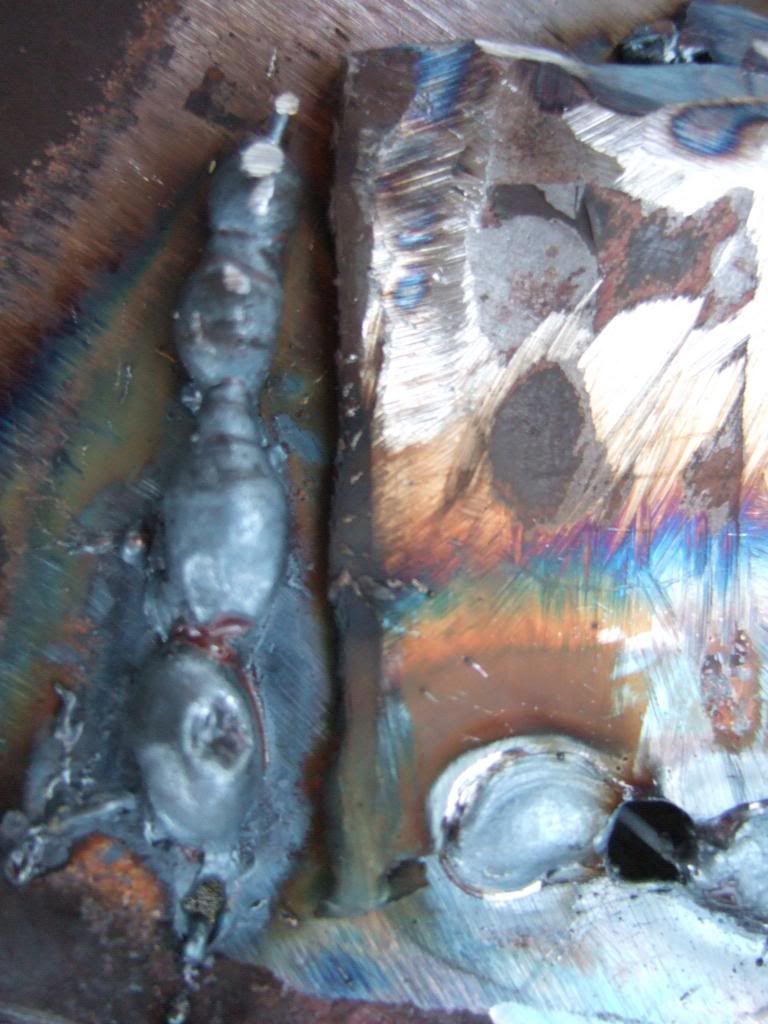
I took one of the strips of metal I'd previously removed from my hand brake panel.


Then I cut two small squares out and tried to weld them back on top of the strip.
Sorry the photos are not great, but here goes...

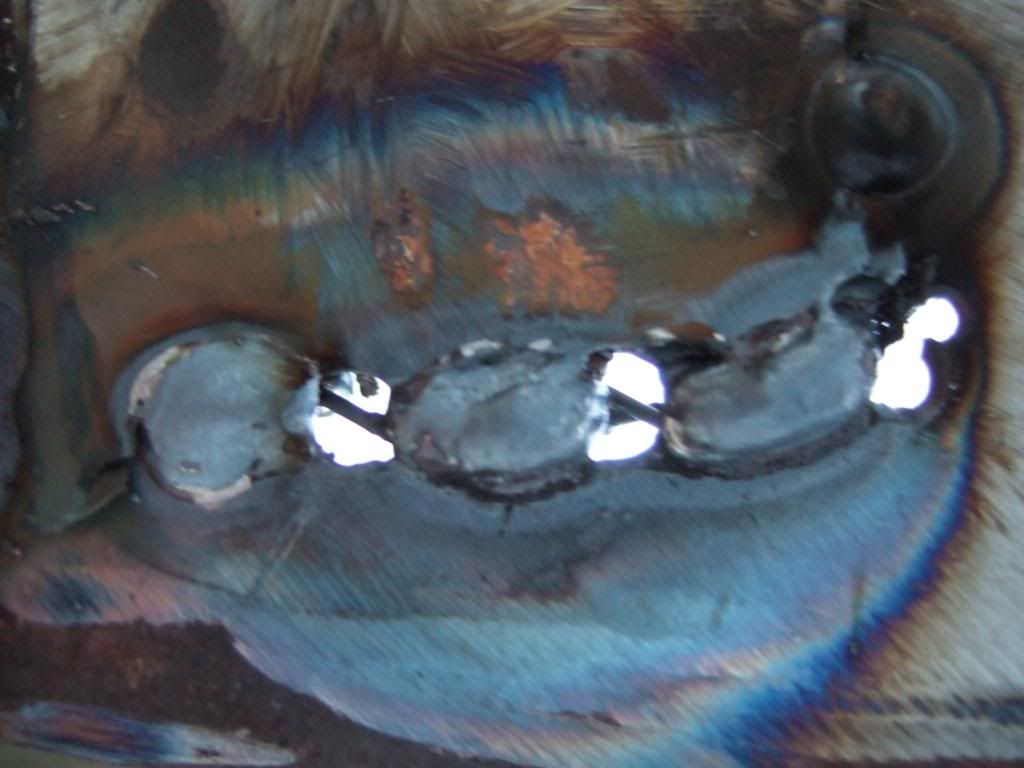
This is one of the patches, I didn't try to do all sides.


The bottom edge I simply blew straight through the metal (note daylight in the holes).


The left edge I missed completely as I still haven't got used to the mask. :rolleyes:


But the top edge wasn't too bad for a first attempt.


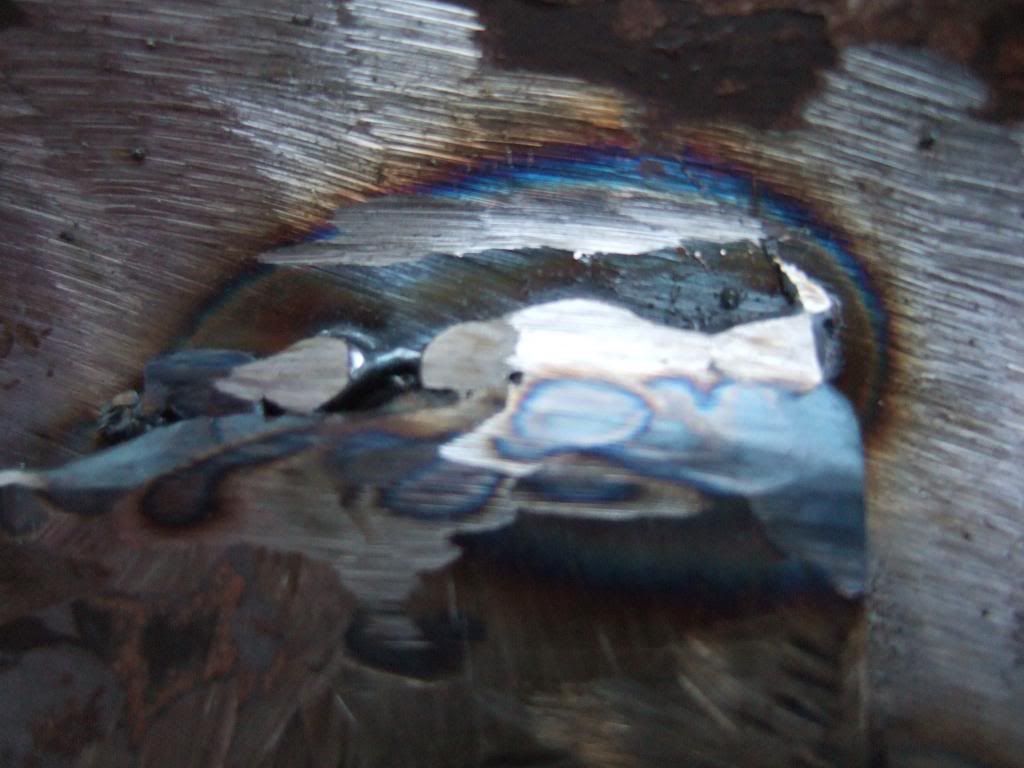
Is this what the metal is supposed to look like on the other side of the weld?
( Again, sorry it is a bit blurred. )


So plenty of room for improvement before I start on the Cordite framework.

Until next time, take care, Paul. :)

Replies:
SeaNick & AndyP57 - Thanks chaps I will have another go at the head rest template tomorrow.
Although I can't imagine a "scatter cushion" staying in place for long at speed. :icon_wink:
It is definitely wooly hat on weather at the moment and as I type this I still cant feel my toes!

I was having "Little Matchstick Girl" visions of garages with wood burning stoves at the end. :icon_twisted:
5 Feb 2013, 4:48pm
Theres Some Great Modern Art There... Might Pay For The Build!
Like Nick Said About The Welding, That Takes 26 Years.
5 Feb 2013, 5:02pm
'Kudos' for being out there in this weather.

Any progress is progress.

I certainly wouldn't be able to do much out there at the moment - a couple of skinned knuckles and I'd quit!
5 Feb 2013, 5:40pm
i admire you sticking withit, in my opinion the key to a reasonable mig weld is as much the settings as the technique, you may be better spending some time on a single piece of scrap adjusting the power and wire feed and just doing simple runs until you get a nice straight bead with good penetration, little or no splatter and in the place you want it :-) once you have the settings sussed for the thickness of material your using then move on trying to weld 2 bits together.
As has already been said time is the key ive been welding for years and still struggle with some jobs.
try welding a discovery boot floor in upside down with a piece of weld splatter dropping in your ear!
5 Feb 2013, 10:56pm
Hi Paul, Viatron has a good point, that is get hold of some scrap and just keep practicing. To be honest I have always struggled with a MIG outside. You have to turn up the gas so much it gets really expensive. If I may say, on your thin metal welds when you prep the metal to get it clean, try to remove as little metal as possible. Try a sanding disc instead of a grinder.
When it comes to your frame I would use an ARc welder as the box has plenty of thickness, and you can weld in a gale of wind-well nearly. I took some pics of a join I did this afternoon on 1" box section.
A bevel on the ends at 30deg, nearly through to the other side, and the millscale removed from the other piece...
[IMG][/IMG]
Then line them up....
[IMG][/IMG]
Run a weld in the groove, leaving the black slag behind....

Remove the slag and do the other edges.....
[IMG][/IMG]
The great thing is if you gring out the joint first and lay a reasonable weld in there there is no grinding afterwards, as the weld finishes flush.
[IMG][/IMG]

However I still left a hole! More practice required!!
[IMG][/IMG]

Hope this helps a bit,
N
6 Feb 2013, 7:14am
GaryH & Nike55 - Cheers, I want to keep little things ticking over if I can.
I know I need to wait for some decent weather to make significant progress.
But hopefully by then I'll know what I want to do, rather than waste a sunny day "thinking".

Viatron & SeaNick - Really appreciate the tips and those photos are great. :cool:
I'm happy to learn from others and that is why this forum is so helpful.
I think I will end up buying buy an ARC welder to go with my mate's MIG.
I might also keep an eye out for some sort of breach "windbreak" to work inside. :rolleyes:


Well it is my last day off work today, but weather forecast is pretty grim.*
Hopefully I will still get the chance to tick a few little jobs off the list.

Cheers, Paul. :)

* In the time it has taken me to write this, the wind & rain are now lashing down outside. :icon_sad:
6 Feb 2013, 8:36am
Good effort so far Paul. Practice makes perfect as they say, but I wouldn't get too hung up on acheiving perfect, flowing zig zag welds like Seanick's. That takes years of experience.

Pretty though they undeniably are, everything that needs welding on these cars ends up hidden, so only you'll know what lies beneath. Unless you're an absolute detail freak, so long as it's strong enough to hold the parts together and sealed from the elements, it'll do the job.

I was a bit concerned about my newbie stick welds until I tried to remove a couple of seatbelt brackets I'd welded to the frame after a redesign - they were well and truly fixed in place to my surprise and delight.

So, my advice would be to follow an expensive brand of training shoes for people to walk to the off-licence in's marketing slogan and Just Do It! :icon_razz:
6 Feb 2013, 11:00am
Rain stops play...
Whilst the heavy rain first thing this morning did stop, which allowed me to play outside for a bit.
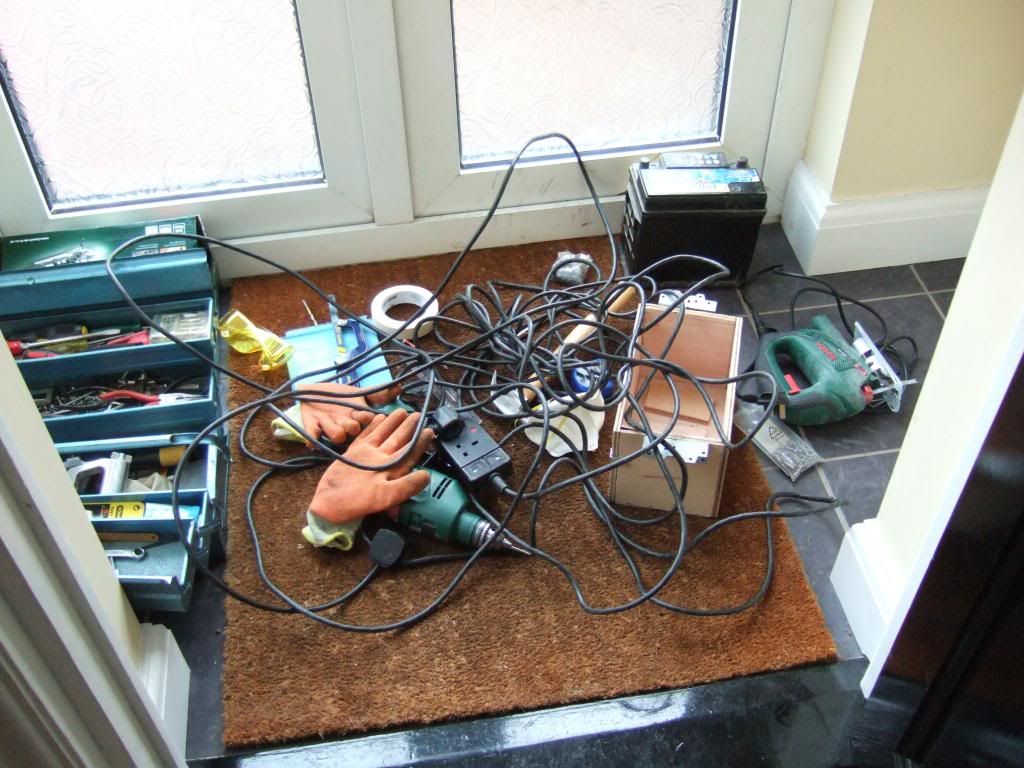
Unfortunately, it did return & once again, I had to quickly throw everything into the porch & cover the car.


But for once, I'm not really complaining as it gives me an excuse to thaw out indoors by my computer.
No sign of the snow that other areas are experiencing, but it is still very cold out & too windy to weld.

Still, I did make some progress while I was outside...

Battery Box - Part 3:
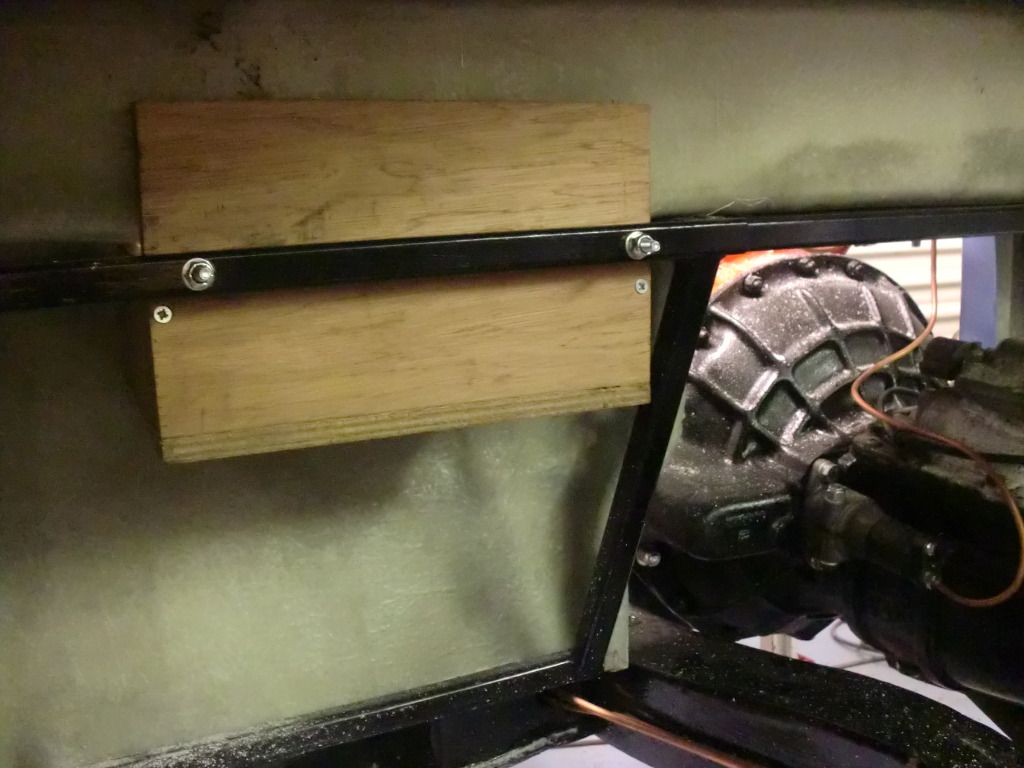
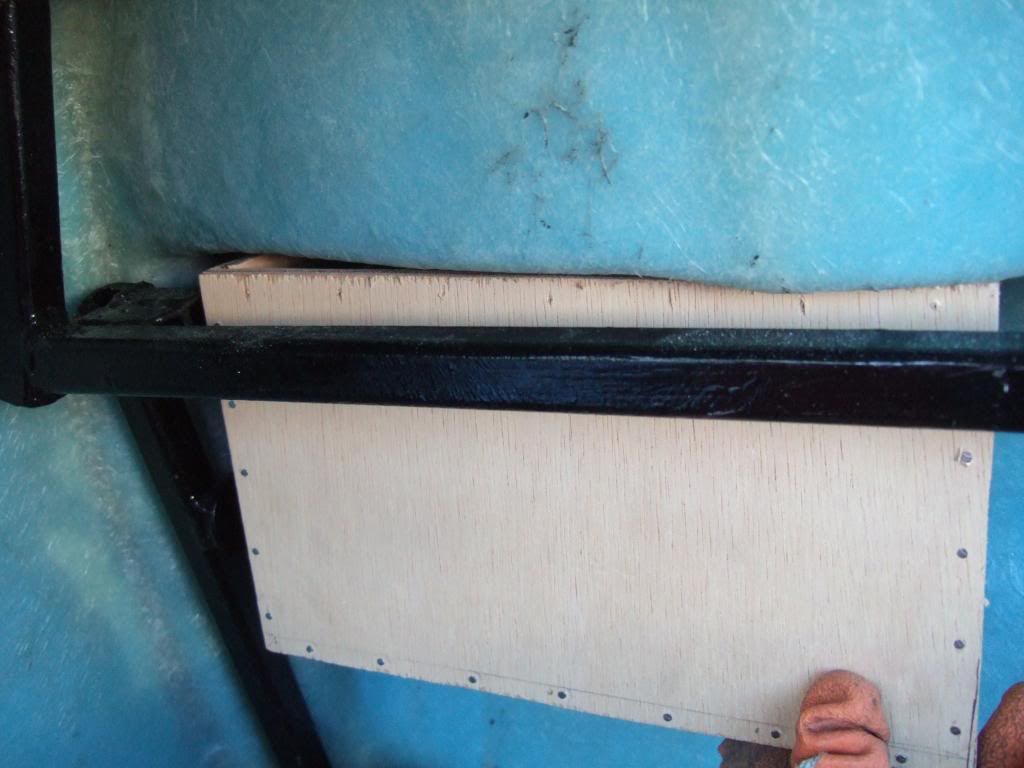
I have now decided that rather than reinforce my plywood box with fibreglass, I will use it as a mould.
Then I can make the whole battery tray out of fibreglass, including a supporting "lip" around the top edge.

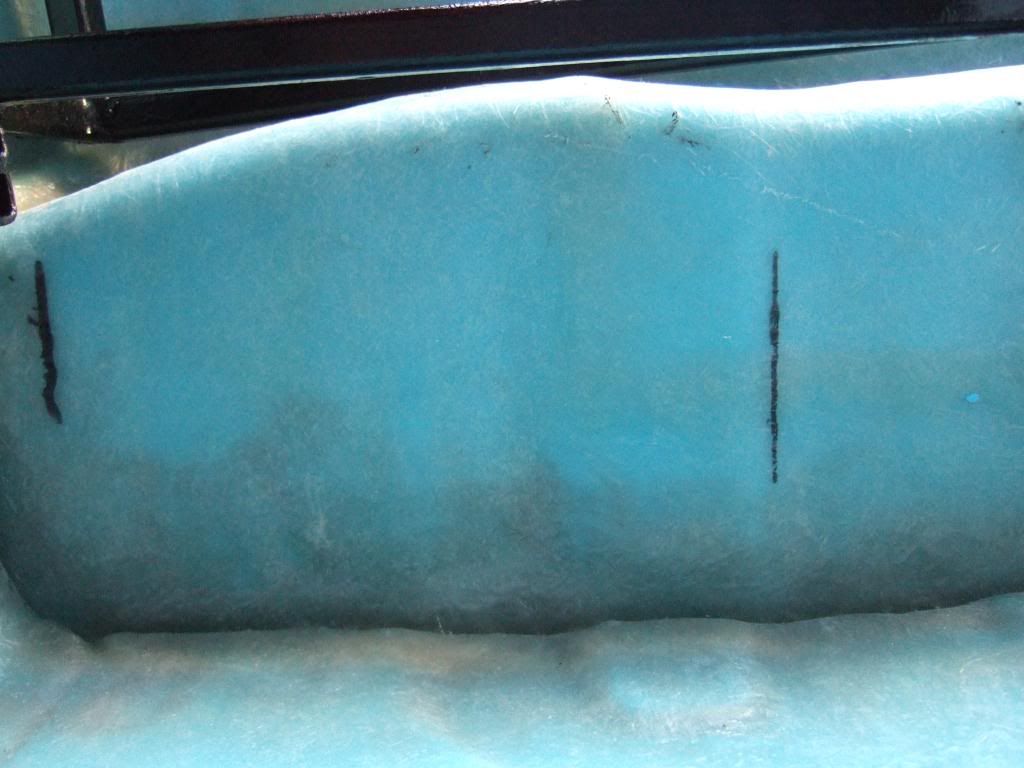
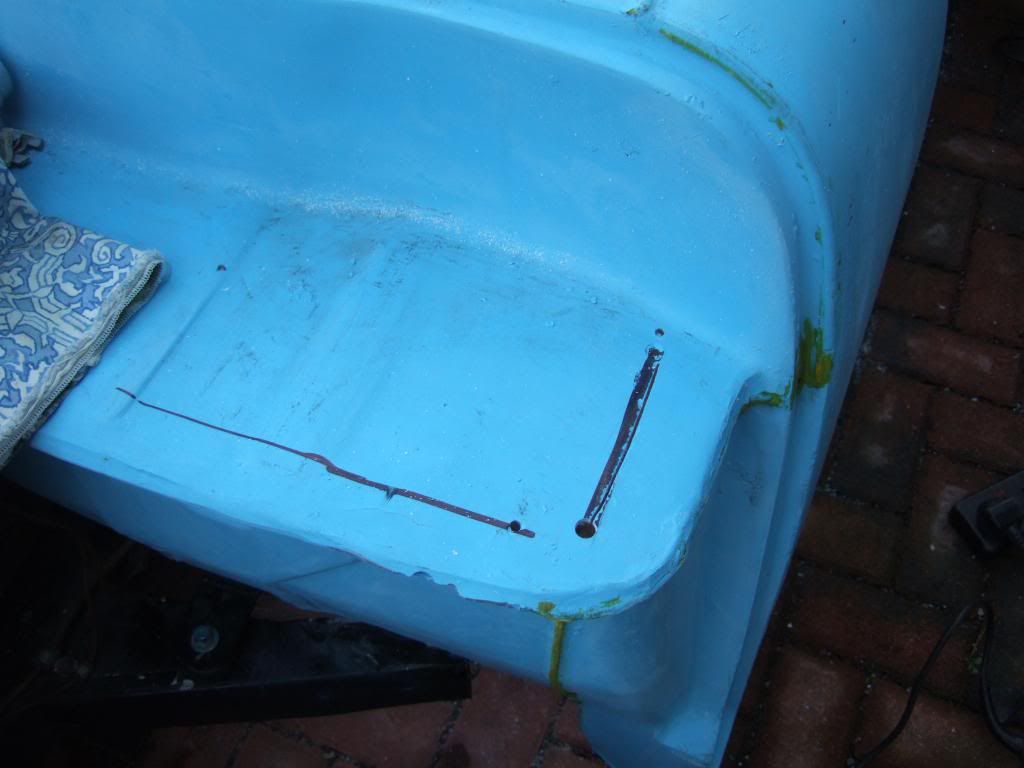
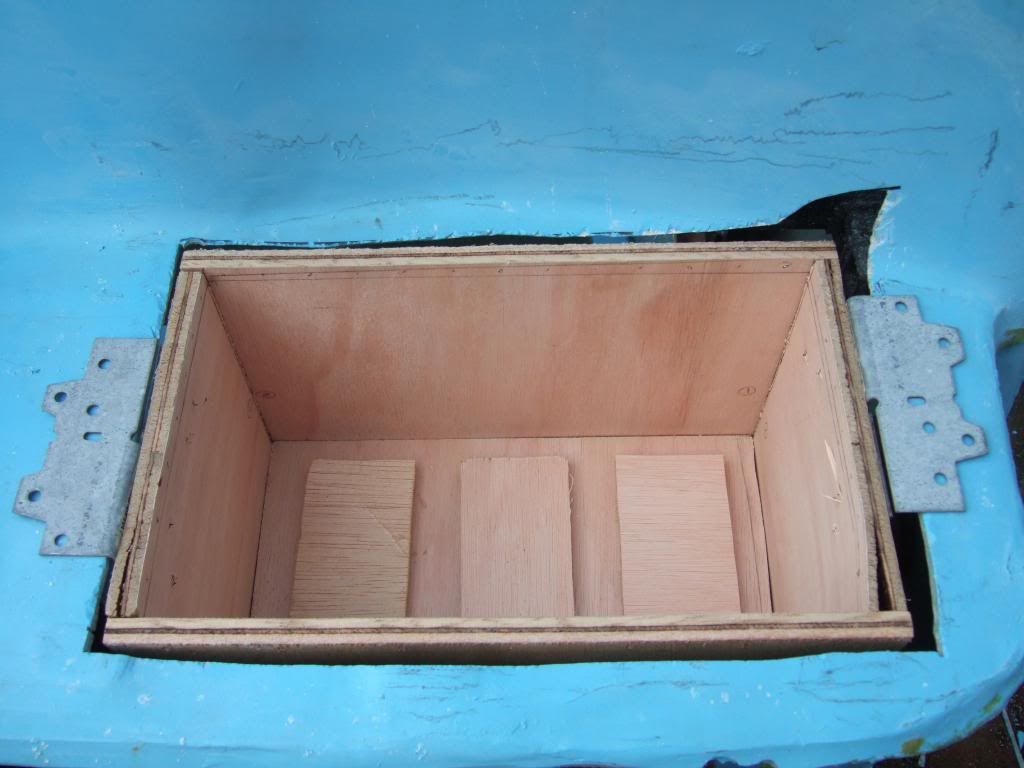
But for now, it was time to make a "hole" in the bulk head to drop the battery box into.
I remembered Simon (DonnySoutherner) saying he cut more of his bulk head than was required…


Note - I will steal his idea of supporting the box through the frame when I am finished.

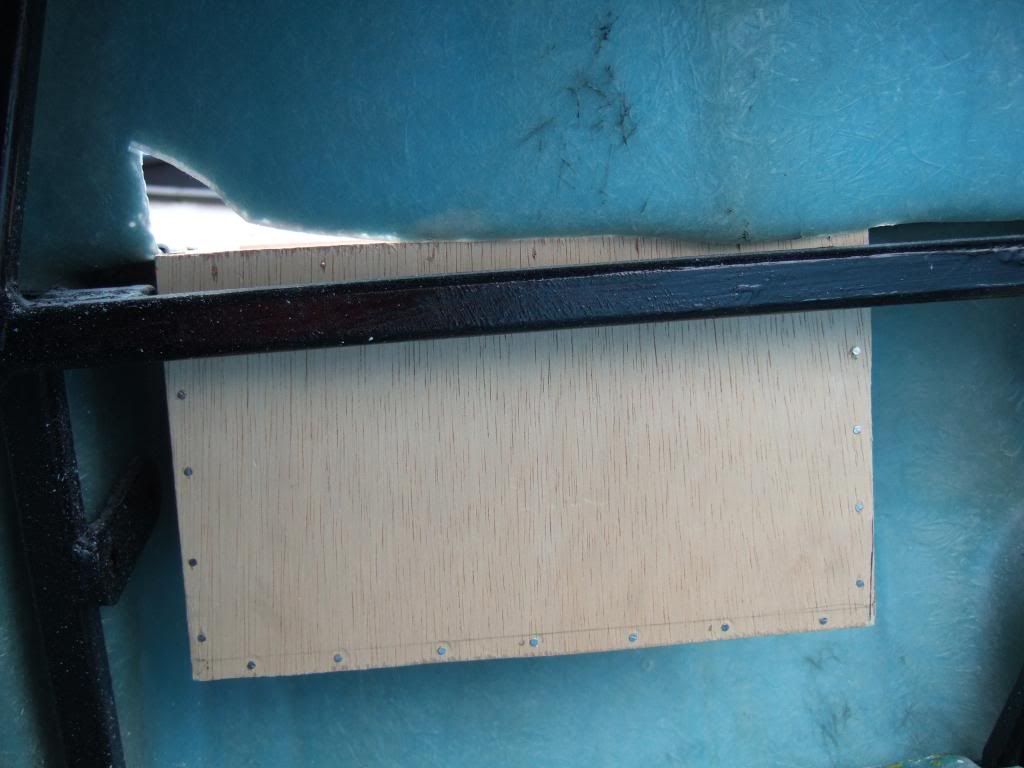
So I offered my box up underneath the bulk head as there are frame & fibre glass areas to avoid.


This allowed me to draw a couple of guide lines below & drill some pilot hole though to align above.
( The first photo is taken underneath, so the bottom of the photo is behind the front of the bulk head.


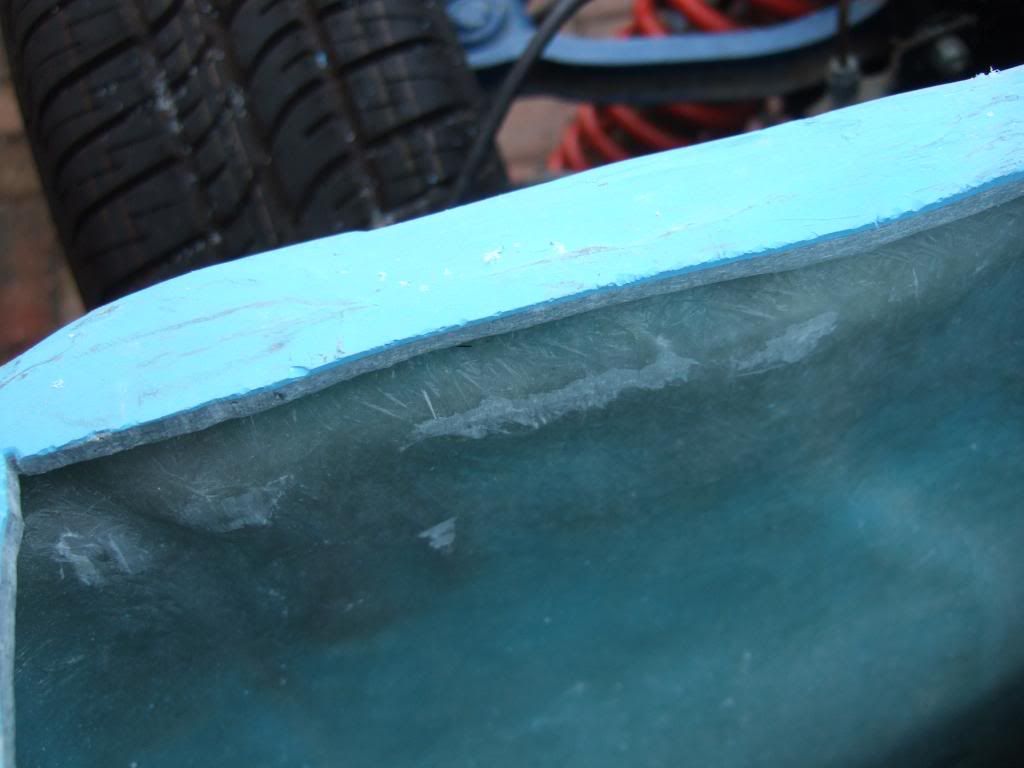
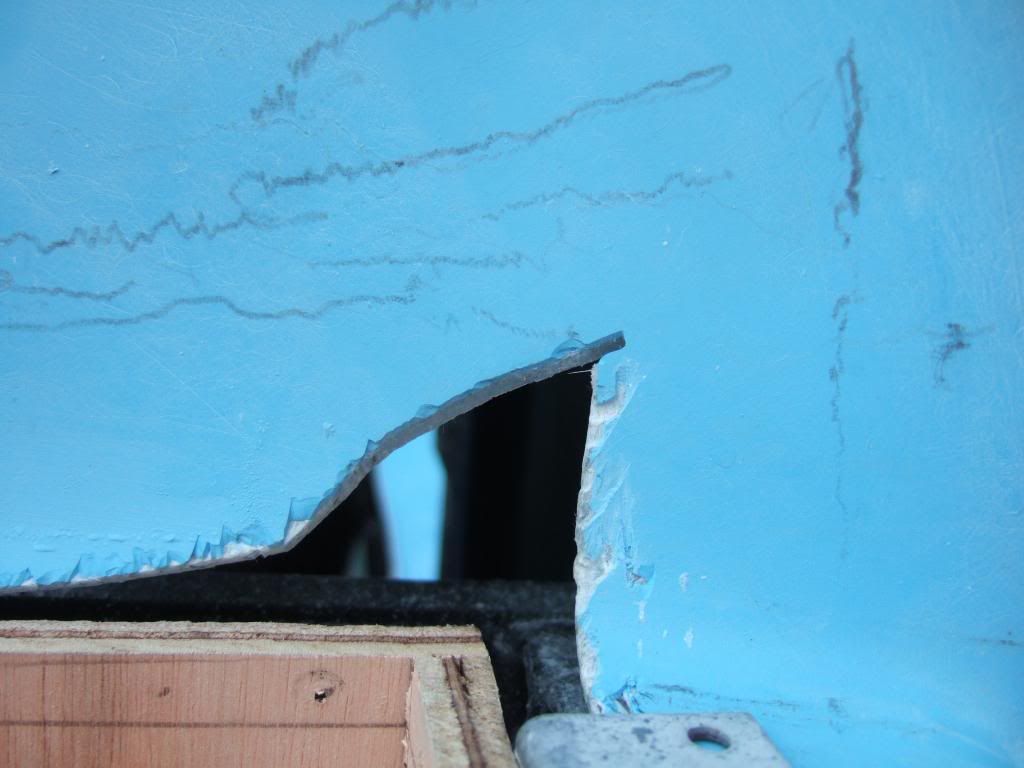
Then it was a case of drilling bigger holes to allow room for my jigsaw to cut the hole out.
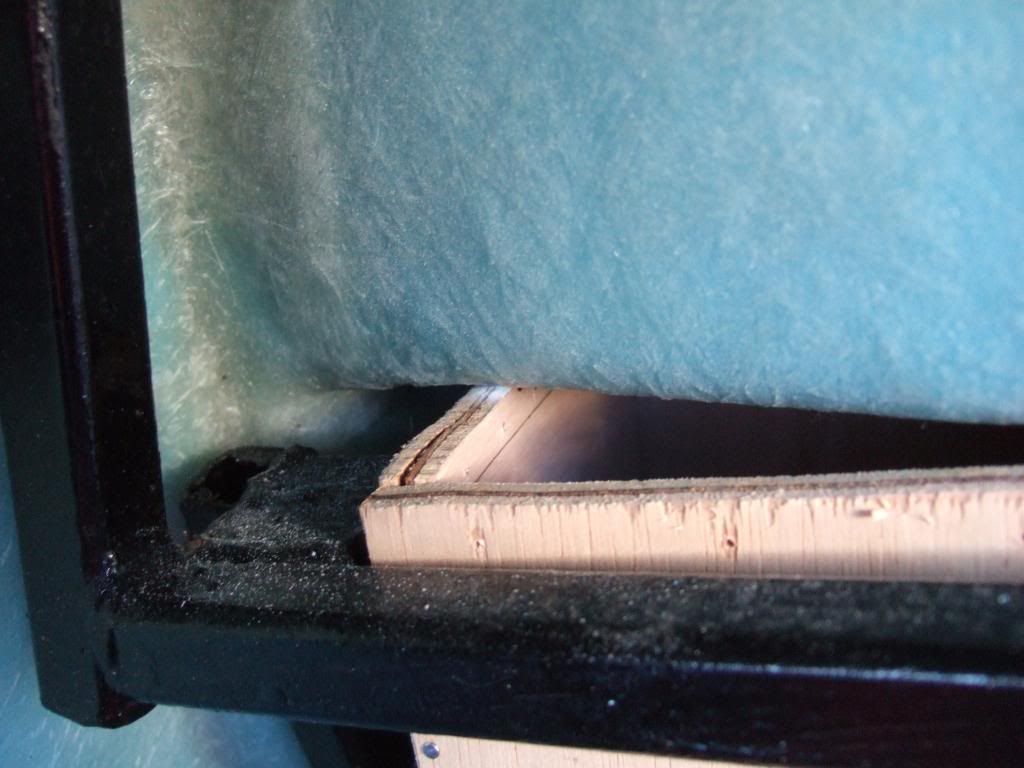
This is bulkhead front edge & you can see how deep the fibre glass is due to the bulk head shape.


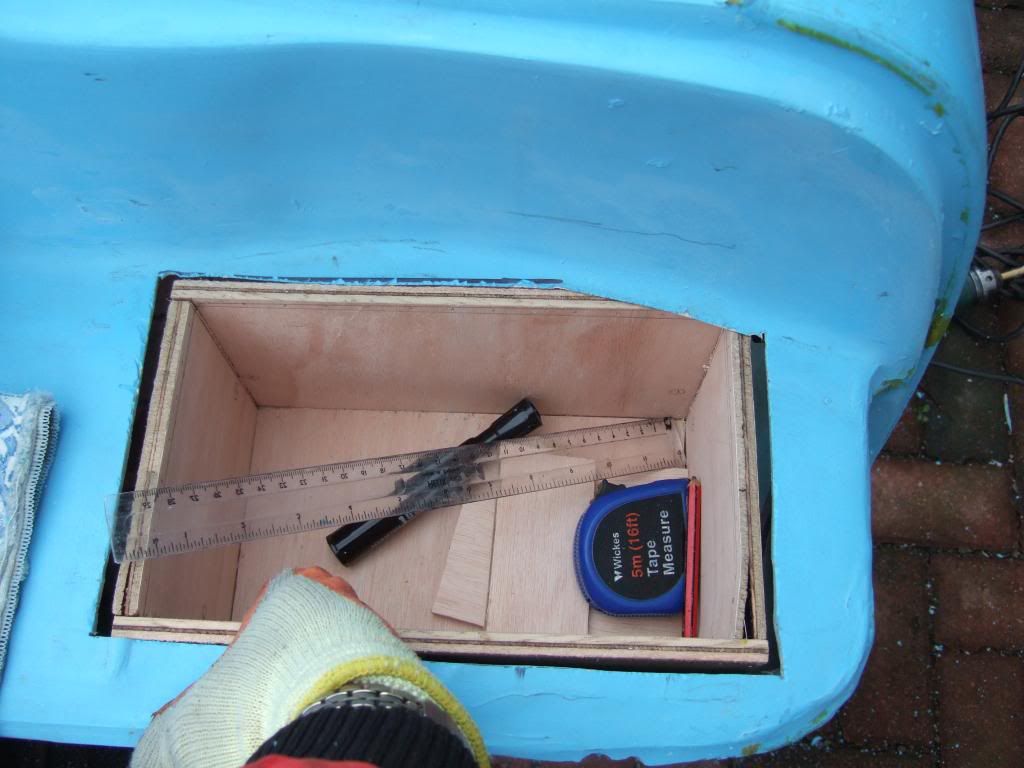
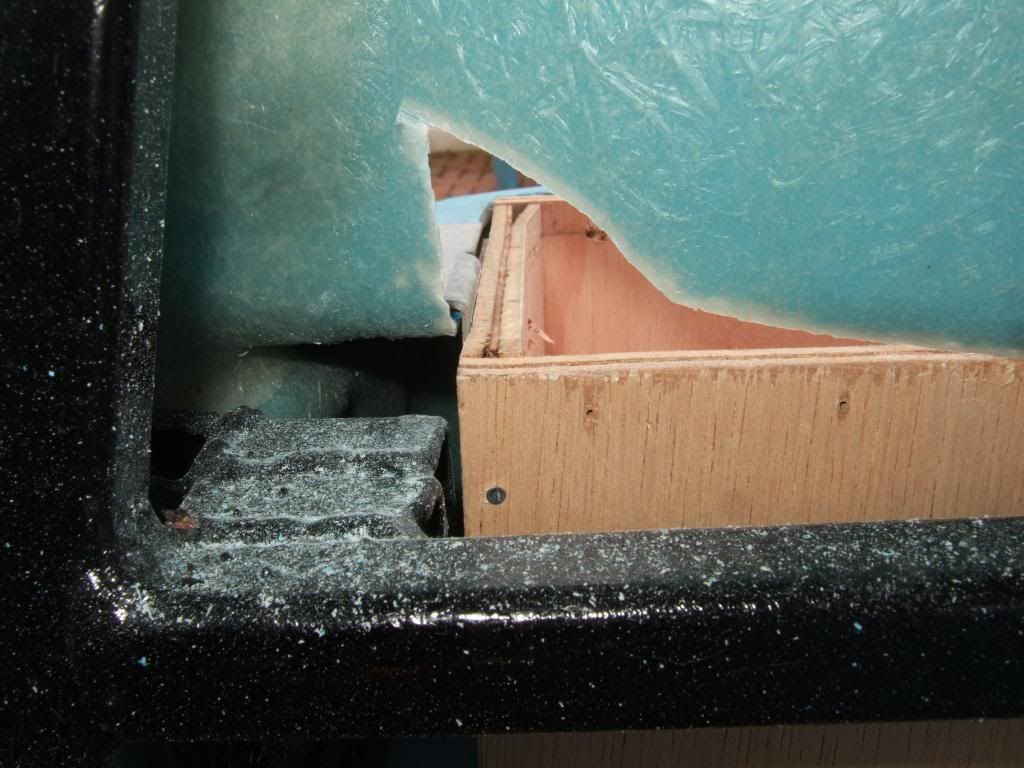
Once I offered the box back up to my initial hole, I knew there was still work to do in that corner.
( Note: The box was proving quite a useful place to store things! )


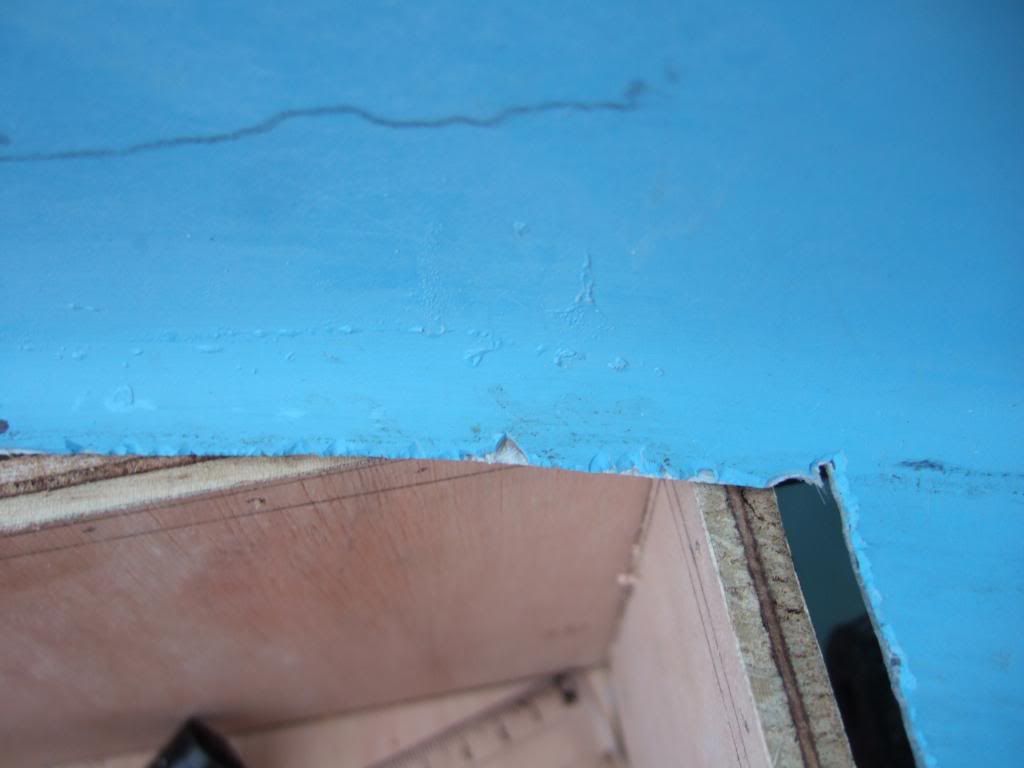
So I had to take quite a chunk out to let the box fit neatly, which will be repaired another day.


I just tacked on a couple of corner brackets to hold the box in place for now.
The gaps all around were to allow for the addition width of fibre glass around the ply.
No doubt, a bit of fine tuning will be required when the final box is finished.


Here is the view from below & you can see the limiting factors in that corner clearly.


Still some work to do before this job is complete, but another step in the right direction.
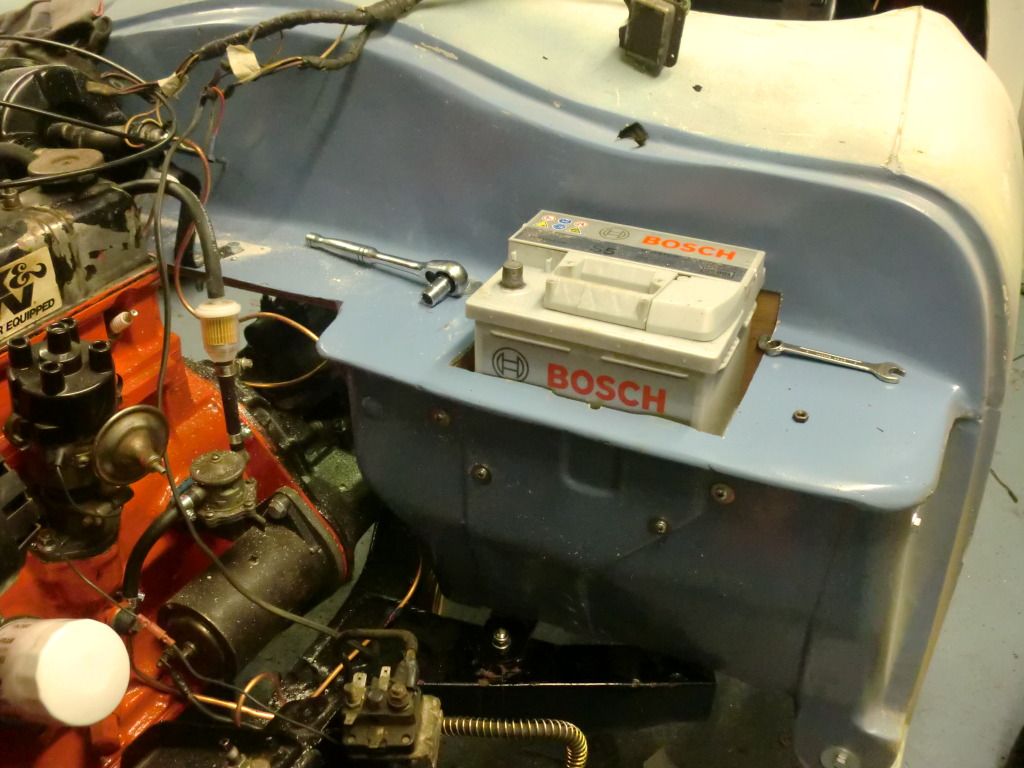
And I am really pleased with my "Before" & "After" photos. :cool:


Note: The before was actually taken in July as there is definitely no sunshine today!

OK, well I am still cold, so I might nip to B&Q to get the sanding disc SeaNick mentioned.
As I might need my heated car seats to fully restore feeling in my "back end"!

Cheers, Paul. :)

Replies:
Mister Towed - Thanks mate, it is reassuring that your seat belt brackets wouldn't budge.
I was actually planning to re-read your thread on your welding experience for inspiration.
6 Feb 2013, 9:02pm
Hi Paul, it's going really well I see. Nearly caught me up given my three months off with a broken leg. back at work now but living away from home temporarily, so still no car work. Hope to be back to it again soon. Might be following you by then.