Brake Light Switch:
This is such a small part, but it really punches above its weight when it comes to being a complete pain in the ****!
When the original switch that came with my donor broke, I thought I must have accidentally knocked it against something.
Then I watched as the brand new replacement switch spilled its guts out within minutes of being fitted.

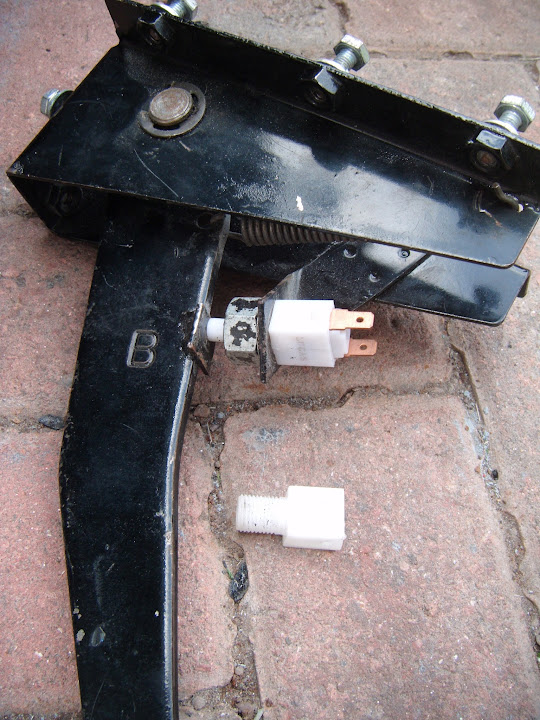

I then bought an alternative metal brake light switch.

But this didn't work either.

As the plastic Spitfire switch works when the "button" is released, but the metal one works when the button is pressed.

( Which meant the brake lights were permanently on when I connected the switch. )
So I ordered two more plastic ones and a bit of reading on a Triumph forum suggested "re-enforcing" the switch.
( As apparently the plastic "walls" are too thin to resist the pressure of the internal springs under load! )
One tip was to simply use some lock wire around the outside to prevent flex, so I went with a variation of that.
I cut out and shaped two small sections of aluminium.

Note: This would have been a single section if I hadn't accidentally cut too far.
I had to put little cut outs in them to avoid these parts of the switch.

I also filed some groves in all for corners.

Before wiring the aluminium to the outside of the switch body.

Finally, I added a strip of tape around the outside to tidy it all up a bit.

So far, so good…
Now, I am going to blame what happened next on a rush of blood to the head.
( Caused by crawling head first into the foot well to fit the switch. )
I initially tightened up the nut by hand, then used an adjustable spanner to get it tight.
A bit more effort got it "good & tight".
At which point I appeared to channel my
Inner Gorilla and this was the end result.

Again, it may have been all the blood rushing to my head, but I could barely summon a swear word.
I just couldn't face doing all that work again, so I was within seconds of packing up for the day.
Then it dawned on me, that all the hard work was already done and the spare switch was just waiting for me.
So I just had to cut the wires around the old switch and swop the "jacket" over to the spare.


To say I exercised a degree of caution fitting the spare would be an under statement.

Couldn't get a decent photo, but you can just about make out the nut to the left and the "jacket" to the right of the bracket.

I connected up the wires and tried to work out the easiest way of testing if it actually worked.
In the end I went for a technical solution and set my camera up on some blocks of wood to video the rear of the car.
So without further ado, here is a short clip that shows me climbing in and testing the lights.
https://youtu.be/o2puSt1WM_Q
In no particular order, the following all passed.
- Brake
- Rear
- Fog
- Rear & Brake
- Left Indicator
- Right Indicator
- Hazard Lights
Unfortunately, I can't tell if number plate light came on, so I will have to check that again another day.
But apart from that, the back of the car appears to be ready for an MOT.
Anyway, that was all the car time I had today & I'm actually supposed to be doing something else right now.
So I'd better go, take care, Paul.